

Slack has revolutionized the world of online communication. This popular chat application has taken the business world by storm, and for a good reason. So if you need a way to communicate with your team effectively, Slack for Linux is the way to go.
You’re on the right track if you’re new to Slack or considering using it for your business. And in this tutorial, you’ll learn the basics of this incredibly powerful tool.
Read on to get started with Slack for better team collaboration!
Prerequisites
This tutorial will be a hands-on demonstration. If you’d like to follow along, be sure you have the following:
- A Linux system – This tutorial uses an Ubuntu 20.04 system, but any Debian-based system will work.
- A user account with sudo privileges to install Slack on your system.
For the sake of simplicity, this tutorial uses a root user. But for best practice, use a non-root user with sudo privileges when working with Linux systems.
This tutorial assumes you’ve logged/SSHed into your Linux system as a user with sudo privileges.
- Python 3.6 or later installed on your system.
- A Slack account and a workspace – Note your workspace name as you’ll need it later to create a Slack application.
A workspace is a place where you can communicate with your team members.
Installing Slack for Linux (Ubuntu) via the APT Package Manager
Slack works in different operating systems, like Windows, Mac, and Linux. But since Slack is a third-party application, it doesn’t come installed by default. And the recommended way to install Slack on a Debian-based system is via the Advanced Package Tool (APT).
If you’re using a non-root user, you must append sudo on each command you run throughout this tutorial.
To install Slack from the official Ubuntu repository:
1. First, run the apt update command below update your local package index to ensure you have the latest versions of all available packages.
apt update -y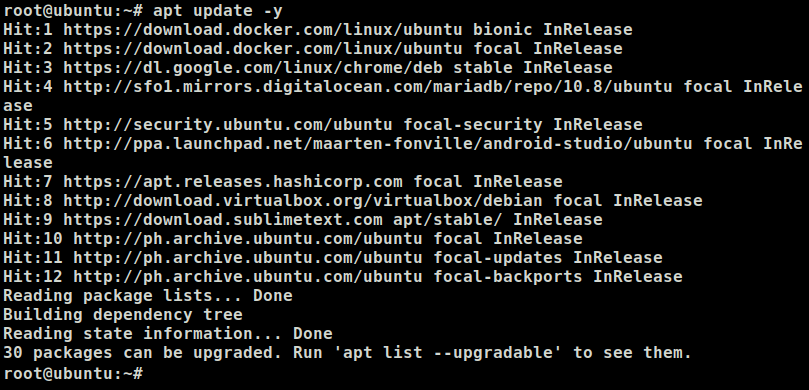
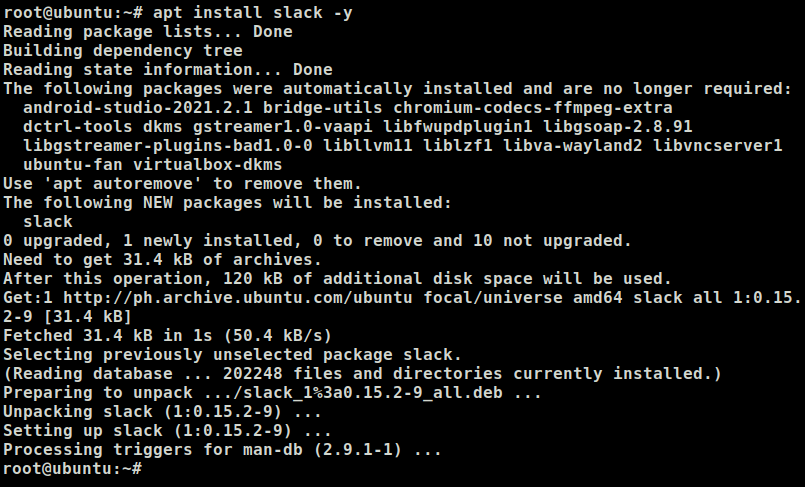
2. Next, run the following apt install command to install the Slack package. This command downloads and installs Slack and all its dependencies on your Linux system.
apt install slack -yAt this point, you’ve successfully installed Slack for Linux using the apt package manager.
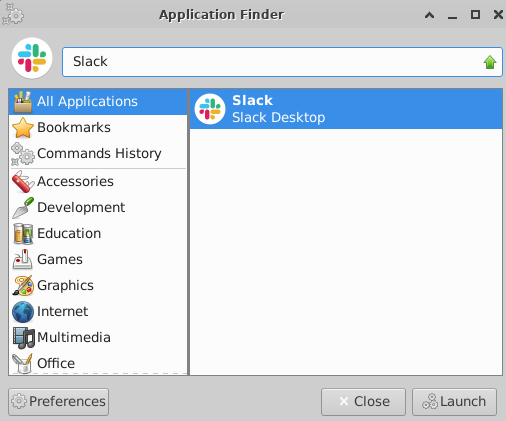
3. Lastly, search for and click Slack on your Application Finder to open the application on your desktop environment.
Installing Slack Using Snap
If you’re not into APT, using Snap is another way to install Slack. Snap is a universal Linux packaging format that lets you install applications on your system.
But why use Snap? For one, Snap packages are always up-to-date. As a result, you always get the latest version of Slack (and any other Snap package) installed on your system. Another advantage of using Snap is that it’s sandboxed. This way, each Snap application is isolated from the rest of your system, improving security.
To install Slack with Snap, make sure your system supports Snap packages first:
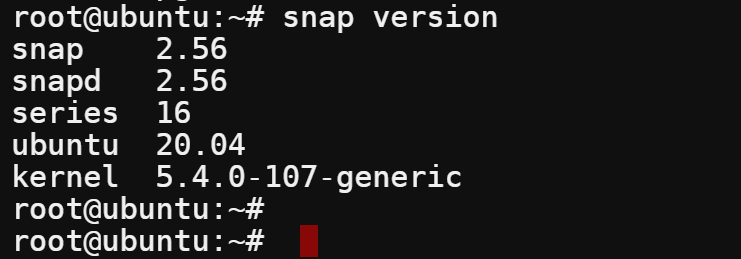
1. Run the following snap command to check Snap’s installed version on your system.
snap versionYou’ll see an output similar to the one below, which confirms your system supports installing Snap packages.
2. Now, run the below command to refresh your system’s Snap package cache. This command ensures you have the latest versions of all available Snap packages.
snap refresh
3. Finally, run the snap install command below to download and install Slack.
The -classic flag tells Snap to use the classic confinement mode, which gives Slack access to additional resources on your system. Your system will treat Slack as a traditional, non-sandboxed application so you can use all its features.
snap install slack -classicIf all goes well, you’ll see an output like the one below, indicating you’ve successfully installed Slack on your system.

Installing Slack Using a Deb Package
So far, you’ve seen that installing packages via APT or Snap works fine. But what if the latest version of Slack (or any other application) is not available in the official repositories? In that case, a Deb package would be your best option to install Slack.
Another advantage of using a Deb package is that you can install a package offline. Offline Deb package installation is handy if you’re installing Slack on a remote server that doesn’t always have internet access. You can also control which packages/dependencies to install on your system from a Deb package.
To install Slack using a Deb package, you’ll first have to download the Deb package for Slack:
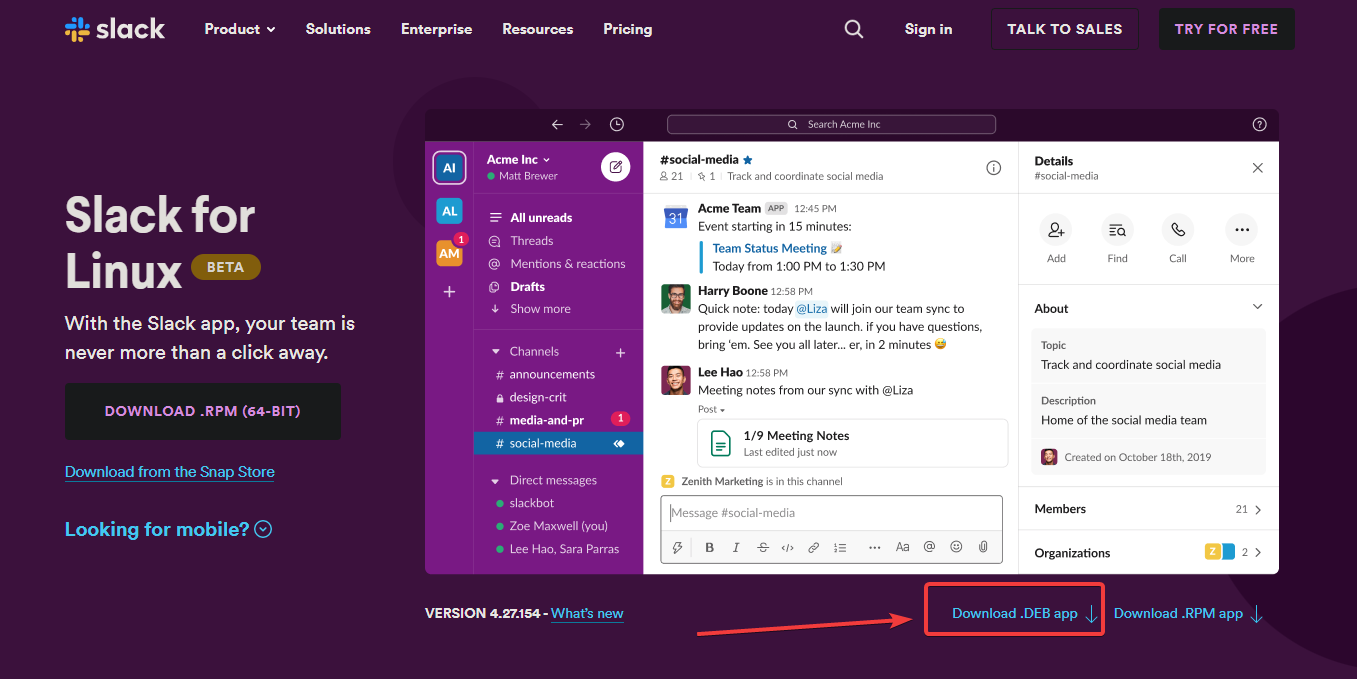
1. Open your favorite web browser and navigate to Slack’s download website.
2. Click on Download .DEB app, but don’t proceed with the download.
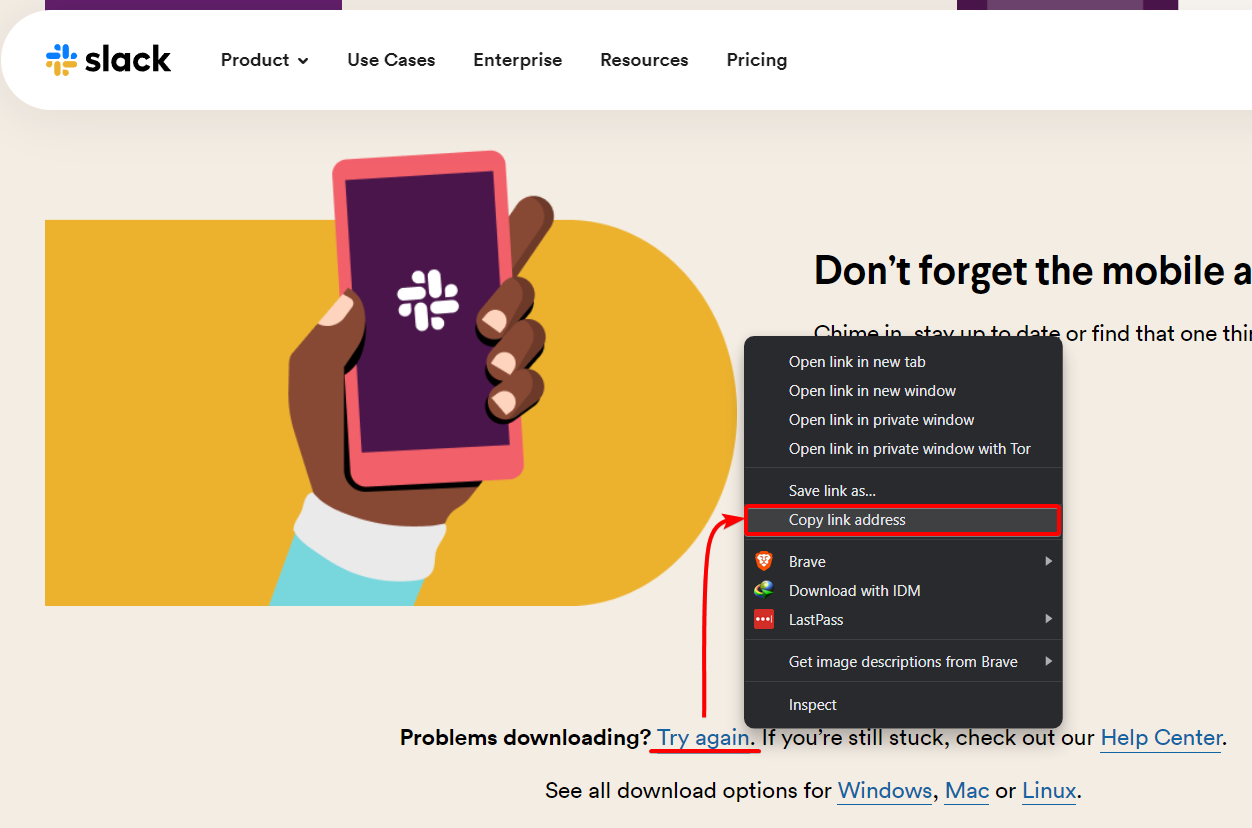
3. Scroll down to the bottom, right-click on Try Again, and select Copy link address to copy the download URL.
4. Now, run the wget command below to download the Deb package.
Be sure to replace the URL below with the one you copied in step three. You should get a .deb file around 60 MB in size to your current directory. But if you get an HTML page, ensure you copy the URL correctly.
wget https://downloads.slack-edge.com/releases/linux/4.27.154/prod/x64/slack-desktop-4.27.154-amd64.deb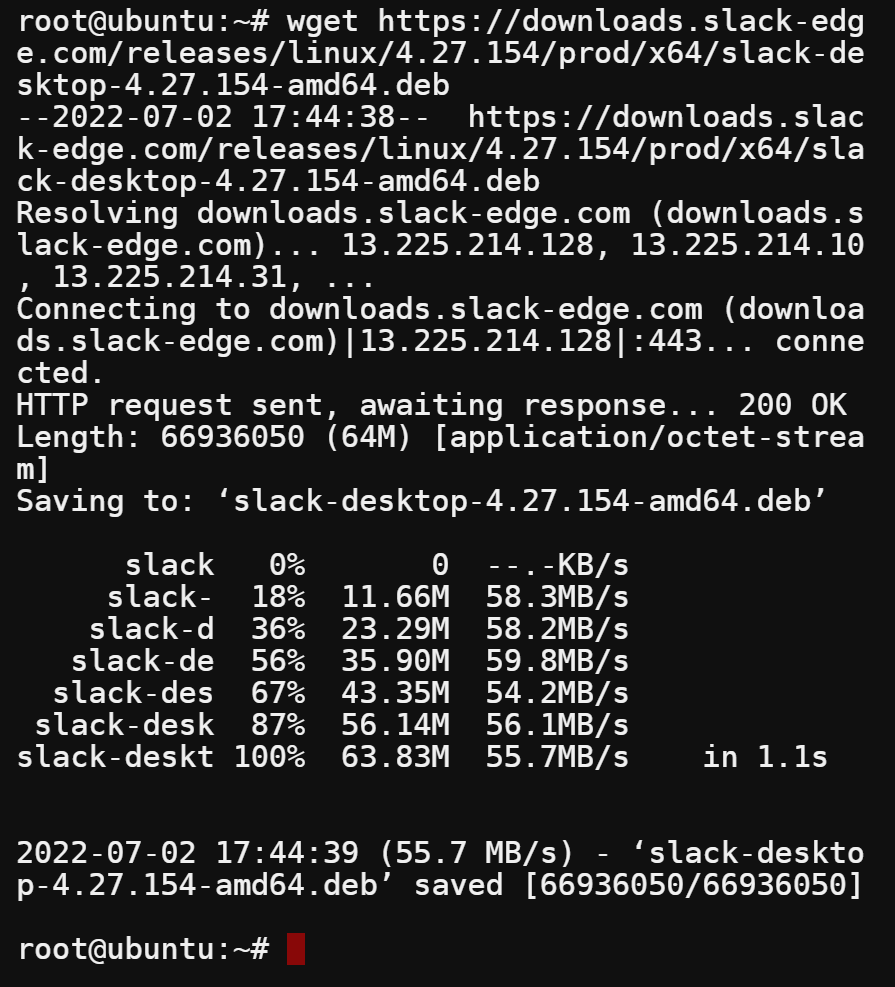
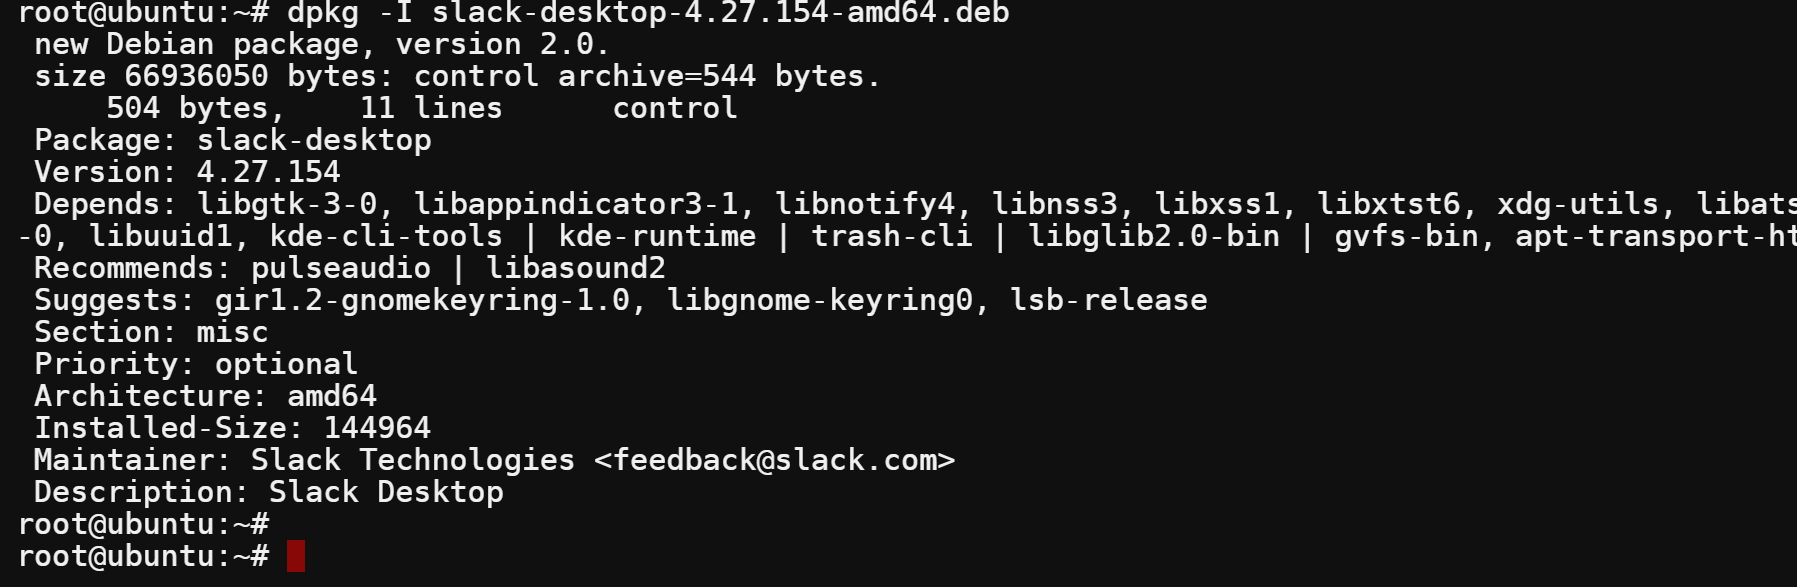
5. Once downloaded, run the following dpkg command to list (-I) the contents of the Slack Deb package. Note that the Deb package’s name may differ depending on your downloaded release.
This command can be useful to verify you’re installing the correct package of Slack.
dpkg -I slack-desktop-4.27.154-amd64.debIn the output below, you can see that you have the correct Deb package for Slack. You can also see the Depends section, which lists all dependencies that Slack needs to run on your system.
Unlike APT or Snap, installing via a Deb package lets you have total control over which packages are installed on your system.
6. Ultimately, run the below command to install (-i) Slack using the Deb package. This command extracts and installs all files that Slack needs to run on your system.
dpkg -i slack-desktop-4.27.154-amd64.deb
Building Your First Slack App
Now that you have Slack installed, it’s time to make the most of Slack’s powerful features. Apart from having a workspace and channels to discuss/collaborate on projects, Slack also allows you to interact with other applications and services with a Slack app as an integration tool.
At this time of writing, there are fours types of app builders you can use to build a Slack app:
- Bolt – This framework allows you to build a Slack app using JavaScript, Python, and Java.
- Workflow Builder – This visual tool allows you to build a Slack app without writing code.
- Slack SDKs – A set of libraries that allows you to build a Slack app using different programming languages. Including Python, Node, and Java SDKs.
- Development tools – A set of tools that allows you to test and debug your Slack app.
But in this tutorial, you’ll use the Bolt framework with Python to build a basic Slack app responsible for handling incoming events from Slack. The Bolt framework is the quickest way to build a Slack app, as it comes with everything you need to get started. Including a command-line interface, a local development server, and TypeScript support.
To build your first Slack app:
1. Open your favorite web browser, head to the app dashboard, and log in to your Slack account.
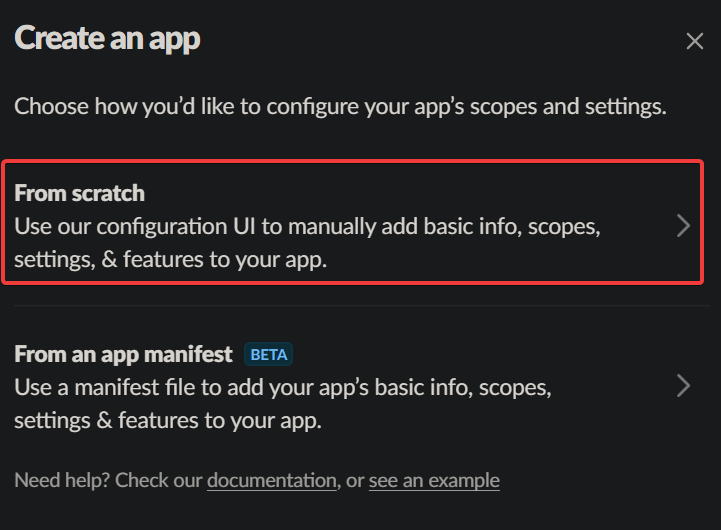
2. Next, select From scratch on the pop-up window since you’ll build your app from the ground up.
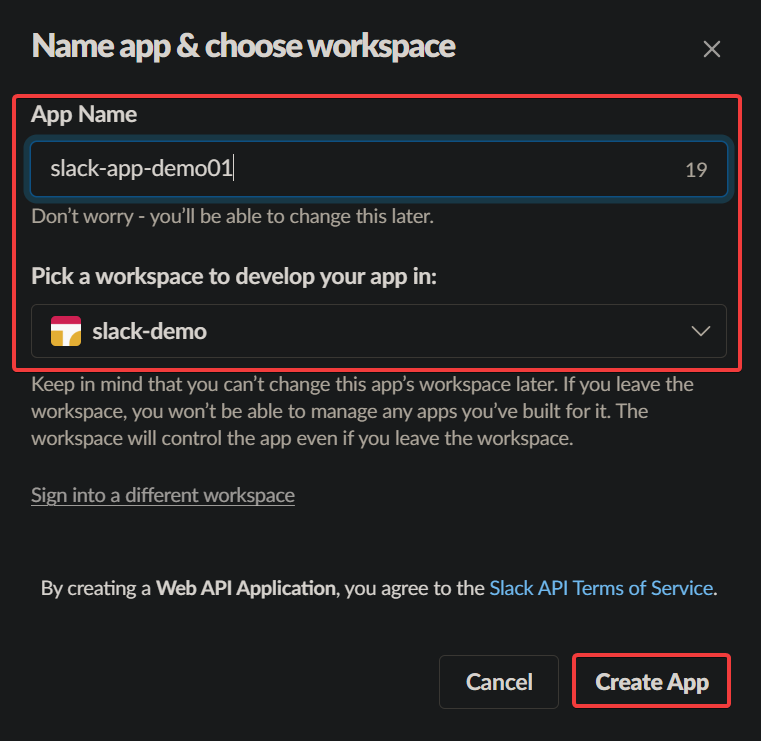
3. Provide the following information about your Slack app on the new pop-up window:
- App Name – Set a name for your Slack app, which can be anything you want. This tutorial’s choice is slack-app-demo01.
- Pick a workspace to develop your app in – Select the workspace you want to use for development from the dropdown field. This workspace is where you’ll test your Slack app.
- Click Create App to finalize creating your Slack app.
4. Now, select Permissions under the Basic Information page’s Add features and functionality section. Your browser redirects to the OAuth & Permissions page, where you can manage the app’s permissions (step five).

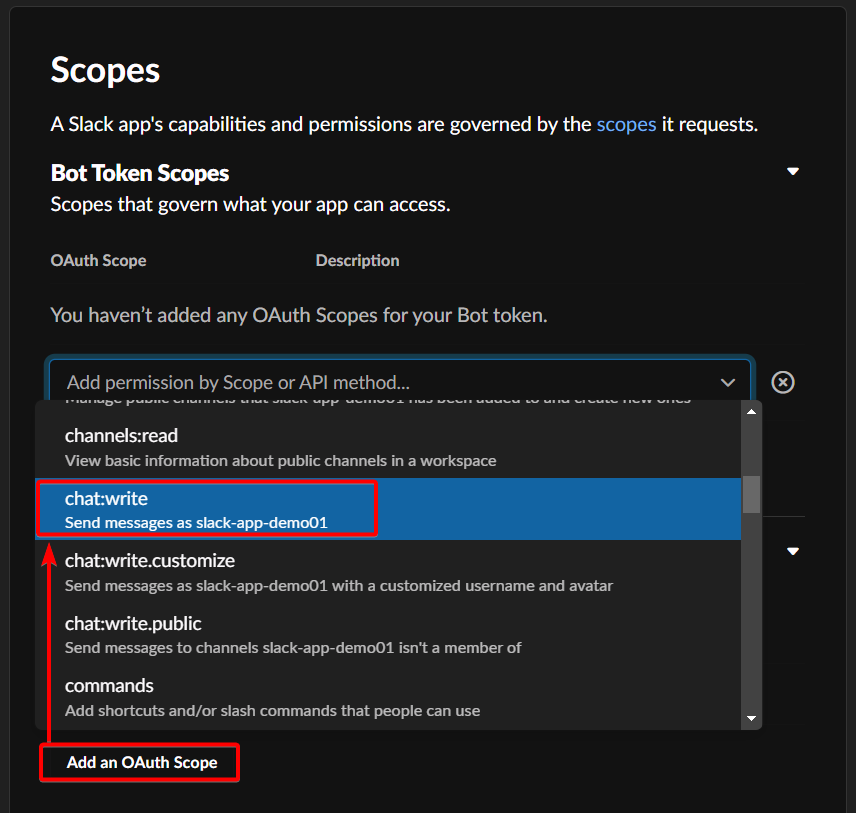
5. Finally, scroll down to the Scopes section, click Add an OAuth Scope under the Bot Token Scopes section, and select the scope below (chat:write) to add it to your Slack app.
A scope is a set of permissions you can request from a user. When you add a scope to your app, you request permission from the user to access specific Slack APIs on their behalf.
Installing Your Slack App in a Workspace
You’ve already created your first Slack app, and that’s cool. But your Slack app is just sitting until you install it on your workspace.
To install your Slack app in your workplace:
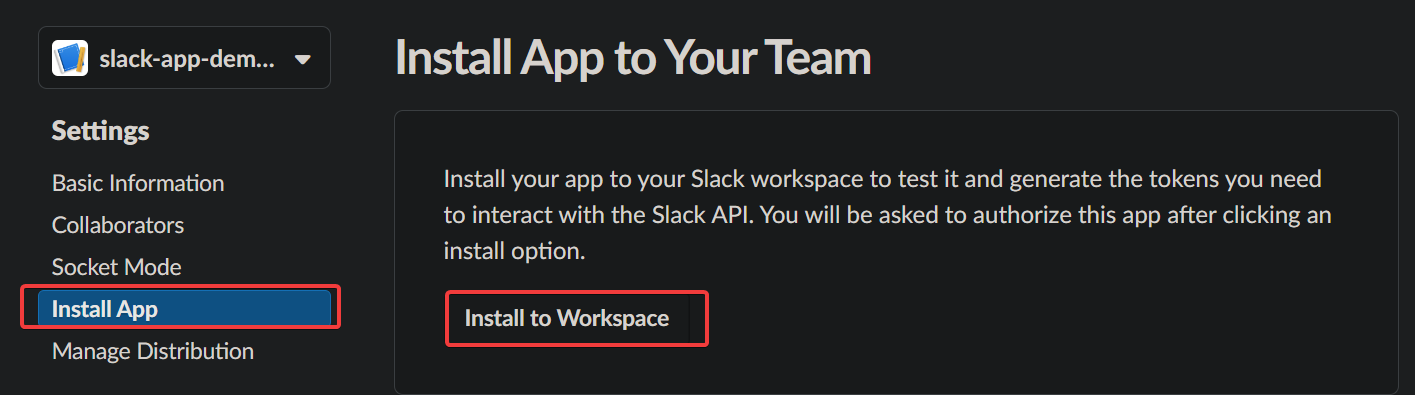
1. Navigate to the Install App menu (left-panel), and click Install to Workspace, as shown below to install your Slack app. Your browser redirects to a page where you’ll authorize your app to access your workspace.
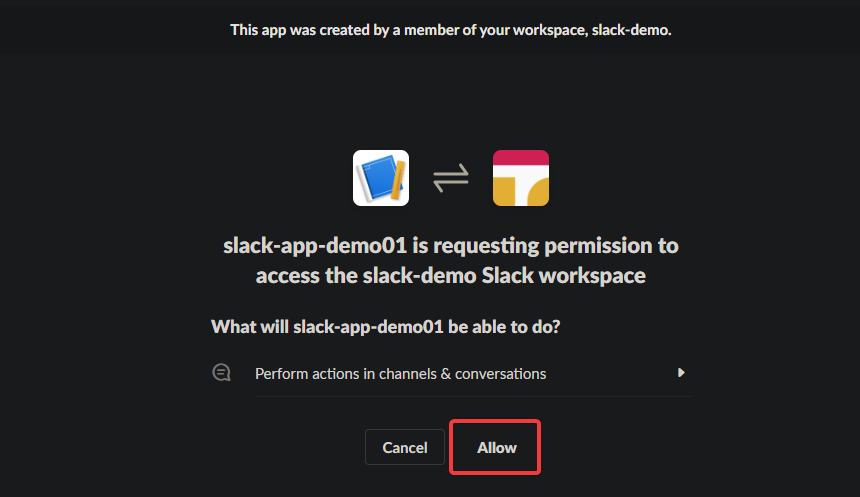
2. Next, click Allow on the permission request page to allow the installation of your Slack app in the workspace. Your Slack app is now installed in your selected workspace.
Once allowed, your browser redirects the OAuth Tokens for Your Workspace page (step three).
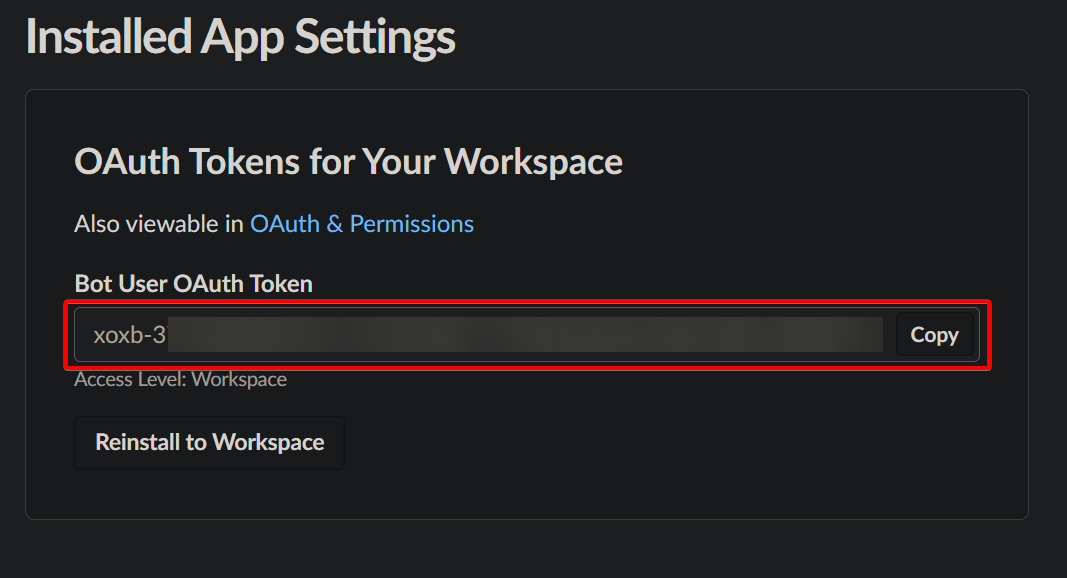
3. Lastly, note down the Bot User OAuth Token in a safe place. You’ll need this token later when you start developing your app.
Never put your Slack token in version control systems (VSC), such as Git, or a CI/CD system, like Jenkins. Or else, you’re giving anyone who has access to your VCS or CI/CD system access to your Slack workspace.
Setting Up Your Bolt Project
You’ve just built your Slack app, and to see it in action, you’ll need a project to work with your app. For this tutorial, you’ll set up your Bolt project with Python to build and manage your project.
But first, you must create a virtual environment for your project:
1. Run the below command to create a virtual environment, an isolated Python environment that allows you to install Python packages without affecting other Python projects on your system.
This command doesn’t provide output but creates a directory called .venv in your project’s root directory. This .venv directory stores all dependencies for your project.
python3 -m venv .venv2. Next, run the following source command to activate your newly created virtual environment.
source .venv/bin/activateWhen your virtual environment is activated, you’ll see (.venv) prepended to your prompt, as shown below.

3. Once activated, run the below export command, which doesn’t provide output but sets the Slack token for your app as an environment variable.
Replace xoxb_your_token with the Bot User OAuth Token you noted in the last step of the “Installing Your Slack App in a Workspace” section.
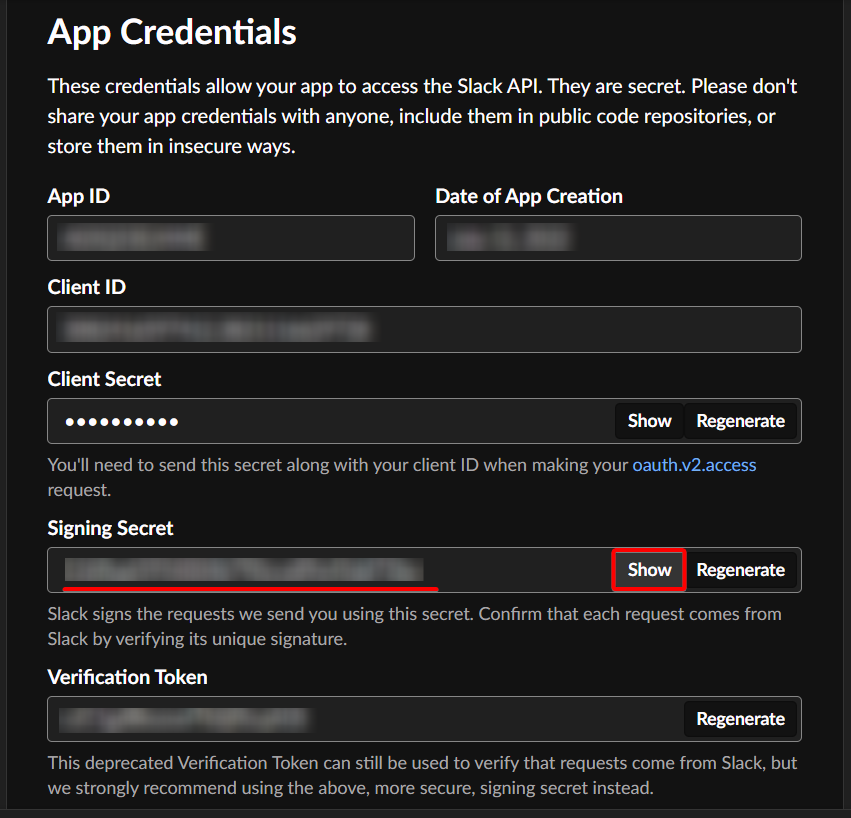
export SLACK_BOT_TOKEN=xoxb_your_token4. Now, navigate to the Basic Information page, and find your app’s signing secret under the App Credentials section, as shown below. A signing secret is a unique token to sign and encrypt all the requests sent from Slack to your app.
Click on the Show button to reveal your signing secret and note it down to a safe place. Your Slack app needs this signing secret to verify request signatures.
5. Run the below command to set the signing secret for your app as an environment variable (SLACK_SIGNING_SECRET). Be sure to replace signing_secret with the signing secret you noted in step four.
export SLACK_SIGNING_SECRET=signing_secret
6. Next, open a new terminal, and run the below ngrok http command. This command creates a public HTTPS endpoint that forwards requests to your localhost on port 3000. Your Bolt and Python app will be running on this port.
Note that you can change the port number to the one you prefer for your endpoint.
ngrok http 3000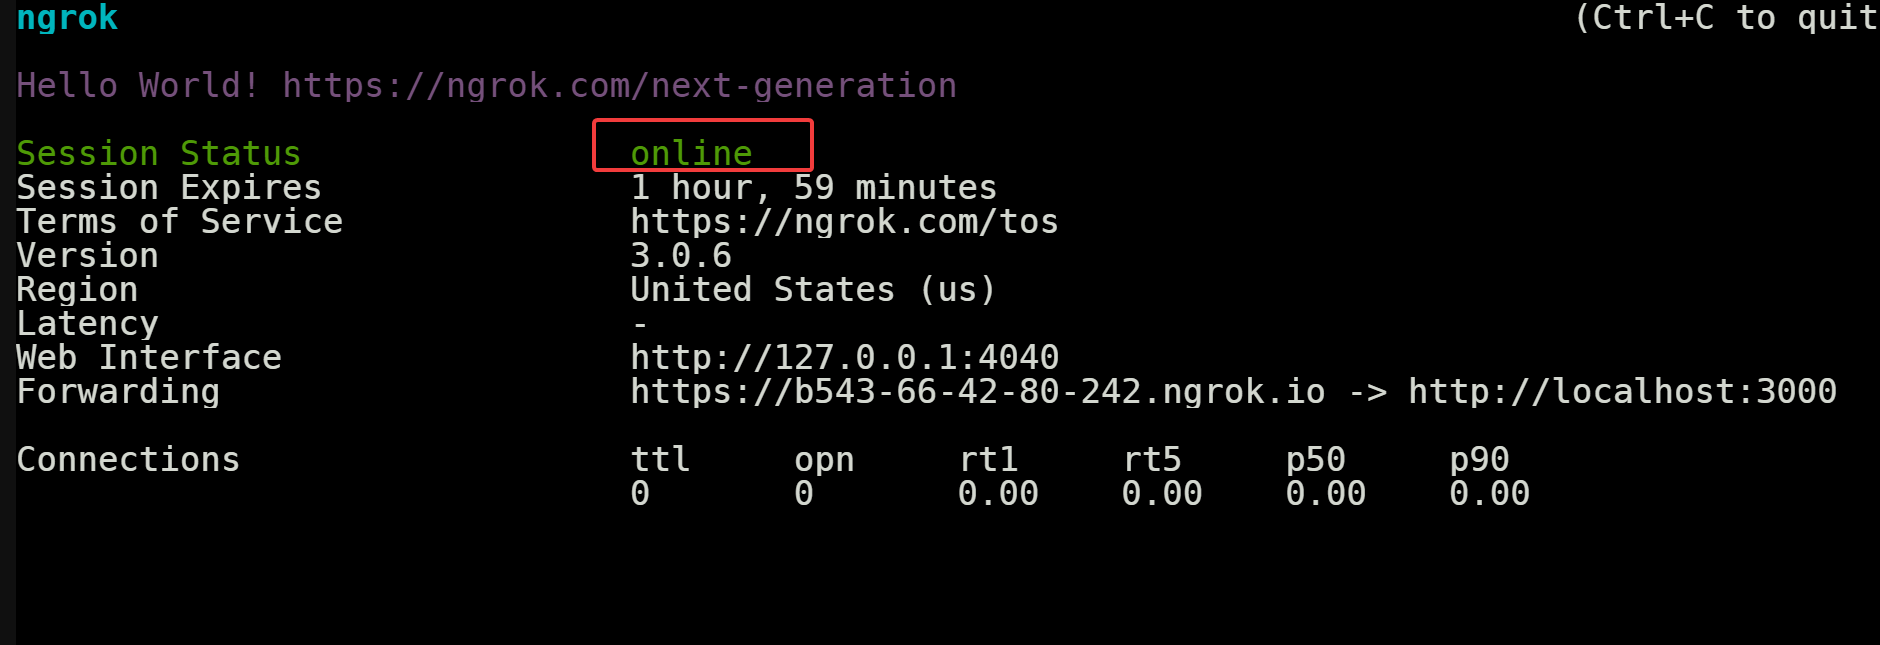
7. Ultimately, execute the pip install command below to install the slack_bolt Python package in your virtual environment. This package will help you build your app quickly.
pip install slack_bolt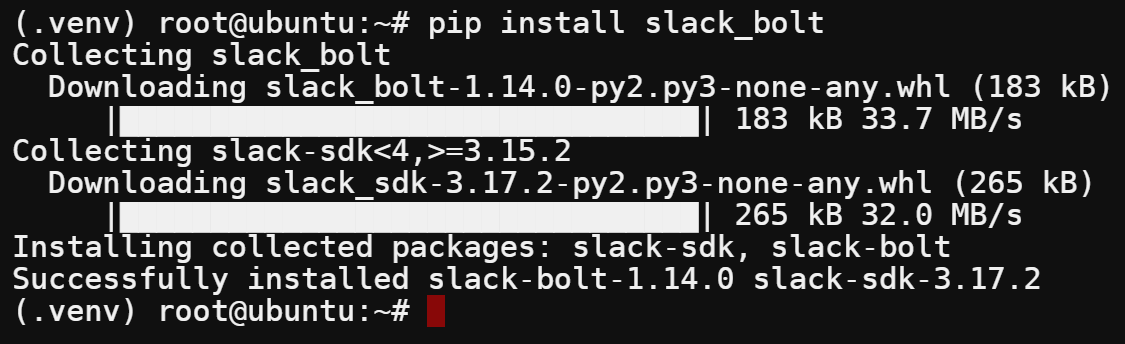
Running and Testing Your Slack App
So far, you’ve built your app and set up your Bolt project. But right now, your app is empty and not doing much. But since you’ve set up your environment, write some code, then run and test your Slack app.
1. Create a file called app.py using your preferred text editor.
nano app.py2. Populate the below code to the app.py file, save the changes and close the editor.
The code below creates a new App instance using the token and signing secret stored in your environment variables (SLACK_BOT_TOKEN and SLACK_SIGNING_SECRET).
The code also includes a placeholder event listener (@app.event), a function invoked when a certain event occurs in Slack. You can add extra functionality to your app by adding more event listeners.
import os
# Use slack_bolt package installed
from slack_bolt import App

# Initialize your app with your bot token and signing secret
app = App(
    token=os.environ.get("SLACK_BOT_TOKEN"),
    signing_secret=os.environ.get("SLACK_SIGNING_SECRET")
)

# Add functionality here
# @app.event("app_home_opened")

# The built-in development adapter starts your app on port 3000.
if __name__ == "__main__":
    app.start(port=int(os.environ.get("PORT", 3000)))
3. Finally, run the following command to start your Slack app (app.py). Ensure you are in the project’s root directory and your virtual environment is activated as you run this command.
python3 app.pyYou’ll see the following output if the app starts successfully.
At this point, your Bolt and Python app are running locally on port 3000. The ngrok tunnel forwards requests from a public HTTPS endpoint to your localhost on this port.

Conclusion
In this tutorial, you’ve learned to set up Slack for Linux and created a Slack app. You’ve touched on setting up a development environment and writing code for your Slack app.
Now, why not add more functionality to your app? You can subscribe to various events using the Events API and add event listener functions to your code. These functions will be invoked when the subscribed events occur in Slack.
How about using the Web API methods to perform various operations on the fly? Like sending messages, retrieving user information, and so on.


