

If you’re an IT professional diving into web application development and searching for efficient ways to validate your applications across multiple browsers, ngrok proves to be an indispensable tool. By using ngrok, you can expose your local apps to the web, making testing on different devices or VMs a breeze.
Join us in this comprehensive tutorial as we delve deeper into the world of ngrok. You’ll discover how it enhances the app development and testing experience. Let’s elevate your local development environment with ngrok!
Ngrok Prerequisites
This tutorial is designed with hands-on demonstrations in mind. To effectively dive into ngrok’s capabilities, ensure you have the following prerequisites:
- A Windows PC – This ngrok tutorial primarily focuses on Windows 10 64-bit (though 32-bit works fine too). However, the concepts are adaptable to other operating systems.
- Apache installed on your Windows PC. Setting up Apache is crucial when working with ngrok on Windows.
Downloading and Setting Up Ngrok
Before getting hands-on with ngrok for your local application development, it’s essential to download the ngrok agent and authenticate it. Unlike some agents that demand a full-fledged installation, with ngrok, you just need to extract the agent. But remember, to harness all of ngrok’s features, authenticating with your ngrok account is a must.
Here’s a step-by-step guide to get ngrok up and running:
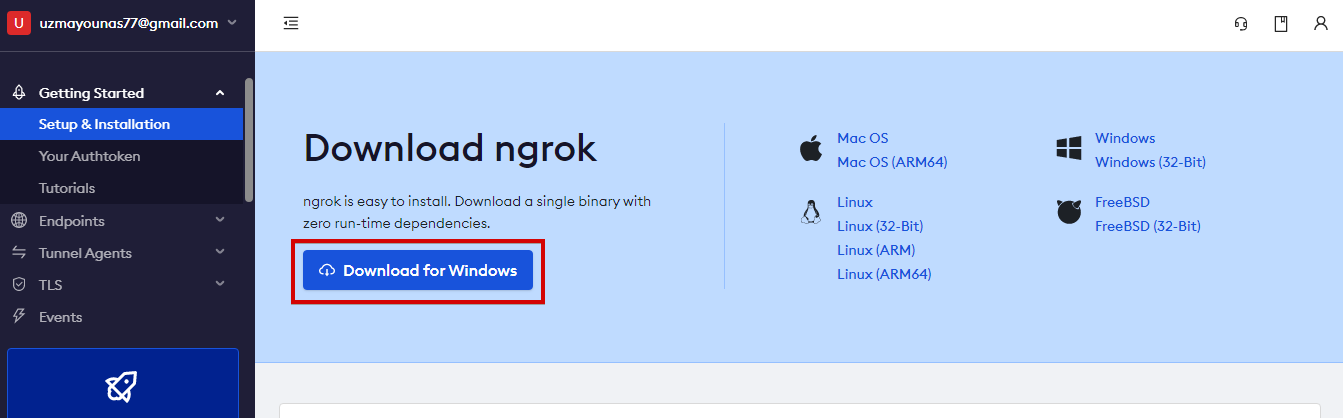
1. Launch your favorite browser and sign in to your ngrok account.
2. Once you’re in, head to the home page and click Download for Windows to snag the ngrok agent in ZIP format. Alternatively, you can choose your operating system from the list provided.
Keep in mind, ngrok is versatile and supports a variety of operating systems. So, pick the one that aligns with your needs.
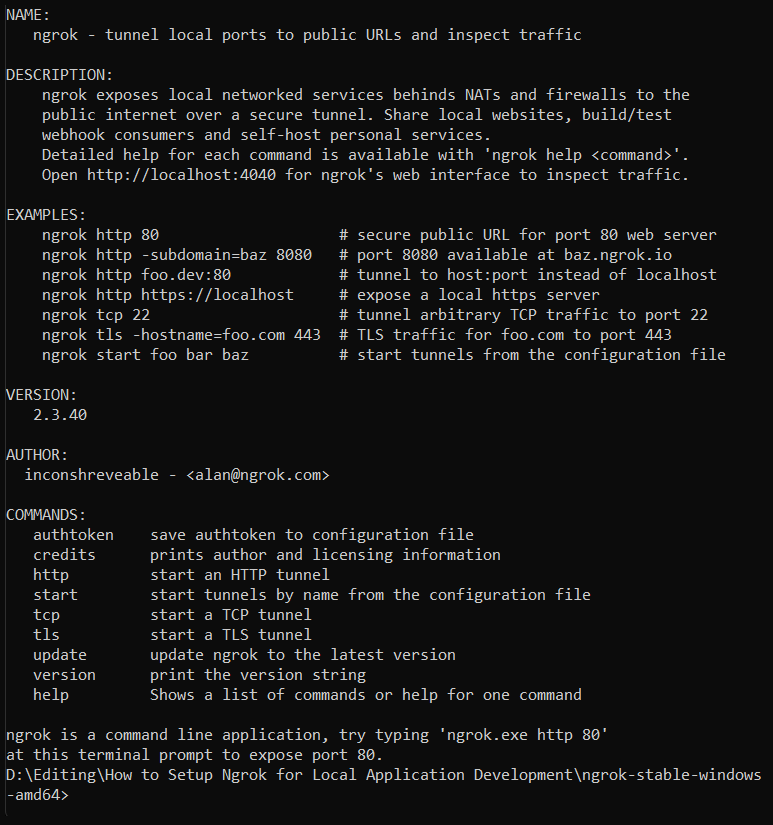
3. Unpack the ZIP you’ve downloaded to your preferred directory. Then, run the ngrok.exe file, and you’ll see the ngrok terminal pop up, as depicted in the image above.
4. On the ngrok home page, scroll until you find the Connect your account section. Here, copy the command displayed. This command embeds the authtoken you need to associate your ngrok agent with your ngrok account. Integrating this authtoken not only connects your account but also grants access to advanced ngrok features and prolonged session durations.
5. Go back to the ngrok terminal and input the copied command as follows: ngrok authtoken {your-authtoken}. By doing this, you’re effectively establishing a link between your ngrok agent and account. This connection is pivotal when you want to form tunnels for your locally developed apps using ngrok.
The configuration file for ngrok, named ngrok.yml, with the included authtoken, resides in the user directory at C:\Users\USERNAME/.ngrok2/ngrok.yml, as depicted below.

Establishing a ngrok Tunnel for Local Hosting
Having authenticated your ngrok agent, the next step is to carve out a tunnel for your localhost. This tunnel will open a gateway for your web apps hosted locally, letting them breathe on the internet. For this demonstration, we’ll harness the default HTTP port, which is 80.
Here’s how to get it done:
1. To set the stage for a session that taps into port 80 (where your local server is active), run the ensuing ngrok command:
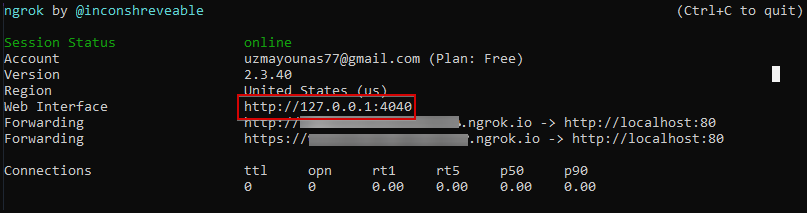
ngrok http 80Upon firing up the command, ngrok forges a tunnel leading to localhost:80. The URLs that emerge point directly to your local server, as illustrated in the subsequent image.
Remember the Web Interface URL? You’ll need it soon for testing purposes (look at step three).
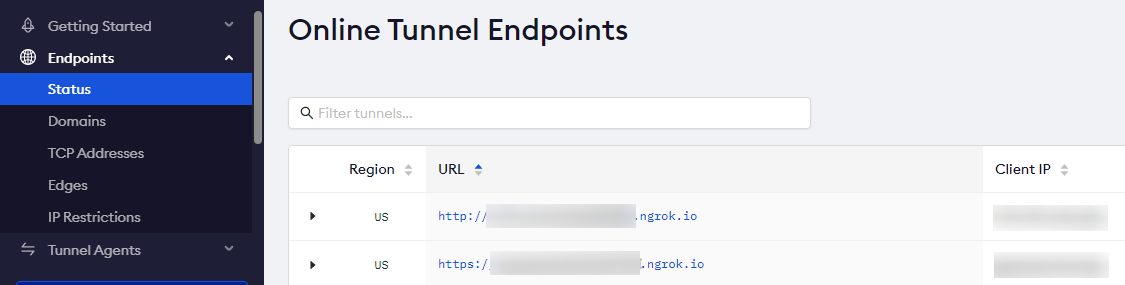
2. From the ngrok dashboard, click on the Status menu located on the left. This action will lead you to the status page. Here, you’ll observe active URLs and the respective client IP addresses, painting a clear picture of your ongoing session.
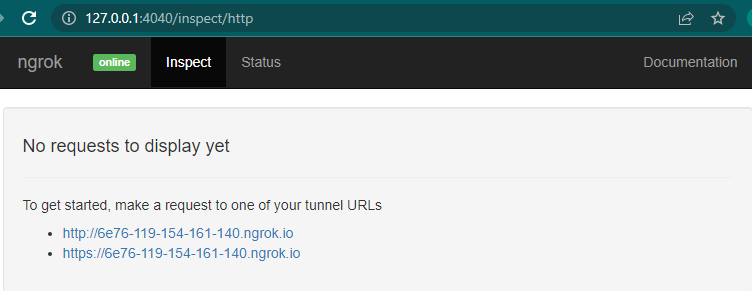
3. As your last move, tap into the Web Interface URL (the one you noted earlier) through your browser. The page that loads showcases your tunnel URLs. Feel free to click any of these links and carry out GET request tests.
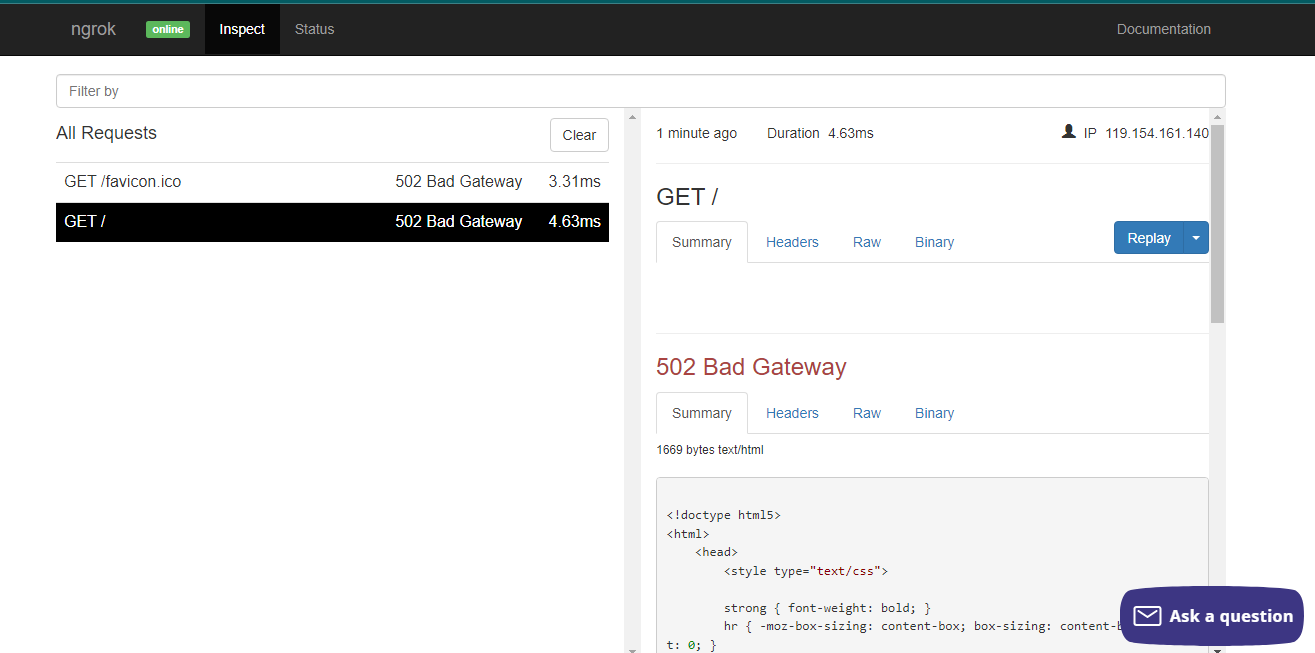
As illustrated below, if there’s no active application on port 8080, you might bump into a 502 Bad Gateway error. To rectify this, halt the current ngrok session with Ctrl + C. Afterward, kick-start a new session post-creating a local application, such as an HTML file.
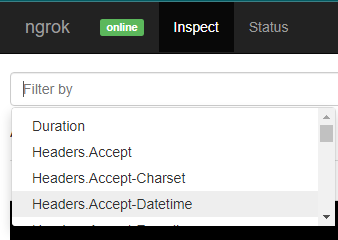
Keen on dissecting specific requests with ngrok? Apply filters for a more pinpointed analysis. As showcased in the upcoming screenshot, tap on the Filter bar and integrate multiple filters as per your requirements.
Employing Apache Web Server for ngrok HTTP Request Testing
Stumbling upon a 502 Bad Gateway error can be disheartening. However, look at the silver lining! It’s your chance to craft an index.html page nestled within the Apache web server. Why? So you can run a thorough test of HTTP requests directed at this server. This becomes invaluable if you aim to scrutinize ngrok’s full range of capabilities.
If port 80 already serves another active server handling HTTP requests, like an XAMPP server, you’re good to use that for your ngrok test runs.
Ready to proceed? Here’s the pathway:
1. In the default Apache directory (Apache/htdocs), forge an index.html file. Populate it with the code presented below:
This snippet, when executed, unveils a header text (“Testing Local Website with Ngrok Proxy”) on your webpage, confirming ngrok’s seamless functionality.
<html>
   <body>

     <h2>Testing Local Website with Ngrok Proxy</h2>

  </body>
</html>
2. Now, fire up your ngrok agent. Input the following command to initiate a brand new ngrok session, directing it toward port 80:
ngrok http 80It’s worth noting, not all services ride on the HTTP wave. For example, you can harness ngrok’s TCP tunnels to spotlight any networked service operating over TCP. Use the following command: ngrok tcp 1234
3. Redirect yourself to the Web Interface URL that we elaborated on in the “Establishing a ngrok Tunnel for Local Hosting” section (step three).
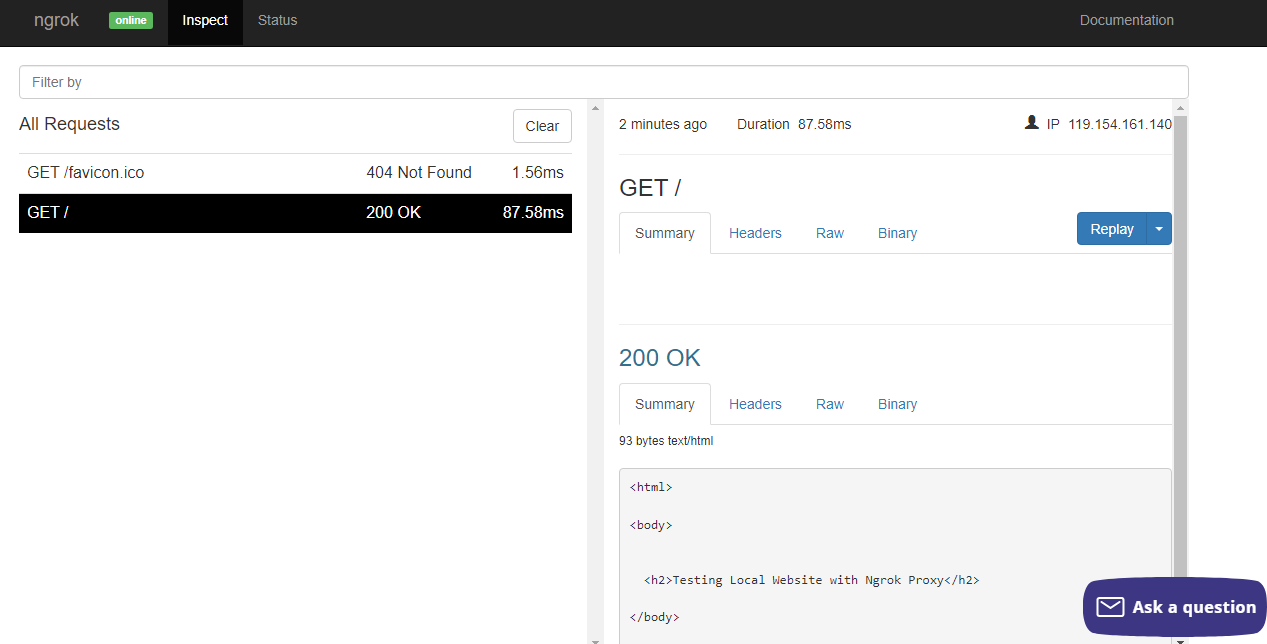
Click on any provided link. Instantly, a new tab surfaces, redirecting you to your local webpage, the index.html. The ensuing display is illustrated below.

4. Next, shift your attention back to the ngrok Web Interface. You should now spot a 200 OK message. This confirms that your GET request has flown through successfully.
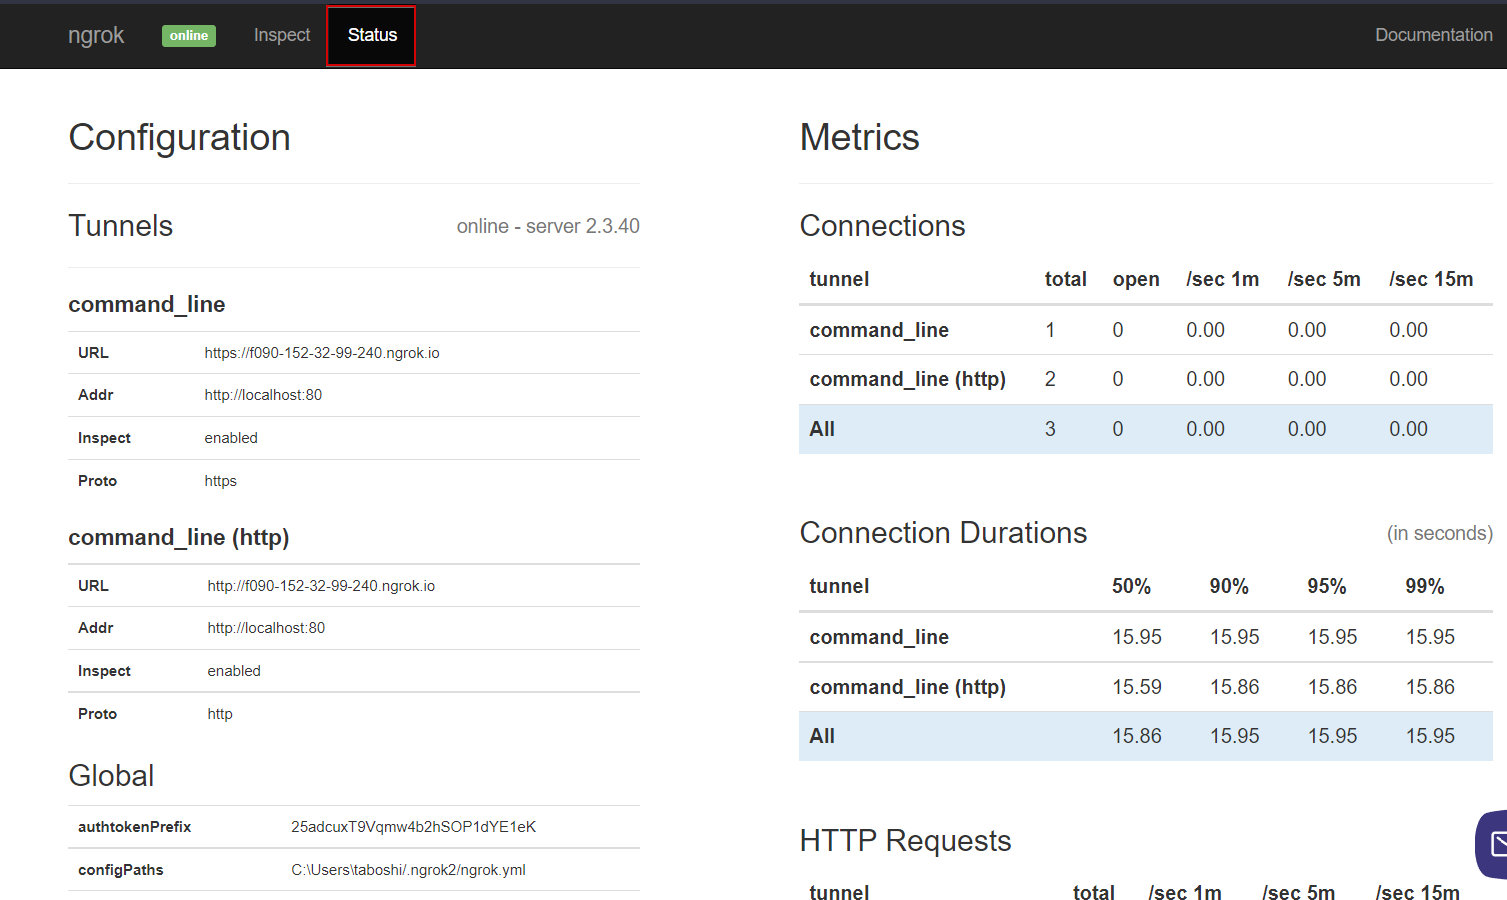
Yearning for a more granular peek into active tunnels? The Status tab on the ngrok dashboard dishes out all the nitty-gritty. Just glance at the illustration below. It’s your one-stop-shop for intricate tunnel configurations and insights.
Tailoring and Replaying Requests with ngrok
Post a successful volley of requests, your adventure with ngrok doesn’t halt. The ngrok Web Interface bestows you with the powers to tweak requests and replay them on the fly. From HTTP request attributes like method and path to headers, trailers, and request bodies, everything is modifiable at your fingertips.
Here’s how to navigate this feature:
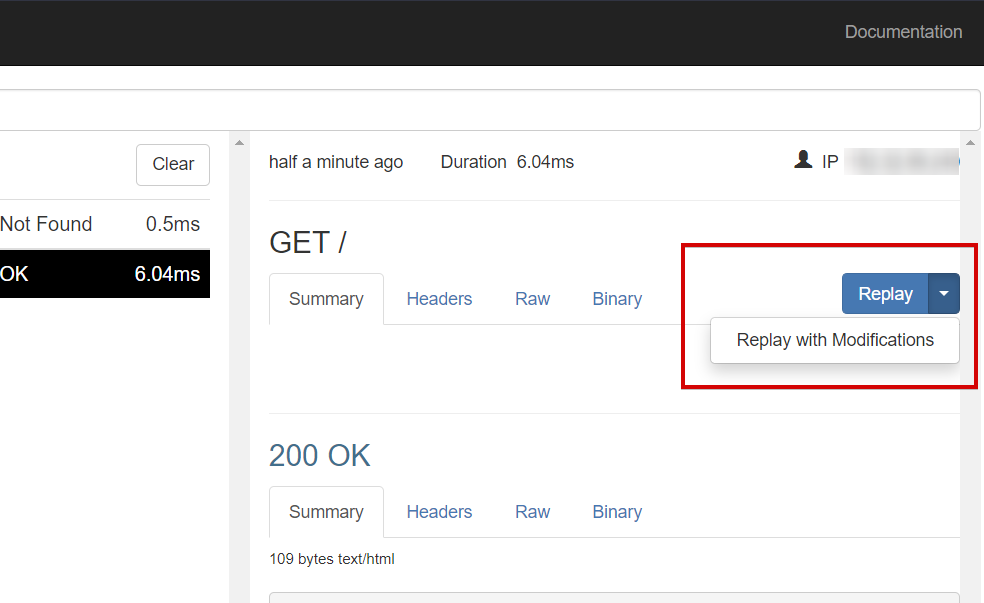
1. Pinpoint the drop-down arrow beside the Replay button. From the options, cherry-pick Replay with Modifications. A fresh pop-up blooms, extending a buffet of request modification choices to you.
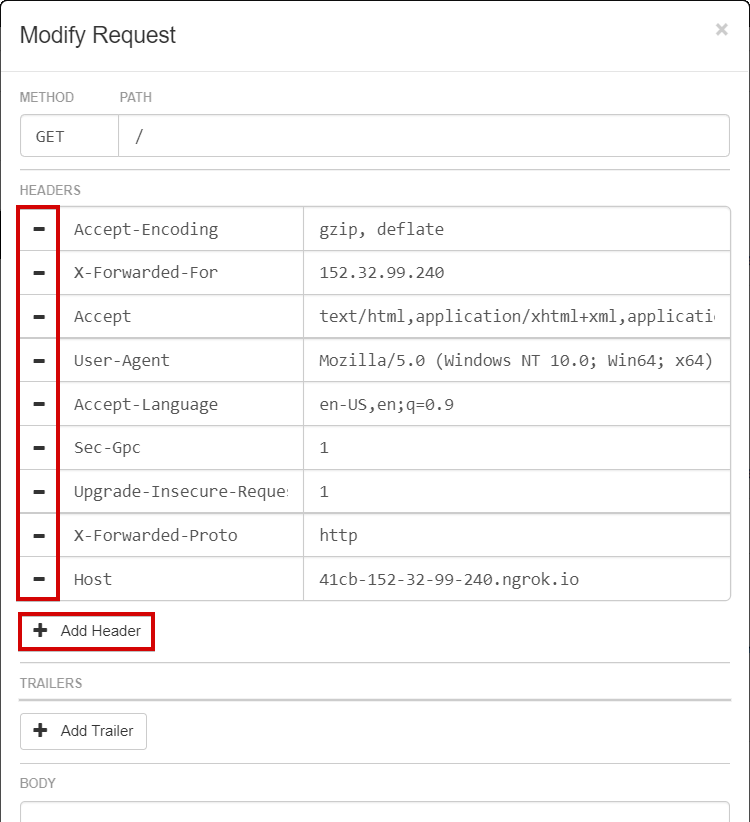
2. Want to infuse or pluck out headers? Deploy the minus (-) buttons or flirt with the + Add Header feature. Once satisfied with your tweaks, tap on the Replay button stationed at the base of the Modify Request arena.
With ngrok at your disposal, the sky’s the limit. Dive deep, experiment, and finesse your requests just the way you like.
Wrapping Up with ngrok
Traversing through this exhaustive tutorial, you’ve transformed into an adept at setting up and wielding ngrok. With newfound prowess, you can now unveil web applications hosted locally to the vast expanse of the internet. Such a setup is invaluable for thorough testing of endpoint reachability. The dual capability of ngrok, to fashion both HTTP and HTTPS endpoints, positions it as a cornerstone for probing integrations with diverse third-party services and APIs.
Moreover, don’t overlook ngrok’s replay asset. It’s a goldmine when the need to scrutinize API calls or webhooks crops up. Why? Because it aggregates a detailed inspection of headers along with the entire request/response data chronicle, all under one roof.
With the sea of insights absorbed, think about propelling ngrok on platforms like Mac, Windows, or Linux. It’s a stepping stone to sharing your digital environment with peers beyond your immediate network.


