


Downloading multiple files from the Internet manually as part of your daily routine can truly be a nightmare. And if you’re looking for a way to automate your file downloads, then Python’s Wget is the right tool for you.
In this tutorial, you’ll learn many ways to download files, from running the basic Python wget command to creating a script to download multiple files simultaneously.
Let’s get down to it!
Prerequisites
This tutorial will be a hands-on demonstration. If you’d like to follow along, be sure you have the following:
- Virtual Studio Code (VS Code) – This tutorial uses Virtual studio code version 1.58.2 (64 bit).
Related: What You Need to Know about Visual Studio Code: A Tutorial - Python – This tutorial will be using Python v3.9.6.
- A Windows PC -This tutorial uses Windows 10 for demonstrations but works for Windows 7 and 8.1.
Downloading and Installing Wget on Windows
Wget is a non-interactive utility to download remote files from the internet. Aside from being built-in with Unix-based OS, the wget command also has a version built for Windows OS. At the time of writing, the latest Wget Windows version is 1.21.6.
Before you download files with the wget command, let’s go over how to download and install Wget on your Windows PC first.
1. Download Wget either for 64bit or 32bit for Windows.
2. Open File Explorer and find the wget.exe file you downloaded, then copy and paste it to the C:\Windows\System32 directory to add wget.exe to the PATH environment variable. The PATH environment variable specifies sets of directories to be searched to find a command or run executable programs.
Adding wget.exe in the PATH environment variable lets you run the wget command from any working directory in the command prompt.
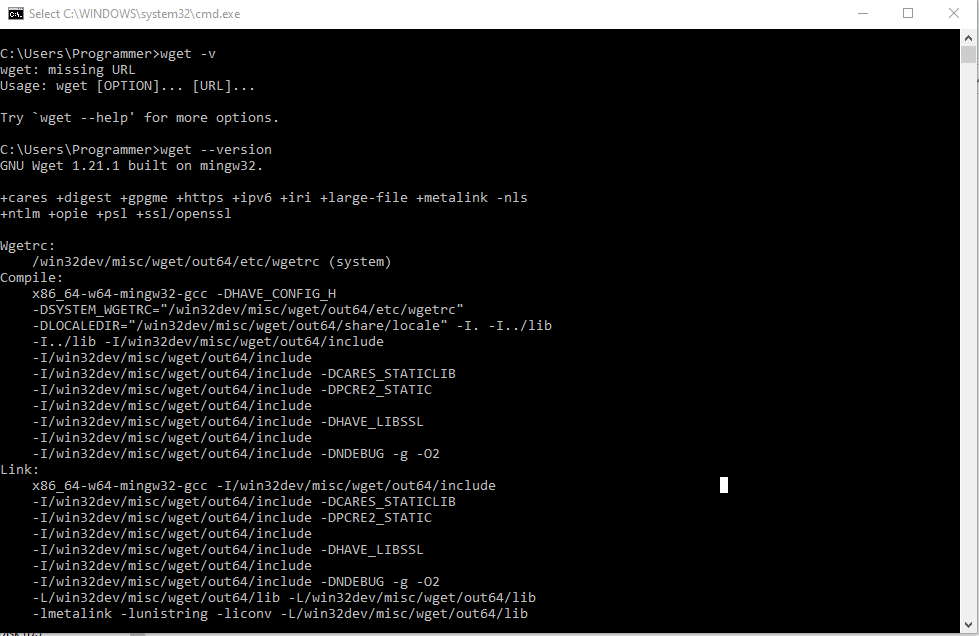
3. Now, launch the command prompt and confirm the version (--version) of Wget (wget) you downloaded with the command below.
wget --versionOnce you see the output on the screenshot below, then Wget is successfully installed in your machine.
Downloading a File Directly from a URL
Now that you’ve installed Wget, let’s dig into running basic wget commands. Perhaps you want to download a file from a specific URL. In that case, you only need the basic wget command syntax and specify the URL to download the file from.
Related: Download a File with an Alternative PowerShell wget Command
Below, you can see the basic syntax for running the wget command. Notice that after the wget command, you’ll specify various options followed by the website URL.
wget [options] urlDownloading a File to the Working Directory
With the wget command syntax you learned still fresh in your memory, let’s look at downloading a file to the working directory by running the wget without added options.
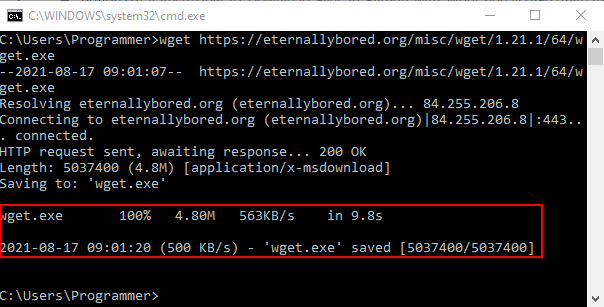
Run the command below to download the wget.exe file from the specified URL (https://eternallybored.org/misc/wget/1.21.1/64/wget.exe) to the working directory.
wget https://eternallybored.org/misc/wget/1.21.1/64/wget.exeOnce you see this output on your command prompt, the file has been downloaded successfully.
Downloading a File to a Specific File Path
You’ve just downloaded a file to your working directory, but what if you prefer to download the file to a specific file path? If so, then run the below command instead to specify the download location.
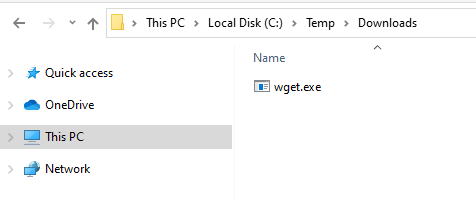
Run the wget command below and add the --directory-prefix option to specify the file path (C:\Temp\Downloads) to save the file you’re downloading.
wget ‐‐directory-prefix=C:\Temp\Downloads https://eternallybored.org/misc/wget/1.21.1/64/wget.exeOpen File Explorer and navigate to the download location you specified (C:\Temp\Downloads) to confirm that you’ve successfully downloaded the file.
Downloading and Renaming a File
Downloading a file to your preferred directory with a single command is cool enough. But perhaps you’d like to download a file with a different name. If so, the -o flag is the answer! Adding the -o flag lets you output the file you’re downloading with a different name.
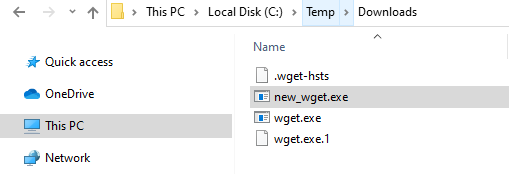
Below, run the basic wget command syntax to download the wget.exe file from a specific URL. But this time, add the -o flag to rename the file you’re downloading. So instead of wget.exe, you’re naming the file new_get.exe.
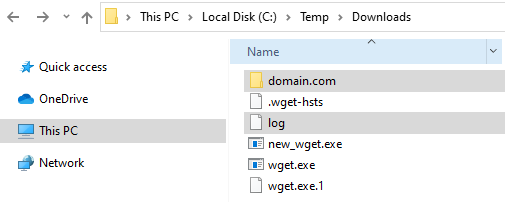
wget -o new_wget.exe https://eternallybored.org/misc/wget/1.21.1/64/wget.exeYou can see below in File Explorer that the downloaded file is named new_wget.exe.
Downloading a File’s Newer Version
Perhaps you want to download a newer version of a file you previously downloaded. If so, adding the --timestamp option in your wget command will do the trick. Applications on a website tend to be updated over time, and the --timestamp option checks for the updated version of the file in the specified URL.
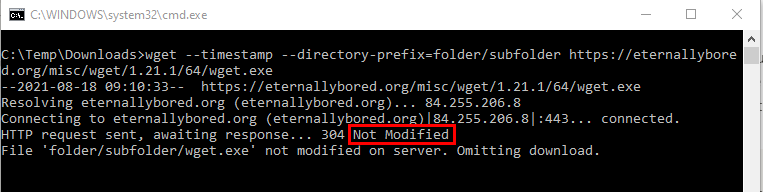
The wget command below checks (--timestamp) and downloads the newer version of the wget.exe file to the C:\Temp\Downloads directory.
wget ‐‐timestamp ‐‐directory-prefix=C:\Temp\Downloads https://eternallybored.org/misc/wget/1.21.1/64/wget.exeIf the file (wget.exe) were modified from the version you specified, you’d get a similar output as in the previous examples. But if not, you’ll see the screenshot below. Notice the part where it says Not Modified, indicating there’s no new newer version of the file you’re downloading.
Downloading Files from a Website Requiring Username and Password
Most websites require a user to be logged in to access or download some files and content. To make this possible, Wget offers the --user and --password options. With these options, Wget provides a username and password to authenticate your connection request when downloading from a website.
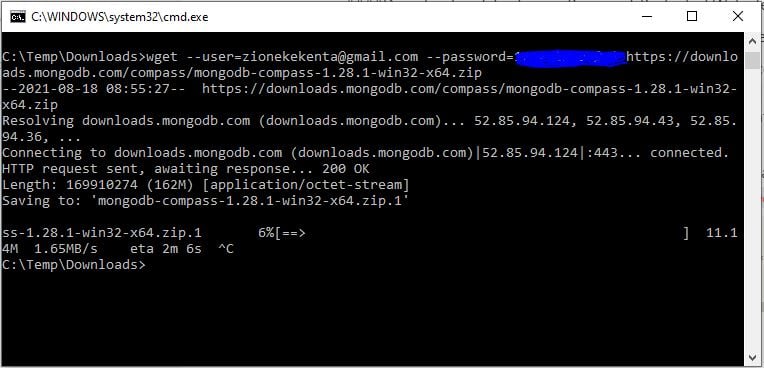
Below is the basic syntax of the wget command to download files from websites requiring your account’s username (myusername) and password (mypassword).
wget --user=myusername --ask-password=mypassword https://downloads.mongodb.com/compass/mongodb-compass-1.28.1-win32-x64.zipYou will see an output similar in the image below if the command is successful.
Downloading a Web Page
Instead of a file, perhaps you’re trying to download a web page to keep a local copy. In that case, you’ll run a similar command that downloads a file, but with additional options.
Run the wget command below to download the home page of the http://domain.com/ website and create a folder named domain.com in the working directory. The domain.com folder is where the downloaded home page is saved (-o).
The command also creates a log file in the working directory instead of printing output on the console.
wget -r http://domain.com/ -o logBelow, you’ll see the local copy of the downloaded web page and log file where the download logs are saved.
You may also put several options together, which do not require arguments. Below, you can see that instead of writing options separately (-d -r -c), you can combine them in this format (-drc).
wget -d -r -c http://domain.com/ -o log   # Standard option declaration
wget -drc http://domain.com/ -o log       # Combined options
Downloading an Entire Website
Rather than just a single web page, you may also want to download an entire website to see how the website is built. To do so, you’ll need to configure the wget command as follows:
- Replicate (
--mirror) the website (www.domain.com), and ensure all files (-p), including scripts, images, etc., are included in the download. - Now add the
-Poption to set a download location (./local-dir). - Ensure you download the specific website only by adding the
--convert-linksoption to your command. Most websites have pages with links pointing to a resource for other websites. You’re also downloading all other linked websites when you download a website, which you may not need.
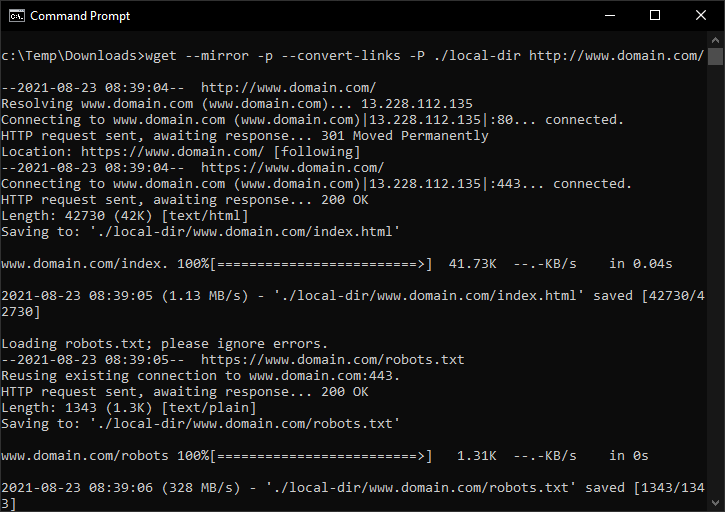
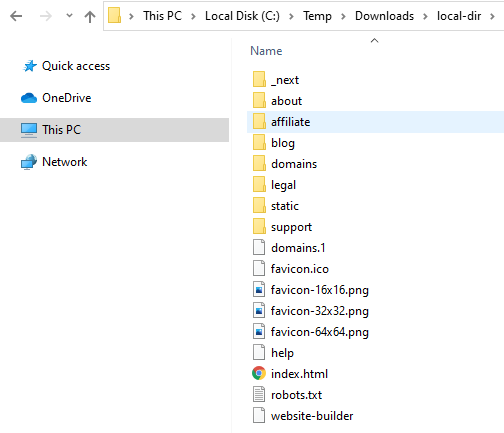
wget --mirror -p --convert-links -P ./local-dir http://www.domain.com/Once you see the below output, the file has been downloaded successfully.
Wget downloads all the files that make up the entire website to the local-dir folder, as shown below.
The command below outputs the same result as the previous one you executed. The difference is that the --wait option sets a 15-second interval in downloading each web page. While the --limit option sets the download speed limit to 50Kmbps.
wget --mirror -p --convert-links -P ./local-dir --wait=15 --limit-rate=50K http://www.domain.com/Downloading Files from Different URLs Simultaneously
As you did in the previous examples, downloading files manually each day is obviously a tedious task. Wget offers the flexibility to download files from multiple URLs with a single command, requiring a single text file.
Sounds like a good deal? Let’s get down to it!
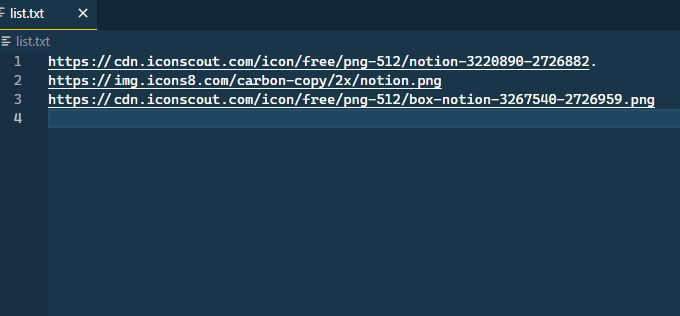
Open your favorite text editor and put in the URLs of the files you wish to download, each on a new line, like the image below.
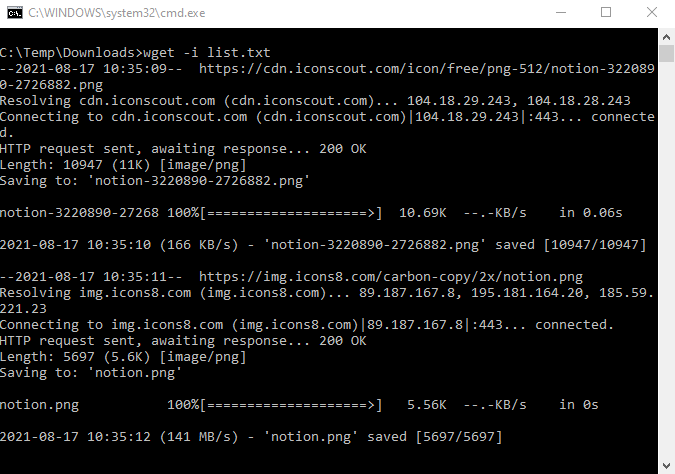
Now, run the command below to download the files from each URL you listed in the text file.
wget -i list.txtBelow, you can see the output of each file’s download progress.
Resuming an Interrupted Download
By now, you already know your way of downloading files with the wget command. But perhaps, your download was interrupted during the download. What would you do? Another great feature of wget is the flexibility to resume an interrupted or failed download.
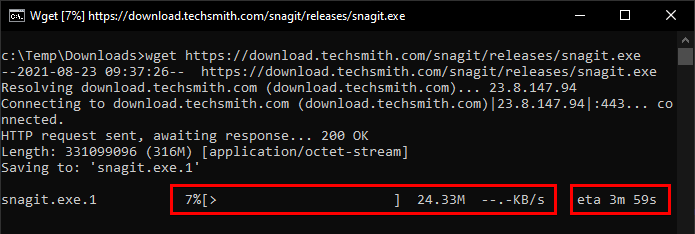
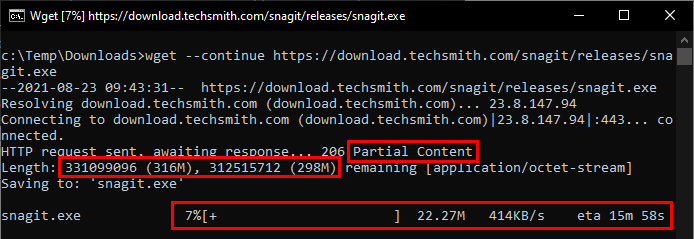
Below is an example of an interrupted download as you lost your internet connection. Notice that the download progress (7%) gets stuck, and the eta keeps counting up.
The download progress will automatically resume when you get your internet connection back. But in other cases, like if the command prompt unexpectedly crashed or your PC rebooted, how would you continue the download? The --continue option will surely save the day.
Run the wget command below to continue (--continue) an interrupted download of the wget.exe file.
wget --continue https://download.techsmith.com/snagit/releases/snagit.exeYou can see below that the interrupted download resumed at 7% when interrupted (not always). You’ll also see the total and remaining file size to download.
Alternatively, you may want to set a certain number of times the wget command will retry a failed or interrupted download.
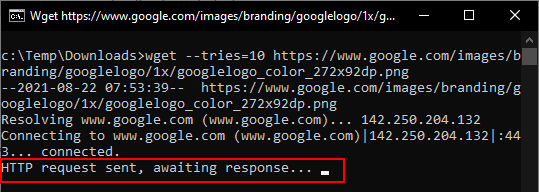
Add the --tries option in the wget command below that sets 10 tries to complete downloading the wget.exe file if the download fails. To demonstrate how the --tries option works, interrupt the download by disconnecting your computer from the internet as soon as you run the command.
wget --tries=10 https://www.google.com/images/branding/googlelogo/1x/googlelogo_color_272x92dp.pngBelow, you can see that the download stops, and the HTTP request is awaiting a response.
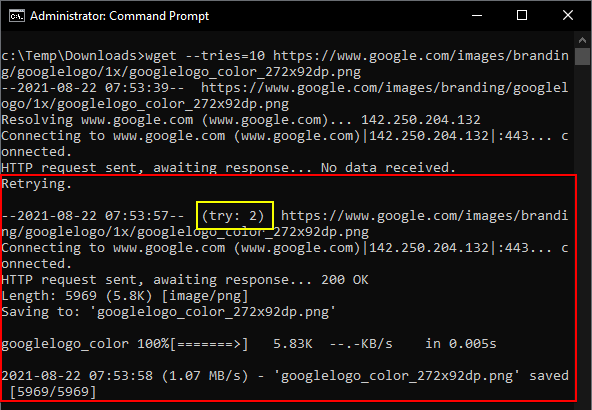
Now, reconnect your computer to the internet, and you’ll see the download will automatically continue, as shown below. You can see that it’s the second try to download the file.
Creating a Python Script for Downloading Files
You’ve learned how to download files by running commands so far, but did you know you can also create a script to download files automatically? Let’s dive into writing some Python code.
1. Create a new folder named ~downloader.
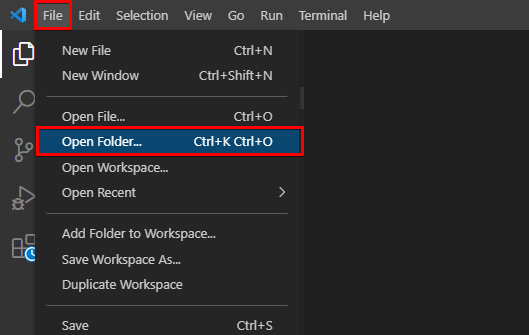
2. Launch VS Code, then click on the File menu —> Open Folder to open the ~downloader folder you created.
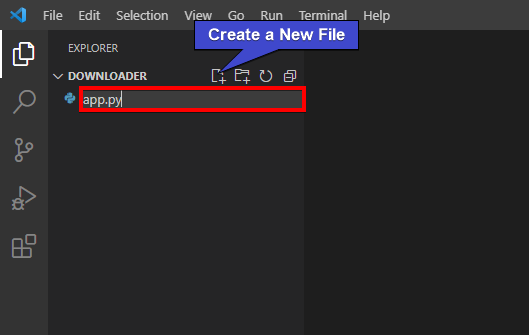
3. Click on the new file icon to create a new Python script file named app.py in your project directory, as shown below.
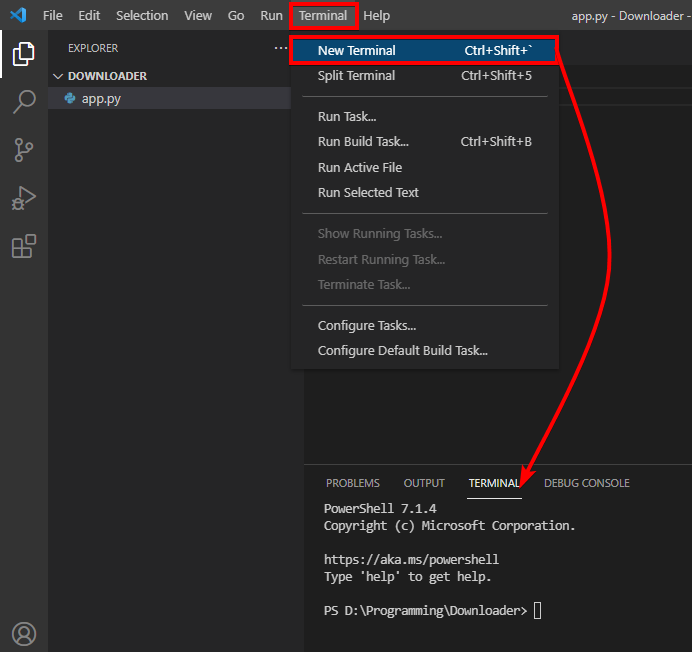
4. Now, click on the Terminal menu, and choose New Terminal to open a new command-line terminal, as shown below.
Installing and Activating Virtual Environment
Now that you have your project folder and script file, let’s dig into creating a virtual environment. A virtual environment is an isolated environment for Python projects where the packages required for your project are installed. You’ll activate this virtual environment to enable the execution of your program in the future.
Run the below commands on your VS Code terminal to install the virtual environment package and create a virtual environment.
pip install virtualenv # Install Virtual Environment Package
virtualenv download    # Create a Virtual Environment named 'download'
Run either of the commands below depending on your operating system to activate your virtual environment.
source download/bin/activate # Activate Virtual Environment for Unix/Mac
download\Scripts\activate    # Activate Virtual Environment for Windows
Installing wget Module
You now have your virtual environment set up, so it’s time to install the wget module. The wget module is developed to provide an API for the Python developers’ community. This module eases the applications and implementations of the wget command with Python
When building a Python project, you need to store the packages in a requirements.txt file. This file will help you install the same version of the packages used in the future.
Run the commands below to install the Wget module and add it to the requirements.txt file.
pip install wget # Install the wget module
pip freeze > requirements.txt # Add wget to requirements.txt
Now copy and paste the code below to the app.py you previously created in VS Code.
The code below changes the output of the file download so that you can see each file download’s progress with a custom progress bar.
# import the wget module
from wget import download
#
# create a downloader class.
class downloader:
    #  Create a custom prgress bar method
    def progressBar(self,current,total):
        print("Downloading: %d%% [%d / %d] bytes" % (current / total * 100, current, total))

    # Create a downloadfile method
    # Accepting the url and the file storage location
    # Set the location to an empty string by default.

    def downloadFile(self, url, location=""):
         # Download file and with a custom progress bar
        download(url, out = location, bar = self.progressBar)

downloadObj = downloader()
downloadObj.downloadFile("https://blog.debugeverything.com/wp-content/uploads/2021/04/python-virtualenv-project-structure.jpg","files")
Finally, run the command below to execute the script app.py script.
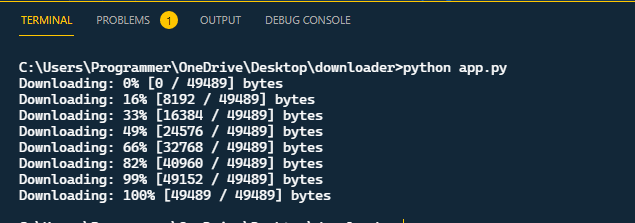
python app.py
Below, you can see each file’s download progress in percentage with the file’s total and current downloaded size in bytes.
Conclusion
Throughout this tutorial, you’ve learned how to download files with Python wget command. You’ve also experienced downloading files from running basic wget commands to running the wget module in Python script to download multiple files.
Now, how would you use Python Wget in your next project to download files automatically? Perhaps creating a scheduled download task?


