


Juggling SSH clients on different operating systems to connect to an SSH server can be difficult! Instead of finding an SSH client for each operating system, how about using a universal SSH client built right into your browser? You can use the Google Chrome SSH extension that to connect to any SSH server.
Google Chrome is a cross-platform browser, which means the SSH Chrome extension is available on any supported operating system.
In this article, you’ll learn how to download, install, and set up the SSH Chrome extension, and use it to connect to a remote host.
Prerequisites
To follow along with this tutorial, you need a computer with Google Chrome and an SSH server to connect to. This article is using Google Chrome Version 88.0.4324.182 on a Windows 10 Pro 20H2 computer.
Installing the SSH Chrome Extension
Using Google Chrome, a common and easily accessible browser, you can avoid needing a standalone SSH client. Instead, you can give Google Chrome an SSH client right at your fingertips with the SSH Chrome extension!
Since the SSH client in Chrome is an extension you’ll need to install it via the Google Chrome web store. To do that follow these steps.
1. Open your Google Chrome browser.
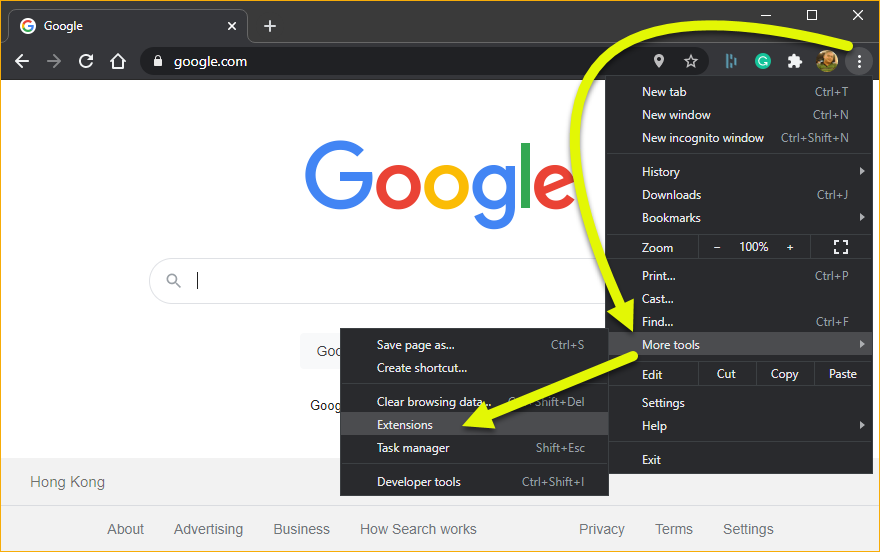
2. Once Google Chrome is open, click the three vertical dots button on the upper-right corner and click on More tools —> Extensions. Loading the Chrome Extensions Page.
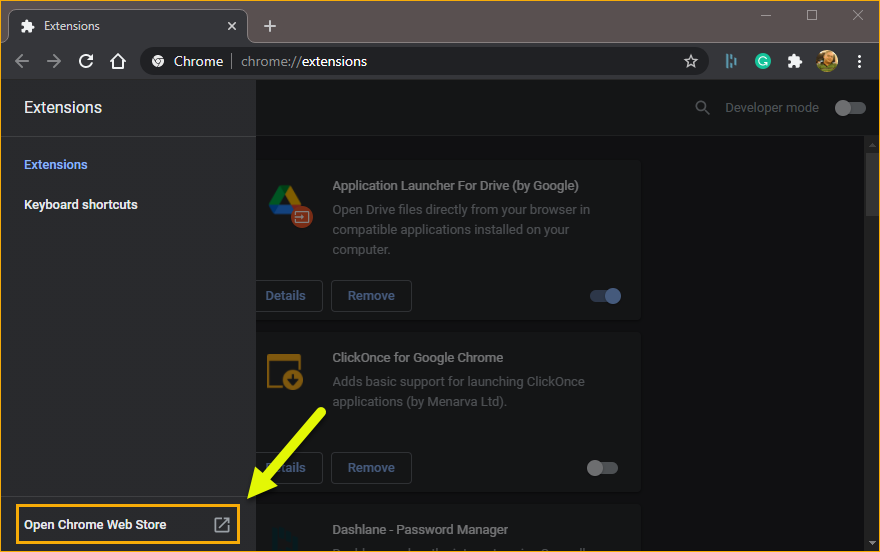
3. On the Extensions page, click on the hamburger button in the upper-left corner.

4. Next, on the fly-out menu, click on Open Chrome Web Store is at the bottom. Doing so opens the Chrome Web Store in a new tab.
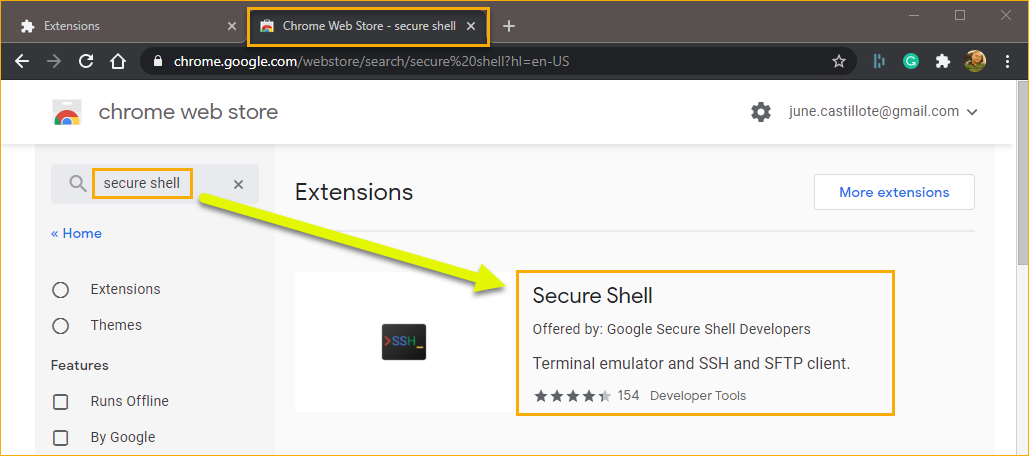
5. Look for the search box on the Chrome Web Store page’s upper-left side and type the search term secure shell.
6. Next, click Secure Shell under the list of results.
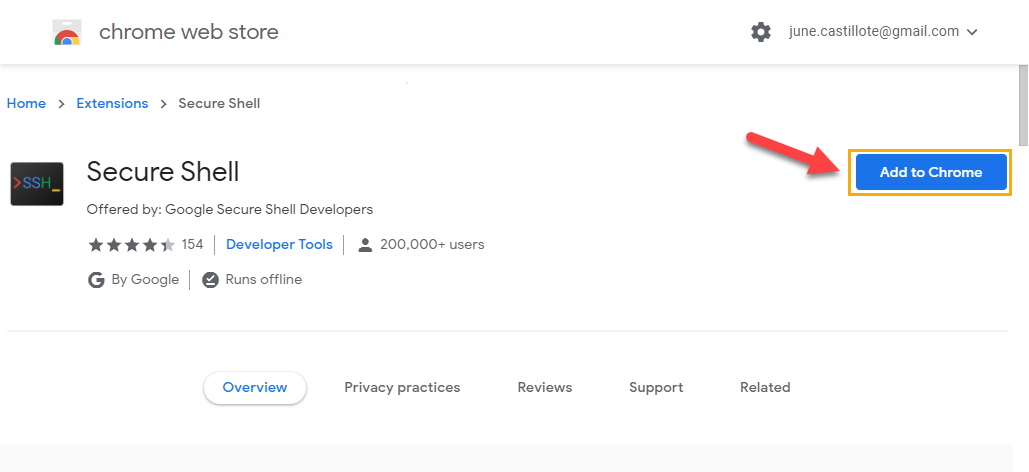
7. Once you’re on the Secure Shell extension page, click Add to Chrome.
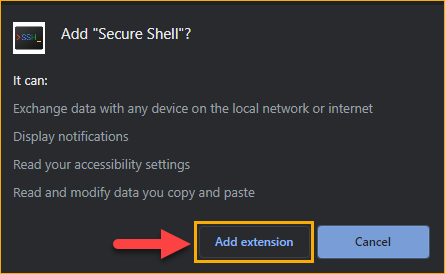
8. At the confirmation prompt, click Add extension to add the Secure Shell extension to Chrome.
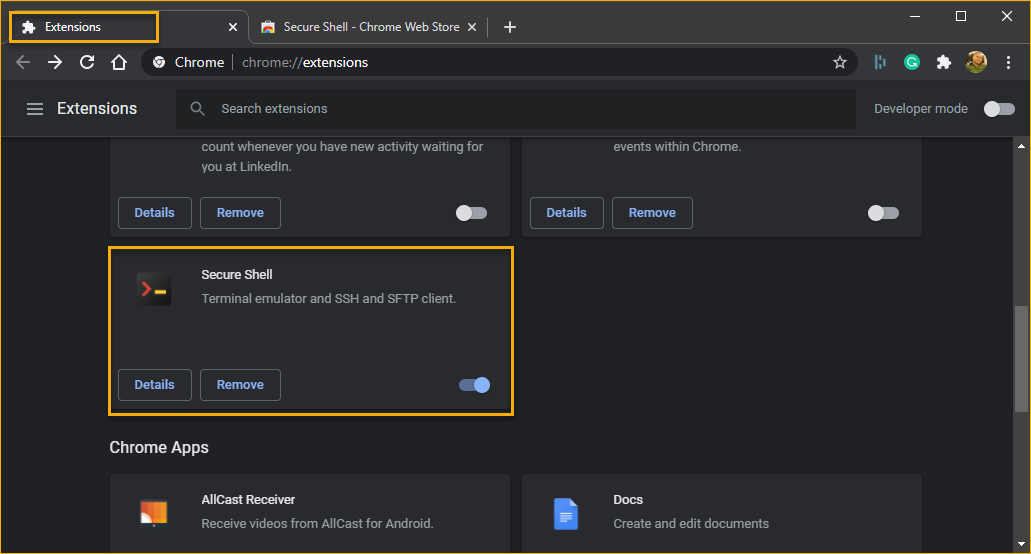
9. After installing the extension, return to the Extensions page and confirm that Secure Shell is now on the extensions list.
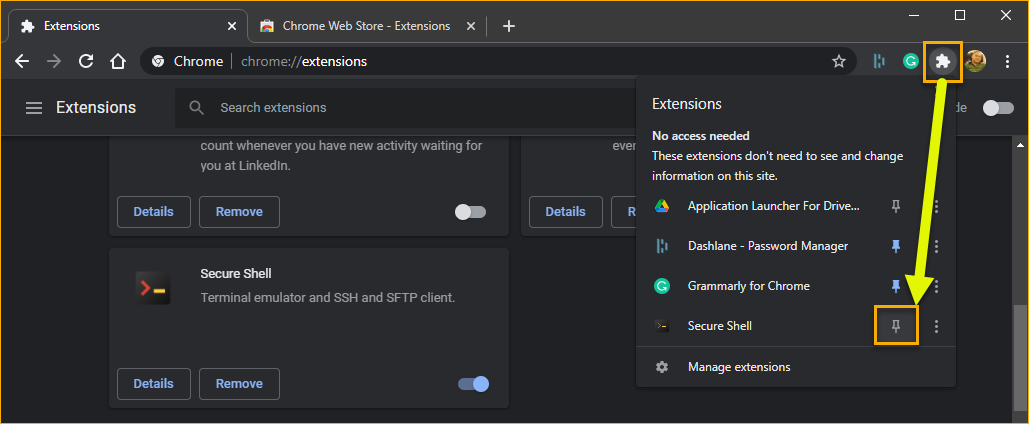
10. To keep the Secure Shell extension always visible you need to pin the extension to the toolbar. To do so, click on the Extensions button that looks like a puzzle piece.
11. When you see the list of extensions, click the pin next to Secure Shell.
If you’ve turned on sync in Google Chrome, the SSH Chrome extension will synchronize to your other computers where you’ve installed Google Chrome.
Creating and Opening a New Connection
Now that you’ve installed the Secure Shell extension get ready to use it to connect to your SSH server. The SSH Chrome extension uses connections to save your common SSH servers. Follow these steps to create and open a connection.
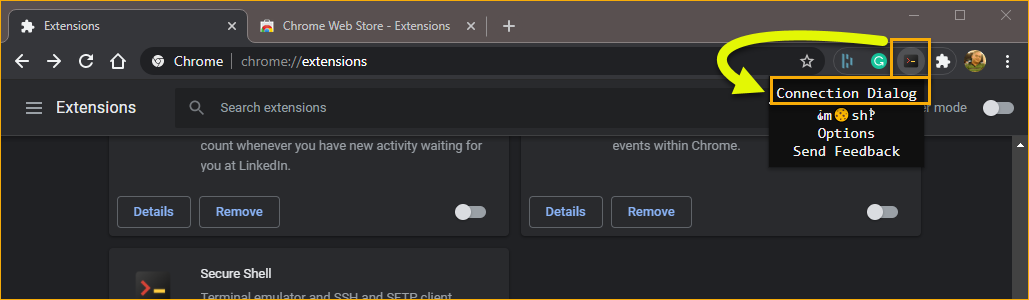
1. On the Google Chrome toolbar, click the Secure Shell extension icon.
2. When the dropdown menu appears, click Connection Dialog.
3. On the Connection Details window that opens, enter the following details.
- In the description box, enter a name to assign to the new connection. In this example, the new connection name is ssh-test-1.
- Next, enter the username, hostname, and optionally the SSH server’s port number to connect to. If you do not enter a port number, the connection will use port
22by default. - When you’ve filled in the required information, press Enter or click the [ENTER] Connect button. Doing so saves the new connection for later use and connects to the SSH server.

4. Since you’re connecting to the server for the first time, you’ll see a message displaying the remote host’s fingerprint asking you to confirm whether to continue with the connection. To continue with the SSH connection, type yes in the box and press Enter.
A fingerprint is the remote host’s unique identifier that you can use to verify that you are connecting to the correct server.

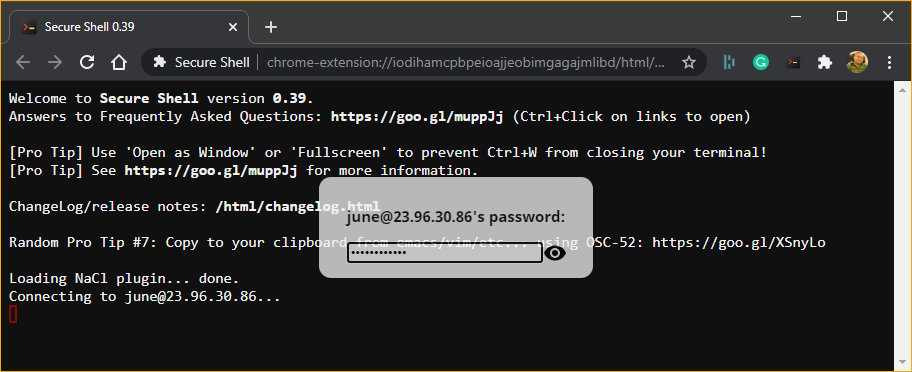
5. Next, at the password prompt, enter your password and press Enter. The SSH extension will then log you into the remote host.
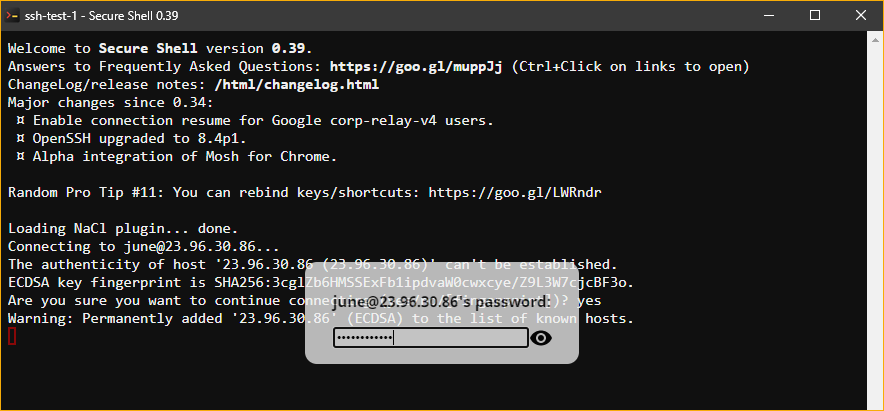
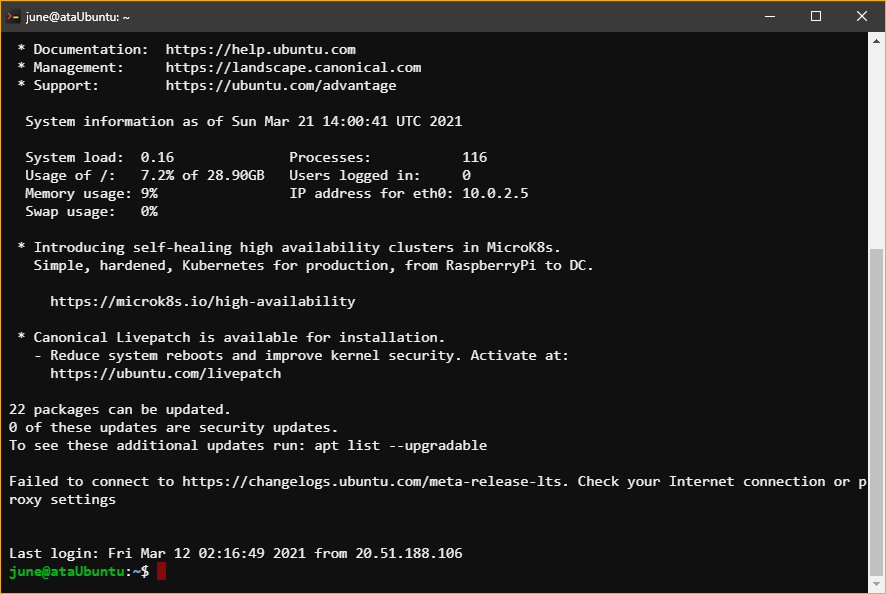
At this point, you’ve successfully connected to the SSH server, and you should see an output similar to the screenshot below.
Connecting to a Previously Saved Connection
You won’t want to recreate a connection every time, but thankfully the extension saves your connection for reuse. After saving the connection, the SSH connection becomes available in the SSH extension’s dropdown menu.
Connecting via the Drop-Down Extension Menu
To connect to a saved SSH connection with the drop-down extension menu, follow the steps below.
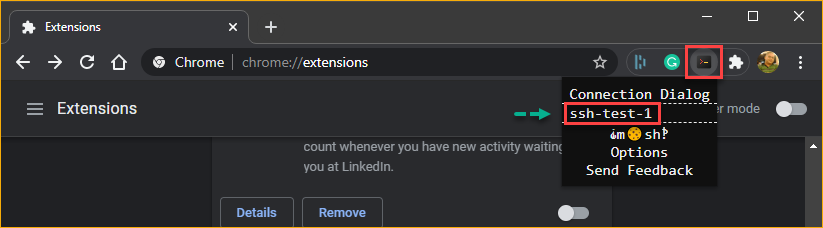
1. Click the Secure Shell extension on the Google Chrome toolbar.
2. Next, click the saved connection you want to connect, which in this example is ssh-test-1.
3. At the next prompt, type in your password and press Enter.
Connecting via the Connection Dialog
Although the way demonstrated above is quick, there is one other way to start a saved connection from the Connection Dialog. The only difference when using this approach is you can make changes to a saved connection, if needed, before connecting to the SSH server.
To do so, follow these steps.
1. On the Google Chrome toolbar, click the Secure Shell extension icon —> Connection Dialog.
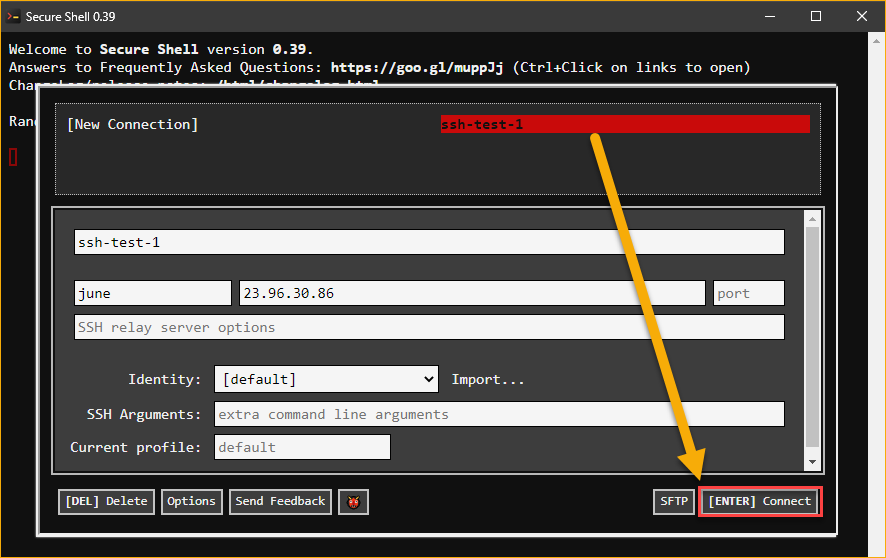
2. Once you’ve opened the Connection Dialog page, click to select the connection name, which is ssh-test-1 in this example.
3. Press Enter or click the [Enter] Connect button to begin the SSH connection process.
Connecting to a Remote Host using the Search Bar
Perhaps one of the handy features of the SSH extension is the ability to use it from Chrome’s Omnibox. The Omnibox is the text box at the top-middle area in Chrome where you type addresses or search terms.
This connection method allows you to establish a remote SSH connection without saving that connection. To establish an SSH connection using the Omnibox, follow these steps:
1. Open a new Google Chrome tab.
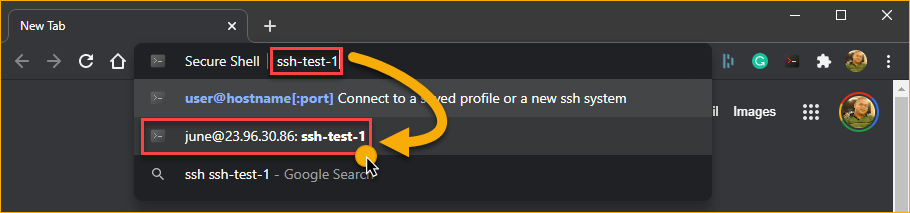
2. In the Omnibox, type ssh and press Tab. As you can see in the screenshot below, the Omnibox now shows a Secure Shell prompt.

3. Type username@hostname into the Omnibox, where username is your username and hostname is the IP address or Fully Qualified Domain Name (FQDN) of your SSH server. Press Enter to connect.

Alternatively, type in the connection name, then click to select a previously saved connection.
4. At the password prompt, type in your password and press Enter.
Adding Key-Based Authentication
So far, throughout this tutorial, you’ve been using a user account and password to connect to an SSH server. But, you don’t have to! Instead, you can use a shared key to authenticate your connection to an SSH server, the key-based authentication method uses a public and private key-pair instead of a password.
A key-pair consists of a private key on your client and a public key on the SSH server. This configuration ensures that only the private key that matches the public key on the server can authenticate.
This tutorial does not cover the process of generating a key-pair and configuring the public key on the SSH server.
To enable key-based authentication for a connection, import the private key into the connection in Secure Shell. This tutorial assumes that you’ve already deployed your public key to the SSH server.
1. On the Google Chrome toolbar, click the Secure Shell extension icon —> Connection Dialog.
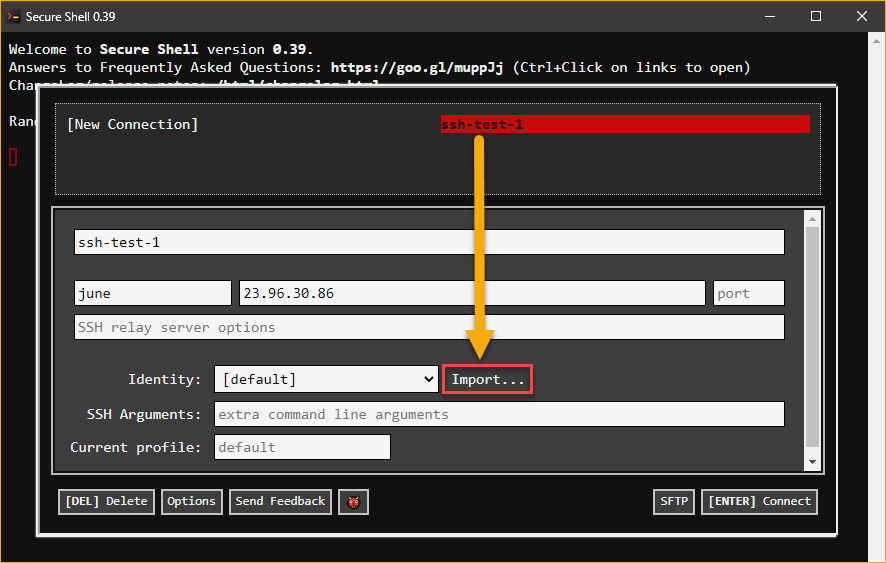
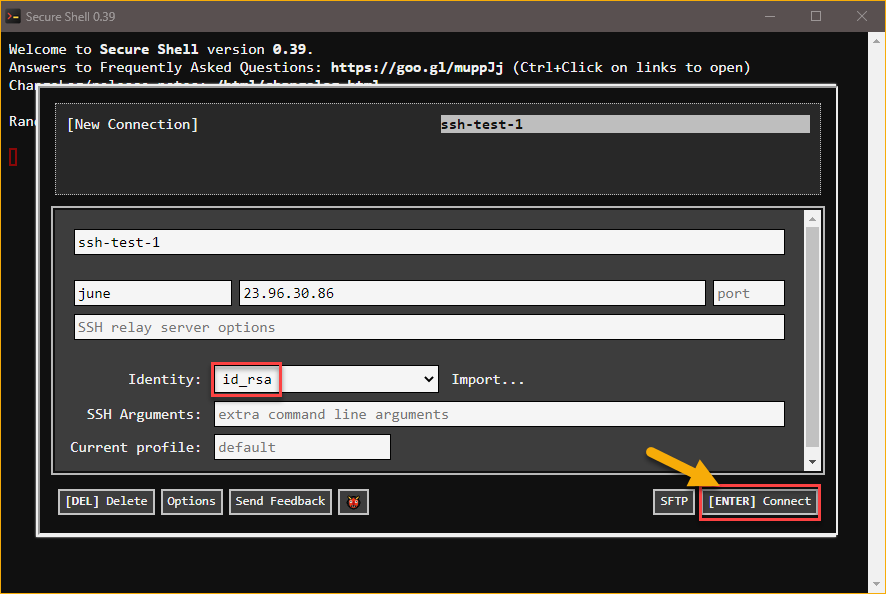
2. Once you are in the Secure Shell window, click to select the connection name you want to enable key-based authentication. This example uses ssh-test-1.
3. Next, click the Import link next to the Identity dropdown box.
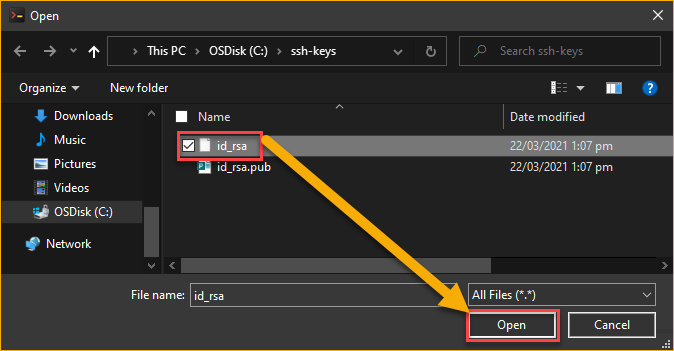
4. When the Open dialog box shows up, browse for the private key file and click Open.
Typically, a private key file does not have a filename extension by default, like id_rsa, for example. But depending on how you generate a key-pair, a private key may have a different name and have an extension.
Conversely, the public key has the .pub filename extension by default, such as id_rsa.pub.
5. After importing the private key, the Identity dropdown box automatically selects the private key name. In this example, the private key name is id_rsa, and to connect, press Enter or click the [ENTER] Connect button.
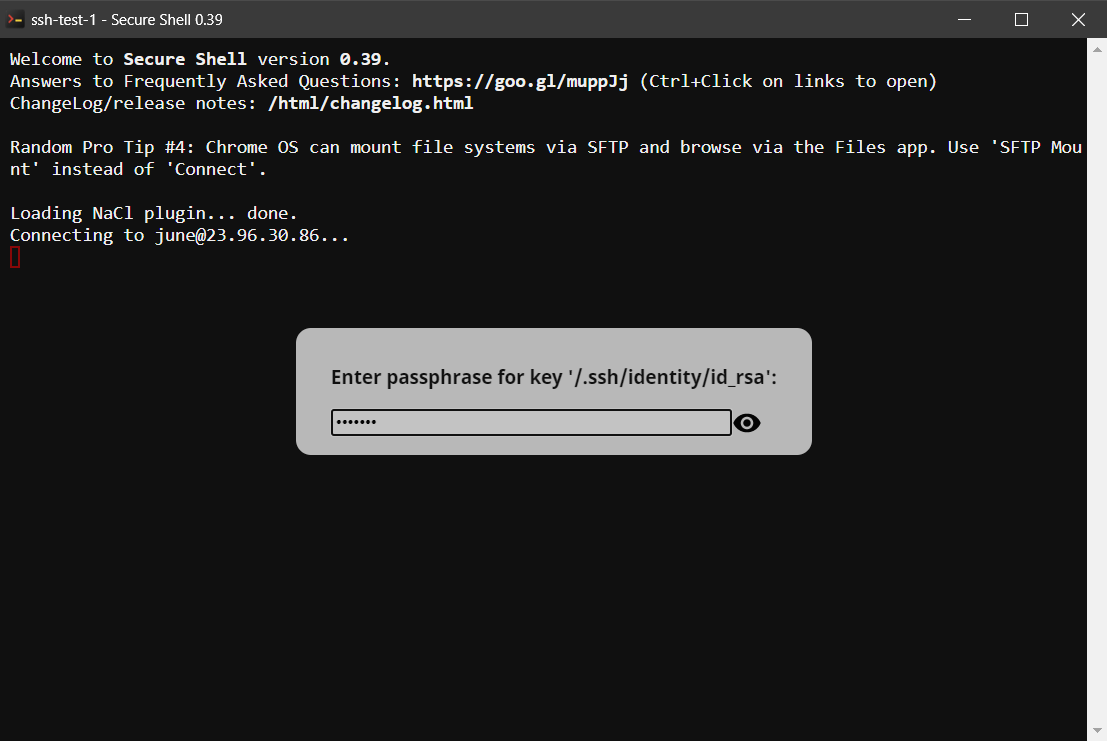
6. If your private key has a passphrase, enter the passphrase at the next prompt, as shown below. Otherwise, the login process will continue without asking for input.
Conclusion
In this article, you’ve learned about the SSH Chrome extension called Secure Shell. You’ve learned how to install the Secure Shell extension, create new connections, and connect to new and saved connections. You’ve also learned how to add key-based authentication to your SSH connections.
For all intents and purposes, the Secure Shell extension is a viable alternative SSH client. What do you think of the Secure Shell extension? Is it good enough to use in your daily tasks?


