


If you’re a developer, you’d typically prefer to automate the tedious manual build deployment process. So why not install Maven on Ubuntu?
Apache Maven allows you to simplify the deployment process and provide a quality uniform build system for any Java-based project. And in this tutorial, you’ll learn how to install Maven on Ubuntu machine to automate build and code deployment.
Read on and save yourself the stress of manual build deployments!
Prerequisites
This post will be a step-by-step tutorial. To follow along, be sure you have the following:
- An Ubuntu Linux machine (14.04.4 LTS or greater) – This tutorial uses Ubuntu 20.04.4 LTS.
- Jenkins instance installed.
Installing Java on Ubuntu Machine
Before automating Java builds, kick-off this tutorial by installing Java required for Apache Maven. Apache Maven uses the concept of a project object model (POM) and is used mainly for building Java projects. POM is an XML file that contains information about a project and configuration details used by Maven to build that project.
You can use multiple Java implementations to work with Apache Maven, but OpenJDK is the most popular, which you will install and use in this tutorial.
1. Log in to your Ubuntu machine using your favorite SSH client.
2. Next, run the following commands to create a directory named ~/install_apache_maven_demo and switch to that directory.
# Create the ~/install_apache_maven_demo directory
mkdir ~/install_apache_maven_demo
# Change the working directory
cd ~/install_apache_maven_demo
3. Run the apt install command below to install Java (default-jdk) on your machine. \
sudo apt install default-jdk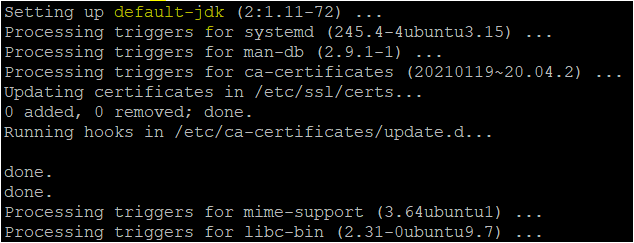
4. Finally, run the below command to check the version of installed Java on your machine. Doing so ensures that you’ve successfully installed Java.
java -versionBelow, you can see the Java version installed is 11.0.13, but yours may be different.

Install Maven on Ubuntu Machine
Now that you have Java installed on the Ubuntu machine, it’s time to install Maven on Ubuntu. Installing Apache Maven is pretty similar to installing other packages on your machine. But for this tutorial, you’ll run the wget command to download the Apache Maven package.
1. Run the apt update command below to update your system packages.
sudo apt update2. Next, run the wget command below to download the latest Apache Maven package in the ~/install_apache_maven_demo directory. The latest version of Apache Maven is 3.8.4 as of this writing.
wget https://downloads.apache.org/maven/maven-3/3.8.4/binaries/apache-maven-3.8.4-bin.tar.gz
3. Run each command below to extract (tar xf) the Apache Maven archive (apache-maven-3.8.4-bin.tar.gz) and verify the extracted files in the ~/install_apache_maven_demo directory.
# Extract the Apache Maven archive to the working directory.
tar xf apache-maven-3.8.4-bin.tar.gz
# List contents of the working directory.
ls
4. Now, create a file named maven.sh in the /etc/profile.d/ directory with your preferred text editor and copy/paste the below lines to the maven.sh file.
In the code below, the export commands set the Java and Apache Maven home directory by defining the path they are installed.
export JAVA_HOME=/usr/lib/jvm/default-java
export M2_HOME=~/install_apache_maven_demo/apache-maven-3.8.4
export MAVEN_HOME=~/install_apache_maven_demo/apache-maven-3.8.4
export PATH=${M2_HOME}/bin:${PATH}
5. Run the below source command for the declared variables in step four to affect the environment.
source /etc/profile.d/maven.sh6. Finally, run the following command to check the version.
mvn -versionAs you can see below, the installed Apache Maven version is 3.8.4, but yours may be different.

Integrating Jenkins with Maven Plugin
You’ve completely installed Java and Apache Maven on your machine, and that’s a good start. But to automate your Java builds, you’ll need an automation tool, like Jenkins. You’ll configure Jenkins to integrate with Apache Maven to run your builds.
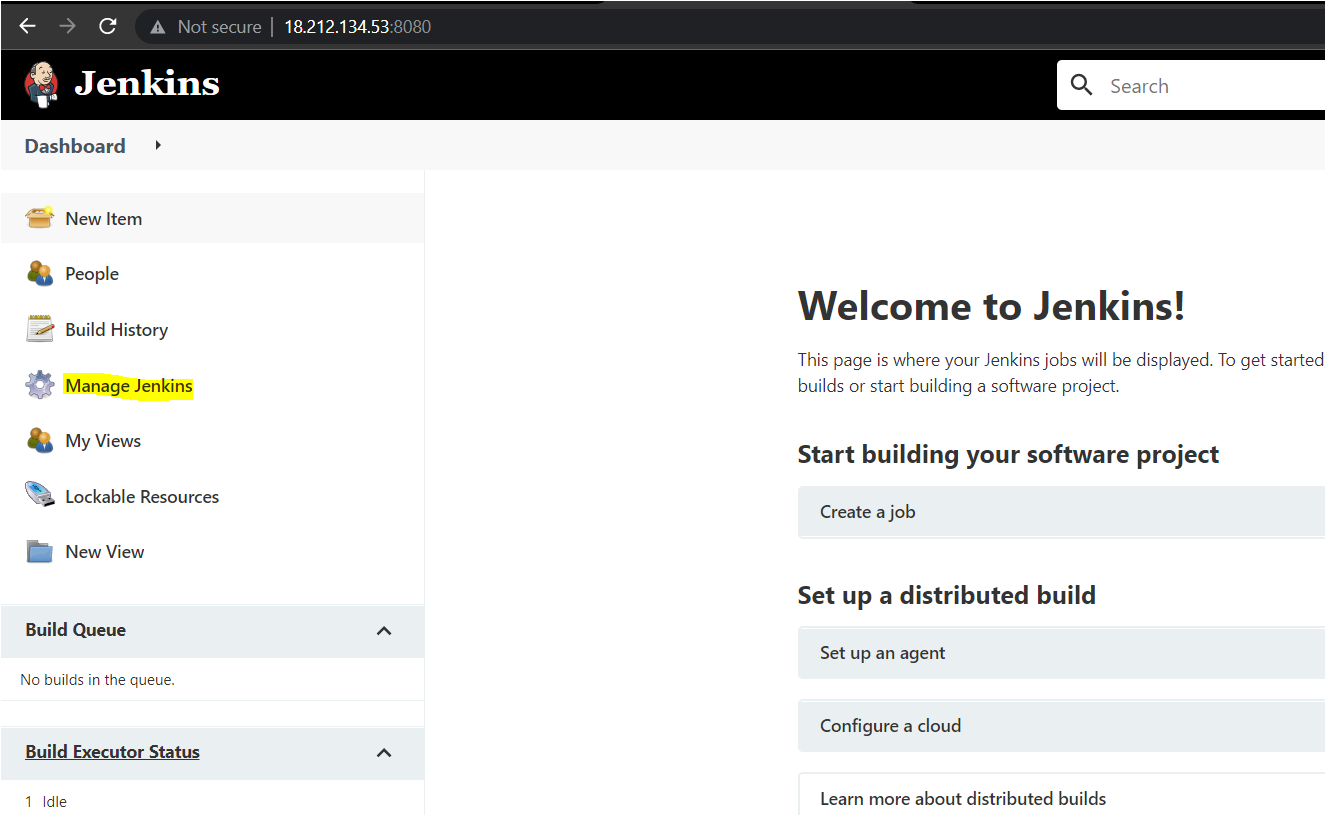
1. Open your favorite web browser, and navigate to Jenkins URL followed by port 8080 (i.e., jenkins-ip:8080).
Click on the Manage Jenkins menu at the left panel to see Jenkins system configuration options (step two).
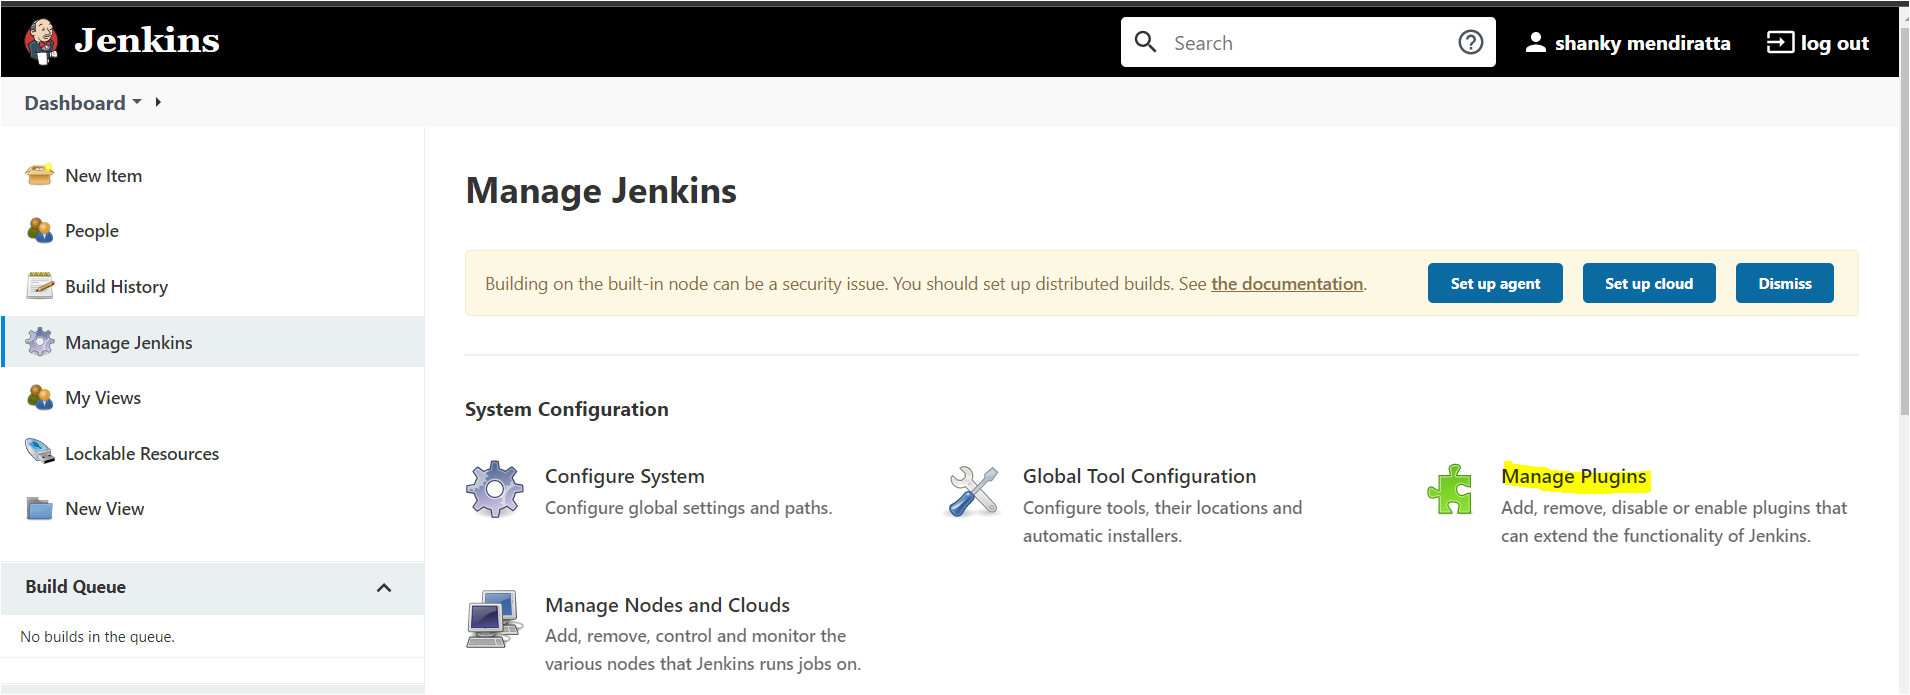
2. Next, click on Manage Plugins, as highlighted below, to access the Plugin Manager page, where you’ll install the Maven Integration plugin (step three). Maven Integration plugin allows you to configure, build, and run Maven-based projects in Jenkins.
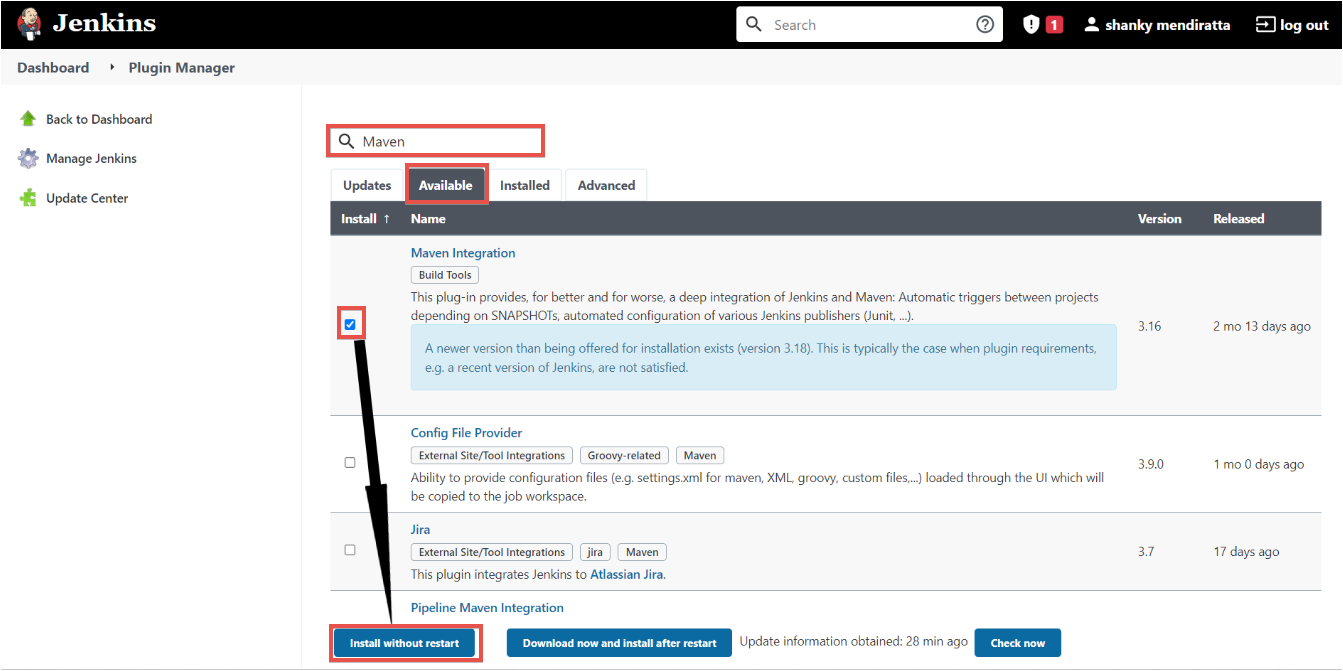
3. Lastly, install the Maven Integration plugin with the following:
- On the Plugin Manager page, click on the Available tab.
- Search for Maven on the search box. After a few seconds, Maven Integration will appear in the list of available plugins.
- Check the box in front of the Maven Integration plugin to select the plugin.
- Click on the Install without restart button at the bottom of the page to install the selected plugin.
Creating a Jenkins Job to Build a Java Project
You’ve successfully integrated the Apache Maven plugin with Jenkins, but nothing much is happening unless you configure a Jenkins job with code and build the Java code. So, you’ll create a simple Jenkins job that fetches Java code from Git and build the code using Maven.
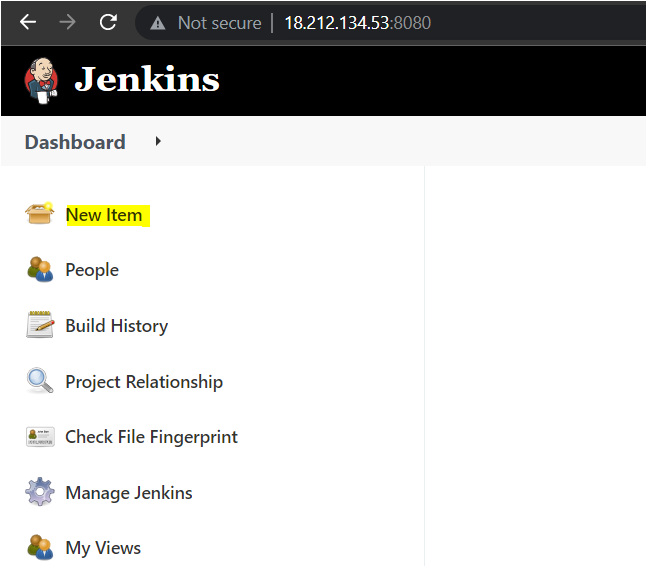
1. Navigate back to the Jenkins dashboard, and click on the New Item menu to create a new Jenkins job.
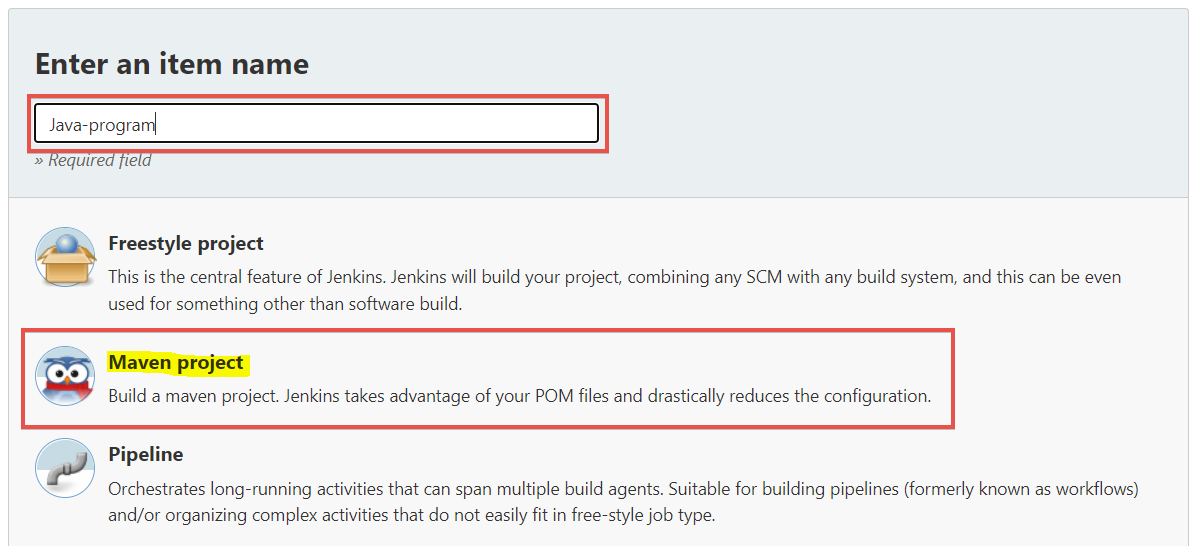
2. Next, set a job name in the Enter an item name field, as shown below, and select Maven project as Jenkins job type. For this tutorial, the job name is set as Java-program.
Click on OK at the bottom of the page to create the Jenkins job.
3. Click on the Source Code Management tab and Git as source code manager. Copy/paste the below URL to the Repository URL field. The Git repository contains a java code that runs a “hello world” program.
https://github.com/jenkins-docs/simple-java-maven-app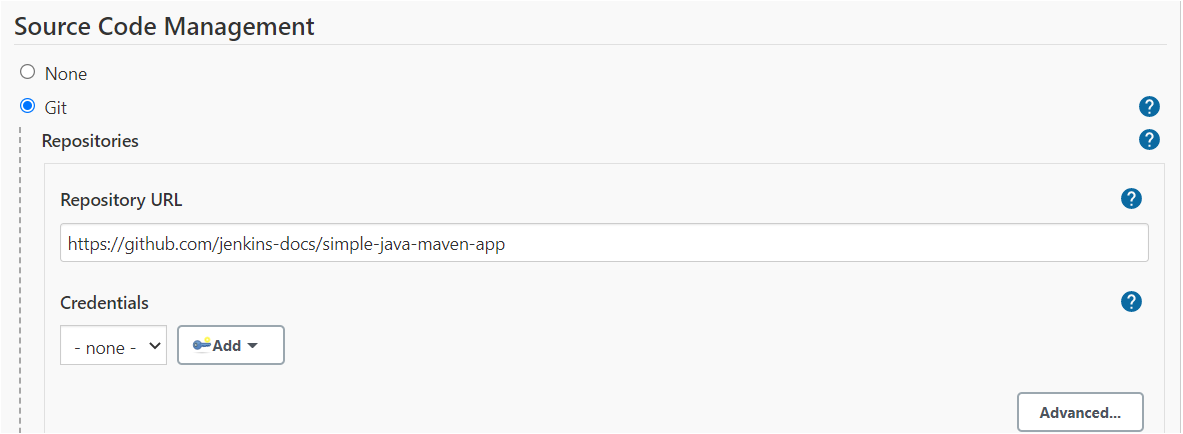
4. Now, configure the post steps with the following:
- Click on the Post Steps tab, and choose the Run only if the build succeeds option.
- Click on Add post-build step dropdown button, and select Execute shell.
- Copy/paste the below two lines of commands to the Command field, then click on Save at the bottom of the page to save the settings of the Jenkins job.
# Switch to the directory where Jenkins will
# compile, build and store the Java code
cd /var/lib/jenkins/workspace/Java-program/target
# Executes the built code
java -jar my-app-1.0-SNAPSHOT.jar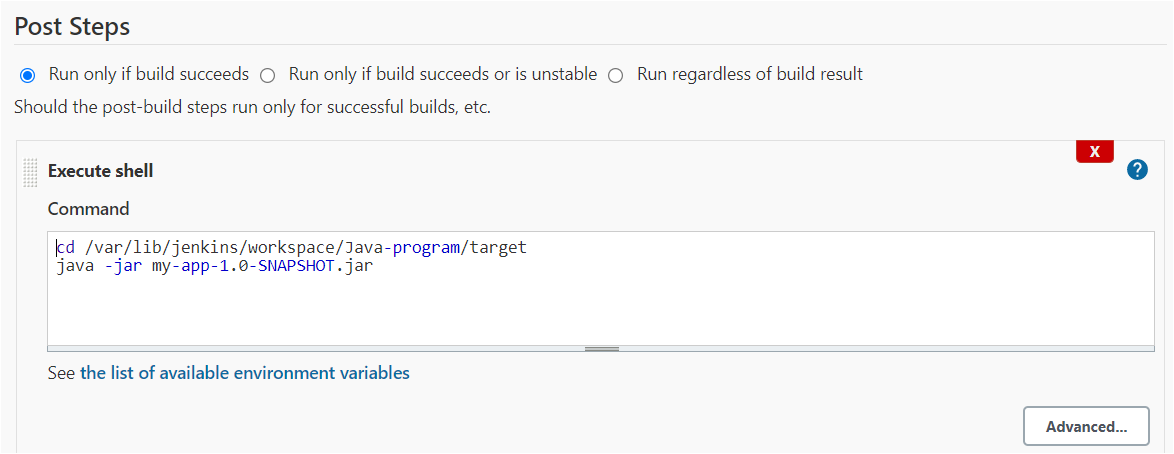
5. Navigate back to the Manage Jenkins page, and this time, click on Global Tool Configuration, as shown below.

6. Run the commands below to see the values of the MAVEN_HOME and JAVA_HOME environment variables.
echo $MAVEN_HOME
echo $JAVA_HOME
Note down the values of the MAVEN_HOME and JAVA_HOME variables as you’ll need them in the next step.

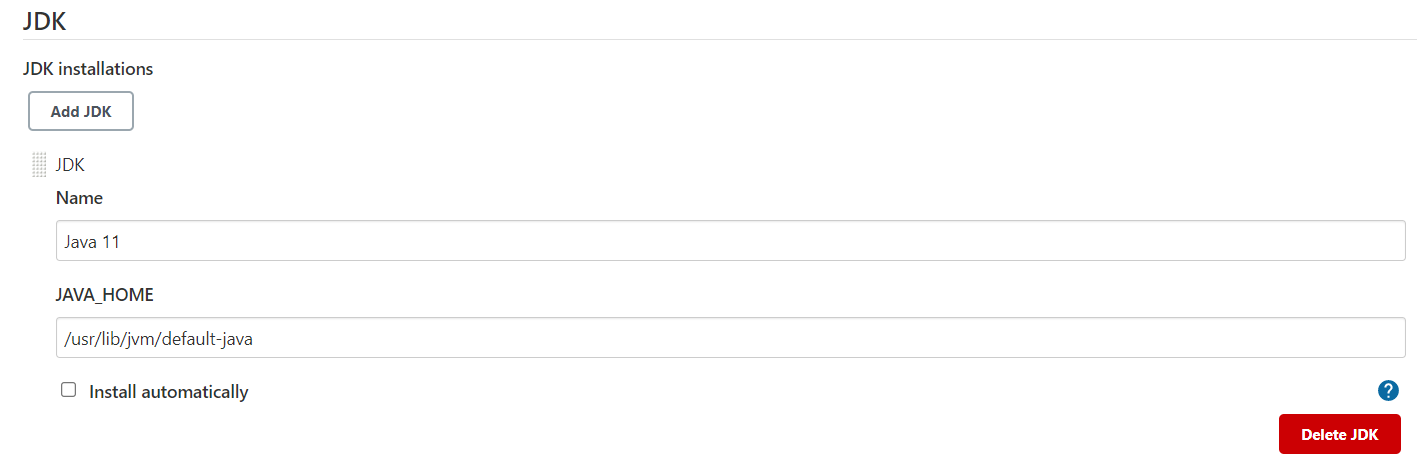
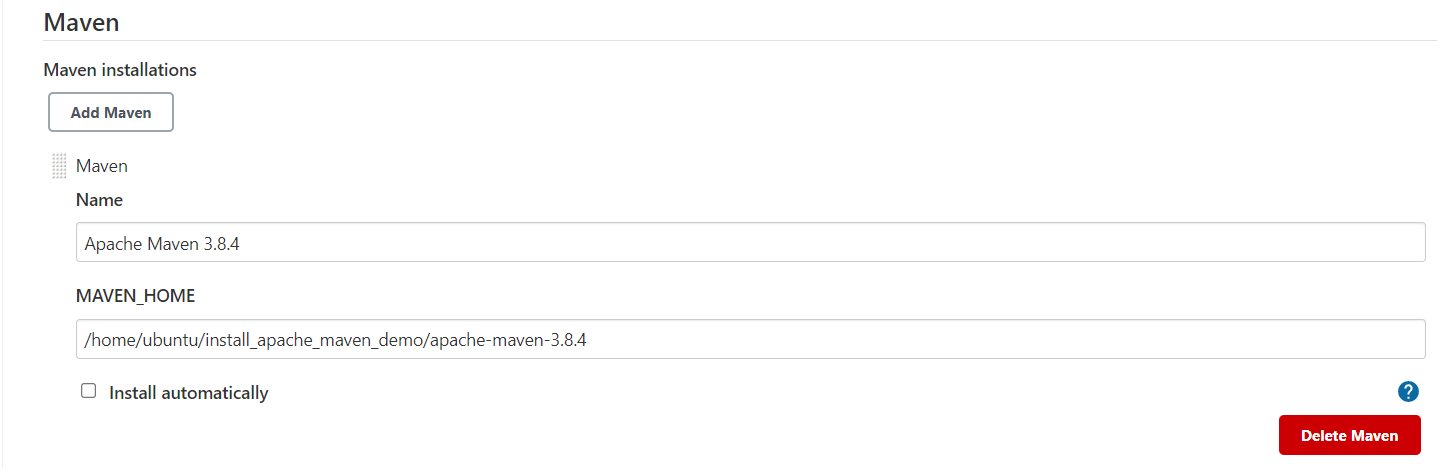
7. Now, set the Name and values of JAVA_HOME and MAVEN_HOME under JDK and Maven sections, as shown below. Doing so ensures that Jenkins can run the Java code successfully and use Apache Maven.
After setting the values, click on the Save button at the bottom of the page to save the settings.
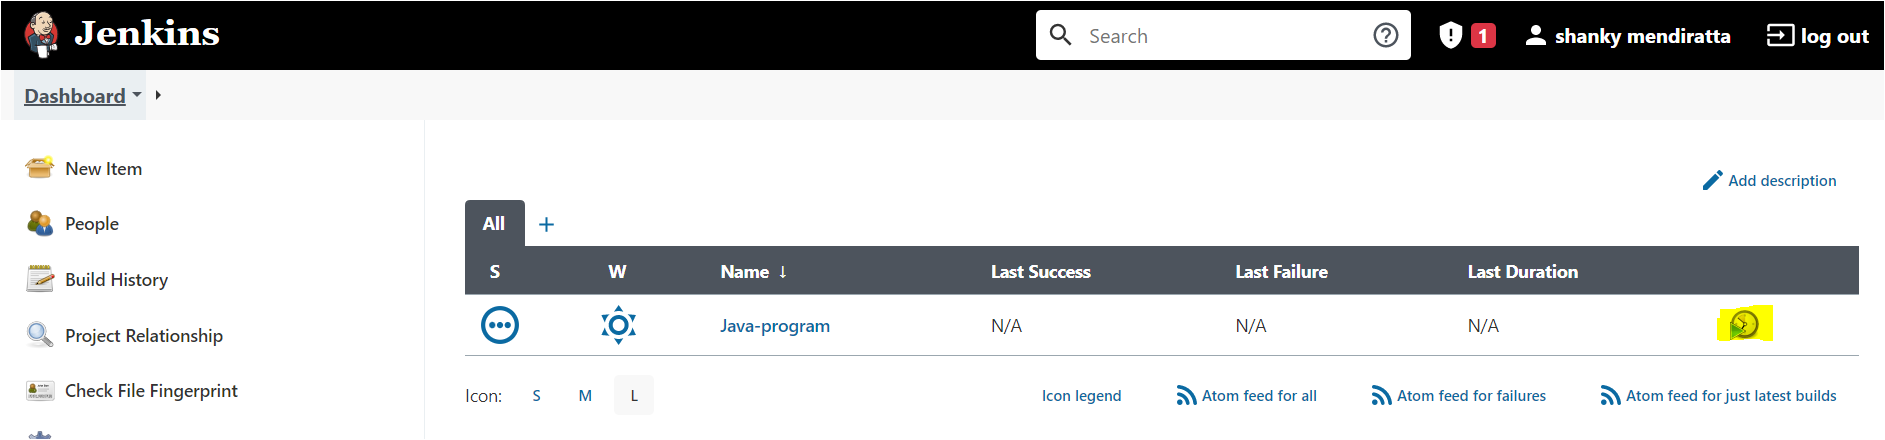
8. Return to the Jenkins dashboard, and you’ll see your newly created Jenkins Job (Java-program). Click on the build (play) button to build your code. As soon as you click on the build button, Jenkins starts, compiles, and executes the Java program using Apache Maven.
Click on the Java-program Jenkins job to view the build’s status.
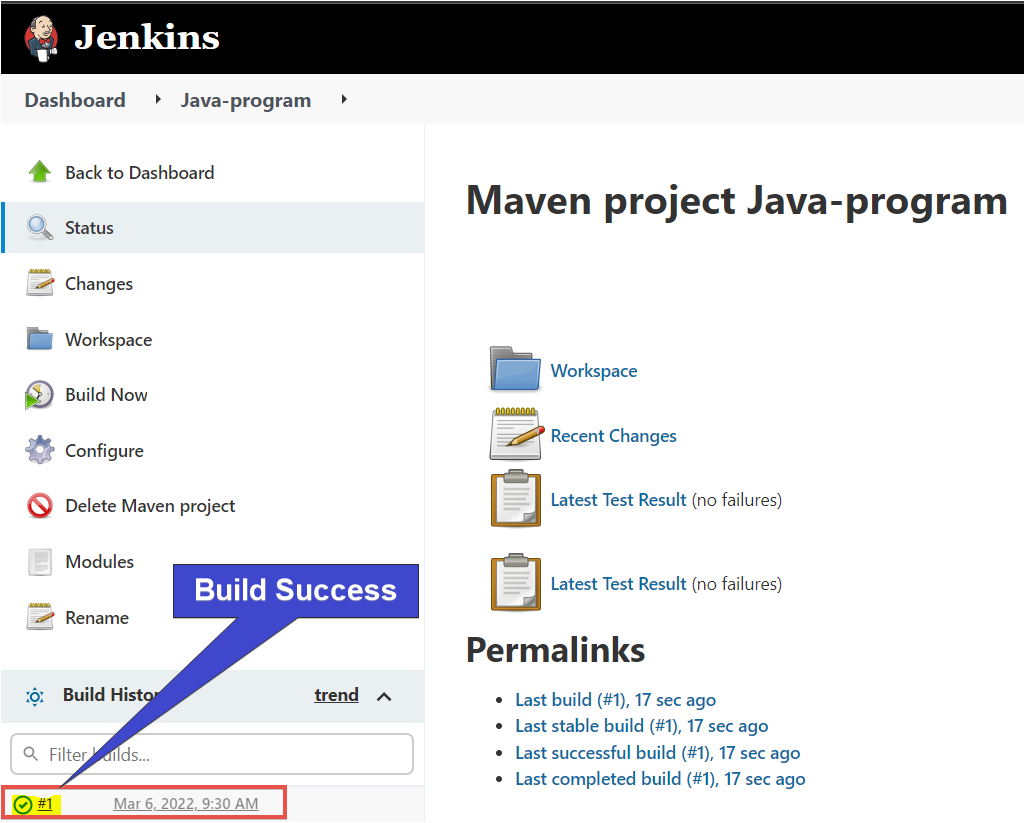
Below, you can see a build number under the Build History section in the left panel, denoting you ran the Jenkins job once. The green check indicates the build has been successfully finished without any errors.
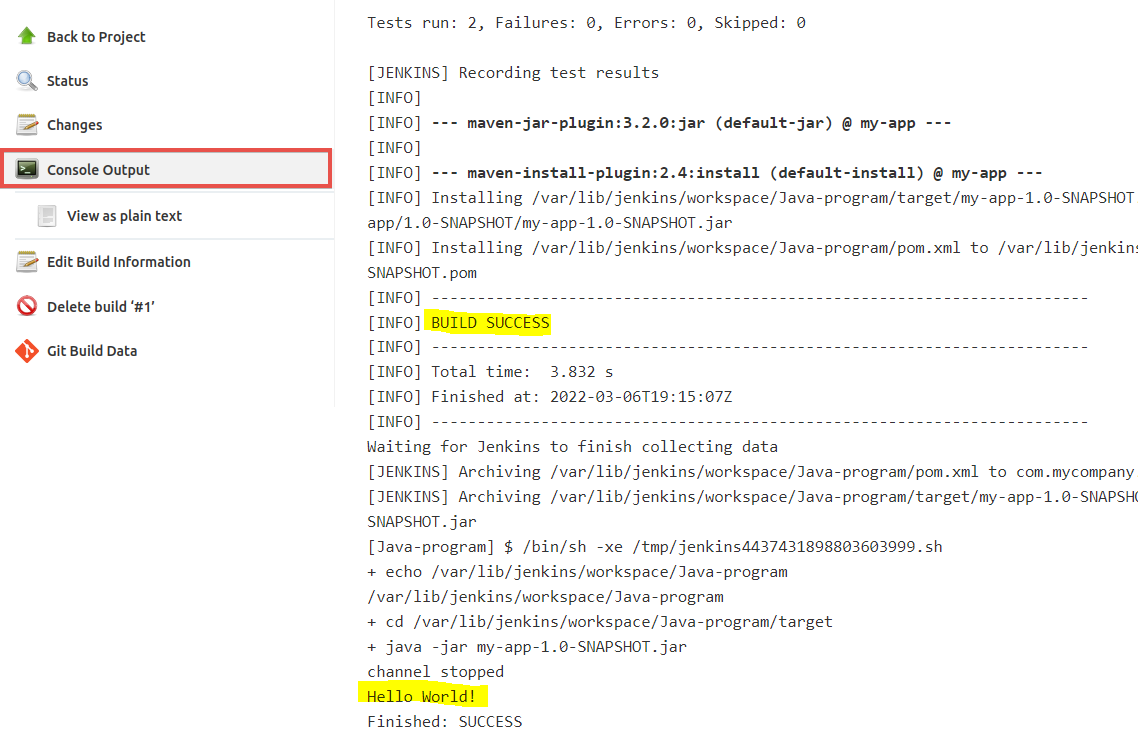
Click on the successful build (#1), and you will see an option for console output.
9. Finally, click on the Console Output menu to view the logs of the Jenkins job that ran successfully.
As you can see below, the Job has run and executed the Java program successfully, printing the Hello World! text in the output.
Conclusion
Throughout this tutorial, you’ve learned how to install Maven on Ubuntu. You’ve also installed the Maven Integration tool and set up the Global Tool Configuration on Jenkins to automate Java builds.
Now, what do you plan to deploy using Apache Maven with Jenkins in the future? Perhaps automate web deployments? Or create a Jenkins CI CD pipeline to improve your Java projects’ software development process?


