

Have you ever wondered how to unzip files in Linux? Or how to create and extract a zip archive? Then this tutorial is all you need to manage your zip files effectively.
Zipping is one of the best and popular techniques to compress files by reducing their size without losing quality. And in this tutorial, you’ll learn how to compress and decompress zip files in Linux, along with other tips and tricks. Ready?
Dive in and you’ll become a “zip master” at the end of this tutorial!
Prerequisites
Stop struggling with password reset calls and account lockouts in Active Directory. Get a FREE trial of Specops uReset.
The demonstrations throughout this tutorial were made in Kali Linux 2021.2. Still, you could also work with other Linux distributions, such as Debian-based (like Unbuntu or Kali Linux), CentOS, or Fedora.
Installing the Zip and Unzip Packages
To compress and decompress into ZIP files with Linux, you’ll need a couple of packages called zip and unzip. Let’s now go through how to install these packages with the apt package manager.
To install the zip and unzip packages, launch the terminal on your desktop first and run the commands below depending on the Linux distributions you’re working on.
Each of the commands below begins with the sudo command to handle elevated permissions.
For Debian
The commands below are using the apt package manager to install the zip and unzip packages.
sudo apt install zip   # Installs the zip package
sudo apt install unzip # Installs the unzip package
For Fedora and CentOS
The commands below are using the yum package management tool to install the zip and unzip packages.
sudo yum install zip   # Installs the zip package
sudo yum install unzip # Installs the unzip package
Compressing Files with the Zip Package
Now that you’ve installed all the necessary packages, it’s time to learn how to compress files. To do so, you’ll run the zip command, which allows you to compress files into ZIP packages, both via the command line and via the GUI. Let’s go over each method!
Zipping Files via Command Line
In Linux, you’re typically going to be using the command line quite a bit so let’s first see how to zip files via the command line.
Notice the command syntax below. You’ll see that after the zip command, outpufile represents the name of the zip file. Then followed by the name of the files and folder (file1 file2 folder) to include in the zip file.
zip [option] outputfile file1 file2 folderTo demonstrate zipping files on the command line, open a terminal first and create a directory called ~/mydir. Then create two files and a folder named test1, test2, and myfolder inside ~/mydir.
1. Run the mkdir command below to create the mydir directory.
mkdir mydir2. The commands below create (touch) the test1.txt and test2.txt files. Then create (mkdir) the myfolder directory.
touch ~/mydir/test1.txt
touch ~/mydir/test2.txt
mkdir myfolder
3. Run the command below to list (ls) the contents of the working directory (~/mydir), as shown below.
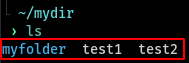
Now that you’ve created the files and folders, compress the ~/mydir folder by running the command below.
The zip command below is recursively (-r) searching through the mydir directory for all files and subdirectories. When complete, it’s then compressing all of those files into a ZIP file called newdir.zip.
zip -r newdir.zip mydir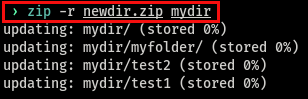
Perhaps you only plan to compress the ~/mydir/test1.txt, ~/mydir/test2.txt, and ~/mydir/myfolder directories. To do that, run the command below.
The zip command below is recursively (-r) searching for all files and folders in the working directory (mydir) called test1.txt, test2.txt, and myfolder and creating a ZIP file called newfiles.zip.
cd mydir
zip -r newfiles test1.txt test2.txt myfolder
Adding the .zip extension for the zip file is optional as it’s automatically added after the compression is complete. In the example above, the zip command will create a ZIP file called newfiles.zip instead of just newfiles.

Deleting the Original File after Archiving
In the previous section, you learned how to compress files into a ZIP file, but you’d have noticed that the original files were not removed after doing so. Add the -m option in the zip command to remove the original files, as shown below.
After creating the ZIP file, launch a terminal, then run the following command to delete the original files automatically. The zip command below zips the files and folder called test1.txt, test2.txt, and myfolder to the newsfiles.zip ZIP file, then deletes (-m) the original files.
After running the command, you’ll notice that the zip command removes the original files.
zip -m -r newfiles.zip test1.txt test2.txt myfolderAdding New Files to an Existing Zip File
Perhaps you forgot to include a file while compressing files to a ZIP file. How would you add a new file to an existing zip file? You could delete the zip file and create another one, but there’s a better way.
To add a new file to the existing ZIP file (newfiles.zip), run the following command. The command below updates (-u) the existing ZIP file package (newfiles.zip) by recursively (-r) searching through all files in the ~/mydir directory, then adding them to the ZIP package.
zip -u -r newfiles.zip test3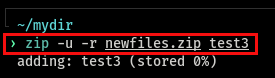
Deleting Files from a Zip File
You previously learned how to add files to existing compressed files. But what if you added a file unintentionally to a zip file? You’d obviously want to remove that file from the zip file, and adding the -d option to the zip command would do the trick.
To delete a file from the ZIP file, run the zip command deleting (-d) the test3 file from the (newfiles.zip) ZIP file.
zip -d newfiles.zip test3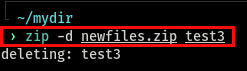
Zipping Files via GUI
By now, you’ve learned how to zip files using the command line. But if you’re more comfortable working with a graphical interface, you’re in luck. The GNU Network Object Model Environment (GNOME) environment lets you create a zip archive with a few clicks. GNOME is a desktop GUI on top of your operating system. So, let’s get started!
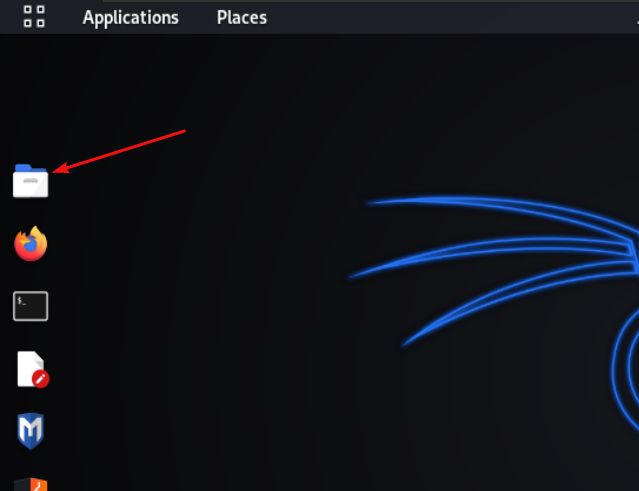
1. Switch to GNOME environment, then open the file manager.
2. Look for the files to zip by navigating inside the ~/mydir directory.
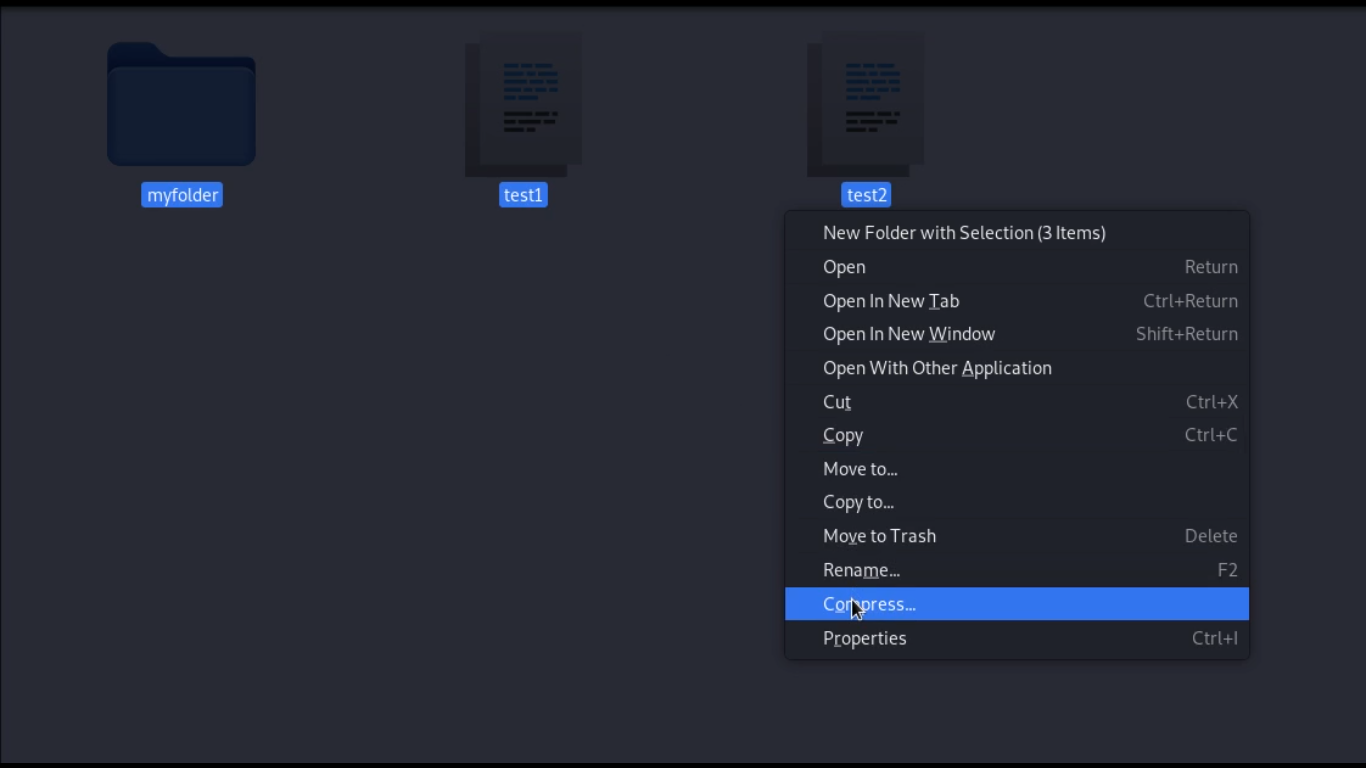
3. To create the ZIP package, select all the files to zip, then right-click on any of the files and choose Compress from the context menu.
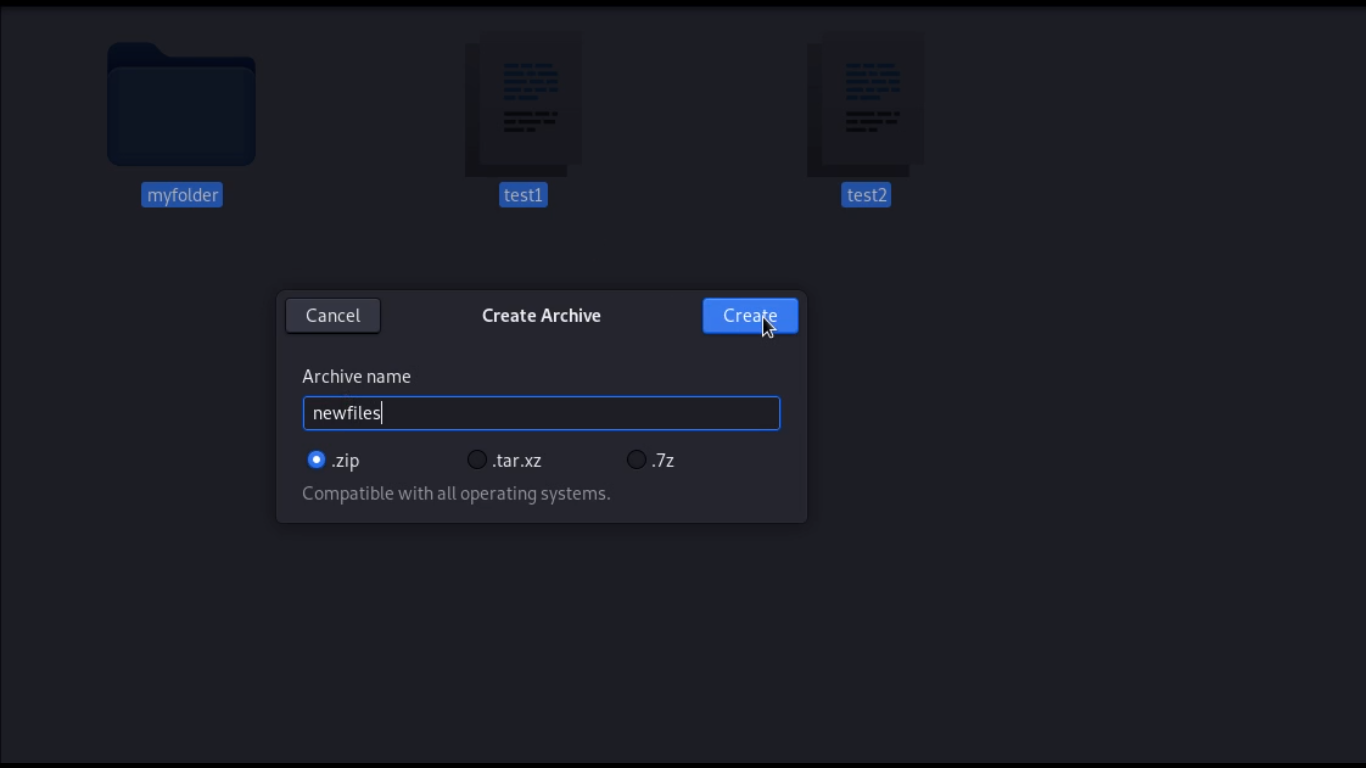
Now choose the format for the compressed file in the pop-up window below. Notice that there are three format options, .zip, .tar.xz, and .7z. These formats are all compression formats.
Since you’re creating a zip file, select the .zip option. Then create the zip file by giving it a name (newfiles), and click on Create.
The zip file is automatically created inside the ~/mydir folder, where the files you’re compressing are located.
You’ll notice below that Linux creates a file called newfiles.zip from those that you selected.

Decompressing Files with the Unzip Package
In the previous examples, you’ve learned how to zip files. But perhaps you need to extract or decompress the contents of the zip file. How would you do that?
Similar to compressing files, you get two methods for decompressing files, via Command-Line and GUI. Both methods leverage the unzip package you previously installed to decompress ZIP files.
Unzipping Files via Command Line
Since you’ll still be running commands in a command-line environment throughout this tutorial, let’s start unzipping files via the command-line method.
To unzip a ZIP file, launch your terminal and run the following command. Notice the command below will unzip the contents of the (newdir.zip) ZIP file. By default, the contents are extracted to the same directory (~/mydir) of the (newdir.zip) ZIP file.
If you’d like to unzip the contents of a ZIP file in a directory other than the working directory, specify the
-dfollowed by the directory to extract the contents of the ZIP file into like:unzipnewdir.zip-danotherdir.
unzip newdir.zip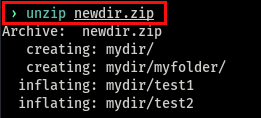
Unzipping Files via GUI
If unzipping files via command-line seems like a lot of work, try unzipping files in a few clicks with the GUI method. And similar to the command-line method, you’d also get to choose where to extract the files.
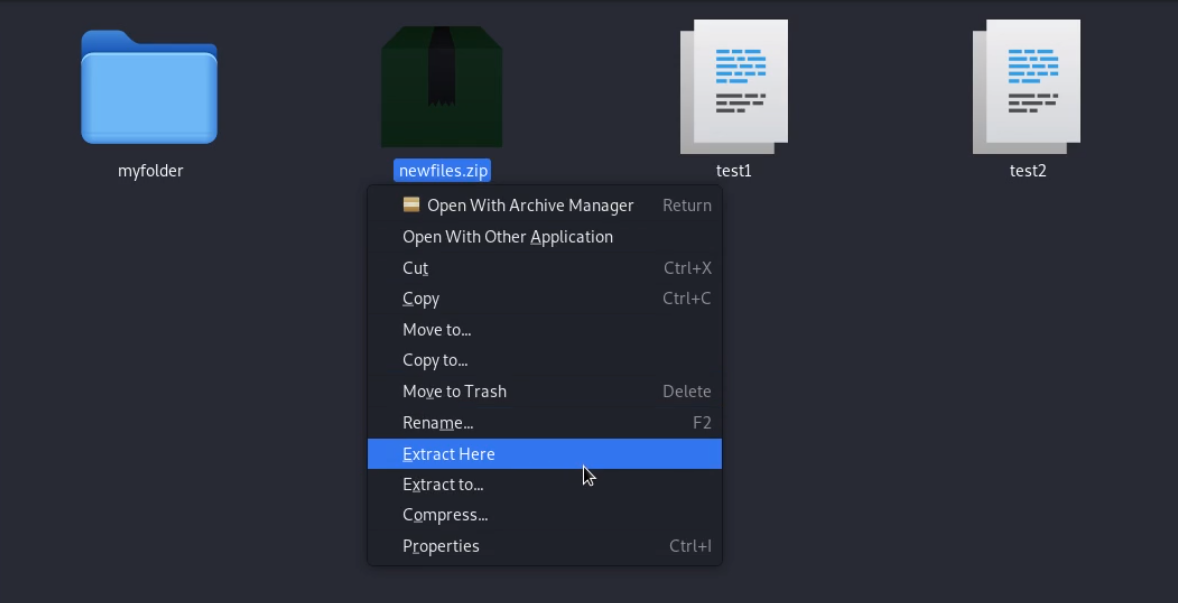
To unzip files, open File Manager, as explained in the Zipping Files via GUI section. Right click the ZIP package you’d like to extract, and select Extract Here, as shown below.
Once you click Extract Here, Linux will extract all files in the ZIP package in the working directory.
If you prefer to extract all files on another directory, choose the Extract to option from the context menu.
Verifying the Zip File Integrity
In some instances, ZIP files can become corrupt, such as downloading the ZIP file from the internet. Or when the ZIP file was transferred to a corrupted storage device. You may not know they’re corrupted on the surface, so it’s important to verify their integrity.
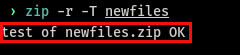
To verify the integrity of the zip file, run the following command. The zip command below recursively (-r) searches through the working directory for the (newfiles.zip) zip file, then verifies (-T) if it’s in good condition.
The command below only verifies the ZIP file’s integrity, but not the files and subdirectories inside it.
zip -r -T newfilesAs shown below, you’ll see an indication that the test was successful.
Testing the Compressed Files Before Extracting
Extracting a ZIP file with corrupted files would only waste time and result in errors, especially when dealing with a large zip file with multiple files. So, it’s a good idea to test the compressed files in the ZIP file before extracting them.
Testing the compressed files is similar to verifying the ZIP file’s integrity, but this time you’re testing each file inside the ZIP file and not just the ZIP file itself.
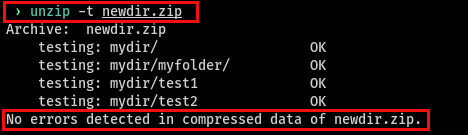
Now, run the unzip command to test (-t) each file’s status inside the (newdir.zip) zip file.
unzip -t newdir.zipAs you see in the image below, the unzip package found no errors.
Viewing Zip File Contents Without Extracting
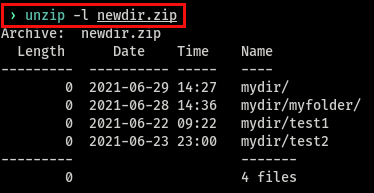
Perhaps you’d rather just see what’s inside of the ZIP file rather than actually extract the files. Lucky for you, the unzip command has the -l option that displays the contents of a zip file without extracting them.
To view a ZIP file’s contents, run the unzip command to list (-l) the zip file’s (newdir.zip) contents without extracting them.
unzip -l newdir.zipNotice the screenshot below that displays a table list of the contents inside the (newdir.zip) ZIP file.
Zipping Files with the Same File Extension
To demonstrate how to script some common use cases with the zip utility, perhaps you have a directory with many different files but only need to compress those that match a specific extension. To do that, you need a script that will repeatedly search for all files with the same extension. When found, adds them to a zip file.
Let’s go through what the script below does and how to run it.
The script below declares a variable (files) to hold the file extension value (*.txt), then another variable (targetDir) for the target directory (anotherDir).
The script then executes a for loop function to search all files with the .txt (files) extension inside the target directory (anotherDir). When a .txt file is found, the zip command adds (-u) that file to the (mynewfiles.zip) ZIP file. Ready to automate zipping files?
1. Open a text editor and save the script with the .sh extension (ex: script.sh), which is the extension for the files written with the shell programming language.
files=*.txt # Declare variable to hold the .txt extension
 targetDir=anotherDir # Declare variable to hold the target directory
 for file in $files; do # Searches all files with .txt extension
     zip -u $targetDir/mynewfiles $file # Adds found .txt files to mynewfiles.zip file
 done
2. Ensure that you can run the script by modifying its permission. To do that, run the chmod command to modify (+x) the script’s (script.sh) execute permission.
chmod +x script.sh3. Now execute the script by running the command below. The below command runs the script (script.sh) as long as the script is inside the current working directory.
./script.shAs you notice, there is a warning message telling you that the ~/mynewfiles.zip does not exist. But don’t worry, as the script will automatically create the zip file.

Conclusion
Reduce service desk calls & update cache credentials for remote users even off VPN with a self-service password reset solution. Get a Demo of Specops uReset!
Throughout this tutorial, you’ve learned how to manage zip files (compress and decompress) and a practice example of how to automate the process of zipping files. As promised, you are now a “zip master”!
Now would you either turn to manual or automated processes the next time you’re zipping?


