


Storing private data in the cloud has become a popular and convenient way to back up and secure your data. But for a more shareable and collaborative data experience without sacrificing security, consider using a self-hosted cloud storage system like Seafile.
Seafile allows you to create a cloud storage system with additional data security encryption on your private cloud or local environment. And in this tutorial, you will learn how to install Seafile to share data across devices and your teams.
Stay tuned and take advantage of this sync and share solution!
Prerequisites
This tutorial comprises hands-on demonstrations. To follow along, ensure you have the following:
- A Linux server running Ubuntu – This tutorial uses an Ubuntu Server 20.04 with the hostname seafile.
- A non-root user with sudo privileges.
- A domain name pointed to your Ubuntu Server IP address – This tutorial uses a domain name called seafile.atadomain.io.
- Generated SSL certificates for your domain name.
Installing Seafile Dependencies
Seafile is an open-source cloud storage system mainly written in Python Django web framework, which can be run with MySQL/MariaDB and PostgreSQL. But before using Seafile, you must install its dependencies, such as Python database server MySQL/MariaDB and some Python packages.
To install package dependencies for the Seafile server:
1. Open your terminal, log in via SSH to your server, and run the following apt update command to update and refresh the repository package index.
sudo apt update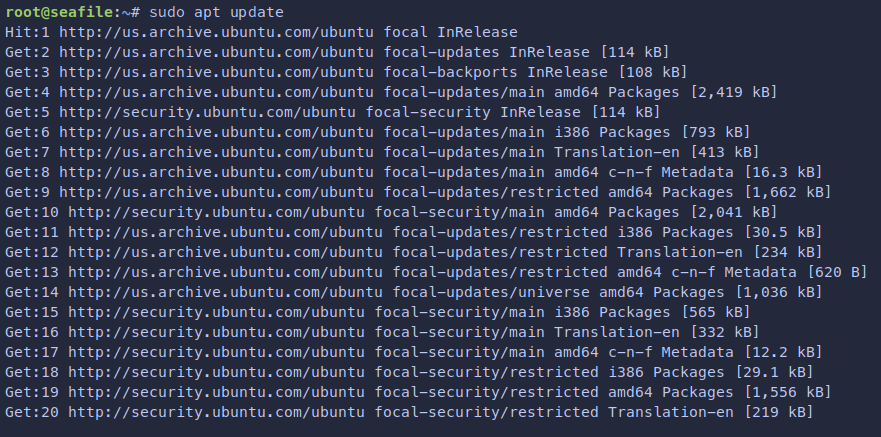
2. Next, run the following apt install command to install package dependencies like python3, nginx, mariadb, and memcached.
sudo apt install python3 python3-setuptools python3-pip libmysqlclient-dev libffi-dev mariadb-server nginx memcached libmemcached-dev tree -y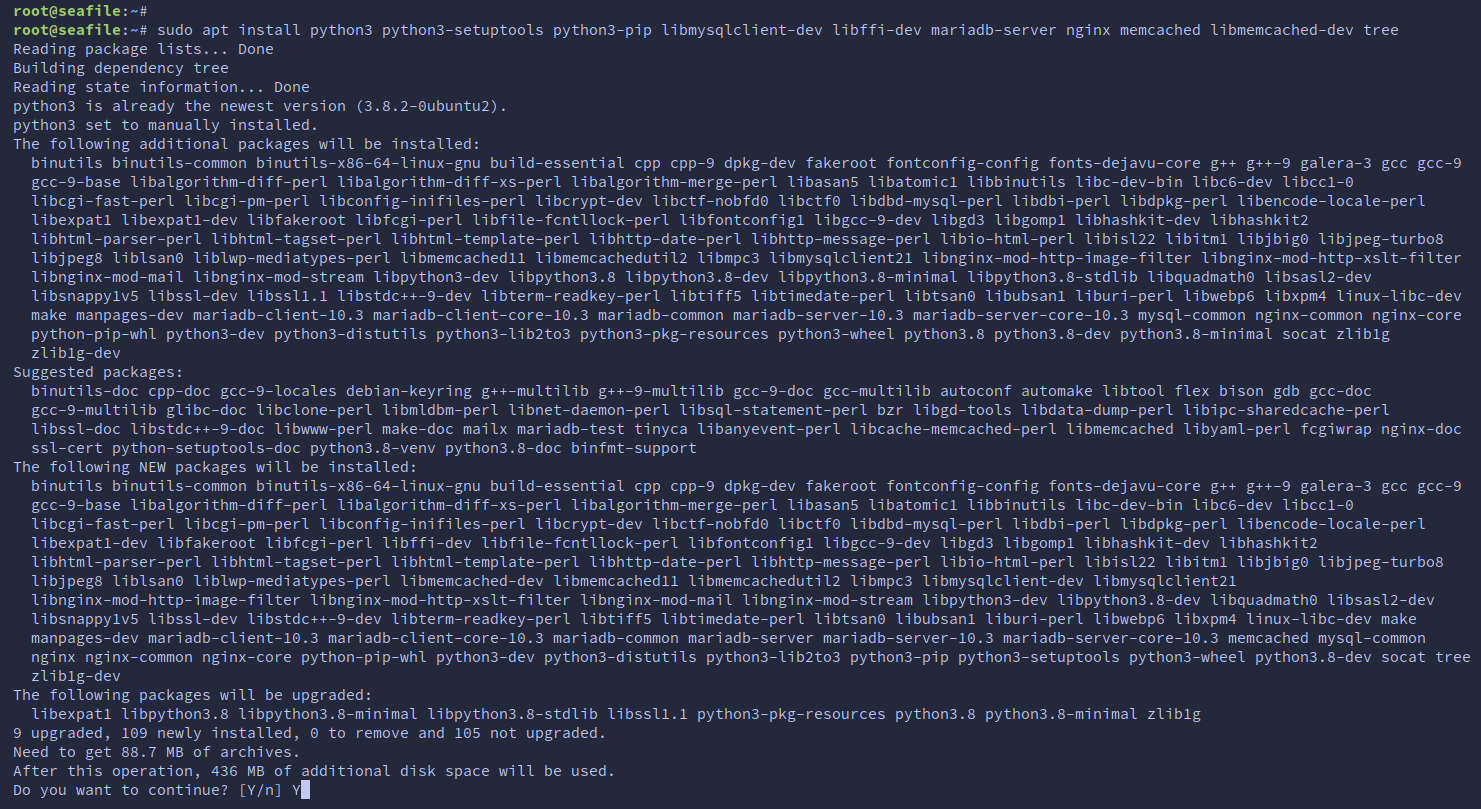
3. Now, run the below pip3 command to install Python dependencies for the Seafile server.
sudo pip3 install --timeout=3600 django==3.2.* Pillow pylibmc captcha jinja2 sqlalchemy==1.4.3 \
    django-pylibmc django-simple-captcha python3-ldap mysqlclient pycryptodome==3.12.0 cffi==1.14.0 lxml
Configuring a MariaDB Root Password
After installing the MariaDB server packages, you must secure your MariaDB deployment from unauthorized login, especially for the default MariaDB root user. How? You will set up the root password of the MariaDB server you will use for the Seafile installation.
To configure a MariaDB root password, you will first log in to the mysql database and set the root password with the following steps:
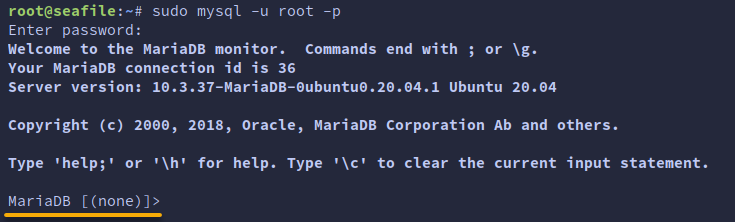
1. Run the following mysql command to log in to the MariaDB shell.
sudo mysql -u root -pWhen prompted for the MariaDB root password, as shown below, press ENTER to continue.
2. Next, run the below query to select the mysql database.
use mysql;
3. Now run the following MariaDB queries to set up the password for the MariaDB root user and reload table PRIVILEGES to apply the changes.
ALTER USER 'root'@'localhost' IDENTIFIED BY 'rootp4ssw0rd';
FLUSH PRIVILEGES;
4, Lastly, run the quit command to exit from the MariaDB shell.

Downloading the Seafile Server Source Code
With a MariaDB root password configured, you can install a Seafile server. But first, you must set up a dedicated user for running Seafile and download the Seafile source code.
Visit the official Seafile Server download page and look for your preferred server version. But this tutorial uses the Seafile server 9.0.10 and runs it with the user seafile.
To set up the Seafile server, you will create a directory to download and install the server with the following steps:
1. Run the below useradd command, which does not provide output but creates a new user called seafile, which you will use to run the Seafile server.
sudo useradd -d /opt/seafile -s /bin/bash seafile2. Next, run each command below to create a new directory called /opt/seafile with the ownership set to user seafile.
These commands do not produce output, but you will later log in as the seafile user to download the Seafile server.
# Make a directory called /opt/seafile and switch to that directory
mkdir -p /opt/seafile; cd /opt/seafile
# Change ownership of the /opt/seafile directory to the "seafile" user
sudo chown -R seafile: /opt/seafile
3. Run the following commands to log in (su) as the seafile user and download (wget) the Seafile server source code.
su - seafile
wget -q https://s3.eu-central-1.amazonaws.com/download.seadrive.org/seafile-server_9.0.10_x86-64.tar.gzBelow you can see the Seafile source code extracted to the seafile-server-9.0.10 directory.

4. Once downloaded, run the below commands to extract (tar) the source code and verify (tree) the content structure.
tar xf seafile-server_9.0.10_x86-64.tar.gz
tree -L 2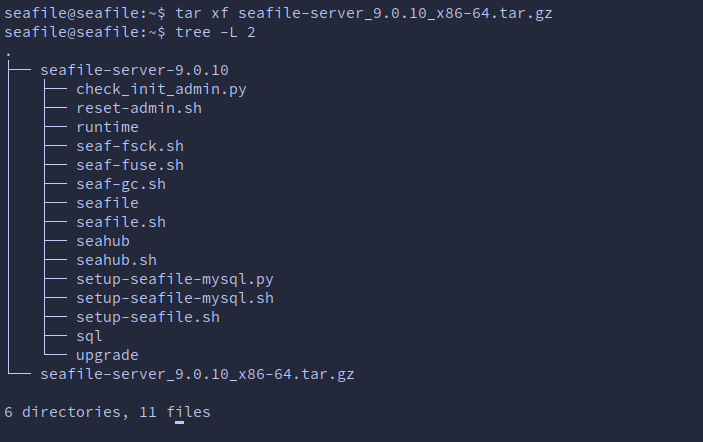
Installing Seafile with MySQL/MariaDB Server
Downloading the source code does not automatically install the Seafile server. But after verifying the source code, you can install Seafile with the MariaDB server via the installer script. After installing Seafile, you will also set up an admin user for your Seafile server.
To install Seafile with the MariaDB server:
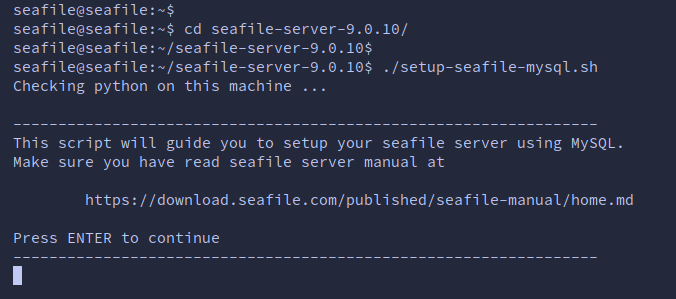
1. Run the following commands to execute the Bash script (setup-seafile-mysql.sh) to start the Seafile installation and configure Seafile with the MariaDB server.
You will be prompted with some of the Seafile server configurations.
# Change the working directory to the source code directory
cd seafile-server-9.0.10/
# Run the Bash script
./setup-seafile-mysql.sh
Press ENTER to continue the installation.
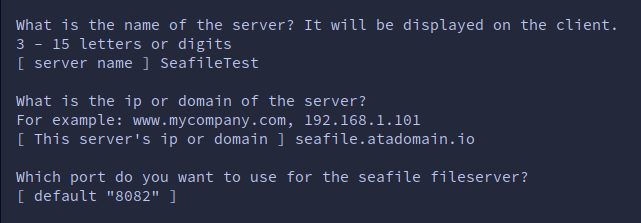
2. Next, configure your server with the following:
- Server Name – Set a name for your Seafile server (i.e., Seafiletest).
- Domain Name – Set the Seafile server’s IP or domain name (i.e., seafile.atadomain.io).
- Default Port – Leave the default Seafile server port as is.
Once configured, press ENTER to continue.
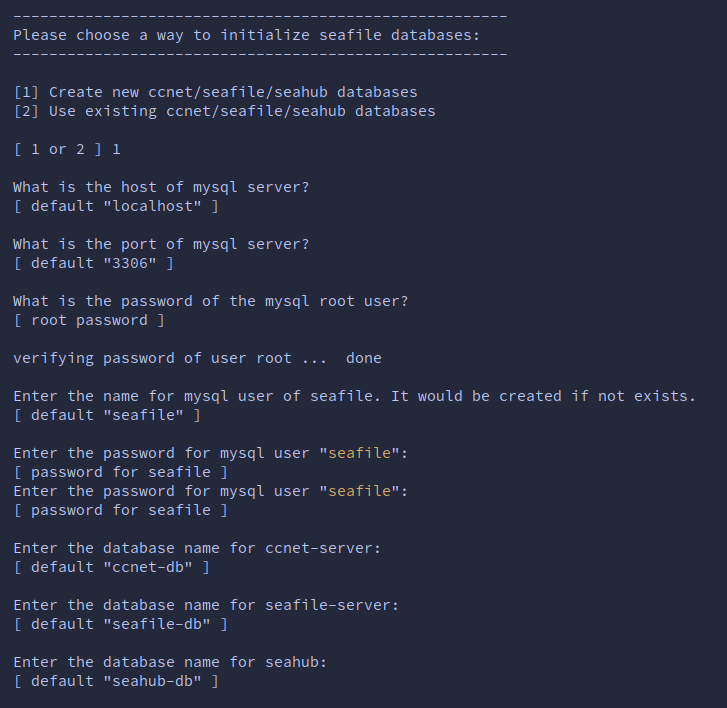
3. Configure the MariaDB database as follows:
- Input the number 1 option to set up and create new databases and a new user for Seafile.
- Leave the database host to localhost and the port to 3306 since this example uses a single server.
- Input the MariaDB server credentials of the root user.
- Leave the default user name called
seafile - Input the Seafile user’s password twice.
- Leave the default values for all Seafile databases.
4. Now, review your selected Seafile configurations, and press ENTER to confirm and continue with the installation.
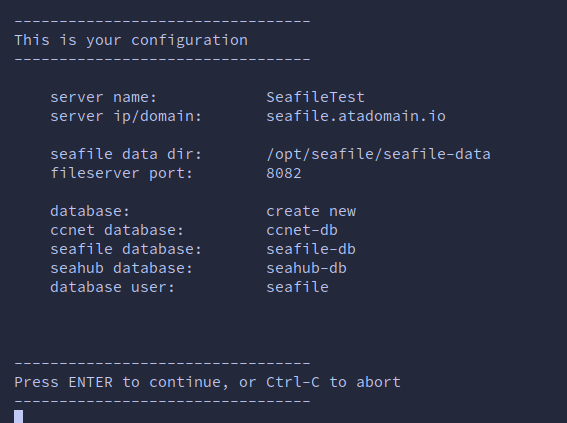
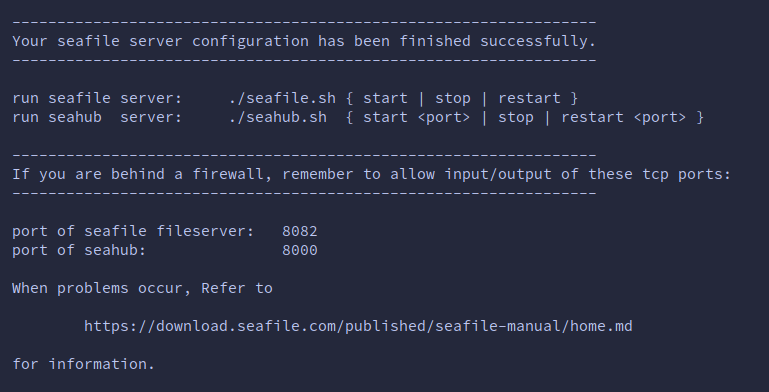
When the Seafile installation is successful, you will see a similar output to the one below.
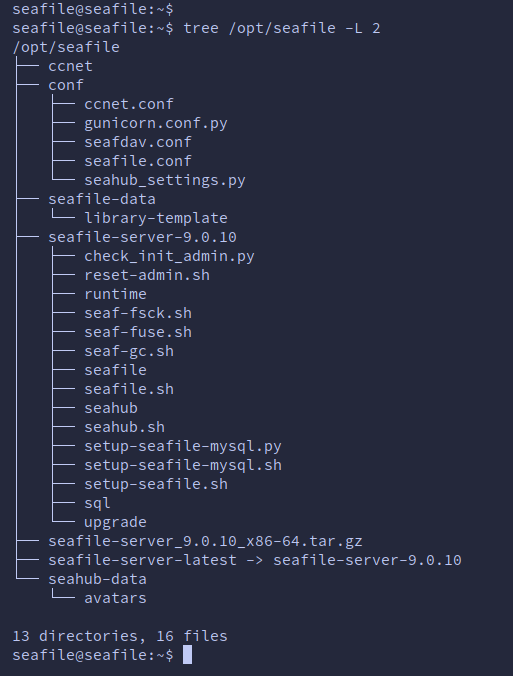
5. Next, run the below tree command to check the list of available directories on the /opt/seafile directory.
tree /opt/seafile -L 2You should see the new directory called seafile-server-latest, which is the main directory of your Seafile installation.
6. With Seafile installed, run each command below to start your Seafile server.
# Switching to the Seafile installation directory
cd /opt/seafile/seafile-server-latest
# Runs the seafile.sh Bash script
./seafile.sh start
# Runs the seahub.sh Bash script
./seahub.sh start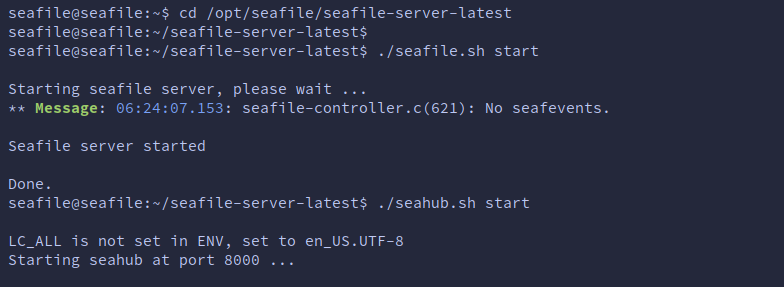
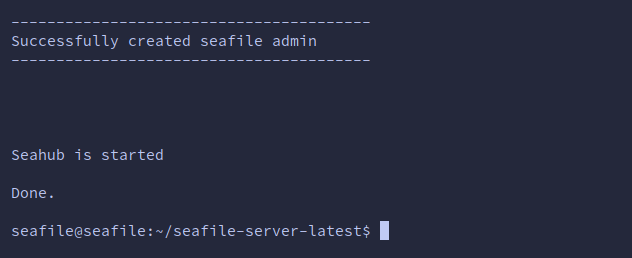
7. When prompted, as shown below, input your admin email address and password to create the admin account. This prompt only shows at the first run of the seahub.sh script.
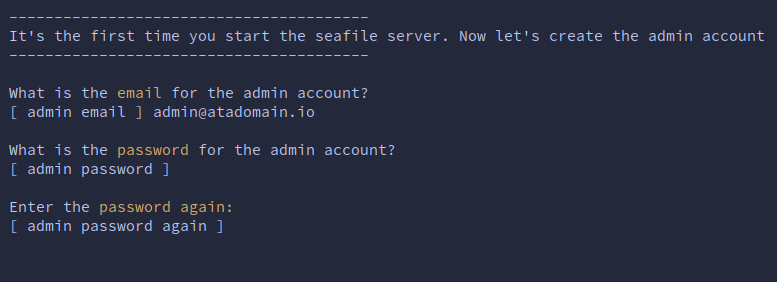
When an admin user is created, you will get an output like the one below, and the Seahub service starts. At this point, your Seafile server is now running on the default port 8082 and 8000.
8. Finally, run the following commands to stop the Seafile server.
Stopping the Seafile server is necessary since you will further configure Seafile with a custom domain name and run Seafile via Systemd in the following section.
./seafile.sh stop
./seahub.sh stop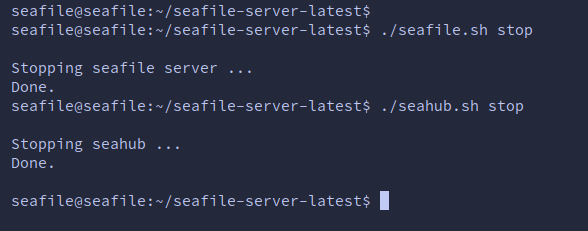
Configuring Seafile with Custom Domain Name
You have successfully set up your Seafile server, which is excellent. But to make user access more accessible, you will set up a custom domain for your Seafile installation.
To configure Seafile with a custom domain name, you must edit some of Seafile’s configurations as follows:
1. Open the file /opt/seafile/conf/ccnet.conf using your preferred editor, add your domain name to the SERVICE_URL parameter, and save the changes.
For this example, the Seafile server will run at https://seafile.atadomain.io, as shown below.
SERVICE_URL = https://seafile.atadomain.io2. Next, open the /opt/seafile/conf/seafile.conf config file, add the parameter host = 127.0.0.1 to the [fileserver] section and save the changes.
This configuration ensures the Seafile fileserver is running localhost only.
[fileserver]
host = 127.0.0.1
port = 8082
3. Open another config file called /opt/seafile/conf/seahub_settings.py, edit the following, and save the changes:
- Change the default value of the
SERVICE_URLandFILE_SERVER_ROOTparameters with the target domain name of your Seafile server. - Add new configurations
CACHES = ...to integrate Seafile with the Memcached server.
SERVICE_URL = "https://seafile.atadomain.io"

FILE_SERVER_ROOT = 'https://seafile.atadomain.io/seafhttp'

CACHES = {
    'default': {
        'BACKEND': 'django_pylibmc.memcached.PyLibMCCache',
        'LOCATION': '127.0.0.1:11211',
    },
}
Running Seafile via Systemd
After configuring the custom domain, you can start your Seafile server again. But this time, you will create systemd service files for the Seafile and Seahub services to run the Seafile server.
To run your Seafile server via Systemd, follow these steps:
1. Create a new systemd unit file called /etc/systemd/system/seafile.service with your preferred text editor, which will be used to run the Seafile service.
Next, add the following systemd unit configurations to the seafile.service file. This file is where you set up the seafile service to run as a user seafile when the MariaDB server runs.
[Unit]
Description=Seafile
# Add mysql.service or postgresql.service depending on your database to the line below
After=network.target mariadb.service

[Service]
Type=forking
ExecStart=/opt/seafile/seafile-server-latest/seafile.sh start
ExecStop=/opt/seafile/seafile-server-latest/seafile.sh stop
LimitNOFILE=infinity
User=seafile
Group=seafile

[Install]
WantedBy=multi-user.target
3. Create another systemd unit file called /etc/systemd/system/seahub.service for running the Seahub service.
Add the following systemd unit configurations setting the seahub.service to run after the Seafile service as the seafile user.
[Unit]
Description=Seafile hub
After=network.target seafile.service

[Service]
Type=forking
# Change start to start-fastcgi if you wish to run fastcgi
ExecStart=/opt/seafile/seafile-server-latest/seahub.sh start
ExecStop=/opt/seafile/seafile-server-latest/seahub.sh stop
User=seafile
Group=seafile

[Install]
WantedBy=multi-user.target
4. Now, run the following systemctl command to reload the systemd manager and apply the changes.
Reloading the systemd manager after adding new systemd service/unit files is strongly recommended.
sudo systemctl daemon-reload5. Once reloaded, run the following commands to start and enable the seafile and seahub services.
sudo systemctl enable --now seafile
sudo systemctl enable --now seahub
6. Lastly, run each command below to verify the status of both the seafile and seahub services.
# Check if the Seafile service is enabled and running
sudo systemctl is-enabled seafile
sudo systemctl status seafile
# Check if the Seahub service is enabled and running
sudo systemctl is-enabled seahub
sudo systemctl status seahub
When seafile and seahub services are enabled and running, you will see output like the ones below.


Configuring NGINX as a Reverse Proxy
For your Seafile server to run with a custom domain, you must set up the web server as a reverse proxy to the seafile and seahub services. For this example, you will set up and use NGINX as a reverse proxy for the Seafile server with HTTPS enabled.
To run your Seafile server with a custom domain, you must first allow OpenSSH and NGINX in your firewall with the following:
1. Run the following command to add the OpenSSH and Nginx Full applications to the UFW firewall.
sudo ufw allow OpenSSH
sudo ufw allow 'Nginx Full'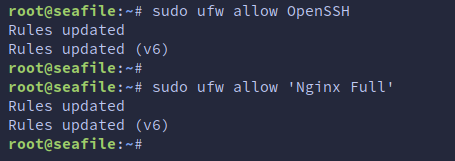
2. Next, run the below command to start and enable the UFW firewall.
sudo ufw enableWhen prompted, input Y to confirm. Doing so sets UFW firewall to start automatically upon the system startup.

3. Run the following command to verify the status of the UFW firewall. You should see the UFW is Status: Active with the OpenSSH and Nginx Full applications added.
sudo ufw status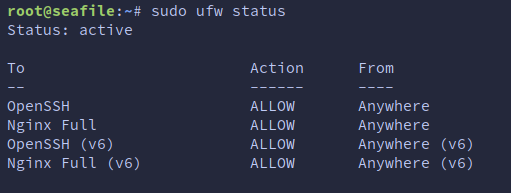
4. Create a new NGINX server block configuration file called /etc/nginx/sites-available/seafile.conf, and add the following configuration.
This configuration sets up NGINX as a reverse proxy for the Seafile server.
Be sure to change the following accordingly:
- The
*seafile.atadomain.io*domain name in theserver_nameparameter. - The path of SSL certificates on both the
ssl_certificateandssl_certificate_keyparameters.
log_format seafileformat '$http_x_forwarded_for $remote_addr [$time_local] "$request" $status $body_bytes_sent "$http_referer" "$http_user_agent" $upstream_response_time';

server {
    listen       80;
    server_name  seafile.atadomain.io;
    # Forced redirect from HTTP to HTTPS
    rewrite ^ https://$http_host$request_uri? permanent;
    # Prevents the NGINX version from being displayed in the HTTP response header
    server_tokens off;
}

server {
    listen 443 ssl http2;
    # Path to your fullchain.pem
    ssl_certificate /etc/letsencrypt/live/seafile.atadomain.io/fullchain.pem;
    # Path to your privkey.pem
    ssl_certificate_key /etc/letsencrypt/live/seafile.atadomain.io/privkey.pem;

    server_tokens off;
    server_name seafile.atadomain.io;

    proxy_set_header X-Forwarded-For $remote_addr;

    location / {
         proxy_pass         http://127.0.0.1:8000;
         proxy_set_header   Host $host;
         proxy_set_header   X-Real-IP $remote_addr;
         proxy_set_header   X-Forwarded-For $proxy_add_x_forwarded_for;
         proxy_set_header   X-Forwarded-Host $server_name;
         proxy_read_timeout  1200s;

         proxy_set_header   X-Forwarded-Proto https;

         # Used to view/edit office file via Office Online Server
         client_max_body_size 0;

         access_log      /var/log/nginx/seahub.access.log seafileformat;
         error_log       /var/log/nginx/seahub.error.log;
    }

    location /seafhttp {
        rewrite ^/seafhttp(.*)$ $1 break;
        proxy_pass http://127.0.0.1:8082;
        client_max_body_size 0;
        proxy_set_header   X-Forwarded-For $proxy_add_x_forwarded_for;

        proxy_connect_timeout  36000s;
        proxy_read_timeout  36000s;
        proxy_send_timeout  36000s;

        send_timeout  36000s;

        access_log      /var/log/nginx/seafhttp.access.log seafileformat;
        error_log       /var/log/nginx/seafhttp.error.log;
    }
    location /media {
        root /opt/seafile/seafile-server-latest/seahub;
    }
}
5. Now, run the commands below to activate your newly-created server block /etc/nginx/sites-available/seafile.conf and verify NGINX configurations.
sudo ln -s /etc/nginx/sites-available/seafile.conf /etc/nginx/sites-enabled/
sudo nginx -t
You will get an output like the one below with proper and correct NGINX configurations.

6. Lastly, run the following systemctl command, which does not provide output but restarts the NGINX service to apply the changes.
sudo systemctl restart nginxAccessing Seafile and Uploading Files via a Web Browser
With a fully configured NGINX as a reverse proxy for Seafile, you can now access and upload files to your Seafile server. How? You will navigate to your Seafile server’s domain name in a web browser and log in.
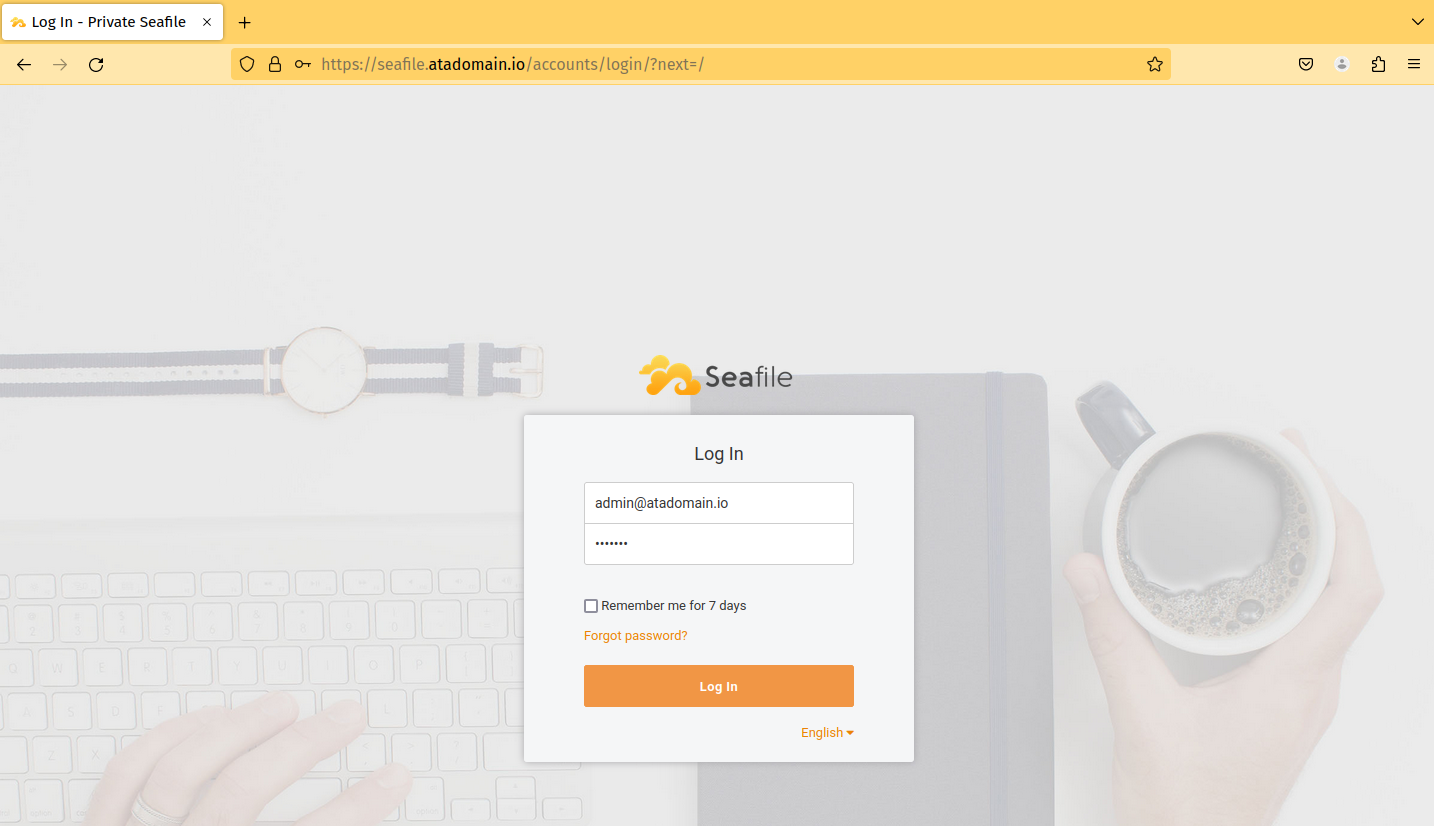
1. Open your web browser and visit the domain name of your Seafile server (i.e., https://seafile.atadomain.io). If all goes well, your browser redirects to the Seafile server login page (step two).
2. Next, input your admin email address and password, and click Log In. If successful, your browser redirects to the Seafile user dashboard (step three).
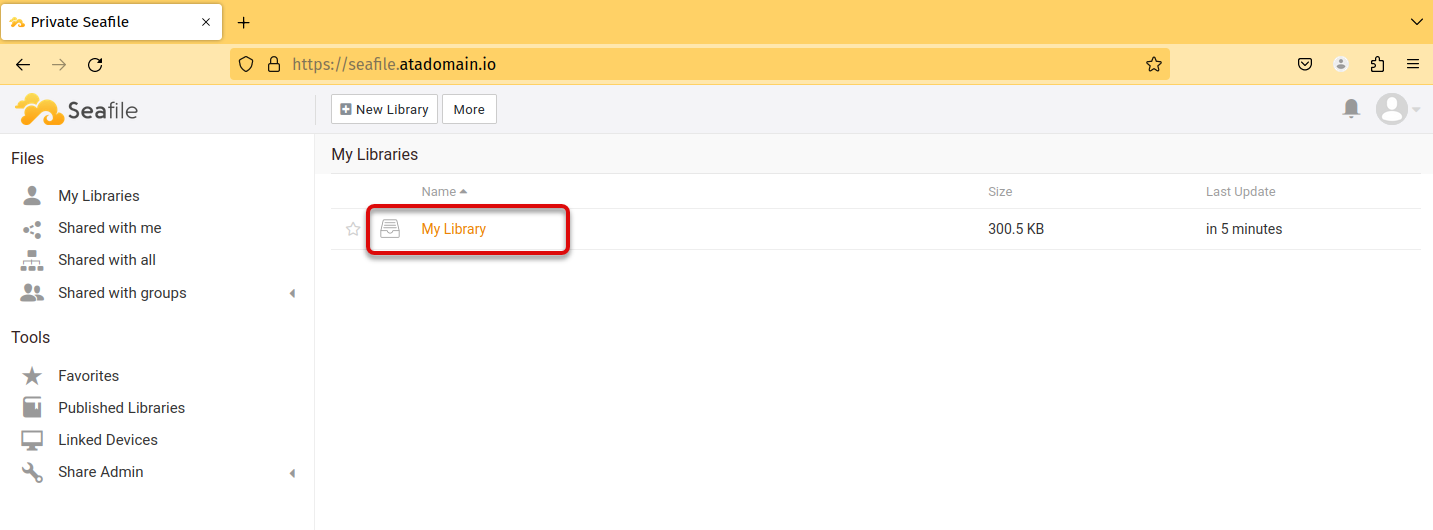
3. Click the default library/folder called My Library to access it.
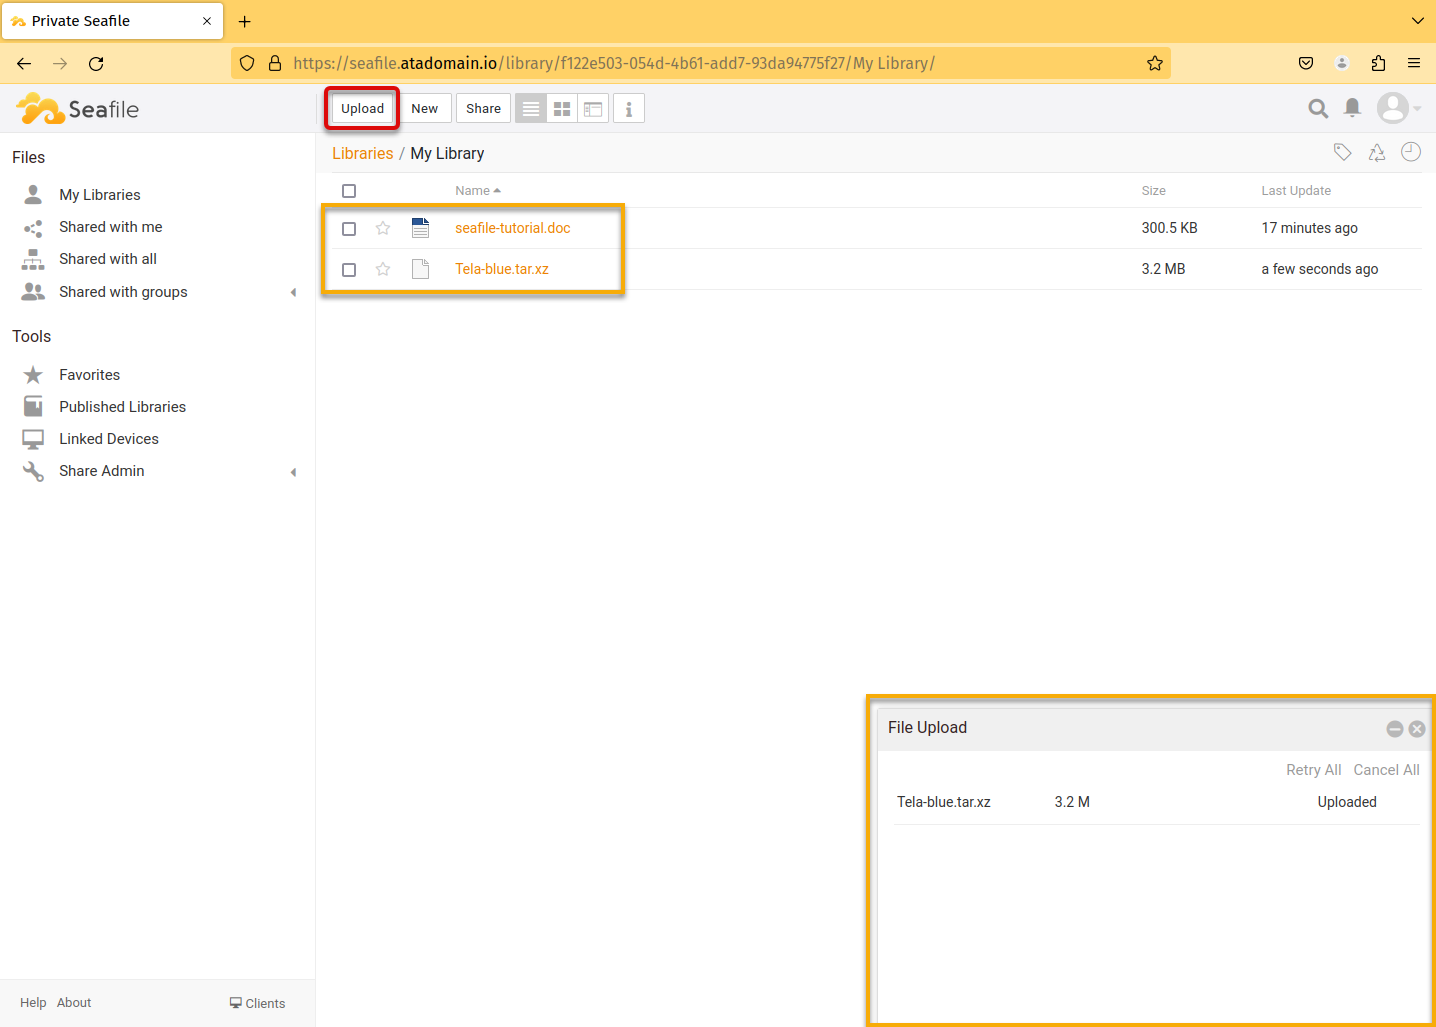
4. Now, click Upload and select the random files you wish to upload.
When the operation is successful, a File Upload pop-up window (bottom-right) appears with your files showing the Uploaded status.
Once successfully uploaded, you will see your files listed inside the My Library folder, as shown below.
Conclusion
In this tutorial, you have learned how to install Seafile as your cloud storage system on an Ubuntu system with the MariaDB database server secured via the UFW firewall. You have set your Seafile server to be accessible via a web browser by setting a custom domain name with NGINX as a reverse proxy.
Now that you have a fully functional Seafile server, why not install a Seafile Desktop Syncing client? Set up automatic upload and sync your important data to the Seafile server, and never worry about losing data!


