


Without a firewall, there are no rules or restrictions on your network traffic and that leads to a number of negative consequences. Linux system comes with a default firewall configuration tool, which is Uncomplicated Firewall (UFW). But how do you set up a UFW firewall? Sit back and relax, this tutorial has got you covered!
In this tutorial, you’ll learn how to configure UFW and set up a firewall on your Linux system to secure your network and ward-off malicious acts.
Ready? Read on to get started!
Prerequisites
This tutorial will be a hands-on demonstration. If you’d like to follow along, be sure you have the following:
- An Ubuntu machine – This tutorial uses Ubuntu 20.04 LTS, but other Linux distributions will work.
- Root privileges to your machine.
Installing UFW and Enabling IPv6 Connection
Even though UFW comes packaged with your Ubuntu system, UFW is not installed by default. Install UFW first with the apt package manager and configure it to allow connections over IPv6.
1. Open your terminal and run the apt update command below to update your local package index. The command accepts all prompts (-y) during the update for less user intervention.
sudo apt update -y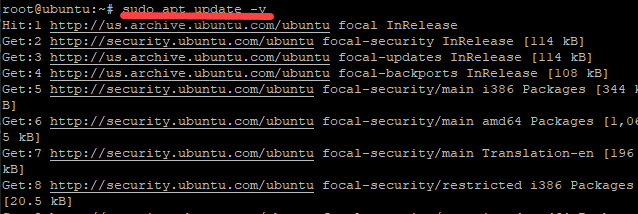
2. Next, run the below command to install UFW (install uwf) on your system while accepting all prompts (-y) during the installation.
sudo apt install ufw -y
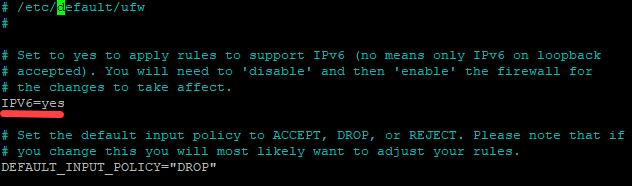
3. Open the UFW configuration file (/etc/default/ufw) with your favorite text editor. UFW supports IPv6, but you need to make sure that the firewall is configured to accept connections over IPv6.
If you only have IPv4 enabled, you’re still leaving yourself open to IPv6 attacks.
4. Scroll down to the IPV6 variable and set the value to yes, as shown below, then save the changes and exit the editor
5. Finally, run the command below to disable and re-enable UFW. The command restarts the UFW service so the changes can take effect.
After the command completes, your firewall can now write both IPv4 and IPv6 firewall rule sets.
sudo ufw disable && sudo ufw enableConfiguring Default Policies for Firewall Rules
If you’re just getting started with UFW, it’s recommended to set up a default policy for your rules. The default policies are applied to a chain that doesn’t have any specific rules defined yet.
Set up UFW to deny all incoming connections and allow all outgoing connections. As a result, anyone trying to reach your machine from the outside world is denied, while you can still freely connect to any website or server.
Run the ufw command below to deny all incoming connections by default.
sudo ufw default deny incoming
Now run the following command to allow all outgoing connections by default.
sudo ufw default allow outgoing
Allowing SSH Connections on the UFW Firewall
You’ve just set up default policies on your UFW firewall to deny all incoming traffic, and the “allow all-deny all” rule is a good setting for a regular user. But what if you’re running a server? You’ll need to allow specific traffic in and out. Allowing SSH connection on your UFW firewall will do the trick to allow specific traffic in and out.
You’ll set up an SSH server that allows incoming SSH connections on port 22. But why port 22 and not any other port? On Unix-like systems, the SSH daemon listens on port 22 by default, so it’s a good practice to use the default SSH port to make your life a bit easier.
1. Run the below commands to install the OpenSSH server (install openssh-server) on your system and start an OpenSSH server (start ssh).
sudo apt install openssh-server -y
sudo systemctl start ssh
2. Now run the command below to allow incoming SSH connections. Without specifying port 22 will be enough as UFW knows what port is for SSH.
sudo ufw allow ssh
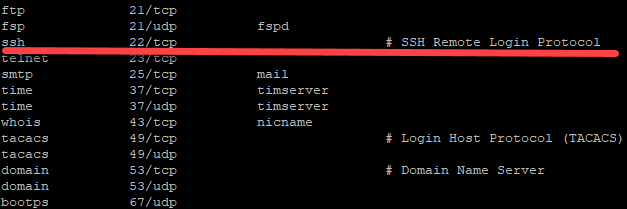
The /etc/services file contains a list of all available services on your system. Open the file on your text editor, scroll down to ssh and see the port number (22) is part of the service description, as shown below.
But perhaps you prefer to specify the port number (22) to allow for SSH. If so, run the following command instead.
sudo ufw allow 223. Now run the below command to enable UFW.
sudo ufw enableType Y in the confirmation prompt, as shown below, and press Enter to continue running the command. UFW will now start filtering packets on your system.

4. Finally, run either of the below commands to check the status of your UFW firewall.
## Displays more detailed information, such as the interface and
## the packet's current progress
sudo ufw status verbose
## Shows each rule with a number and the corresponding allow or deny status
## The numbered mode is useful when you are trying to delete a rule set here and there
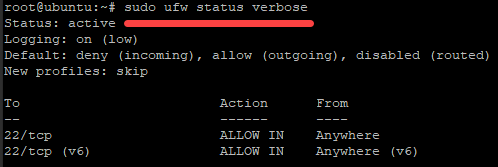
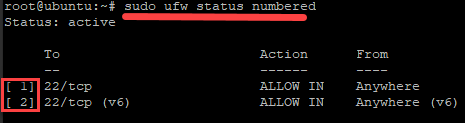
sudo ufw status numberedIf you run the command with the verbose option, you’ll see an output similar to the one below:
- Status: active – Indicates the firewall is currently running.
- Logging: on (low) – Indicates that UFW is logging all packets being processed by the firewall.
- Default: deny (incoming), allow (outgoing), disabled (routed) – Indicates that the default policy is to deny all incoming connections and allow all outgoing connections.
- New profiles: skip – Indicates the firewall is currently using the default set of rules.
If you run the command with the numbered option instead, you’ll see the output below. You can see a list of numbered rules and their corresponding ALLOW or DENY status.
Allowing HTTP and HTTPS Connections
At this point, you’ve only allowed SSH connections on your UFW firewall, but that limits your server’s capabilities. Allow other types of connections, such as HTTP or HTTPS, and add more rules to the UFW firewall.
Run either of the following commands to allow incoming HTTP connections.
## HTTP connection uses port 80 (not secure)
sudo ufw allow 80
sudo ufw allow http
Now, run either of the commands below to allow incoming HTTPS connections.
sudo ufw allow https
## HTTP connection uses port 443 (secure)
sudo ufw allow 443
Allowing Connections from Specific Port Range and IP Address
Some applications use multiple ports in order to provide their services. And perhaps you have a range of ports to open or you need to allow connection from a specific IP address. In that case, add more UFW firewall rules.
Run the commands below to allow incoming connections on ports 5001 to 5009. You always should specify the protocol (tcp or udp) after the port range that the rules apply to because not all ports are used by both protocols.
For example, commonly used TCP ports include 80 (HTTP) and 443 (HTTPS). But common UDP ports include 53 (DNS) and 67/68 (DHCP).
sudo ufw allow 5001:5010/tcp
sudo ufw allow 5001:5010/udp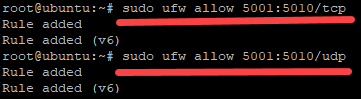
Run the below command instead if you prefer to allow SSH connections from a specific IP address. The command allows SSH connections (port 22) only from the 192.168.1.2 IP address.
sudo ufw allow from 192.168.1.2 to any port 22
Allowing Traffic from a Specific Network Interface
UFW also lets you allow traffic on a specific network interface only, such as eth0 is the first Ethernet interface and wlan0 is the first Wi-Fi interface.
Run either of the commands below to allow HTTP connections only on the eth0 and wlan0 interfaces.
## Allow HTTP connection only on the eth0 interface
sudo ufw allow in on eth0 to any port 80
## Allow HTTP connection only on the wlan0 interface
sudo ufw allow in on wlan0 to any port 80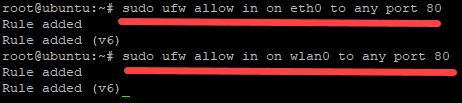
Deleting UFW Firewall Rules
Perhaps some UFW firewall rules don’t serve any purpose anymore. In that case, you might want to remove some of the rules from UFW. But first, you must know either the number or the name of the rule to delete.
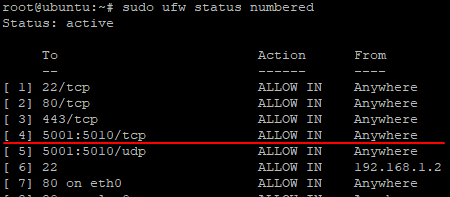
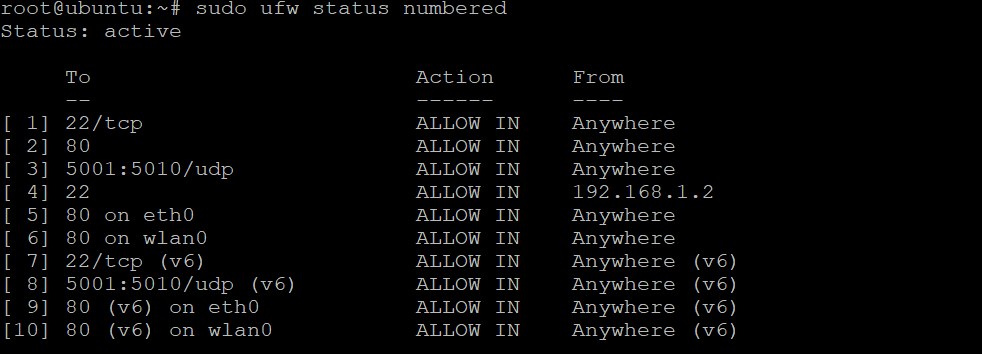
1. Run the below command to get a numbered list of the rules added to UFW.
sudo ufw status numberedNote the rule’s number or name in the output, like the one below.
2. Next, run the command below to delete rule number 4, which is the 5001:5010/tcp port range.
sudo ufw delete 4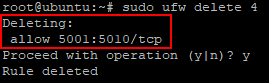
3. Run the below command to delete a rule by its actual name with the allow status. In this example, you would delete the http rule by running the following command.
sudo ufw delete allow http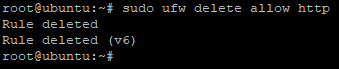
4. Now run the following command to delete a rule by specifying a port number (443) with the allow status.
sudo ufw delete allow 443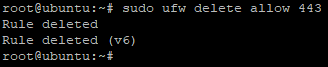
5. Finally, re-run the following command as you did in step one to list all rules.
sudo ufw status numbered As show can see below, the rules for the 5001:5010/tcp port range, the http, and the 443 port are now gone.
Resetting the UFW Firewall
There might be times when you need to reset UFW to its defaults, such as after configuring a large set of rules. An update may change your configuration, requiring you to re-configure UFW and possibly start over from scratch.
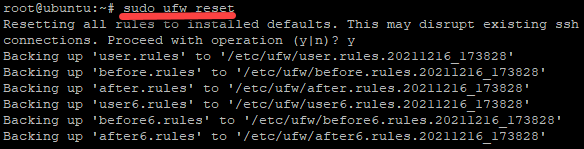
Run the ufw reset command below to reset all of your firewall rules to their default settings. This command disables UFW and deletes all of your current firewall rules.
sudo ufw resetType ‘Y’ and press Enter to continue resetting your UFW firewall.
After the reset is complete, you will have a fresh installation of UFW fully disabled, and even your default policies are gone.
Now run the below command to re-enable UFW start configuring your firewall rules from scratch.
sudo ufw enableIf you decide you don’t want to use UFW anymore, then there’s no need to re-enable it. Or run the command below to ensure UFW is disabled.
sudo ufw disable
Conclusion
Throughout this tutorial, you’ve realized that setting up a firewall is not too daunting when using UFW. You should now have a good understanding of how to set up and implement your own rules with UFW on Ubuntu.
Now, why not build on this newfound knowledge by learning more about UFW and Docker Security on a Linux machine?


