

In today’s fast-paced digital world, keeping tabs on user accounts and access control is no easy feat. But fear not! OpenLDAP is a solution to your woes, a widespread open-source implementation of the Lightweight Directory Access Protocol (LDAP).
This tutorial will walk you through the ins and outs of setting up an OpenLDAP server on your Ubuntu machine. Say goodbye to scattered user data and hello to centralized management, authentication, and authorization.
Read on to streamline your user management and simplify your IT workflows!
Prerequisites
This tutorial houses hands-on demonstrations in setting up an OpenLDAP server. If you wish to follow along, be sure you have the following:
- Two machines (one for the server and one for the client) running Ubuntu 20.04 or later.
- A non-root user with
sudoprivileges on both machines.
Installing the OpenLDAP Server on Ubuntu
From ensuring your system’s readiness, you now delve into the heart of your setup, installing the OpenLDAP server. LDAP holds significant weight in server administration, especially when managing user accounts and access control within an organization’s network.
To install OpenLDAP server on your system, proceed with the following:
💡 Throughout this guide, you must use your domain name to replace ata.com.
1. Open your terminal and execute the following command to set your machine’s hostname (i.e., ldap.ata.com). This command has no output to the terminal but allows other devices on the network to recognize your machine.
sudo hostnamectl set-hostname ldap.ata.com2. Next, run the apt update command below to update your system’s package index.
sudo apt update -y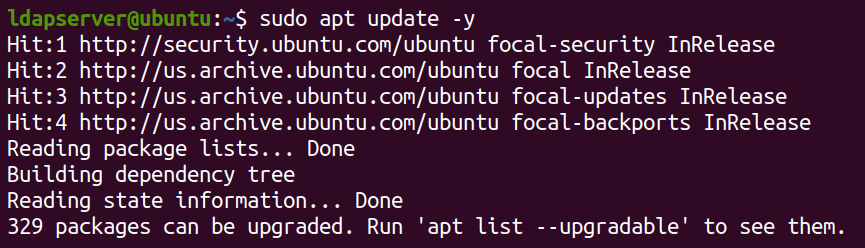
3. Once updated, run the below apt install command to install the Apache web server and essential components (PHP modules). These components are necessary for the proper functioning of OpenLDAP.
sudo apt install apache2 php php-cgi libapache2-mod-php php-mbstring php-common php-pear -y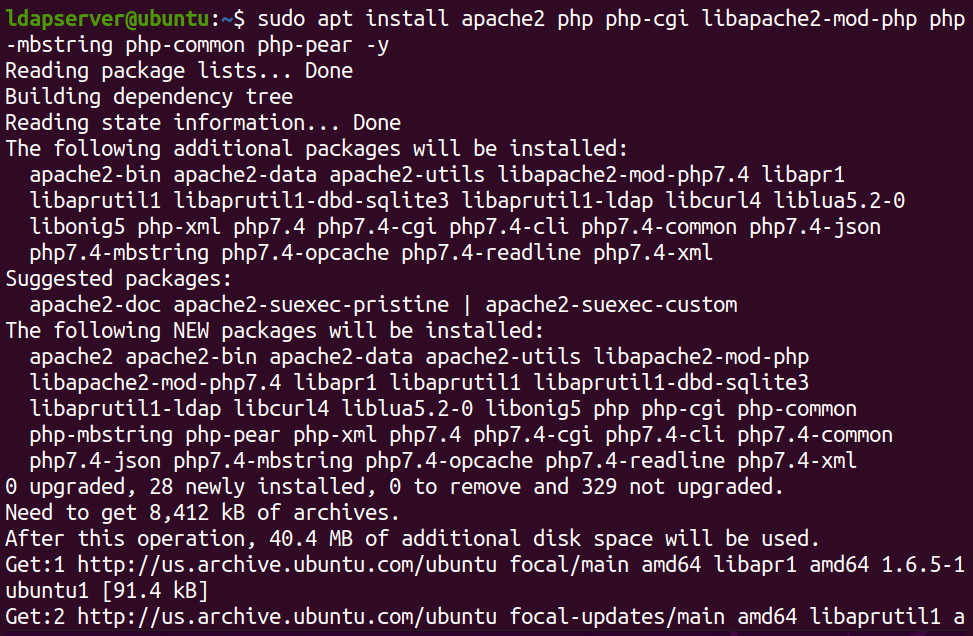
4. Now, invoke this command to install the OpenLDAP server and LDAP Account Manager (LAM), a convenient web-based management tool.
sudo apt install slapd ldap-utils -y && sudo apt install ldap-account-manager -y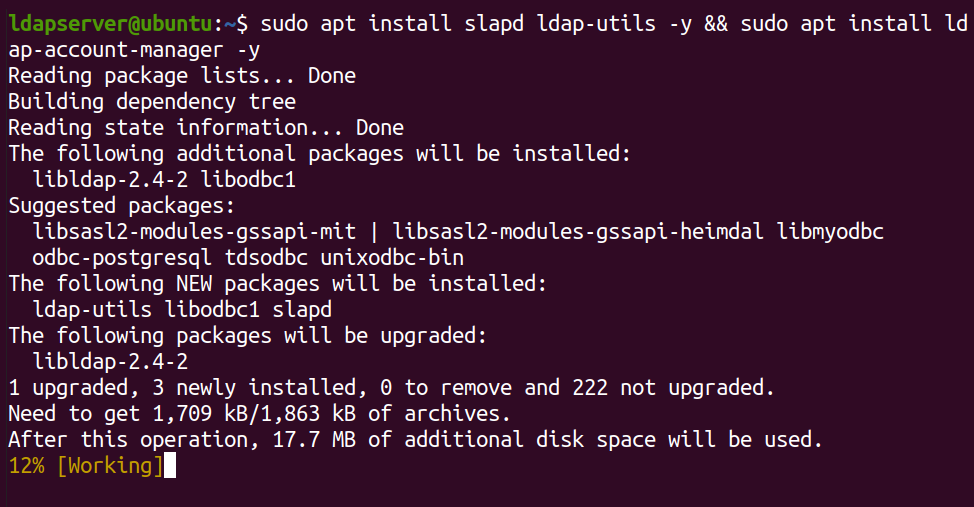
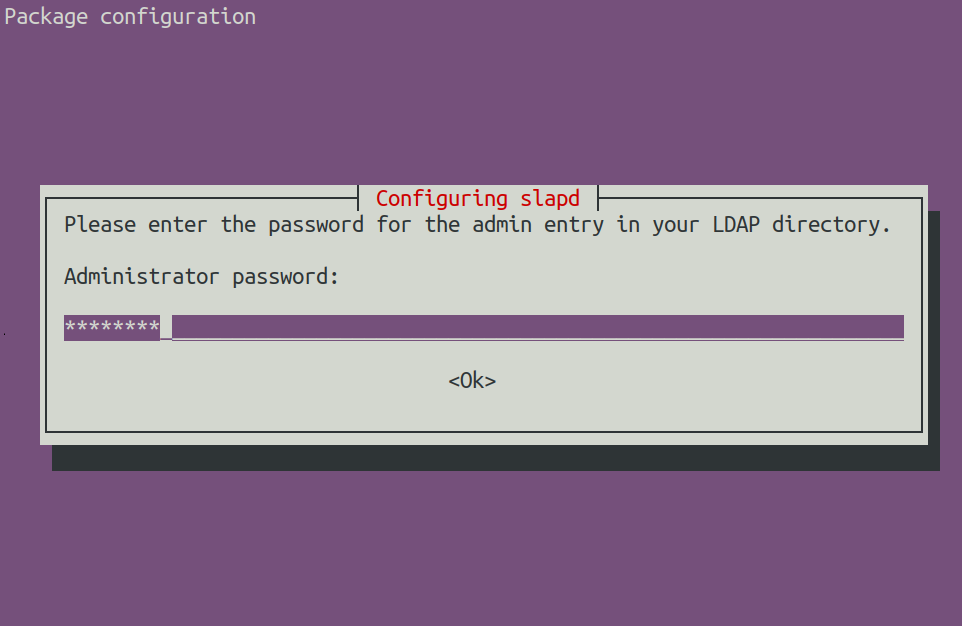
5. Provide an admin password for your LDAP server when prompted during the installation.
6. Once installed, execute the following systemctl command to confirm the OpenLDAP server’s (slapd) status.
sudo systemctl status slapd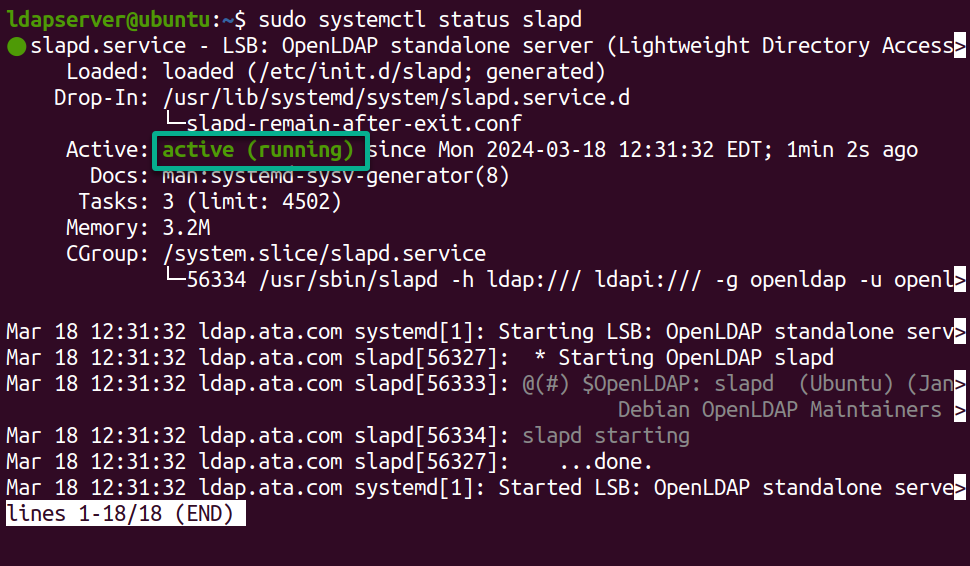
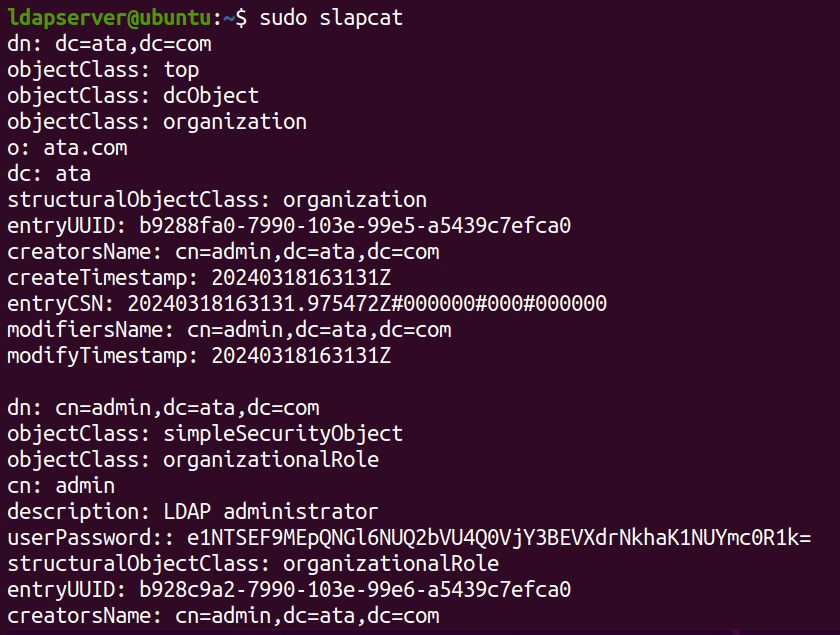
7. Lastly, run the slapcat command below to check the LDAP database contents.
sudo slapcatA list of default schemas and configurations below indicates that OpenLDAP has been installed correctly.
Keeping the OpenLDAP Server Safe with UFW Firewall
You have successfully installed your OpenLDAP server, but you must fortify its defenses before it can guard your network. How? By enlisting the help of UFW, Ubuntu’s trusty default firewall.
Configuring the UFW Firewall is like setting up a digital moat around your castle. You will tailor the firewall to shield your server, allowing only essential traffic to pass through and keeping digital marauders at bay.
To ensure secure connections on your OpenLDAP server, you must open certain ports for the OpenLDAP server as follows:
Execute the following ufw commands to allow incoming traffic on ports for HTTP (80), HTTPS (443), and LDAP (389).
# Allow HTTP Traffic
sudo ufw allow 80
# Allow HTTPS Traffic
sudo ufw allow 443
# Allow LDAP Traffic
sudo ufw allow 389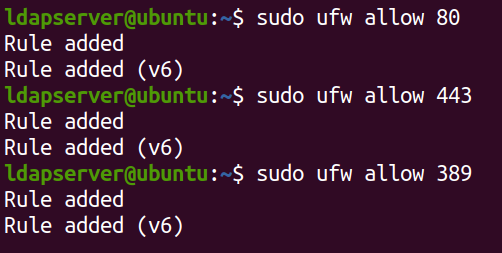
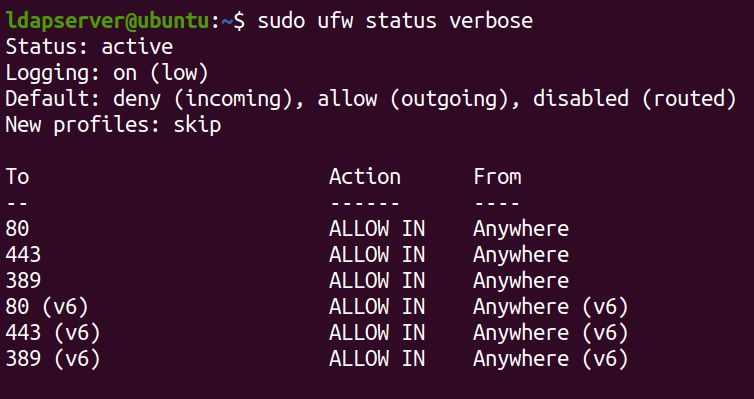
Now, run the command below to check a detailed overview of the current status and configuration of UFW on your system.
sudo ufw status verboseThe output below confirms that the firewall rules you added were applied successfully.
Enabling PHP Support in Apache for LAM
After fortifying the security of your LDAP server with the UFW Firewall, you must ensure Apache recognizes and processes PHP files effectively. This critical step paves the way for seamless integration between Apache and LAM, enabling efficient management of your LDAP directory.
To enable PHP support in Apache, carry out the following:
1. Run the following a2enconf command to enable a configuration file for Apache’s PHP Common Gateway Interface (CGI).
These configuration files typically contain directives related to configuring PHP for Apache, such as setting up handlers or defining options for PHP execution. By enabling these configuration files, you ensure that Apache is properly configured to handle PHP scripts using the CGI interface.
sudo a2enconf php*-cgi
2. Once enabled, execute the command below to reload the Apache service (apache2) to apply the changes.
This command outputs nothing but ensures that any modifications made to the Apache configuration take effect. This process includes enabling the PHP CGI module without restarting the entire Apache service.
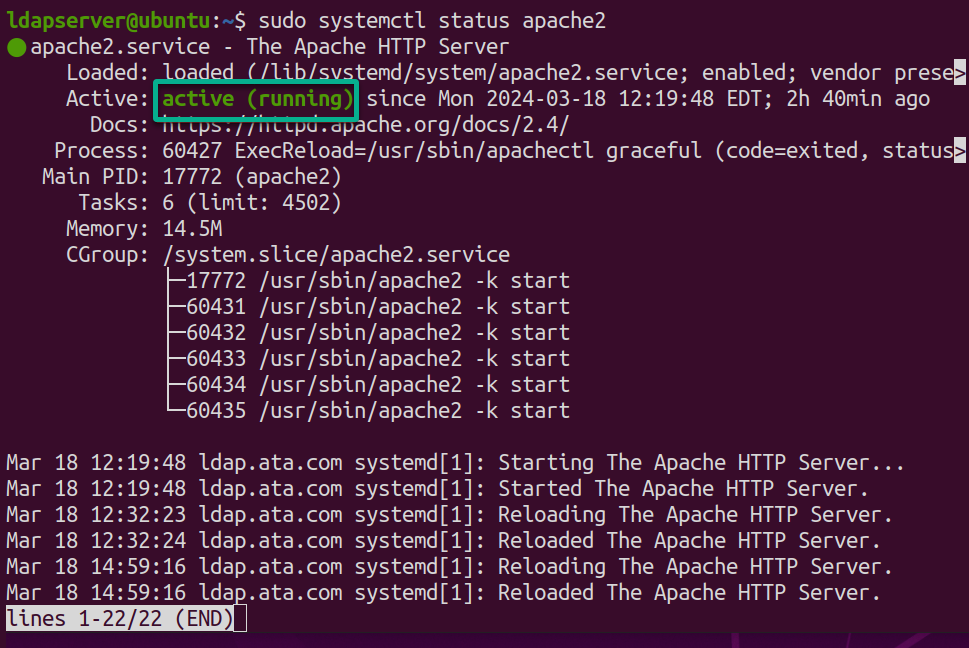
sudo systemctl reload apache23. Now, invoke this command to check the status of the apache2 service to ensure everything’s running smoothly.
sudo systemctl status apache2The output will show the current status of the Apache web server as active (running) without any errors, as below.
Setting Up the LAM Web Interface
Moving on from enabling PHP support in Apache for LAM, you now focus on a centralized hub where you can control your OpenLDAP server—the LAM web interface. This web interface offers an intuitive platform for administrators like yourself to oversee directory services.
To set up the LAM web interface, proceed with these steps:
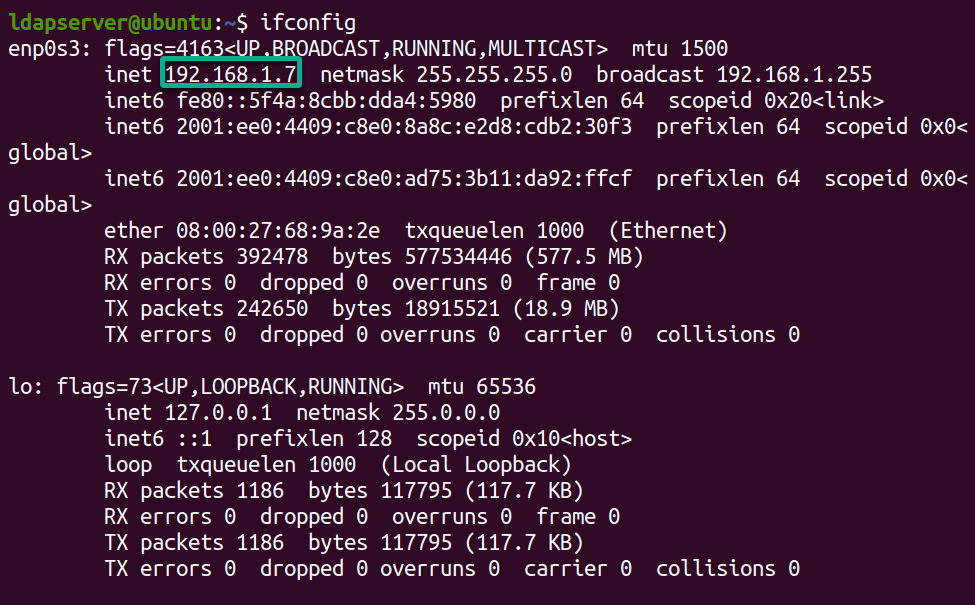
1. Run the ifconfig command below to display your network information.
ifconfigLook for and note down your server’s IP address (i.e., 192.168.1.7), typically denoted by inet.
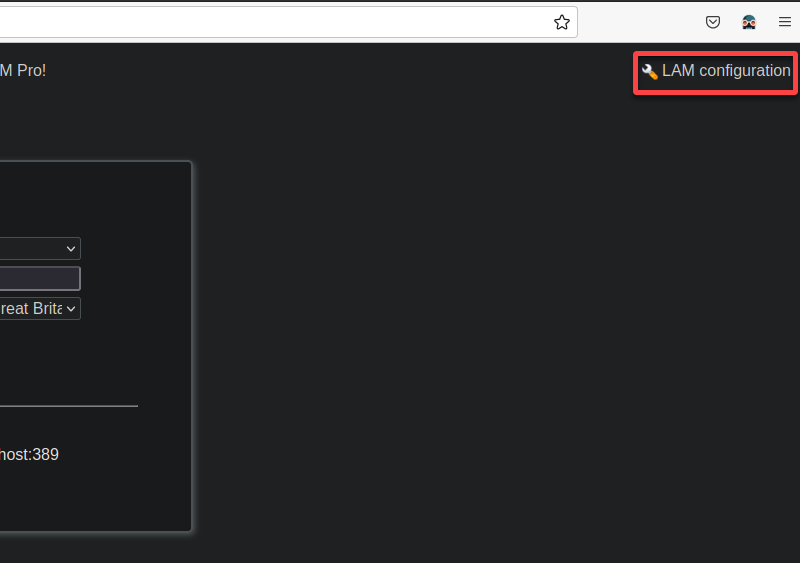
2. Open your favorite web browser, and navigate to your server’s IP address followed by /lam into the address bar (e.g., http://192.168.1.7/lam). Doing so redirects your browser to LAM’s web interface, as shown below.
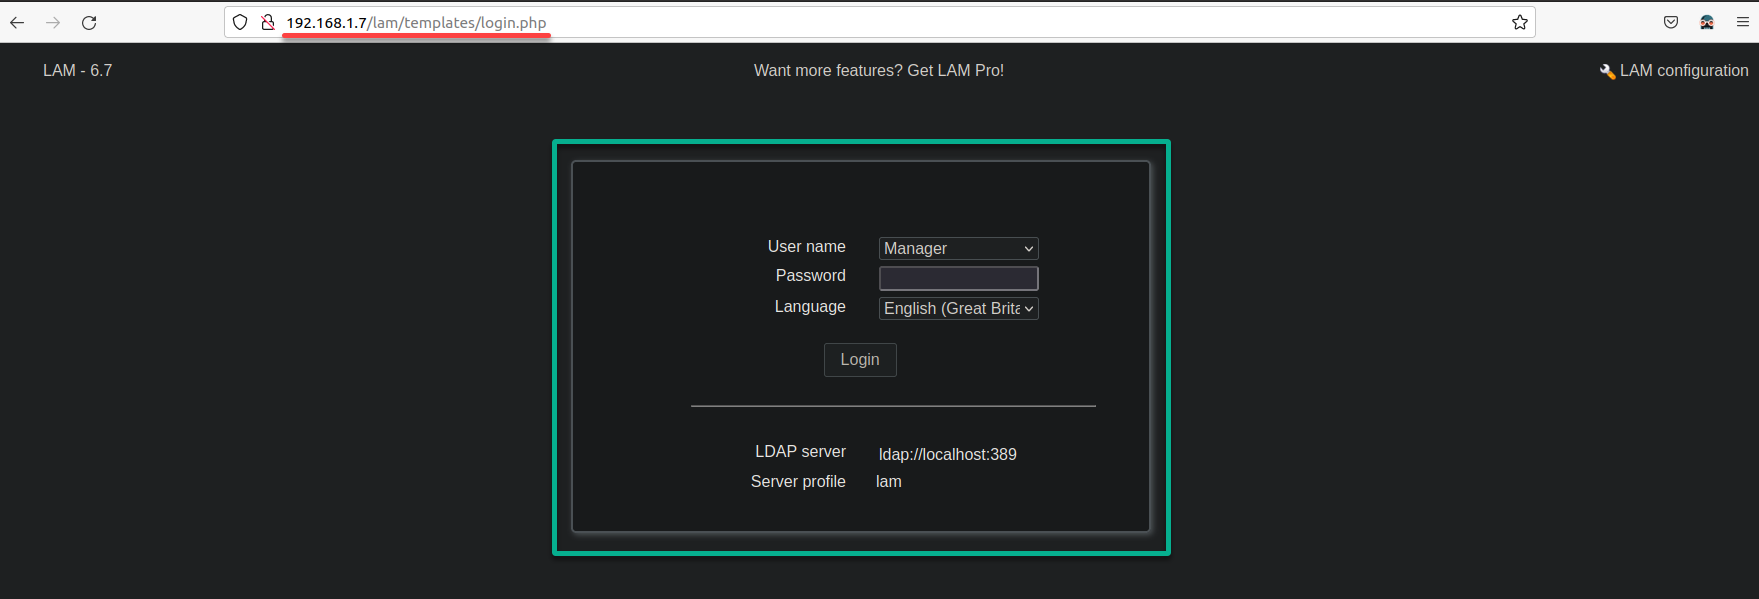
3. Click LAM configuration (top-right) on the login page to access the LDAP Account Manager page (step four).
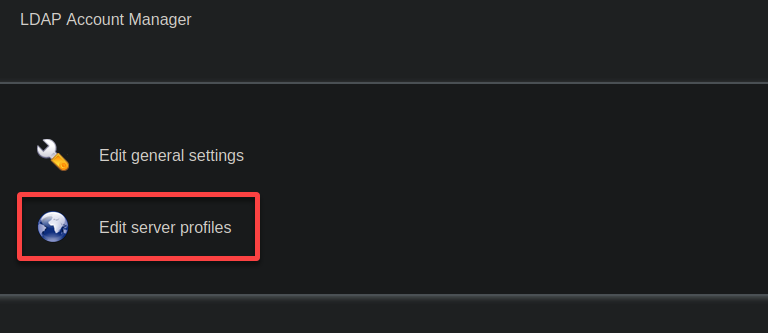
4. Now, click Edit server profiles to modify your LAM settings.
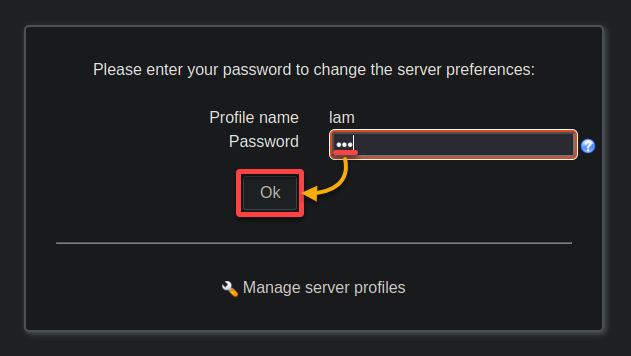
5. Input the default lam password on the second login page, and click OK to authenticate.
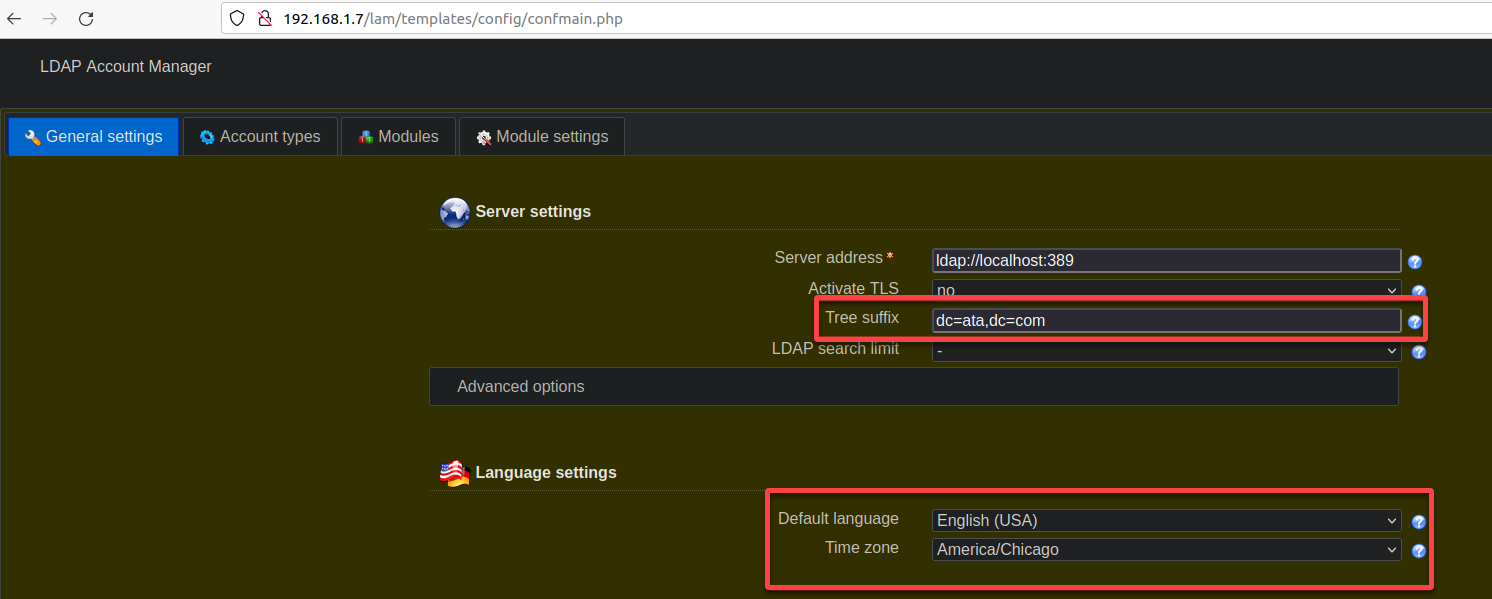
6. Once logged in, configure the following server and language settings under the General settings:
- Tree suffix – Type in your directory’s base distinguished name (DN), such as dc=ata,dc=com, replacing them with your actual domain components.
- Default language – Select your language preference for the LAM web interface.
- Time zone – Choose the time zone that aligns with your server’s location, which is crucial for precise management of account expirations.
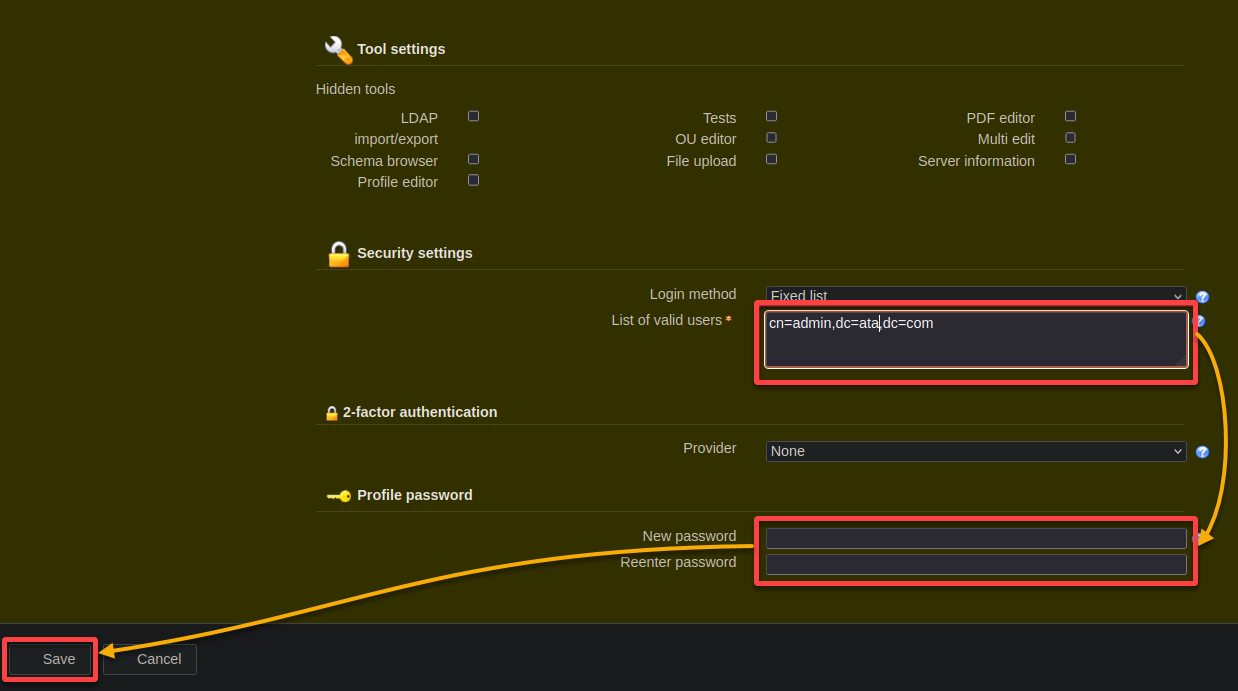
7. Scroll down and set the options for security and profile password with the following:
- List of valid users – Insert the DN of your LDAP admin user, for example, cn=admin,dc=ata,dc=com.
- New password and Reenter password – Create and confirm a strong password for the LAM admin account to replace the initial default password.
- Keep other settings as default, and click Save to apply your configurations. Once saved, your browser will be redirected back to the login page.
Creating Groups and Users in LAM
With your LAM dashboard ready, you focus on laying the foundation for an organized and secure directory structure—groups and users. Creating groups and users is like organizing your team into departments and giving everyone their ID badge.
To create groups and users in LAM, execute the following:
1. Navigate to the LDAP Account Manager following steps three to five of the “Setting Up the LAM Web Interface” section. But this time, input your newly configured password for the OpenLDAP server.
2. In the LAM Account Manager, navigate to the Account types tab to view all access type options.
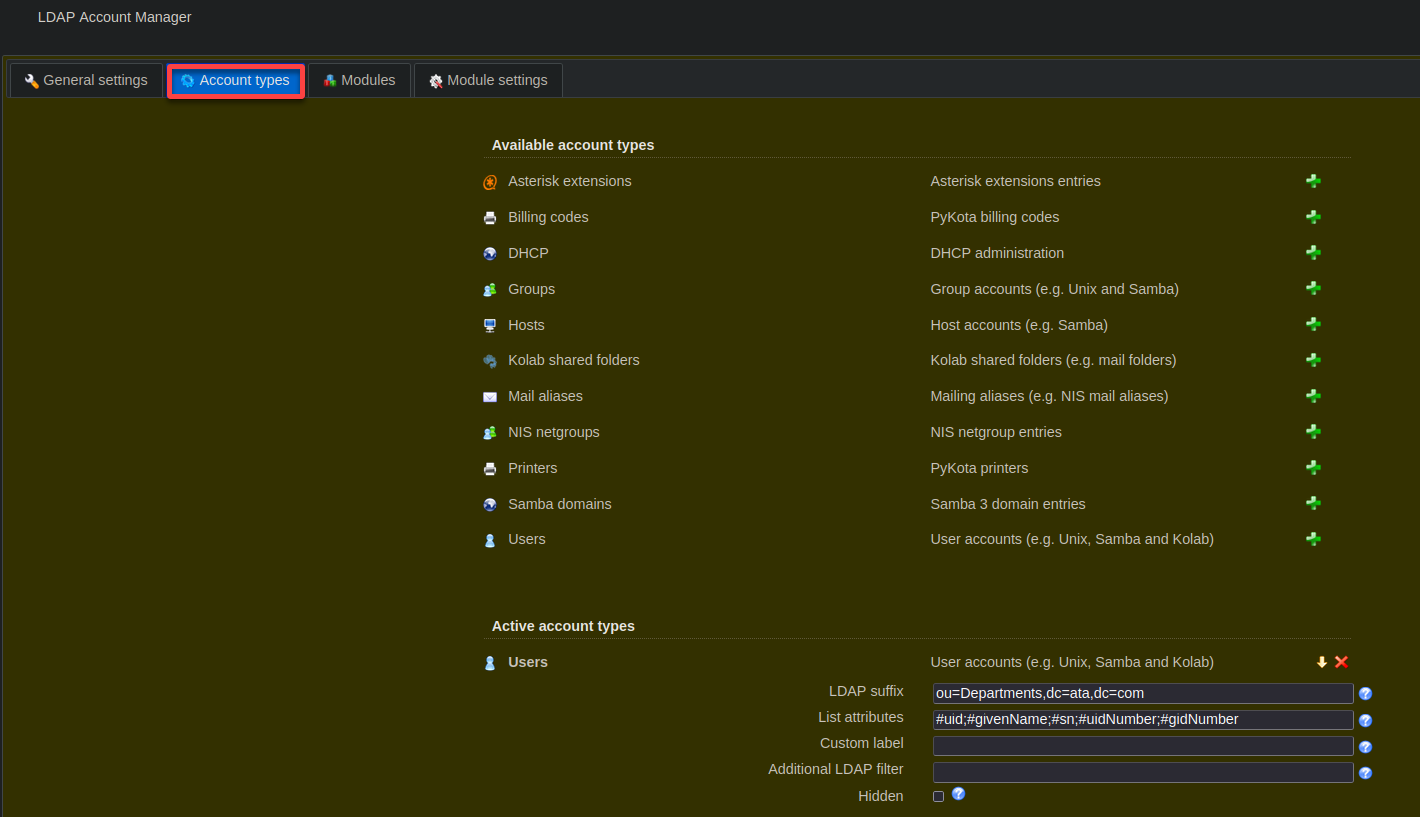
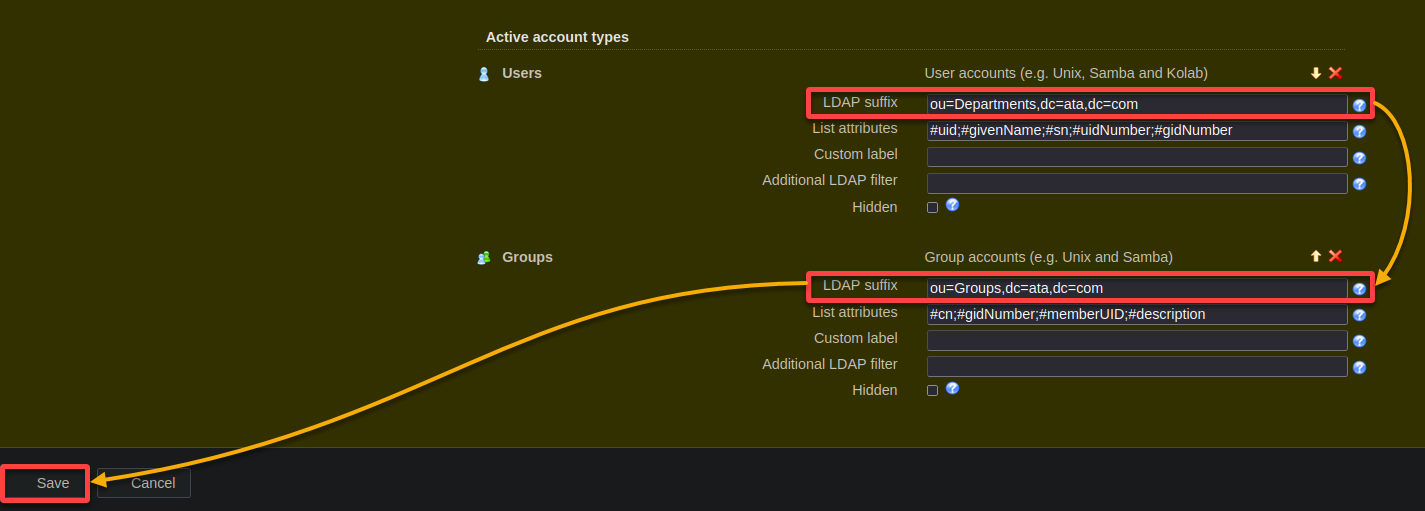
3. Next, scroll down and set the LDAP suffixes while replacing <base_DN> (i.e., dc=ata,dc=com), accordingly as follows:
- Users – ou=Departments,<base_DN>
- Groups – ou=Groups,<base_DN>
- Leave other settings as default, and click Save.
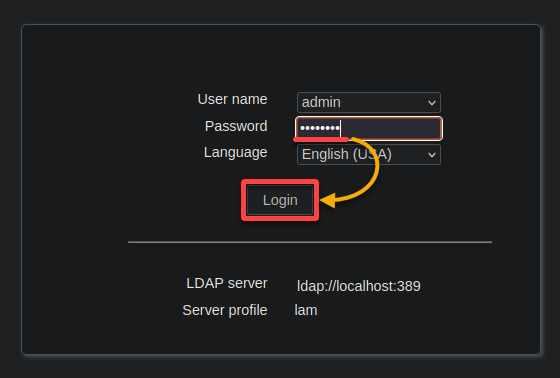
After saving, your browser will be redirected to the admin login page (step four).
4. Now, enter the admin password you set during installation, and click Login to access your OpenLDAP server.
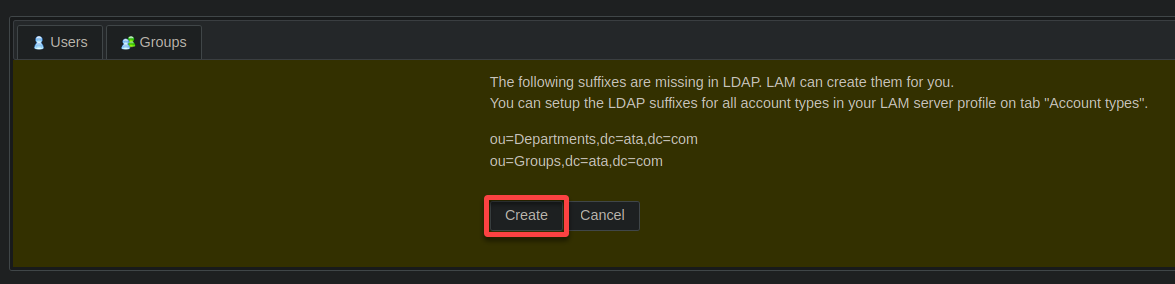
5. When prompted, click CREATE to establish the two missing suffixes.
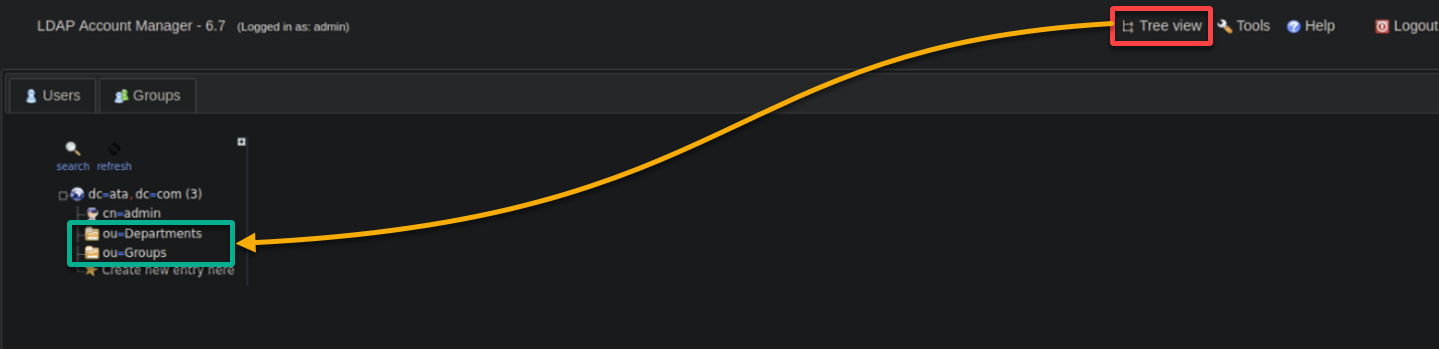
6. Upon creation, click Tree view (upper-right) to see the new LDAP suffixes (Departments and Groups) displayed in a hierarchical structure, as shown below.
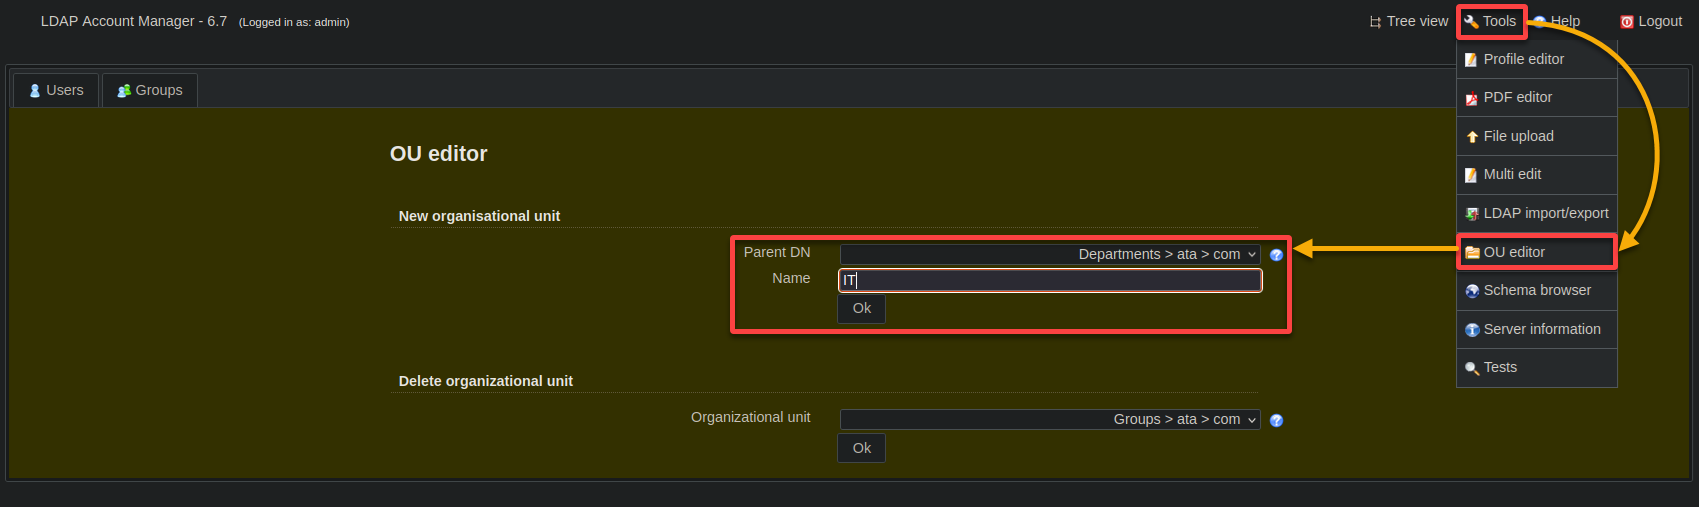
7. Moving on, click Tools (upper-right) and choose OU editor to configure a new department with the following:
- Parent DN – Choose Department > ata > com for the Parent DN. This option specifies where the new department will be created within your LDAP directory.
- Name – Input IT (arbitrary) as the department (OU) name.
Once configured, click OK to add a new department named IT.
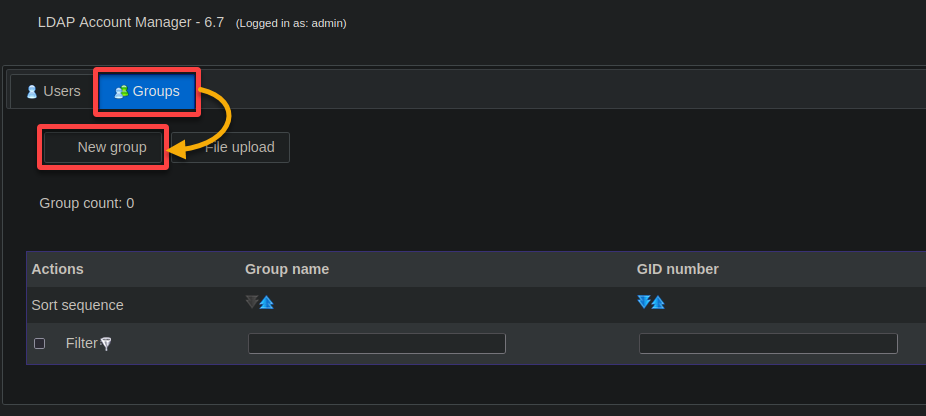
8. Now, navigate to the Groups tab and click New group to create a new group.
Creating groups simplifies administration, promotes collaboration, enforces policies, and facilitates organizational scalability.
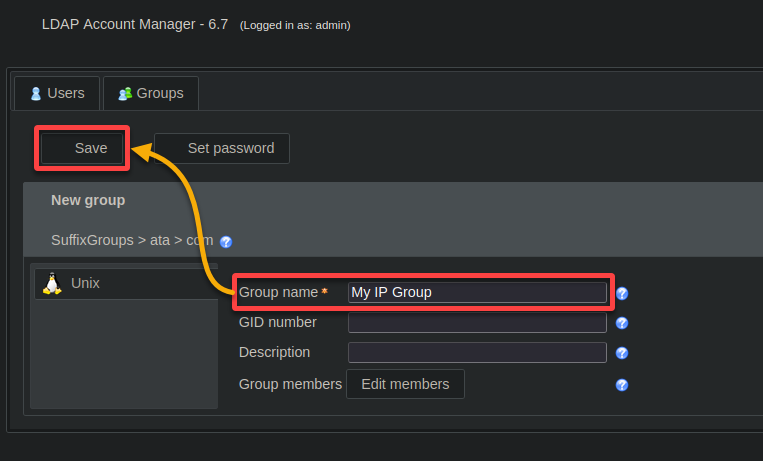
9. Provide a descriptive group name (i.e., My IP Group) and click Save to confirm the new group.
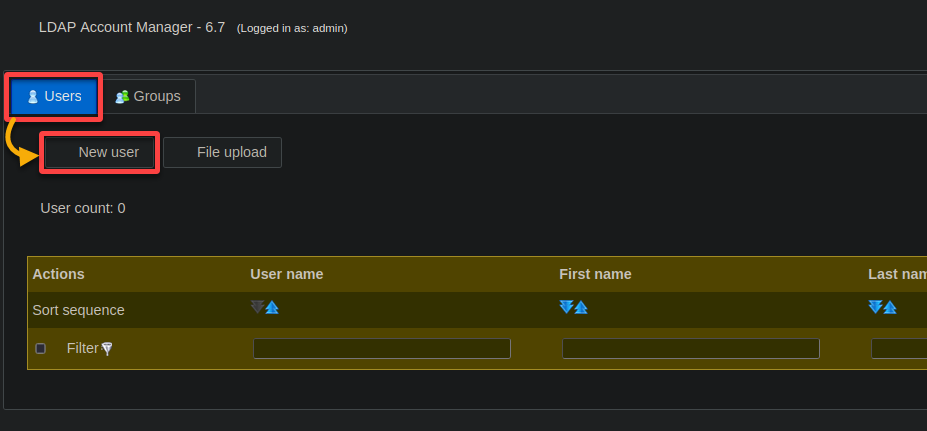
10. Once the group is created, navigate to the Users tab and click New user to create a new user.
Establishing a robust framework by grouping users according to their roles, departments, or other criteria is crucial. This framework helps manage resource access and promote efficient collaboration across your organization.
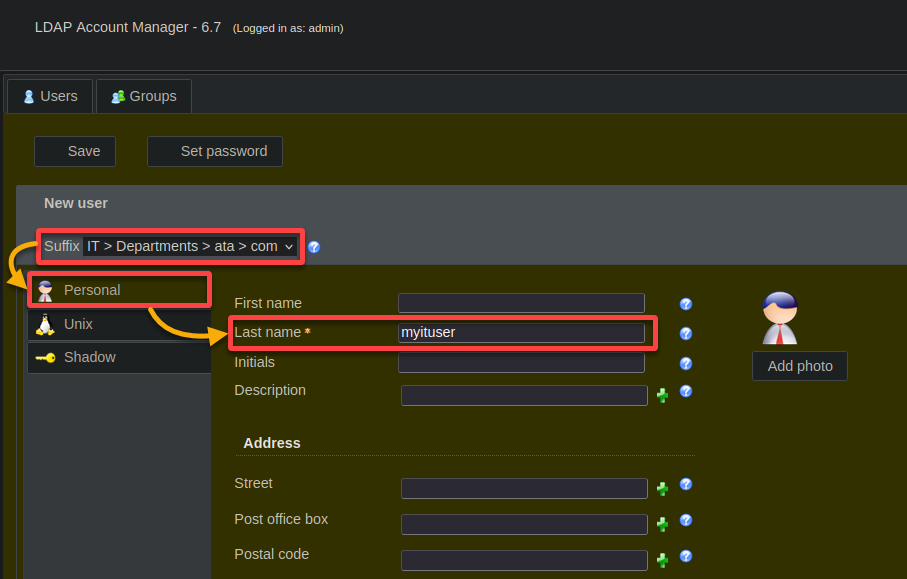
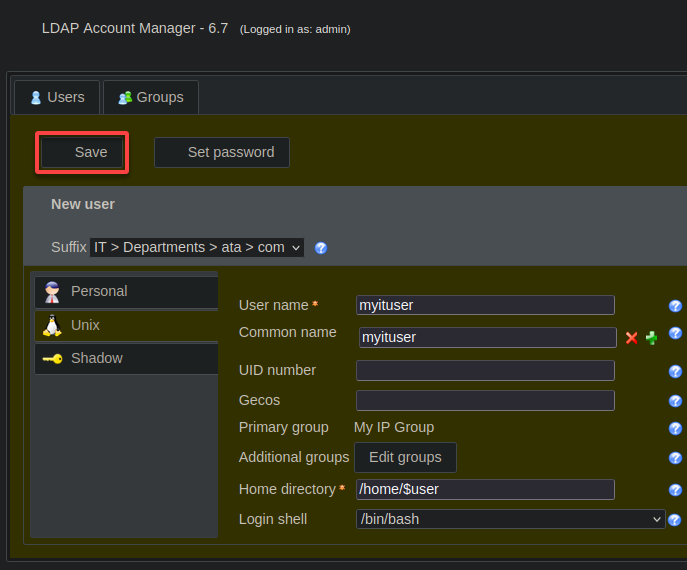
11. Subsequently, set the user’s Personal information as follows:
- Select IT > Departments > ata > com from the Suffix dropdown to place the user in the IT department.
- Under the Personal tab (left pane), input myituser (arbitrary) in the Last name field.
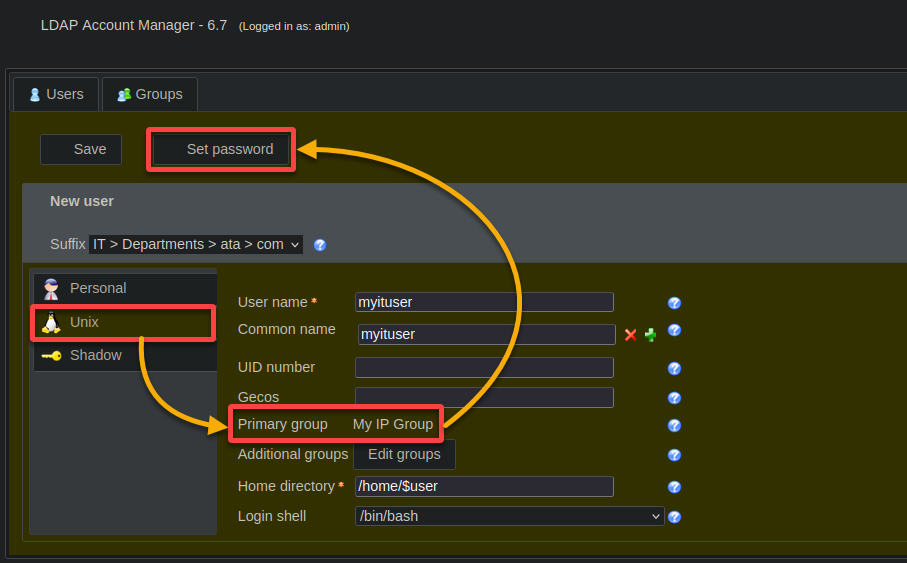
12. Configure the new user’s credentials with the following:
- Navigate to the Unix tab (left pane), and ensure the newly created group’s name (i.e., My IP Group) is set as the Primary Group.
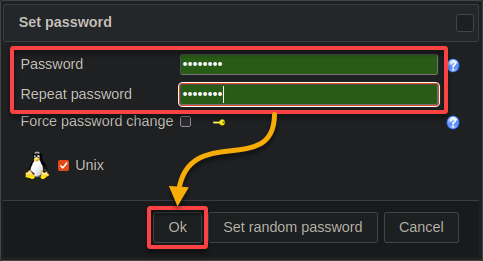
- Click Set password, which opens a dialog box where you will set a password for the new user (step 13).
13. Provide a secure password for the new user, and click OK to confirm.
14. Keep other settings as is, and click Save to finalize the creation of the new user account.
15. Revisit the Tree view to see the updated structure with the new department (IT), group (My IP Group), and user account (myituser) included.

Installing and Configuring the OpenLDAP Client
Now that you have a great server setup, you need a way to interact with it by installing and configuring the OpenLDAP client. Setting up this client is essential for enabling centralized authentication and resource access across your network.
Integrating your Ubuntu system with the LDAP directory server establishes a unified authentication mechanism, enhancing security and simplifying user management.
To install and configure the OpenLDAP client, follow these steps:
1. Execute the following sh command to add the OpenLDAP server’s hostname and IP address to your client machine to the /etc/hosts file, allowing hostname-based communication.
Remember to replace 192.168.1.7 and ldap.ata.com with your server’s IP address and hostname.
sudo sh -c 'echo "192.168.1.7 ldap.ata.com" >> /etc/hosts'
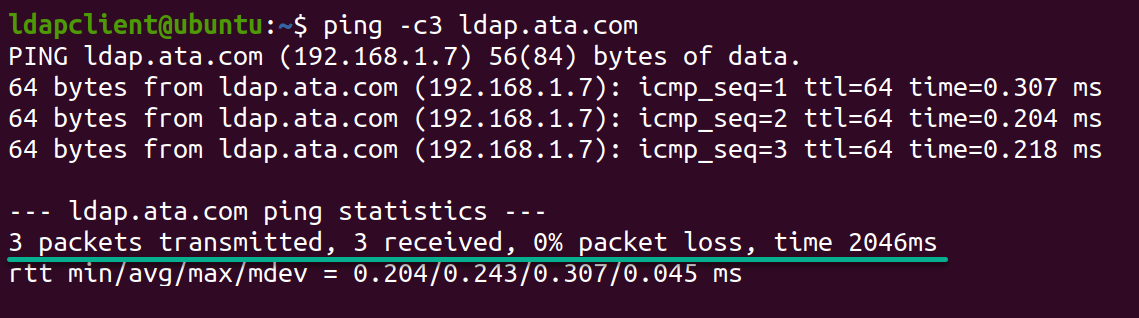
2. Once added, run the below ping command to check the connectivity between your system and your OpenLDAP server (ldap.ata.com).
ping -c3 ldap.ata.comThe output below confirms the client machine can successfully communicate with the OpenLDAP server using the specified IP address and hostname.
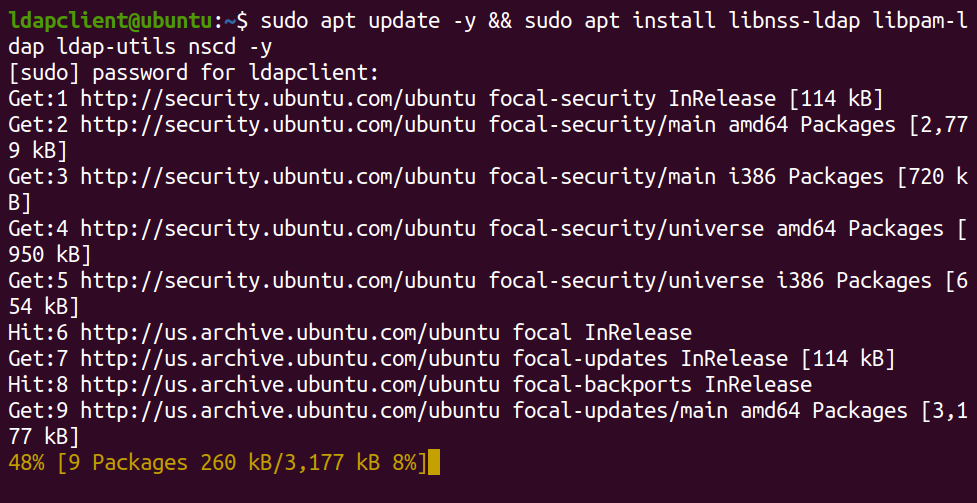
3. Next, run the command below to update your package lists and install the following necessary OpenLDAP client packages:
libnss-ldap– Enables your system to use LDAP for common configuration databases.libpam-ldap– Allows system authentication against LDAP directories.ldap-utils– Provides command-line tools for managing LDAP directory entries.nscd– Caches NSS lookups, improving performance by reducing LDAP server queries.
sudo apt update && sudo apt install libnss-ldap libpam-ldap ldap-utils nscd -yDuring installation, you will get a series of prompts to configure the OpenLDAP client (step four).
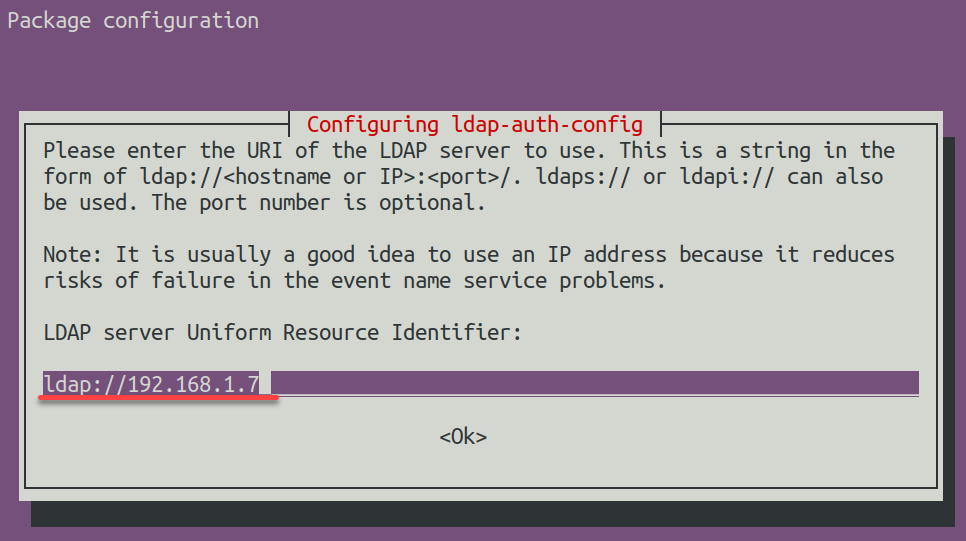
4. Now, enter ldap://192.168.1.7 in the LDAP server Uniform Resource Identifier field, which directs the client to your OpenLDAP server.
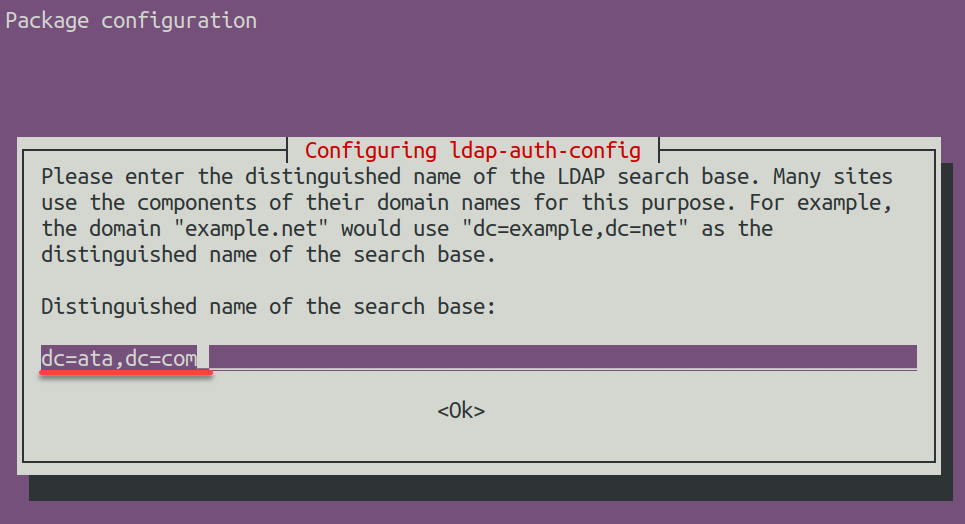
5. Input the DN of the search base (i.e., dc=ata,dc=com) for LDAP operations.
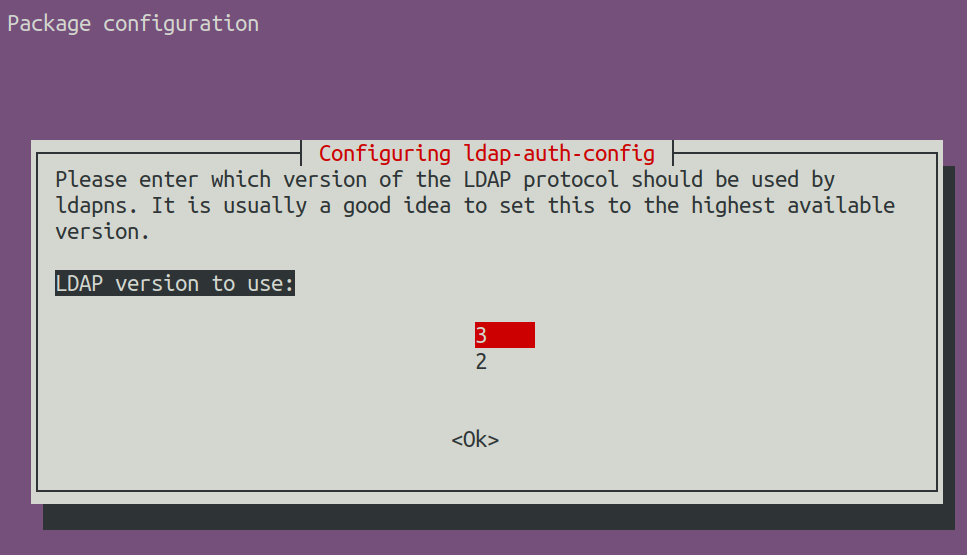
6. Choose 3 for the LDAP version to use for enhanced security and features
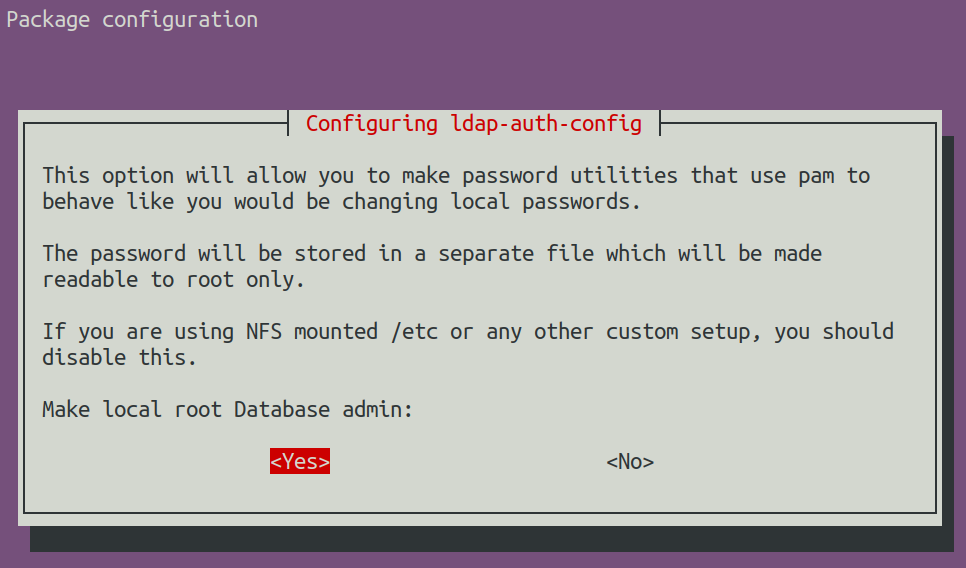
7. Next, select Yes to give the root user database admin privileges.
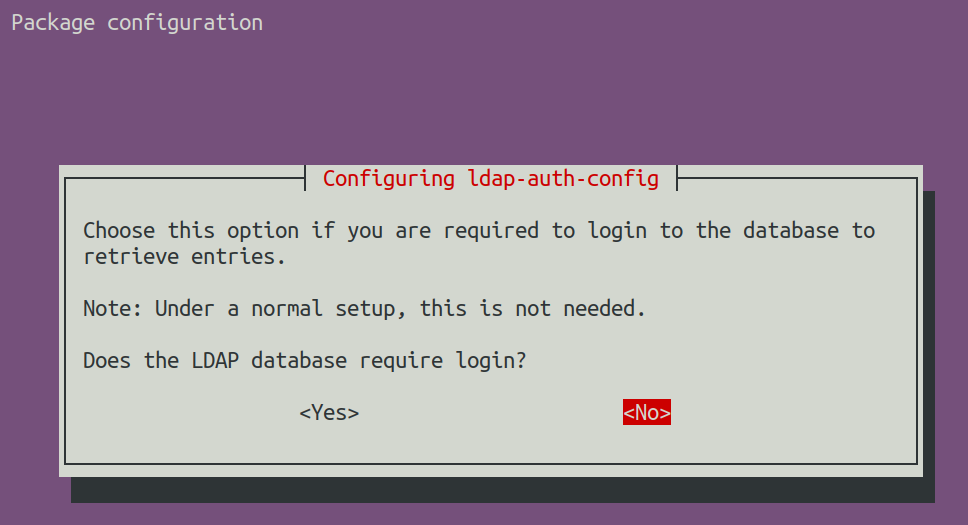
8. Afterward, choose No for root account management to disable the LDAP database login.
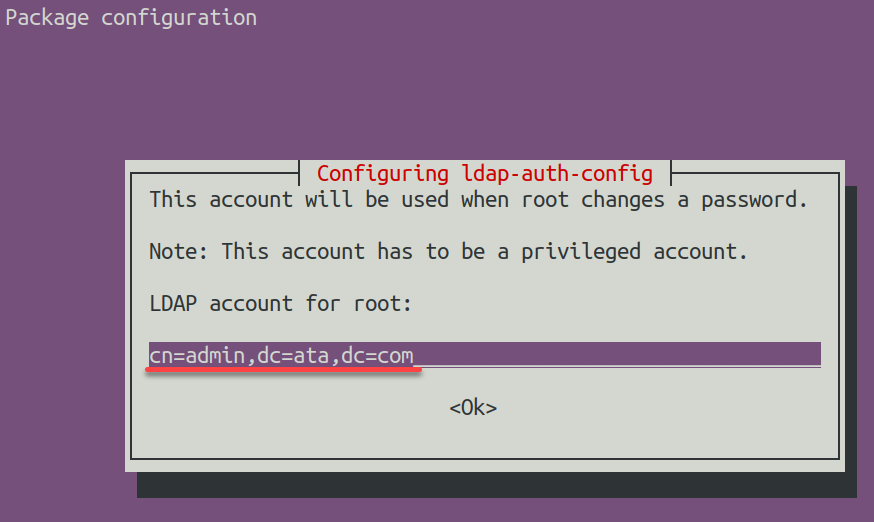
9. Input the LDAP account for root (i.e., cn=admin,dc=ata,dc=com). This configuration specifies the admin account for managing LDAP.
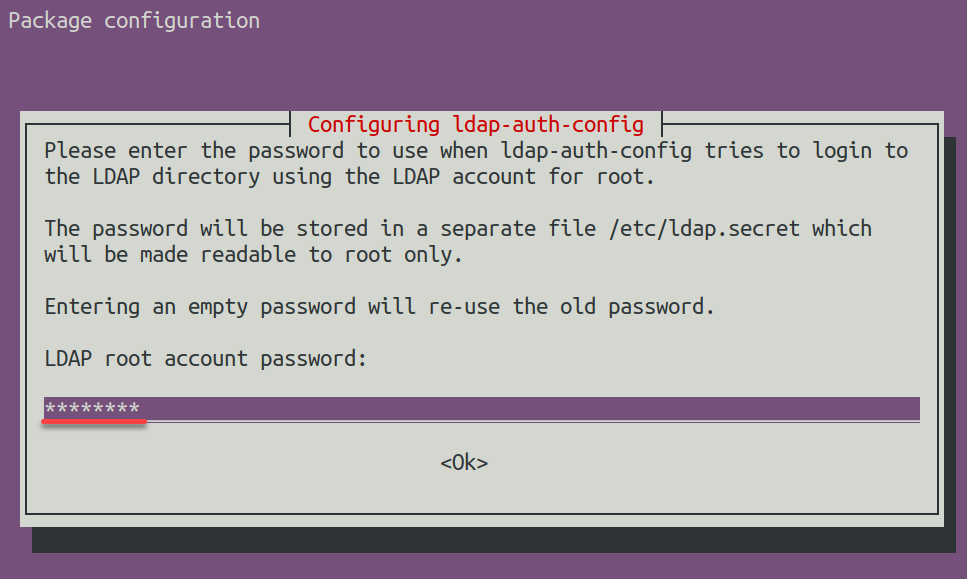
10. Provide a strong LDAP root account password (admin password).
11. After the client configuration, open the /etc/nsswitch.conf file in your preferred editor (i.e., nano or vim) to configure your system’s name service switch.
This file decides the pecking order for where the system looks up stuff like user accounts, groups, hosts, and services.
12. Change the value of the following lines in the /etc/nsswitch.conf file to include the following:
compat – Refers to local files like /etc/passwd.
ldap – Specifies the use of LDAP.
This configuration allows the use of LDAP user authentication and other system functions
passwd:         compat systemd ldap
group:          compat systemd ldap
shadow:         compat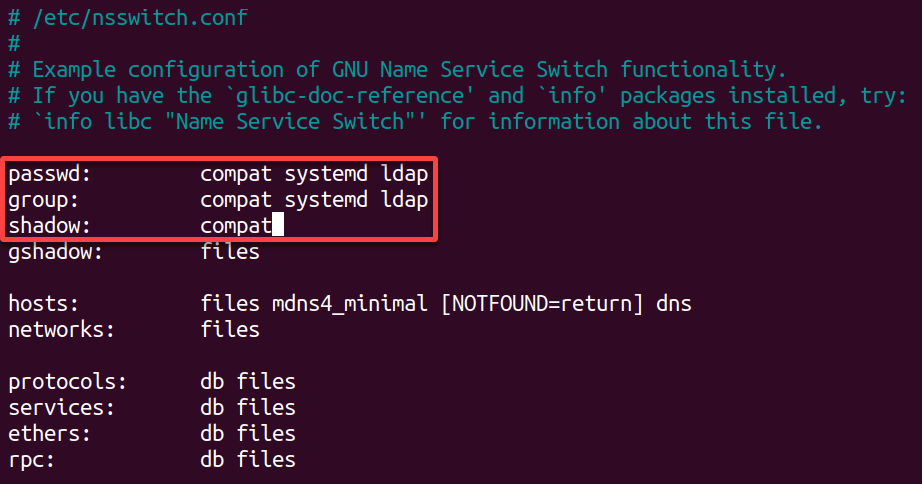
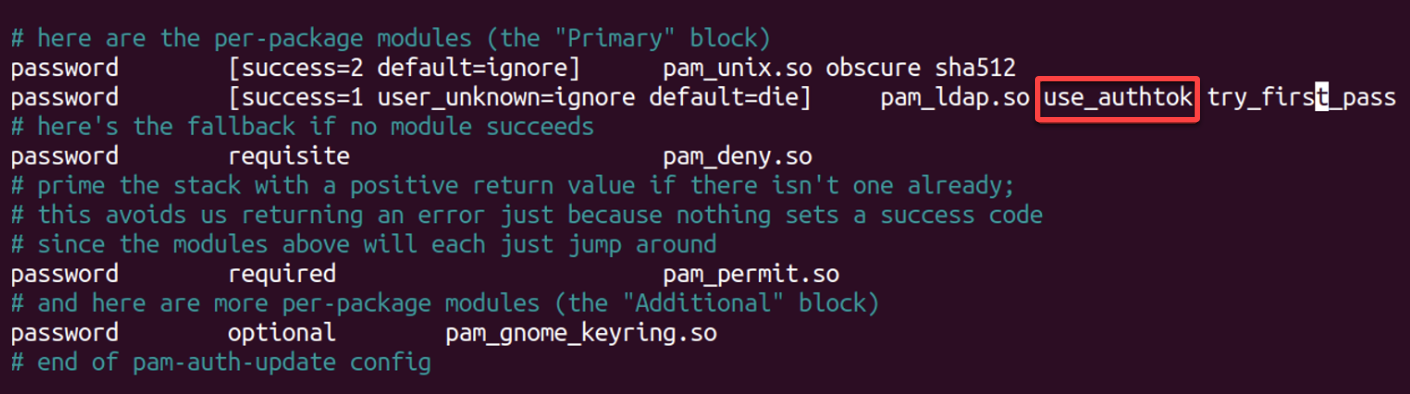
13. Now, open the /etc/pam.d/common-password file, locate and remove the use_authtok option, as highlighted below, save the changes, and close the file.
This action lets you adjust the PAM password settings to use the password provided by the user.
14. Additionally, open the /etc/pam.d/common-session file, add the following line and save and close the file.
Upon user login, this configuration adds automatic home directory creation to ensure user home directories are created with proper permissions.
session optional pam_mkhomedir.so skel=/etc/skel umask=077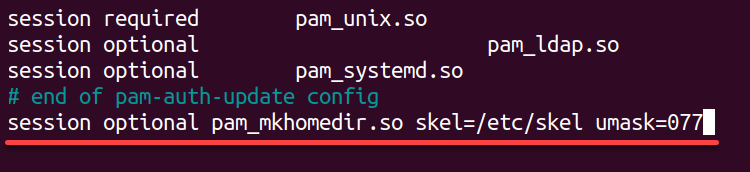
15. Lastly, run the command below to restart the Name Service Cache Daemon (nscd) and apply the configuration changes.
sudo systemctl restart nscdChecking Your OpenLDAP Setup
With everything in place, you must ensure your OpenLDAP server and client configurations work as expected. You will test to confirm your LDAP directory is accessible, that users can authenticate successfully, and that data is being retrieved and updated correctly.
To ensure the integrity and functionality of your OpenLDAP server and client setup, perform the following:
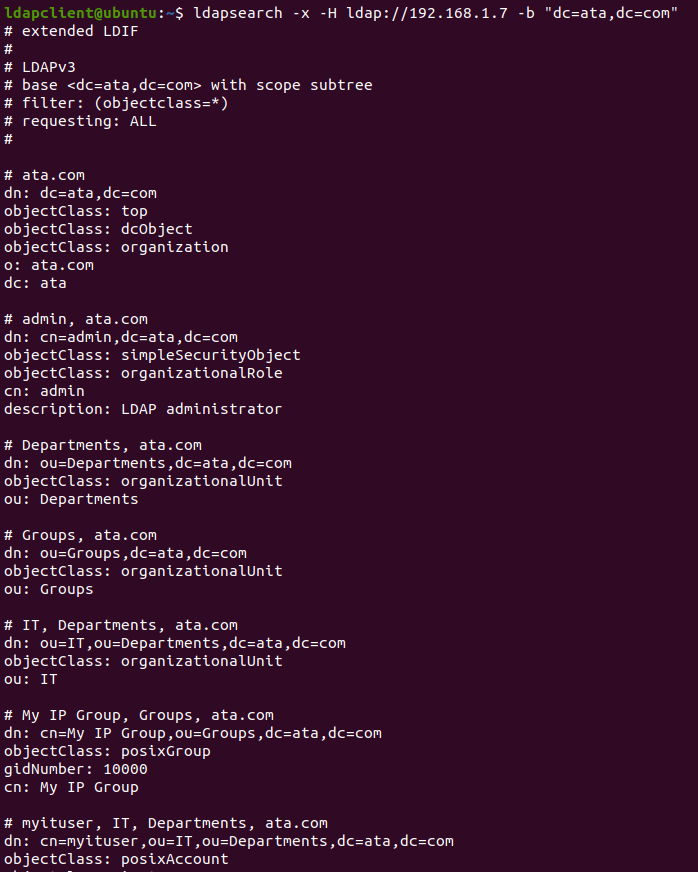
Execute the following ldapsearch command to query your LDAP directory for all user accounts.
ldapsearch -x -H ldap://192.168.1.7 -b "dc=ata,dc=com"You will see an output that looks something like the following, listing out the details of each user. This output tells that the OpenLDAP server responds correctly to your search queries.
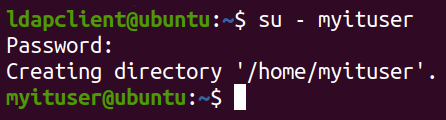
Finally, attempt to log in (su) to the myituser user account.
su - myituserSuccessful login indicates that the authentication against the OpenLDAP server is working as expected.
💡 A successful login message may not always be shown; instead, you might be just logged in and presented with a new command prompt, as shown below. If there are any errors, they will be displayed, and you will remain logged in as the current user.
Conclusion
You have done it! Your Ubuntu server now has a fully operational OpenLDAP system with a secure firewall, a PHP-enabled web server, and a sleek LDAP Account Manager interface.
Groups and user accounts are set, and your OpenLDAP client is ready to connect. Thus, you can be confident in your server’s performance.
Now, take some time to browse the comprehensive official document page of OpenLDAP, packed with valuable tips and tricks. Also, why not consider learning how to backup and restore your OpenLDAP server to ensure the safety of your user accounts and configurations?


