


Imagine you’re knee-deep in your Linux system, desperately trying to edit a file, and every attempt feels like deciphering an ancient code. If the more you click around, the more lost you become, why not turn to Vim for Linux?
In this tutorial, you’ll unravel the secrets of Vim, a widely acclaimed text editor, transforming you from a Linux wanderer into a command-line virtuoso.
Grab your metaphorical sword (aka your keyboard) and journey into the world of Vim!
Prerequisites
Below are a few prerequisites to set the stage for mastering Vim on your Linux system:
- A Linux OS – This tutorial uses an Ubuntu 22.04 LTS.
- Vim installed on your machine – see the official documentation on how to install Vim.
Creating and Editing Files with Vim for Linux
Vim operates in different modes, each offering unique editing capabilities. But before jumping to those modes, you first need to learn how to create and edit files with Vim on Linux.
To create and edit a file with Vim, follow these steps:
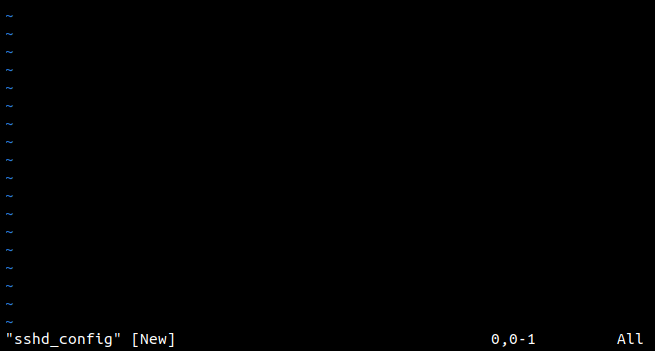
1. Open a terminal and execute the following vim command to create a file called sshd_config (arbitrary) with Vim. This command automatically creates the file if it doesn’t exist. Otherwise, the existing file opens on Vim.
Vim’s interface looks like the one below if you created a new file, which signifies Vim is currently in command mode. The command mode is one of the primary modes in which you interact with the text in the Vim editor.
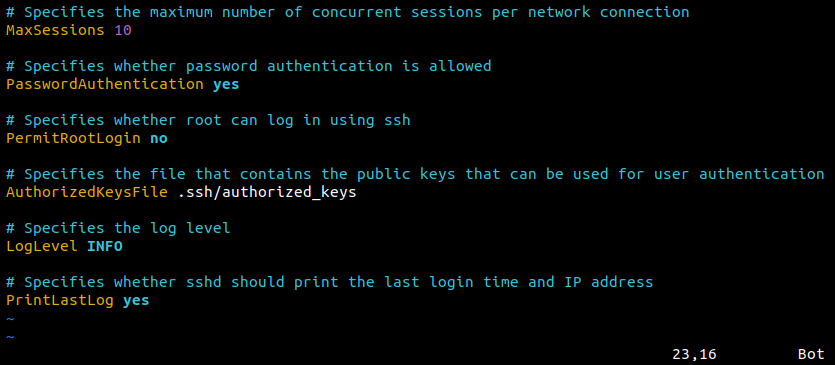
2. Next, copy the text below to your clipboard, which contains sample SSH server settings purely for demonstration and doesn’t reflect actual server configurations.
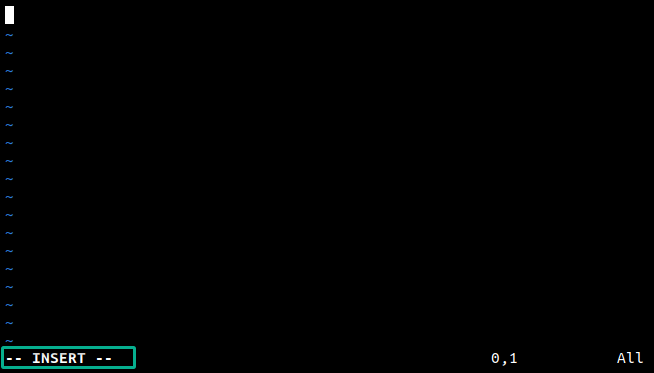
3. On Vim, press i, the command to enter the insert mode. The insert mode is also one of the primary modes in Vim, which lets you type and modify the content of your document.
Once you enter the insert mode, you’ll see the status line displays — INSERT — like in the following.
4. Now, press Ctrl+Shift+V or Shift+Insert to paste the text you copied in step two to the Vim editor, and press Esc to exit the insert mode (switches to command mode).
Notice that the — INSERT — status disappears, which signifies you’re back in the command mode.
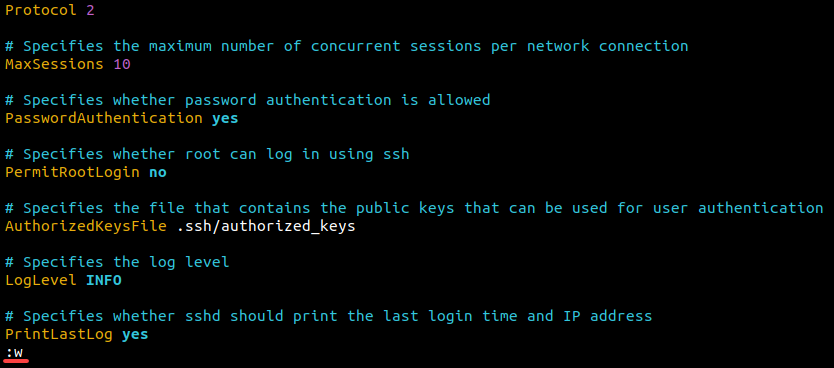
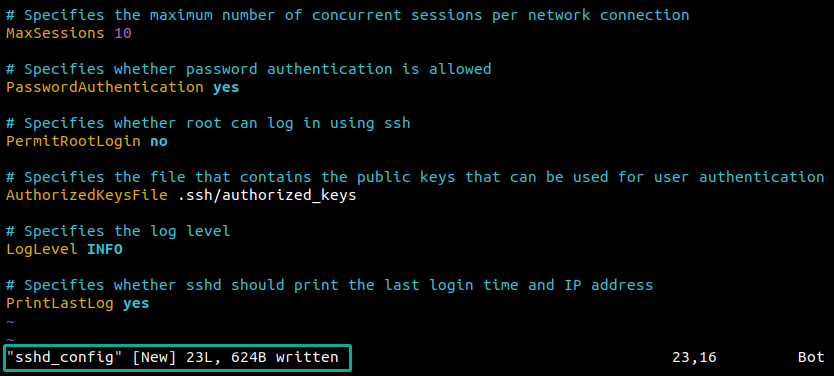
5. Lastly, type the :w command and press Enter to save the changes to the file without closing the editor.
When necessary, you can execute the other commands below:
| Command | Details |
|---|---|
:q! | Quit the editor without saving the changes. |
:w! | Write the current file changes forcefully. |
:wq | Save the changes and quit the editor (or :wq! to save and quit forcefully). |
e! | Revert to the last saved version of the file. |
The status line displays the data size written to the file, which, in this case, is 23 lines (23L) and 624 Bytes (624B).
Navigating Through Texts in Vim
After grasping the art of creating and editing files with Vim, you’ll delve into a crucial skill that will elevate your text-editing prowess — navigating Vim. Effective navigation is the key to unlocking Vim’s potential, like exploring a vast landscape.
To see how to navigate through texts in Vim, proceed with the following:
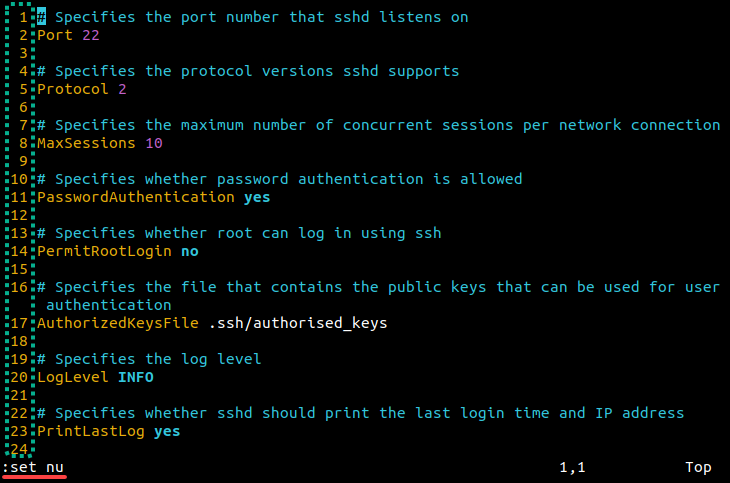
1. Now, type in the :set nu command and press Enter to set the line numbering on Vim. Line numbering is a crucial editor feature when dealing with code or large documents.
If successful, you’ll see the line numbers in the editor, as shown below.
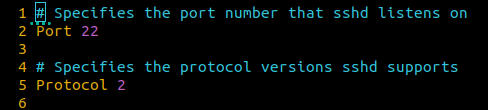
2. Next, switch to the command mode (Esc) and press the gg command to jump to the beginning of the file.
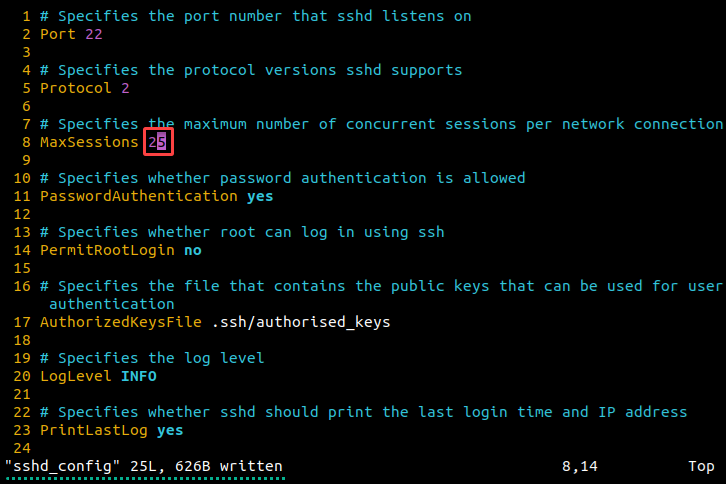
3. Next, press any of the following commands until you reach the beginning of the MaxSessions parameter, and press $ to move the cursor to the end of the line.
| Command | Details |
|---|---|
h | Move the cursor to the left or the previous character. |
j | Move the cursor one line down. |
k | Move the cursor one line up. |
l | Move the cursor to the right or the next character. |
4. Now, replace a text with the following:
- Press
ito switch to insert mode. - Delete the value (Backspace or Delete), which is 10, and replace it with 25.
- Switch to the command mode (
Esc) and save the changes (:w).
Inserting Texts at Specific Points
Vim offers a range of commands that allow precise control over where and how you insert new texts (exactly where you need them). This function works whether you wish to insert at the beginning of a line, right after the current cursor position, or at the end of a line.
To see how inserting texts at specific points works, carry out the following:
1. Press I (Shift+I) while the cursor is at the line’s end to enter the insert mode and simultaneously point the cursor at the beginning of the line.

2. Switch to the command mode (Esc), move the cursor to any other character in the current line of text (i.e., at the beginning), and press the a command.
This command switches Vim to insert mode and places the cursor on the next character from its previous position. This behavior is handy for quickly adding text in the middle of a line without disturbing the existing text.

3. Insert ‘y’ to spell the MaxSession key as MyaxSession, as shown below, and return to command mode (Esc).
You’ll notice that the new character ‘y’ appears immediately after the first one.

4. Now, modify the line of text as follows:
- Press Shift+A to execute the
Acommand, which lets Vim enter the insert mode and move the cursor to the end of the line. This behavior is ideal for quickly adding content like a semicolon or finishing a sentence. - Append 0 at the end of the line, which changes the value to 250.
- Return to the command mode (
Esc), and save the changes (:w).

Opening New Lines
Now that you’ve mastered strategically placing text within your Vim files, it’s time to explore a skill that will keep your content well-structured and organized. The ability to open new lines in Vim is your ticket to a more readable and aesthetically pleasing text.
To open new lines, above or below, complete the steps below:
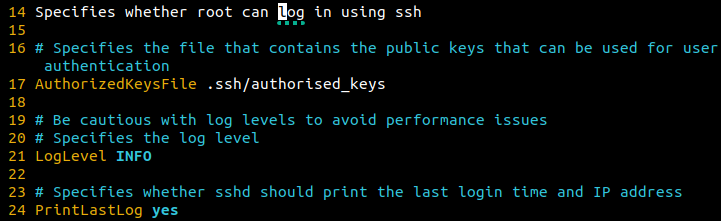
1. While in the command mode, press o to open a new line below the current line of text and add the following comment about the MyaxSessions.
# Note: Adjust maxSessions as per server load
2. Switch to the command mode (Esc), point the cursor to another line of text, and press O (Shift+O) to add a new line above the current line of text.
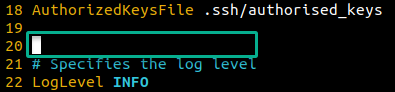
3. Now, add the following command to the file and save the changes (:w).
# Be cautious with log levels to avoid performance issues
Deleting Words and Lines of Texts
Vim provides efficient commands for deleting and replacing text beyond basic Delete or Backspace keys. These commands are accessible from the command mode, which enables you to quickly make modifications and corrections, allowing you to delete or replace characters, words, or entire lines.
To delete and replace texts in Vim for Linux, execute the following:
1. Move your cursor to the MyaxSessions parameter, specifically at the ‘y’ character.

2. Next, press x to instantly remove the character under the cursor, which, in this case, is ‘y’.
The parameter is back to its original text as MaxSessions, as shown below.

3. Move your cursor to the line PermitRootLogin no:.

4. Now, press "_dd to delete the entire line of text, regardless of the cursor position.
The "_ part in the command specifies the black-hole register, which discards the deleted text (it won’t be stored in any register).
Vim has its own set of registers where you can store texts, and not specifying the black-hole register makes the command cut the text instead of deleting it.
If successful, you’ll notice the PermitRootLogin no: line is gone.

5. While in the command mode, place your cursor at the beginning of the word Specifies in the line # Specifies whether root can log in using ssh.

6. Lastly, execute the "_dw command, which removes the word Specifies as shown below:

Optionally, you can opt with the following commands for additional deletion operations:
| Command | Details |
|---|---|
"_d$ | Delete texts from the cursor position to the end of the line. |
"_D | Deletes from the cursor position to the end of the line. |
"_d^ | Deletes from the cursor position to the first non-whitespace character of the line |
"_dgg | Deletes from the cursor position to the beginning of the file. |
"_dG | Deletes from the cursor position to the end of the file. |
Replacing Characters and Lines of Text
From strategic deletions in Vim, turn your attention to the flip side of the coin — replacing characters and lines of text. Replacing is the brushstroke that allows you to refine and redefine your text precisely. The good news is that Vim lets you perform one-off character replacements or entire lines of text.
To replace characters and lines of text, continue with these tasks:
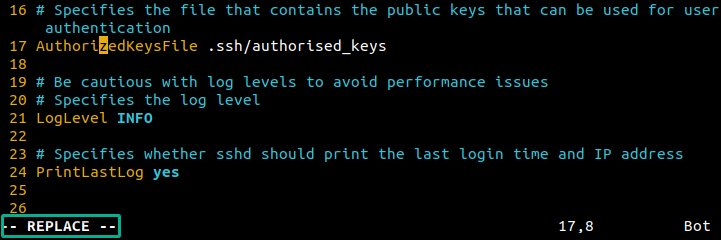
1. Position your cursor on the line AuthorizedKeysFile .ssh/authorized_keys, specifically the ‘z’ character in authorized, as shown below:

2. Once positioned, press r, which tells Vim you’re about to replace the character under the cursor and input the ‘s’ character. The r command lets you replace a character without entering the insert mode (i) first.
Notice that the ‘z’ character in authorized has been replaced with the ‘s’ character, changing the word to authorised.

3. Next, place your cursor at the character ’z‘ in AuthorizeKeysFile.

4. Press R (Shift+R ) to enter replace mode, type in ‘s’ to replace the character, but don’t exit the replace mode yet.
Unlike the r command, which only lets you replace one character, the R command allows you to overwrite existing texts as you type continuously.
5. Ultimately, copy the following text to the clipboard, move your cursor to the beginning of the file, and paste the text you copied (Ctrl+Shift+V or Shift+Insert).
Since you’re still in replace mode, pasting the text replaces the first line in the file.
Searching Texts Within a File
Involved in redoing or undoing actions, the skill to search texts within a file comes in handy. Vim lets you search for specific words, phrases, or patterns in your file.
Imagine the sheer productivity boost when you can swiftly locate and manipulate specific text sections without aimlessly scrolling.
To search for texts with a file, fulfill these steps:
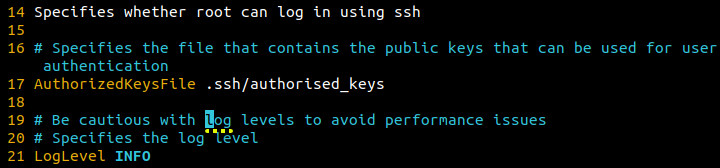
1. Move your cursor to the beginning of the file (gg command), press / (forward slash) to start the search mode, type the search term log, and press Enter.
This command searches for the term you specified (log), moving the cursor forward to the next occurrence of the term.

2. Next, press n to move to the next occurrence of the term.
3. Now, press N (Shift+N) to return to the previous occurrence.

Additionally, Vim offers other search shortcuts like the following for more search flexibility:
| Command | Details |
|---|---|
? | Initiates a reverse search of a term. |
* | Performs a forward search for the word under the cursor. Continue pressing * to cycle through further occurrences of the word until it loops back to the first instance. |
# | Performs a backward search for the word under the cursor. Continuously pressing # works similarly to the * command but cycles until it loops back to the last instance. |
Combining Search with Other Commands on Vim
As you navigate the intricate landscapes of Vim, why not add another layer to your text-editing mastery — combining search with other commands?
Vim lets you perform actions from replacing specific occurrences to deleting lines that match a pattern.
To witness the synergy between search and action in Vim, execute the following:
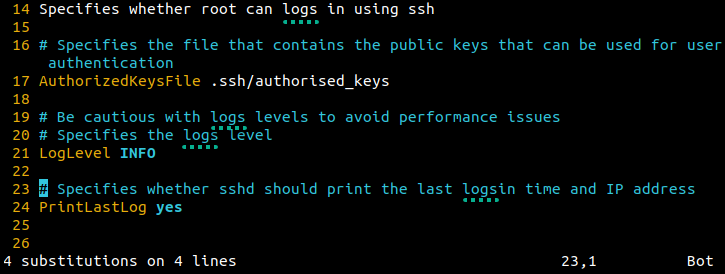
1. While in command mode, place the cursor at the starting point from where you want to begin the deletion (i.e., the first occurrence of the search term log).
2. Next, type d/log and press Enter to delete everything from the cursor’s position to the next occurrence of the term log, as shown below.

3. Undo the previous action (u command), and place the cursor at the first instance of the search term log.

4. Now, execute the below command to search and replace texts within a specific range, where:
:.– Enters the command mode (:) at the current line (.).,$– Specifies the range for the substitution.s/log/logs/g– Substitute all occurrences of the old word (log) with new (logs) globally (g) within the specified range.
Selecting Texts While in Visual Mode in Vim
Besides blending the art of search with other commands in Vim, you must unveil a feature that transforms your text-editing experience. Vim’s visual mode allows you to manipulate text more interactively and visually. The visual mode provides a flexible and efficient method for highlighting and operating on portions of your text.
To select and edit text, you can choose to select and edit individual characters or select and edit blocks of text, as follows:
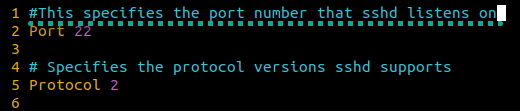
1. Move your cursor to the beginning of the file (gg command), and press v to activate the visual mode, as shown below.
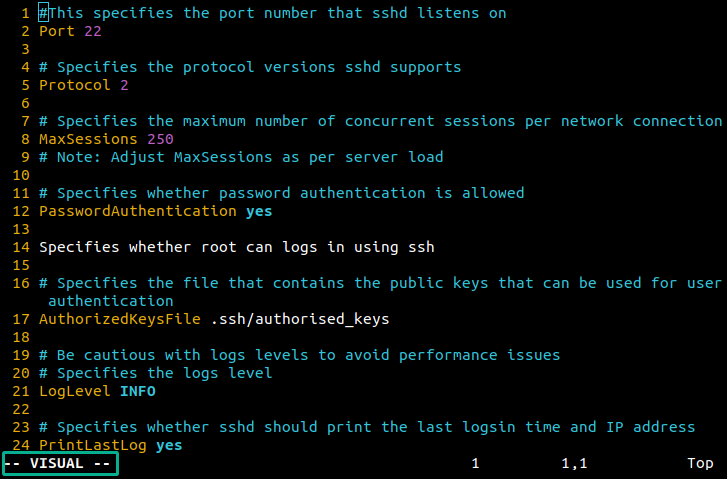
2. Press $ to move your cursor to the end of the line. Since you’re in the visual mode, the command highlights the line of text.

3. Now, perform a copy-and-paste action as follows:
- Press
yto copy the highlighted text to Vim’s register. - Press
G$to move the cursor to the end of the last line in the file. - Press
pto paste the text you copied (specifically after the cursor).
Note that thepcommand differs from the shortcut keys in pasting texts (Ctrl+Shift+V or Shift+Insert). As you copy the text with theycommand, the text is stored in Vim’s register, and thepcommand pastes the text from the register.


4. Undo (u) your previous action, move the cursor to the beginning of the file (gg), and press V (Ctrl+V) to enter the visual line mode.
Unlike selecting a single line in the visual mode, the visual line mode lets you select multiple lines of text, which you’ll see in the following step.
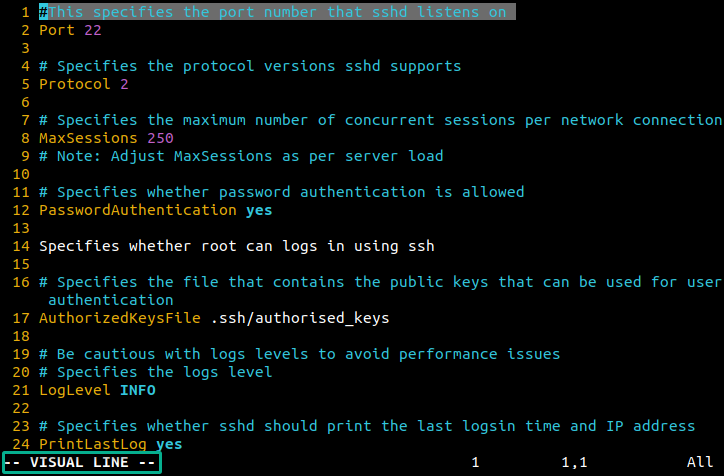
5. Use your down arrow key to select the characters from the beginning of the file down to the Protocol 2 line.

6. Press d to cut the selected multiple lines of text.

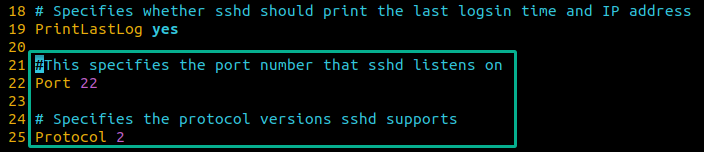
7. Finally, paste the text you cut in step six as follows:
- Move to the last line in the file (
G), and create a new line below (o). - Return to command mode (
Esc), and paste the text (p).
Conclusion
Congratulations! You’ve navigated the intricate realms of Vim for Linux, unlocking a treasure trove of text-editing wisdom along the way. From creating and editing files to mastering the art of visual mode, you’ve donned the hat of a Vim virtuoso.
But your command-line adventures have only just begun. Why not explore advanced features like macros and plugins to tailor Vim to your needs?
Use these foundational skills to explore deeper aspects of Vim, such as file management, complex search patterns, and Vim scripting for personalization.


