

Are you an SQL Server fan who wants to deploy on a Linux server? You are in the right place! You can now install Microsoft SQL (MSSQL) Server on Linux systems. Moreover, MSSQL on Linux now uses the same SQL Server database engine with similar features.
This tutorial will walk you through installing an MS SQL Server and SQL Tools on Ubuntu Linux and performing basic operations on SQL Server.
Stay tuned and say hello to seamless management with MSSQL on Linux!
Prerequisites
Before jumping into the installation, make sure you are equipped with the following requirements:
- An Ubuntu 22.04 server.
- A non-root user with root administrator privileges.
- (Optional) – A Windows client (with SQL Server Management Studio (SSMS) installed) for testing remote access to the Microsoft SQL Server.
Installing the MSSQL Linux Server
You have gathered all the necessary elements, and now it is time to put them into action by setting up your MSSQL Linux Server. MSSQL Server is a Relational Database Management System (RDBMS) developed by Microsoft, which now also supports Linux.
From downloading the necessary packages to configuring the server settings, you will cover everything you need to get started with an MSSQL Server on Linux. But for a start, you first need to install MSSQL Server on your Linux machine.
To install MS SQL Server on Ubuntu Linux, carry out the following:
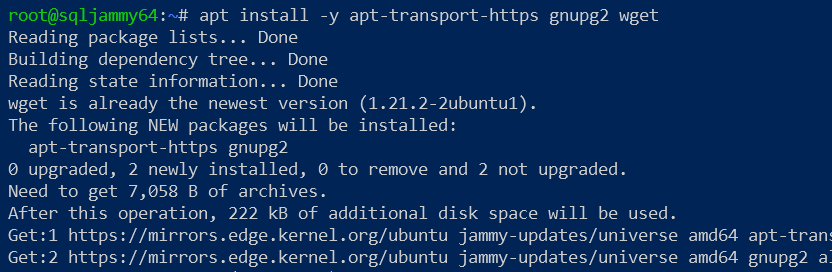
1. Open a terminal, and run the apt install command below to install the packages below:
apt-transport-https– This package allows the Advanced Package Tool (APT) to handle repositories accessed via the HTTPS protocol. By installingapt-transport-https, you enable APT to download and install packages from repositories that use HTTPS securely.gnupg2– GNU Privacy Guard (GNUPG) is a secure communication and data storage tool. In this context, installinggnupg2is likely for package verification purposes. GNUPG is commonly used to verify the authenticity and integrity of packages and repositories.wget– A command-line utility that lets you download files from the web. For example, you can usewgetto download files necessary for configuring repositories or downloading packages directly.
These packages provide the tools and protocols for securely obtaining and verifying packages from repositories.
apt install -y apt-transport-https gnupg2 wget💡 This tutorial uses the root account to avoid conflicts with existing configurations for demonstration purposes. But for security reasons, ensure you employ a non-root user with
sudoprivileges when performing similar actions on your system.
2. Now, run each command below to enable access to the Microsoft SQL Server 2022
💡 Microsoft provides an official repository for multiple Linux distributions, such as Debian, Ubuntu, and RHEL.
# Downloads and imports the GPG key for the MS SQL Server repository.
wget -qO- <https://packages.microsoft.com/keys/microsoft.asc> | gpg --dearmor > /etc/apt/trusted.gpg.d/microsoft.gpg
# Adds the MS SQL Server 2022 repository, stored at */etc/apt/sources.list.d/mssql-server-2022.list*
# Only for Ubuntu 22.04 jammy.
sh -c 'echo "deb [arch=amd64,armhf,arm64 signed-by=/etc/apt/trusted.gpg.d/microsoft.gpg] <https://packages.microsoft.com/ubuntu/22.04/mssql-server-2022> jammy main" > /etc/apt/sources.list.d/mssql-server-2022.list'
3. Next, run the following apt update command to refresh the Ubuntu package index.
apt update
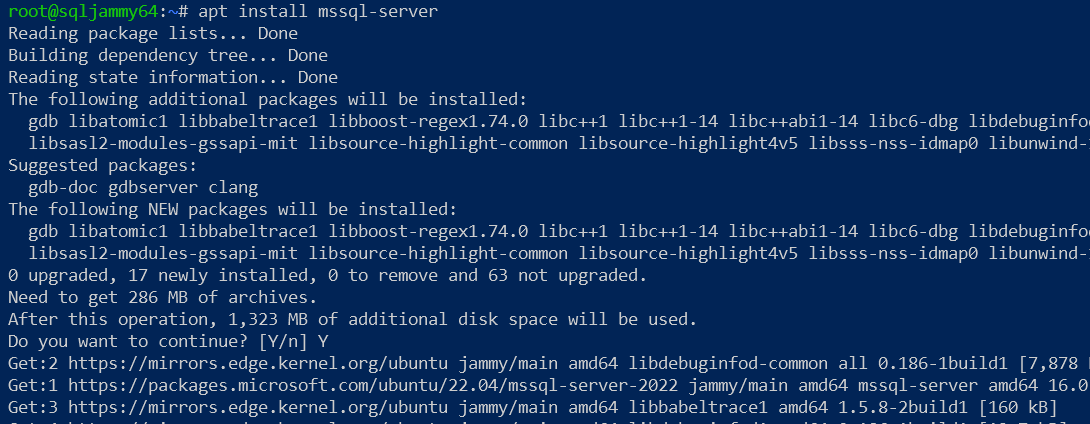
4. Lastly, execute the following command to install the mssql-server package.
apt install mssql-serverWhen prompted, enter y and hit Enter to proceed with the installation.
At this time of writing, Microsoft SQL Server 2022 is the latest stable version, which you can install on Ubuntu 22.04 LTS.
Fine-Tuning Your MSSQL Server Configurations
With the MSSQL Server installed, continue laying the foundation for your SQL Server on Linux by tailoring your MSSQL Server configurations (/opt/mssql/bin/mssql-conf).
Configuring your SQL Server involves:
- Selecting the SQL Server edition to install.
- Accepting the license terms.
- Setting up a password for the SQL admin.
To configure MS SQL Server installation, proceed with these steps:
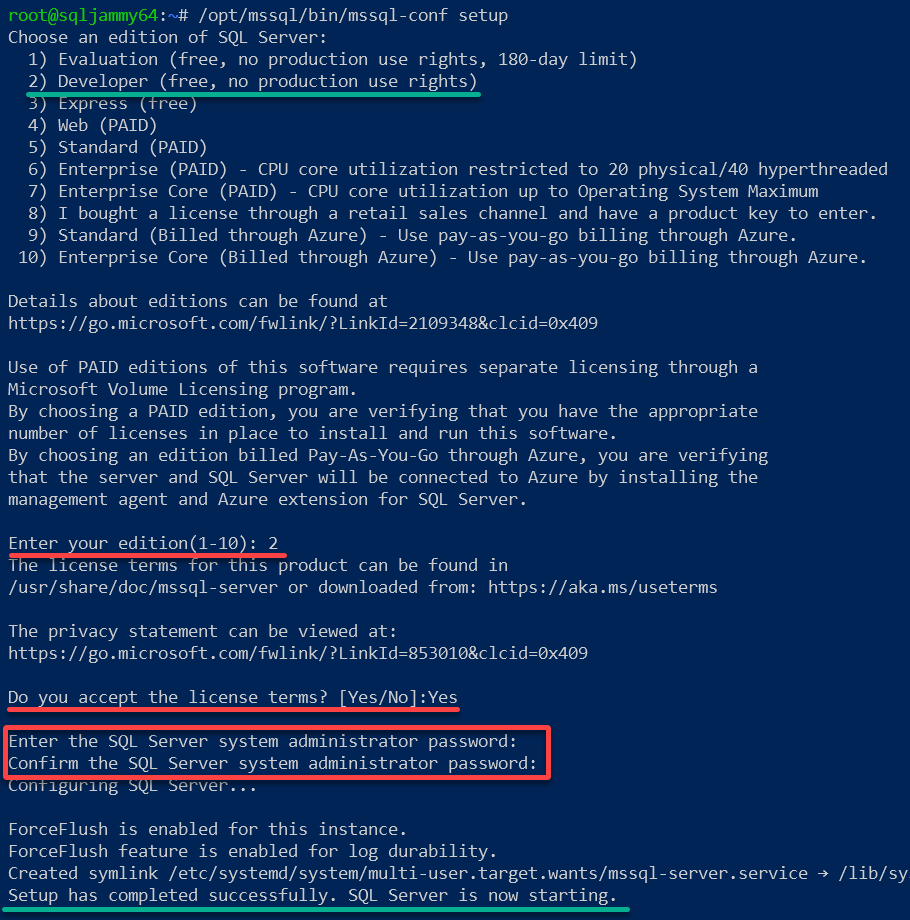
1. Execute the following /opt/mssql/bin/mssql-conf program to configure an MSSQL Server installation.
/opt/mssql/bin/mssql-conf setupConfigure the SQL Server with the following subsequent prompts:
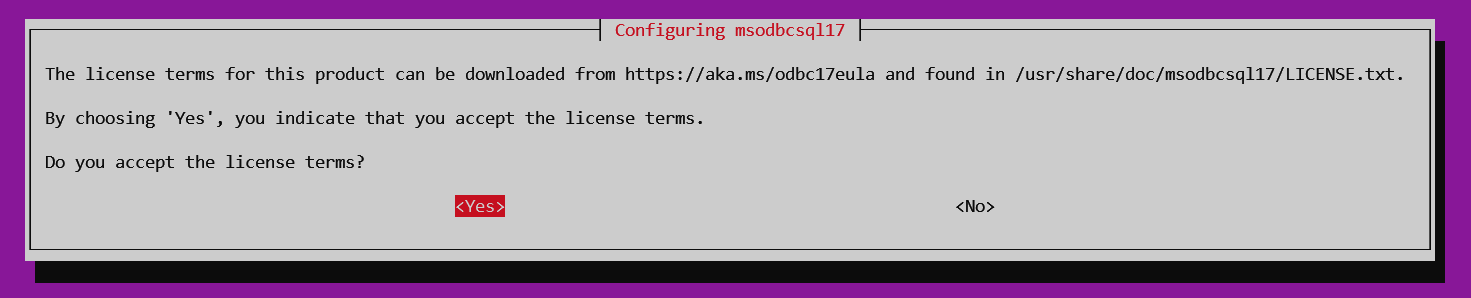
- Input number 2 to select the MSSQL Server Developer edition (free, no production rights).
- Input Yes to accept the license terms.
- Input a new password for the MSSQL Server sa (system administrator).
Once configured, you will get an output saying, “Setup has completed successfully. SQL Server is now starting.“
2. Next, run the systemctl command below to verify your msssql-server is enabled.
systemctl is-enabled mssql-serverThe output below confirms that the mssql-server is enabled, and will start automatically at boot.

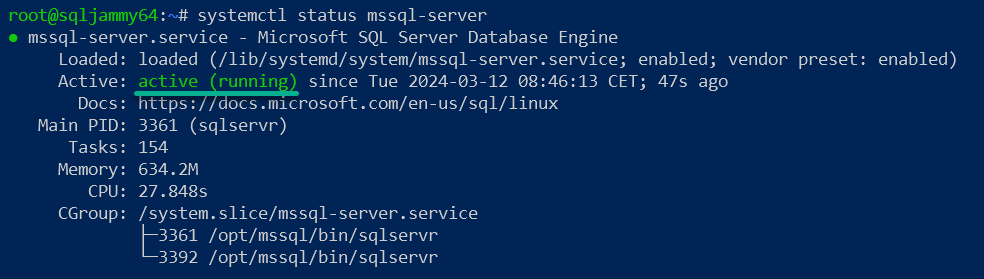
3. Lastly, run the following command to verify the status of the MSSQL Service (mssql-server).
systemctl status mssql-serverAssuming your MSQL Server runs, you will see the status says active (running), as shown below.
Installing MSSQL Tools for Managing Your MSSQL Server
After optimizing your server settings, you must equip your system with the tools to manage and interact with your MSSQL environment effectively. You must ensure access to your MS SQL Server by installing the MS SQL Tools (which comes separately) to your Ubuntu server.
To install and configure MSSQL Tools on Ubuntu, perform these actions:
1. Execute the following curl commands to download the GPG key and add the repository for MS SQL Tools.
# Adding the MS SQL Tools GPG Key
curl https://packages.microsoft.com/keys/microsoft.asc | sudo tee /etc/apt/trusted.gpg.d/microsoft.asc

# Adding the MS SQL Tools repository
curl https://packages.microsoft.com/config/ubuntu/22.04/prod.list | sudo tee /etc/apt/sources.list.d/mssql-release.list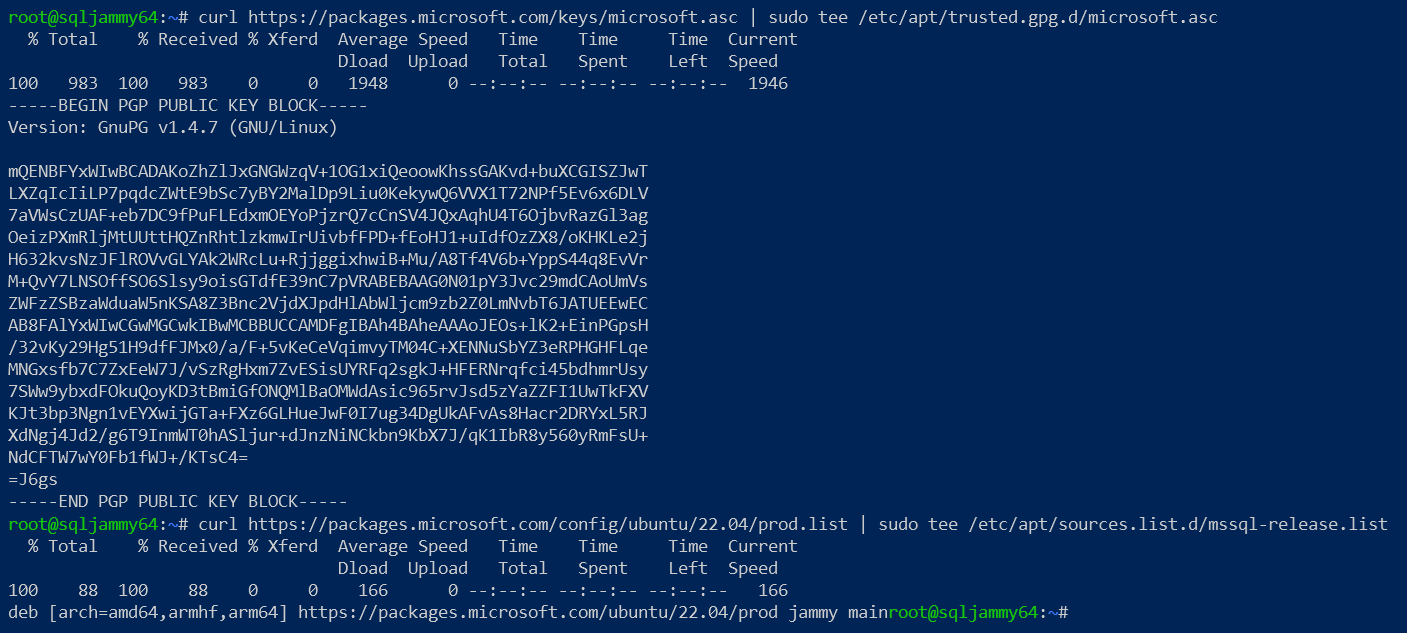
2. Run the below command to update and refresh your Ubuntu package list.
apt update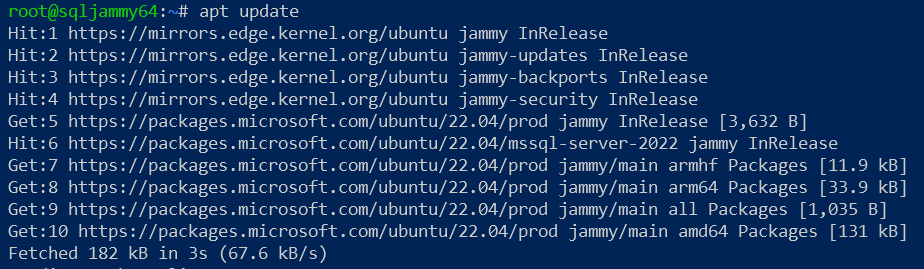
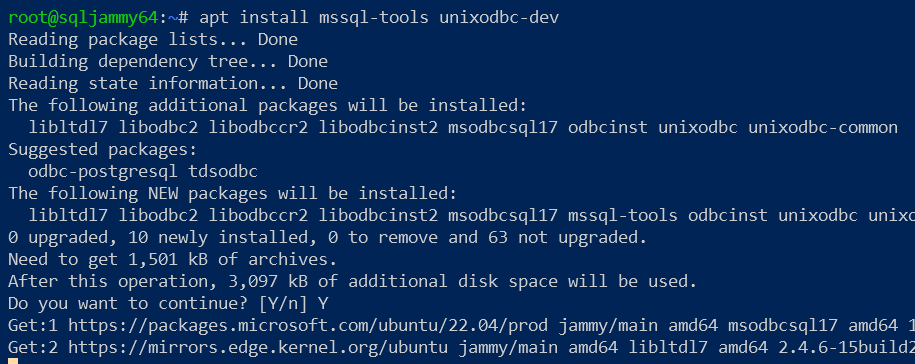
3. Once updated, run the command below to install the following packages:
mssql-tools– This package contains command-line utilities and tools for interacting with MSSQL databases. These tools includesqlcmd(a command-line query utility) andbcp(a bulk copy utility).
Installingmssql-toolsenables you to perform various database administration tasks, such as executing SQL queries, importing and exporting data, and managing database objects.unixodbc-dev– This package includes development files and libraries for UnixODBC, an open-source implementation of the Open Database Connectivity (ODBC) standard for Unix-like operating systems. ODBC is a standardized API for accessing DBMS.
Installingunixodbc-devprovides the necessary development components for building applications that interact with databases via ODBC drivers. Applications often require this package when connecting to MSSQL databases from Linux using ODBC.
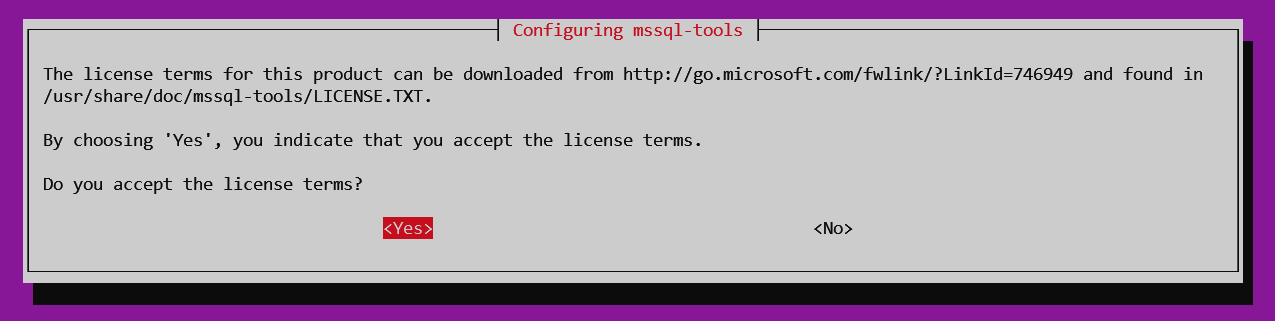
apt install mssql-tools unixodbc-devEnter y and hit Enter to confirm the installation.
3. When prompted, select Yes twice to accept the license terms.
5. Now, open the /etc/environment file with your preferred editor (i.e., nano or vim) and add the MSSQL Tools binary path (/opt/mssql-tools/bin) to the system PATH.
This modification lets you execute MSSQL tools commands without specifying the full path to the executable each time.

6. Next, execute the commands below to load the /etc/environment to the current session and verify the system $PATH environment variable.
# Source the /etc/environment file to apply changes
source /etc/environment

# Print the updated PATH variable to verify changes
echo $PATHThe output below confirms the MS SQL Tool binary path (/opt/mssql-tools/bin) is added to the system PATH. You can now execute sqlcmd and bcp commands without specifying a full binary path.

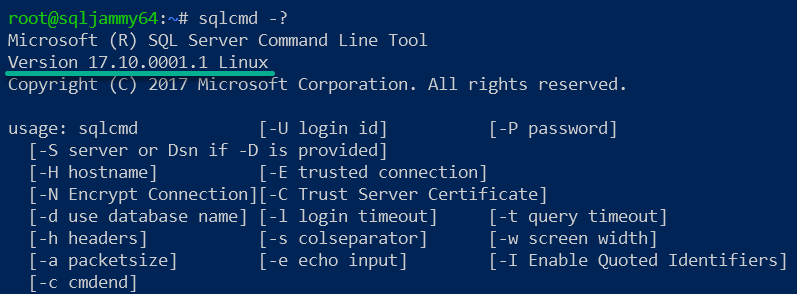
7. Ultimately, execute the sqlcmd command below to access the help documentation for the sqlcmd utility.
sqlcmd -?The following shows the MSSQL Tools Version 17.10.0001.1 Linux is installed.
Connecting to the MSSQL Server
With the MSSQL Tools installed, you can now connect to the MS SQL Server via the command line. You will use the sqlcmd command line to connect and manage databases on your MSSQL Server.
To connect to your MS SQL Server via sqlcmd, execute the following steps:
1. Run the sqlcmd command below, which connects you to your MS SQL Server with the default sa or system administrator user.
Ensure you change the password with the one you set during fine-tuning your MSSQL Server configurations.
sqlcmd -S localhost -U sa -P 'Str0ngP4ssword'Once logged into MS SQL Server, you will see the following prompt.

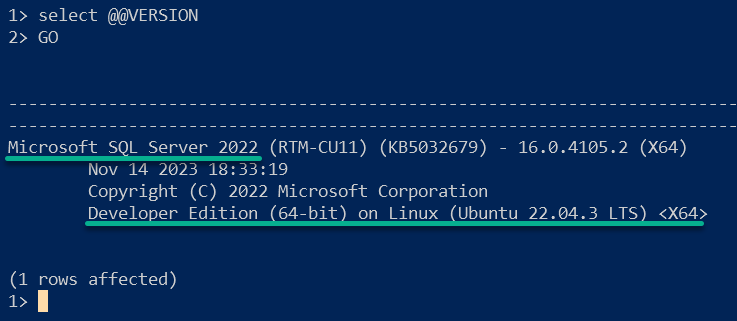
2. Next, run the query below to verify the MSSQL Server version.
select @@VERSION3. Now, type GO and hit Enter to confirm and execute the query.
💡 SQL commands and queries will not provide output and only proceed when you run the batch separator (
GO), which signifies the end of the batch of SQL statements.
GOYou can see below that the output shows the MSSQL Server 2022 Developer Edition is installed.
Creating a Database in the MSSQL Server
With a successful connection to your MSSQL Server, you must ensure everything within your MSSQL Server environment operates seamlessly. What better way to validate its functionality than by crafting your database firsthand?
To create a database in your MSSQL Server and insert data, follow these steps:
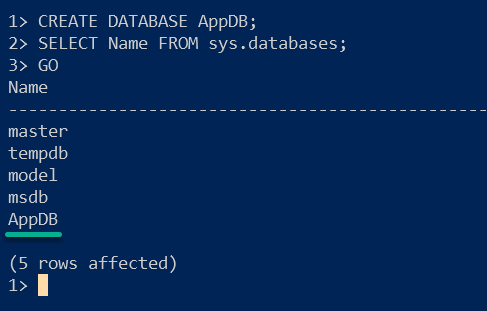
1. Execute the following lines to CREATE and verify (SELECT) a database called AppDB (arbitrary) on your MSSQL Server (sys.databases).
-- Create a new database named "AppDB"
CREATE DATABASE AppDB;

-- Retrieve the names of all databases from the system catalog view "sys.databases"
SELECT Name FROM sys.databases;

-- Batch separator to signify the end of the SQL batch
GO
In the output below, the database AppDB is created.
The output below lists the automatically generated system databases when you installed the MSSQL Server, and the new one, AppDB.
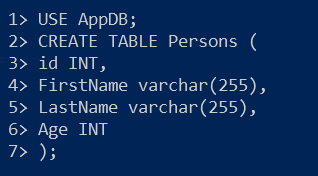
2. Next, run the command and statement below to switch (USE) to the newly-created database AppDB and CREATE a TABLE named Persons.
The SQL statement adds four columns: id, FirstName, LastName, and Age to hold data.
-- Switch the context of the current database session to "AppDB"
USE AppDB;

-- Create a new table named "Persons" with the specified columns
CREATE TABLE Persons (
    FirstName varchar(255),
    LastName varchar(255),
    Age INT
);
3. Now, run the commands below to INSERT data to the Persons table and proceed (GO) with the action.
INSERT INTO Persons VALUES ('John', 'Snow', 24);
INSERT INTO Persons VALUES ('Arya', 'Stark', 18);
INSERT INTO Persons VALUES ('Rhaenyra', 'Targaryen', 35);
GO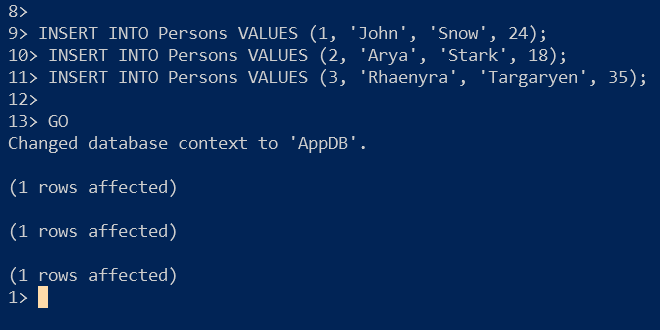
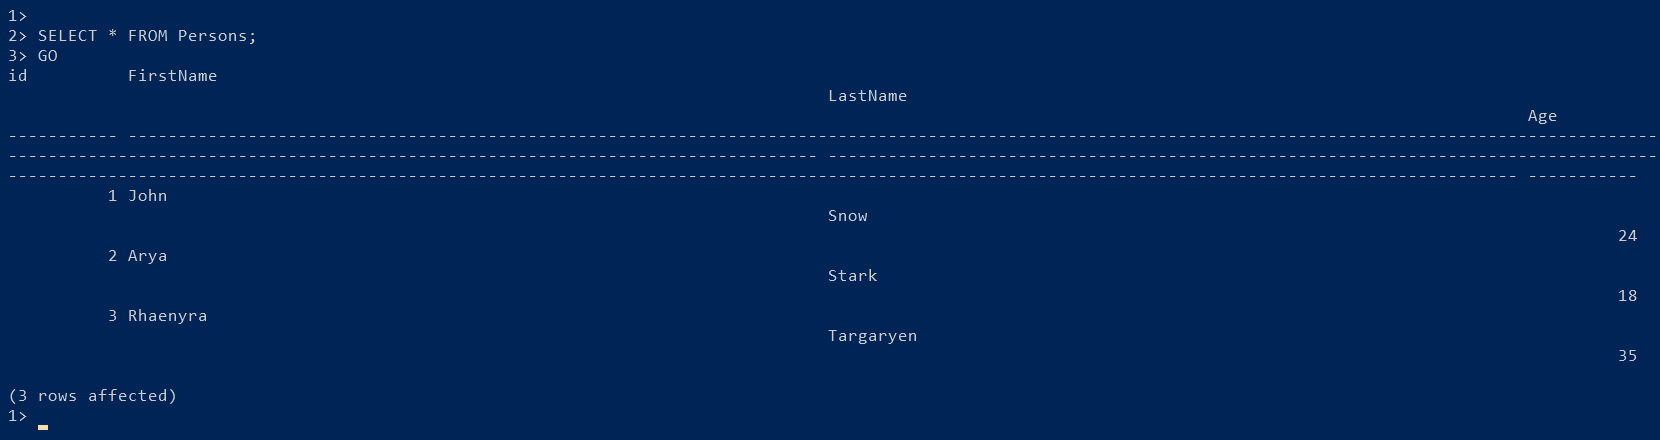
4. Lastly, execute the following query to retrieve (SELECT) all (*) data FROM the Persons table.
SELECT * FROM Persons;
GO
If all goes well, your data becomes available in the Persons table, as shown below.
Connecting Remotely to the MSSQL Server via SSH Tunneling
Your MSSQL Server is now running with a database brimming with data you can access locally. But what about managing your MSSQL Server from afar? Fortunately, MSSQL Server offers SSH tunneling, allowing you to access and manage your databases securely.
To connect securely to your MSSQL Server via SSH tunneling, proceed as follows:
1. On your local client, open a terminal (or PowerShell as admin), and run the ssh command below to create secure SSH tunneling to the MS SQL Server (192.168.5.30).
Remember to substitute the ata user server address with yours, accordingly.
ssh -L 1433:localhost:1433 [[email protected]](<mailto:[email protected]>)Once connected, a secure tunnel connection is created from 127.0.0.1:1433 (localhost) to your MSSQL Server on port 1433.

2. Next, open SSMS from your desktop or the Start menu.
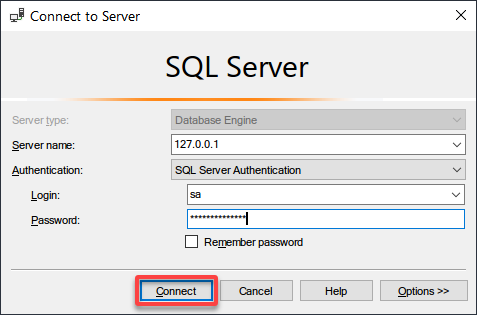
3. When prompted, input details of your MSSQL Server like the following:
- Server name – 127.0.0.1, which is the address via SSH tunneling.
- Authentication – Select SQL Server Authentication.
- Login – Input the default user sa.
- Password – Input your MSSQL Server password.
Once filed out, click Connect to confirm and connect to your MSSQL Server.
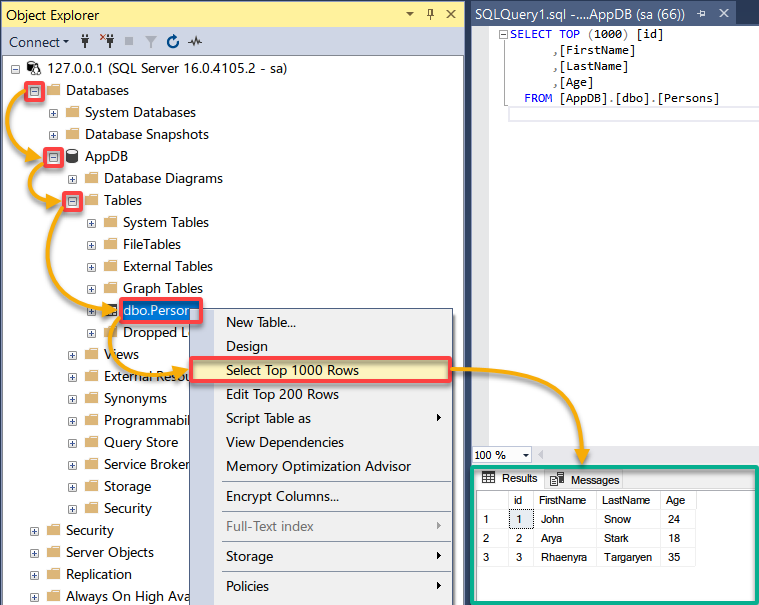
4. Finally, expand Databases (left pane) → AppDB → Tables, then right-click dbo.Persons, and choose Select Top 1000 Rows to retrieve your data.
In the Results tab, SSMS populated data from your database, as shown below.
Conclusion
Throughout this tutorial, you have installed and configured MSSQL on Linux. Consequently, you have connected to the MSSQL Server, created databases, and even accessed your MSSQL Server remotely via SSH tunneling.
With these fundamental skills under your belt, you are well-equipped to leverage the power of MSSQL on Linux for your data management needs.
What’s next? Why not explore the SQL Server effective permissions to create a new login and database user for your applications?


