


Whether you are a tech-savvy entrepreneur or an aspiring web developer, having a reliable server is the backbone of your online success. With Linode VPS, you can enjoy enterprise-grade infrastructure, robust security, and unparalleled support at an affordable price point.
This tutorial will walk you through deploying a Linode VPS server, so you can focus on what matters most — growing your online business.
Read on and start the journey to your online success!
Prerequisites
This tutorial comprises hands-on demonstrations in deploying a Linode VPS server. To follow along, ensure you have the following in place:
- A Linode account with active billing enabled – A free trial account is sufficient.
- A local system running Ubuntu machine – This tutorial uses Ubutu 20.04.
Deploying a Linode VPS via the Linode Console
When you deploy a Linode, you are essentially creating a virtual machine (VM) that runs on Linode’s infrastructure. A Linode VPS is dedicated solely to you and can be used to host websites, run applications, or store data.
The quickest way to deploy its server is via the Linode Console (web-based interface), which allows you to create a VPS server in a few clicks.
To deploy via the Linode Console:
1. Open your favorite web browser, and log in to your Linode Console.
2. Once logged in, click Create Linode (top-right) to initiate creating a new Linode VPS.

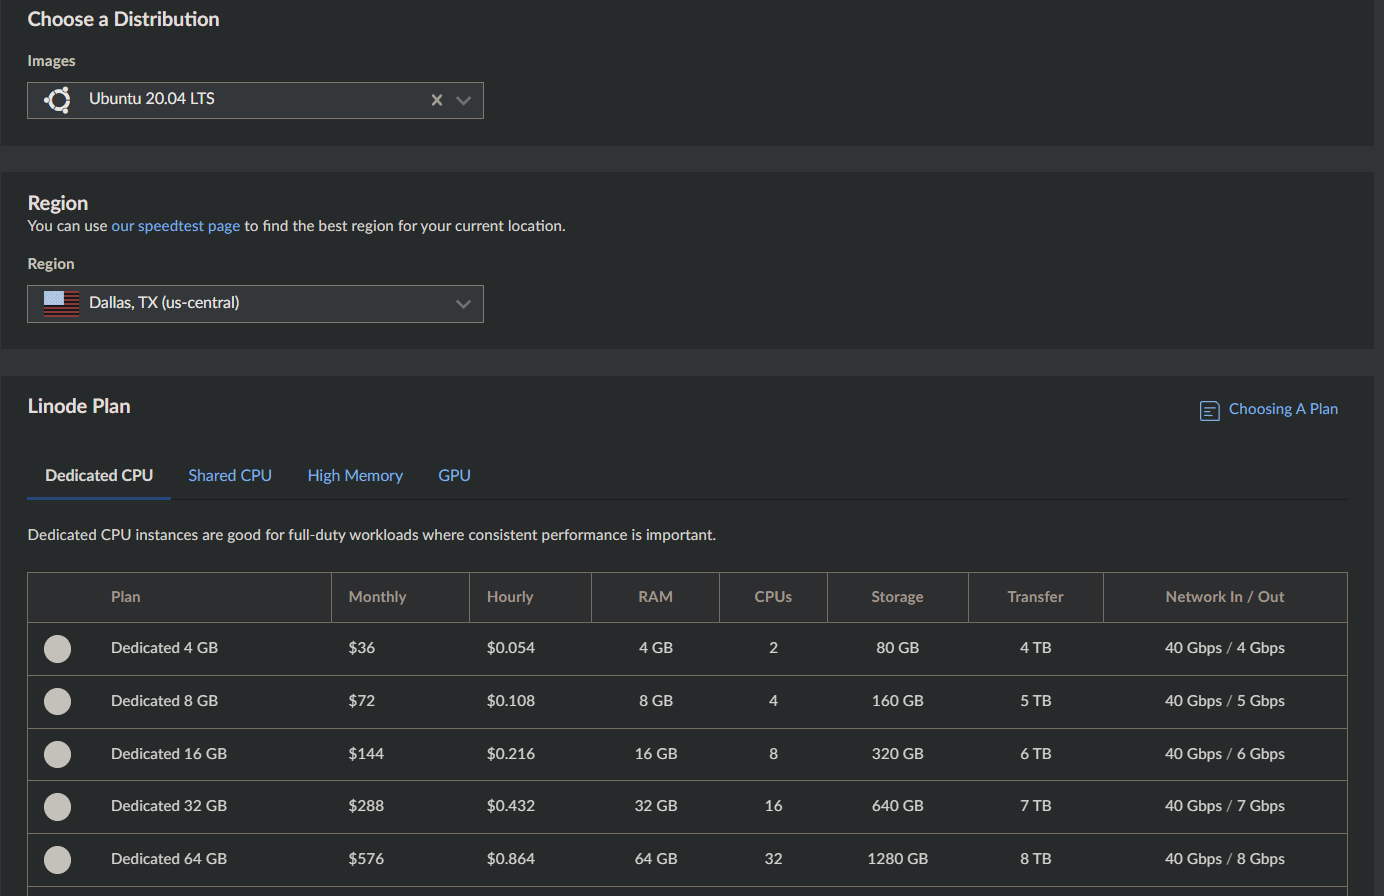
3. Configure the following :
- Images – Select an image (i.e., Ubuntu 20.04 LTS) from the dropdown menu that meets your needs and requirements.
- Region – Select a region or data center location (i.e., Dallas, TX (us-central)) closest to your target audience to ensure optimal performance and minimize latency. This location determines where your VPS server is physically located and can affect the performance of your website or application.
- Linode Plan – Select a plan that meets your hosting needs and budget. Linode offers a variety of plans with different amounts of RAM, CPU, storage, and transfer limits.
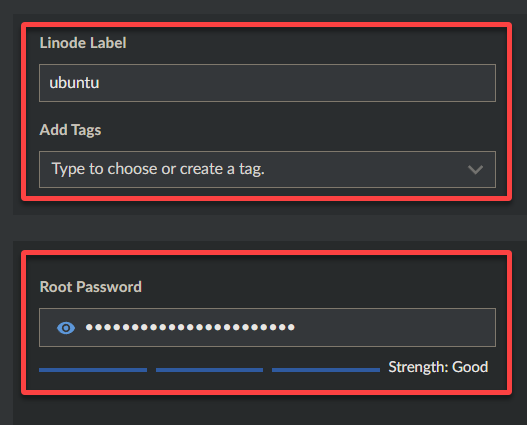
4. Scroll down, and configure your credentials as follows:
- Linode Label – Provide your Linode VPS with a descriptive label or a hostname.
- Root Password – Provide a strong root password , and store it safely. You will need this root password later to log in to your server and perform administrative tasks.
5. Now, review your selected Linode VPS server settings, and click Create Linode (bottom-right) to create your Linode VPS.

Wait for the Linode VPS server to be provisioned, which can take a few minutes.
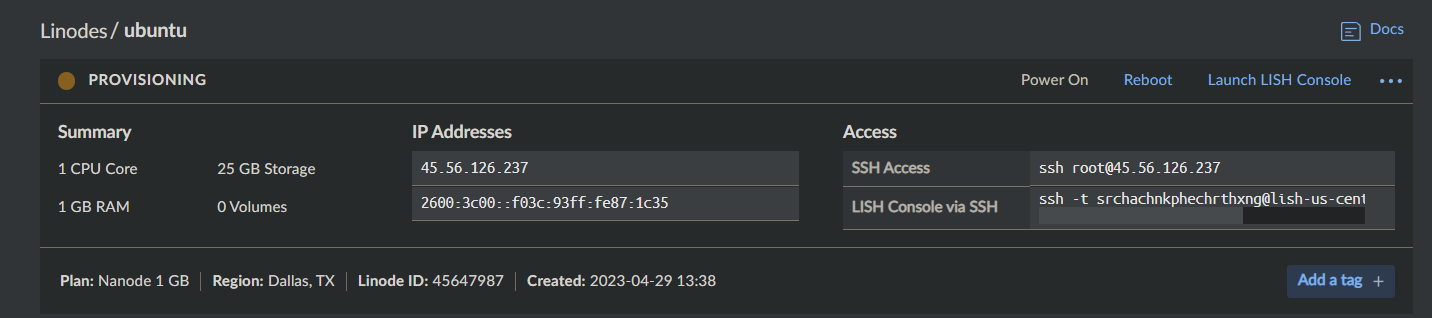
6. Copy the public IP Address of your Linode VPS once the status changes to RUNNING, as shown below.
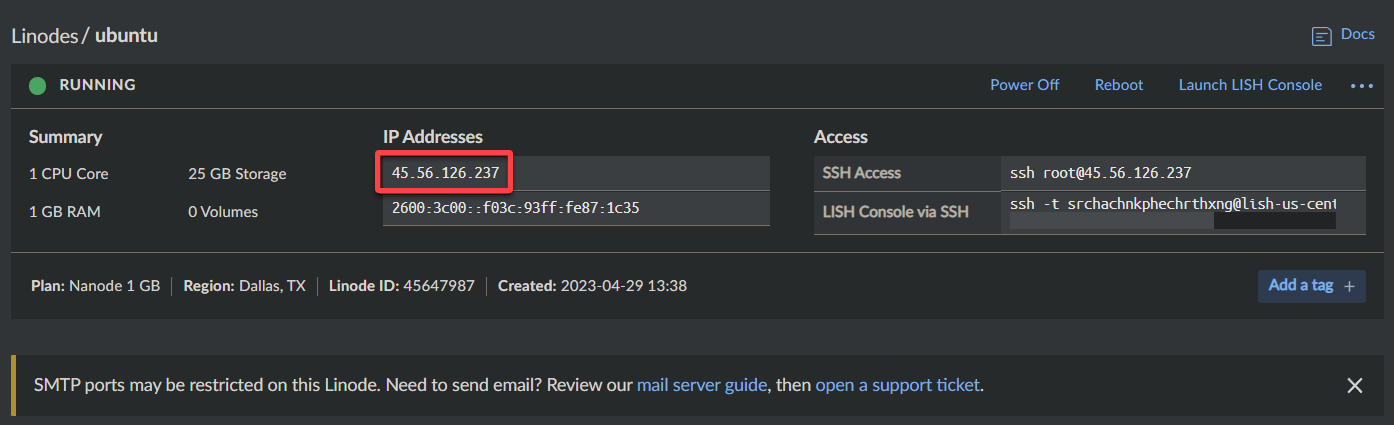
Linode may restrict outbound traffic on SMTP ports, such as port 25, to prevent spam and abuse. This behavior is a common practice among hosting providers to prevent their infrastructure from being used for malicious activities such as spamming.
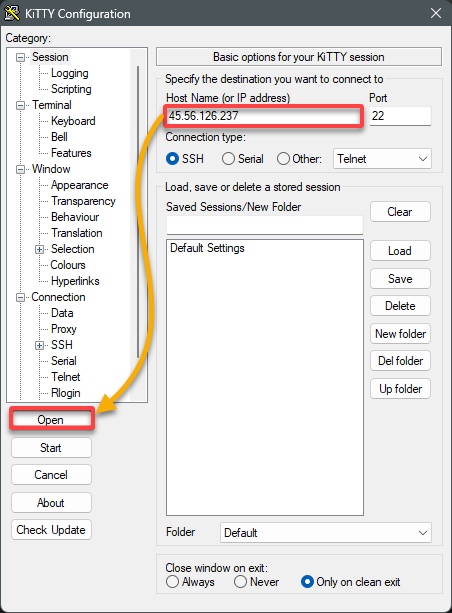
7. Open an SSH client (i.e., KiTTY), enter the copied IP address in the Host Name field, keep other settings as is, and click Open to open the SSH connection.
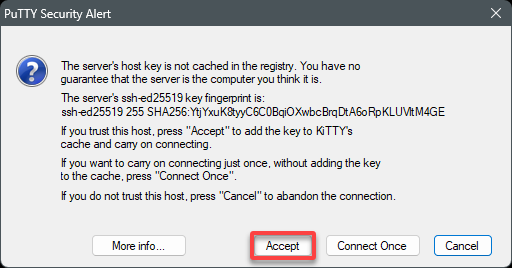
8. Click Accept to accept the host key when prompted.
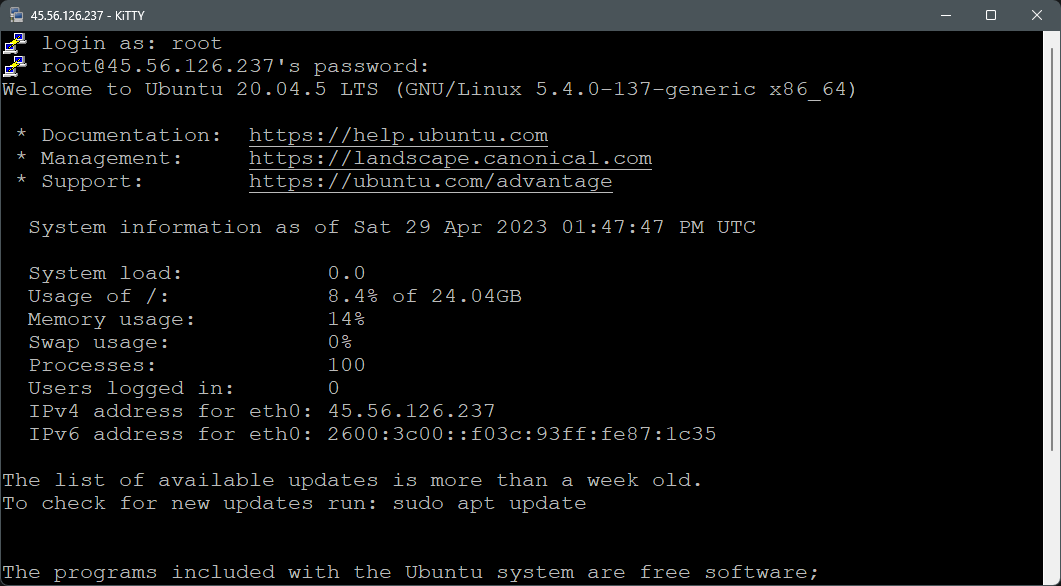
9. Lastly, enter the root password you set up in step four to authenticate the connection.
Once authenticated, you can access the command line interface of your Linode VPS server via SSH, as shown below.
Installing the Linode CLI
Besides the web-based console, you can also create and manage your Linode VPS server using the Linode CLI from your local computer. The Linode CLI allows you to perform various tasks, from essential server management to complex scripting to CICD pipelines.
To install the Linode CLI, follow these steps:
1. Open a terminal, run the following apt update command to update the package lists, and install Phyton (python pip) since the Linode CLI is written in Python.
The Linode CLI is officially managed through pip for quick installation and management.
apt update && sudo apt install python3 -y && sudo apt install python3-pip -y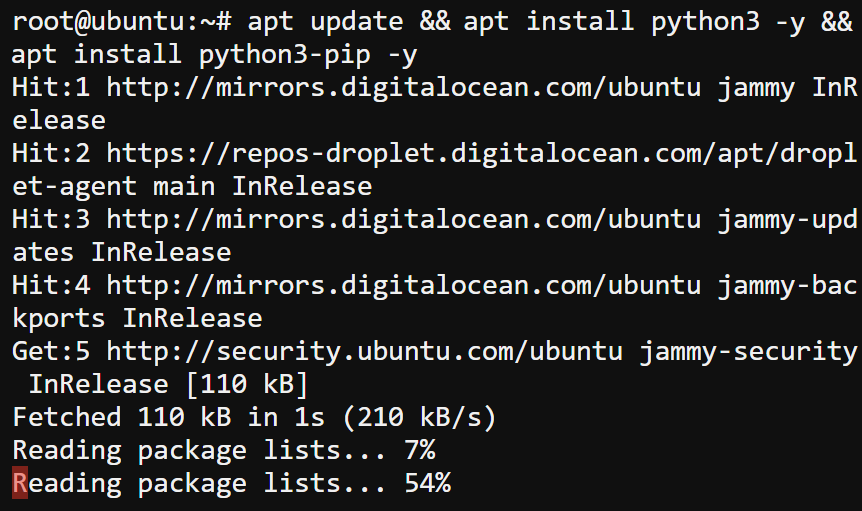
2. Next, run the below pip3 command to install the Linode CLI.
pip3 install linode-cli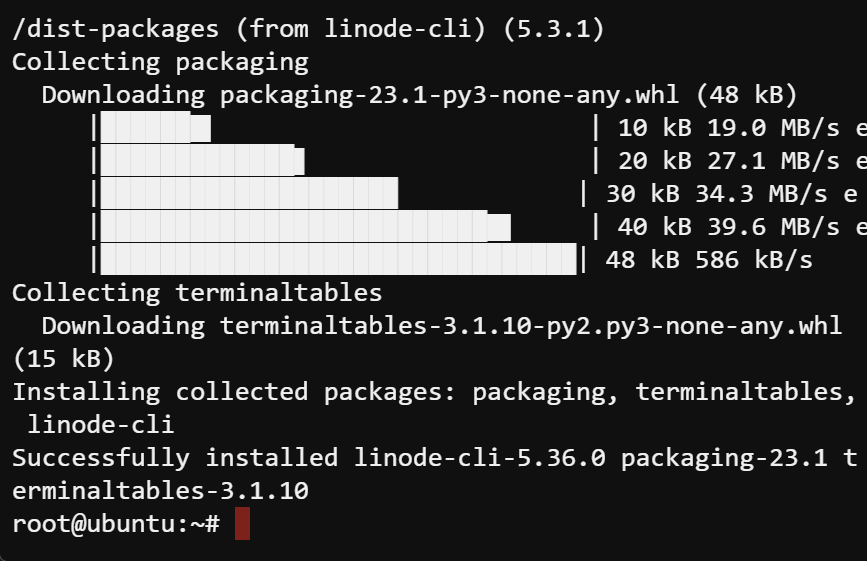
3. Once installed, run the command below to --upgrade the Linode CLI to the latest.
pip3 install linode-cli --upgrade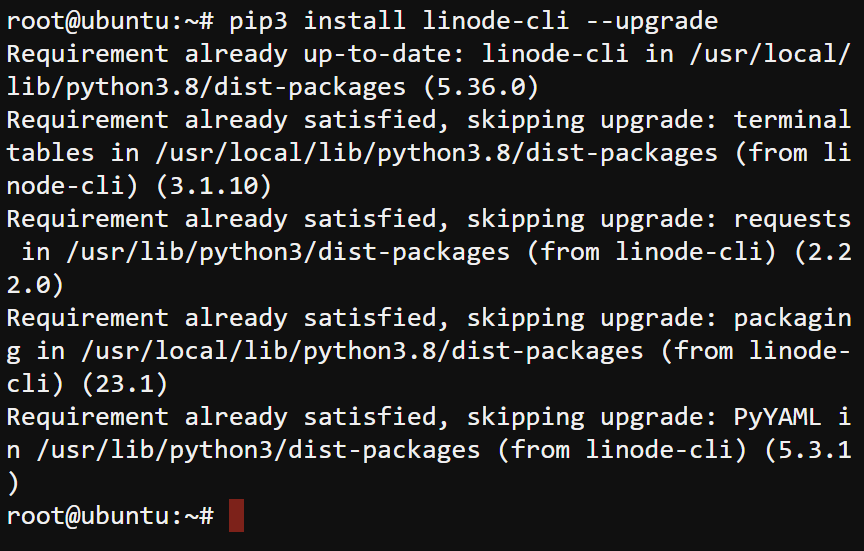
4. Now, run the below linode-cli command to check the Linode CLI’s version installed.
linode-cli --versionIf the installation is successful, the command outputs the version number of the Linode CLI, as shown below.

Retrieving a Linode Personal Access Token
With a Linode VPS running, typically, you cannot leave your Linode resources unprotected. Why not add another layer of security with a Linode personal access token? This token allows you to access and manage your Linode resources securely.
You can use a personal access token to perform various operations on your Linode account and resources, including creating Linode VPS.
To retrieve a Linode personal access token:
1. On your Linode Console, navigate to the Personal Access Tokens page.
2. Next, click Create a Personal Access Token to initiate creating a new personal access token.

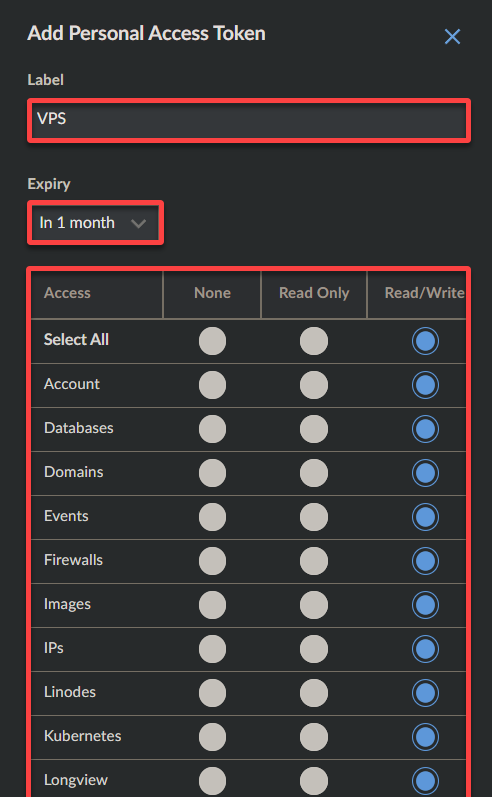
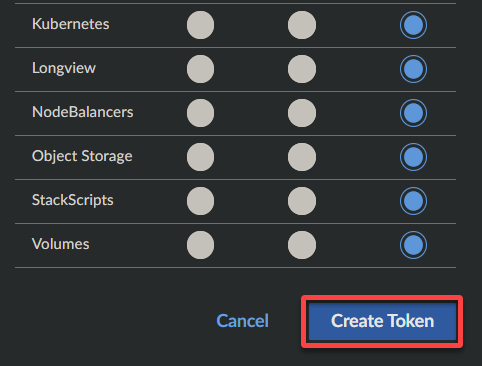
3. Configure the new token as follows:
- Label – Provide a label (i.e., VPS) for your new token.
- Expiry – Select the expiry period that best suits your needs
- Select the scopes that you want to grant to the token. Scopes determine the token’s access level to your Linode resources.
4. Now, click Create Token at the bottom to create the token based on your configurations.
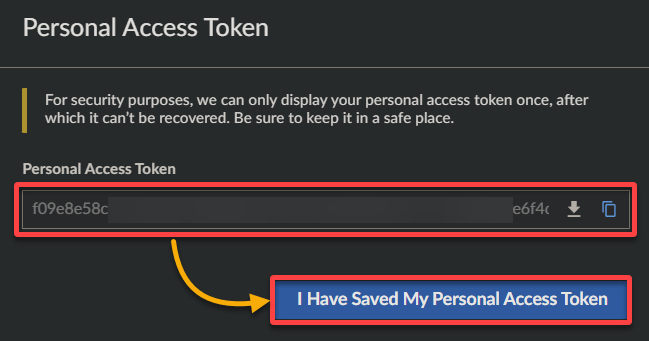
5. Copy and save the generated token to a secure place, like a password manager or a secure file for later use.
Authorizing the Linode CLI to Your Account
Now that you have retrieved a personal access token, you can use it to authorize the Linode CLI on your local computer. Doing so enables you to manage your Linode resources through the CLI.
To authorize the Linode CLI, follow the steps below:
1. Run the below export command to set your personal access token (YOUR_TOKEN) as an environment variable (LINODE_CLI_TOKEN) on your local computer.
This environment variable allows the Linode CLI to access your Linode resources on your behalf without having to prompt you for the token each time.
This command does not provide output, but you will verify the variable in the following step.
export LINODE_CLI_TOKEN="YOUR_TOKEN"2. Next, run the echo command below to verify the LINODE_CLI_TOKEN environment variable is set correctly.
echo $LINODE_CLI_TOKEN
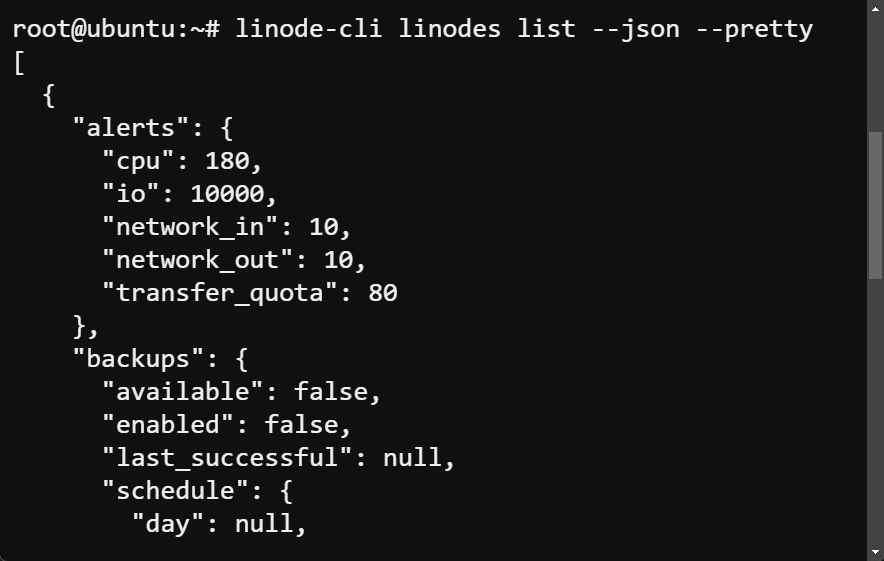
3. Now, run the below linocde-cli command to list all VPSes in your Linode account in a human-readable (--pretty) and JSON-formatted output (--json).
linode-cli linodes list --json --prettyThe output below verifies the Linode CLI can access your Linode resources.
Deploying a Linode VPS Using The CLI
With the Linode CLI set up and authorized with your token, you can deploy a Linode VPS server directly from your local computer.
Linode’s web-based interface works well in managing your Linode VPS. But perhaps you are looking into streamlining your Linode VPS management, like creating a Linode VPS. If so, the Linode CLI will do the trick.
To deploy a Linode VPS server via the Linode CLI:
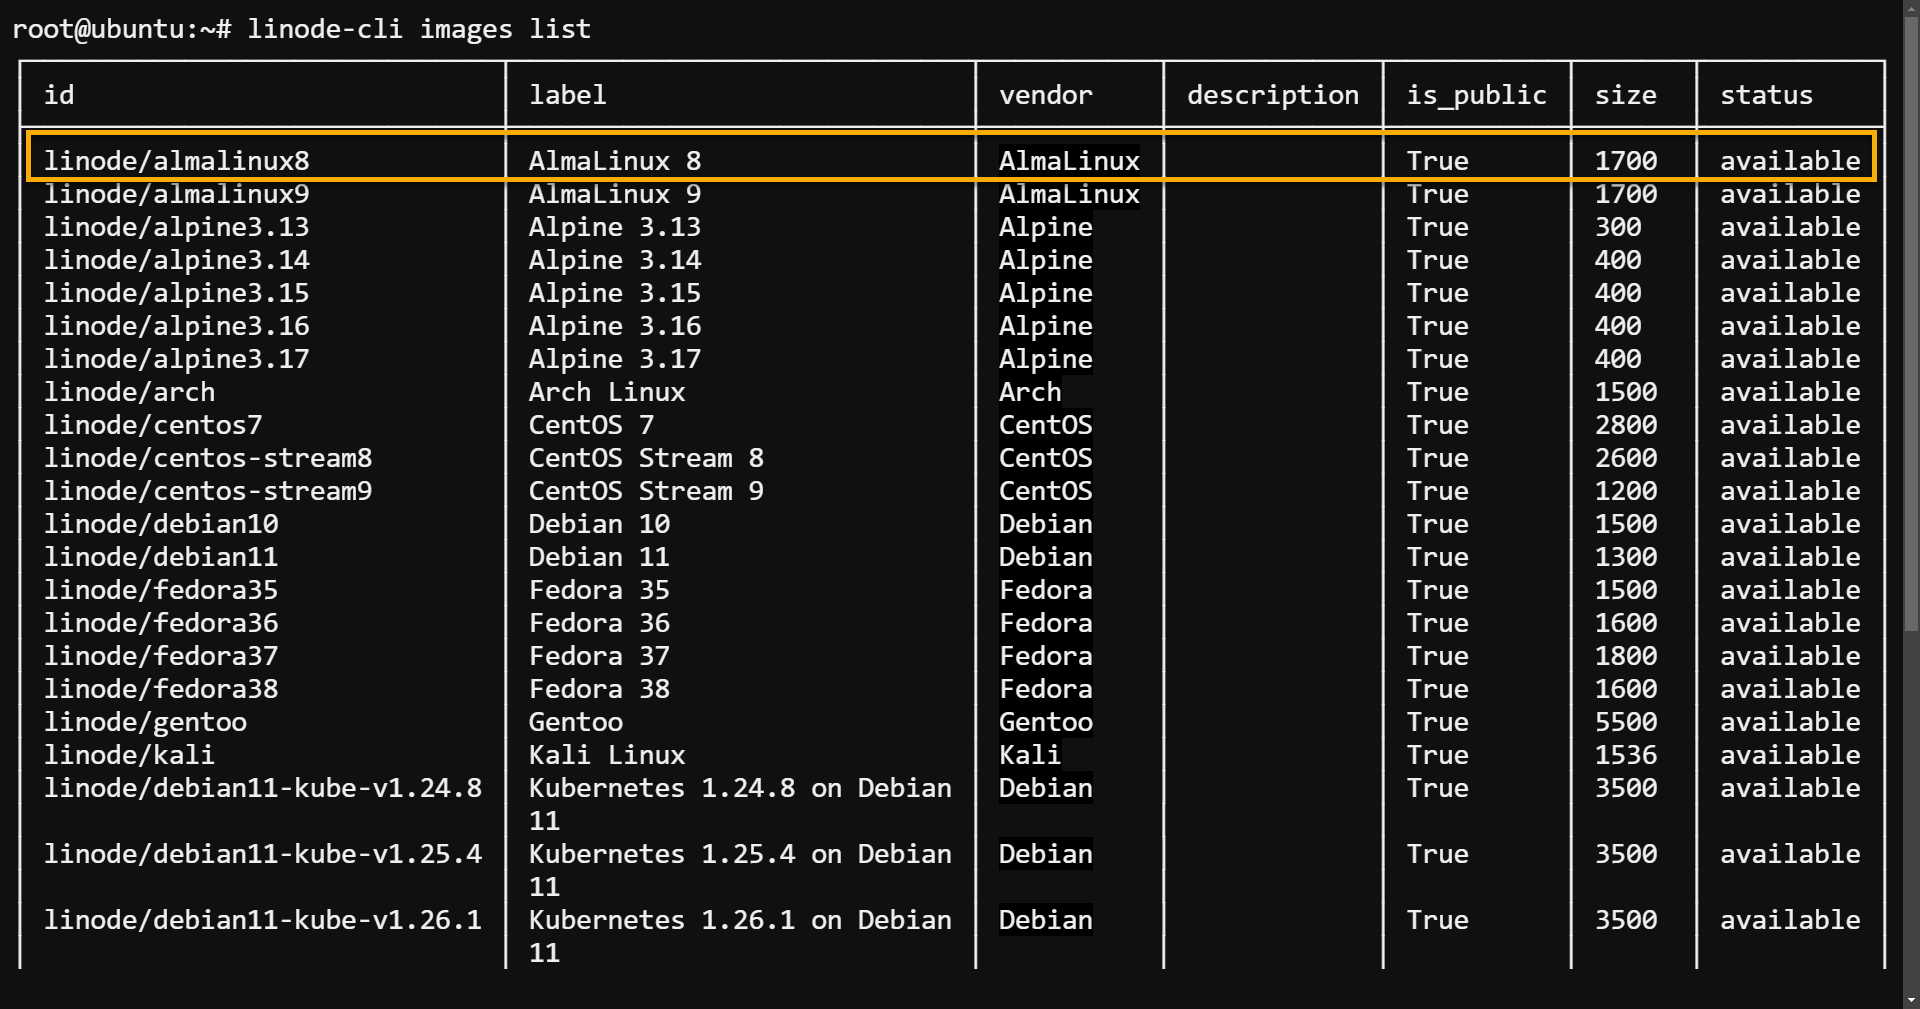
1. Run the following linode-cli command to list all available images you can use to create your Linode VPS server, along with their image ID, distribution, label, and so on.
linode-cli images listPick one image, and note its image ID, which you will use later in creating your Linode VPS server. But for this tutorial, the choice is linode/almalinux8.
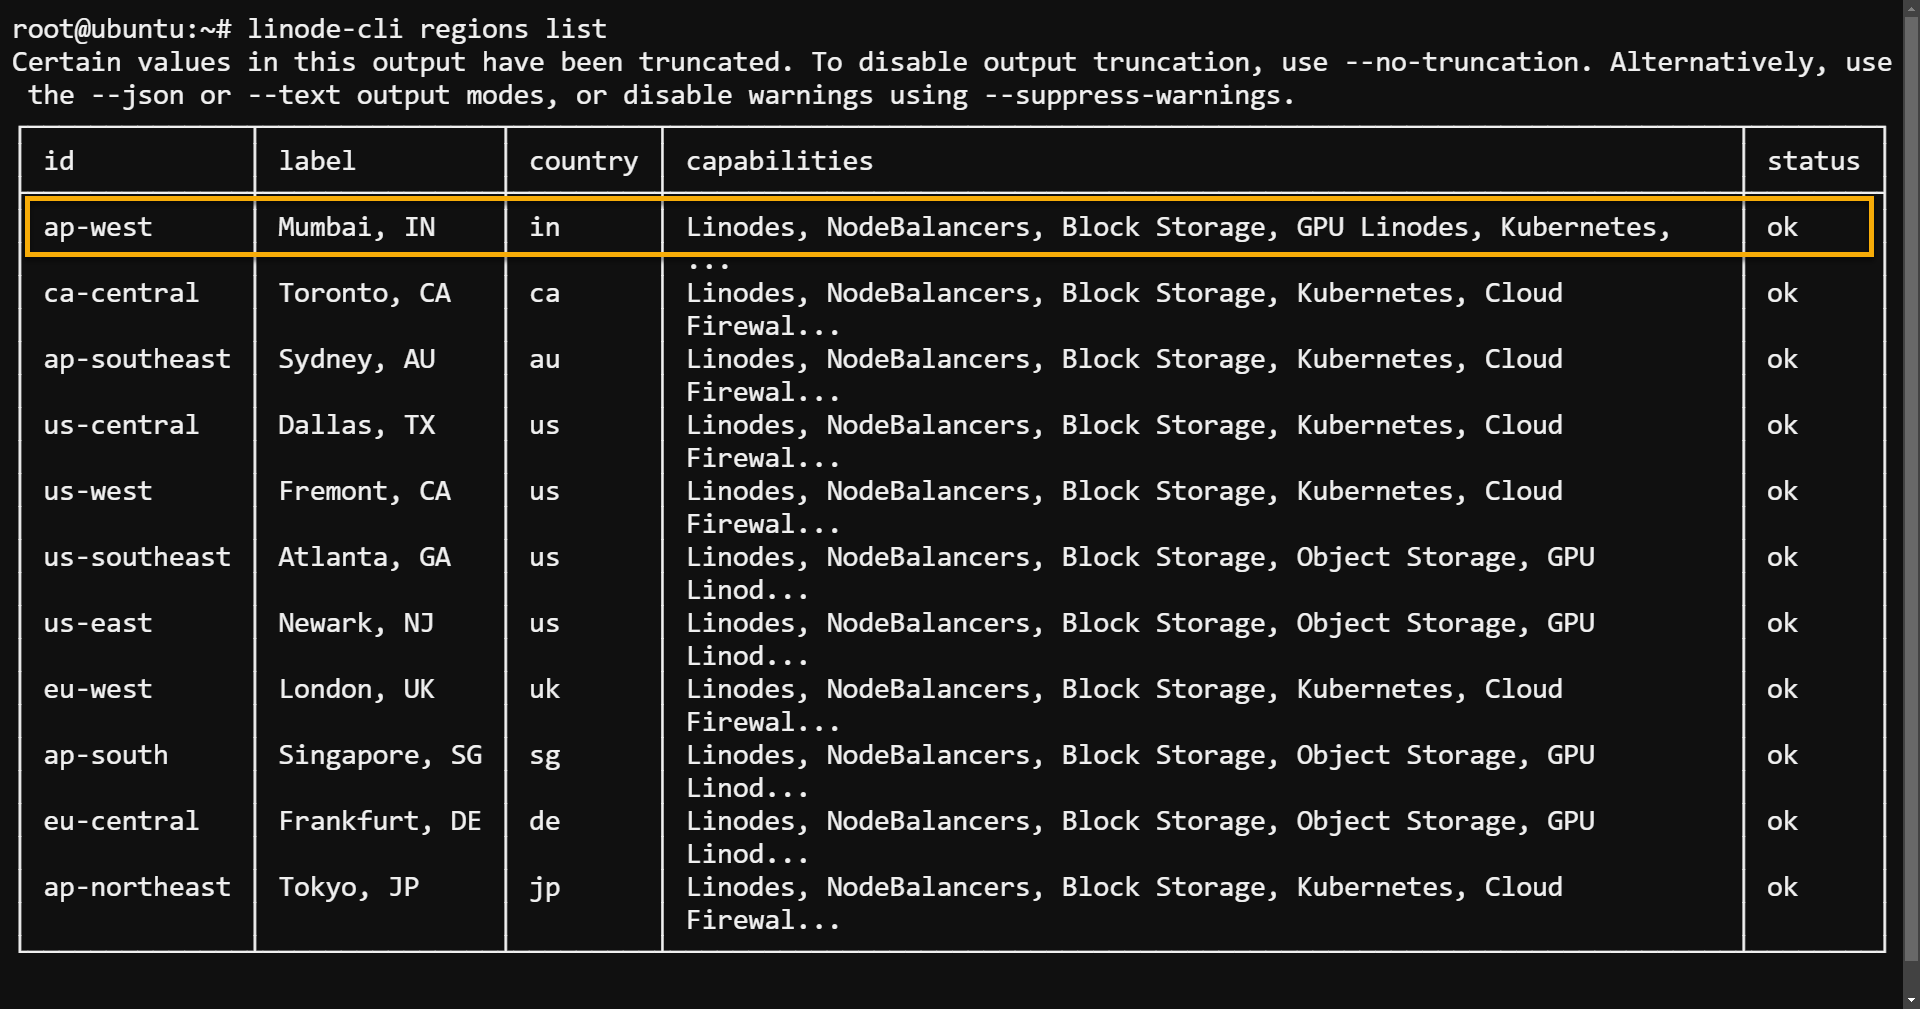
2. Next, run the command below to list all available regions where you can create your Linode VPS server.
linode-cli regions listAs you did with the image ID, note down the region id for later use. But this tutorial uses the ap-west region.
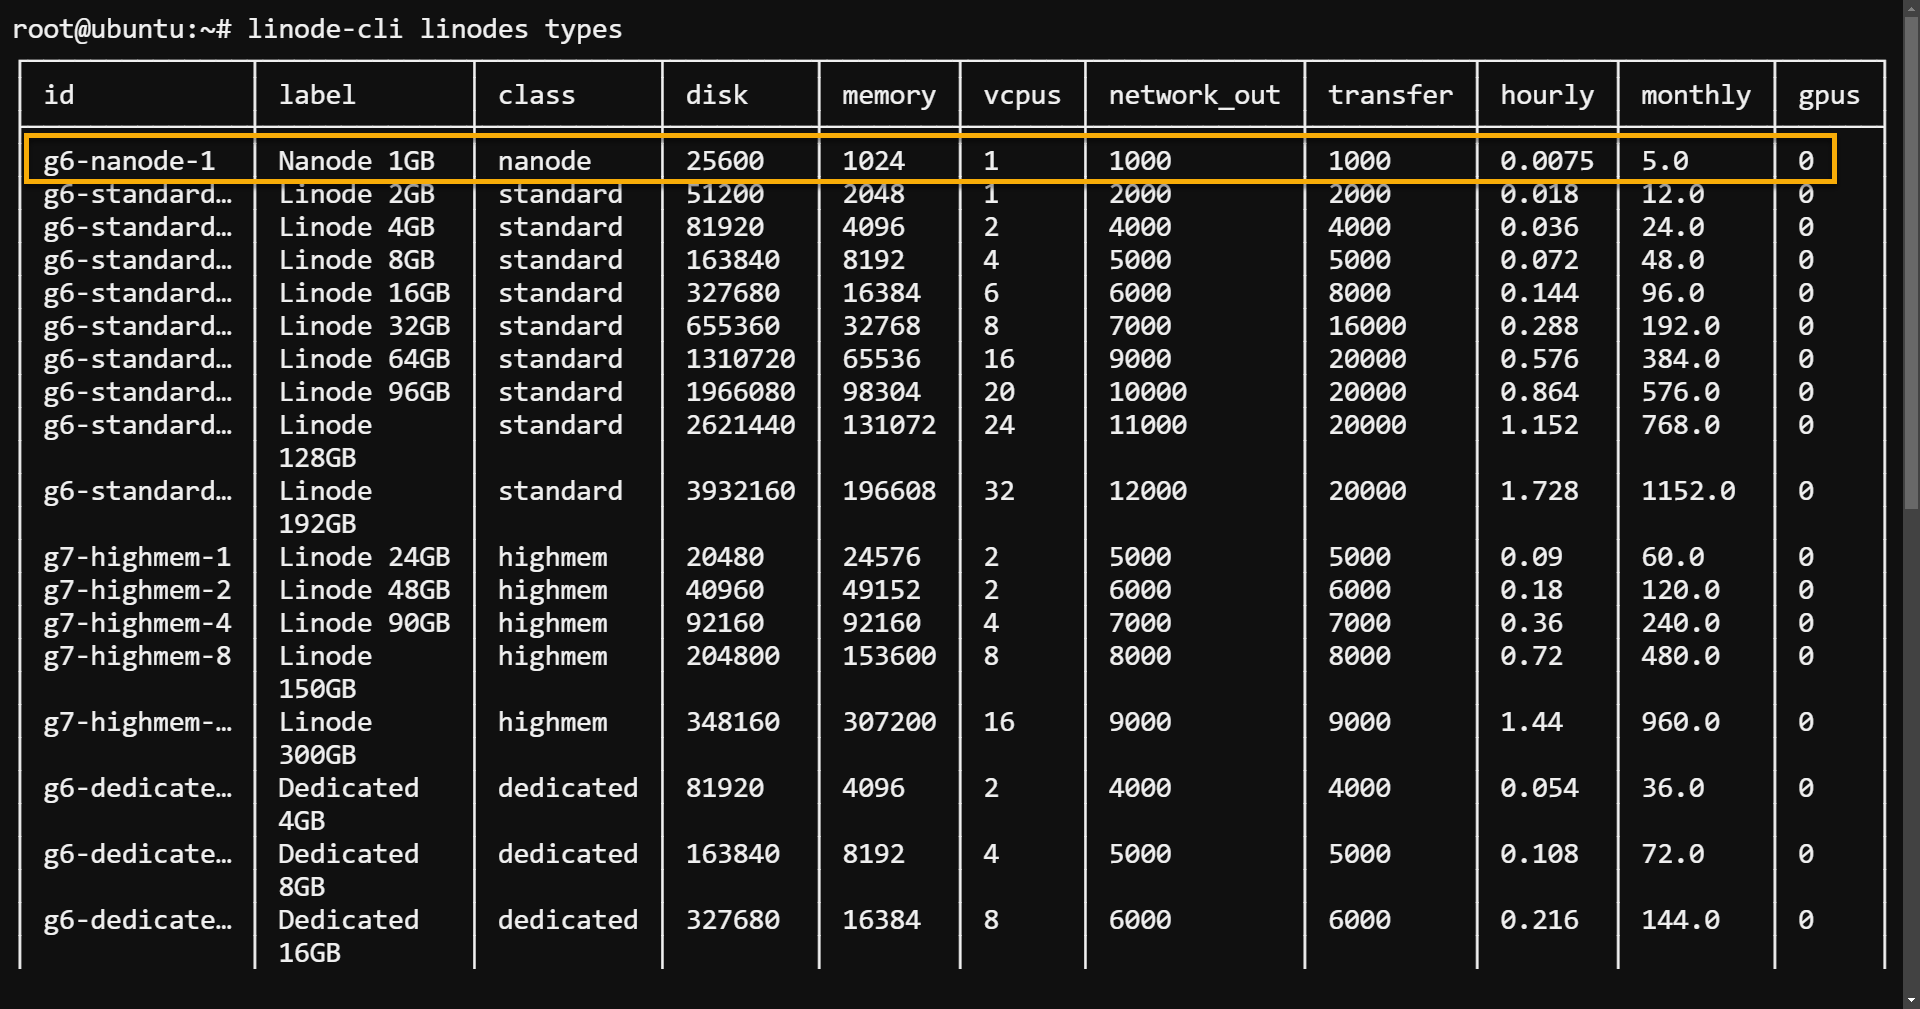
3. After picking a region, run the below command to list all available Linode plans (linode-types).
linode-cli linode typesPick a plan and note down its plan id to use for later. This tutorial’s choice is the g6-nanode-1 plan.
4. Now, run the following command to deploy (create) a Linode VPS. Ensure you replace the following:
almalinux8,ap-west, andg6-nanode-1– The image, region, and Linode plan you noted in steps one to three.your_password@A123– A root password for the new Linode VPS.
linode-cli linodes create --root_pass your_password@A123 --region ap-west --image linode/almalinux8 --type g6-nanode-1Below, you can see your Linode VPS is currently in the provisioning state.

5. Finally, run the below command to list all available Linode VPS in your account.
linode-cli linodes listThe output below confirms you have successfully deployed your Linode VPS.
If you do not see your Linode VPS listed, wait a few minutes for it to finish deploying.

Conclusion
In this tutorial, you have learned how to deploy a Linode VPS server in a few clicks via the web-based console and the Linode CLI. With Linode’s robust infrastructure and flexible management tools, you can now easily create and manage VMs to host websites, run applications, or store data.
But why stop at just a VPS server? Linode offers a plethora of additional services and tools you can use with your Linode VPS server to scale your applications and infrastructure.
Why not consider learning how to deploy Kubernetes clusters or utilize object storage and load balancers? Take your cloud computing capabilities to the next level!


