


As more and more businesses move their operations to the cloud, having a reliable infrastructure that can handle high traffic volumes is essential. Which infrastructure to pick? AWS Load Balancer is an excellent solution to distribute incoming traffic across multiple instances, increasing the availability of your application.
In this tutorial, you will learn the basics of the AWS Load Balancer and how configuring and managing them is a valuable skill to save time and resources.
Read on to dive in and balance your traffic with ease!
Prerequisites
This tutorial contains hands-on demonstrations. To follow along, be sure you have the following:
- An AWS with active billing enabled – A free tier account is sufficient.
- A Virtual Private Cloud (VPC) with multiple subnets in different Availability Zones (AZs).
- A security group with both inbound and outbound rules that allow HTTP traffic to your AWS Load Balancer and application.
Creating a Launch Template for Reusable Configurations
In a typical web application, multiple clients access your application simultaneously from different devices and locations. In such a scenario, ensuring your application is highly available and can handle a surge of concurrent requests is crucial. How? Let an AWS Load Balancer be the solution.
But before creating an AWS Load Balancer, you need a launch template to define a reusable configuration to launch instances in your Auto Scaling Group (ASG). In a nutshell, an ASG contains a collection of EC2 instances for autoscaling.
To create a launch template, follow these steps:
1. Open your favorite web browser, sign in to the AWS Management Console, and navigate to the EC2 console.
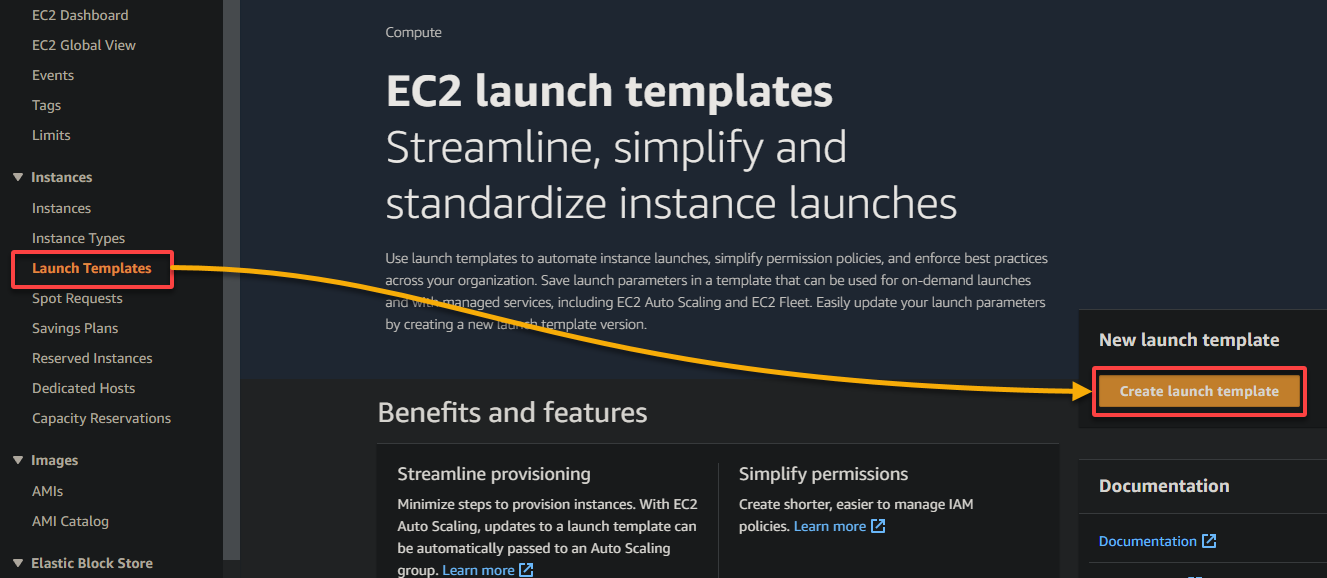
2. Next, navigate to Launch Templates (left pane), and click Create launch template to create a new launch template.
When you create a launch template, you can define the configuration for your instances, such as the instance type, AMI, storage, and security groups.
This feature allows you to create a standardized configuration to use across multiple ASGs and regions, simplifying launching and managing instances.
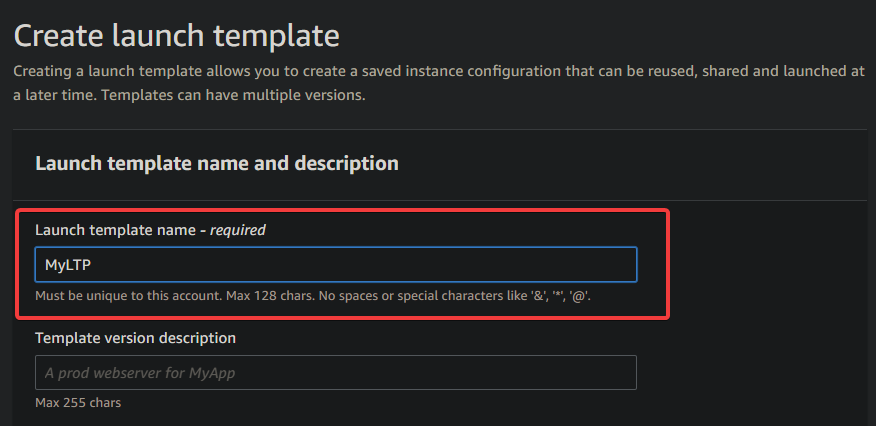
3. Provide a descriptive Launch template name (i.e., MyLTP) on the Create launch template page, as shown below.
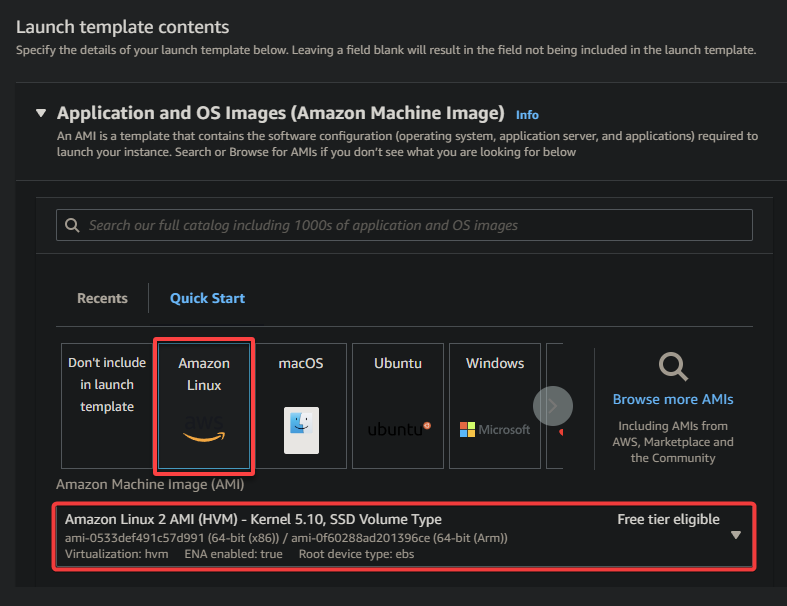
4. Now, scroll down and select an image compatible with your application and meets your specific requirements.
This tutorial’s choice is the Amazon Linux 2 AMI (HVM), a popular and widely used AMI, This AMI provides a stable, secure, and high-performance environment for running applications on AWS.
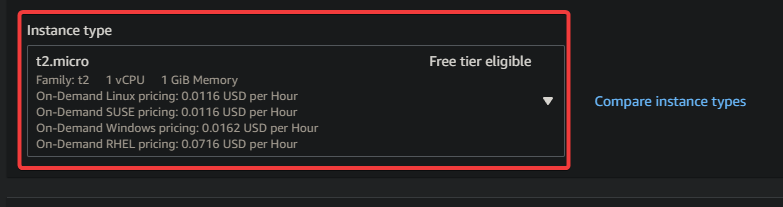
5. Choose an instance type that provides the appropriate CPU, memory, and network performance for your application while being cost-effective. The t2.micro type is sufficient for this tutorial.
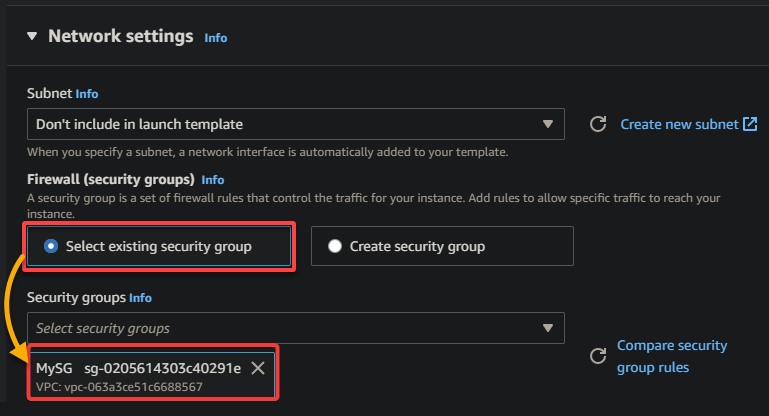
6. Next, select your existing security group under the Network settings section, as shown below.
This security group controls the traffic allowed to and from your resources.
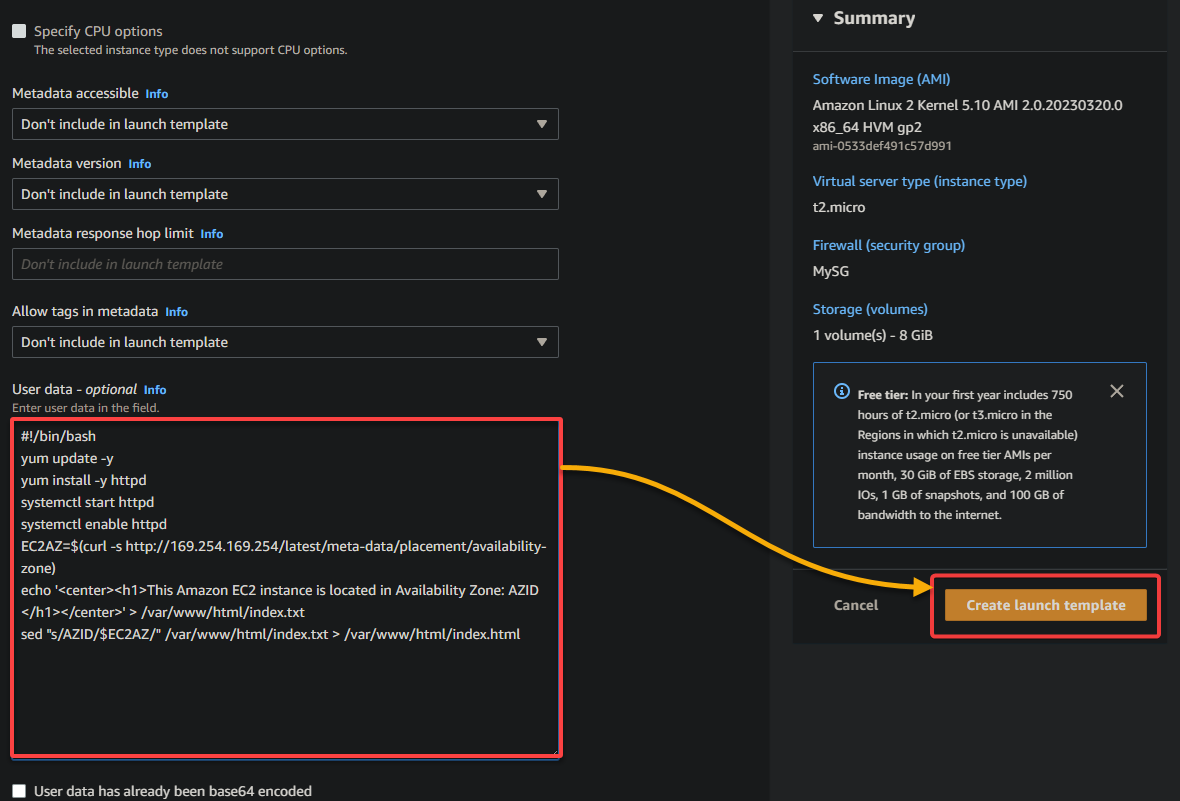
7. Finally, scroll down to the end of the page and paste the following code into the User data textbox, which executes automatically when your instance boots up.
The below code is a basic Bash script for setting up a web app that displays the AZ of your instance on an HTML page.
#!/bin/bash
# Installs and configures the Apache web server
yum update -y
yum install -y httpd
systemctl start httpd
systemctl enable httpd
# Retrieves the instance's Availability Zone
EC2AZ=$(curl -s <http://169.254.169.254/latest/meta-data/placement/availability-zone>)
echo '<center><h1>This Amazon EC2 instance is located in Availability Zone: AZID </h1></center>' > /var/www/html/index.txt
# Creates an HTML file with the Availability Zone information,
# which is accessible via a web browser.
sed "s/AZID/$EC2AZ/" /var/www/html/index.txt > /var/www/html/index.html
Keep other settings as is, and click Create launch template to finalize creating the new launch template.
A launch template generally ensures all instances launched by your ASG have the same configurations and settings. This behavior helps minimize issues caused by differences in configuration between instances, ensuring your application runs smoothly.
If successful, you will see a success message like the one below.

Creating an Auto-scaling Group for High Application Availability
With a launch template in place, the next step is to ensure you have the right capacity to handle loads and keep your application running smoothly. But how exactly? By creating an ASG to automatically scale your instances based on CPU utilization or changes in traffic to your application.
You will configure your ASG to automatically register new instances with your load balancer and ensure they can immediately start receiving traffic. With this setup, your load balancer can distribute traffic evenly across instances, improving your application’s availability and performance.
To create an ASG for your web app, follow these steps:
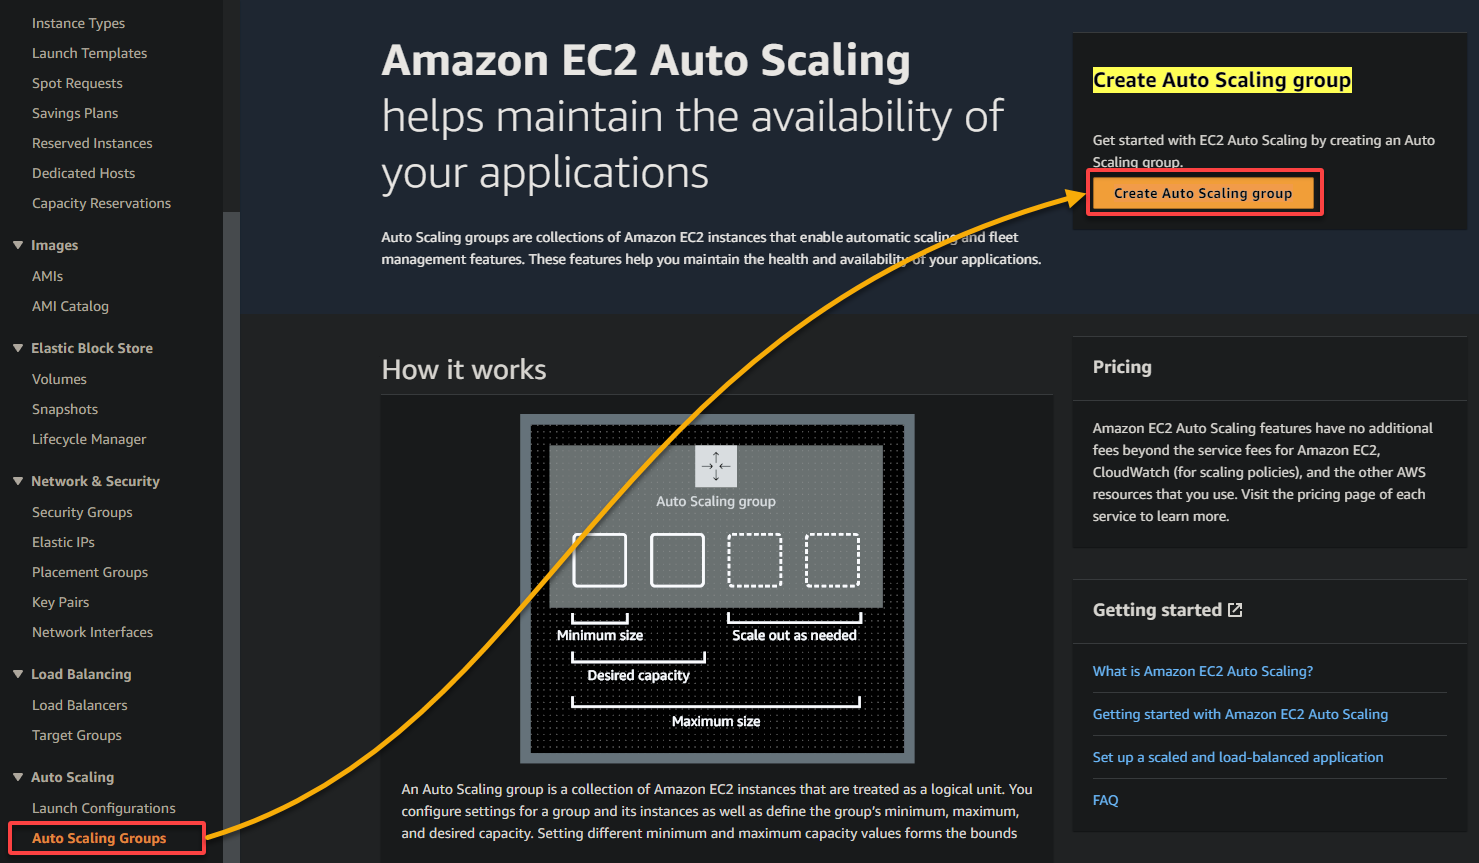
1. On your EC2 console, navigate to Auto Scaling Groups (left pane), and click Create Auto Scaling Group (upper-right) to create a new ASG.
2. Next, provide a descriptive name for your ASG (i.e., MyASG), select your newly-created launch template from the list of available templates, and click Next.
The selected launch template defines the configuration for the instances the ASG group will launch.

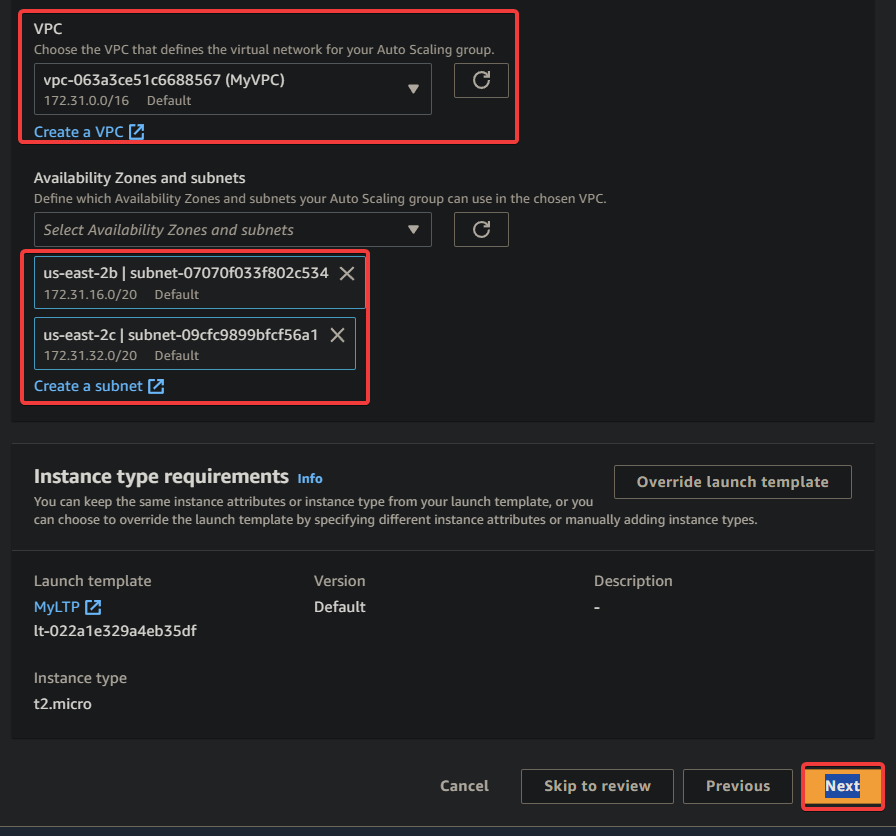
3. Select your VPC, at least two different subnets within the selected VPC for the instances launched by the ASG, and click Next.
These settings ensure your instances are distributed across multiple AZs, which helps improve your app’s availability and fault tolerance.
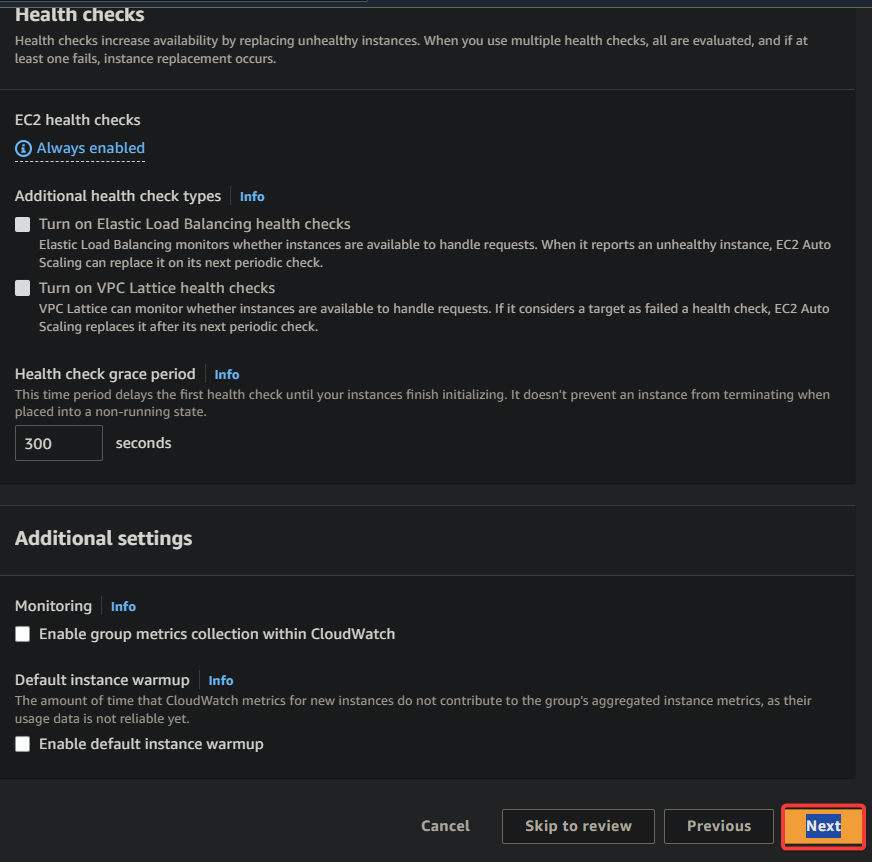
4. Now, keep all the settings as is and click Next to continue.
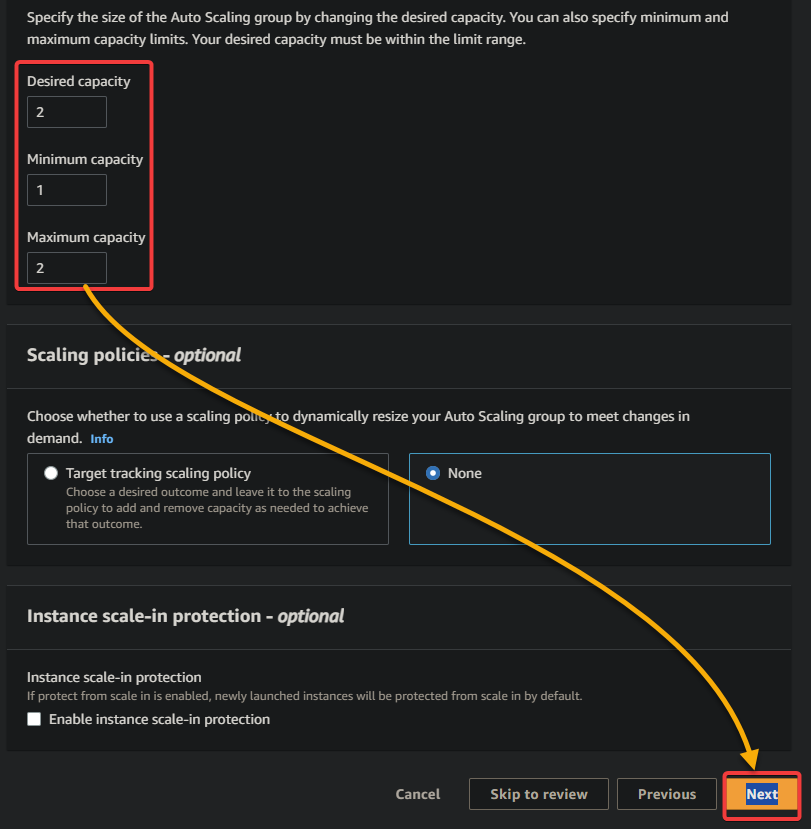
5. On the next page, specify the size of your ASG as follows:
- Desired capacity (2) – The desired number of instances to maintain at all times.
- Maximum (2) – The maximum number of instances the ASG can scale up in response to changes in demand or if an instance becomes unavailable (i.e., instance failure).
- Minimum (1) – Ensures your ASG always runs at least one instance, even if the workload is low.
In this case, your ASG maintains two (2) instances at all times and will scale up to two (2) instances if an instance fails or becomes unavailable.
Once specified, keep other settings as is, and click Next.
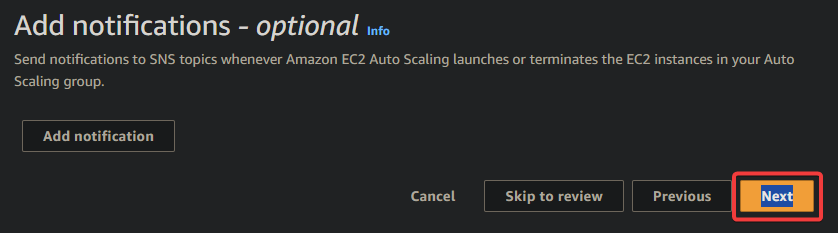
6. Click Next on the following two pages to skip adding notifications and tags, as shown below. Those settings are optional; you do not need them for this tutorial.

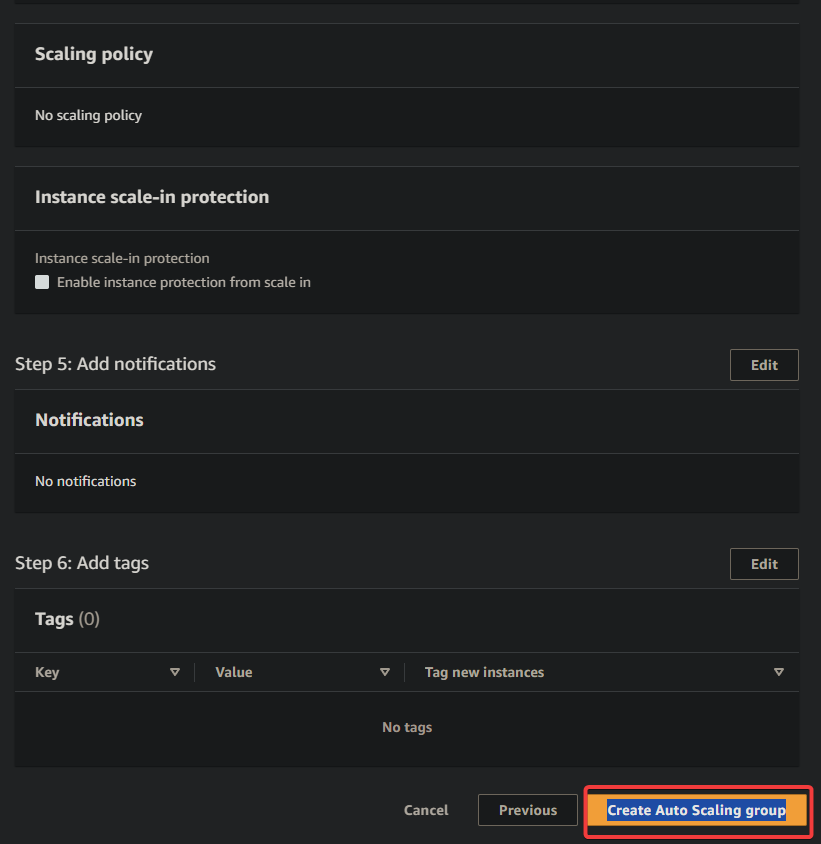
7. Lastly, review your selected settings and click Create Auto Scaling group to finalize creating your new ASG.
8. Once created, click on the ASG’s name to view its detail.

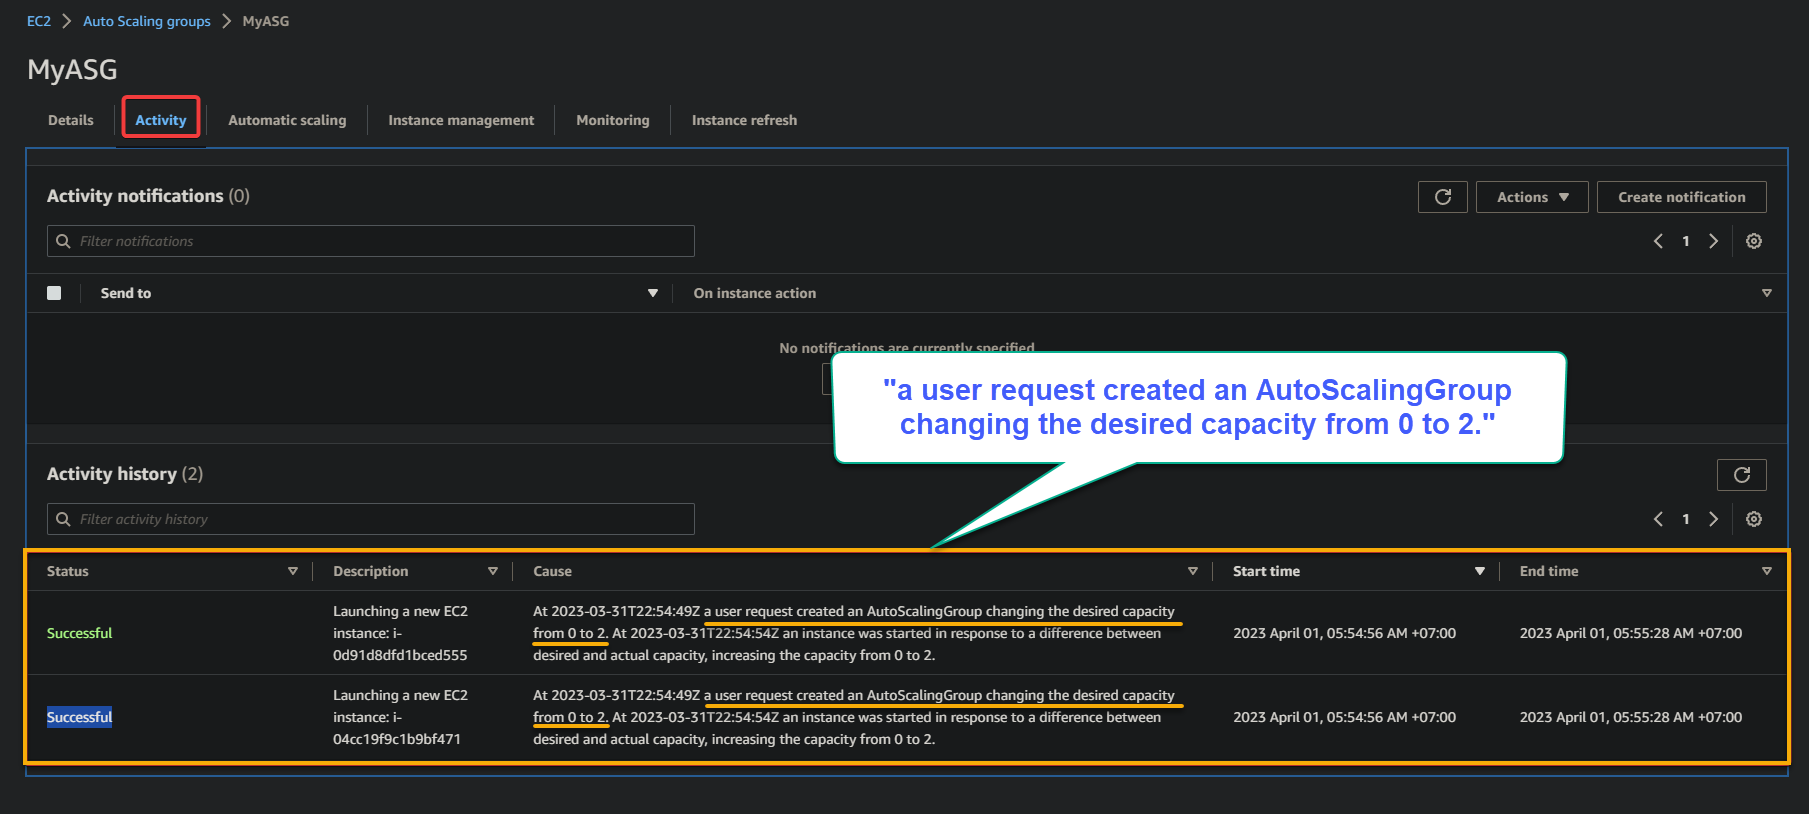
9. On the ASG’s detail page, click the Activity tab to view the activity history of the ASG.
This tab displays a chronological list of events and activities related to selected ASG, such as instance launches, terminations, and scaling events.
This information can be useful for the following:
- Monitoring the performance and behavior of your ASG.
- Identifying any issues or anomalies that may require attention.
10. Navigate to the EC2 console to see a list of your EC2 instances, including any instances that were launched as part of the ASG.
Below, you can see you have launched two instances in two different subnets in different AZs (us-east-2b and us-east-2c), as specified during your ASG creation.

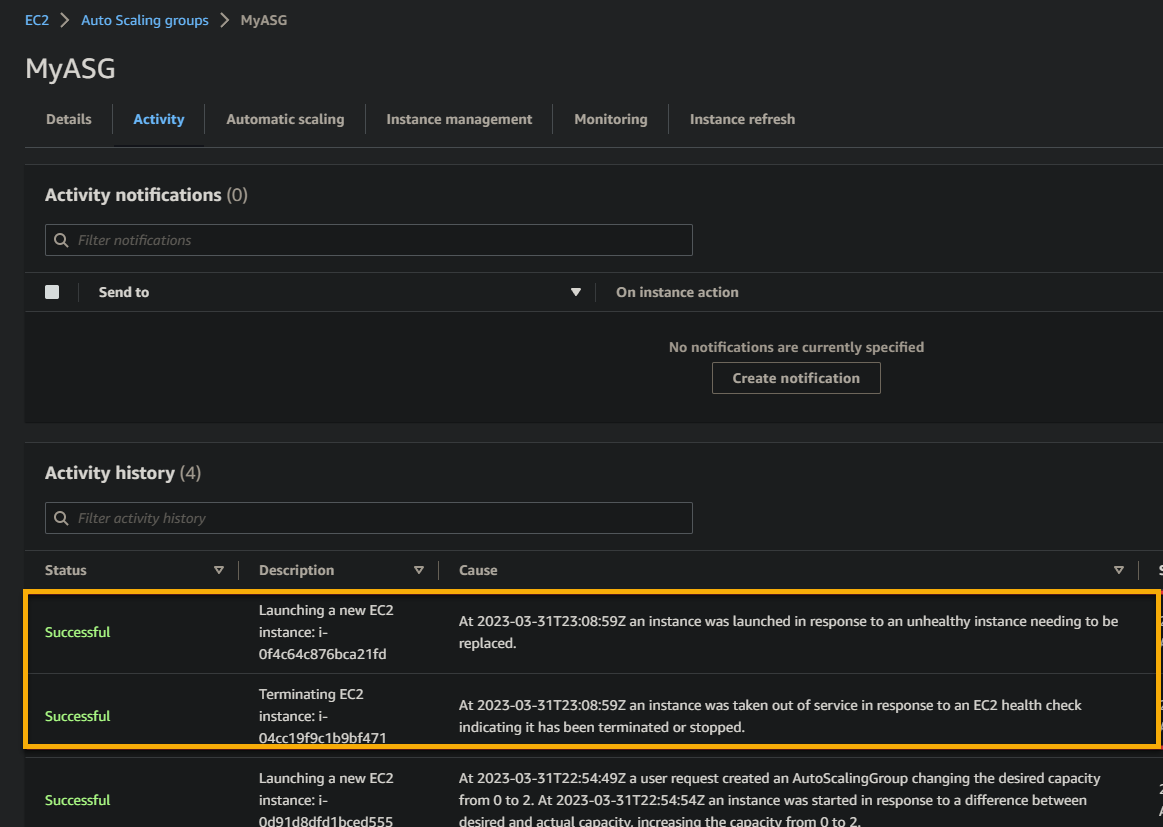
11. Lastly, terminate an instance to simulate an instance failure, which causes the ASG to detect that the instance is no longer available. The failure triggers the launch of a replacement instance to maintain the desired capacity of the group.
After a few moments, you will see a new entry in the activity history as shown below. The history shows that the unhealthy instance was terminated and a new instance was launched to replace it.
Alternatively, return to the EC2 console to verify the newly-launched instance, like in the screenshot below.

Creating a Target Group to Receive Load Balancer Traffic
You have ensured your application’s high availability, and now you need a way to receive traffic from your load balancer. A target group is a logical group of targets (i.e., EC2 instances) that allows you to route requests to registered targets based on rules defined in the listener configuration.
To create a target group, follow these steps:
1. Return to your EC2 console, navigate to Target Groups, and click Create target group to initiate creating a target group.

2. Next, configure your target group as follows:
- Choose a target type – Select Instances since your web app runs on two EC2 instances.
You can also select a Lambda function or IP address. But those are out of this tutorial’s scope.
- Target group name – Provide a descriptive name for your target group.
- Protocol and Port – Select HTTP as the protocol and 80 as the port number since you have a web app running on port 80. Your application load balancer will route traffic to the registered targets using these settings.

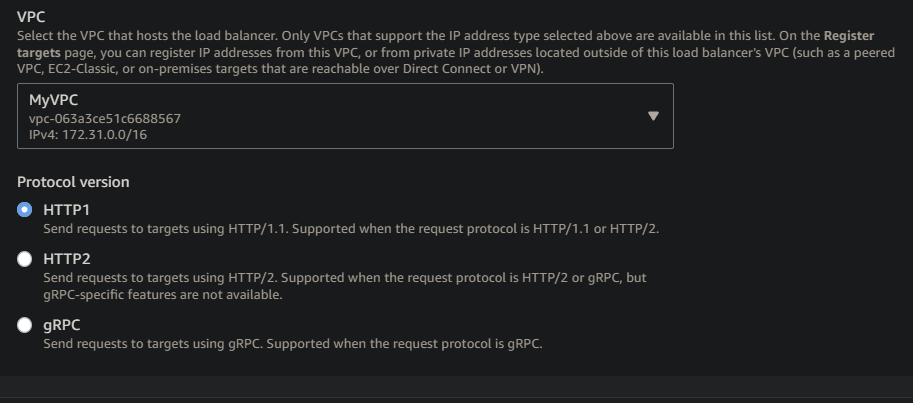
3. Configure your target group’s VPC and protocol configuration:
- VPC – Select the VPC where your ASG and EC2 instance is launched to ensure your load balancer can properly communicate with your targets.
- Protocol version – Select HTTP1 as the protocol version for this tutorial. HTTP1 is a widely used and established protocol version compatible with most web applications.
HTTP1 is also supported by Amazon Elastic Load Balancing (ELB) and is the default protocol version for Application Load Balancer.
4. Keep all other settings as is, and click Next.
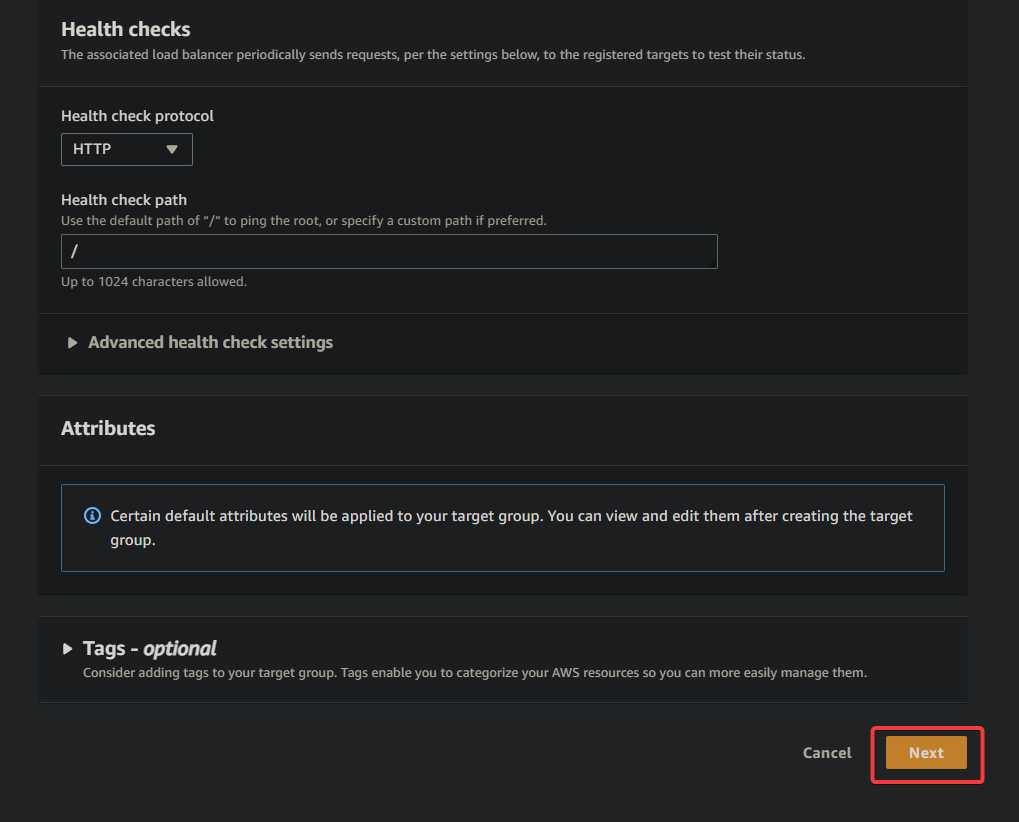
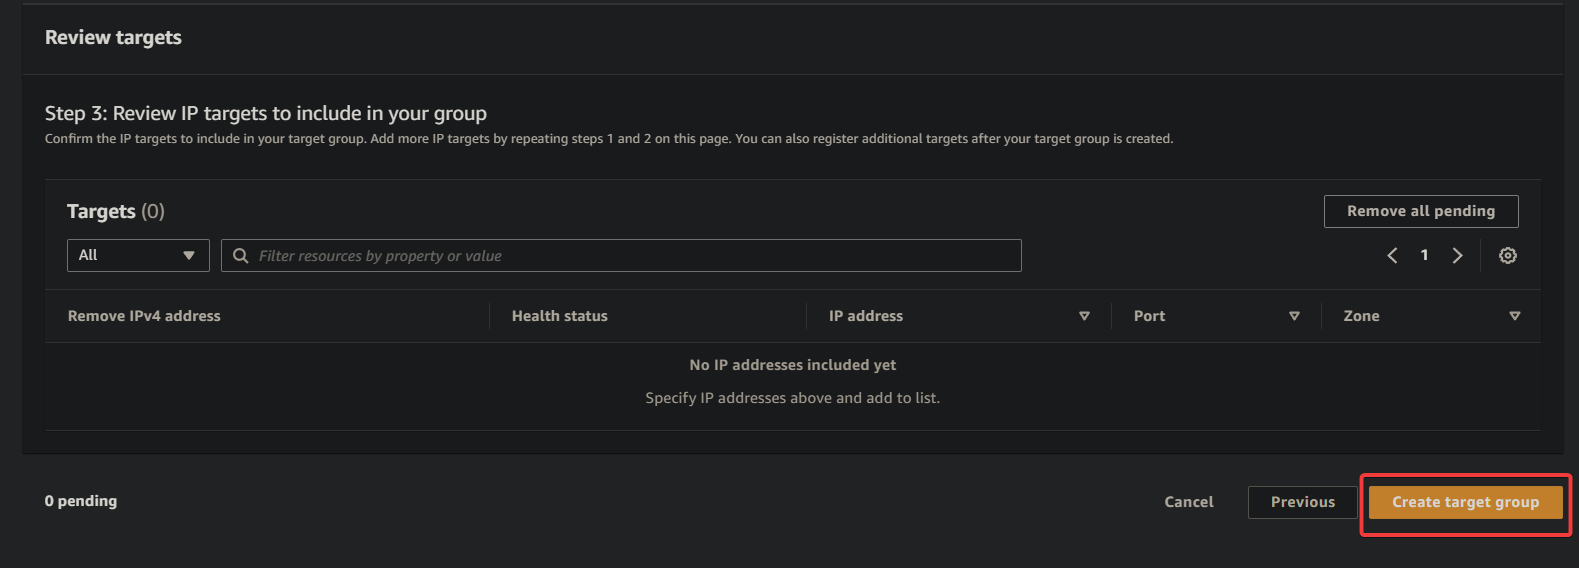
5. Review your setting, and click Create target group to finalize creating your target group.
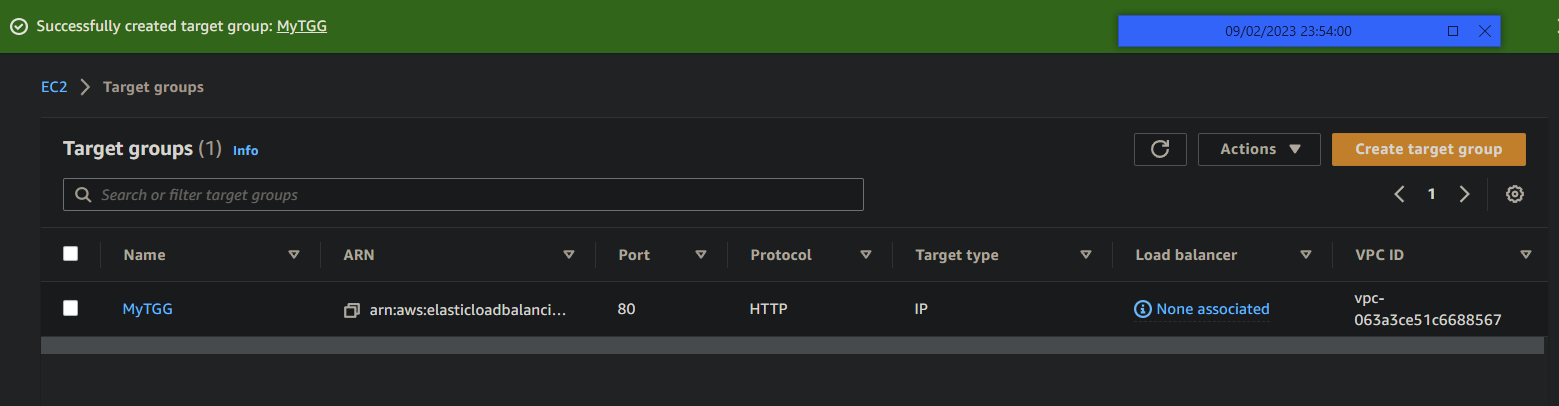
Once created, your browser redirects to the page below, showing the newly-created target group.
Creating an AWS Load Balancer to Handle Overwhelming Traffic
Since a target alone cannot handle overwhelming loads, you will create a load balancer to serve as a single point of contact for clients. An AWS Load Balancer distributes incoming traffic across multiple targets, such as EC2 instances, in multiple AZs.
As a result, the load balancer ensures your application can handle a mass of concurrent requests without overwhelming a single target.
To create an application load balancer for your web app and attach it to your ASG:
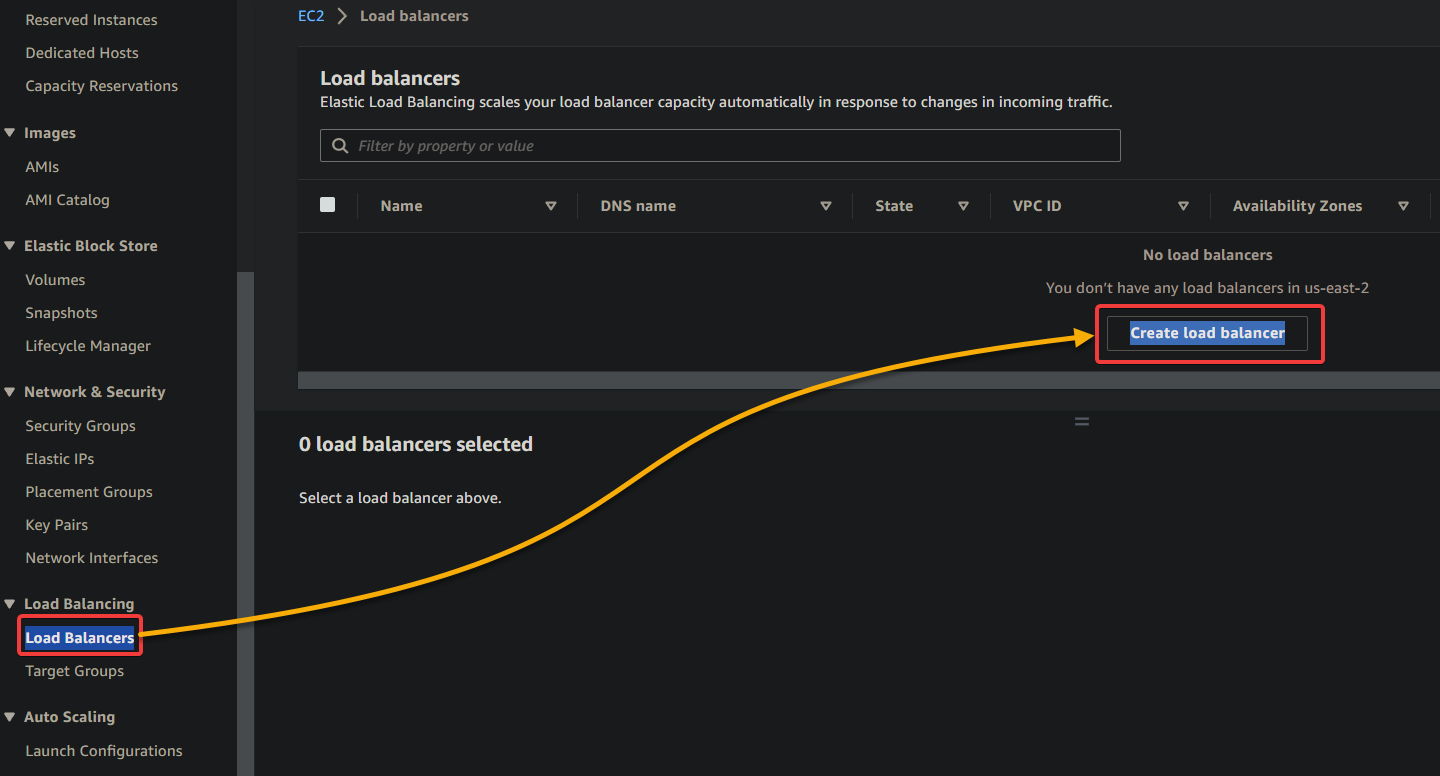
1. On your EC2 console, navigate to Load Balancers (left pane), and click Create load balancer to initiate creating a new load balancer.
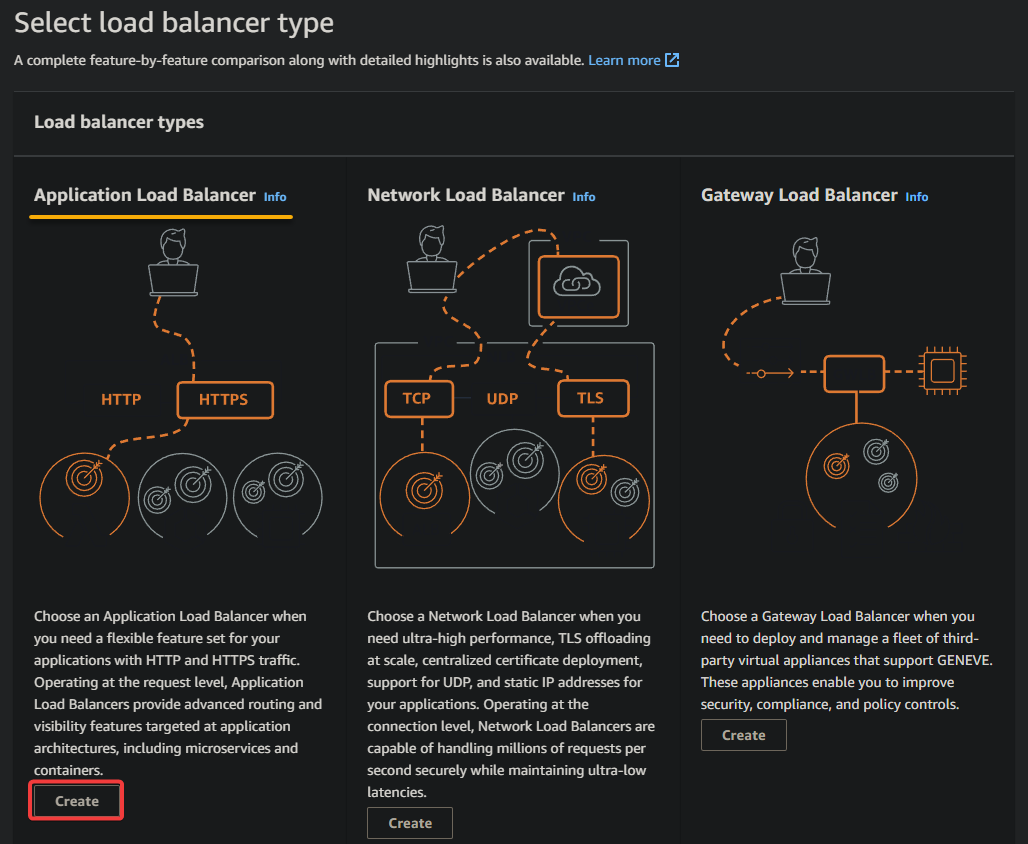
2. Next, click Create under Application Load Balancer to create an application load balancer.
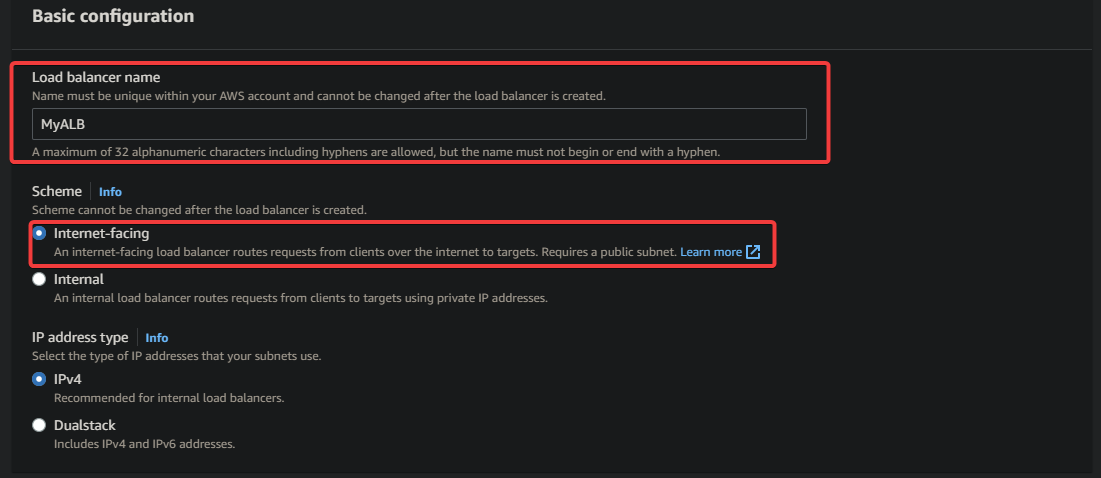
3. On the following screen, configure a balancer name and scheme as follows:
- Load balancer name – Provide a descriptive name (i.e., MyALB) for your application load balancer.
- Scheme – Choose the appropriate scheme for your use case. But for this tutorial, select internet-facing ]to expose your web app to the internet.
4. Now, configure the following network settings:
- VPC – Select the same VPC in which your ASG and your EC2 instances launched.
- Mappings – Select at least two AZs in the selected VPC. This option helps the load balancer distribute traffic across instances in different availability zones.

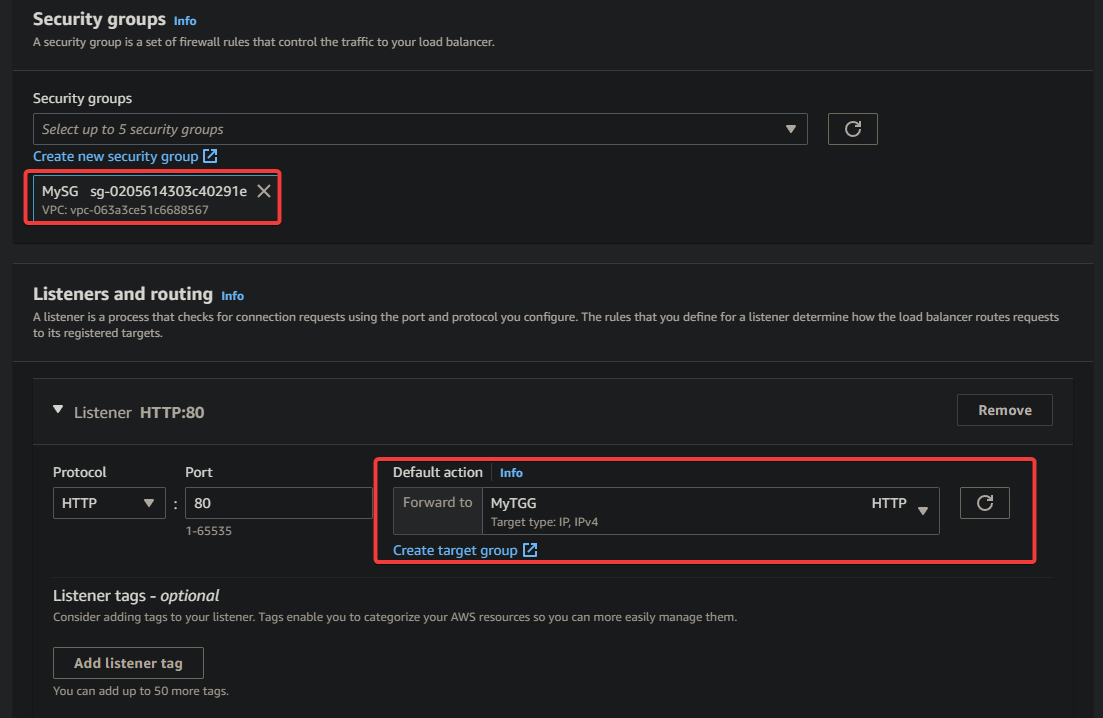
5. Scroll down, and configure the security groups and the load balancer’s default action:
- Security groups – Select an existing security group that has inbound/outbound rules configured to allow traffic on port 80.
- Default action – Select the newly-created target group (MyTGG) in the Forward to field. This option instructs the load balancer to route incoming traffic to the instances registered with that target group.
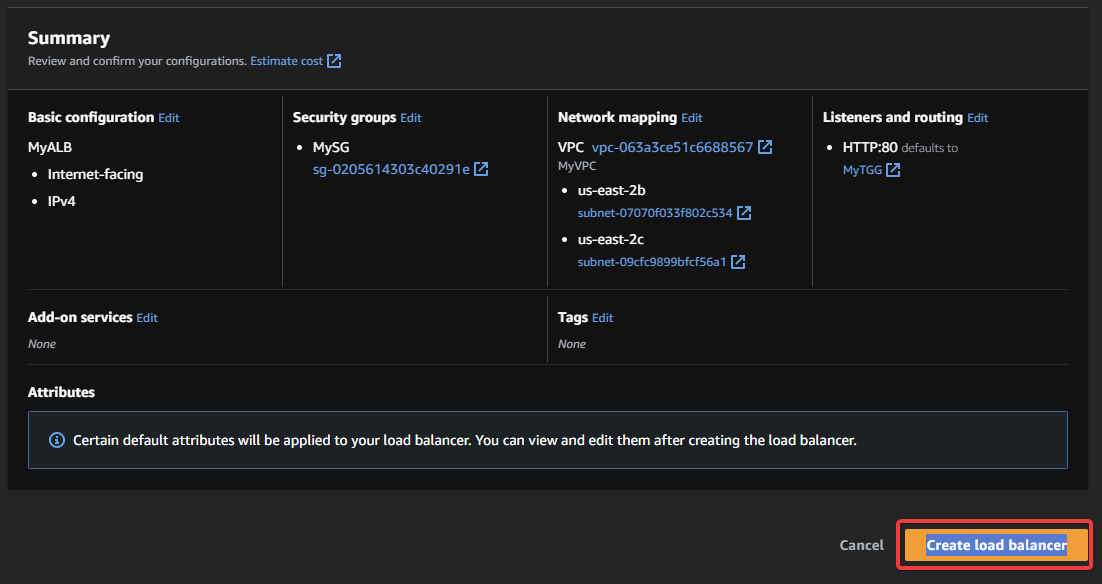
6. Keep other settings as is, and click Create load balancer to finalize creating your application load balancer.
During creation, the page below shows the load balancer’s state as Provisioning.

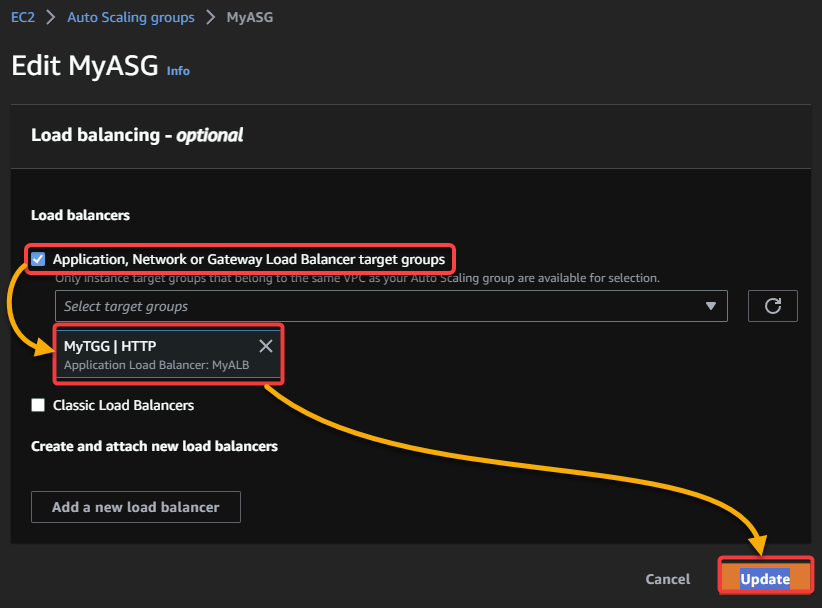
7. Next, navigate to your ASG (MyASG), and click Edit (far right of the Load balancing section) to open the load balancing configuration page.
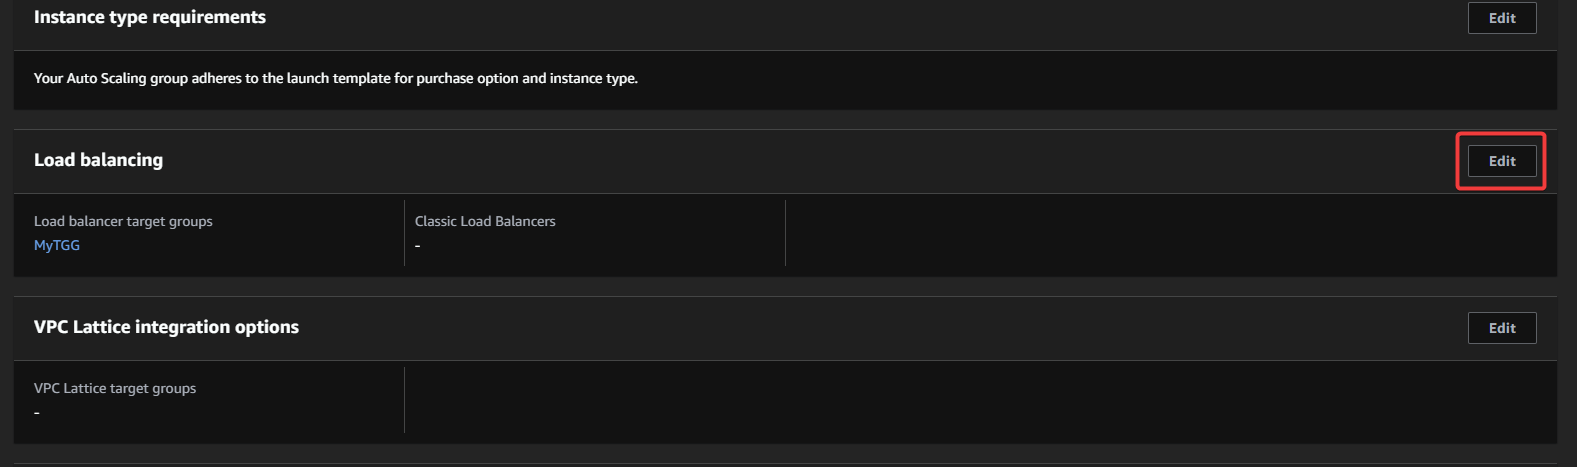
8. Select your target group (MyTGG), and click Update.
This option ensures new instances launched by your ASG automatically registers with the target group and will receive traffic from the load balancer.
Testing the AWS Load Balancer
After setting up your load balancer, how do you know it works as intended? You must test that your load balancer can distribute traffic effectively across your instances.
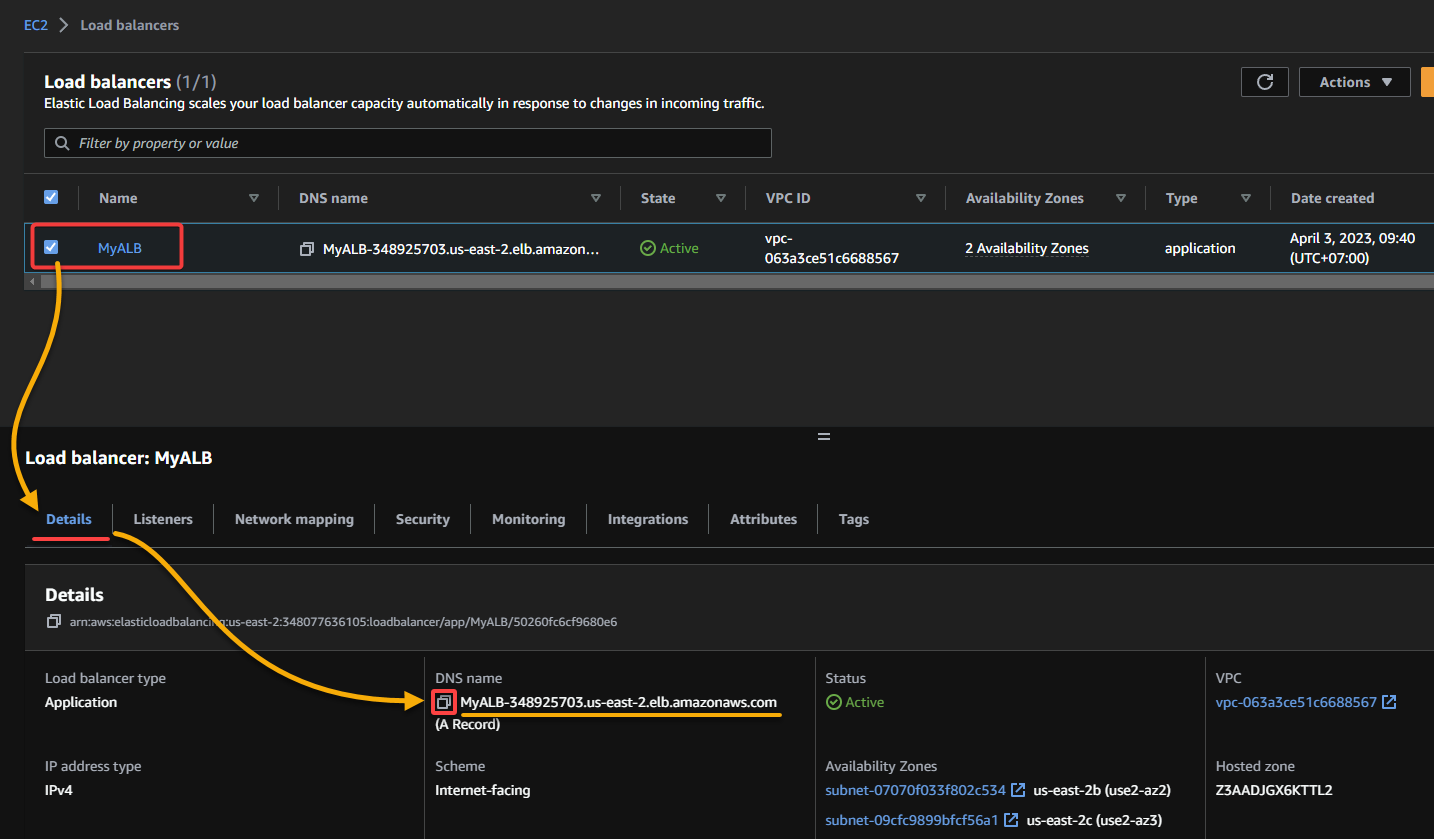
Return to the Load Balancers page, and retrieve your load balancer’s DNS name, as follows:
- Tick the box beside your load balancer (MyALB) to select it.
- Under the Details tab, look for the DNS name field, which displays the DNS name of your load balancer.
- Click the copy icon next to the DNS name field to copy the DNS name to your clipboard.
Now, open a new browser tab and navigate to the DNS name you copied in the previous step to load your application through the load balancer. Keep refreshing the page to simulate a large number of users or requests.
If everything goes well, your web application is load-balanced evenly across multiple AZs, as shown below. This behavior confirms that your load balancer and ASG are working correctly.

Conclusion
Setting up an auto-scaling group and configuring a load balancer are critical steps in ensuring your application can handle traffic effectively while providing a positive user experience. In this tutorial, you have learned to create an AWS load balancer and verified that traffic is distributed evenly across your instances.
At this point, you can confidently ensure your application is scalable, resilient, and can handle high-traffic volumes. With a fully functional load balancer, you can now provide fast, reliable, and consistent service to your users.
Now, why not automate the process of creating and configuring a load balancer by using the AWS CLI? Stay ahead of the competition in today’s fast-paced digital landscape!


