


With the power of cloud computing, hosting your website has never been easier in today’s digital world. Which service to look into? Keep your business competitive as you host a website on AWS EC2!
In this tutorial, you will learn to set up a web server on AWS EC2 instance to host your website and be live in no time.
Ready? Start your website hosting journey now!
Prerequisites
This tutorial comprises hands-on demonstrations. To follow along, you must have an AWS account with active billing enabled.
Setting Up Your EC2 Instance
When hosting your website, you need a virtual server on the cloud. AWS provides an EC2 instance as the virtual server.
To set up an EC2 instance, you will create a virtual machine (to host your website) in the cloud that you can access remotely. With an EC2 instance, you can install the server software and applications you need to host your website.
1. Open your favorite web browser, and sign in to your AWS Management Console.
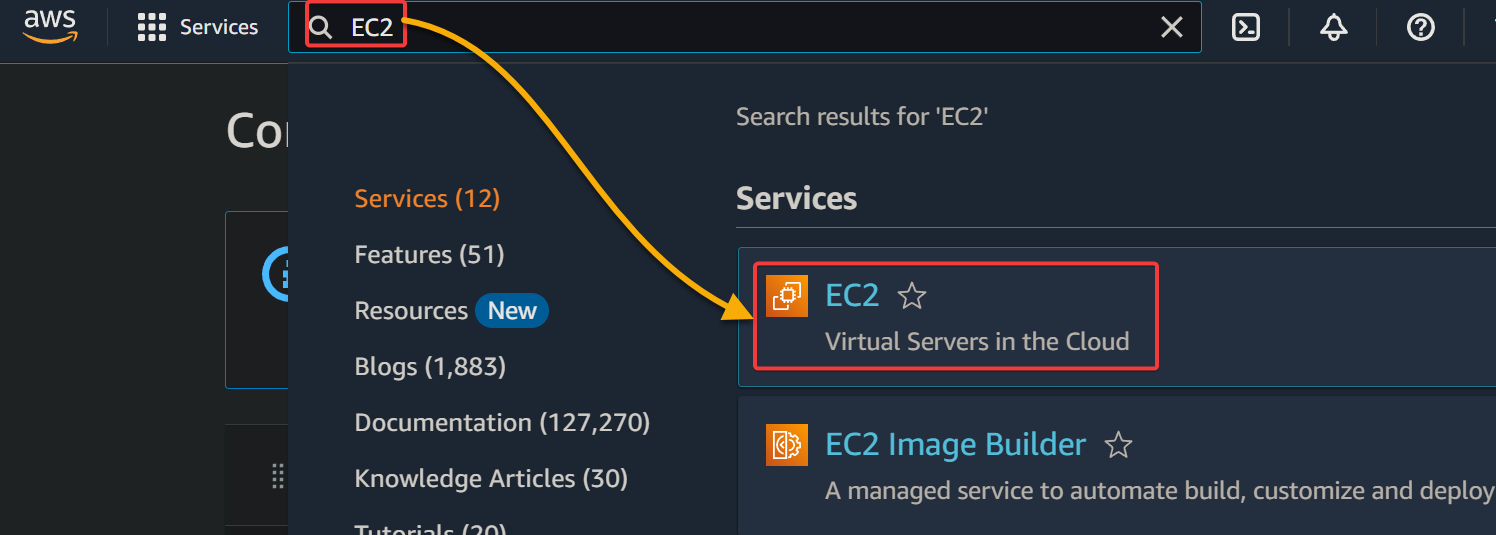
2. Next, search for and select EC2 from the result list to navigate to the EC2 console.
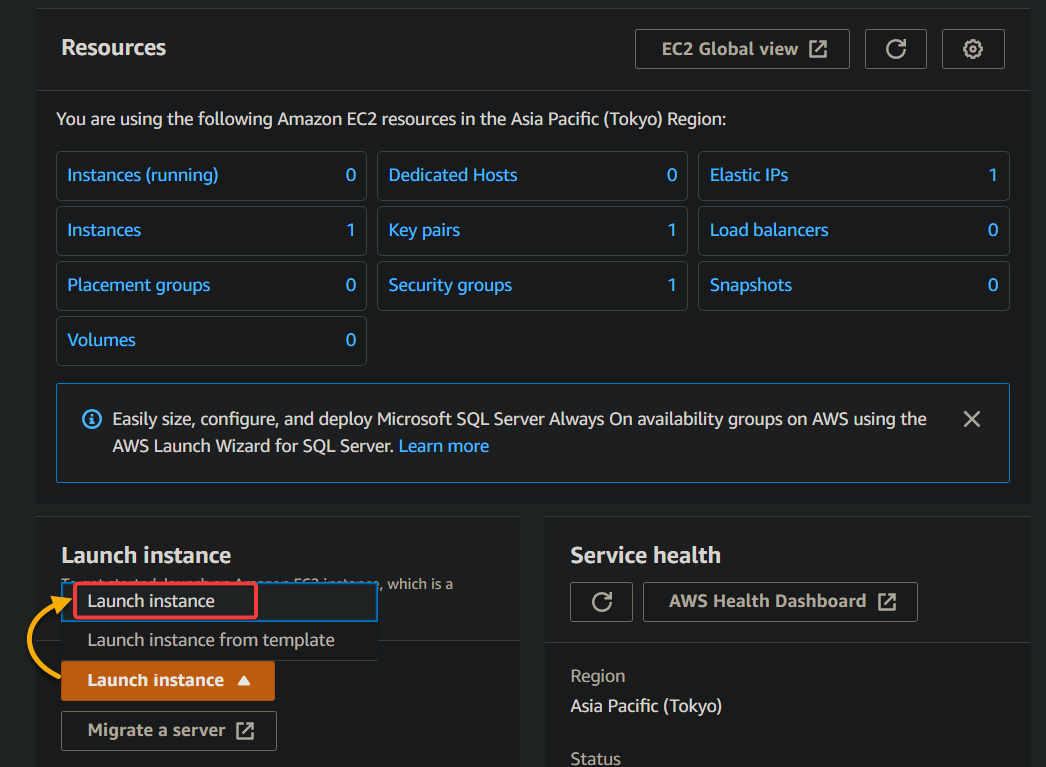
3. On the EC2 console, click Launch Instance, and choose Launch Instance to begin creating your EC2 instance.
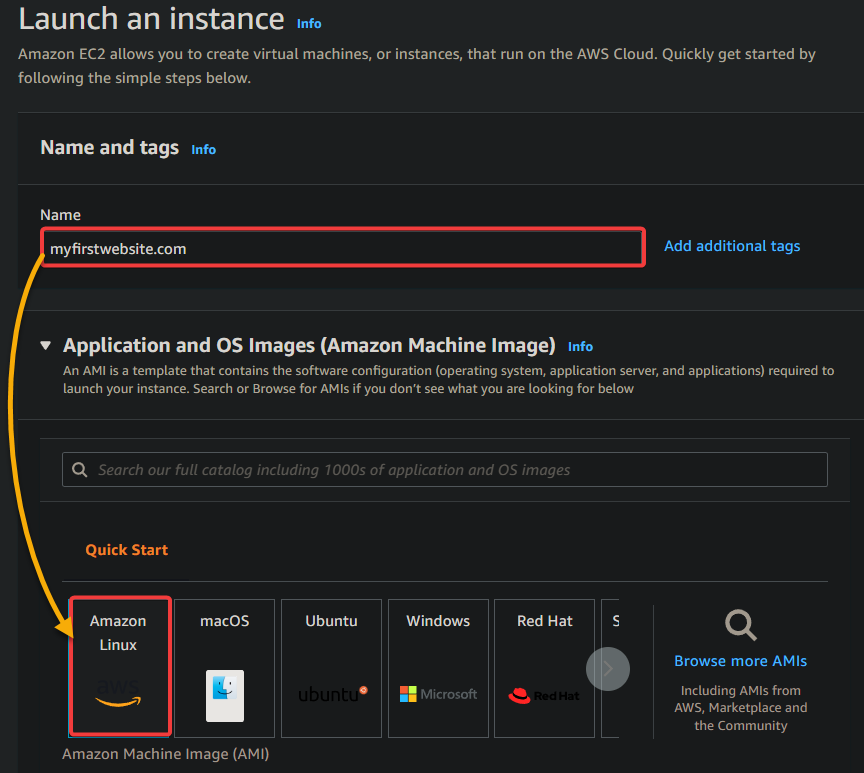
4. Configure the following Name and OS Image for your EC2 instance:
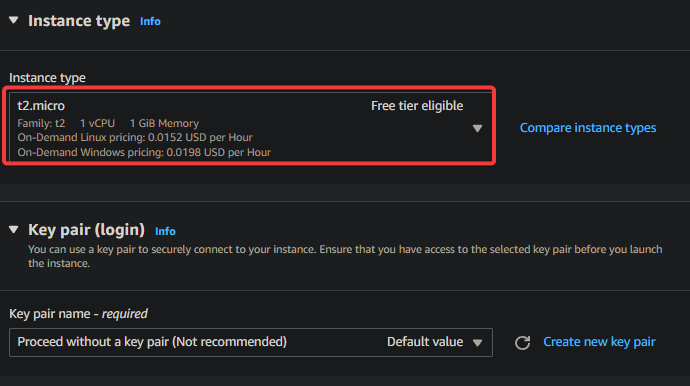
5. Scroll down and choose the Instance type that best suits your needs for hosting your website.
AWS offers a variety of instance types, ranging from the small (micro) size to the powerful xlarge size. The free tier t2.micro instance type is sufficient, but you may need to select a more powerful instance type as your website grows.
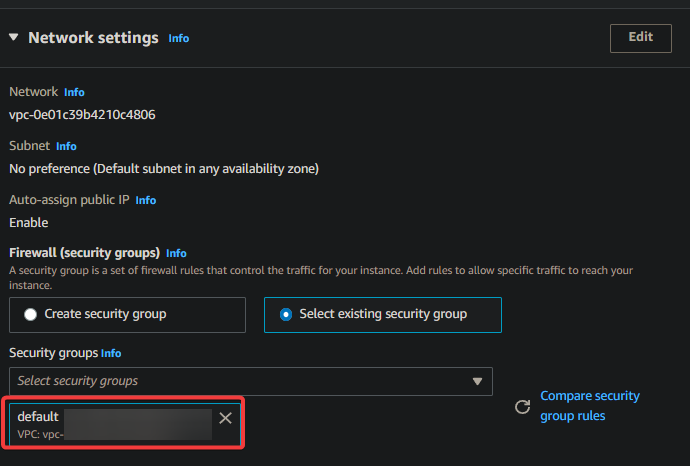
6. Next, select an existing security group under the Network settings section or create a new one. Security groups act as virtual firewalls to secure your instance from unauthorized access.
This tutorial uses the default security group, as shown below.
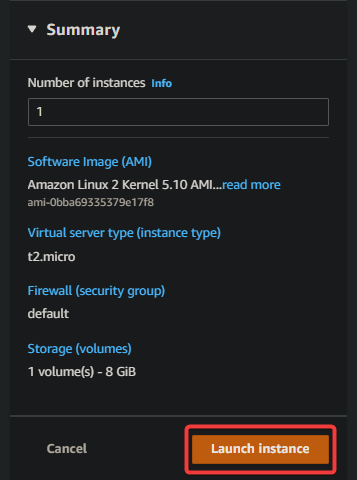
7. Keep other settings as default, and click Launch under the Summary section (right pane).
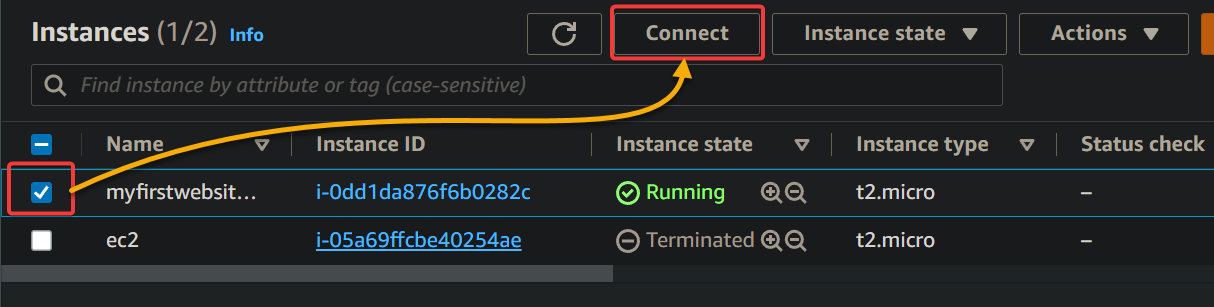
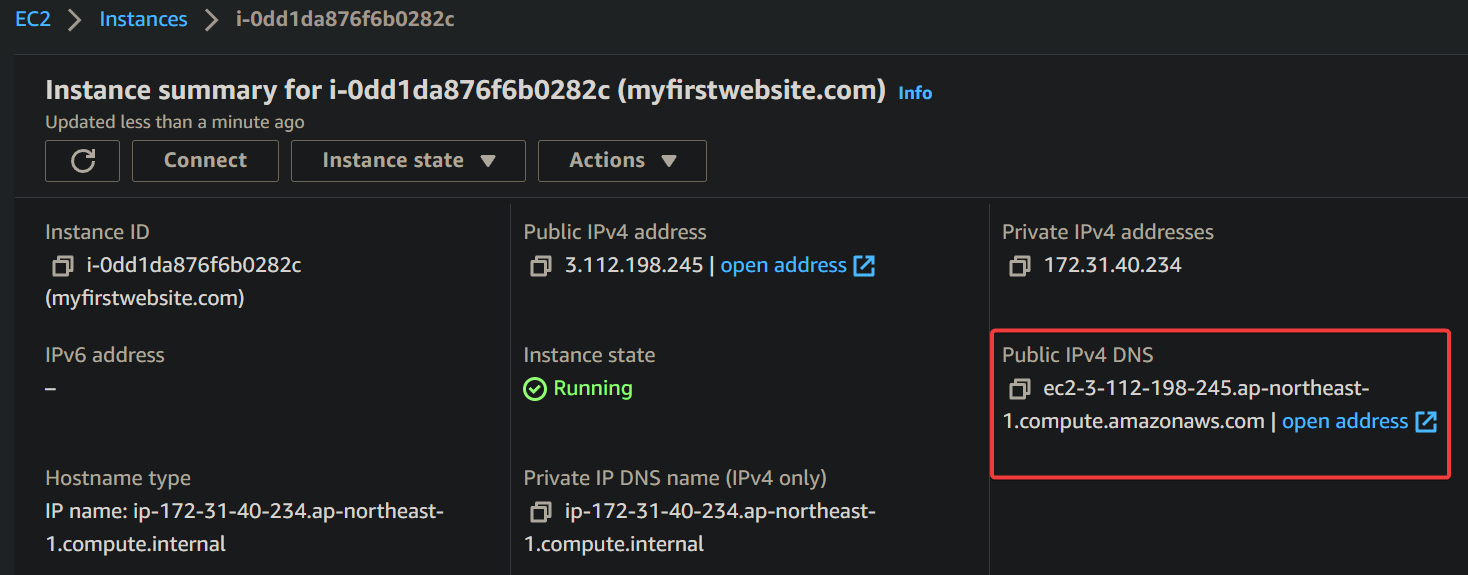
8. Lastly, navigate to the EC2 console, and you will see your new instance in the list, as shown below.
Congratulations! You have successfully set up an EC2 instance to host your website.

Installing a Web Server to Host a Website on AWS EC2
With your EC2 instance set up, you now need a way to deliver web content to users over the internet, a web server. As a software program, a web server on your EC2 instance allows you to host your website and make it accessible to users.
Many different web server options are available, including Apache, NGINX, and Microsoft IIS. But this tutorial uses Apache, one of the most popular and widely used web servers, open-source and highly configurable.
To install Apache as the web server on your EC2 instance, follow these steps:
1. On your Instances page, tick the box next to your EC2 instance, and click Connect to connect to the selected EC2 instance.
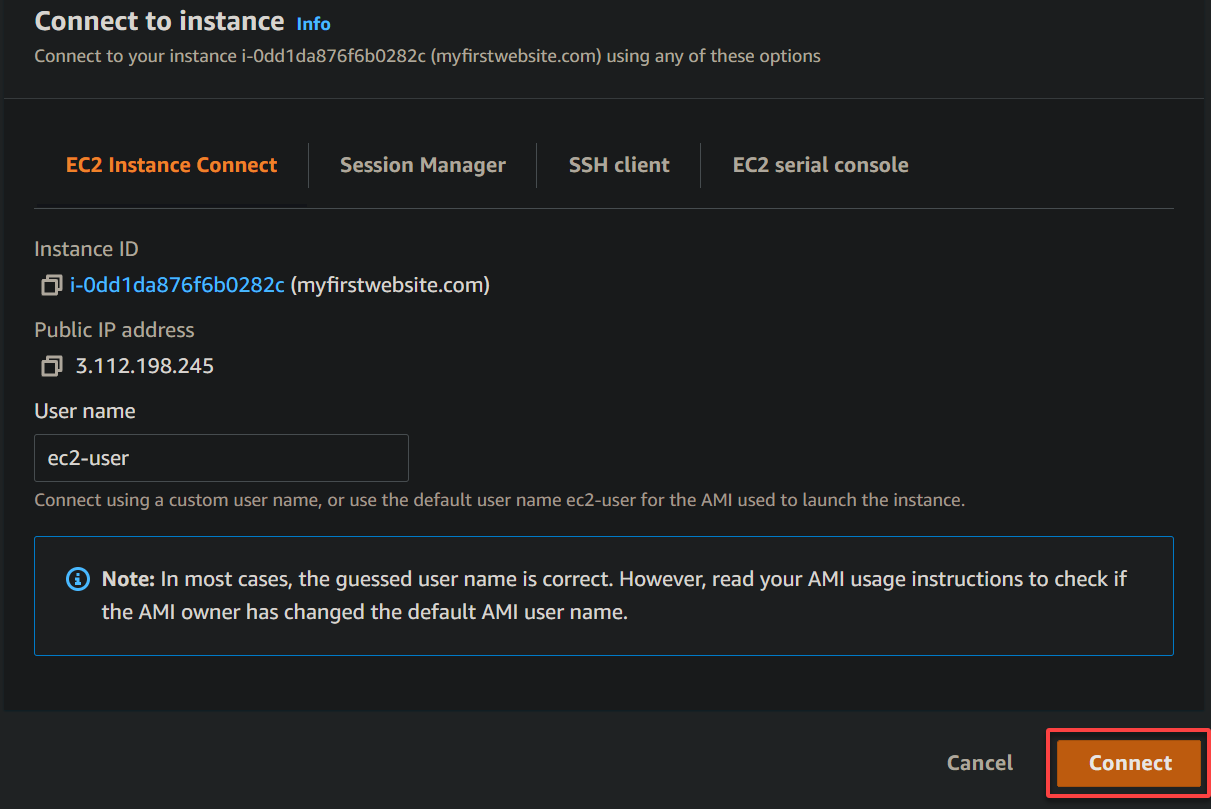
2. Next, keep the settings as default, and click Connect, which opens a console window where you can run commands to your EC2 instance remotely.
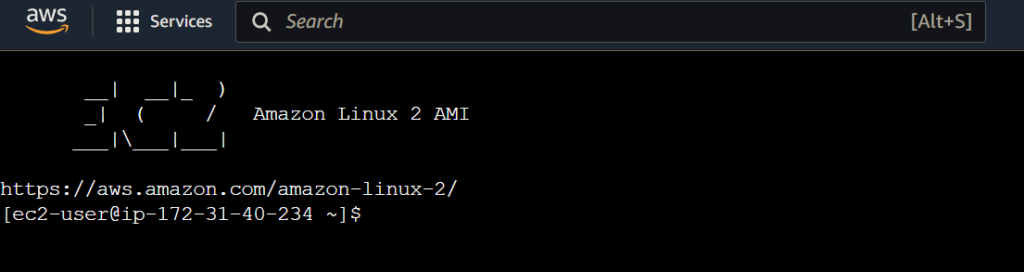
The output below signifies you have successfully connected to your EC2 instance.
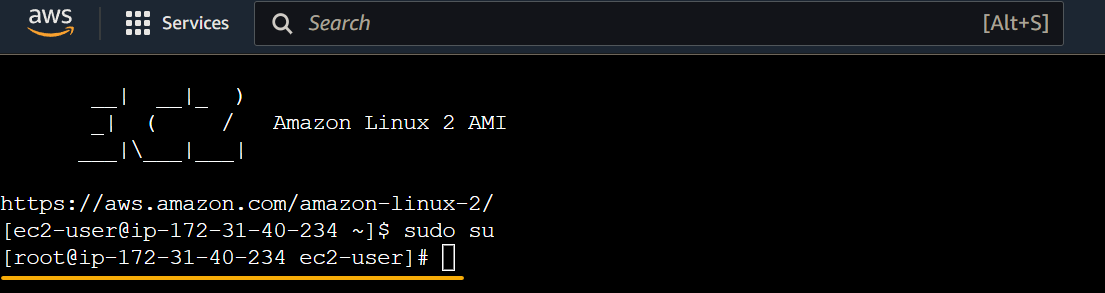
3. Run the below command to gain root access and fully control your EC2 instance. Doing so lets you make any necessary changes or modifications to your web server.
sudo suOnce you gain root access, your prompt changes, like in the screenshot below.
4. Now, run the following yum command to update the list of available packages. This command ensures you have the latest version of packages and security updates.
yum update -y
5. Once updated, run each command below to install the Apache web server (httpd) and the PHP 8.0 (php8.0) package from the amazon-linux-extras repository.
yum install httpd -y
sudo amazon-linux-extras install php8.0 -y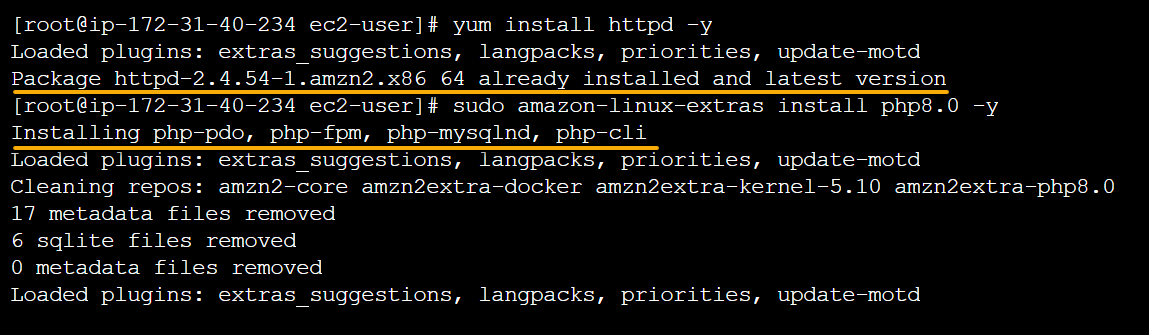
6. Now, run the below service commands to start the Apache web server (httpd) and check its status.
service httpd start
service httpd status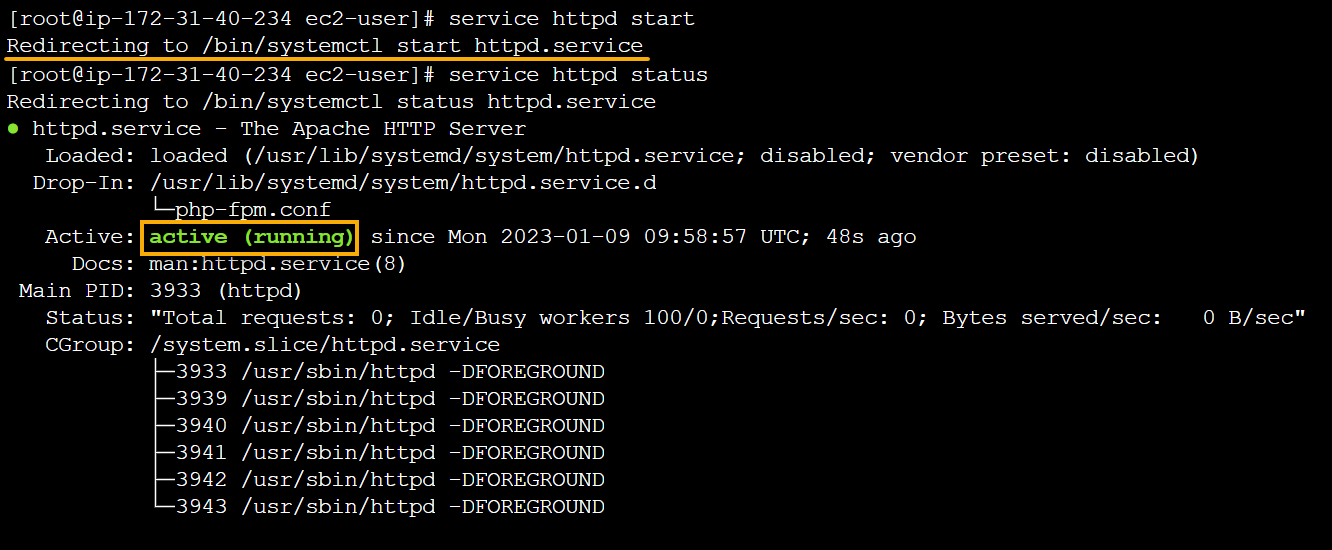
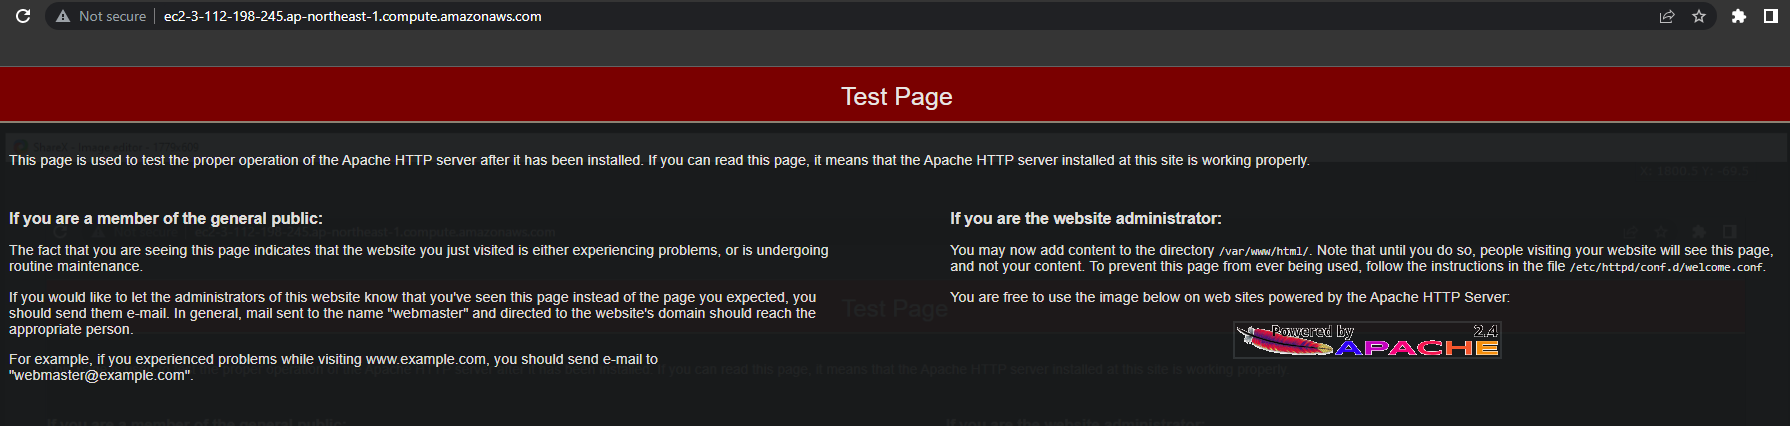
7. Finally, open the Public IPv4 DNS of your EC2 instance in a new browser tab to request web content from the Apache web server.
If all goes well, you will see the Apache test page, as shown below, which indicates you have successfully installed and configured the Apache web server.
Creating Your First Website
Now that you have installed a fully functional Apache web server, you are ready to host your website. Well, almost, since you first need a website to host. In this tutorial, you will create a simple dynamic web page using PHP, generated by a web server, and can display different content on each access.
In this age of websites, dynamic pages are essential to engaging visitors and providing them with a great experience.
Creating your dynamic web page involves creating and placing a PHP script in the appropriate directory on your EC2 instance. Doing so lets the Apache web server serve your website to users.
1. Navigate to the root directory of your web server (/var/www/html), which is main directory where all of the web content for your website is stored.
When a user accesses your website, the web server looks in the root directory to find the requested content.
cd /var/www/html
2. Next, create a new file called index.php with your preferred editor. This file is an interactive landing page for your website, displaying different content based on user input.
3. Add the following code to your index.php file, save the changes, and close the file.
The code below creates a simple PHP script that generates a dynamic web page with a Click Me button. When users click the Click Me, the script displays a different message each time as defined in the array of messages.
At this point, your web page is ready to be served by the Apache web server.
<html>
<body>
<?php
// Create an array of messages
$messages = array("Thank you for clicking the button!", "Thanks for your interest!", "Glad you enjoyed the website!");
// Check if the "click" variable is set in the POST data
if (isset($_POST['click'])) {
// If the "click" variable is set, select a random message from the array
$message = $messages[array_rand($messages)];
} else {
// If the "click" variable is not set, use the default message
$message = "Hello, World!";
}
// Output the message to the web page
echo $message;
?>
<!-- Create a form with a "Click Me" button that submits a POST request -->
<form method="post">
<input type="submit" name="click" value="Click Me">
</form>
</body>
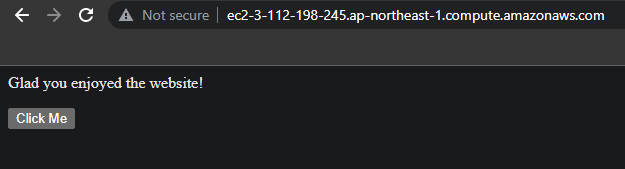
</html>4. Ultimately, reopen the Public IPv4 DNS of your EC2 instance in a new browser tab, and click the Click Me button to see your website in action.
As shown below, you will see a different message each time you click the button.
Congratulations! You have created your first dynamic web page using PHP and Apache web servers.
Conclusion
Having a website is essential for almost every business. And the good news is that in this tutorial, you learned to host a website on AWS EC2. You also gained the skills to create dynamic web pages using PHP and Apache.
You now have a fully functional dynamic web page using Apache and PHP. But why not enhance your website’s security with a free Cloudflare SSL certificate? You are now ready to build the online presence you’ve always wanted!


