


So you’ve got an Amazon Web Services (AWS) EC2 private instance running in a private network. Things are going well until you need to connect to your EC2 instance over the Internet. Now what? You need to set up an AWS bastion host with a public elastic IP address.
Not a reader? Watch this related video tutorial!But wait, do you actually need a bastion host? Nope. In fact, you can use AWS Systems Manager (SSM) to take the place of a bastion host instance. You can then use the AWS CLI to connect to fleets of EC2 instances without exposing another host to the Internet!
Let’s dig in and see what you can do with SSM to connect to your EC2 instances with the AWS CLI! No jump server necessary.
Prerequisites
This article will be a tutorial with hands-on demos. If you’d like to follow along, be sure you have the following:
- An AWS Account with permission to create EC2 instances and IAM policies
- A local computer running MacOS, Linux, or Windows 10. These operating systems support SSH or OpenSSH clients.
If you are running Windows, be sure to install the latest release of OpenSSH. At the time of writing, the latest version is 8.1p1. Earlier versions of OpenSSH do not allow for executables on the system path to be run, which is shown in some of the demos.
- A Linux EC2 instance with no public IP address – This tutorial will use Ubuntu 20.04 LTS from the AMI ID ami-090846e63eb748bc4, but any Linux instance will do. The instance will be in the us-east-1 region called ssm-ssh-demo-instance.
If you will stick with Ubuntu, make sure to use one of the official Canonical Amazon Machine Images (AMIs) listed here.
- AWS CLI installed on your local computer and authenticated to your AWS account – This tutorial will use v2.
- An AWS IAM role that an EC2 instance can assume with the AmazonSSMManagedInstanceCore AWS-managed policy attached. You’ll need this to allow your EC2 instance to use some of SSM’s services.
- An AWS IAM user – This tutorial will use an IAM user using the AmazonSSMFullAccess policy assigned, but you can define more granular permissions if you wish.
- A Virtual Private Cloud (VPC) with a private subnet and a NAT gateway – This tutorial will use a VPC with ID vpc-025553dbb3ae36904 and a private subnet with ID subnet-09933dcee9e3f4226.
Adding an EC2 Instance to SSM Inventory
With your EC2 instance set running without a public IP address, it’s time to begin building the solution using SSM to connect to that instance. After all, we don’t need no stinkin’ AWS bastion host!
“What’s the worst that can happen if you have a public IP address on an EC2 instance? Known public IP address ranges that are actively being scanned by malicious actors and the guidance of AWS to not have any publicly-facing IP addresses on EC2 instances, to name a few.
AWS Systems Manager (SSM) was initially conceived as a tool to manage large groups of resources. It was built to patch large sets of EC2 instances or monitor compliance with policies set by an organization.
To connect to EC2 instances, SSM installs an agent that serves two purposes; it reports back information to SSM for reporting and, for what you’re here for, also allows an AWS user or role with the right permissions to connect with a shell to those instances.
SSM does not use an interactive SSH console to connect to EC2 instances. This concept is important to understand for later.
Let’s kick off this tutorial and add an EC2 instance to SSM. To do that:
1. Open your favorite web browser and navigate to the AWS Management Console.
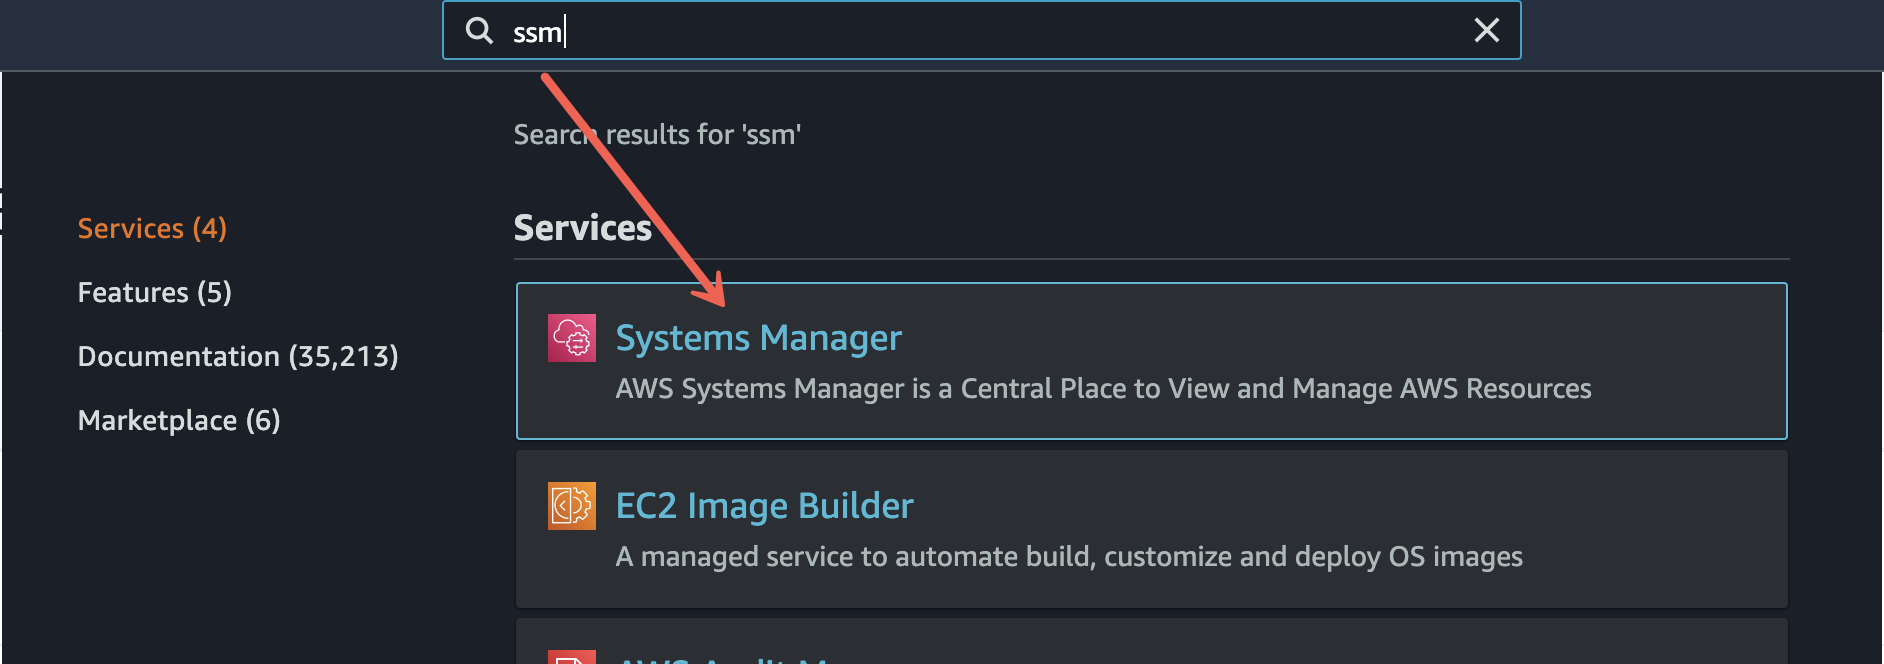
2. In the management console, navigate to the Systems Manager page.
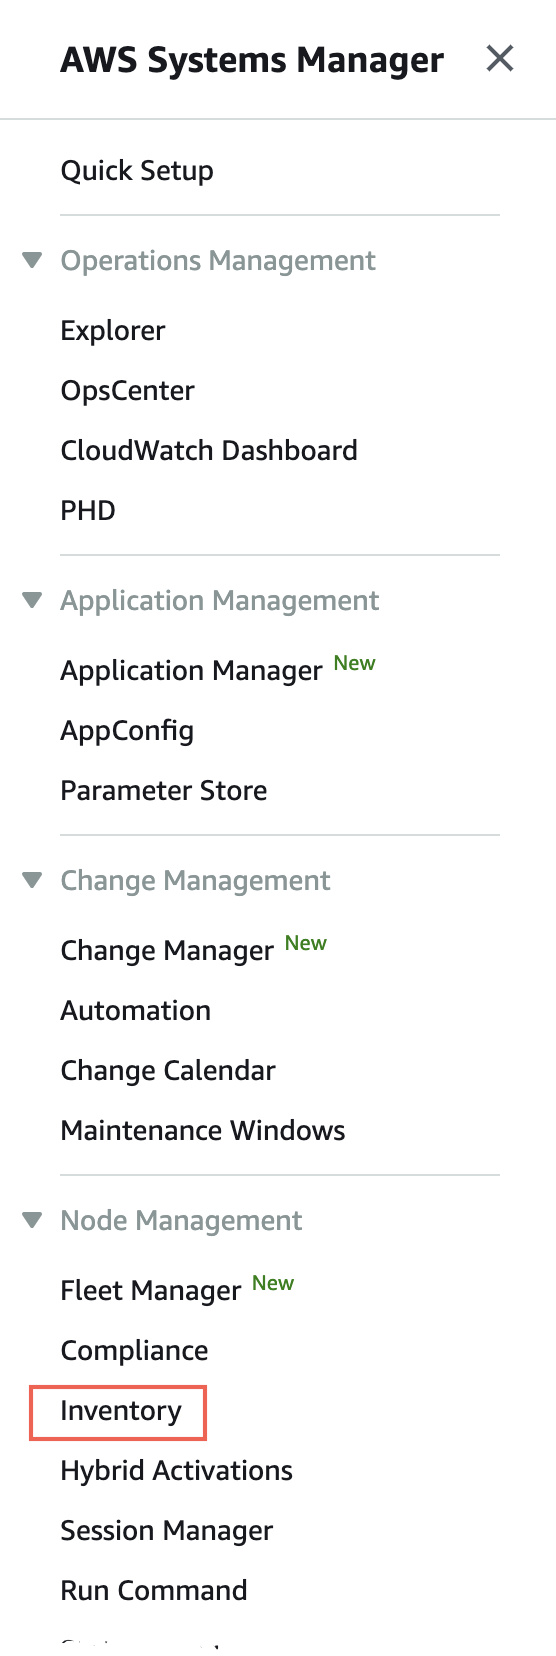
3. Scroll down the left side and under Node Management, click on Inventory.
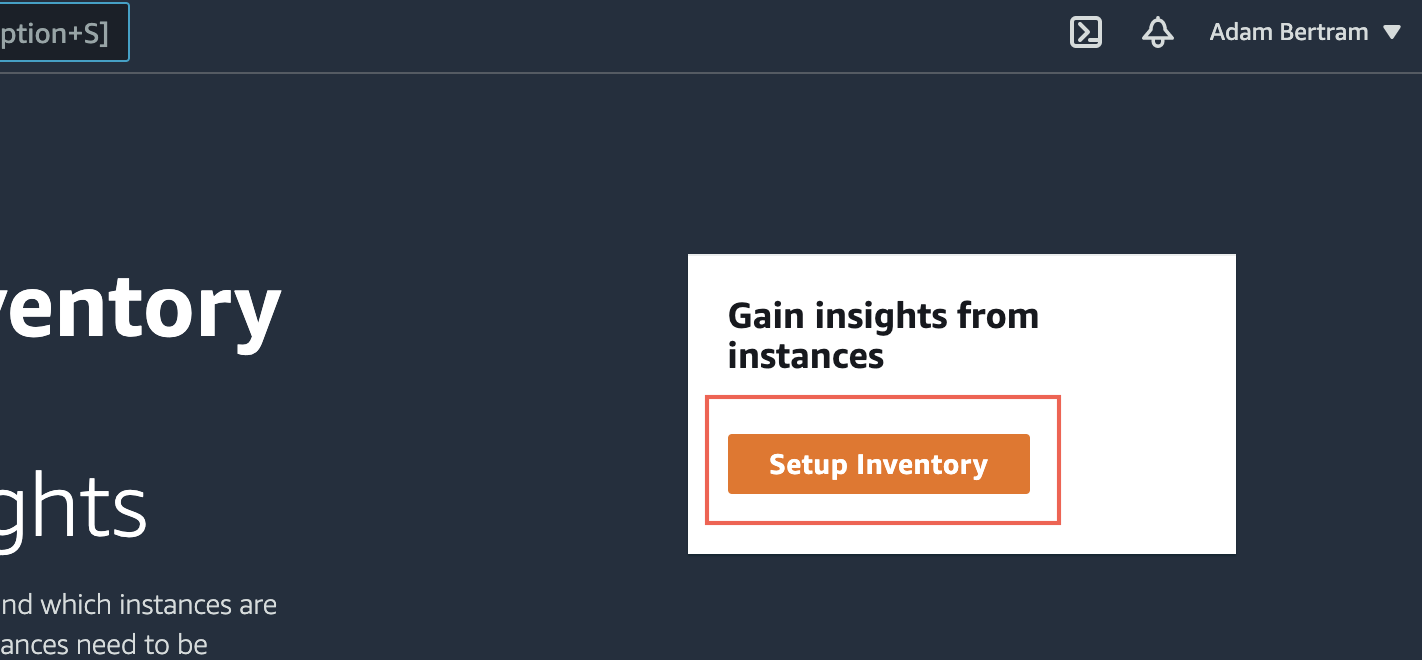
4. Click on the orange Setup Inventory button. This action will open a page to set up the EC2 instance.
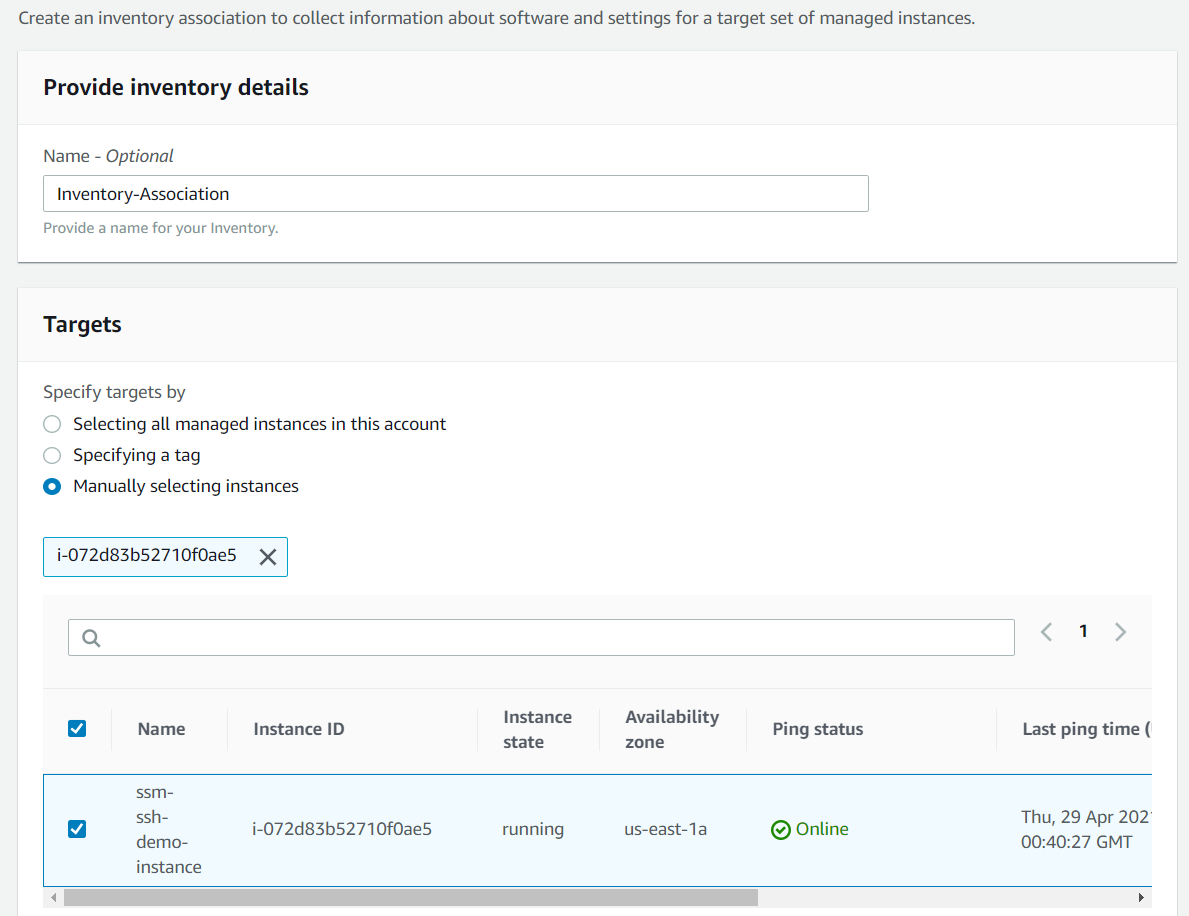
5. Select Manually selecting instances under Targets. You must provide some criteria for selecting the instance. You can do with via all managed instances, a tag, or simply selecting them individually. For simplicity, you’ll select one.
After selecting how to pick the target, select the EC2 instance, you’d like onboard to SSM. When complete, you should see a page that looks like the below screenshot.
When complete, scroll down and click on Setup Inventory to accept all of the parameter defaults.
Once you click on Setup Inventory, AWS will install the SSM agent onto the instance and begin reporting statistics and usage back to AWS.
When complete, the managed instance should appear under the Managed instances tab on the Fleet Manager page. You’re one step closer to connecting to your private EC2 instance without an AWS bastion host!
Limiting the SSM Agent’s Permission
When the SSM agent is installed on a new Linux instance, SSM sometimes adds the ssm-user account to the sudoers file depending on the AMI. This action gives the account admin privileges to that instance. SSM creates this user to authenticate to the instance to perform automated tasks.
In this tutorial, you’re not setting up SSM for any automated management tasks. Instead, you are setting up SSM just to open an interactive shell to the instance, so there’s no need for that additional admin user account. So let’s remove that user from the sudoers file. You’ll do this via the SSM Run Command feature.
Check out the AWS documentation for full instructions for removing the ssm-user from the sudoers file.
- Navigate to the SSM Run Command page and select the instance you just onboarded to SSM.
2. For Command Document, select AWS-RunShellScript and input the following under the Command parameters area in the Commands box.
cd /etc/sudoers.d
echo "#User rules for ssm-user" > ssm-agent-users
3. Run the command on the EC2 instance to remove the ssm-user from the sudoers file. The sudoers file should look like below when complete.
# User rules for ssm-userEstablishing an SSM Session via the AWS CLI
At this point, you have an EC2 instance set up with SSM ready to connect to (no AWS bastion host needed)! But, you’re not quite finished. This tutorial is all about using the AWS CLI to connect to private EC2 instances. To do that, you must first establish an SSM session (open a WebSocket from the AWS CLI to the SSM agent.
The AWS CLI establishes sessions to EC2 instances using the Session Manager plugin. The Session Manager plugin installs libraries that the AWS CLI uses to start and end sessions using SSM. This plugin is not as popular as others, so it’s not installed by default.
To install the Session Manager plugin:
1. Open a terminal on your local computer.
2. Refer to the AWS documentation for setup. The setup process is short.
3. Once installed, run the aws ssm start-session command providing a target parameter of the EC2 instance ID you onboarded to SSM earlier.
On the back-end, AWS uses the ssm-user through the SSM agent and authenticates via your IAM user authenticated via the AWS CLI.
aws ssm start-session --target i-072d83b52710f0ae5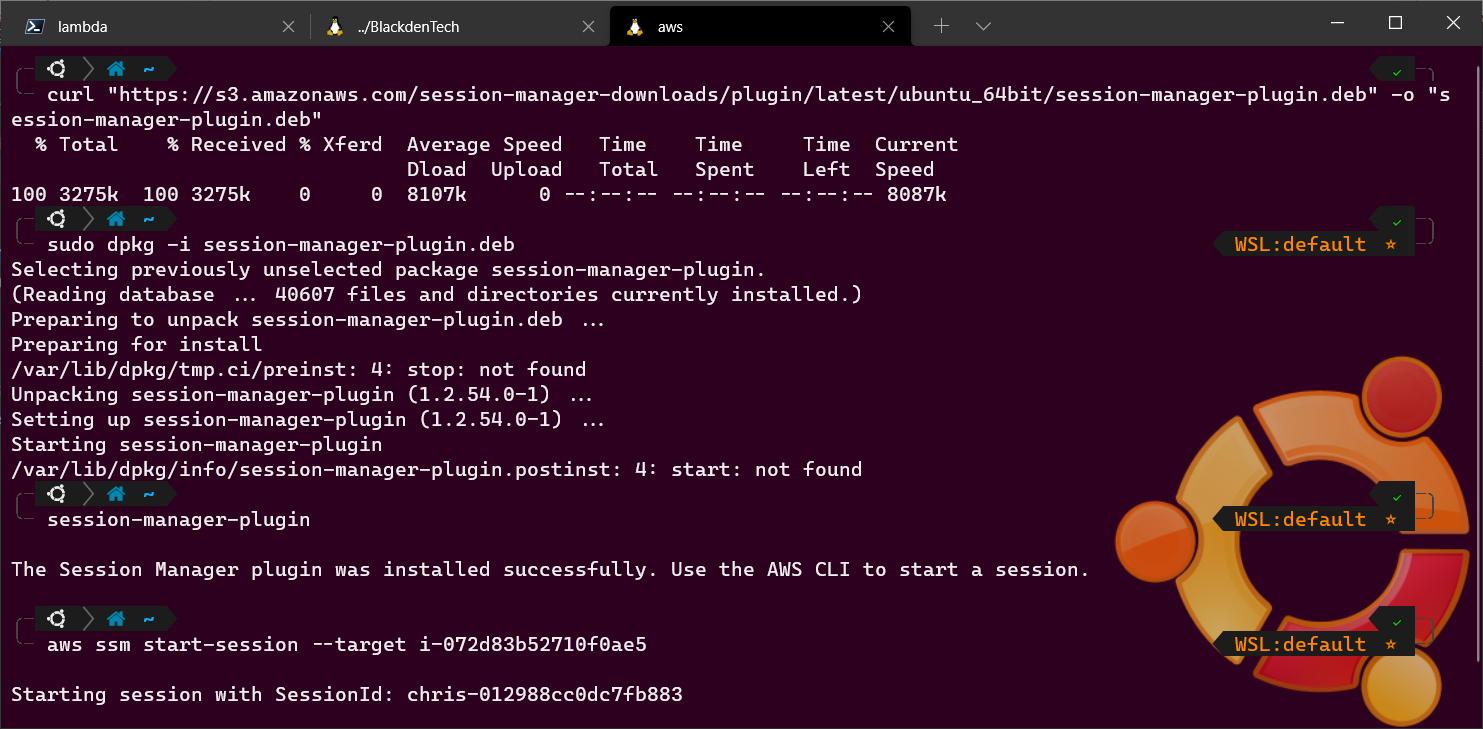
At this point, you’re not connected with SSH to the EC2 instance but only with SSM. You can’t interactively control the remote host via SSH like you’re used to. You can now use this SSM session to connect via SSH without an AWS bastion host.
Connecting to the Instance with SSH
You should now be connected to the EC2 instance via an SSM session. You have just one more step to go, connecting through the SSM session via SSH with no need for a Linux bastion host.
When connecting to an SSH host via the command line, you’ll typically provide a command that looks like below with the (optional) key file created with a key pair, the username, and IP address.
ssh -i <KeyFile> <RemoteUsername>@<IPAddress>But, this approach doesn’t work if you’re connecting from the Internet and the EC2 instance doesn’t have a public IP address. Instead, you must proxy through the connected SSM session with the ProxyCommand SSH option.
Using the ProxyCommand SSH client option, this option specifies a completely separate process to connect to the remote host. Since the SSH client can’t directly connect to the EC2 instance, it can, in a sense, piggyback onto the already connected SSM session.
To use the ProxyCommand SSH option, you must tell the SSH client how to invoke the external process that the SSH client will tunnel through. To connect to the private EC2 instance with your SSH client through the SSM session acting as a bastion host, run the following command.
ssh -i <KeyFile> -o ProxyCommand="sh -c \"aws ssm start-session --target %h --document-name AWS-StartSSHSession\"" RemoteUsername@InstanceIDNote the escaped (
\) double quotes.
When you initiate the SSH client using the command syntax above, a few steps take place:
1. The SSH client reads the values for InstanceID.
2. It then replaces the host placeholder (%h) defined in the aws ssm start-session string which creates a string like below.
aws ssm start-session --target InstanceID --document-name AWS-StartSSHSession3. Once the aws ssm start-session command has been “built” and not yet executed, it opens up a new shell with sh -c.
4. And tells the shell to invoke the aws ssm start-session command to create a new SSM session.
5. Once the SSM session has been established, the SSH client creates a persistent connection through the SSM session, still encrypting all traffic through the connection.
If you’d like to use PowerShell instead of
sh, changesh -ctopowershell -corpwsh -cdepending on which version of PowerShell you are running.
As-is, you’ll have to run that command every time you’d like to use your SSH client to connect through the SSM session. To prevent having to type this entire string every time, you can add the ProxyCommand to your SSH config file (~/.ssh/config on Linux/macOS and $USERPROFILE\.ssh\config on Windows).
If you’d like to add the ProxyCommand to your SSH config file, add the following below. In this example, the host parameter is looking for a pattern that begins with i- or mi-. Any SSH connections to instances with names that fit that pattern will have the ProxyCommand applied to them.
host i-* mi-*
    ProxyCommand sh -c "aws ssm start-session --target %h --document-name AWS-StartSSHSession --parameters 'portNumber=%p'"
Conclusion
By now, you can connect to EC2 instances more securely using the AWS Systems Manager and using the SSH ProxyCommand option. This method doesn’t make for a good party trick, but it might impress your boss if you can show how to better secure connections to development servers!
How do you plan on using this SSM/SSH trick in your environment?


