


Once upon a time, you were limited in the kind of computers you could connect to with Windows PowerShell using PowerShell Remoting. Since PowerShell Remoting only supported the WsMan provider, your chances of connecting to computers running Linux, for example, were nil. Back in 2015 though, Microsoft introduced support for SSH in Windows bringing forth tons of potential and finally allowing you to use SSH and PowerShell together.
In this article, we’re going to dive in and see how to set up Windows’ SSH client and how you can leverage SSH and PowerShell Remoting.
This SSH and PowerShell post is part of the #PS7Now blog series. Be sure to check out all of the other contributors in this series at the bottom of this post.
Before You Start
This article will be a walkthrough tutorial. If you intend to follow along, be sure you meet the following prerequisites:
- Windows 10 – All examples will use Windows 10 Build 1903. The example will be in the same domain as the remote Windows Server.
- PowerShell v6+ installed on Windows 10 – All examples will use PowerShell 7 RC2.
- A remote SSH server – All examples will use a Windows Server SSH machine. If you’re connecting to a Linux machine, you can skip the server setup steps.
- TCP port 22 available on the remote server
SSH Client (Windows 10) Setup
Before you open up a PowerShell console, you’ll first need to perform a few one-time tasks to get SSH and PowerShell working together to make sure Windows 10 can connect to a remote SSH server.
Add the OpenSSH Folder to the PATH environment variable
OpenSSH comes pre-installed on Windows 10 but sometimes needs a little help to work with PowerShell Remoting. If you’ve already tried to use Enter-PSSession, for example, to connect to a remote SSH system and came across the error below, you need to ensure the path to the OpenSSH executable (ssh.exe) in the PATH environment variable.
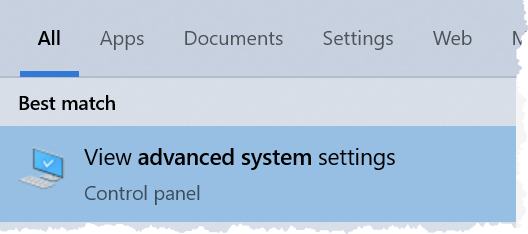
Enter-PSSession : An error has occurred which PowerShell cannot handle. A remote session might have ended.To add the OpenSSH folder path to the PATH environment variable, click on the Start button and search for advanced system settings then click on View Advanced System Settings as shown below.
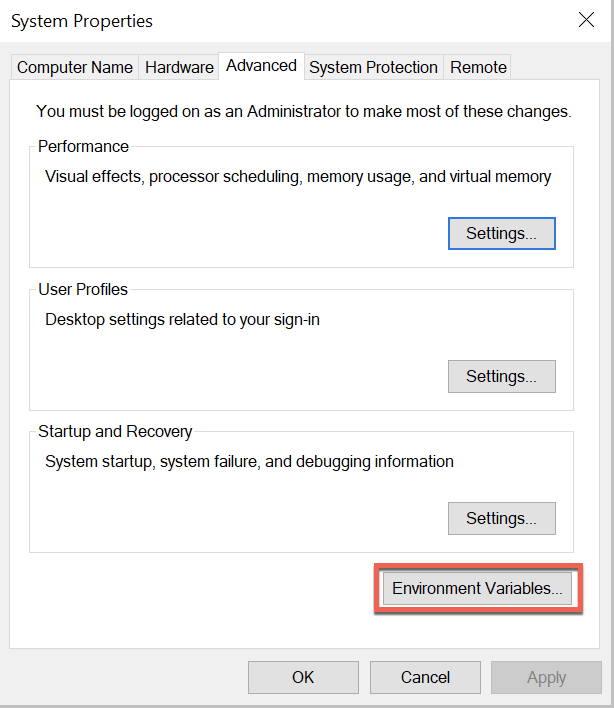
When the System Properties window comes up, click on the Environment Variables button.
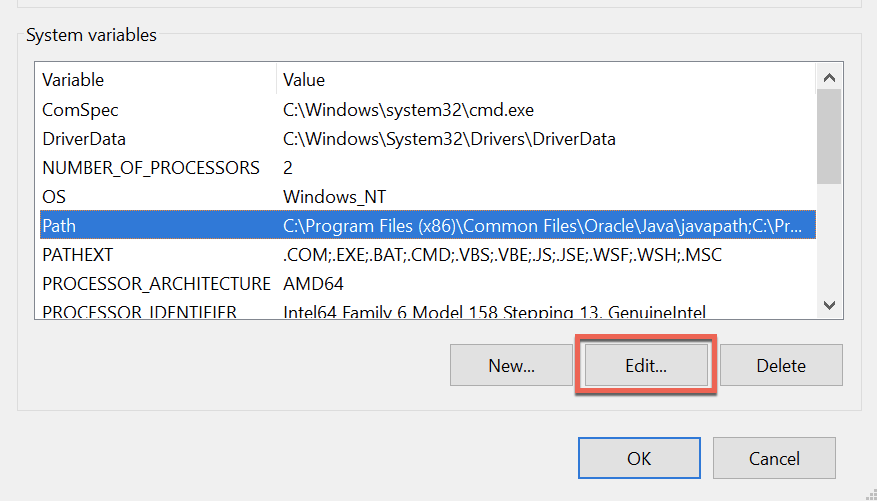
In the Environment Variables window, under System variables, select Path and click Edit.
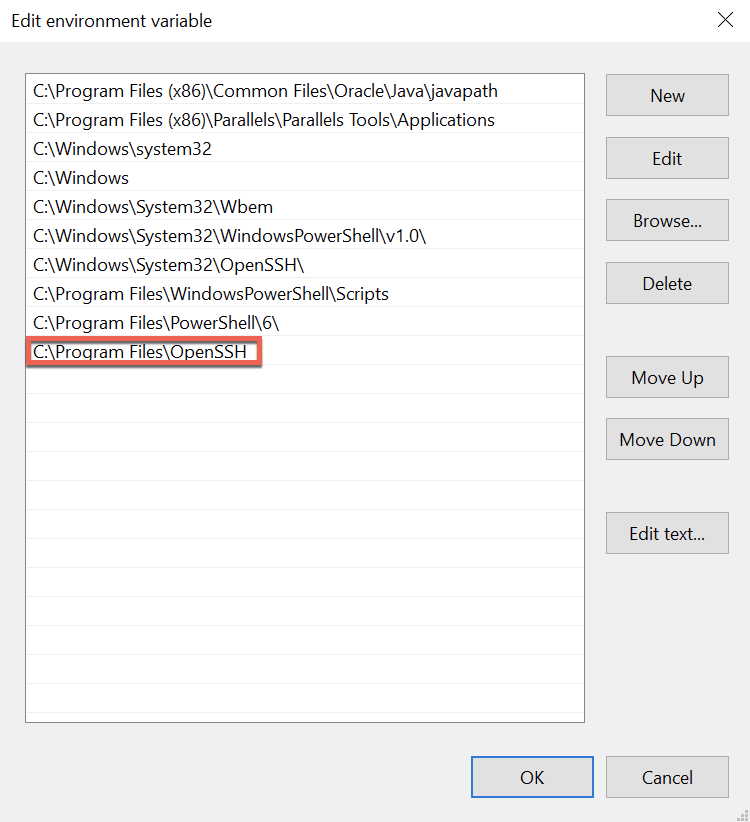
In the Edit Environment Variable window, click New then enter the path where the ssh.exe executable resides. For this tutorial, the path is C:\Program Files\OpenSSH as shown below. Once input, click OK twice to save the new value.
Specify the SSH Subsystem
You’ll now need to specify the SSH subsystem for PowerShell to call on when connecting via SSH on the remote Windows Server. If you don’t tell PowerShell what subsystem to use, you’ll inevitably get the following error:
Enter-PSSession : The background process reported an error with the following message: The SSH client session has ended with error message: subsystem request failed on channel 0.
Note that if you’re not connecting to a Windows Server machine, you will not need to perform these steps.
On the remote Windows Server, open the C:\ProgramData\ssh\ssh_config file. Scroll down to the override default of no subsystems section of the ssh_config file. The section will look like the screenshot below.

Below the existing Subsystem line, add the PowerShell subsystem using the line below:
Subsystem powershell pwsh.exe -sshs -NoLogo -NoProfileNow save the ssh_config file and restart the sshd Windows service on the remote Windows server as shown below.
Get-Service -Name sshd | Restart-ServiceOnce the service restarts, you should now be able to connect via SSH and PowerShell.
Connecting via PowerShell and SSH
Now that the configuration is complete, it’s time to test out PowerShell Remoting.
First, attempt to enter an interactive session by using the Enter-PSSession cmdlet. Unlike what you may be used to, you will not use the ComputerName parameter. Instead, you’ll use the HostName parameter to specify the remote computer.
By default, PowerShell Remoting still uses WsMan. To override the default, use the SSHTransport parameter to indicate you’d like to connect via SSH and PowerShell.
When you attempt to connect for the first time with a username and password, you’ll need to create an SSH private key. To do so, you’ll be prompted as you can see below. When you’re prompted, type ‘y’ to accept.

You’ll then be prompted for the password of the user you’re currently logged in with.
Note that in this example the Windows 10 client and Windows Server SSH server are in the same Active Directory domain. By default, PowerShell Remoting will attempt to authenticate with the logged on user. You can also use the
Credentialparameter to specify a different username and password.
After providing the password, you should then be at a familiar PowerShell Remoting prompt.

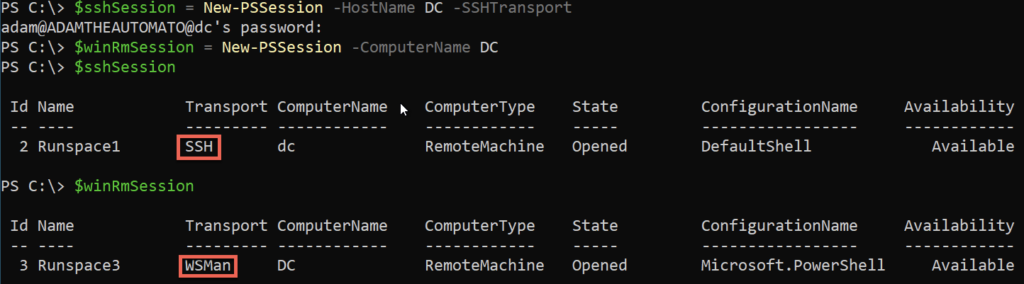
Now exit out of the session with exit and then try out New-PSSession. Notice below using the same HostName and SSHTransport parameters as before, the Transport now shows up as SSH.
You are also still able to use WsMan as the transport protocol too using the ComputerName parameter without using the SSHTransport parameter.
You aren’t required to use a username and password for SSH. You could instead use a private key file and use the
KeyFilePathparameter to provide the location.
Don’t forget to clean up your open sessions with Get-PSSession | Remove-PSSession!
Summary
You should now know how to get both Windows 10 and Windows Server set up to use SSH with PowerShell Remoting. Once configured, the only difference between using WsMan as the transport protocol and SSH is a couple of parameters!
If you’d like to learn more about PowerShell and SSH, be sure to check out PowerShell Remoting over SSH Microsoft documentation article.
#PS7Now Contributors
This post was part of a series on PowerShell 7 by the fine contributors you see below. Be sure to check out their posts and see what they’re up to on their blogs!
| Author | Blog | |
|---|---|---|
| Josh King | @WindosNZ | https://toastit.dev/ |
| Adam Bertram | @adbertram | https://adamtheautomator.com/ |
| Jonathan Medd | @jonathanmedd | |
| Thomas Lee | @doctordns | https://tfl09.blogspot.com/ |
| Prateek Singh | @singhprateik | https://ridicurious.com |
| Dave Carroll | @thedavecarroll | https://powershell.anovelidea.org/ |
| Dan Franciscus | @dan_franciscus | https://winsysblog.com/ |
| Jeff Hicks | @jeffhicks | https://jdhitsolutions.com |
| Josh Duffney | @joshduffney | http://duffney.io/ |
| Mike Kanakos | @MikeKanakos | https://www.networkadm.in/ |
| Tommy Maynard | @thetommymaynard | https://tommymaynard.com// |


