


Amazon Web Services (AWS) EC2 instances are a convenient way to run workloads on Virtual Machines (VM). But what happens if the storage they’re attached to fails or becomes corrupt? It’s time to begin discussing an AWS EC2 backup.
Not a reader? Watch this related video tutorial!When you backup an EC2 instance, you’ll be talking Elastic Block Store (EBS) volumes, more specifically EBS snapshots. EC2 stores all volumes with EBS and taking an EBS snapshot is a great way to backup your data.
In this tutorial, you’re going to learn how to create EBS snapshots with the AWS Management Console and the AWS Command Line Interface (AWS CLI).
If you’d like to manage EC2 backups/EBS snapshots the easy way, be sure to check out Veeam Backup for AWS. Veeam takes care of not only creating EBS snapshots but manages replication, intelligently monitors for changed blocks, and provides a public API.
Prerequisites
This article will be a tutorial. If you plan on following along step-by-step, you will need the following:
- An AWS Account
- An AWS Virtual Private Cloud (VPC)
- An EC2 instance with an attached volume
- An IAM User with:
- AWS Management Console access
- Programmatic access to AWS Services
- The IAM permissions required to perform snapshot-related activities.
IAM policy creation and AWS Application Programming Interface (API) permissions are outside the scope of this article. Always adhere to the principle of least privilege when authorizing accounts to perform actions.
- The AWS CLI installed and authenticated with your IAM user on your local machine.
Creating an EBS Snapshot from the AWS Management Console
There are a few different ways to create EBS snapshots. Let’s get started creating snapshots via the AWS management console.
EBS Snapshots may incur storage costs. For more information on how EBS billing is calculated, reference the AWS Documentation.
Navigating to the EC2 Console
To get started:
- Open the AWS Management Console and sign in to your AWS account by supplying your AWS (root) or IAM account credentials.
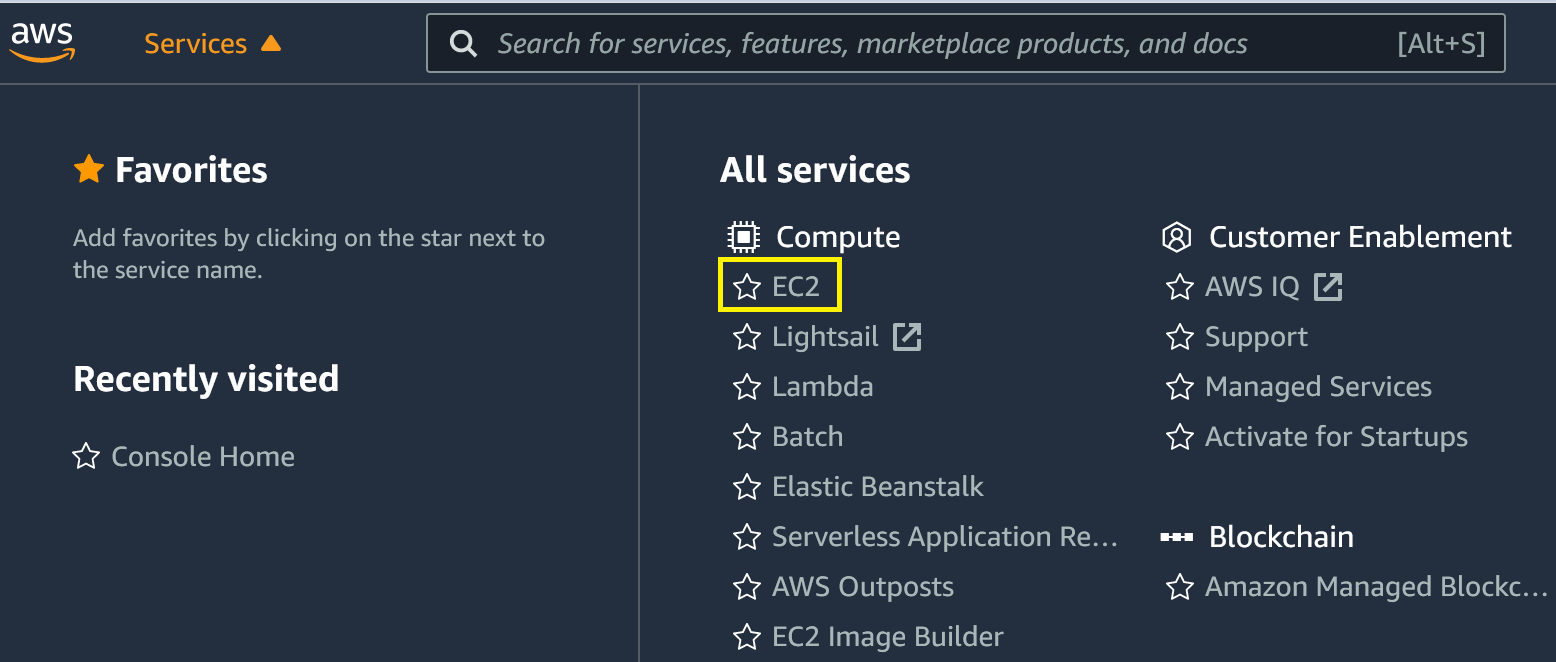
2. Click Services on the upper left-hand corner of your screen.

3. Select EC2 from the Services drop-down menu. The EC2 option is located under the Compute category, as shown below. This option will take you to the EC2 console.
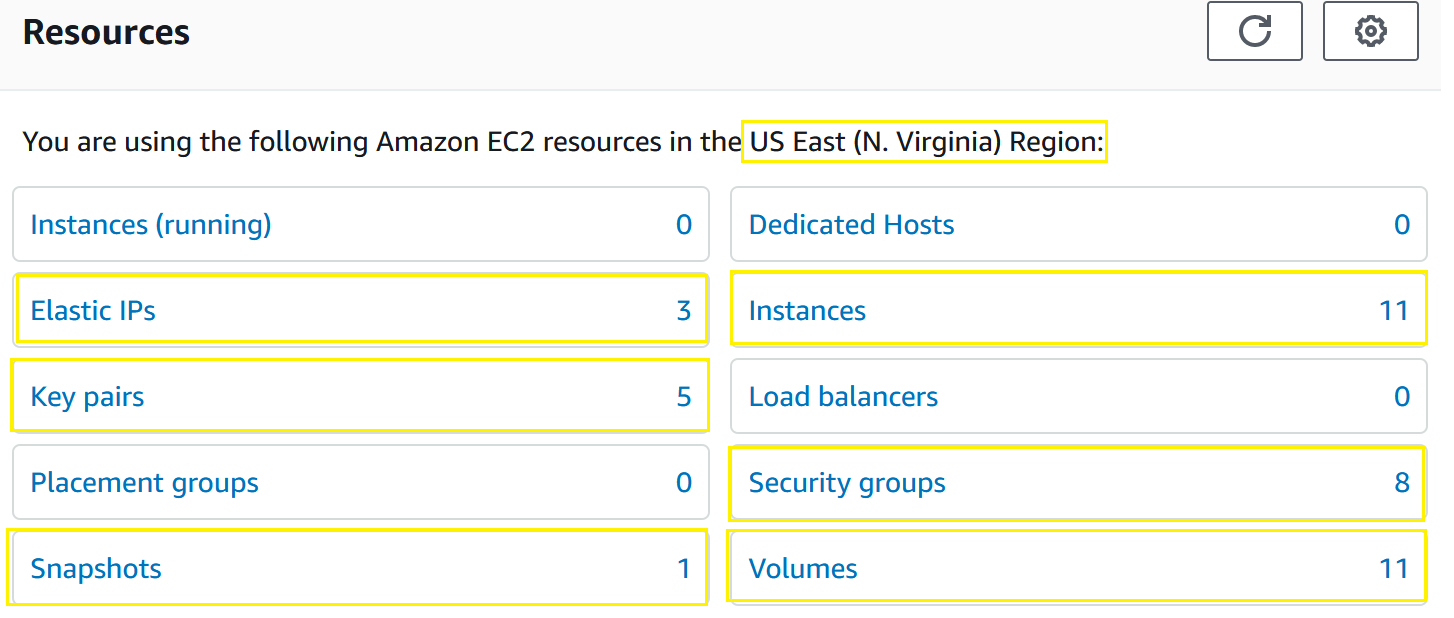
You should now be on the Resources dashboard. The Resources dashboard provides quick insight into the EC2-related resources that are established within your selected region. In the screenshot below, you can see that this tutorial’s Resources dashboard indicates that the following are established for the signed-in user in the US East (N. Virginia) region.
Creating an EBS Snapshot in the EC2 Console
Once you’ve navigated to the EC2 console and are looking at your expected region, it’s time to create an EBS Snapshot (AWS EC2 backup). To accomplish this task:
- Select Snapshots under Elastic Block Store from the navigation pane located on the left-hand side of the screen.

2. Next, select Create Snapshot from the top of your screen. Selecting Create Snapshot will bring you to a menu that requires some additional input.

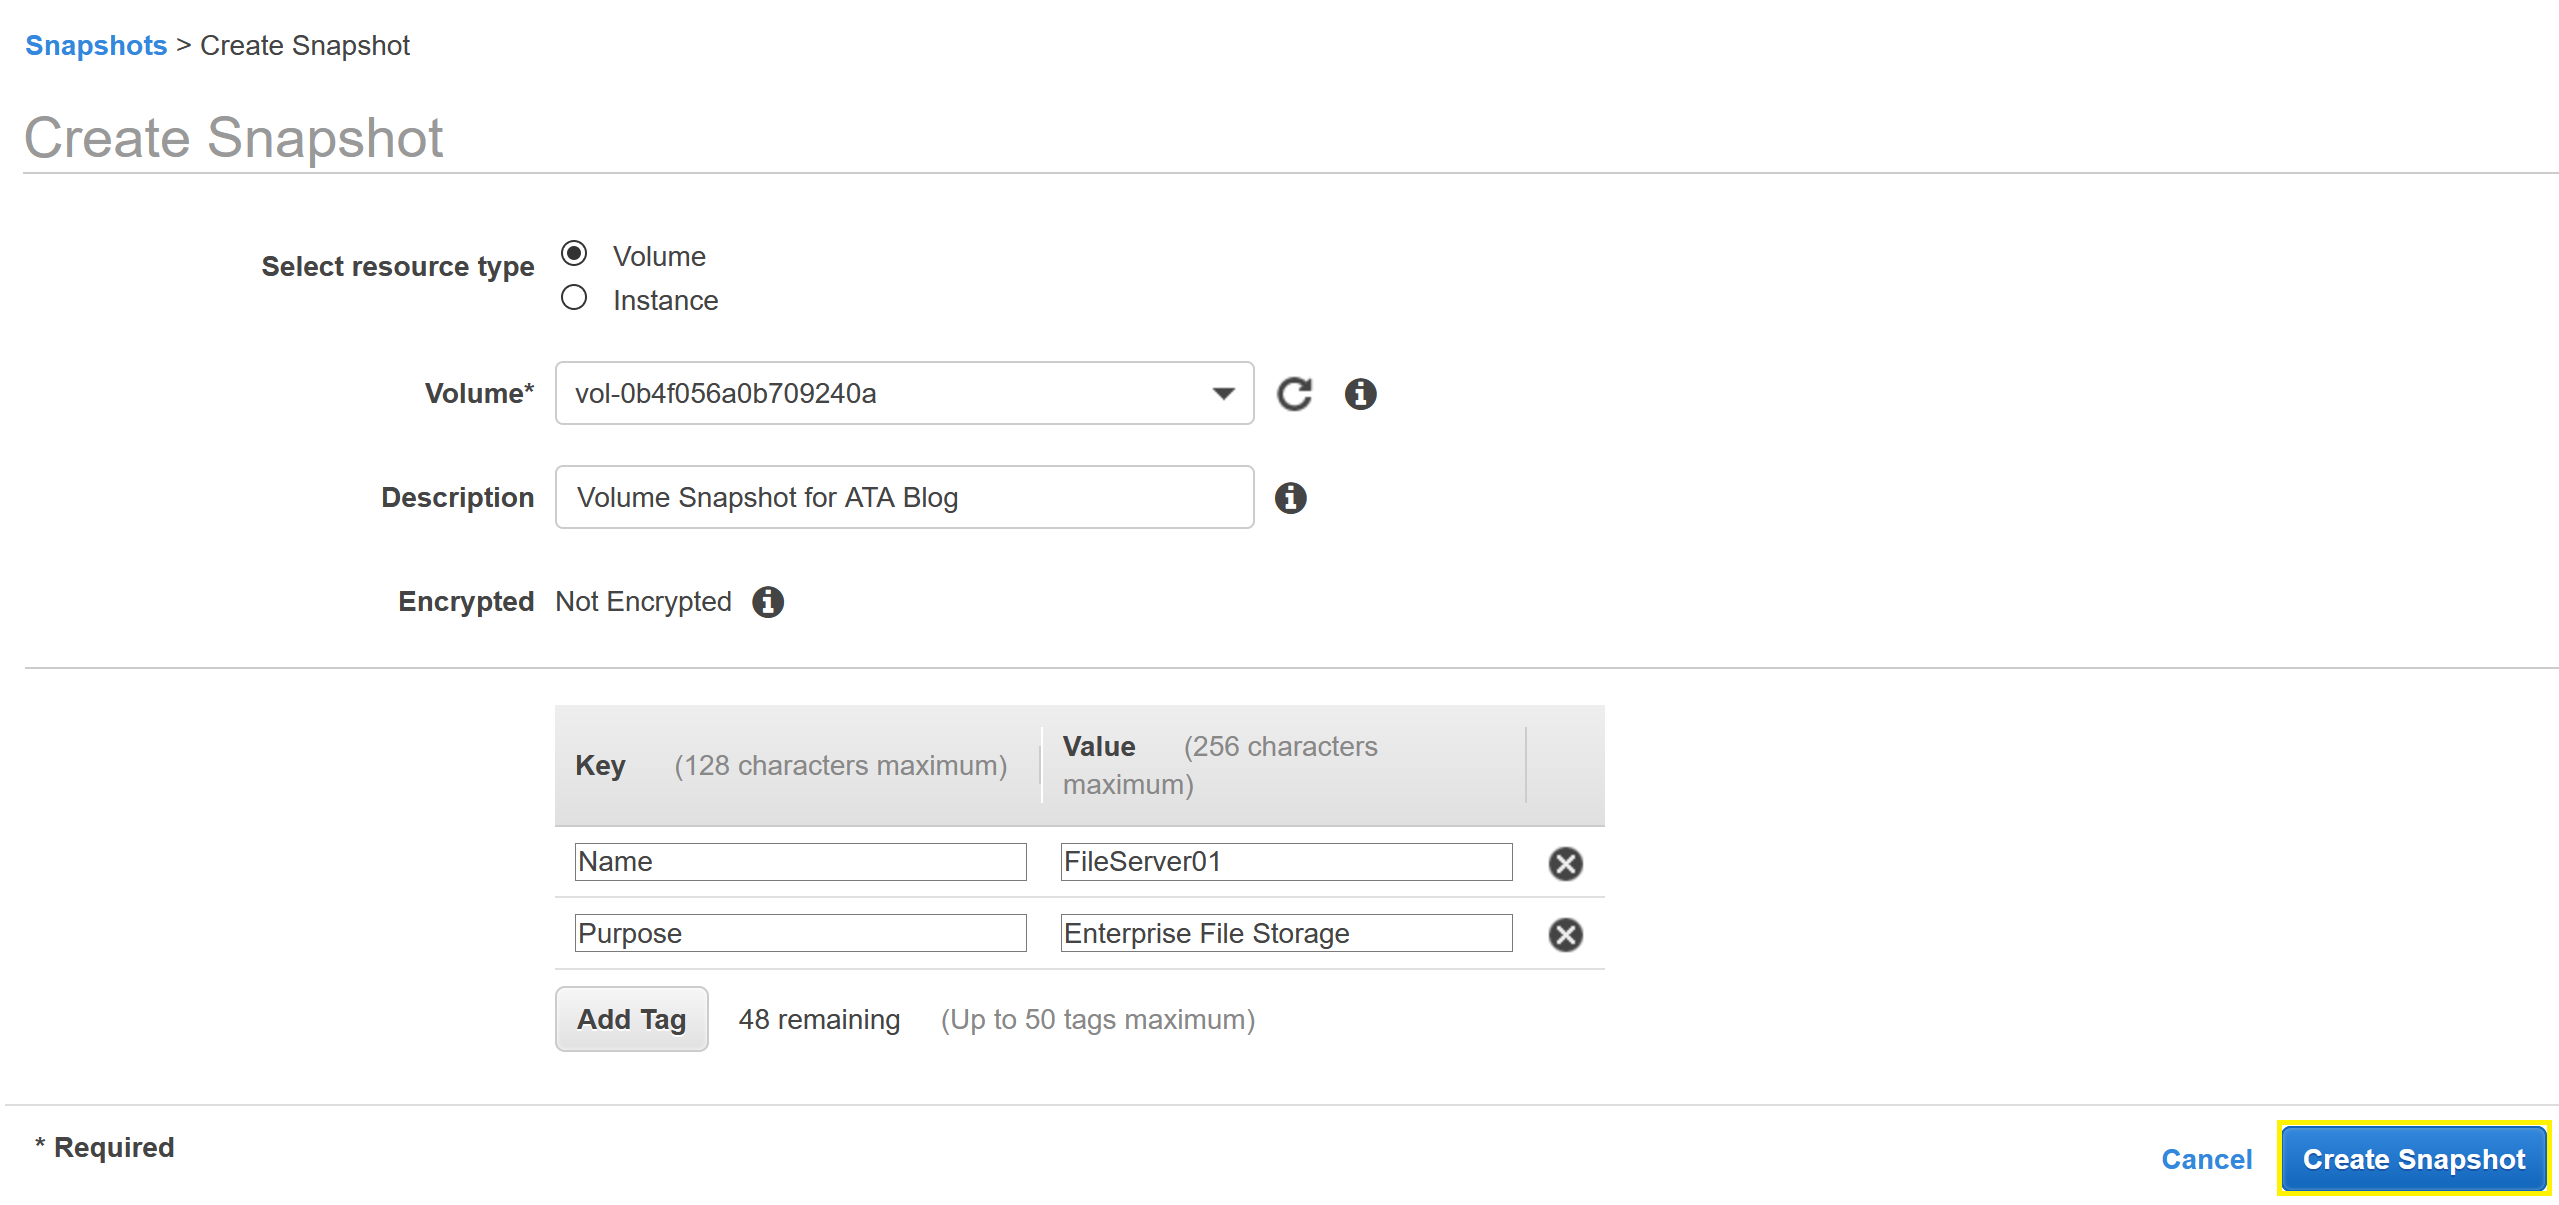
3. On the Create Snapshot page, set the resource type to Volume under the Select resource type field. Setting the resource type to Volume tells AWS to capture a snapshot of a single EBS volume; not all volumes attached to the EC2 instance.

4. Next, select the Volume ID of the EBS Volume to snapshot from the dropdown menu. The Volume ID is a unique identifier that is assigned to each EBS Volume. In the following screenshot, you will see that this tutorial’s Volume ID vol-0b4f056a0b709240a is selected.
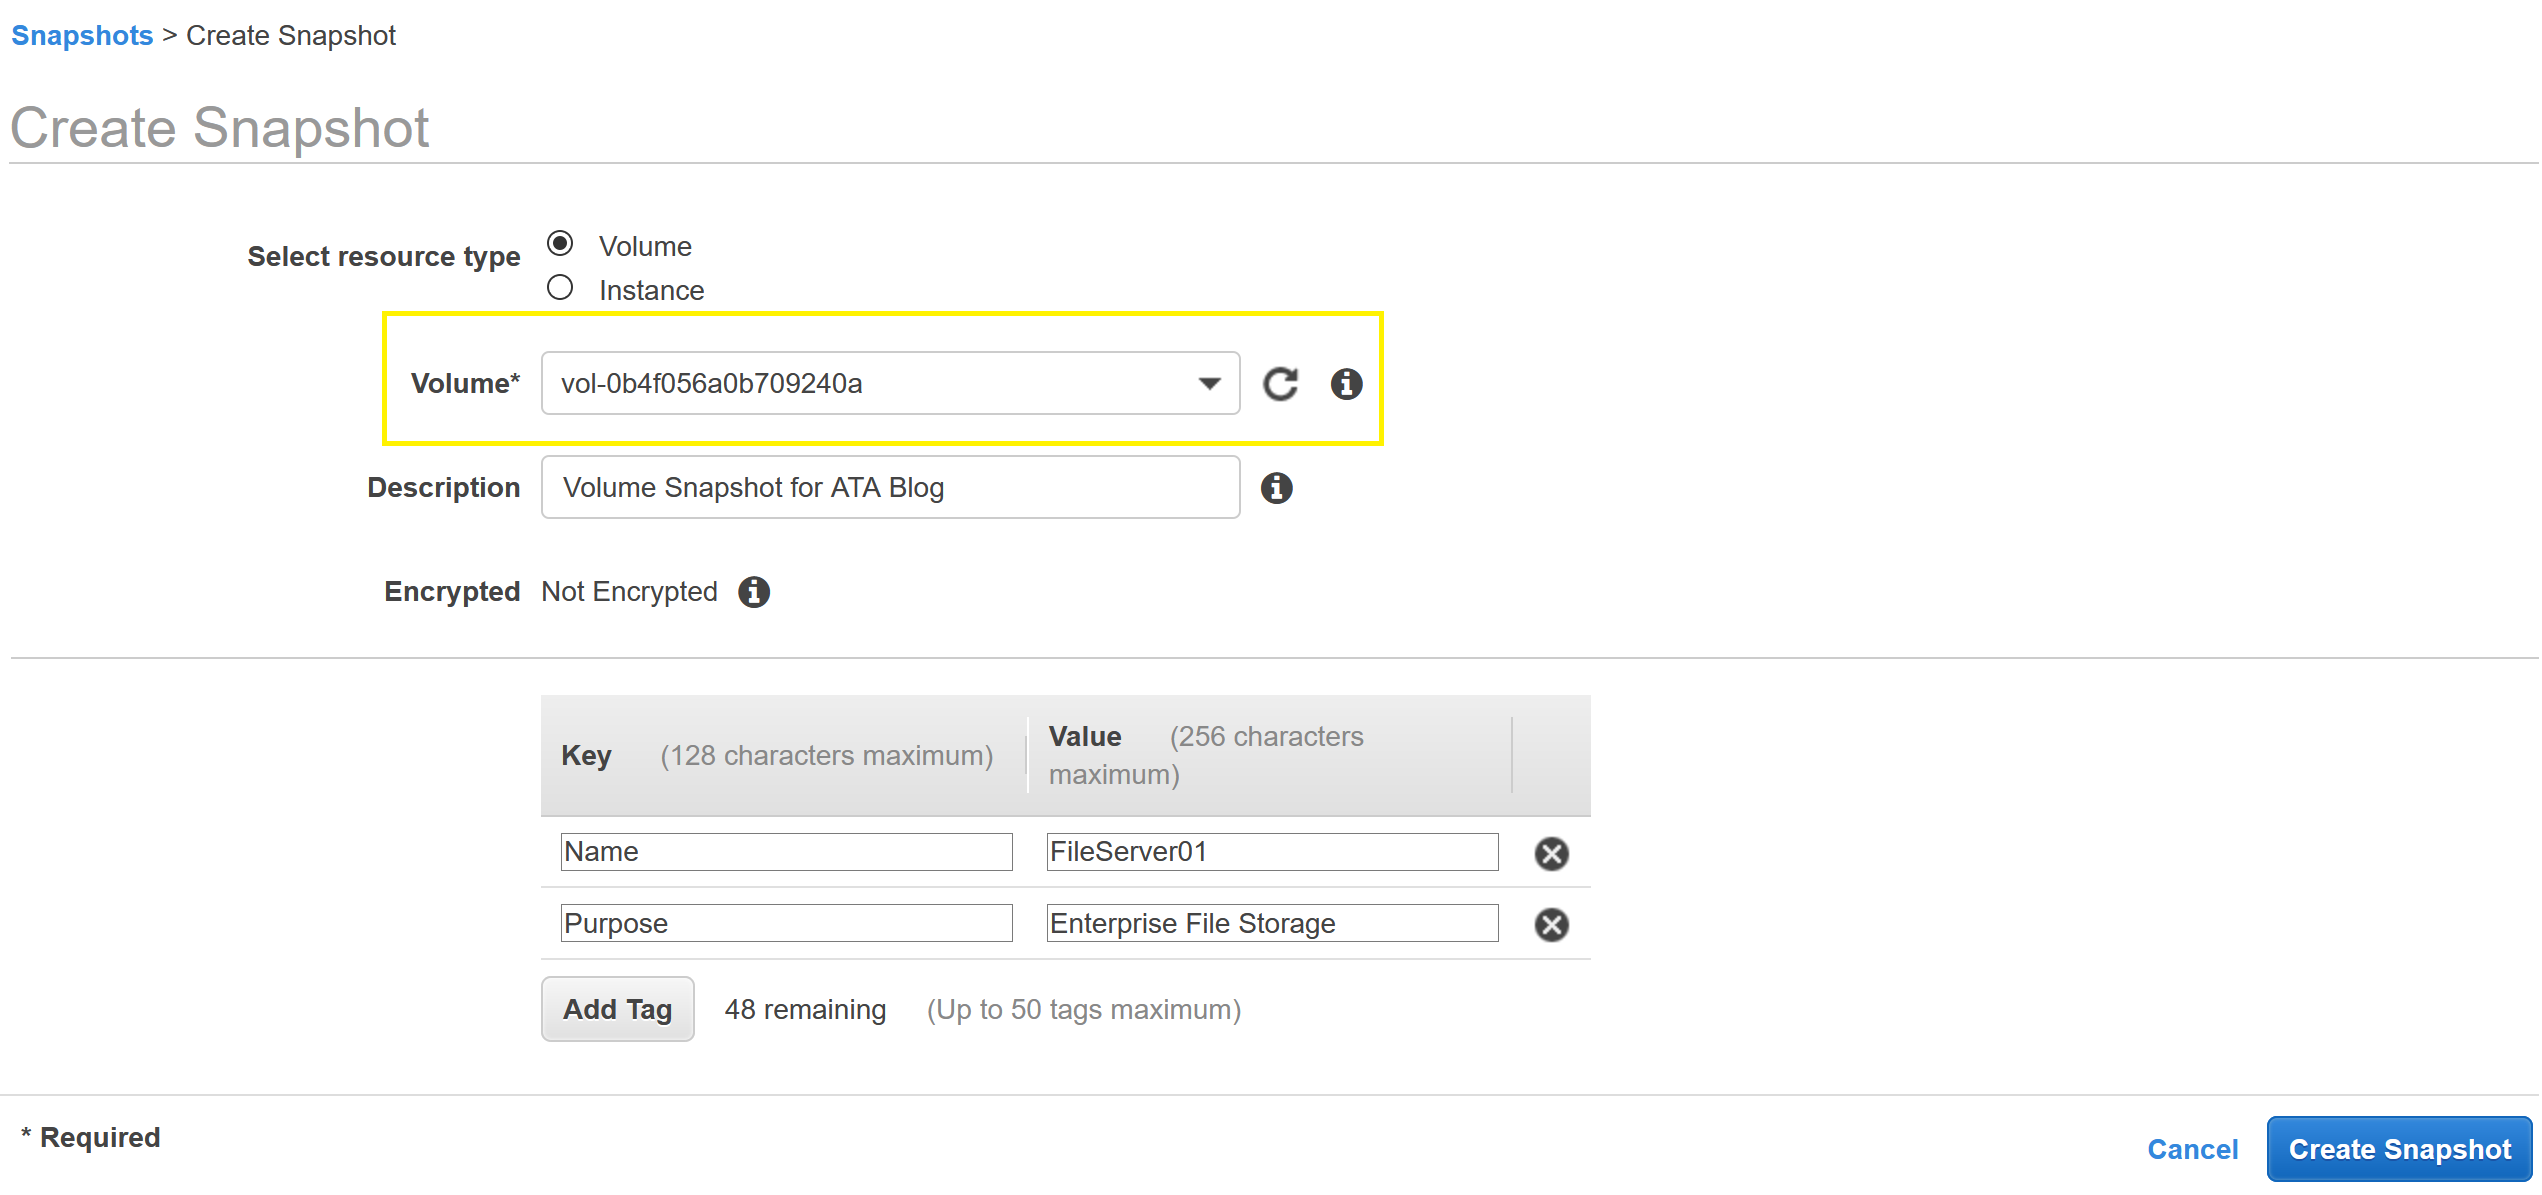
5. Now enter a description for your EBS Snapshot in the Description field. The Description field is optional and can hold up to 255 characters.
You’ll see this description later on as a property on the EBS snapshot. This tutorial will use Volume Snapshot for ATA Blog for the description.

6. Next, you can tag your EBS snapshot using optional key/value pairings. Tags are a powerful way to manage and organize your resources within AWS. This tutorial will use tags that exemplify a common use case for a server.
Other common tags include Name, Owner, Environment, and Purpose.
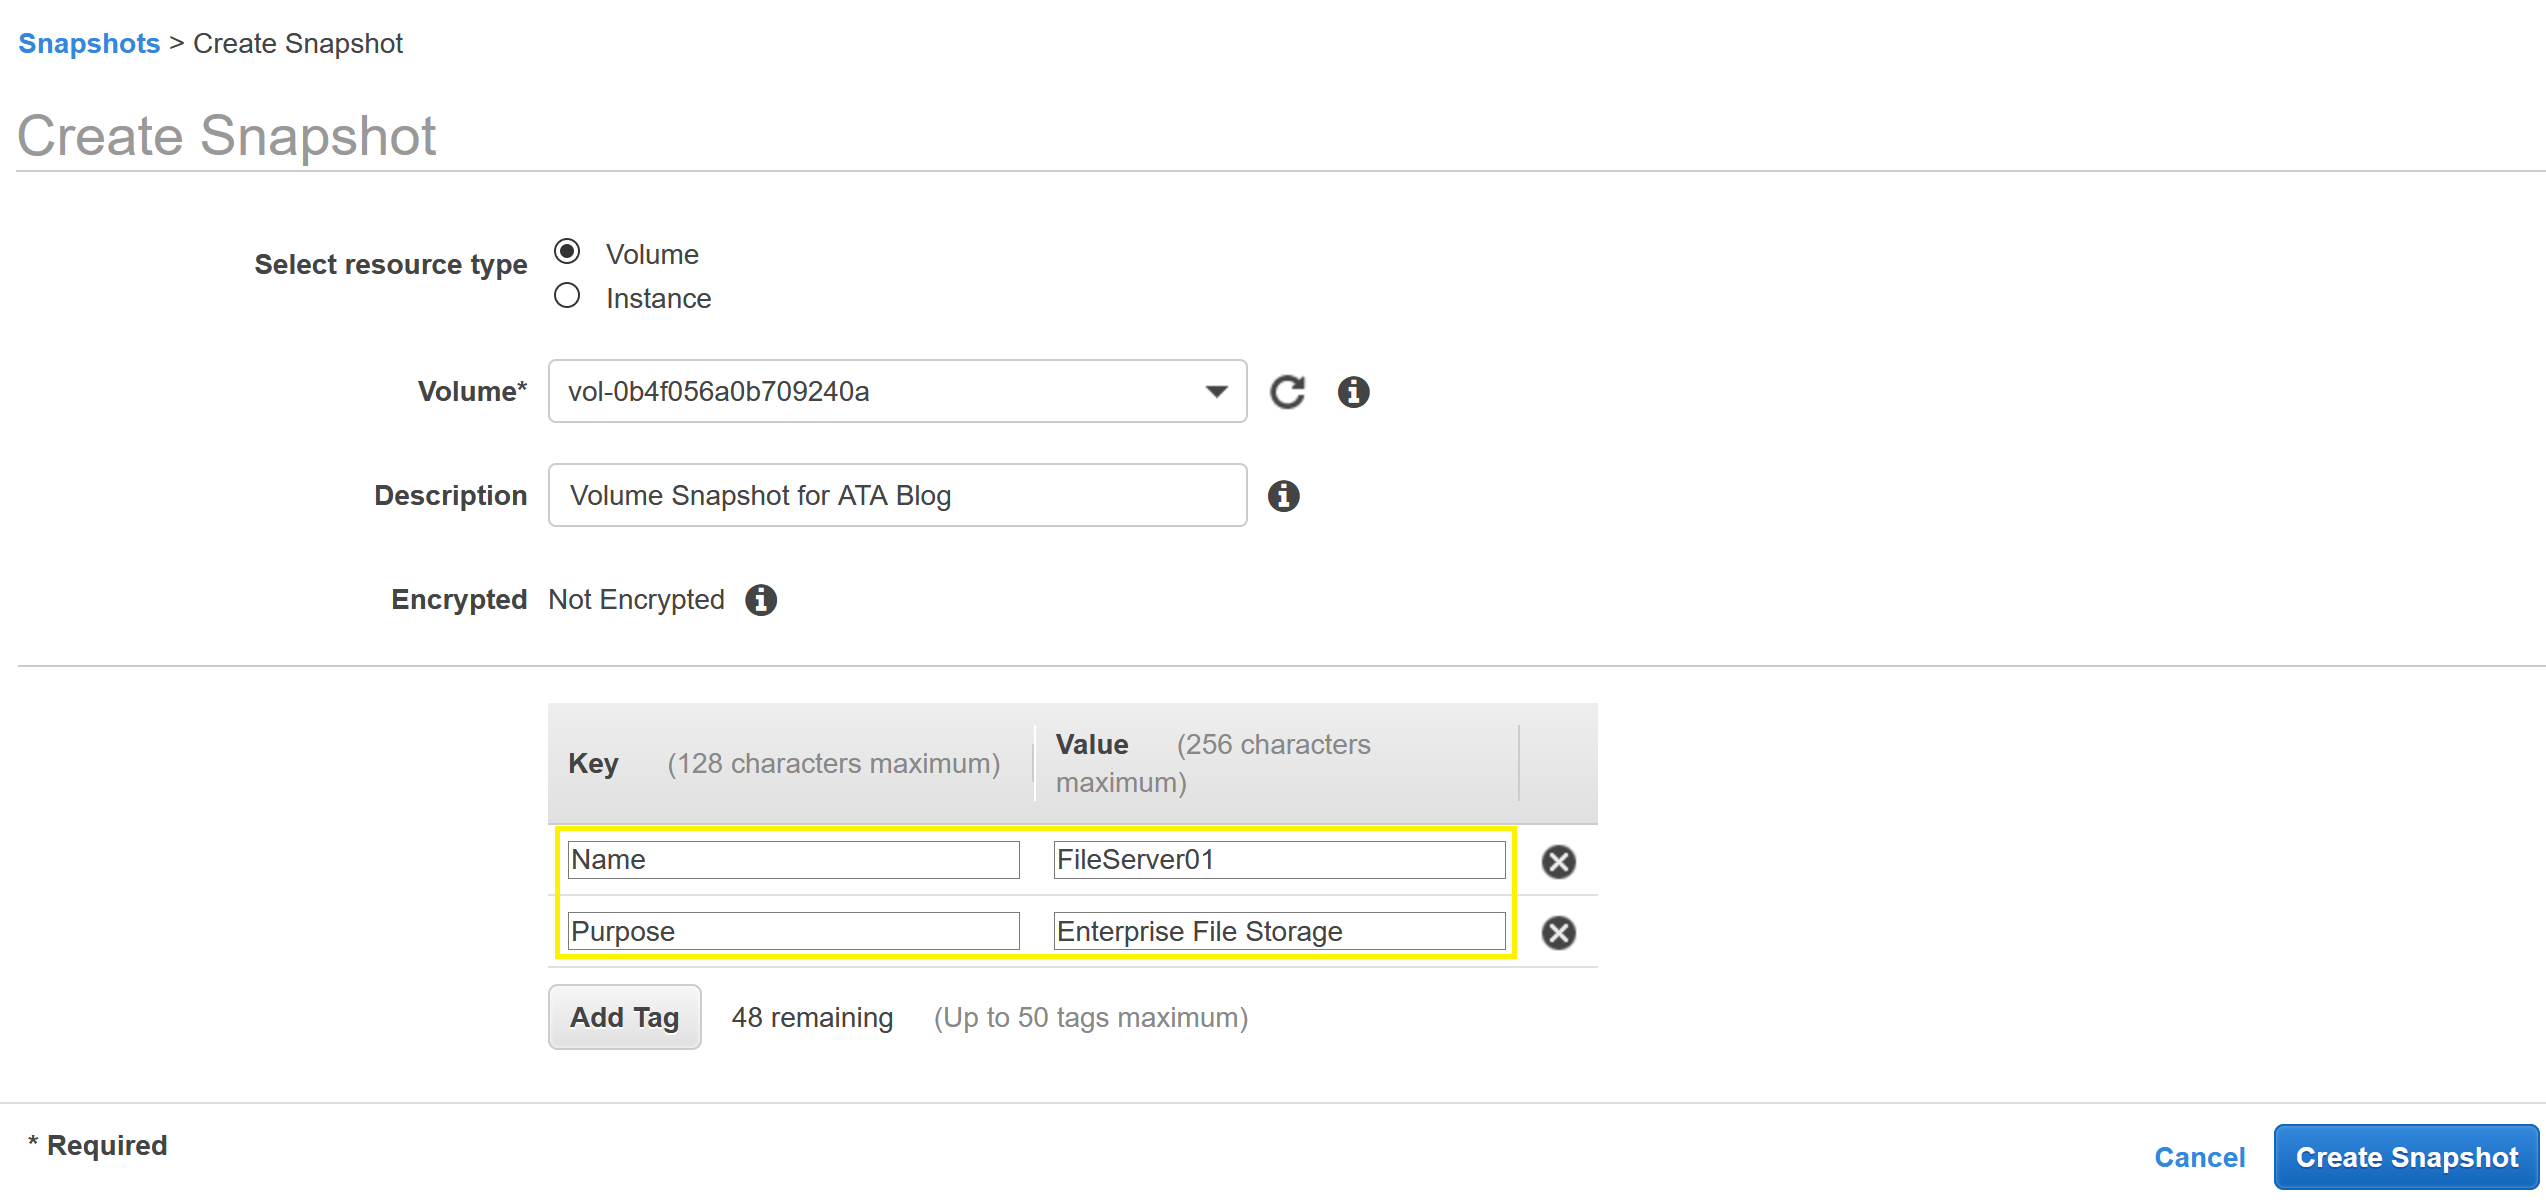
7. Now click on the Create Snapshot button to create the EBS snapshot.
This tutorial did not cover the Encrypted field. EBS snapshots created from unencrypted EBS Volumes cannot be encrypted during EBS snapshot creation. To encrypt an EBS Snapshot taken from an unencrypted EBS Volume, you must first complete the unencrypted EBS Snapshot, copy the unencrypted EBS Snapshot, and apply the desired encryption. Snapshots that are taken from encrypted volumes are automatically encrypted.
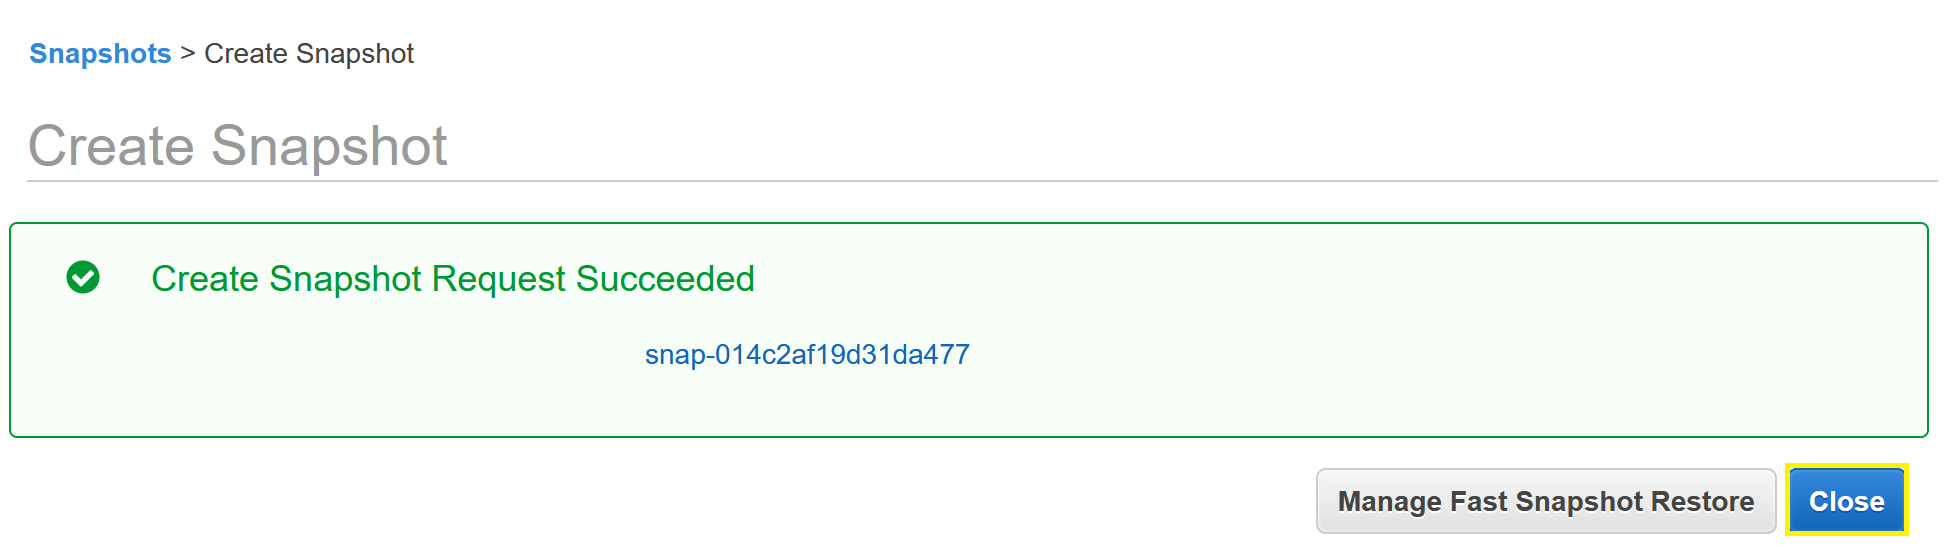
8. When complete, the EC2 console prompts you with the following success message. Discard the message by selecting Close.
You should now see the EBS snapshot listed in the console with a pending status. It will remain in this status until all modified EBS volume blocks are transferred to Amazon S3.

Initial EBS snapshots take longer to create because they are full backups, unlike subsequent incremental backups. If it seems like the snapshot is taking longer than it should, trigger a refresh of the status using the refresh icon located in the upper right-hand corner of your screen.
Once the snapshot is complete, you’ll see a Status of completed as shown below.

You have now created an AWS EC2 backup!
Creating an EBS Snapshot using the AWS CLI
In the last section, you created an EBS snapshot using AWS’s web-based console, but that is not the only way to do it! You can also backup an EC2 instance by creating a snapshot via the AWS CLI.
To create your snapshot with the AWS CLI assuming you have the AWS CLI installed and authenticated to your account:
- Open a command prompt or PowerShell console on your Windows computer
2. Run the aws ec2 describe-volumes command with the --query parameter to output a list of instances and volume IDs. Note the Volume ID that you want to snapshot.
aws ec2 describe-volumes --query 'Volumes[*].Attachments[].{VolumeID:VolumeId,InstanceID:InstanceId}' --output text3. Run the command aws ec2 create-snapshot providing the following parameters:
volume-id– the unique Volume ID of the EBS Volume that you are attempting to backupdescription– the description that you would like to apply to the backuptag-specifications– the tags that you would like to append to the backup
The following command creates a snapshot of the volume that you specify to the right with the --volume-id parameter with the description of Volume Snapshot for ATA Blog via the AWS CLI and two Tags; Name: FileServer01 and Purpose: Enterprise File Storage.
# Be sure to insert your volume ID
aws ec2 create-snapshot --volume-id <your volume ID> --description 'Volume Snapshot for ATA Blog via the AWS CLI' --tag-specifications 'ResourceType=snapshot,Tags=[{Key=Name,Value=FileServer01},{Key=Purpose,Value=Enterprise File Storage}]' 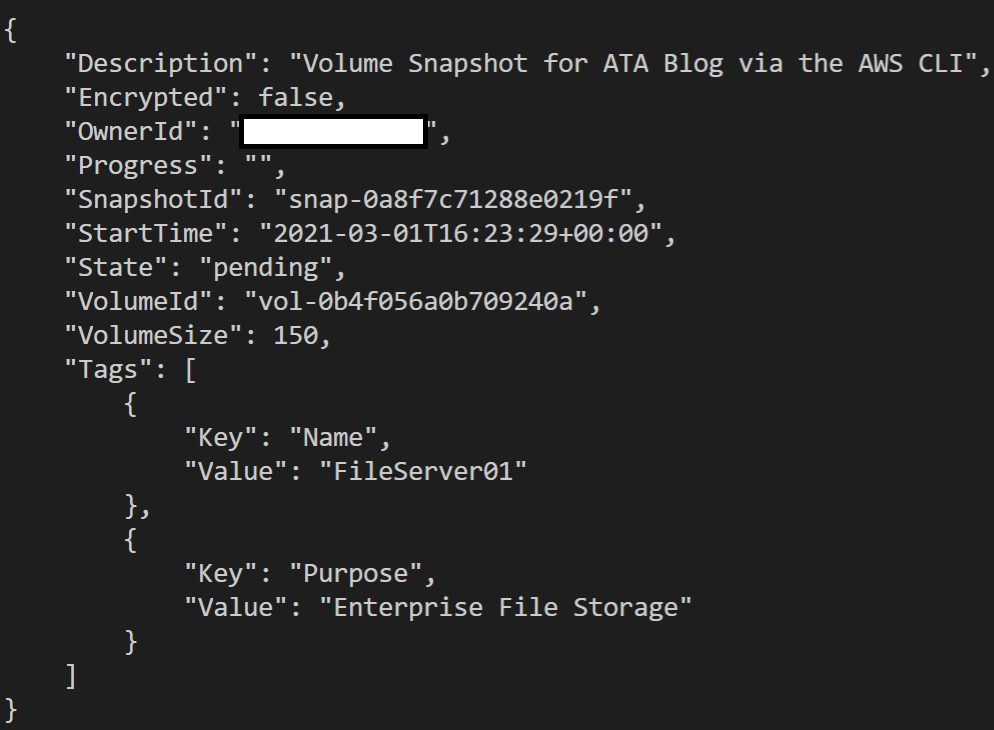
AWS allows you to configure the default output format of AWS CLI commands, based on user preference. Output format selections include JSON, YAML, YAML-Stream, Text, and Table. The output of your command is dependent on the configuration of your AWS CLI and may be different than the output displayed above.
4. Now check on the status of the snapshot with the aws ec2 describe-snapshots command by providing the snapshot’s ID to the --snapshot-id parameter. Find the snapshot ID from the SnapshotID property returned in step 2.
If you don’t know the snapshot ID, search all of your snapshots using
aws ec2 describe-snapshots --owner self.
# Be sure to insert your snapshot ID
aws ec2 describe-snapshots --snapshot-id <your snapshot ID>
Eventually, the describe-snapshots command should return a Progress of 100% and a State of completed as shown below.
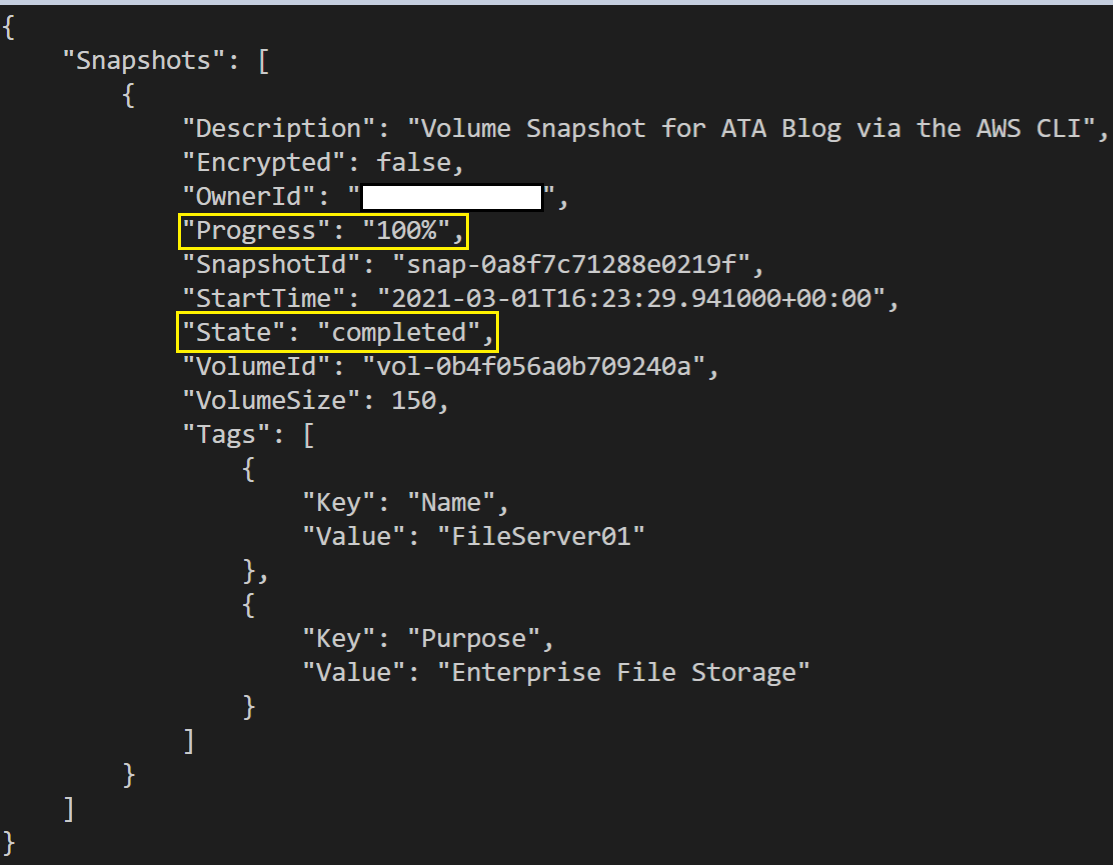
Great work! You just programmatically created an EBS Snapshot using the AWS CLI!
Next Steps
In this tutorial, you’ve learned how to create backups of Amazon EC2 instances with EBS snapshots using the web-based AWS console and programmatic AWS CLI.
If you’re done testing with the snapshot you’ve created in this tutorial, be sure to delete it to avoid being charged!
To go farther, how about trying to restore an EC2 instance?


