

Are you looking for a powerful and efficient way to deploy your applications at scale? Look no further than DigitalOcean Kubernetes! With a few commands, you can easily manage and scale your containerized applications.
In this tutorial, you will learn to deploy an application to your own DigitalOcean Kubernetes cluster and set up a load balancer to ensure high availability.
Read on to unleash your applications’ full potential!
Prerequisites
Before diving deeper into this tutorial, you will need the following to carry out the hands-on demonstrations:
- A DigitalOcean account with active billing enabled – A free trial is sufficient.
- A limit of three droplets at the minimum on your DigitalOcean account – You can request a limit increase by contacting the DigitalOcean support team.
- A local development environment with Docker, Kubectl, and Minikube installed – This tutorial uses a local Ubuntu 20.04 machine.
- doctl installed on your local machine.
Retrieving a Personal Access Token (PAT)
Before you can begin working with the DigitalOcean API and DigitalOcean Kubernetes, you must retrieve a PAT from your DigitalOcean account. This token is what you will use to authenticate your local environment.
To retrieve a PAT from your DigitalOcean account, follow these steps:
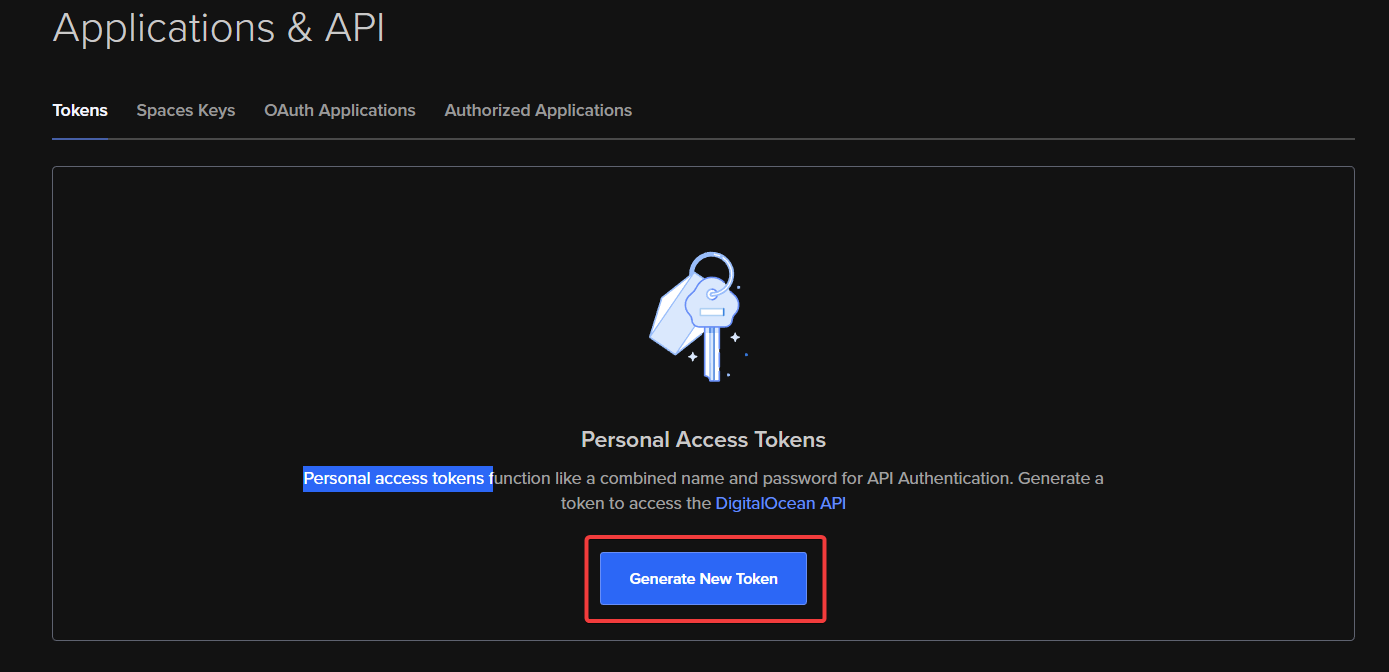
1. Open your favorite web browser, log in to your DigitalOcean account, and navigate to the API page of the console.
2. Next, click Generate New Token to initiate generating a token.
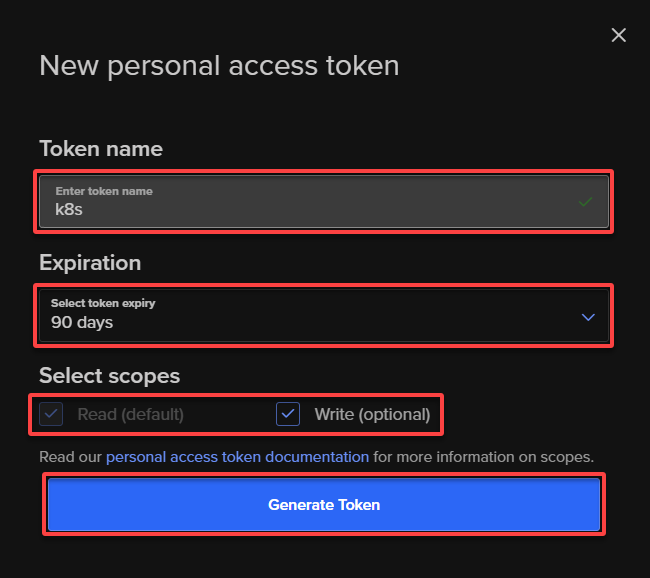
3. Configure the new token as follows:
- Token name – Give your token a descriptive name (i.e., k8s).
- Expiration – Specify an expiry period for the token.
- Select scopes – Select your desired scopes for the token.
You will need the Read and Write scopes for this tutorial for the Kubernetes API and the DigitalOcean API.
Once configured, click Generate Token to generate a new token.
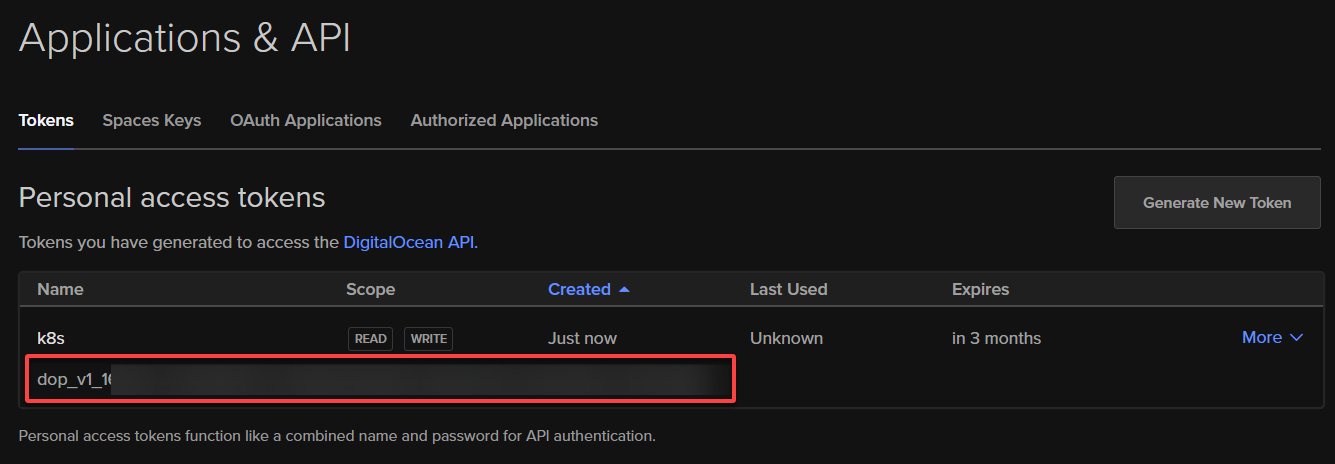
4. Lastly, copy and save your token somewhere secure for later use.
Authenticating Your Local Environment
Now that you have retrieved your token, you need a way to interact with the DigitalOcean API and DigitalOcean Kubernetes on your behalf. How? You will authenticate your local environment using your token.
To authenticate your local environment:
1. Run the below snap connect commands, which do not provide output but enable some necessary permissions to interact with certain system resources.
# Grant doctl permission to access the kube-config personal-files interface
sudo snap connect doctl:kube-config
# Grant doctl permission to access the core ssh-keys interface
sudo snap connect doctl:ssh-keys :ssh-keys
# Grant doctl permission to access the dot-docker personal-files interface
sudo snap connect doctl:dot-docker
2. Next, run the doctl command below to authenticate (auth) your local environment with your DigitalOcean account.
This command initializes (init) doctl with a token that lets you query and manage your DigitalOcean account details and resources.
doctl auth initProvide your token when prompted, as shown below. Your token will be saved locally to your machine to avoid having to input the token when you run subsequent doctl commands.
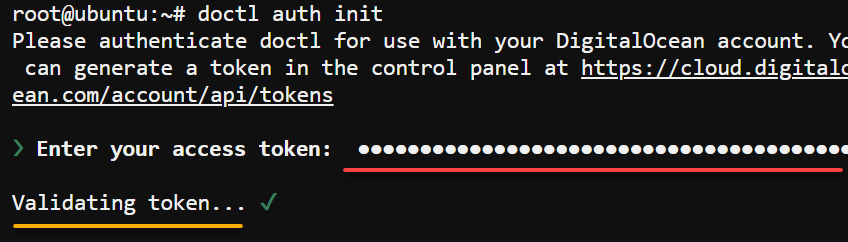
3. Now, run the following command to retrieve (get) information about your DigitalOcean account.
doctl account getThe output below verifies that the authentication was successful.

Creating a Sample “Hello World” App
With an authenticated local environment, you can prepare a containerized app you will deploy to a DigitalOcean Kubernetes cluster.
To create a sample “Hello World” app:
1. Run the below command to create a new directory (mkdir) for your app called hello-app and navigate into it.
mkdir hello-app && cd hello-app
2. Next, create an app.py file with your preferred editor, populate the code below to the file, save it, and close the editor.
The code below creates a Flask application that returns “Hello, World!” when accessed.
# Import the Flask module and other required libraries
from flask import Flask
import os
import socket

# Initialize a new Flask app instance
app = Flask(__name__)

# Define a new route for the app "/"
@app.route("/")
def hello():c
    # Define the HTML string that will be returned
    html = """Hello {name}!
    Hostname: {hostname}"""

    # Retrieve the value of the "NAME" environment variable, if set;
    # otherwise, use "world" as the default value
    name = os.getenv("NAME", "world")

    # Retrieve the hostname of the server where the app is running
    hostname = socket.gethostname()

    # Format the HTML string with the values of "name" and "hostname"
    return html.format(name=name, hostname=hostname)

# If this module is executed directly (i.e., not imported as a library),
# start the Flask app
if __name__ == "__main__":
    # Run the Flask app on all network interfaces (0.0.0.0) and port 80
    app.run(host='0.0.0.0', port=80)
3. Finally, create a new file called requirements.txt, add the word Flask, and save and close the file. This file specifies the required dependencies for your Flask application.
FlashBuilding a Seamless Deployment with Docker and Dockerfile
With your sample Flask application in place, you can now encapsulate your application and all its dependencies by building a container image.
Using a Dockerfile, you can define your app’s dependencies, runtime environment, and code in one document, ensuring consistency and reproducibility. This Dockerfile helps your app run smoothly when deployed to a new environment.
To build a deployment, follow these steps:
1. Create a new file called Dockerfile in the same directory as your app (hello-app).
2. Populate your Dockerfile with the following configuration, save the changes, and close the editor. This Dockerfile defines how to build a Docker container image for your Flask application.
In the provided commands, the Dockerfile specifies the setup of an environment with Python and Flask pre-installed, along with the app and its dependencies. Containerizing the app’s dependencies and runtime environment, your Flask app becomes portable and can run anywhere.
# Set the base image for the container as Python's slim version
FROM python:slim

# Set the working directory inside the container to /app
WORKDIR /app

# Copy the contents of the current directory to the container's working directory
ADD . /app

# Install any required packages specified in the requirements.txt file
RUN pip install -r requirements.txt

# Expose port 80 to allow external access to the containerized app
EXPOSE 80

# Set the environment variable NAME to World
ENV NAME World

# Specify the command to be executed when the container starts running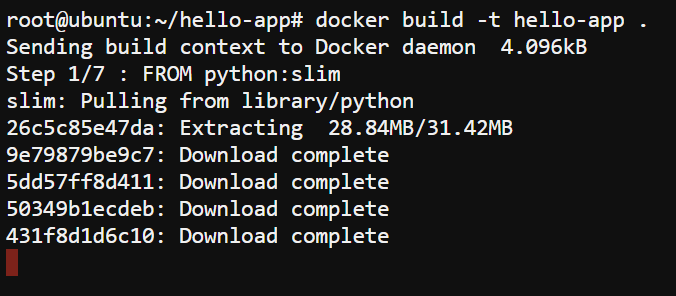
CMD ["python", "app.py"]3. Next, run the docker command below to build the Docker image (hello-app) against the configuration you set in your Dockerfile in the current directory (.).
docker build -t hello-app .This command’s execution takes a while, as Docker downloads the base image and installs the app’s dependencies.
4. Now, run the below grep command to verify that the Docker image (hello-app) was created successfully.
docker images | grep hello-appThe output below verifies the newly-created hello-app image.

5. Execute the following docker command to run a Docker container based on your Docker image (hello-app). This command executes the command specified by the CMD instruction in your Dockerfile.
The -p flag tells Docker to map port 80 on the container to port 80 on the host machine. This port mapping lets you access the containerized Flask app through your web browser at http://127.0.0.1:80.
docker run -p 80:80 hello-app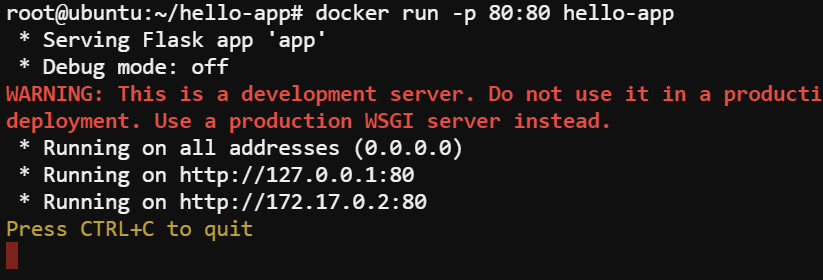
6. Further, keep the current terminal open, open a new one, and run the following curl command to test the containerized Flask app.
This command sends an HTTP GET request to the Flask app inside the Docker container and displays the response in the terminal window.
curl http://127.0.0.1:80The response will be similar to the following, showing the Hello World! message.
Note that the hostname will be different for each container deployment, as it is generated dynamically by Docker.

Pushing the Docker Image to the DigitalOcean Container Registry
Currently, your image lies in your local system. But since the goal is to make your application deployable, pushing your Docker image to a remote registry is essential. The registry provides a scalable and reliable solution for managing your container images, giving you confidence in your deployment pipeline.
In this tutorial, you will store and manage your Docker images in the DigitalOcean Container Registry. Doing so ensures your images are stored in a secure and private environment.
To push your Docker image to the DigitalOcean Container Registry:
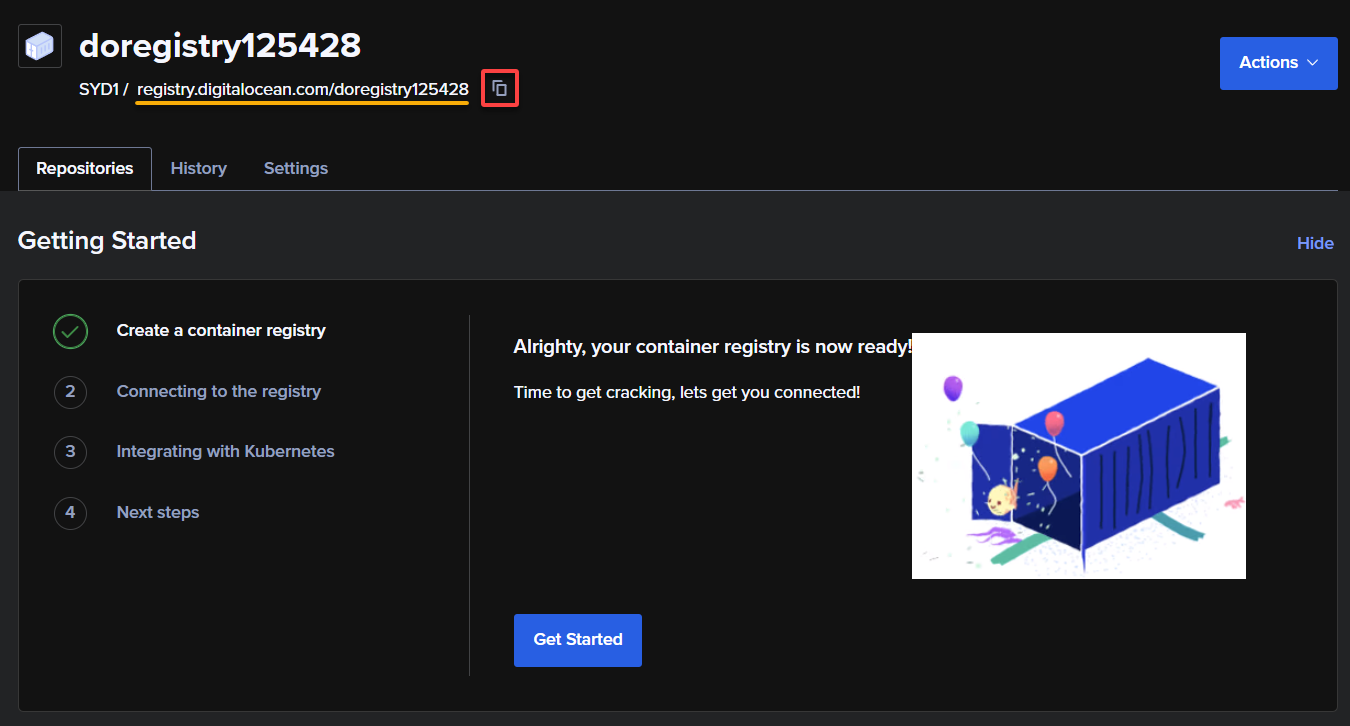
1. Run the following command to create a new DigitalOcean Container Registry (i.e., doregistry125428). The registry name must be globally unique within the DigitalOcean Container Registry service.
doctl registry create doregistry125428
2. Next, run the below command to login into the registry before you can push your image to it.
doctl registry login
3. Once logged in, navigate to the official Container Registry page, and copy and save the full path of the registry’s endpoint for later use.
4. Now, run the docker tag command below, which does not provide output, but tags the Docker image with the endpoint you copied in step three.
Replace hello-app for the tag and the last part of the end-point with your desired tag. A tag is a label attached to a specific version of a Docker image. This tag helps identify and track different versions of an image in the registry.
docker tag hello-app registry.digitalocean.com/doregistry125428/hello-app5. Finally, run the below docker push command to push your Docker image to your DigitalOcean Container Registry (registry.digitalocean.com/doregistry125428/).
This command uploads the image to your DigitalOcean Container Registry, making it available to deploy to your DigitalOcean Kubernetes cluster.
docker push registry.digitalocean.com/doregistry125428/hello-app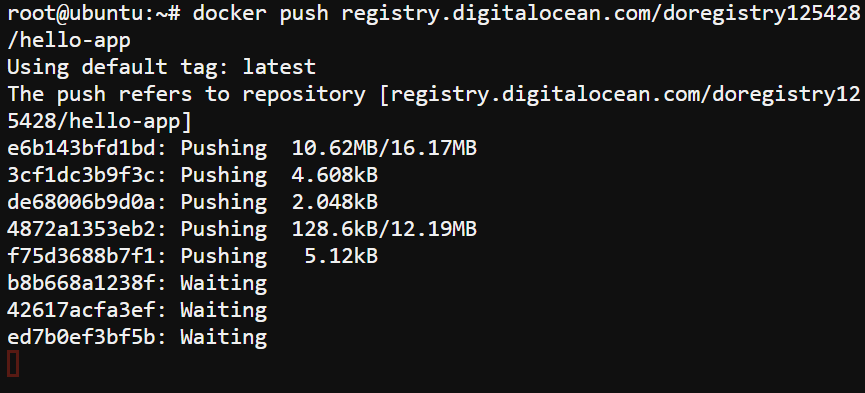
6. Once pushed, run the following doctl registry repository command to verify your image exists in your DigitalOcean Container Registry (doregistry125428).
doctl registry repository list doregistry125428
7. Lastly, execute the below command to run a Docker container based on the image you uploaded in your registry (registry.digitalocean.com/doregistry125428/hello-app).
This command helps ensure the image works as expected and is ready for deployment.
docker run registry.digitalocean.com/doregistry125428/hello-app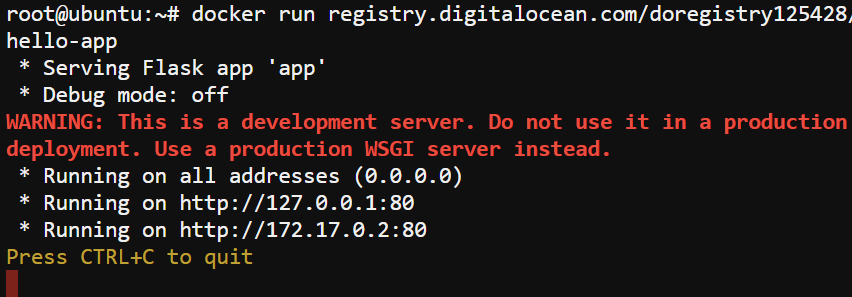
Deploying an App to the DigitalOcean Kubernetes Cluster
You are almost ready to deploy your application with your Docker image fully functional while in your DigitalOcean Container Registry. But first, you will deploy your first DigitalOcean Kubernetes cluster.
DigitalOcean Kubernetes is a fully managed Kubernetes service that eases deployment, management, and containerized application scaling. This service provides a highly available and scalable Kubernetes control plane and an intuitive UI for clusters and applications management.
To deploy an app on your DigitalOcean Kubernetes cluster:
1. Run the below doctl command to create a new kubernetes cluster (i.e., hello-app-cluster) on DigitalOcean with the --tag as hello-app for identification.
| Option | Function |
|---|---|
--auto-upgrade=true | Enables automatic upgrades for the Kubernetes version. |
--node-pool | Creates a node pool with the name myfirstpool (arbitrary), containing two nodes. |
auto-scale=true | Enables automatic scaling of the node pool, with a minimum of one node and a maximum of three nodes. |
tag=hello-app | Assigns the tag hello-app to the nodes in the node pool. |
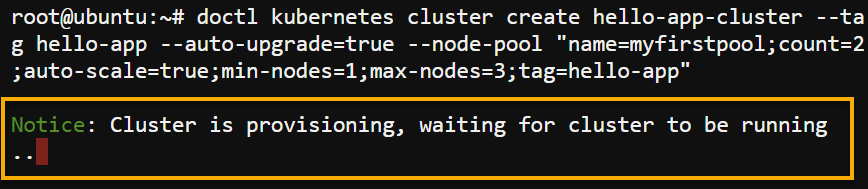
doctl kubernetes cluster create hello-app-cluster --tag hello-app --auto-upgrade=true --node-pool "name=myfirstpool;count=2;auto-scale=true;min-nodes=1;max-nodes=3;tag=hello-app"Wait for the cluster to be provisioned, as shown below.
2. Next, run the command below to list all Kubernetes clusters available.
doctl kubernetes cluster listThe output below shows the provisioning status of your cluster.

With your DigitalOcean Kubernetes cluster running, as shown below, you can now deploy your app on the cluster.

3. Run the below command to generate a kubernetes-manifest for your image and provide DigitalOcean Kubernetes Cluster access to your private Container Registry.
This manifest is a YAML file that contains the necessary configuration to deploy your application to your Kubernetes cluster. The generated manifest includes the details of your DigitalOcean Container Registry, the image to use, and the environment variables to set.
doctl registry kubernetes-manifest | kubectl apply -f -
4. Now, run the following kubectl command to add the DigitalOcean registry credentials to the Kubernetes default service account. Remember to replace doregistry125428 with yours.
This command ensures that Kubernetes can authenticate with the DigitalOcean registry and pull the Docker image for deployment.
kubectl patch serviceaccount default -p '{"imagePullSecrets": [{"name": "registry-doregistry125428"}]}'
5. Run the following command to create a deployment object. This deployment object ensures that your application’s desired number of replicas is always running in the cluster.
During deployment object creation, a default Replica Set is also created. Kubernetes uses this Replica Set to ensure the number of running container replicas is stable. Each replica is a separate running instance of your container, known as a Pod.
kubectl create deployment hello-app --image=registry.digitalocean.com/doregistry125428/hello-app
6. With the deployment object created, run the command below to get all available Replica Sets (rs). This command lets you confirm that the Replica Sets have been created correctly and are functioning as intended.
kubectl get rs
You can scale the replicas of your deployment up or down based on your application’s demands. You may want to scale up during high-traffic periods to ensure your application can handle the load. Conversely, you may scale down during low-traffic periods to save resources and reduce costs.
7. Now, run the below command to get a list of all available pods in your Kubernetes cluster, their status, age, etc.
kubectl get podsYou can use this information to check the status of your app’s pods and to troubleshoot any issues related to your app’s deployment.

8. Run the command below to scale up the --replicas from two to three (3).
kubectl scale --replicas=3 deployment/hello-app
9. Finally, run the below command to get the list (-l) of all pods, and see how they are divided over your nodes for your hello-app deployment.
kubectl get pods -o wide -l app=hello-appBelow, you can see the command lists all the pods in your cluster, their current status, the node, and the IP address they are running on (-o wide).

Creating a Load Balancer for Incoming Traffic Distribution
With the increase of your application replicas running, you must ensure network congestion (downtime) never takes place. As a solution, you will create a load balancer to distribute incoming traffic across your replicas. A load balancer increases your applications’ capacity (concurrent users) and reliability, providing scalability, redundancy, and high availability.
In the case of Kubernetes, the load balancer is created as a separate object, which routes traffic to the underlying pods based on their readiness status.
To create a load balancer for your cluster:
1. Run the below command to perform the following:
- Create a service object (
deployment) in Kubernetes toexposethehello-appdeployment as a network service. By default, the service is only accessible within the cluster but can be made externally available through the--typeparameter. --type=LoadBalancer– Requests a load balancer from the cloud provider (DigitalOcean) and creates an external IP address that forwards incoming traffic to the service.- Specifies the port (
--port=80) to expose the service and the port to target the pods (target-port=80).
kubectl expose deployment hello-app --type=LoadBalancer --port=80 --target-port=80
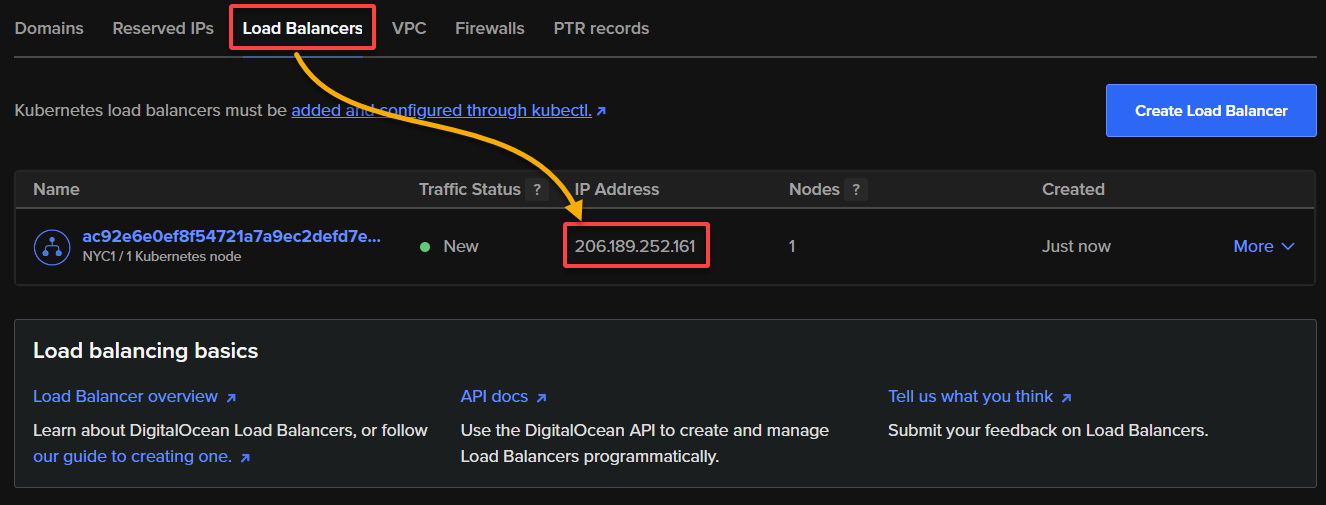
2. Next, navigate to the Load Balancer page in the DigitalOcean console and your newly-created load balancer’s external IP address.
3. Finally, open a new browser tab, and navigate to the external IP address you noted in step two to access your Hello App.
Keep hitting refresh on the page and check the hostname displayed each time. If the load balancer is working correctly, you will see the hostname alternate between the three nodes of your cluster, as shown below. This output verifies your load balancer distributes traffic evenly among the replicas.
Conclusion
Throughout this tutorial, you have started your journey with DigitalOcean Kubernetes. You learned how to create a DigitalOcean Kubernetes cluster, push a Docker image to the DigitalOcean Container Registry, and deploy an application to the cluster.
Now, you can confidently scale your replicas without worrying about incoming traffic load if you have a fully functional load balancer.
What applications do you plan to deploy on your cluster? Perhaps create a highly available Redis database to run a complex microservices architecture?


