
You’ll usually find Kubernetes where it makes sense in cloud environments. But how do you speed up development for Kubernetes by testing locally? Well, you’re in for a treat in this MiniKube tutorial!
MiniKube allows you to test the goodness of Kubernetes and develop applications right on your laptop or desktop. And in this tutorial, you’ll learn how to set MiniKube up and the foundations of Kubernetes through examples.
Ready? Read on and learn about local Kubernetes deployments with MiniKube!
Prerequisites
This tutorial will be a hands-on demonstration. If you’d like to follow along, be sure you have the following:
- A Linux machine to host the cluster – This tutorial uses Fedora 35.
- A container or a virtual machine manager, such as Docker, KVM, Hyper-V, Podman, or VirtualBox – This tutorial uses Docker v20.10.13. Install Docker with this tutorial if you do not already have any of the alternatives installed.
Installing & Starting in this MiniKube Tutorial
Before jumping into Kubernetes, you’ll first have to install MiniKube on your machine. Later, you’ll use MiniKube to transform your machine into a single node Kubernetes cluster.
Unlike other packages, you’ll have to download the MiniKube binary with the curl command before installing MiniKube.
1. Run the curl command below to download a copy of the MiniKube binary on your machine (minikube-linux-amd64).
curl -LO https://storage.googleapis.com/minikube/releases/latest/minikube-linux-amd64
2. In the same directory where the binary was downloaded, run the following command to install the MiniKube binary (minikube-linux-amd64) to the appropriate location (/usr/local/bin/minikube).
Installing MiniKube doesn’t provide output, but you’ll be asked for your sudo password.
sudo install minikube-linux-amd64 /usr/local/bin/minikube3. Lastly, run the below command to start MiniKube using the installed binary.
minikube startIf all goes well, you’ll get an output similar to the one below. If Docker is your container manager, Docker has been automatically selected as the driver.
At this point, Kubernetes is now running perfectly.

Setting up kubectl to Interact with MiniKube
When you start MiniKube for the first time, the Kubernetes client (kubectl) is automatically installed. But how do you let kubectl interact with MiniKube? By running the alias command to shorten the minikube kubectl command.
Perhaps you’re more into clicking on a GUI. If so, you can set up the Kubernetes dashboard instead.
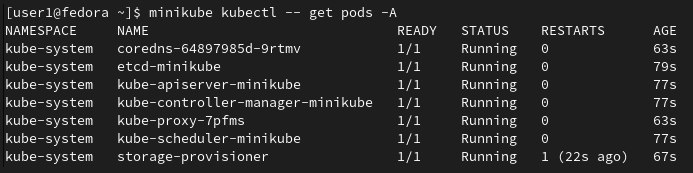
1. Run the following command to get all pods running in all namespaces (-A) in the cluster.
Below, you can see the minikube kubectl works fine, but it’s a bit lengthy, and creating an alias would be a big help (step two).
2. Next, run the following command to create an alias for the minikube kubectl command to save you a few keystrokes.
At this point, and throughout this tutorial, you’ll only need to run the kubectl command as you interact with the cluster (step three).
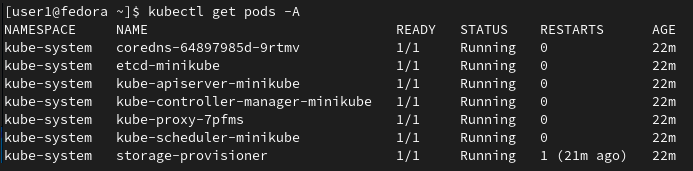
alias kubectl="minikube kubectl --"3. Finally, run the kubectl command below to get all pods running in all namespaces (-A) in the cluster, as you did in step one. This time, you start with just the kubectl command instead of minikube kubectl.
kubectl get pods -ANotice below that you get the same output as step one using only the kubectl command.
Deploying a Webserver Application to Kubernetes on MiniKube
By now, your cluster is ready for its first pod, so you’ll deploy an Apache web server container to the cluster. You’ll create a deployment based on an httpd image for this tutorial.
1. Run the following kubectl command to create a deployment named httpd using the latest image (httpd:latest).
kubectl create deployment httpd --image=httpd:latestYou can see below that the deployment has now been created.

2. Now, run the below command to see the status of the pods created as a result of the deployment.
Running the command immediately produces the screenshot below, where the pod is still in the ContainerCreating state.
kubectl get pods
3. Lastly, rerun the kubectl command below as you did in step two after a few minutes.
kubectl get podsThe output below confirms the pod is Running, as shown below.

Exposing the Deployment for External Access
You’ve successfully deployed a web app-running pod, but the pod cannot be accessed from outside the cluster since external communication with the pod is disabled by default. You need to expressly expose (enable access to) the app for interaction via your web browser outside the cluster.
1. Run the kubectl expose command below to expose your deployment to the outside world with the standard port 80 using a NodePort service.
kubectl expose deployment httpd --type=NodePort --port=80MiniKube is primarily used for development and testing. Using a NodePort is usually sufficient for such use cases. But in production, consider using a LoadBalancer or Ingress to expose your deployment as they are more secure and robust.
The output below confirms the port has been successfully exposed.

2. Next, run the minikube service command below to obtain the external address (--url )for the deployment(httpd)
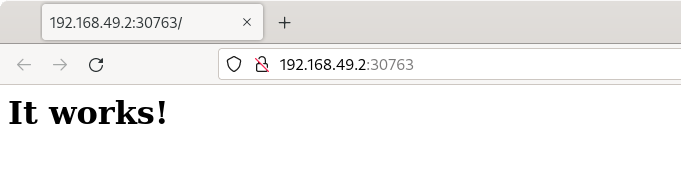
minikube service httpd --urlNote down the URL like in the output below, as you’ll need it to access your web application (step three).

3. Finally, open your preferred web browser and navigate to the URL you noted in step two. This URL redirects your browser to the default httpd container webpage, as shown below.
Pausing a Kubernetes Cluster
Your web server is now fully accessible from your local machine, so take this time to explore other features of MiniKube that can help administer your cluster. Read on about pausing the cluster for a start.
MiniKube allows you to pause running containers in a namespace with the pause command. The pause command lets you free up resources and also simulates service failure. Pausing is useful in resource-constrained development environments like MiniKube.
To pause a Kubernetes cluster:
1. Run the minikube pause command below to free up the processor and runs other containers. This command executes without losing the state of the paused containers in the default namespace (-n).
minikube pause -n defaultAfter pausing the cluster, you’ll see an output similar below.

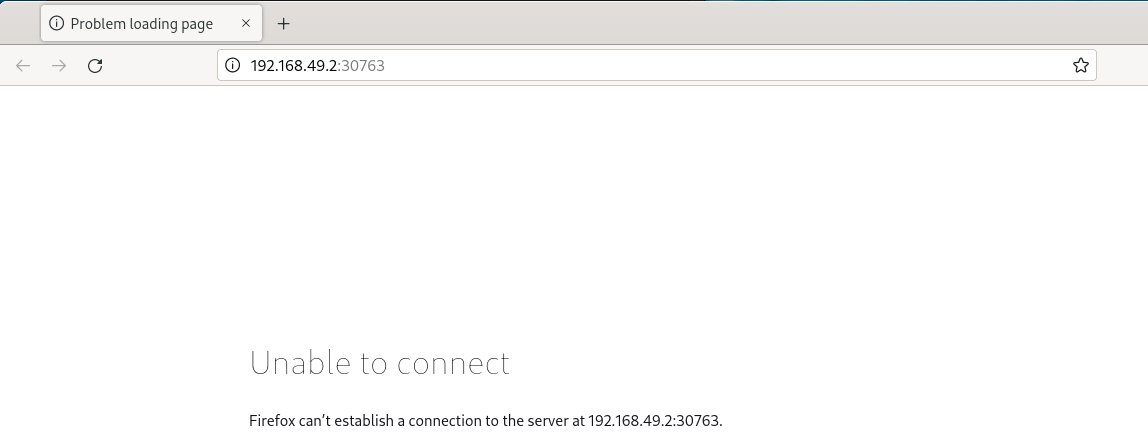
2. Switch back to your browser and notice an error message saying Unable to connect, as shown below. You get this error message since your browser cannot fetch the welcome page anymore after pausing the cluster.
3. Now, run the following minikube unpause command to resume the execution of the paused containers.
minikube unpause -n defaultYou’ll see the output similar below after resuming the paused cluster.

4. Lastly, switch back to your web browser and see the earlier It works message. This output indicates your web browser can connect to the web server again, as shown below.

Stopping a Kubernetes Cluster
Unlike pausing a cluster, you can also stop a Kubernetes cluster entirely if it doesn’t serve any purpose anymore or if you just want to restart the cluster.
1. Run the minikube stop command below to stop the cluster altogether. Stopping the cluster preserves the current cluster configuration.
minikube stopAccordingly, the terminal informs you of the progress as in the following screenshot.

2. Next, run the minikube start command below to restart the cluster.
minikube startYour screen should show the start-up process, as shown below.

3. Finally, run the following commands to get the state of deployment, pods, and services. Restored on Restart
# Get the state of deployments
kubectl get deployments
# Get the state of pods
kubectl get pods
# Get the state of services
kubectl get services
As you can see below, the deployment, service, and pod configurations have been restored. You can now resume work from where you left off.

Scaling a Deployment
You’ve seen most of MiniKube’s capabilities, but there’s more to realize what MiniKube can offer. You’ll perform a few more actions with kubectl to see that MiniKube as a cluster can provide an almost feature-complete playground for Kubernetes testing.
One of the most outstanding capabilities of MiniKube is scaling a deployment for the high availability of your applications.
To scale a deployment, run the kubectl scale command below to increase the number of replicas for the httpd deployment to 2.
kubectl scale --replicas=2 deployment httpd
You’ll receive the following output indicating the scaling is successful.

Now, run the command below to see all available pods.
kubectl get pod
You’ll get another pod with the same parameters as the initial pod with successful scaling, as shown below.

Probing a Cluster for Detailed Information
If you’re in the middle of troubleshooting your cluster, you can also use kubectl to probe your cluster for more details for troubleshooting or documentation purposes.
Run the below kubectl command to probe the cluster-info cluster.
kubectl cluster-info
Once the command completes, you’ll get an output similar to the screenshot below that tells where Kubernetes control plane and CoreDNS are running.

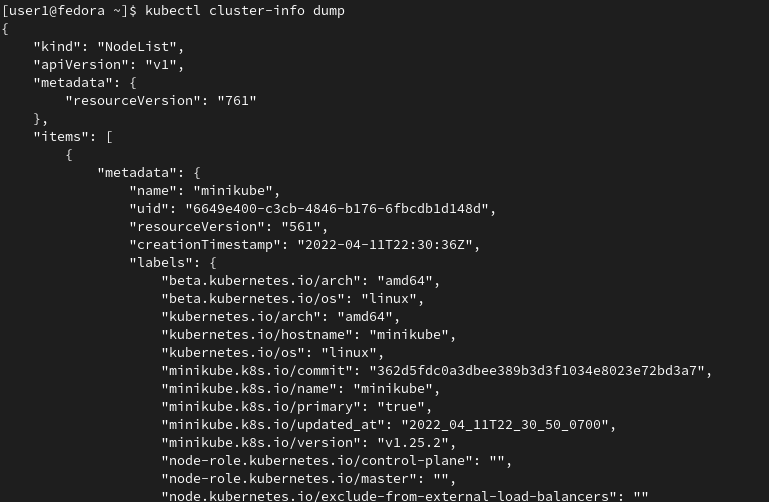
Append the dump sub-command to cluster-info for further information on the cluster, as shown below
kubectl cluster-info dump
The command produces more than enough information on the state of the cluster; which is useful for deep troubleshooting. The following screenshot is a truncation of the entire output of producing a dump.
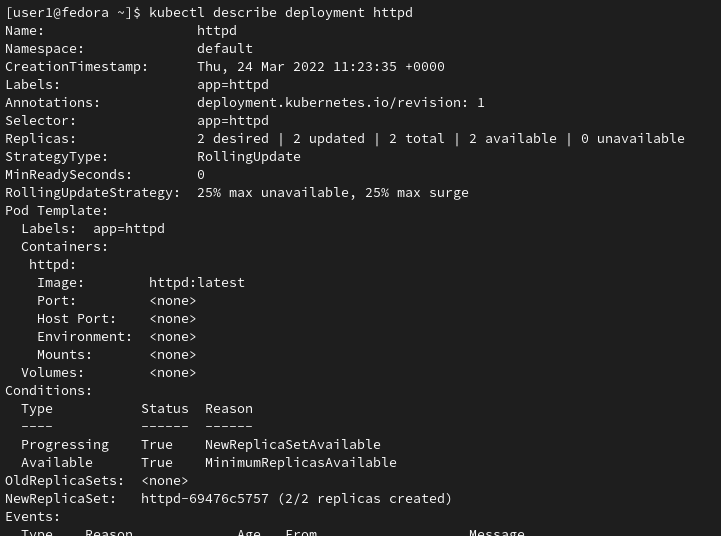
Perhaps you prefer to produce more verbose information about a resource, such as a pod or service. If so, run the following command instead, with the
describeoption.kubectl describe deployment httpd
Deleting Deployments and Clusters
Keeping unused deployments and clusters only takes up your storage space, so getting rid of them is a much better option.
Run the kubectl delete command to delete a deployment, in this case, the httpd deployment you have been working with.
kubectl delete deployment httpd
Deleting the deployment is one way to wind things down as it triggers termination of all the replicas but still leaves the cluster running for other pods, as shown below.

Now, run the minikube delete command below to delete your Kubernetes cluster. This command removes the current VM or container running MiniKube, giving you the chance to start afresh.
minikube delete
You should get confirmation of the actions taken in your terminal, as in the screenshot below.

Conclusion
In this tutorial, you’ve learned how to develop a Kubernetes cluster using MiniKube. You’ve also touched on scaling a deployment for high availability, probing clusters for troubleshooting, and deleting deployments and clusters for storage cleanup.
There’s a lot more to know about Kubernetes. So why not build on this newfound knowledge by learning how to use Kubernetes with Ansible?


