


Have you ever found yourself buried under a mountain of routine chores? Do not lose hope! Embrace automation as your gateway to increased productivity and streamlined efficiency. If you yearn to free up your precious time, automating tasks will be your ticket to liberation.
In this tutorial, you will dive headfirst into the world of automation using Bash scripts and cron jobs with AWS.
Wipe those tears and journey towards a more efficient and productive workflow!
Prerequisites
Before you dive into automating tasks, ensure you are geared up and ready to make the most of this learning experience. Below are a few things you should have in place to follow along in this tutorial:
- A system that supports AWS operations – This tutorial uses an Ubuntu 22.04.2 LTS.
- An AWS account – A free tier option will suffice.
- An EC2 instance running Amazon Linux 2.
- An S3 bucket access for storing processed data.
- An IAM role assigned to the EC2 instance, granting access to your S3 bucket.
- A Python script (script.py) designed for web scraping and a requirements.txt file listing the necessary Python packages for your project.
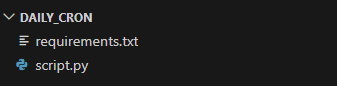
Your initial project directory structure should look like the one below:
Creating a Bash Script for Automating Tasks
Moving on from the prerequisites, you will venture into having a digital assistant to carry out routine tasks on your behalf — a Bash script. You will create a Bash script that automates extracting and uploading valuable data from a designated website to an AWS S3 bucket.
💡 Bash is readily available on nearly every Linux/Unix system, so scripts crafted for one system can be executed on another.
To create a Bash script for automated data extraction, follow these steps:
1. Create a new file named bash.sh with your preferred editor (i.e., Visual Studio Code) in your project directory (i.e., /Daily_cron).
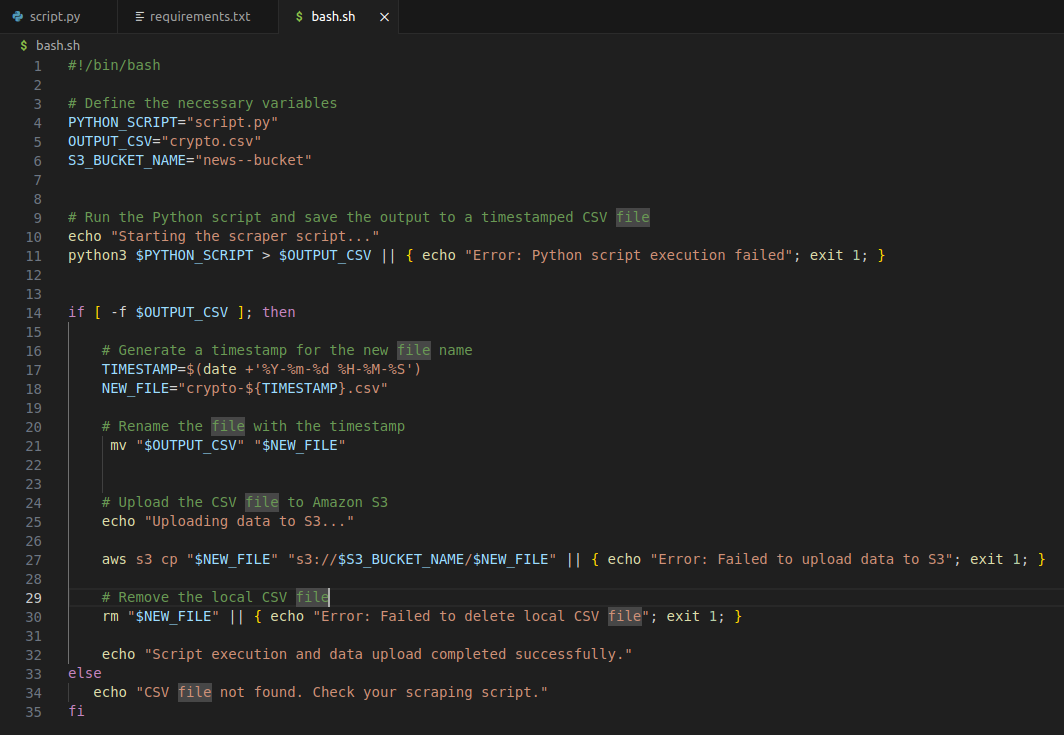
2. Next, add the following code to your bash.sh file to define the necessary variables.
#!/bin/bash

# Define a variable for your Python script file
PYTHON_SCRIPT="script.py"
# Define a variable for the output file post-data-scaping
OUTPUT_CSV="crypto.csv"
# Define a variable for your S3 bucket's name
S3_BUCKET_NAME="news--bucket"
3. Include the following, which executes your Python script and saves the output to a timestamped CSV file.
# Run the Python script and save the output to a timestamped CSV file
echo "Starting the scraper script..."
python3 $PYTHON_SCRIPT > $OUTPUT_CSV || { echo "Error: Python script execution failed"; exit 1; }
4. Add the following code at the bottom of the bash.sh file, which uploads the saved CSV file to your AWS S3 bucket with a timestamp.
# Generate a timestamp for the new file name
TIMESTAMP=$(date +'%Y-%m-%d %H-%M-%S')
NEW_FILE="crypto-${TIMESTAMP}.csv"

# Rename the file with the timestamp
mv "$OUTPUT_CSV" "$NEW_FILE"

# Upload the CSV file to your AWS S3 bucket
echo "Uploading data to S3..."
aws s3 cp $NEW_FILE  "s3://$S3_BUCKET_NAME/$NEW_FILE" || { echo "Error: Failed to upload data to S3"; exit 1; }
5. Lastly, input the following, which removes the local CSV file once uploaded to your AWS S3 bucket.
rm "$NEW_FILE" || { echo "Error: Failed to delete local CSV file"; exit 1; }Once compiled in the bash.sh file, the code should look like the one below.
Transferring Scripts to AWS EC2 Instance
With a script at your disposal, you must ensure you can run automated tasks in a scalable and flexible environment — transferring scripts to your AWS EC2 instance. Imagine having the ability to execute your scripts from anywhere in the world.
To transfer scripts to your AWS EC3 instance, carry out the steps below:
Open a terminal, navigate to your project directory, and execute the following zip command to compress your project into a zip file.
Ensure you replace Daily_cron.zip with your preferred name and Daily_cron with your project directory path.
zip -r Daily_cron.zip Daily_cron
Now, run the below scp command to upload your zipped project to your AWS EC2 instance.
Make sure you replace the following accordingly:
AWS-KEY.pem– Your key pair file (or full path).Daily_cron.zip– Your zipped project’s name.user@AWS-IP– Your AWS EC2 instance’s username and the IP address (or hostname)./path/to/destination/– Your S3 bucket’s full path.
scp -i AWS-KEY.pem Daily_cron.zip user@AWS-IP:/path/to/destination/
Installing Required Packages to the AWS EC2 Instance
Having successfully transferred your scripts to the AWS EC2 instance, what is the next step? You must ensure the environment is properly equipped to execute your scripts seamlessly. This process involves installing the necessary packages directly onto the instance.
To install the required packages to your AWS EC2 instance, proceed with the following steps:
1. Execute the below ssh command to connect to your AWS EC2 instance via SSH. Make sure you replace the following:
AWS-KEY.pem– Your key file’s local path.user@AWS-IP– Your AWS EC2 instance’s username public IP address.
ssh -i AWS-KEY.pem user@AWS-IP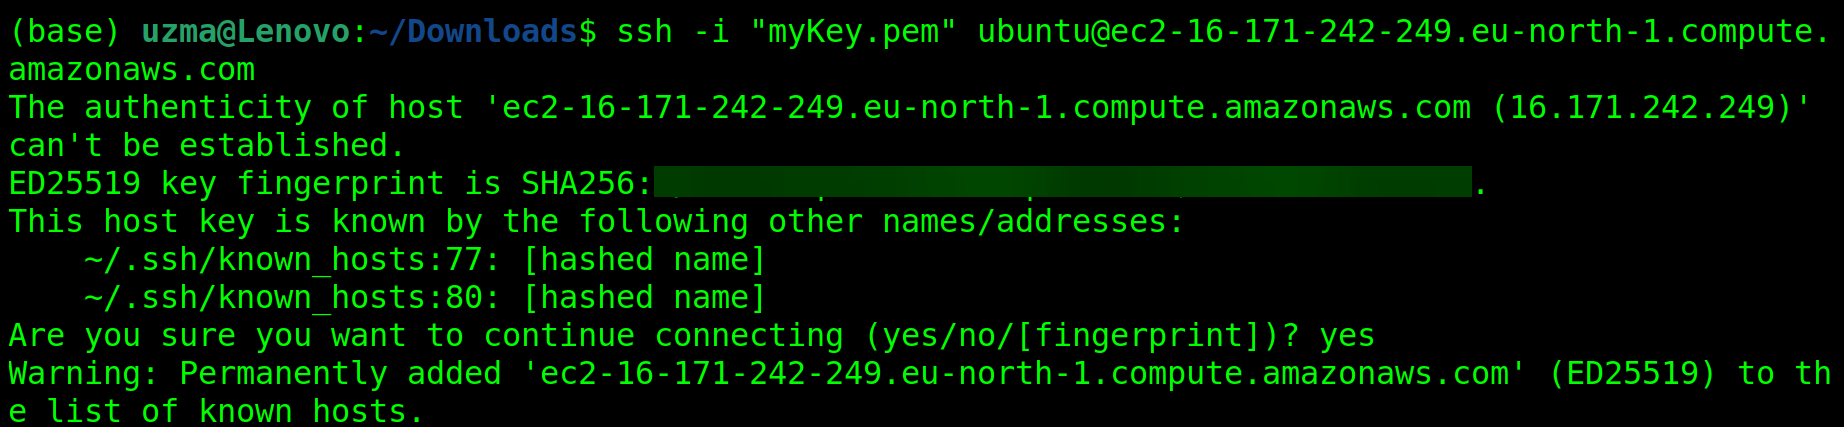
2. Next, navigate to where you uploaded your project, and run the following unzip command to unzip the project folder (Daily_cron.zip) on your AWS EC2 instance.
unzip Daily_cron.zip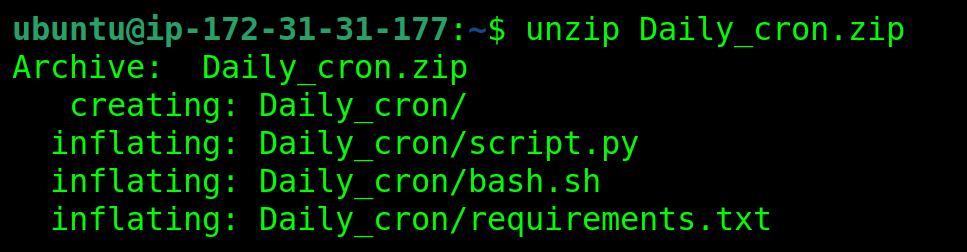
3. Now, run each command below to navigate (cd) to the extracted project directory (i.e., Daily_cron) and install the required packages listed in the requirements.txt file.
# Navigate to the extracted project directory
cd Daily_cron
# Install the required packages listed in the requirements.txt file
pip install -r requirements.txt
Enabling Access to the S3 Bucket
You have successfully installed the required packages, and you are almost ready to automate tasks. But before that, you will ensure seamless interaction between your AWS EC2 instance and S3 bucket.
EC2 instances use an IAM role to manage the permissions for AWS services. Thus, you must enable access to your S3 bucket. In this example, you will grant the appropriate permissions via the AWS Command Line Interface (CLI).
To enable access to your S3 bucket, complete these steps:
1. Execute the following command to install the AWS CLI (awscli).
sudo apt-get update
sudo apt-get install awscli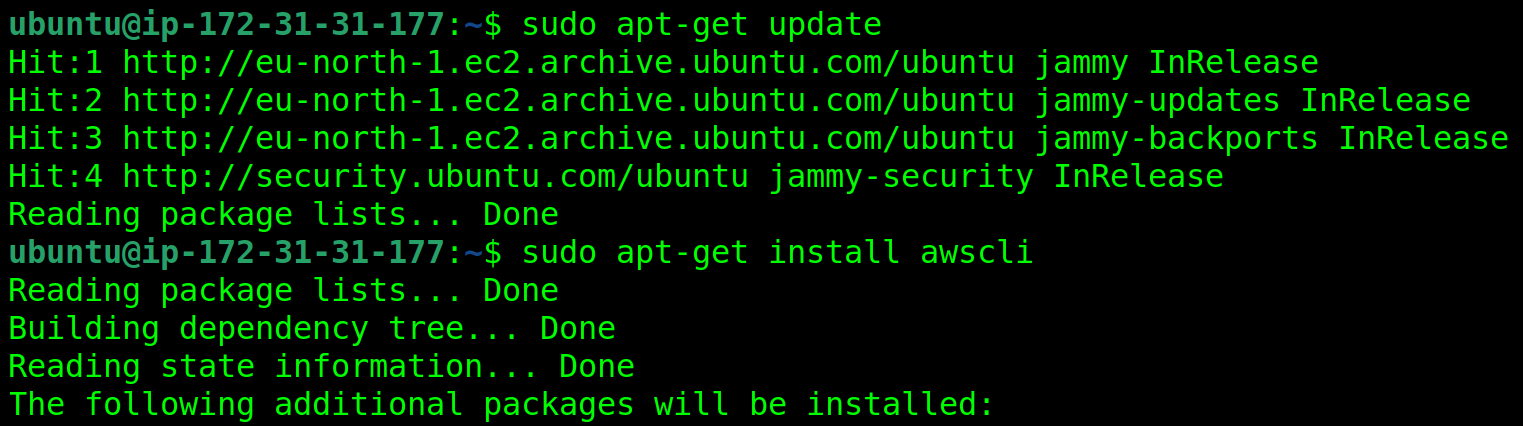
2. Once installed, run the aws command below to configure your AWS CLI installation.
aws configureWhen prompted, provide the necessary information, including your AWS Access Key ID and Secret Access Key.

3. Now, invoke the following bash command to test your script (bash.sh) to ensure the script runs as intended and produces the desired results.
bash bash.shIf all goes well, you will see an output similar to the one below stating the script execution and data upload completed successfully.

Automating Tasks by Scheduling Cron Jobs
Now you have enabled access to your S3 bucket, automating tasks is within your reach. Picture this: you have routine tasks to be executed at specific times, like clockwork — scheduling cron jobs is the answer.
By scheduling cron jobs, you can automate timed tasks, ensuring that essential operations run smoothly. This way, you eliminate the need for manual intervention or constant supervision.
To schedule a cron job for task automation, execute the following steps:
crontab -e💡 If you are on Windows, turn to Task Scheduler instead since crontab is exclusive for Unix-like systems.
Below is the crontab file where you can configure cron jobs for automation.
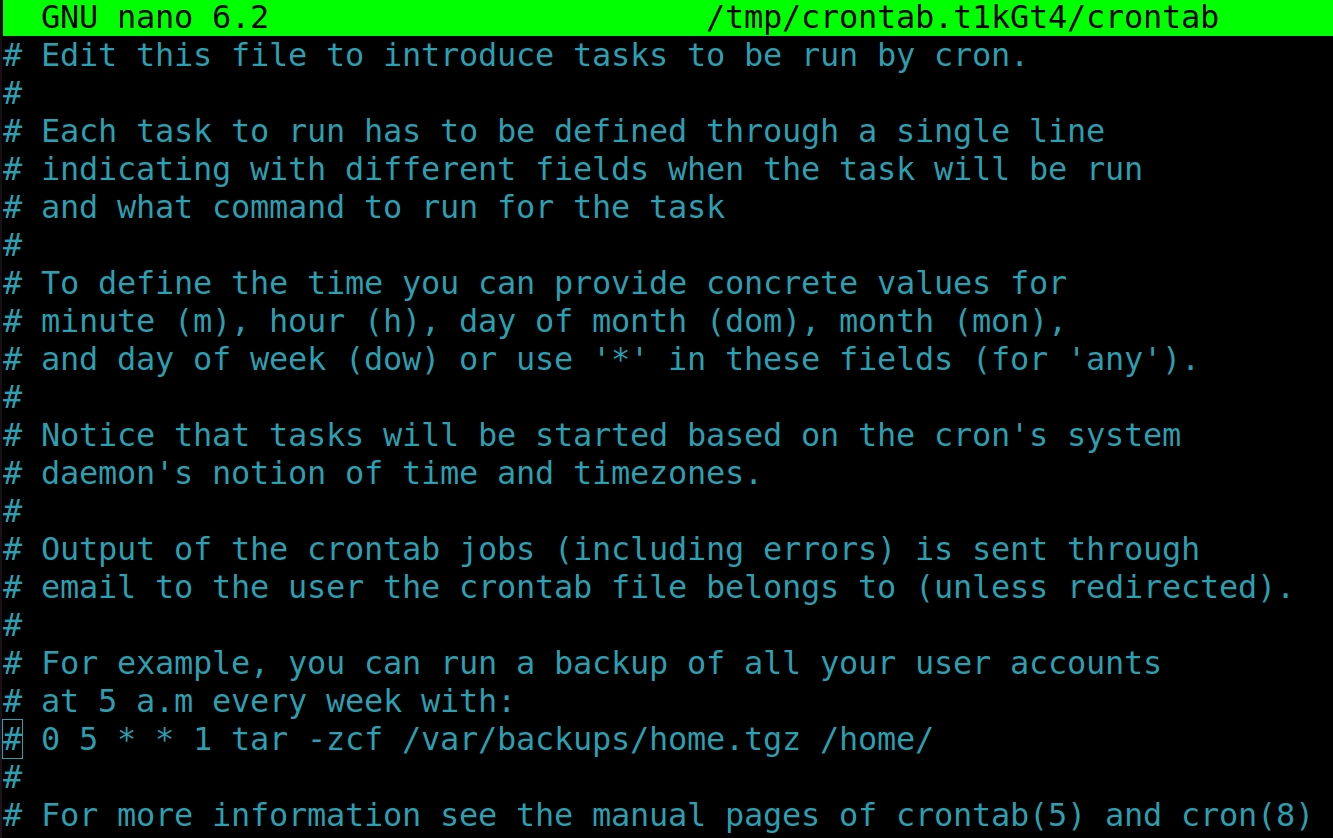
2. Next, add the following configuration, save the changes (Ctrl+O), exit the editor (Ctrl+X), and take note of the current time.
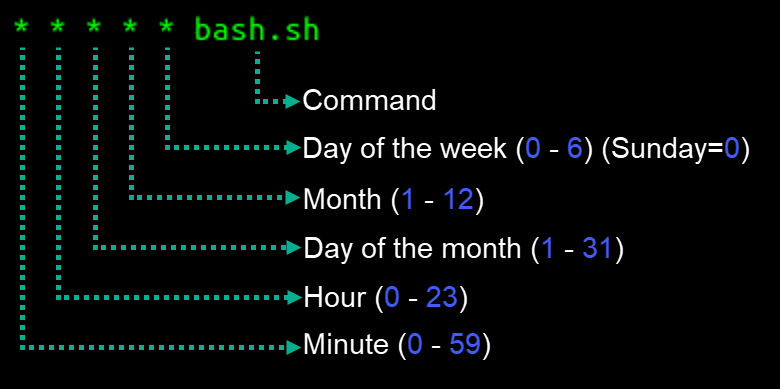
This configuration sets your script to run every minute (for demonstration), so ensure you replace /path/to/MY-SCRIP with the file name or full path of your script.
* * * * * /path/to/MY-SCRIPT
Alternatively, you can schedule a cron job using the following general syntax.
3. Finally, wait a minute, and run the below aws s3 command to list (ls) all files in your S3 bucket (news--bucket).
aws s3 ls news--bucketCompare the file’s timestamp with the time you saved your cron job’s configuration in step one. Assuming everything works correctly, the timestamp should be past a minute.

Conclusion
Throughout this tutorial, you have accomplished something remarkable — automating tasks! By diving into Bash scripts and cron jobs, you have put your AWS workflow on autopilot. You can now channel your energy towards the more exciting parts of your projects.
Now, would you extend this work with some future ideas? Why not start generating AI news from the daily data by leveraging powerful APIs like OpenAI or frameworks like langchain? Or expand the data pipeline to extract from APIs, transform data, and load into data warehouses like Amazon Redshift?
Keep exploring more tasks to automate, and find clever ways to integrate other AWS services!


