

The IAM in AWS can be a challenge to use and understand, especially for new users. Worry not though! If you’re struggling with getting your head over how IAM works in managing user permissions in AWS, you’ve come to the right place in grasping what’s possible with IAM.
Not a reader? Watch this related video tutorial!In this tutorial, you’ll learn the basic concepts of IAM by walking you through a series of examples that build on each other.
Ready? Take a deep breath and dive in!
Prerequisites
This tutorial will be a hands-on demonstration. If you’d like to follow along, be sure you have a PC and an AWS account. If you don’t have an AWS account, a free tier account is available.
Creating IAM in AWS Users
Before getting your head over how IAM works, you’ll first kick off this tutorial by creating users. Users can be used for all sorts of things. But for this tutorial, you’ll create users that don’t have any permissions, don’t belong to any groups, and have no access to anything at all.
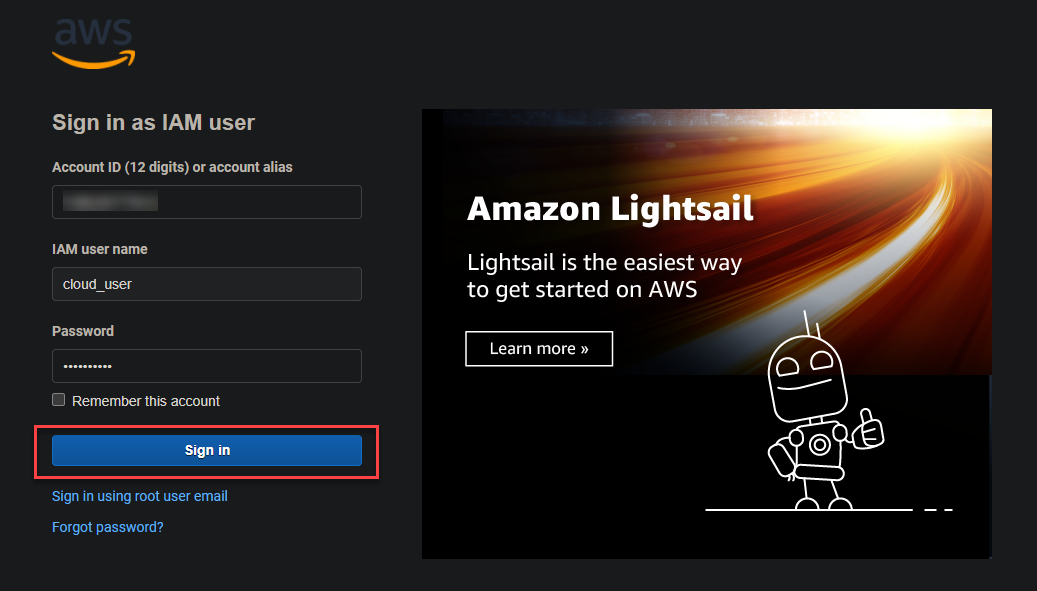
1. Log in to AWS Console. This demo uses a username called cloud_user, but your username will be different.
2. In the AWS console, type IAM in the search box, then click on the IAM service that pops up, as shown below. Your browser will redirect to the IAM dashboard.
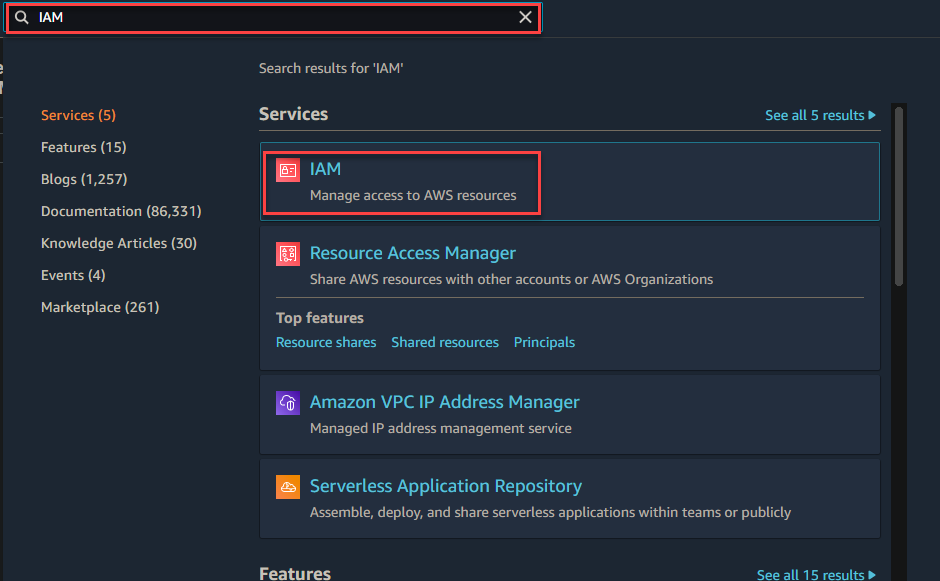
IAM is a global service, which indicates users and their permissions are applied to your entire AWS account/region. If multiple people share one AWS account (which is very common, for example in the case of a company-wide dev team), you will need to ensure proper IAM workforce rotation.
Also, you may create an EC instance inside the us-east region. Instances are regional. However, the AWS Identity and Access Management controls are not regional. The permissions assigned to a user will apply regardless of the region the EC instance the users connect to.

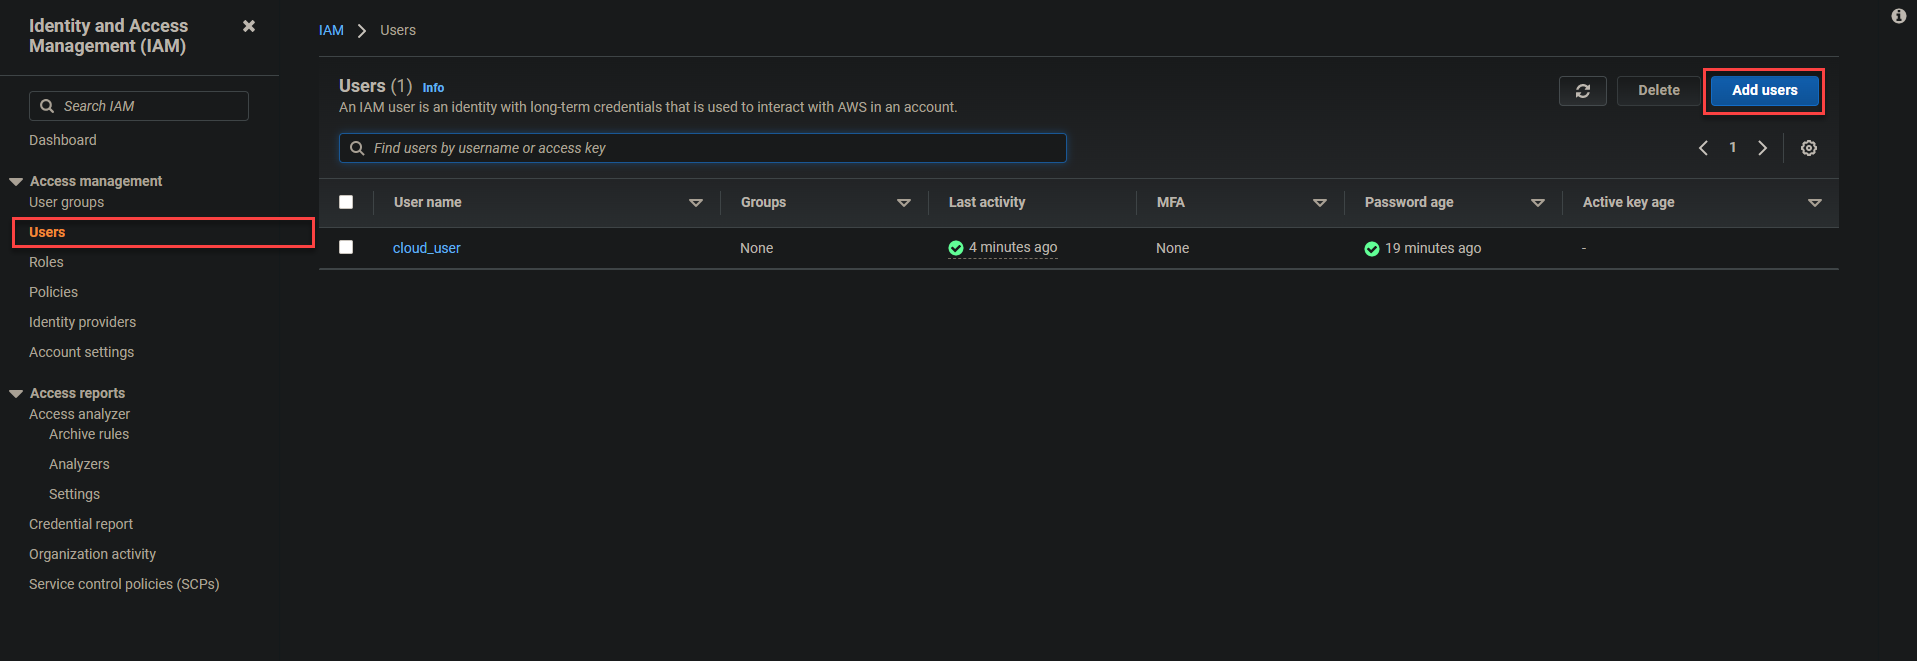
4. On the IAM dashboard, click on Users on the left pane, then click on Add users at the top-right of the page to initialize adding users.
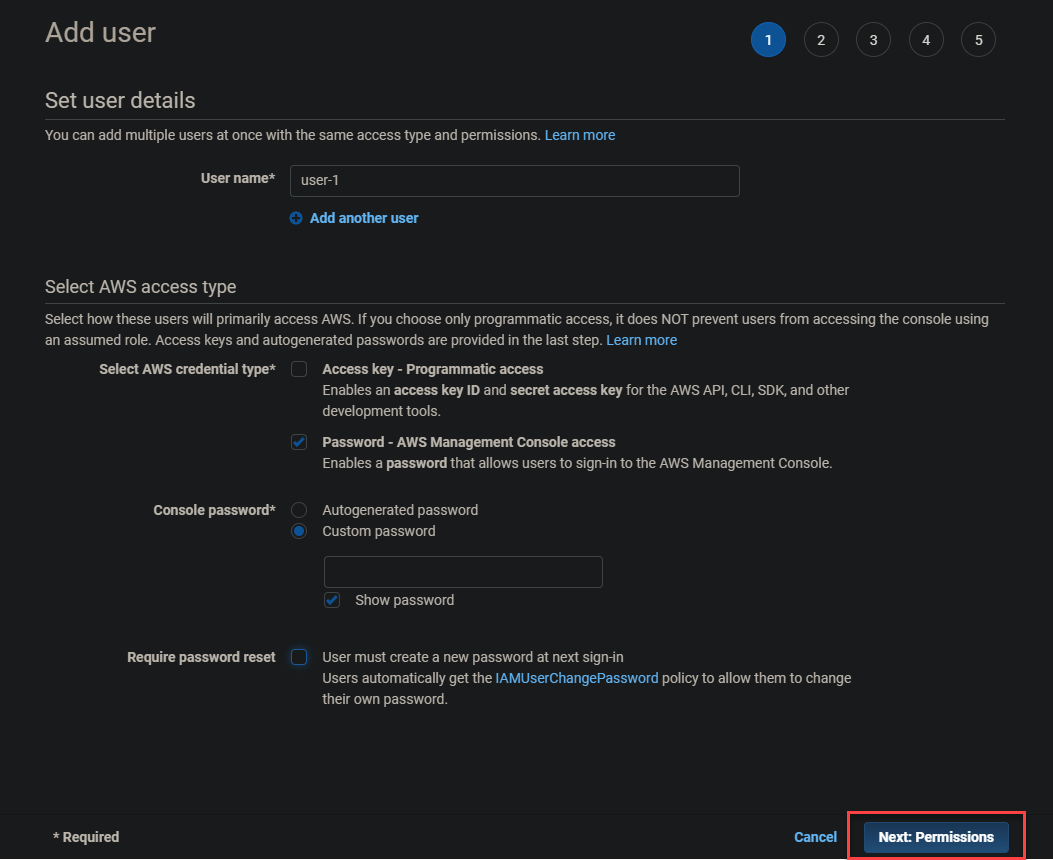
Now configure the user details with the following:
- Provide a username in the User name field shown below. For this example, the username is set to user-1.
- Enable the Password – AWS Management Console access option to allow users to sign in to the AWS Management Console.
- Select the Custom password option for the Console password, and provide a secure password in the text field.
- Uncheck the Require password reset option so the user won’t be prompted to create a new password at the next sign-in, then click on Next: Permission.
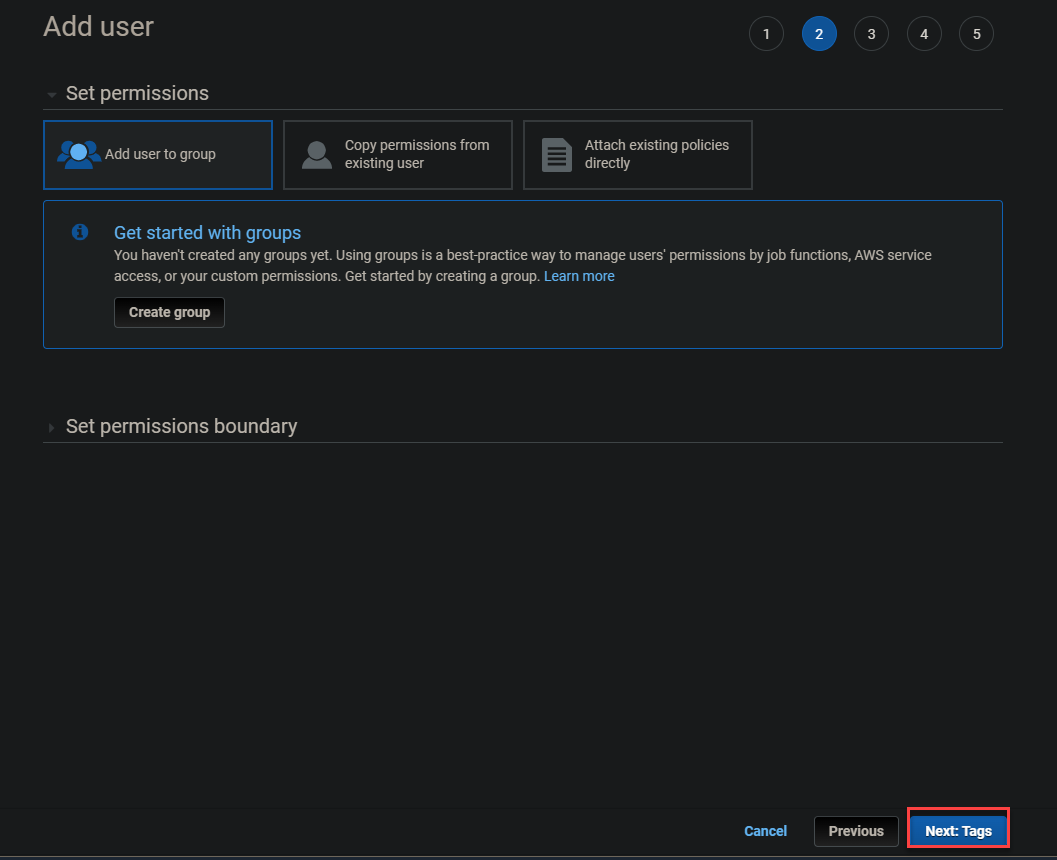
5. Skip setting permission and click on Next: Tags since you’re creating a user that doesn’t have permissions.
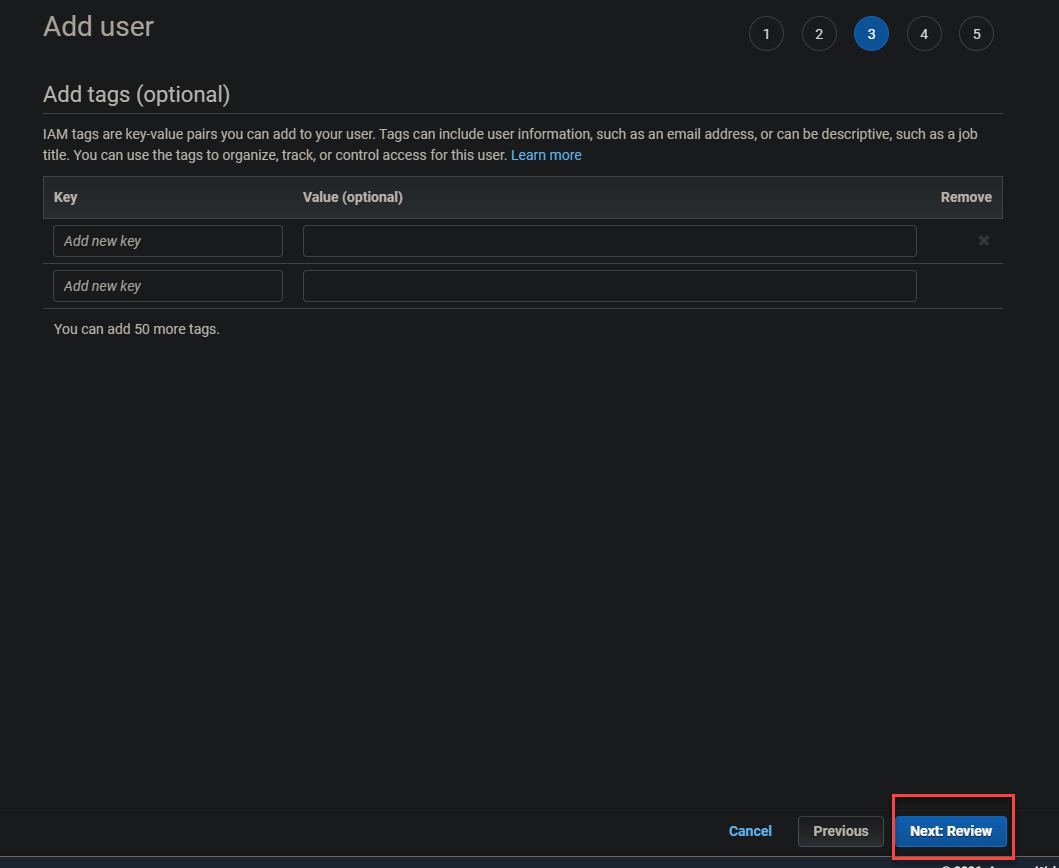
6. Skip adding tags too and click Next: Review.
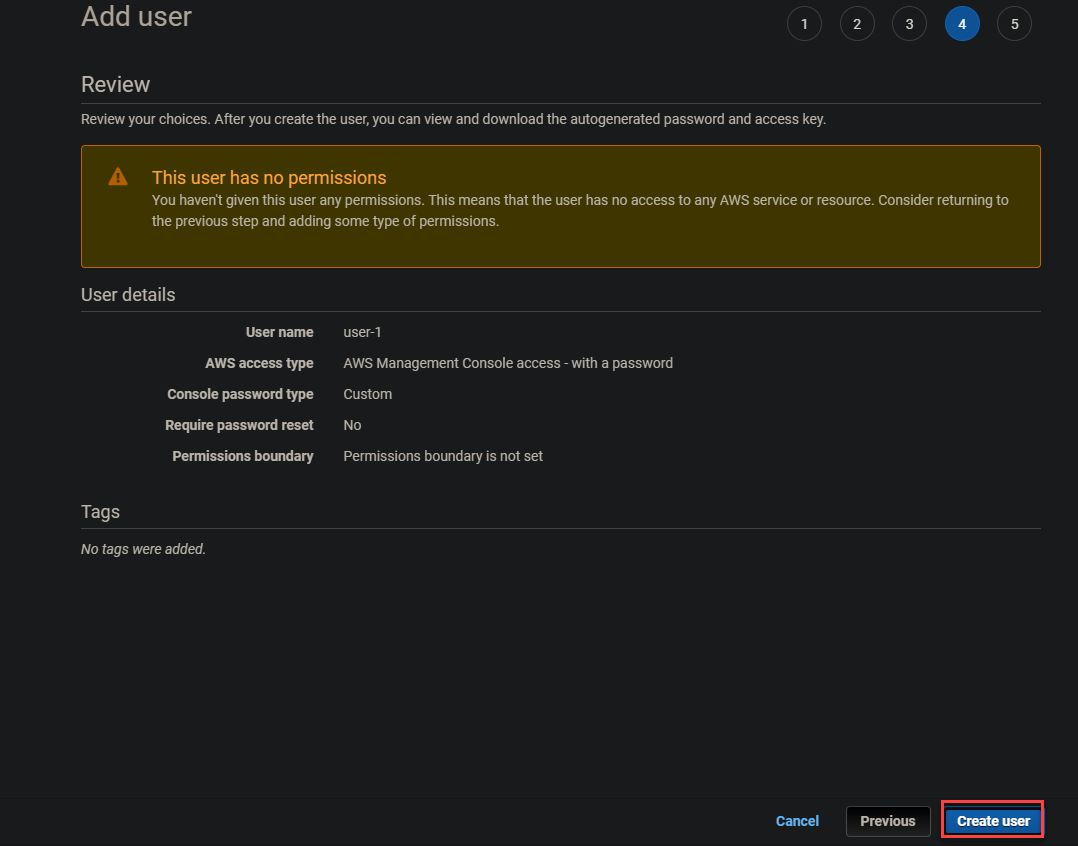
7. Review the user details and click on Create user to finalize creating the user.
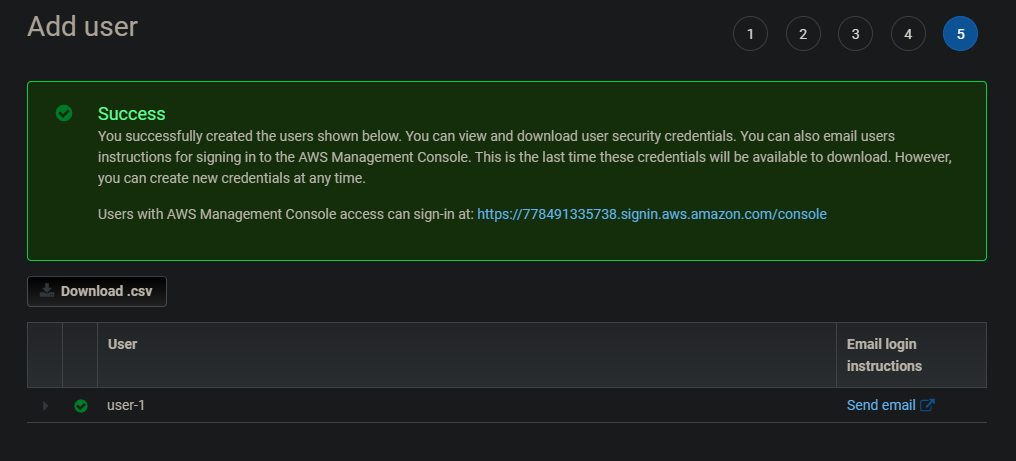
After creating the user, you’ll get a Success screen like the one below.
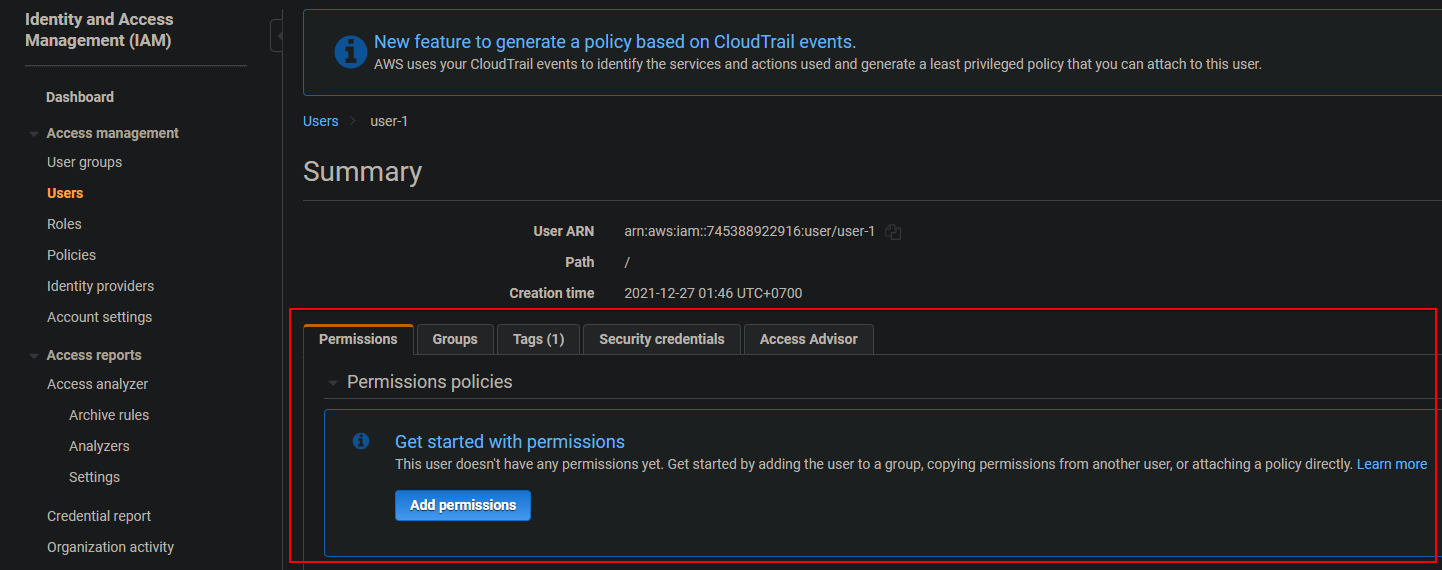
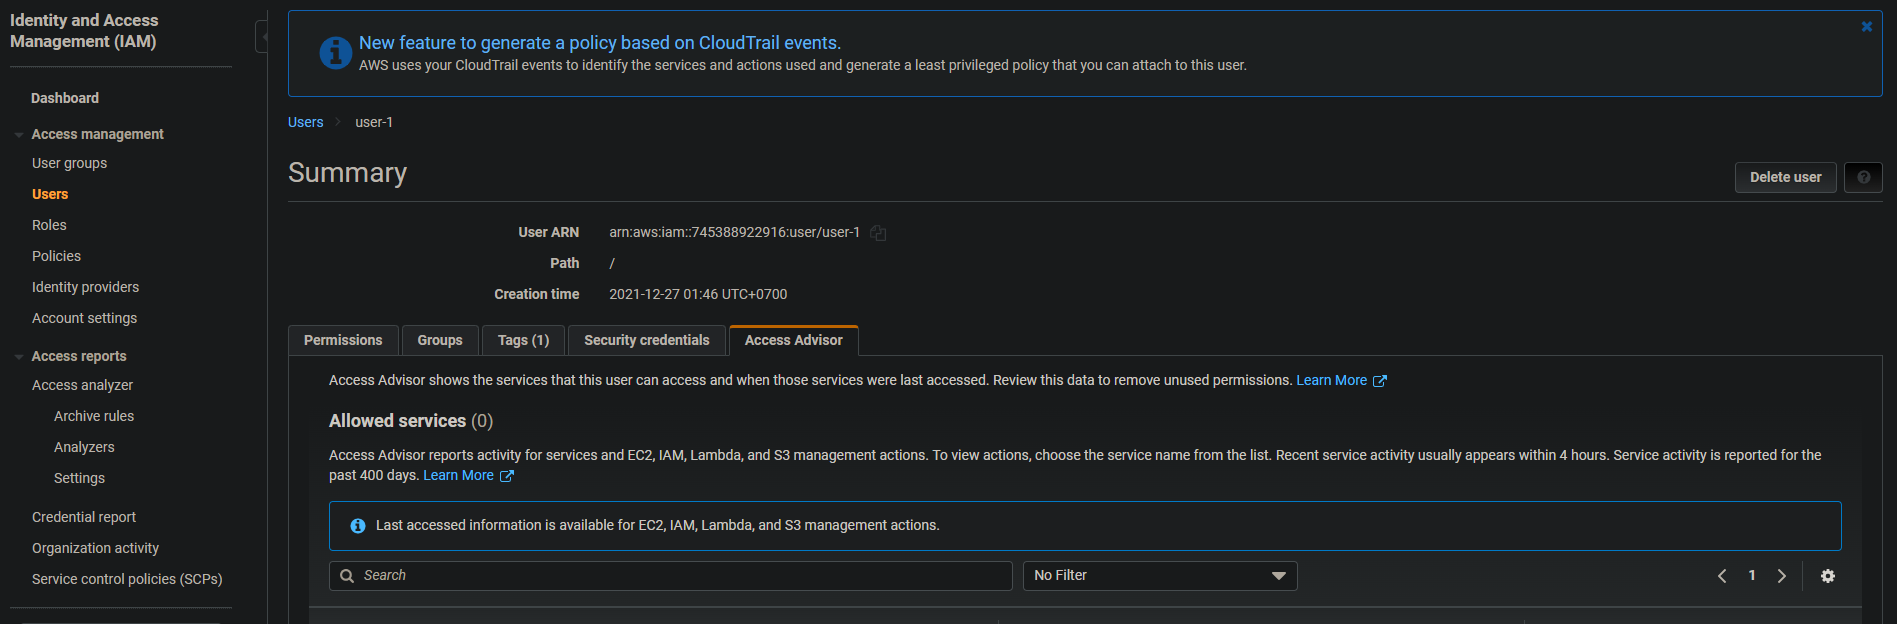
8. Now return to the Users page in your IAM dashboard, and click on the newly created user (user-1) to view the user’s information.  Opening your user-1

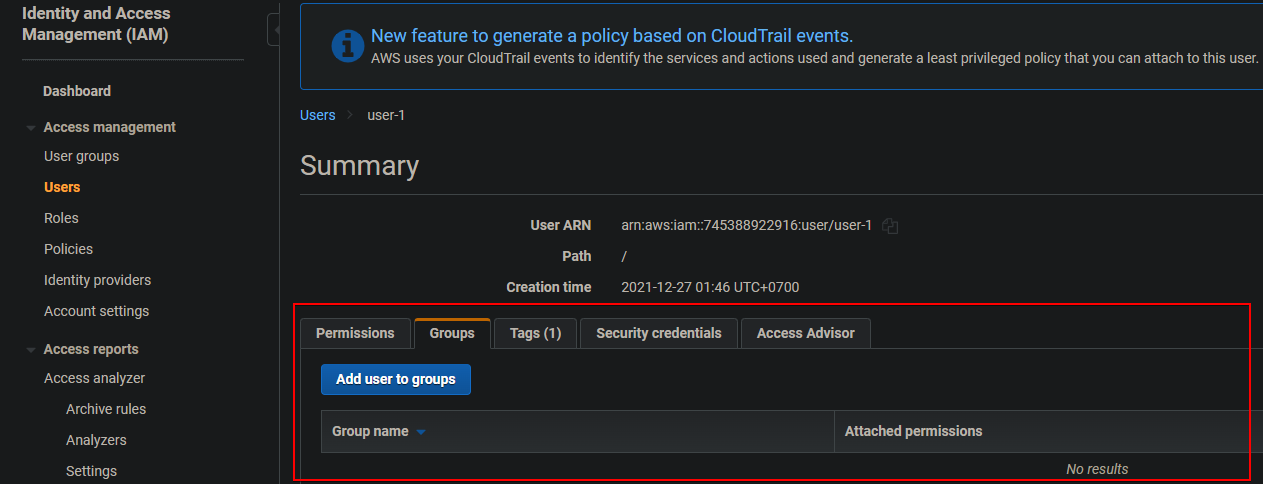
Below, under the Permissions and Groups tab, you can see that user-1 doesn’t have any permissions associated with it, and is not a member of any groups.
In the Security credentials tab, you’ll see different access keys that user-1 might have. You can upload an SSH public key on this tab, which is great for your AWS EC2 instances.
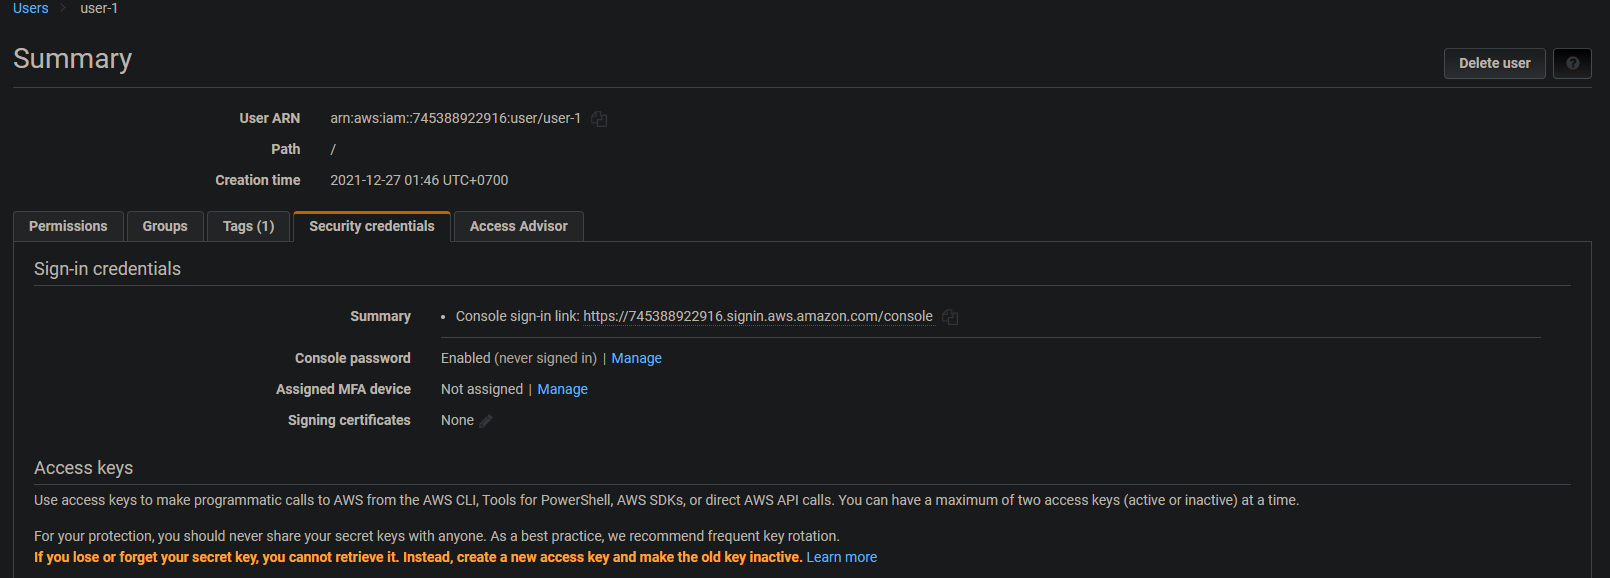
The Access Advisor tab shows you the services that user-1 has accessed, either directly or via other services, along with when user-1 last accessed that service.
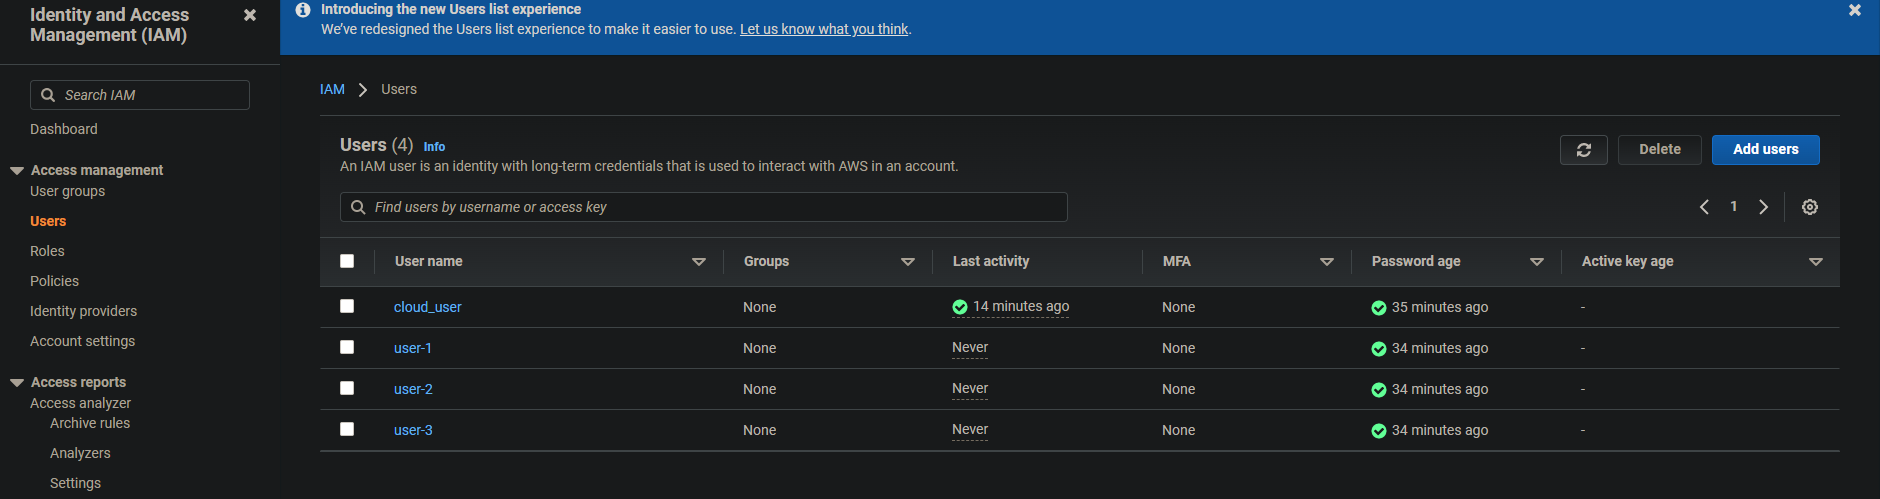
9. Finally, repeat the process (steps three to seven) to create two more users (user-2 and user-3). Return to your IAM dashboard’s Users page and you’ll see a list similar to the one below.
Creating the User Groups
Now that you’ve created the users, it’s time to create groups. You’ll create groups using the AWS managed policy and a JSON file.
For this tutorial, you’ll create three groups:
- EC2-Admin: Provides permissions to view, start, and stop EC2 instances
- EC2-Support: Provides read-only access to EC2
- S3-Support: Provides read-only access to S3
To start creating user groups:
1. In your IAM dashboard, click on the User groups on the left pane, then click on Create group.
2. Provide a User group name (EC2-Admin) on the Create user group page, as shown below.
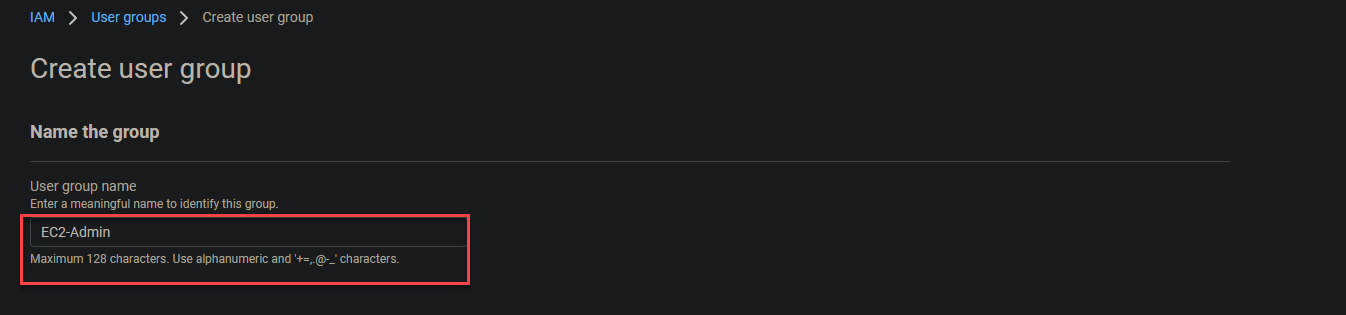
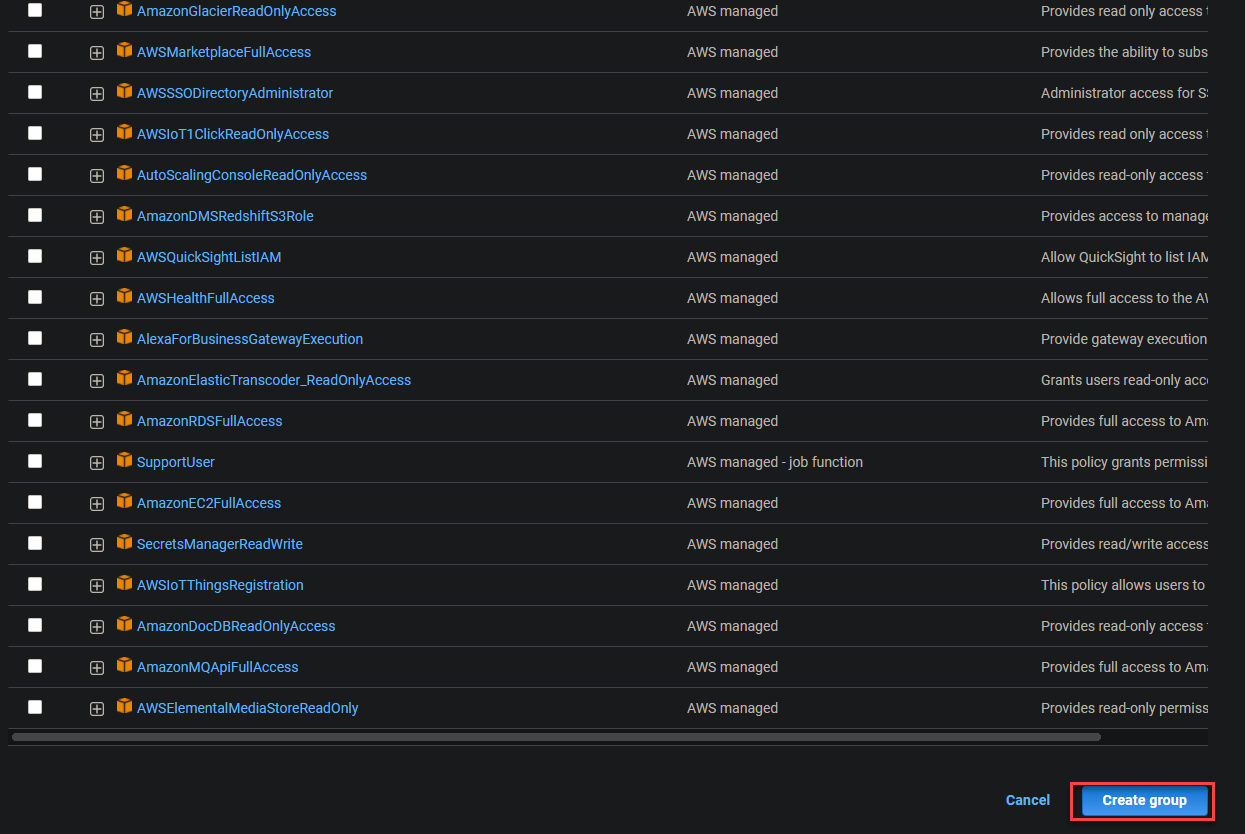
Keep the default permissions and click Create group to finalize creating the EC2-Admin group.
Once you’ve created the new group, you’ll get the EC2-Admin user group created message at the top of the page, as shown below. Your browser then redirects to the User groups page automatically (step three).

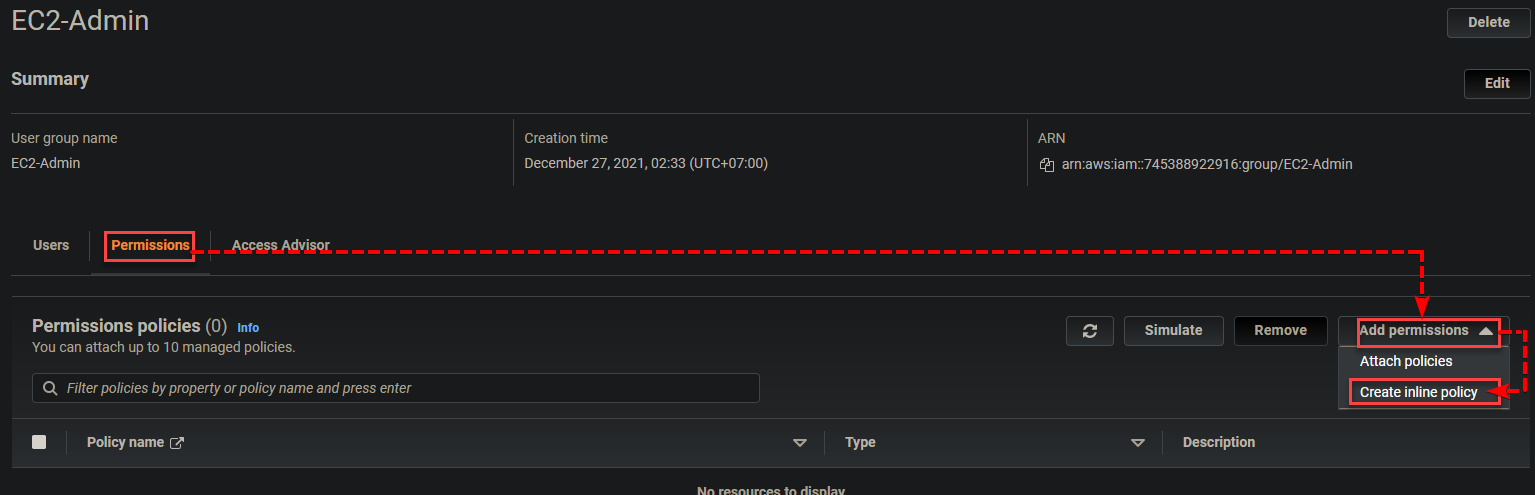
3. Click on the EC2-Admin group under the Group name column to view the group’s summary info where you can add inline policies (step four).

4. Now click on the Permissions tab —> Add Permissions —> Create inline policy to create an inline policy. Inline policies are usually associated with users directly and typically used to apply for permissions in one-off situations.
For example, your team is migrating an old EC2 environment to a new one. You want to ensure that the admin of the old EC2 instance has access to start/stop and copy the security group settings to the new EC2 instance.
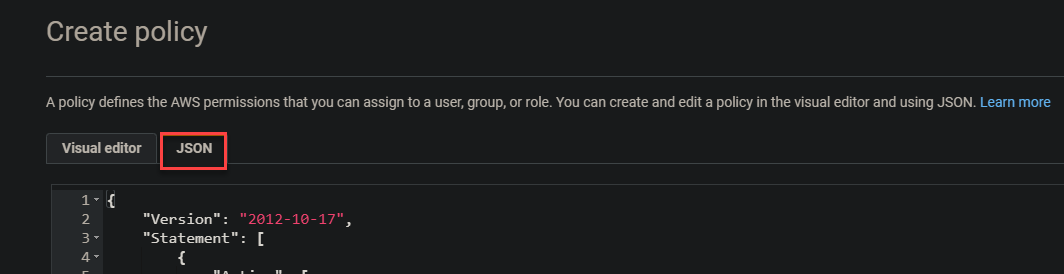
5. On the Create policy page, click the JSON tab shown below to open a JSON editor where you’ll create a policy.
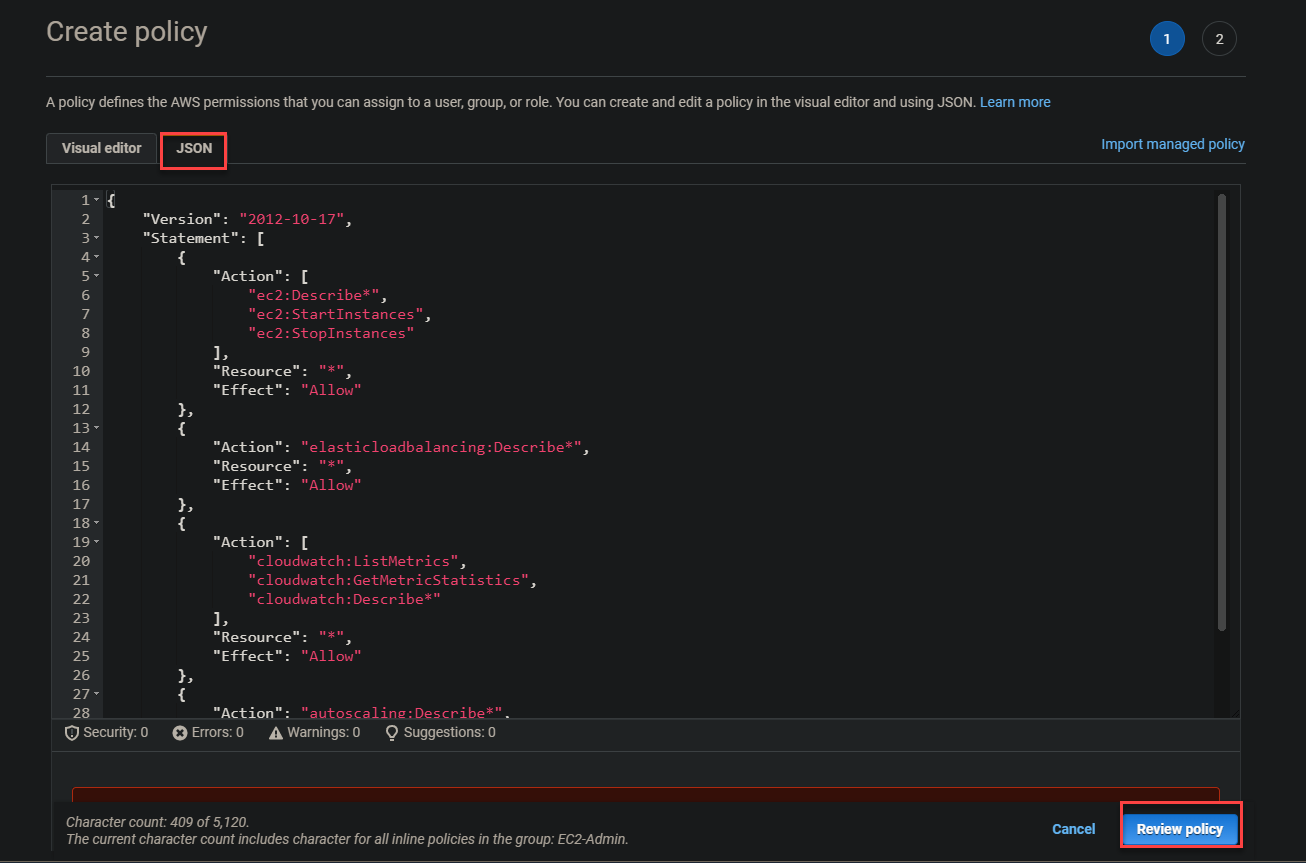
6. Paste the code (policy) below on the editor field and click Review policy to create an inline policy. This inline policy is prebuilt either by AWS or an administrator inside of your AWS account that you can use, customize, or edit to fit your exact needs.
With this policy, members of the EC2-Admin group are allowed to start ("ec2:StartInstances"), stop ("ec2:StopInstances"), and view ("ec2:Describe*") EC2 instances. They are permitted (”Effect”: “Allow”) to perform actions on all resources ("Resource": "*"). These actions are linked to AWS’s programmatic or API calls in essence.
EC2-Admin group members also have permission to view all elastic load balances (Action": "elasticloadbalancing:Describe), list metrics (cloudwatch:ListMetrics), get metrics statistics cloudwatch:GetMetricStatistics, and describe metrics (cloudwatch:Describe).
CloudWatch metrics are automatically configured with your EC instance, and the same thing applies to the Auto Scaling service.
{
	"Version": "2012-10-17",
	"Statement": [
		{
			"Action": [
				"ec2:Describe*",
				"ec2:StartInstances",
				"ec2:StopInstances"
			],
			"Resource": "",
			"Effect": "Allow"
		},
		{
			"Action": "elasticloadbalancing:Describe",
			"Resource": "",
			"Effect": "Allow"
		},
		{
			"Action": [
				"cloudwatch:ListMetrics",
				"cloudwatch:GetMetricStatistics",
				"cloudwatch:Describe"
			],
			"Resource": "",
			"Effect": "Allow"
		},
		{
			"Action": "autoscaling:Describe",
			"Resource": "*",
			"Effect": "Allow"
		}
	]
}
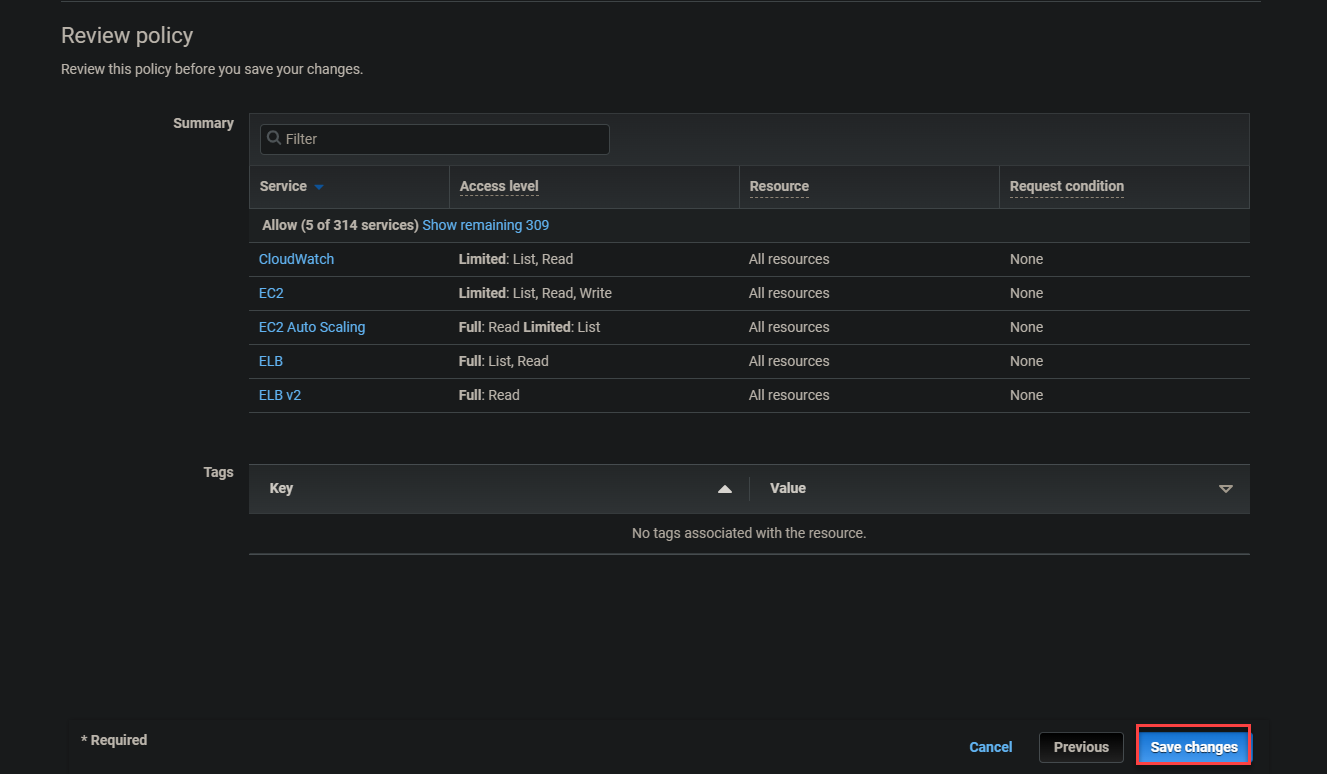
7. Review the policy summary and click on Save changes to save the policy.
8. Now, navigate to your IAM dashboard again and initialize creating a group as you did in step two. But this time, name the User group name as EC2-Support.
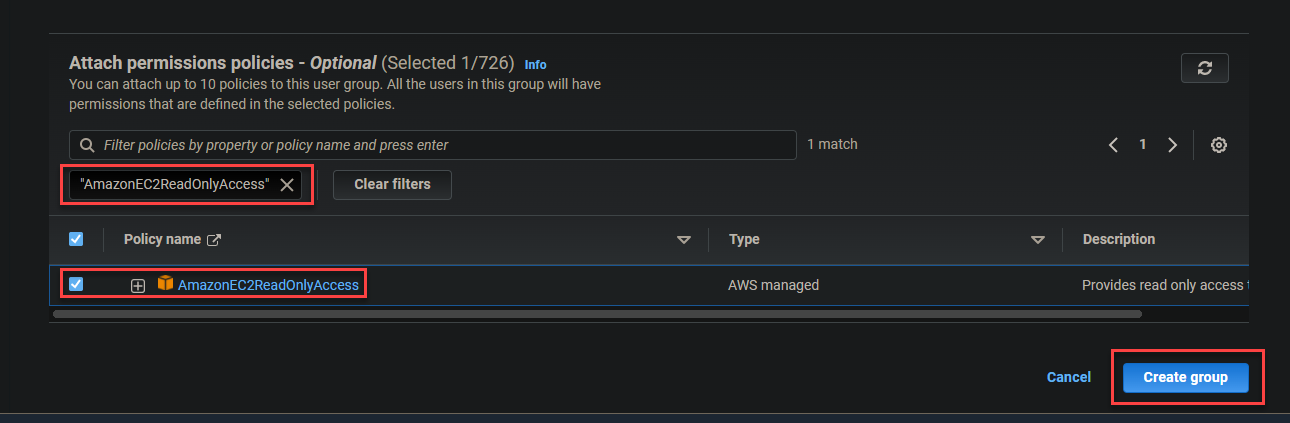
Scroll down, search for AmazonEC2ReadOnlyAccess in the Attach permissions policies search box to attach that policy to the group (EC2-Support):
AmazonEC2ReadOnlyAccess is a managed policy similar to an inline policy as it can also be attached to multiple users or groups of users. But unlike the inline policy, this type of policy created by administrators is reusable and can be shared across your organization or with all AWS accounts in your account.
A managed policy is a shared policy. As a result, all users or groups of users who use the shared policy will have updated permissions automatically when the policy is updated.
This automatic update feature makes the managed policies more appealing than inline policies. With inline policies, each permission has to be updated by the admin if the policy is changed.
Check the AmazonEC2ReadOnlyAccess option and click Create group to finalize creating the group.
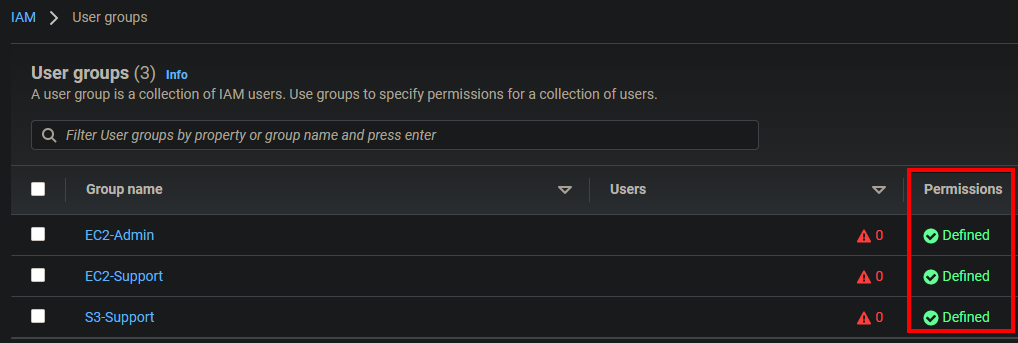
10. Now, repeat steps eight to nine to create the S3-Support group with an AmazonS3ReadOnlyAccess managed policy. Once you’ve created the S3-Support group, you’ll have a list of groups similar to the one below that shows each group has permissions defined.
Adding Users to their Proper Groups
You’ve created the users and groups with defined permissions. Now, it’s time to add the users to their proper groups. You’ll open each group’s summary page and manually add a user to that group.
The table below shows the proper groups where you’ll add each user:
| Users | In-group | Permissions |
|---|---|---|
| user-1 | S3-Support | Read-only access to S3 Bucket |
| user-2 | EC2-Support | Read-only access to EC2 Instance |
| user-3 | EC2-Admin | Full EC2 Access (View/Start/Stop) |
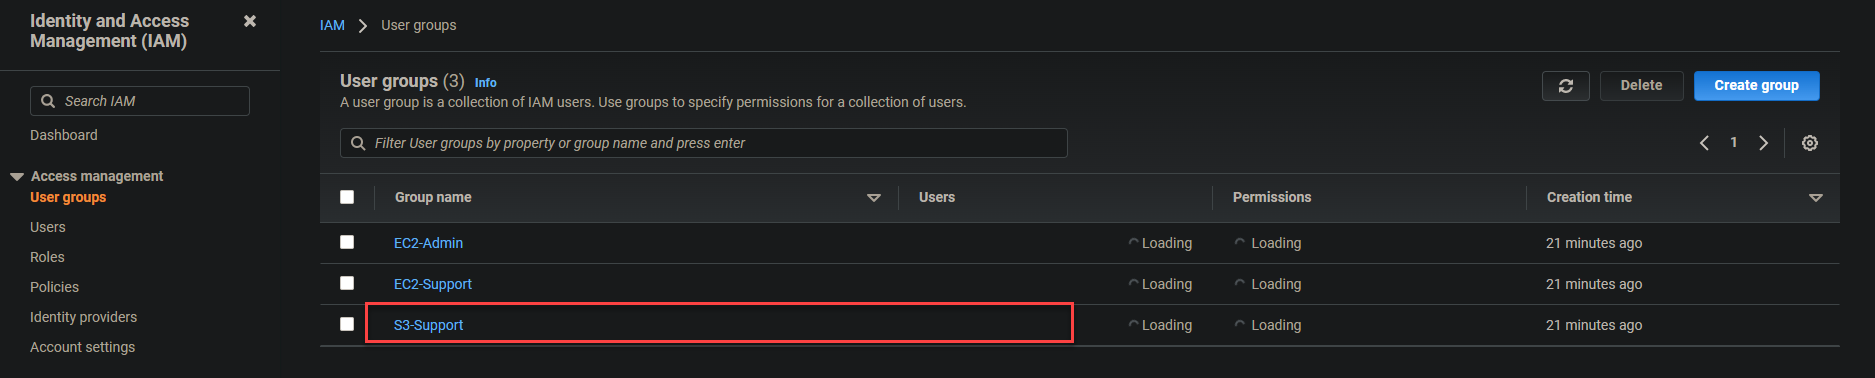
1. In your IAM dashboard, navigate to the User groups page, and click on the S3-Support group shown below to access the group’s summary page.
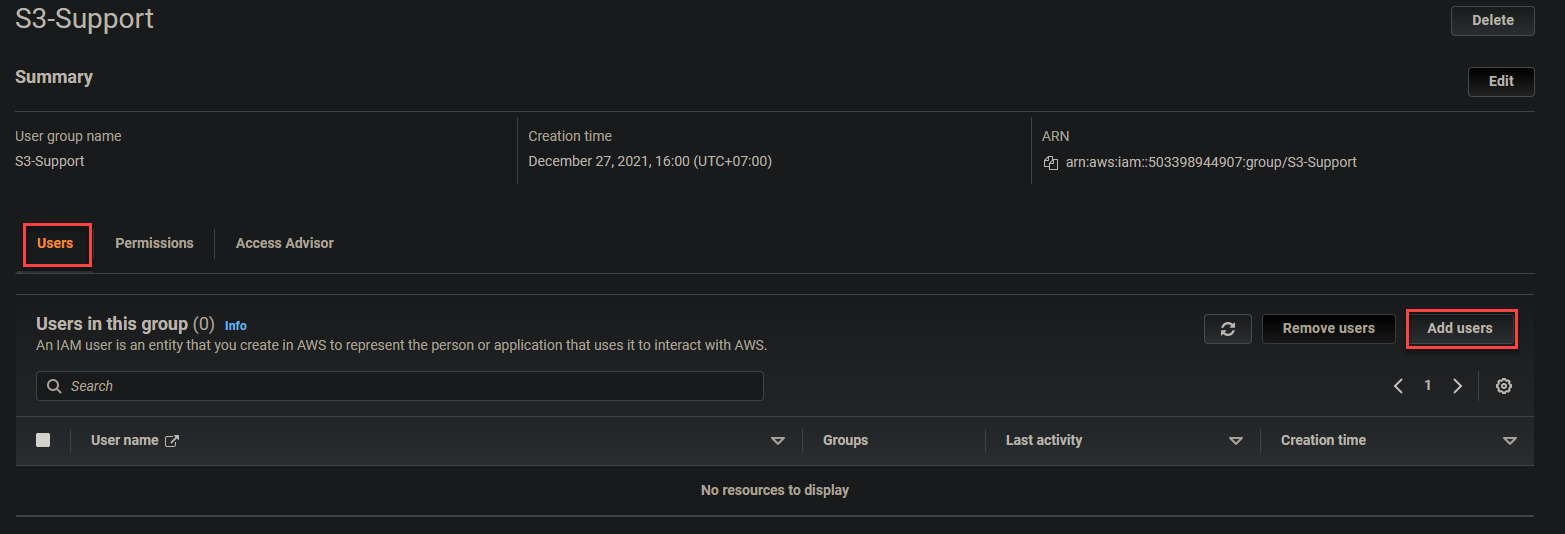
2. Next, click on the Users tab —> Add users to initialize adding users to the group. Your browser redirects to a page where you’ll see a list of users that don’t belong to any group yet (step three).
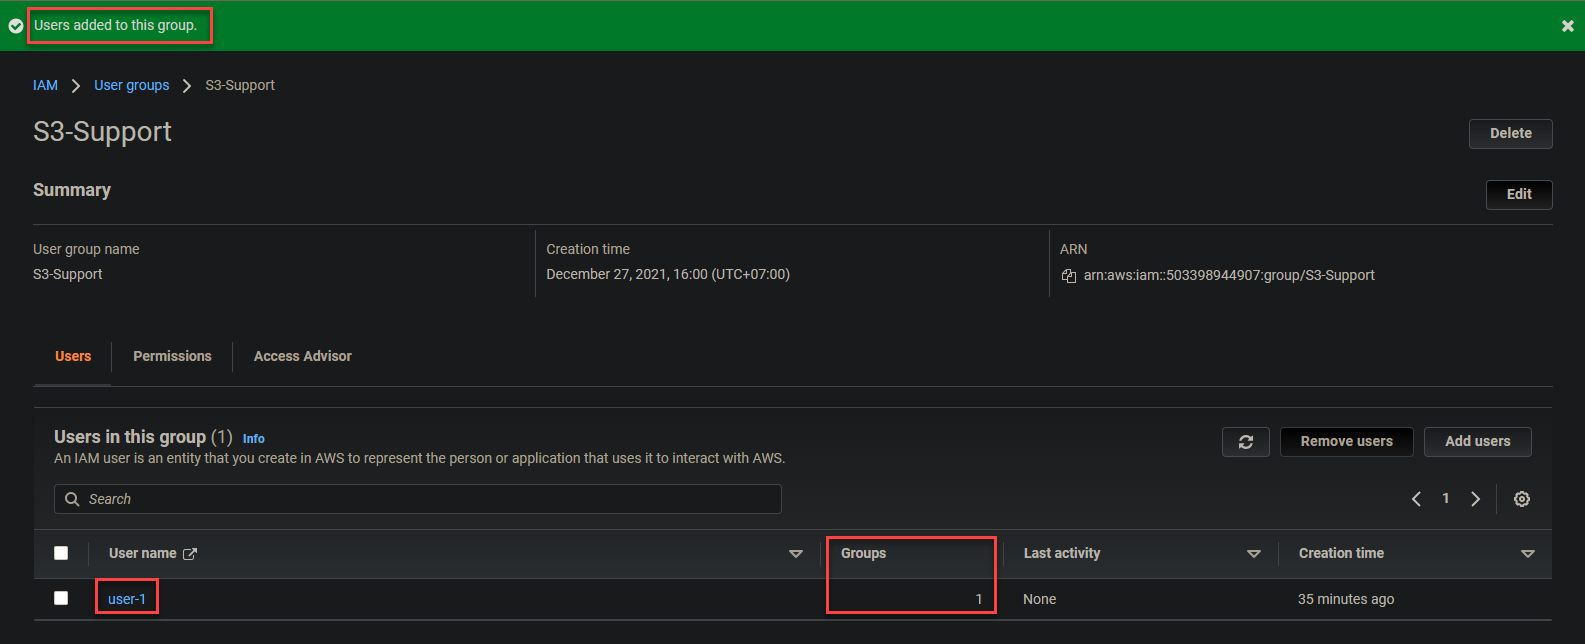
3. Check the box in front of user-1, then click on Add users to add the user to the S3-Support group. Your browser then automatically redirects to the S3-Support group’s summary page.

Below, you can see that user-1 is now a part of the S3-Support group.
4. Repeat steps one to three to add user-2 and user-3 to their proper groups.
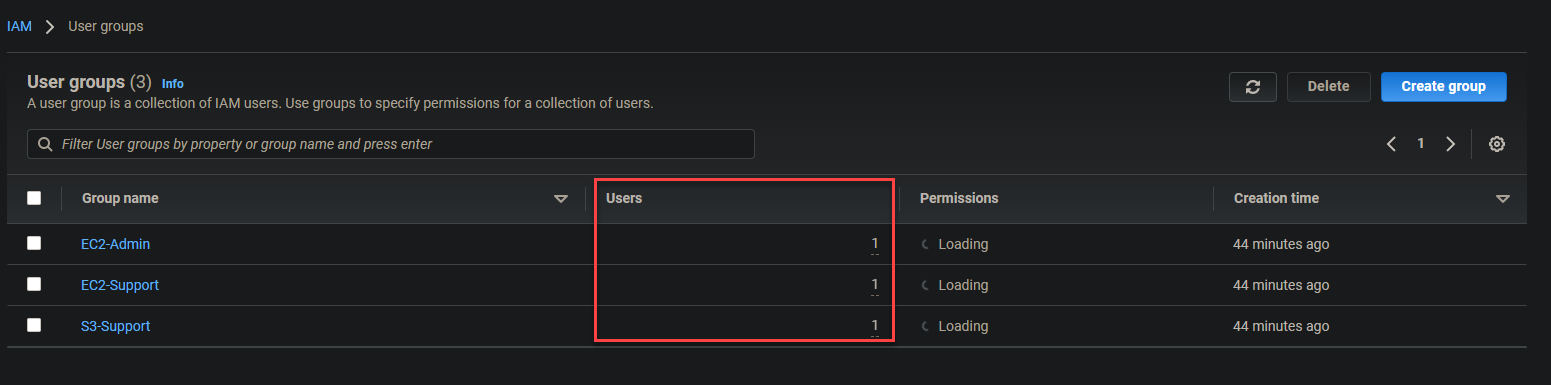
5. Finally, navigate to the User groups page and you’ll see the groups now have one user each, like in the screenshot below.
Testing User Permissions are Working Properly
You’ve completely created users in their own groups with defined permissions. But how do you know if the work? It’s time to verify that the permissions are working as intended, and there are various ways to do so. One of the most common ways is using the web-based AWS Management Console.
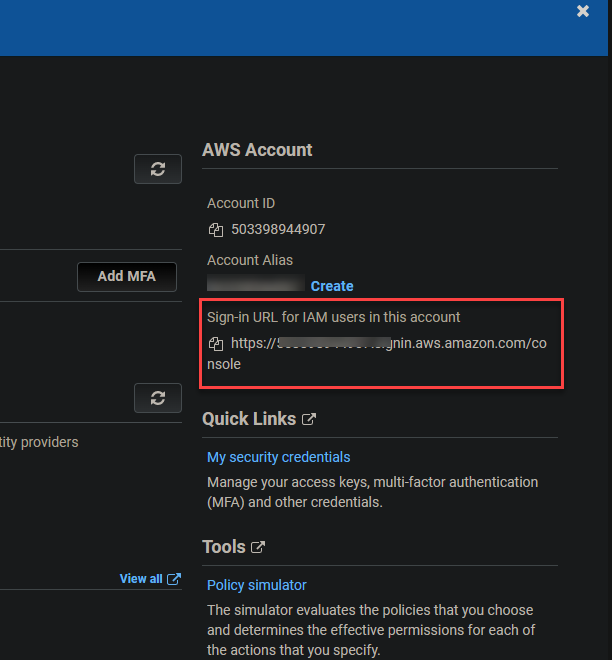
1. Navigate to your IAM dashboard and copy the IAM user sign-in URL at the right panel, as shown below.
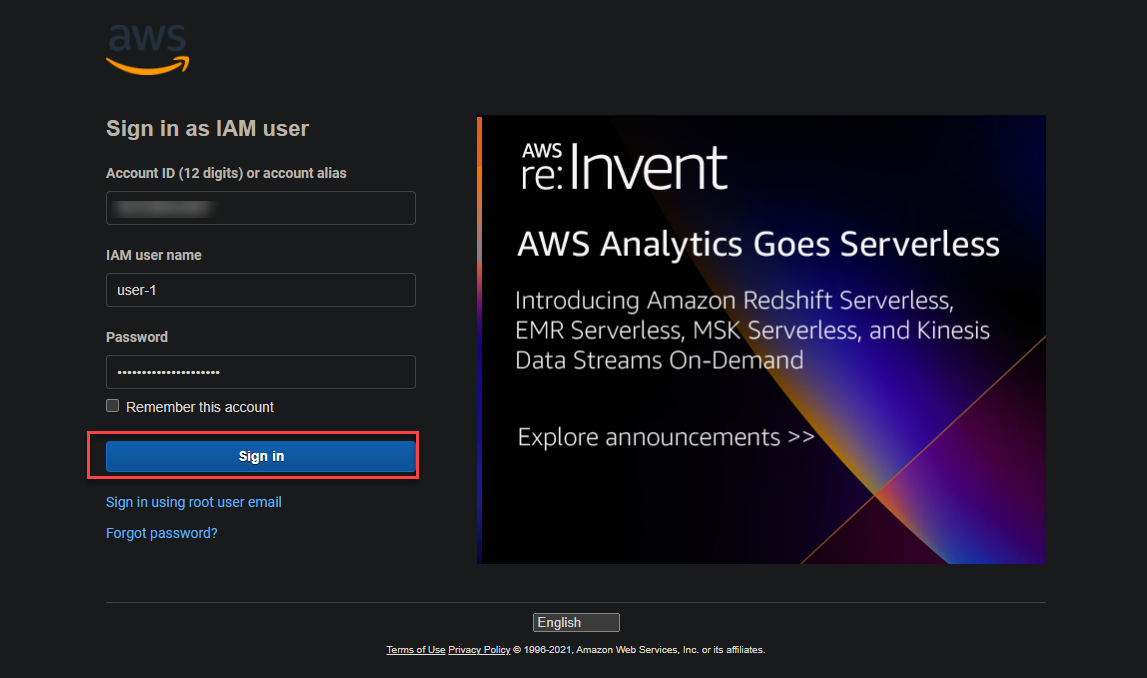
2. On your web browser, navigate to the sign-in URL you previously noted (step one), and log in with user-1’s credentials. Google Chrome and Firefox are the most recommended browsers for this task.
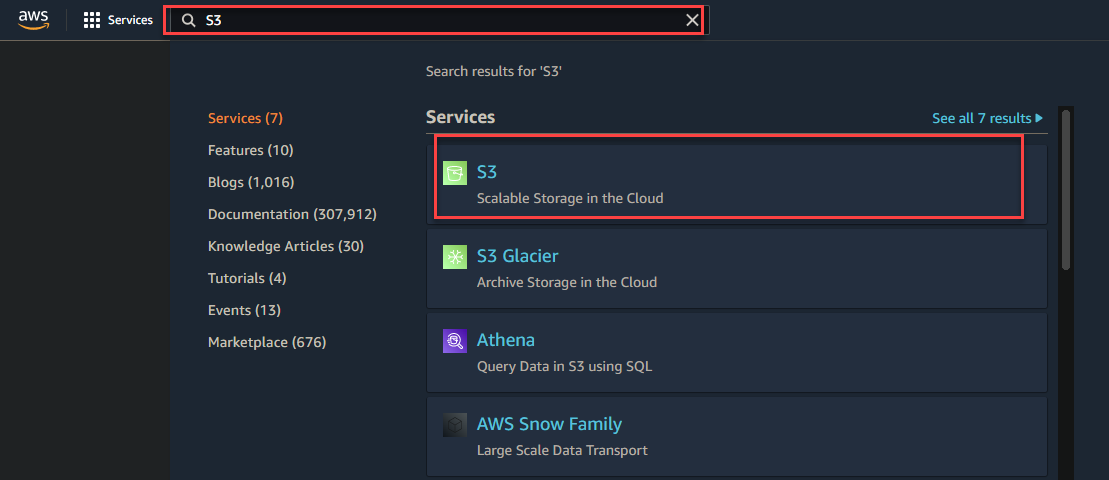
3. Type S3 in the search box, and click on the S3 link shown below to access Amazon S3 Buckets page.
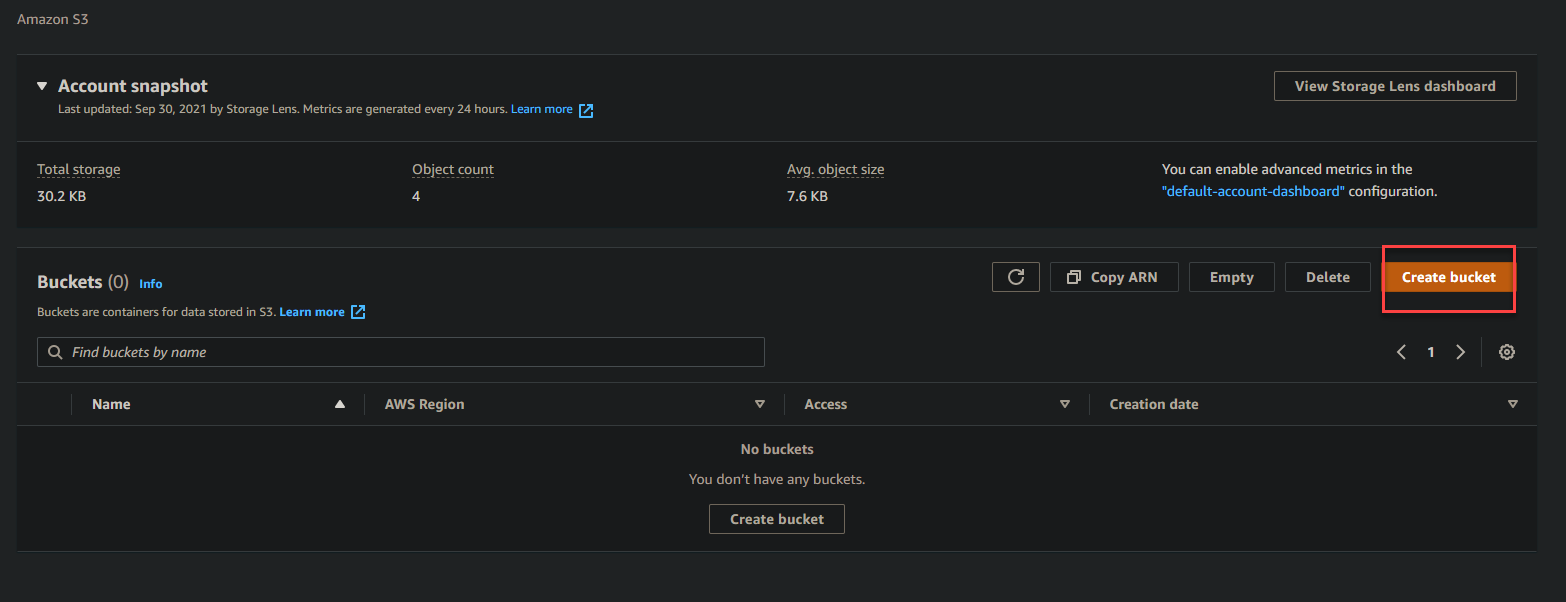
4. Now, click on Create bucket to initialize creating an S3 bucket.
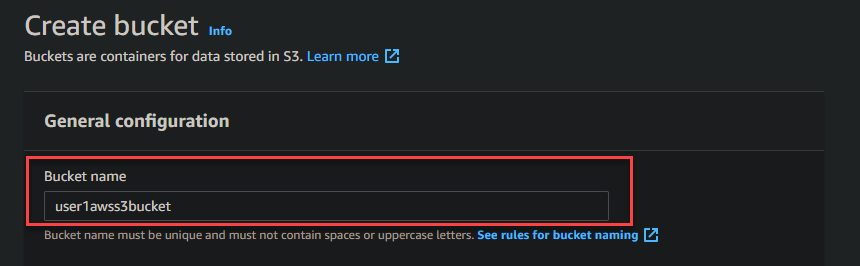
5. Enter a bucket name under the General configuration section, then click on Create bucket to attempt creating an S3 bucket.

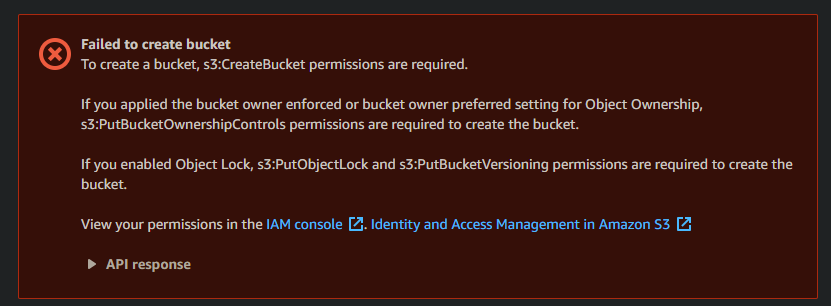
If you recall, you attached the AmazonS3ReadOnlyAccess policy to user-1, which only gives user-1 read-only permission to view S3 buckets. As a result, if user-1 attempts to create, delete, or update an S3 bucket, the error message shown below will pop up.
The error message below indicates that the permission you set to user-1 works properly.
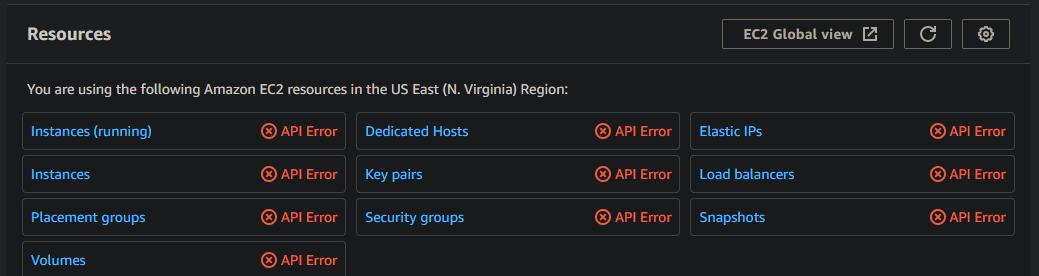
Note that user-1 also does not have any EC2 permissions. So for double-checking, navigate to your EC2 dashboard, and you will get many API errors that pop up like in the screenshot below.
You get these errors because of the principle of least privilege (PoLP). PoLP is the concept that any given OS user account or process should have the absolute minimum privileges necessary to complete a job.
6. Now, log out from user-1 and log in as user-2, and navigate to your EC2 dashboard.
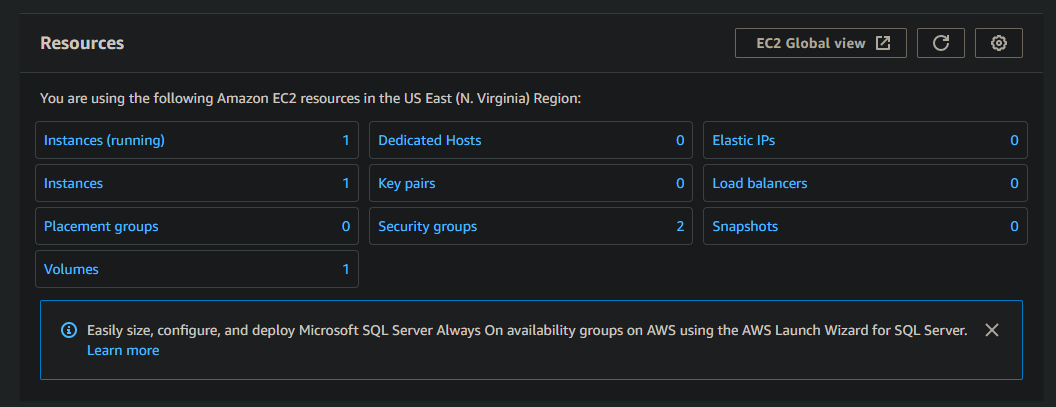
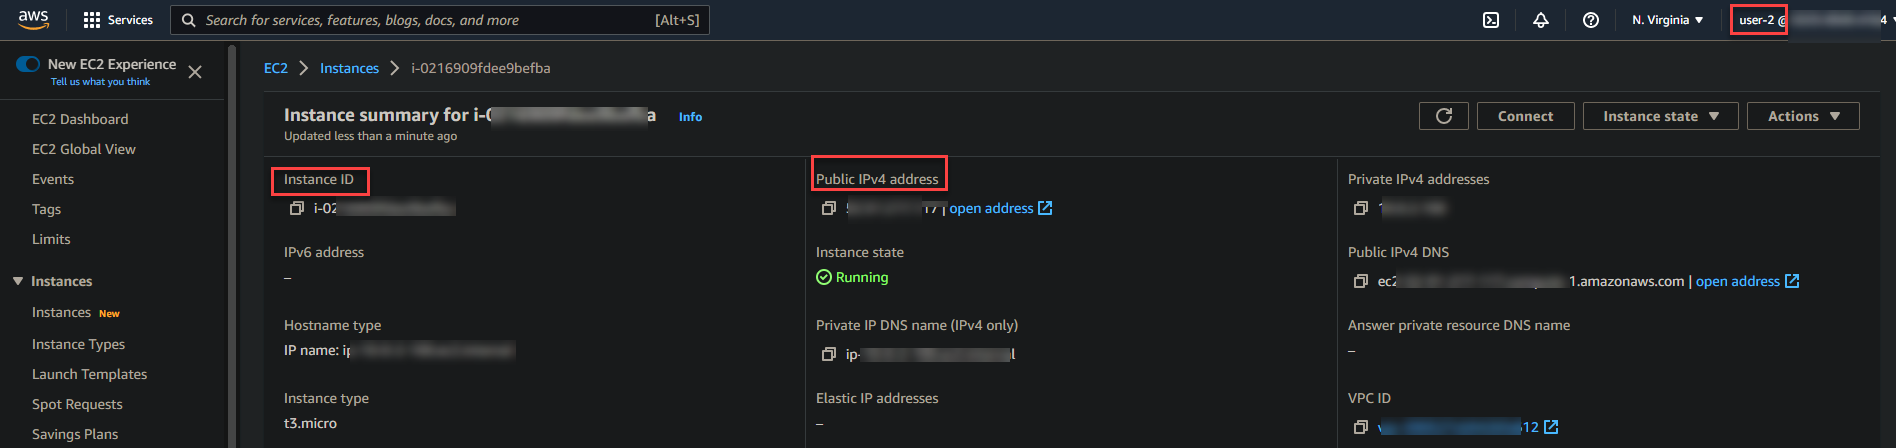
7. Click on any running EC2 instances to view the user-2 permissions. As shown below, you will get information about the instance like Instance ID, Public IPv4 address, and so on.
8. Click on the Instance state at the right most part of the page, and choose either Stop instance, Reboot instance, or Terminate instance option to test if user-2’s permission works.
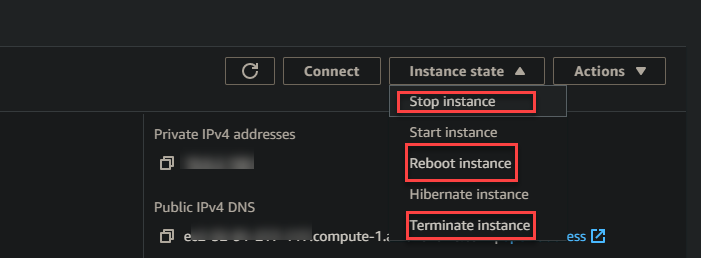
Remember that user-2 only has read-only access for EC2 instances (AmazonEC2ReadOnlyAccess). So if a user tries to manipulate an EC2 instance, the error message below pops up.
Getting the error below indicates that user-2’s permission works correctly.

9. Finally, log out from user-2, then log in as user-3 and try to manipulate any EC2 instances that are running in your account. Since user-3 has full EC2 permission, you can start, stop or terminate an instance without getting an error message.
Conclusion
Throughout this tutorial, you’ve learned how to create IAM users and user groups with defined policies. You’ve also touched on how to verify if permissions are working as intended by trying to change an EC2 instance state and trying to create an S3 bucket.
At this point, you now have your basic setup for IAM users and groups to manage user permissions. Of course, you can always add more users to your account and apply more policies as you see fit.
Now, what’s the next step to build on your newfound knowledge? Perhaps look into setting up your EC2 services on Auto-Scaling to work with IAM.


