


Streamlining tasks through automated processes is an effective way to enhance efficiency and reduce your workload. How? Setting up a cron for Windows jobs is one way to achieve this type of automation.
In this tutorial, you will learn how to set up and run cron jobs on Windows via its own Task Scheduler.
Keep reading and level up your productivity!
Prerequisites
This tutorial houses hands-on demonstrations. If you wish to follow along, ensure you have a system that supports Windows (Windows 7 or newer) in place — this tutorial uses Windows 11.
Creating and Configuring a Cron Job for Windows
A cron job, or cron task, is a time-based job scheduler in Unix-like OSes. Instead of manually running tasks on repeat, this scheduler allows you to automate task executions or scripts at specific intervals. Those intervals can be minutes, hours, days, weeks, or months.
Moreover, cron jobs are typically repetitive and require minimal user interaction, saving time and effort. Similarly, you can set up a cron job in Windows using the Task Scheduler.
To create a cron job for Windows via the Task Scheduler, follow these steps:
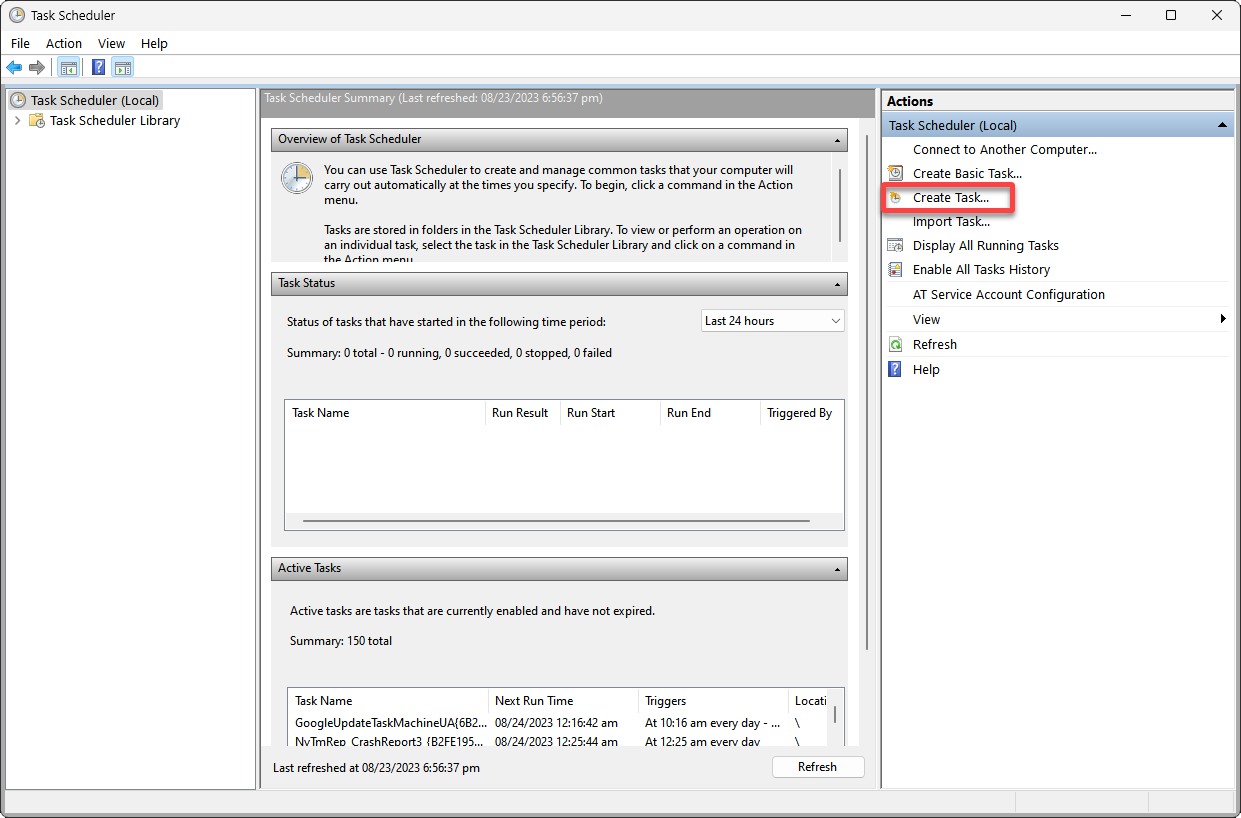
1. Launch the Task Scheduler from the Start menu, or type taskschd.msc in the Run dialog and press Enter.
2. Once the Task Scheduler opens, click Create Task under the Actions (right pane) to initiate the task creation process.
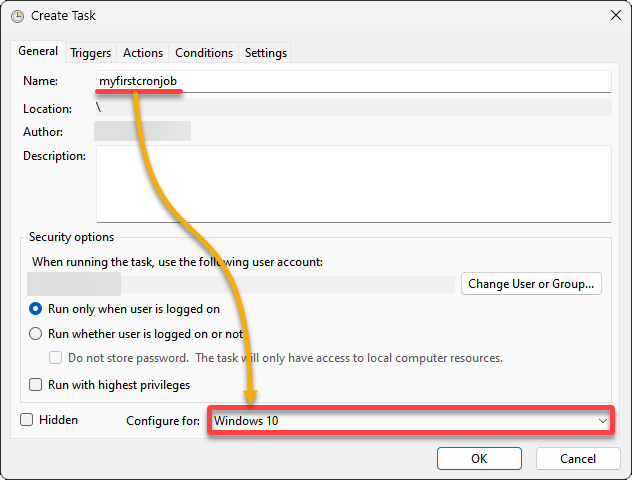
3. Next, configure the following General settings in the Create Task window.
- Name – Provide a descriptive name for your cron job (i.e., myfirstcronjob).
- Configure for – Select your Windows version (i.e., Windows 10) from the drop-down field.
- Keep other settings on defaults, as these are unnecessary for this tutorial.
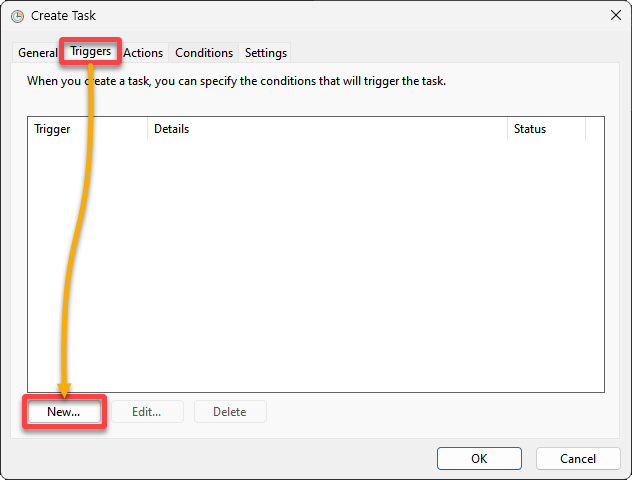
4. Now, navigate to the Trigger tab and click New to set up the schedule for when your cron job should run.
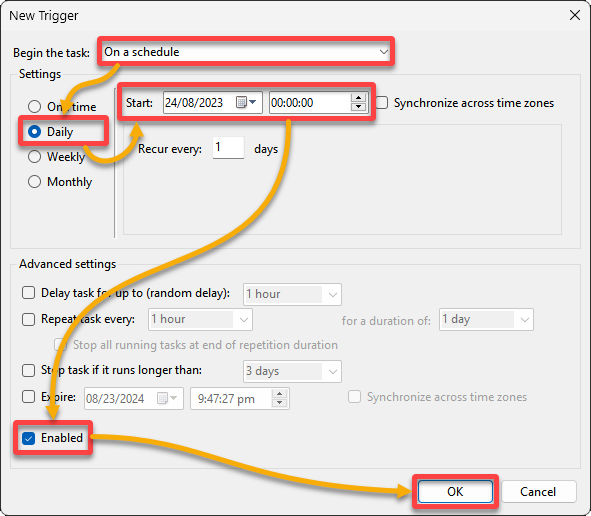
5. On the New Trigger window, configure the trigger for the cron job with the following:
- Begin the task – Select a trigger for the cron job in the drop-down field. The On a schedule option lets you set a date and time to run the cron job automatically.
- Settings – Set a frequency (i.e., Daily) and Start date and time to run your cron job.
- Tick the Enabled box to enable the trigger.
Notice that you can set up various triggers, which allows you to control the frequency and timing of the task execution. But in this example, the cron job is set to run Daily starting on 24/08/2023.
Once configured, click OK to save the trigger changes.
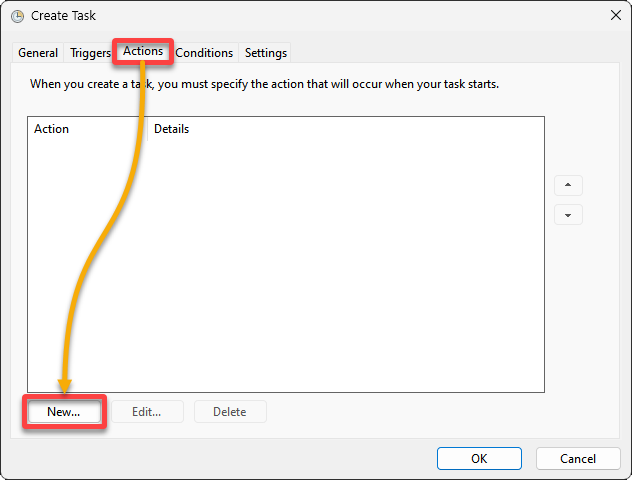
6. Navigate to the Action tab and click New to specify the action your cron job will perform when triggered.
7. Create a file called HelloWorld.ps1 (arbitrary), populate the code below to the file, and save it on your local computer.
The following code, when executed, displays a message (Write-Host) and terminates the script automatically after one second (-Seconds 1) post-countdown.
# Define a counter value (three seconds)
$counter = 3
# Define a loop that runs while the counter value is greater than zero (0)
while ($counter -gt 0) {
    # Prints a message
    Write-Host "Hello, World! Closing in $counter seconds..."
    # Wait one second
    Start-Sleep -Seconds 1
    # Decreases counter value by 1
    $counter--
}
# Prints another message when the counter value reaches zero (0)
Write-Host "Closing now!"
# Wait another second before terminating the script
Start-Sleep -Seconds 18. Switch back to the New Action window and configure the actions your cron job will take when triggered as follows:
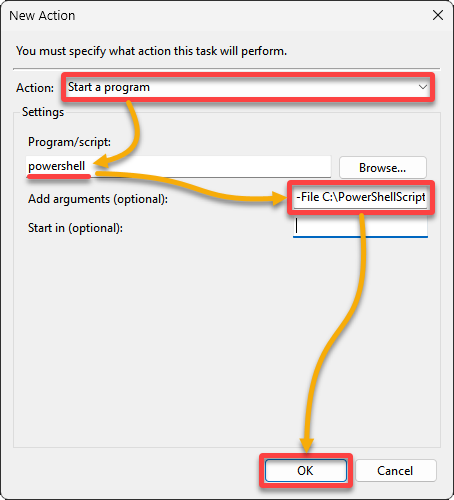
- Action – Select Start a program from the drop-down field to run a program or script when your cron job is triggered.
- Program/script – Input powershell in the empty field, which tells your system to run a PowerShell program/script whenever your cron job triggers.
- Add arguments (optional) – Type in -File <ps1>, replacing <ps1> with your PowerShell script file’s full path (i.e., C:\PowerShellScripts\HelloWorld.ps1).
Arguments provide additional information and parameters to the action being performed. These can modify the behavior of the script or program being executed.
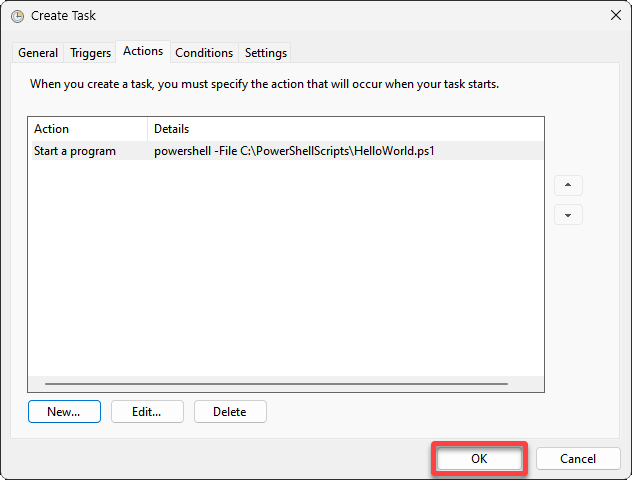
With the action configured, click OK to confirm your selected settings.
9. Click OK when you are happy with your selected settings to save your cron job or task.
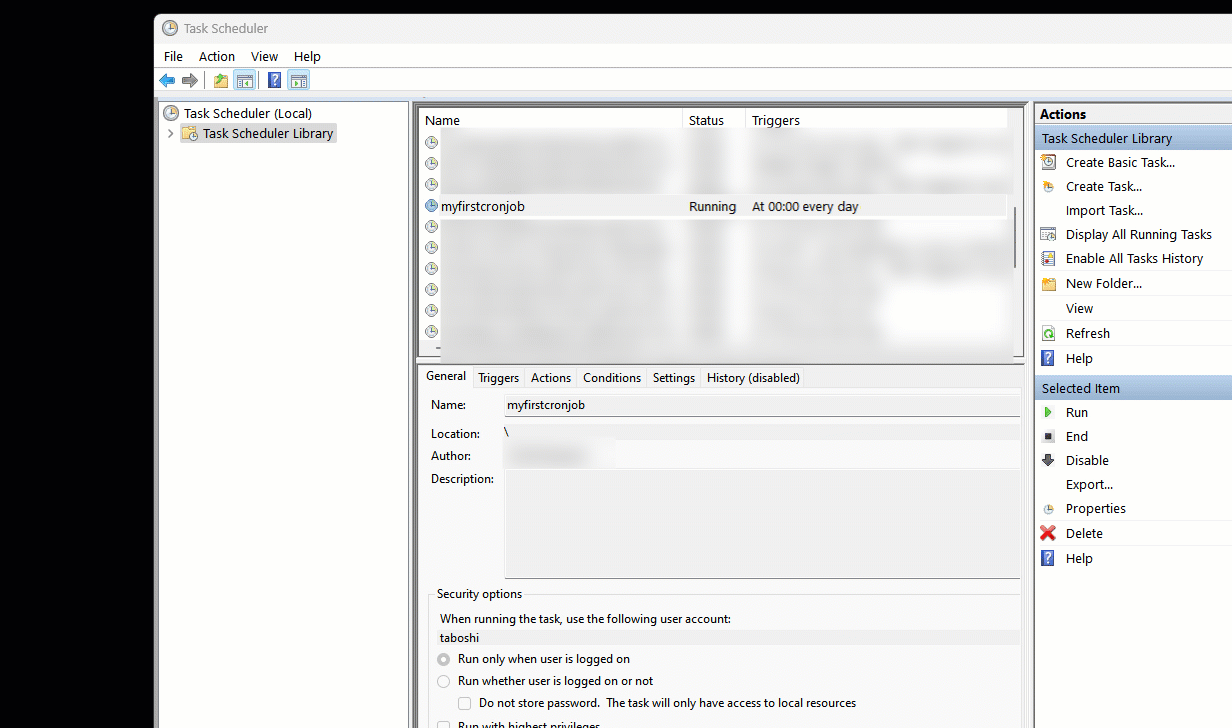
10. Lastly, click Task Scheduler Library (left pane) on the main screen of the Task Scheduler, and you will see your newly configured cron job listed among others.
This library is a central location to manage all scheduled cron jobs on your system.
💡 If your newly created cron job is not found in the list, click Refresh (right-pane) to refresh the list of jobs in the Task Scheduler Library.

Running Cron Jobs Manually
After successfully creating and configuring a cron job, how do you know it works? Instead of letting it run on schedule, testing the execution of a cron job is a crucial step to verify its functionality and ensure it works as intended.
To manually run your cron job:
Select your newly configured cron job from the list, and click Run under the Action section (right pane). As specified in your cron job, the PowerShell script runs, and an output displays on a PowerShell console.
If everything looks good as below, you can rely on this cron job to run automatically based on the schedule you configured.
Modifying Existing Cron for Windows Jobs
Imagine, after running your cron job, you noticed something off. Can you fix it? Yes! You can modify existing cron jobs in Task Scheduler at any time. Since the needs of your system or workflow typically evolve, the task executed by the Cron job needs to be adjusted.
To make changes to an existing cron job, follow these steps:
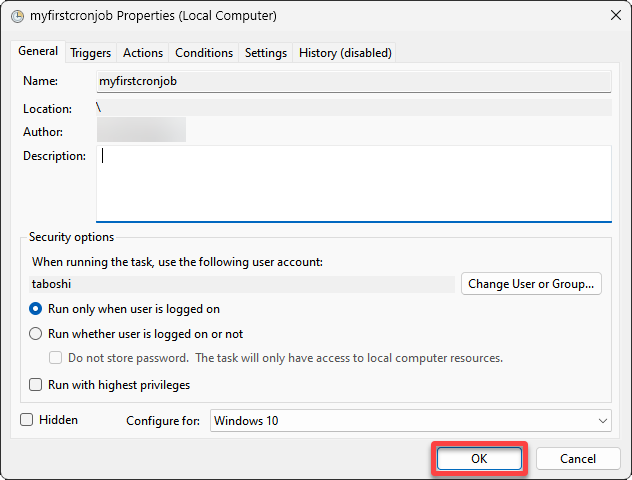
Look for and select the specific job you wish to modify, and click Properties (right pane) to access the cron job’s properties.
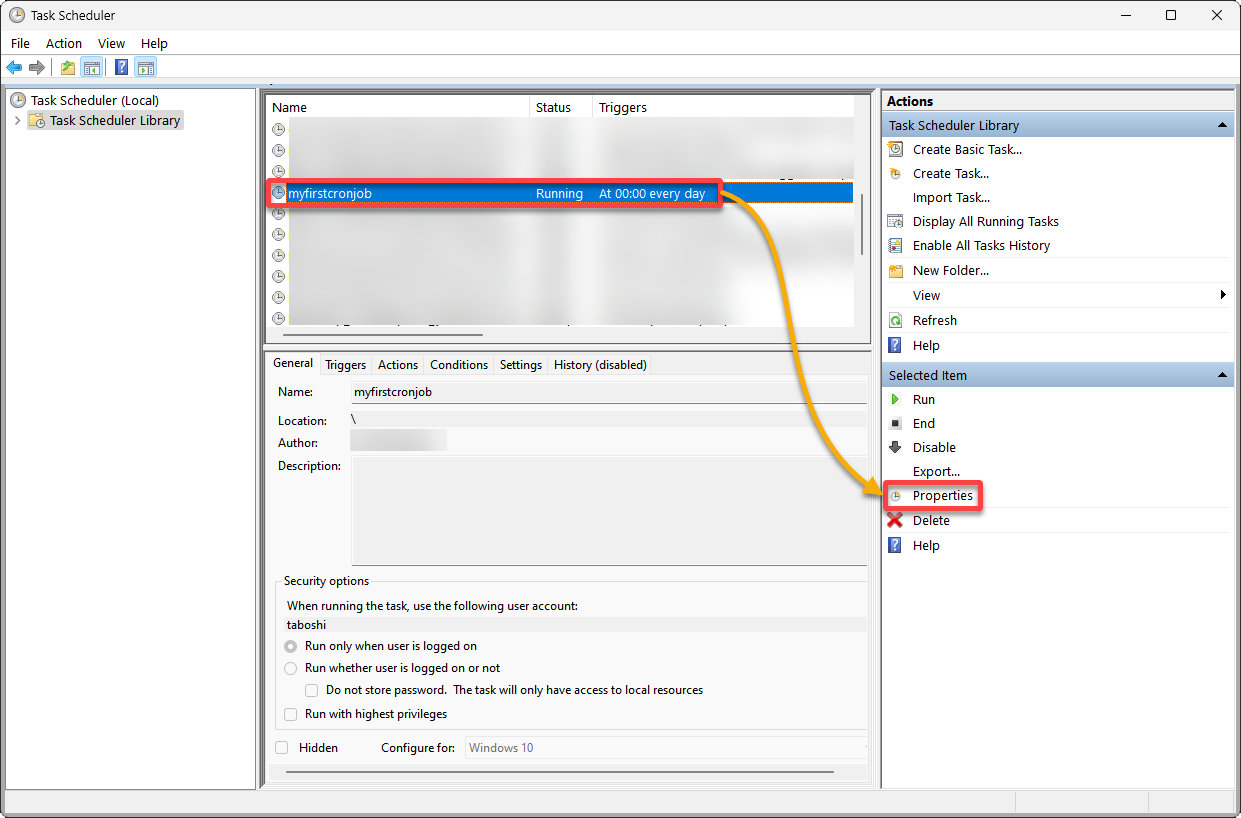
Now, adjust various parameters in the cron job’s Properties window, and click OK to save the changes.
Deleting Obsolete and Unneeded Cron Jobs
Similar to Unix-like systems, Windows can accumulate numerous scheduled tasks. Deleting redundant or obsolete tasks can help optimize system performance and resource utilization.
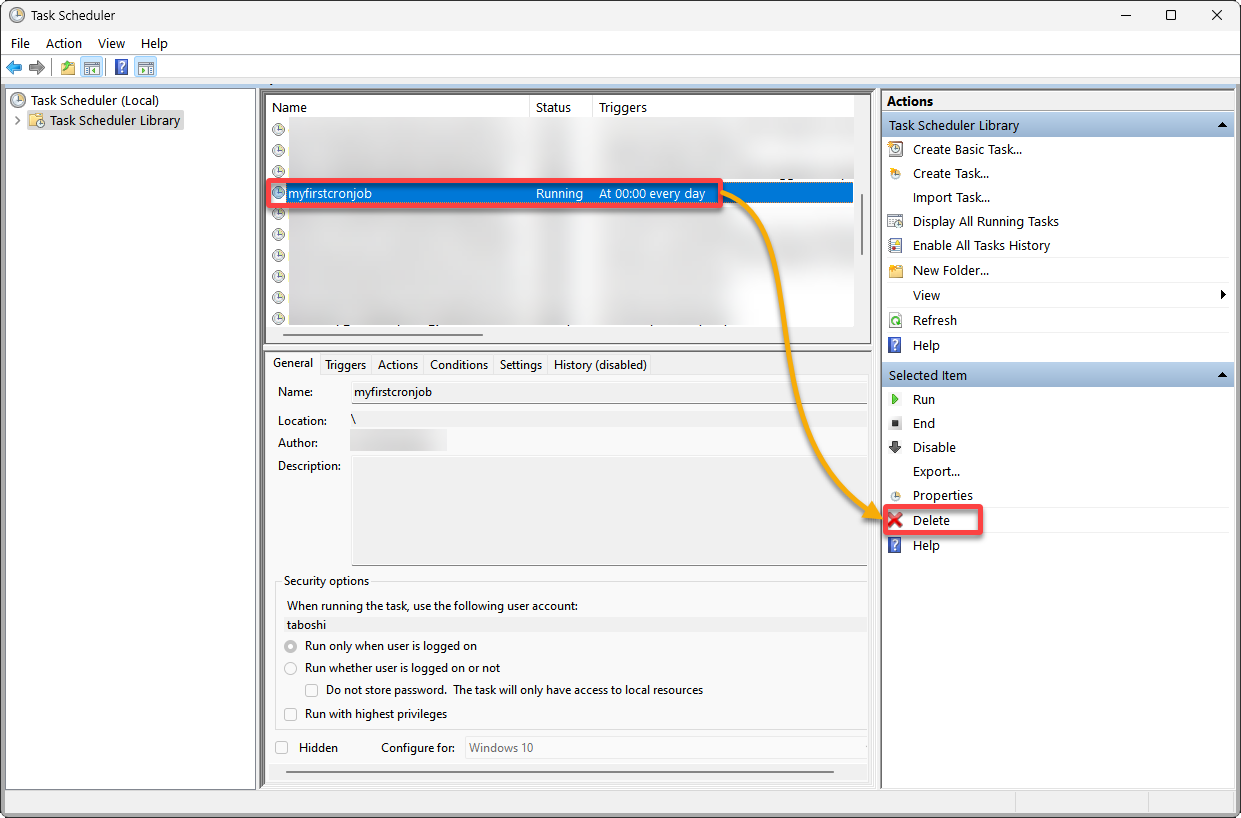
To delete obsolete and unneeded cron jobs:
Select a cron job from the list, and click Delete (right pane) to delete the selected job.
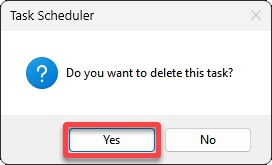
When prompted, click OK, as shown below, to confirm deleting the cron job.
Conclusion
In a world where time is a limited and valuable resource, leveraging the capabilities of automation is an investment that can yield significant returns. Through this tutorial, you have learned to establish cron jobs for Windows using the Task Scheduler.
Accordingly, you can now orchestrate the execution of mundane and/or repetitive tasks in a timely fashion. Reclaim and dedicate valuable time to more important endeavors with this newfound knowledge!
Why not up your productivity game further and explore the concept of automating tasks with PowerShell? Start automating various system admin tasks ranging from simple jobs, like reporting disk space usage, to more complex ones, such as deploying a new web server.
Dive into the world of automation; your future self will thank you for it!


