

With digital data growing at an incomprehensible rate, absorbing, storing, and analyzing data quickly while keeping your costs low can be difficult. So why not consider AWS Redshift?
With its scalable, cloud-based architecture and powerful data warehousing capabilities, AWS Redshift allows you to manage and analyze large amounts of data quickly. And in this tutorial, you will get started with AWS Redshift and learn how it works, its features, benefits, and limitations.
Sounds promising? Stay tuned and claim valuable insights that can help drive business decisions!
Prerequisites
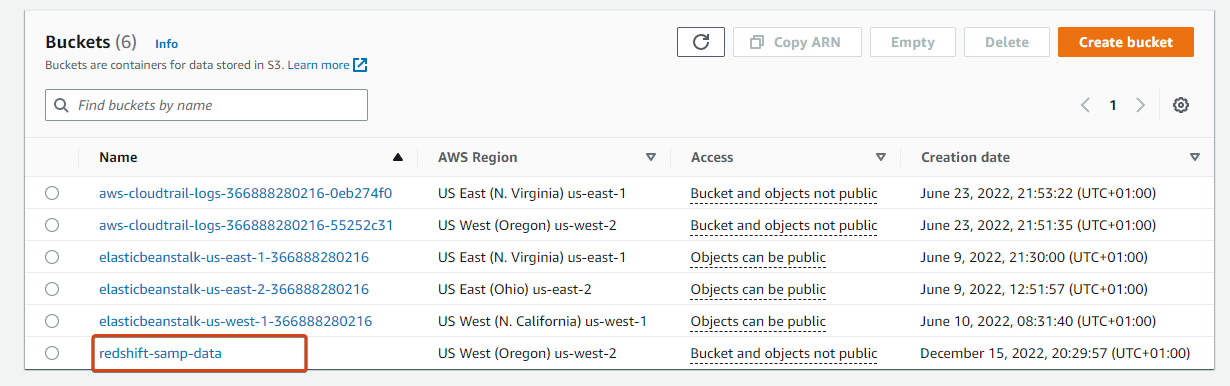
This tutorial will be a hands-on demonstration. To follow along, be sure you have an AWS account with an Amazon Simple Storage Service (S3) bucket. This tutorial uses an S3 bucket named redshift-samp-data and sample data files provided by AWS.
What is AWS Redshift?
AWS Redshift is a cloud-based data warehousing service built to manage massive amounts of data quickly and efficiently. This service enables you to use your existing business intelligence tools and standard SQL to store and analyze your data.
Another factor that makes Redshift stand out is that it costs less than any other cloud data warehouse. Performance-wise, AWS Redshift is one of the fastest data warehouses available.
AWS Redshift enables quicker query times and more remarkable performance. How? By taking advantage of a massively parallel processing (MPP) architecture that spreads query processing across multiple nodes.
Creating an IAM Role to Manage the AWS RedShift Service
AWS Redshift data warehouse comprises a collection of computing nodes called a cluster. You will be creating a Redshift cluster, adding data to it, and also querying it.
But since you will be loading the data from Amazon S3, you need an IAM role with the correct permissions. This IAM role will allow your cluster to communicate or interact with other Amazon services.
To create an IAM role with the required privileges:
1. Open your favorite web browser, and log in to your AWS Management Console.
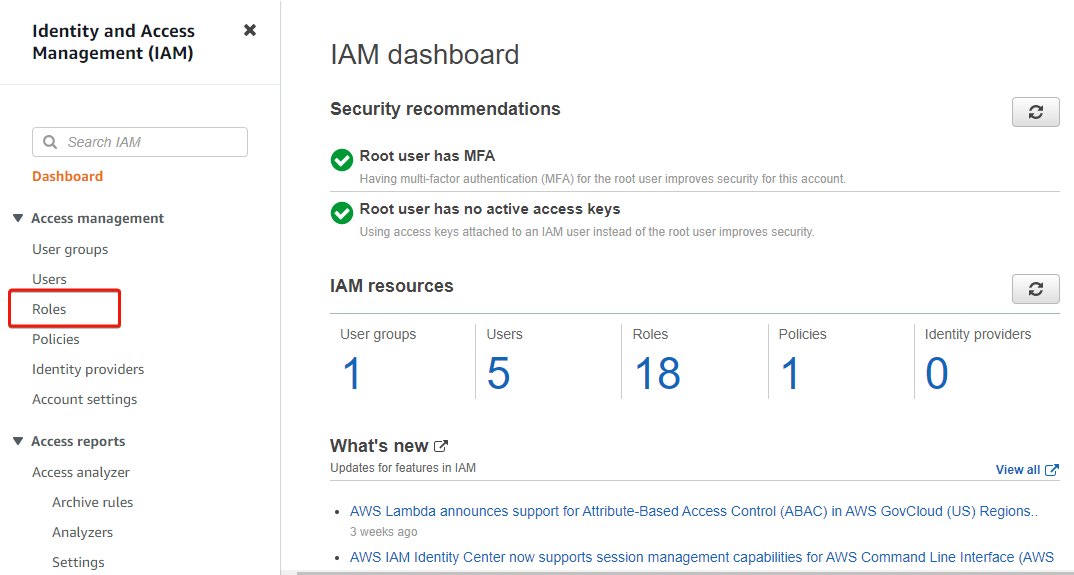
2. Next, search for iam and select IAM under Services from the search results, as shown below, to access the IAM dashboard.

3. On the IAM dashboard, click Roles (left panel) to access the page where you can manage roles.
4. Now, click Create role (upper-right) on the Roles page to initiate creating a role.

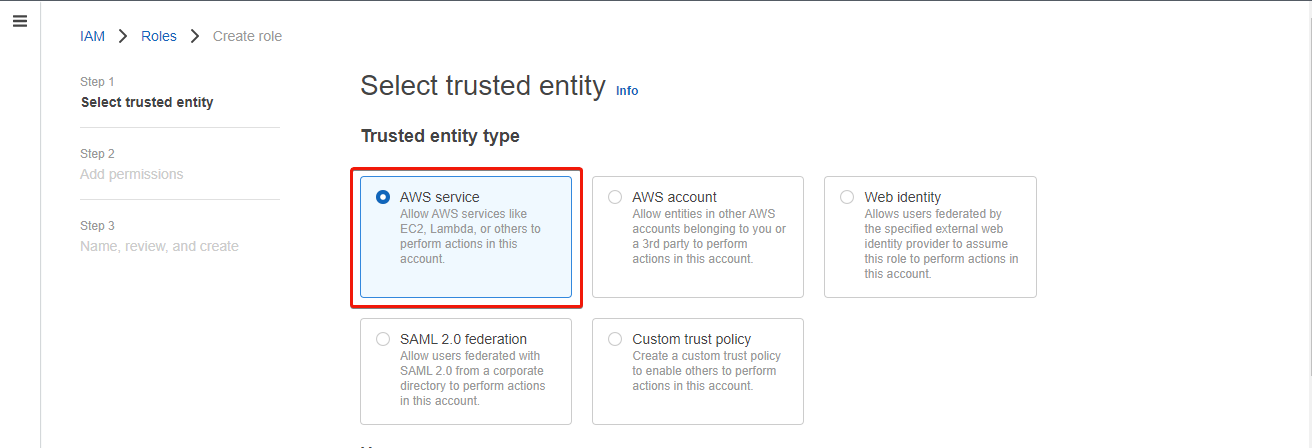
5. On the next page, select AWS service as the Trusted entity type.
A trusted entity is an AWS service, application, or user who is trusted to take on an IAM role.
6. Next, scroll down and select Redshift in the dropdown field shown below, choose Redshift – Customizable option that appears below, and click Next.
The Redshift – Customizable option allows AWS Redshift to access AWS services.

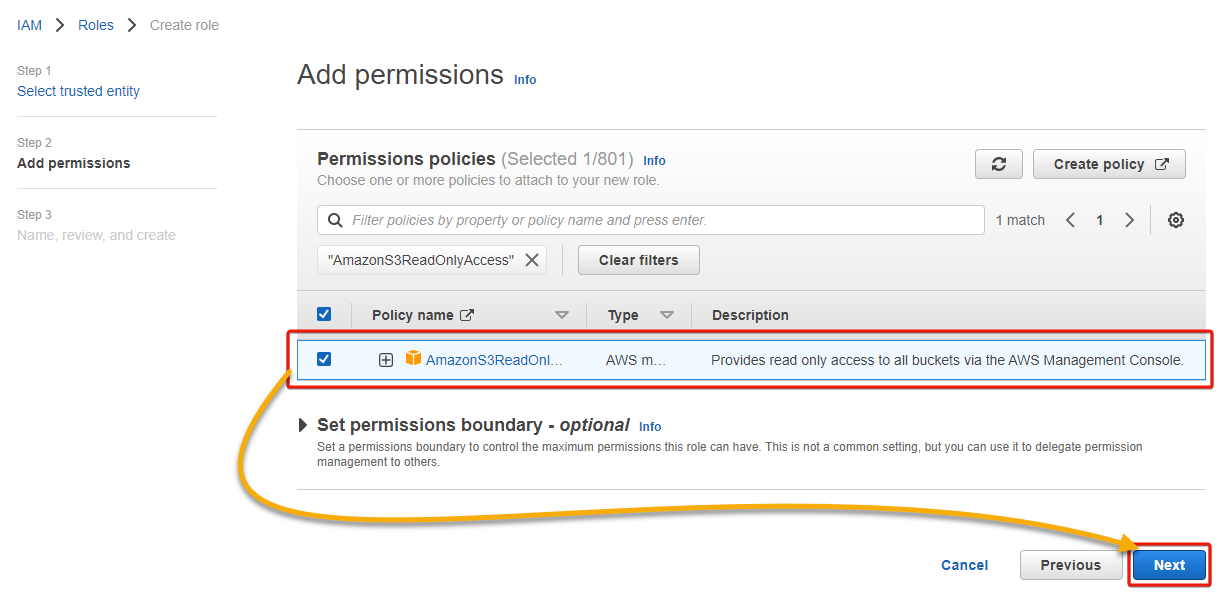
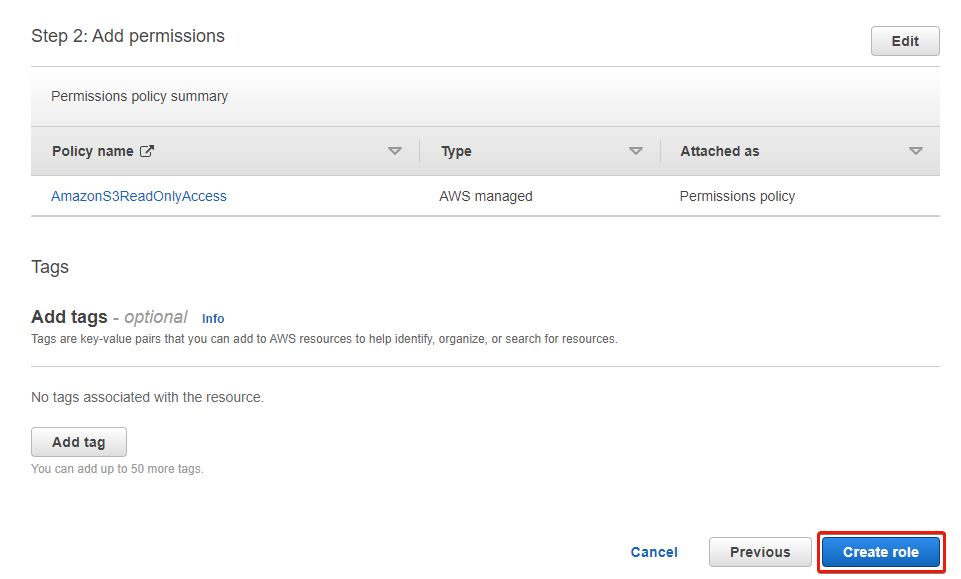
7. On the Permissions policies page, search for and tick the AmazonS3ReadOnlyAccess policy to select it, leave other default settings, and click Next.
The AmazonS3ReadOnlyAccess policy provides read-only access to all your S3 buckets via the AWS Management Console.
8. Now, provide a unique name (i.e., redshiftRole) for the role.
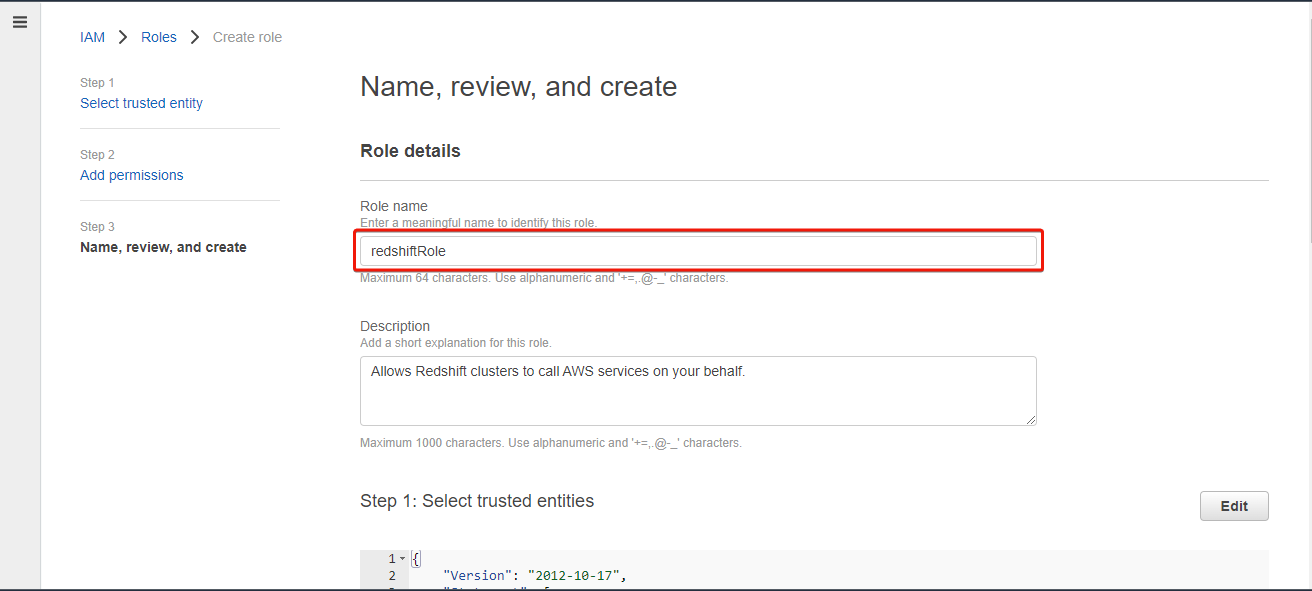
9. Review the role details, and click Create role to finalize creating the role.
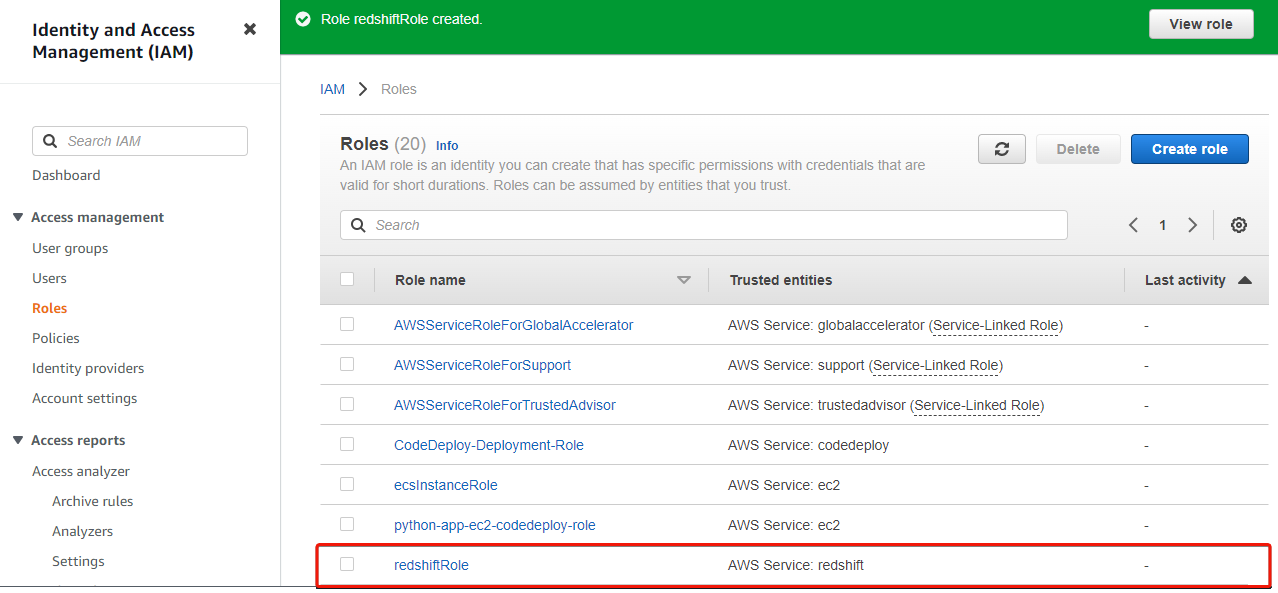
Once created, your browser redirects to the Roles page, where you will see the newly-created role, as shown below.
Creating an AWS Redshift Cluster
Once you have created the IAM role, you are ready to create an AWS Redshift cluster. A Redshift cluster comprises nodes, each containing a set of processing power (CPU, memory, and storage) for storing and processing data.
To create a Redshift cluster, follow these steps:
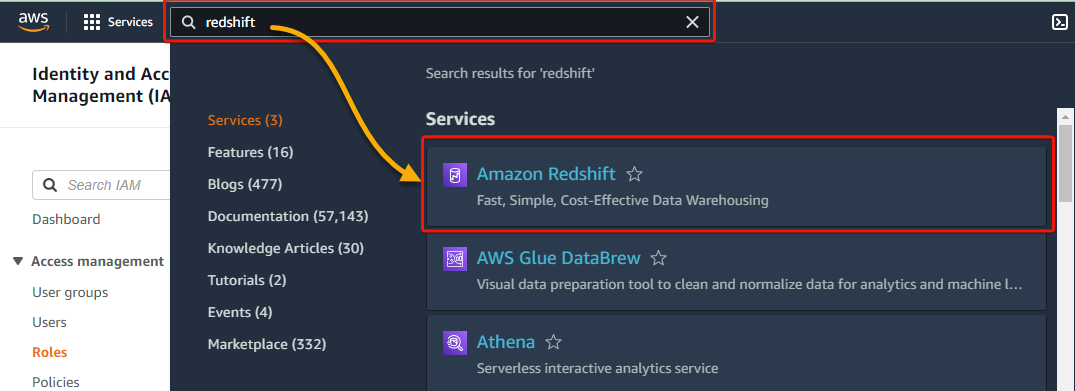
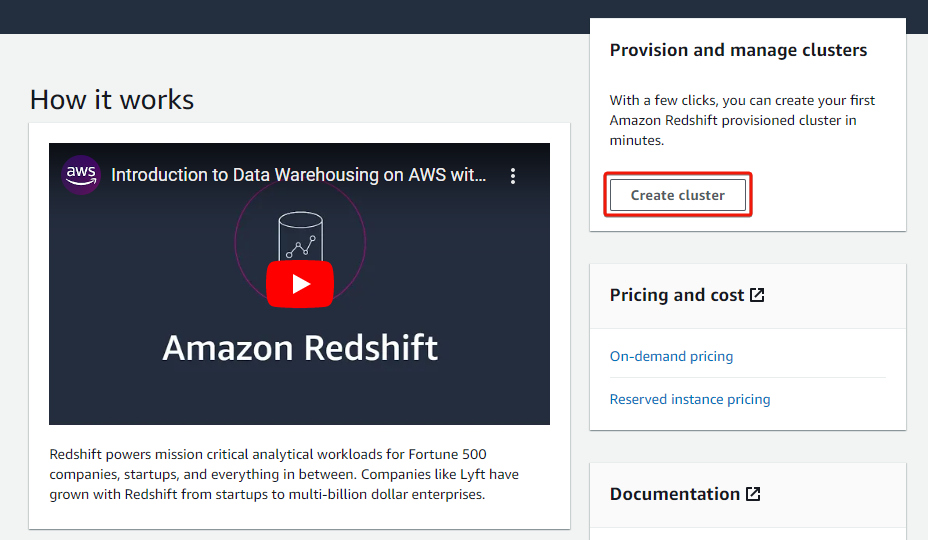
1. In the AWS Management Console, search for redshift and select Amazon Redshift under Services in the search results.
2. Next, click Create cluster to initiate creating an AWS Redshift Cluster.
3. Provide a cluster name in the Cluster identifier field (i.e., redshift-demo-cluster), and choose whether you want to use this cluster for Production or Free trial. But this tutorial goes for Production.

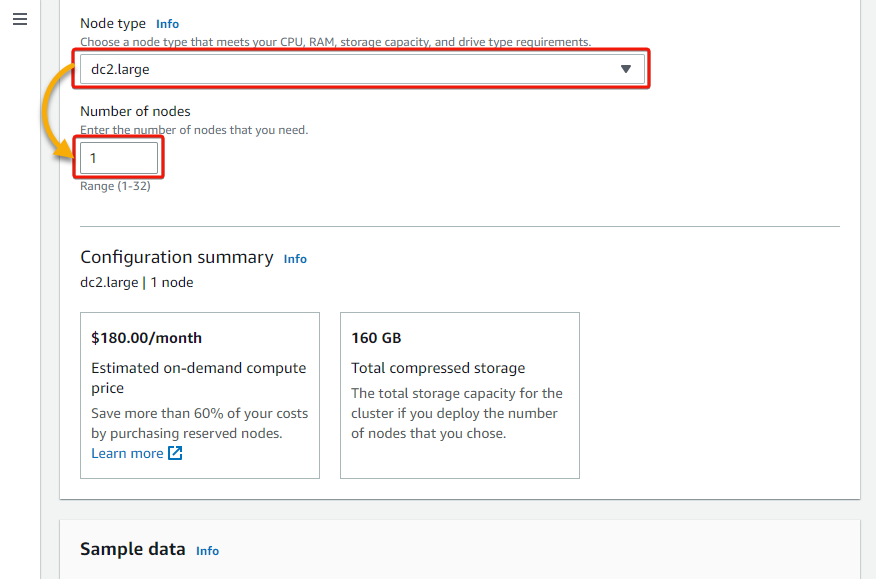
4. Now, select dc2.large for the Node type and put 1 for the Number of nodes.
Your choice of node type would depend on your workload requirements or factors, such as the complexity of your queries and data quantity. dc2.large is sufficient for this demonstration.
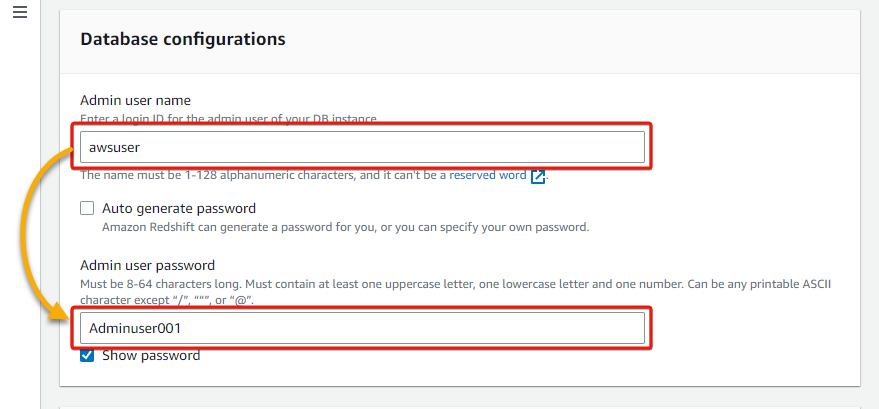
5. Under the Database configurations section, provide a database Admin user name and password.
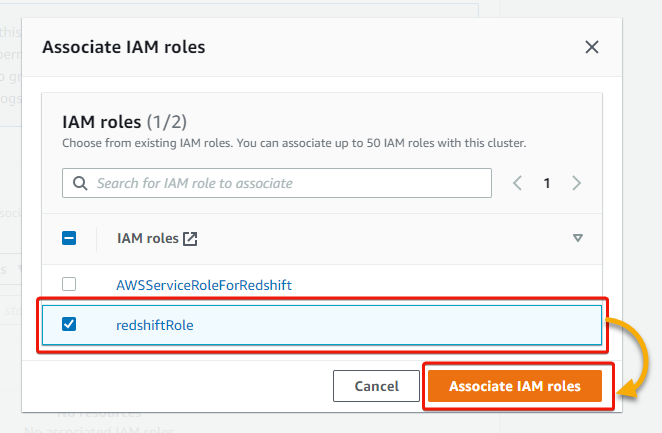
6. Next, click Associate IAM role, which brings up a list of your IAM roles.
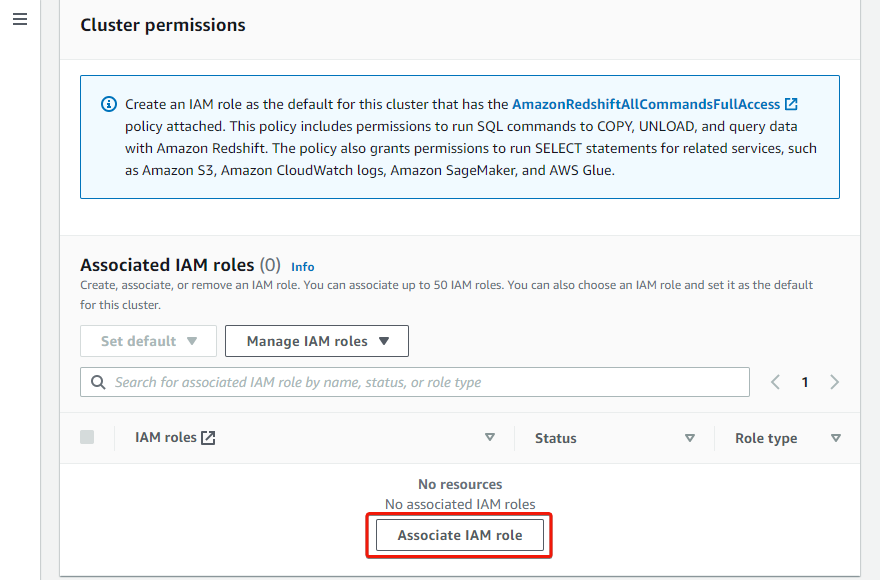
7. In the pop-up window, tick the checkbox beside the IAM role you created and click Associate IAM roles to add an associated IAM role. You will see the role listed as an associated role afterward.
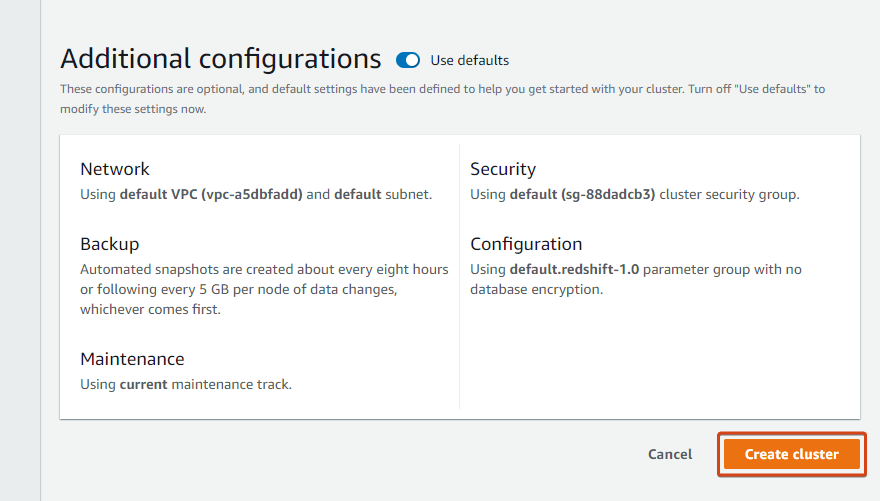
8. Finally, scroll down to the Additional configurations section, leave the default settings, and click Create cluster to create your cluster.
But if you choose not to use the defaults, you can make changes as follows:
- Create a cloud watch alarm.
- Change the database name and port.
- Modify the backup and network settings, and so on.
Creating the cluster takes a few minutes, and you will see a success notification, as shown below, once the cluster is available for use.

Connecting to an AWS Redshift Cluster
With an available AWS Redshift cluster, you can now test if the cluster works. Why? You will connect to your cluster using the Redshift Query Editor or other SQL client tools such as SQL Workbench.
But in this tutorial, you will use the Redshift Query Editor, which provides a visual interface for creating and running SQL queries.
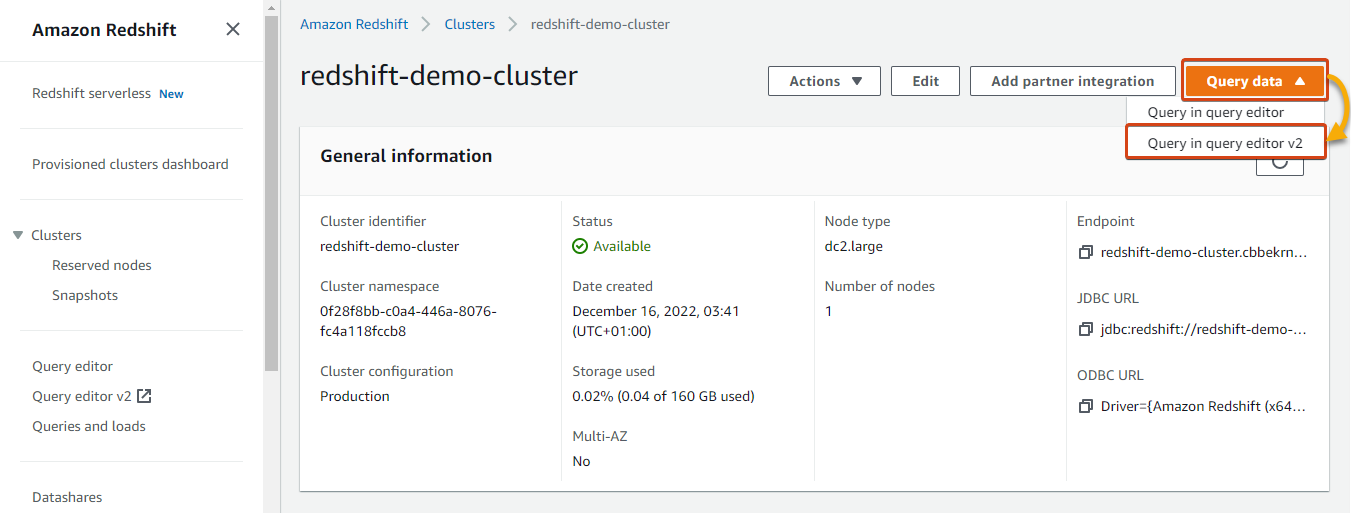
Under the Clusters list, click on your cluster to access its details page.

Next, click on the Query data dropdown (upper-right) and select Query editor v2 to open a connected query editor in a new tab.
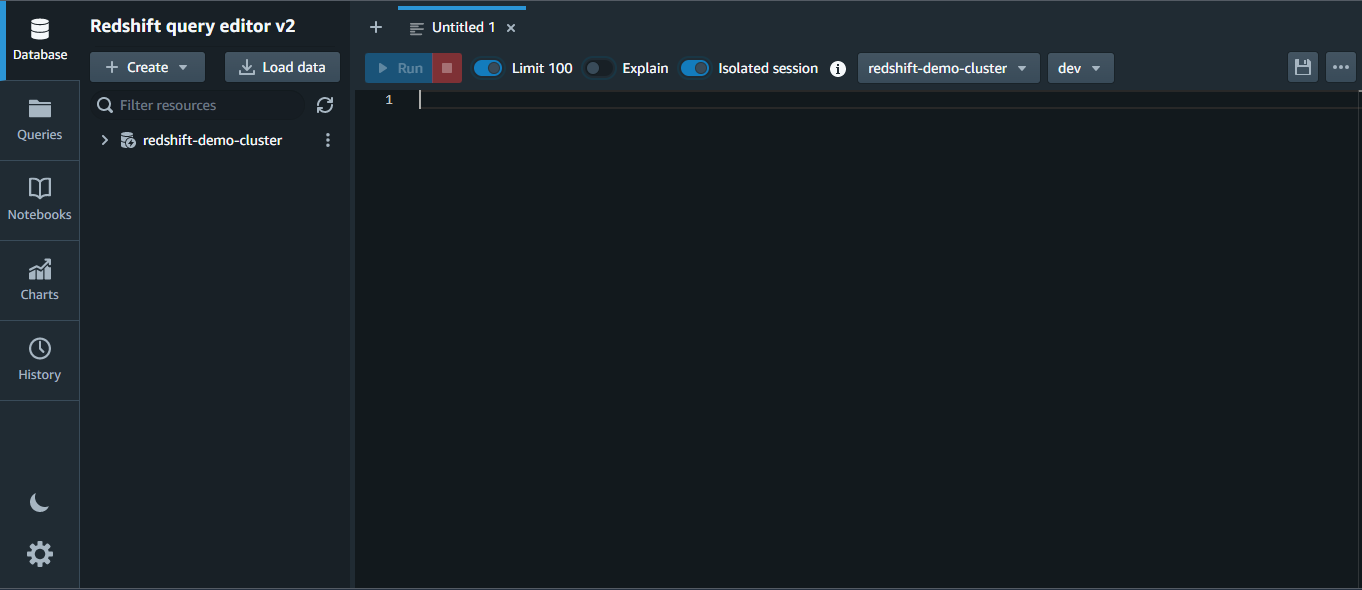
Below, you can see the Redshift Query Editor v2.
Loading Data into AWS Redshift Cluster
Before you can run queries or analyze data using AWS Redshift, you must load the data into the AWS Redshift cluster. In this example, you would load data into the AWS Redshift cluster from an AWS S3 bucket.
This tutorial uses sample data files provided by AWS.
💡 Only S3, DynamoDB, and Amazon EMR permit simultaneous data uploads. If your data is housed in Amazon S3, relational DynamoDB, or Amazon EMR, Redshift can load your data efficiently using MPI. But for any other sources, parallel upload is not supported.
1. Navigate to your Buckets list, and click your S3 bucket (redshift-samp-data) to access it.
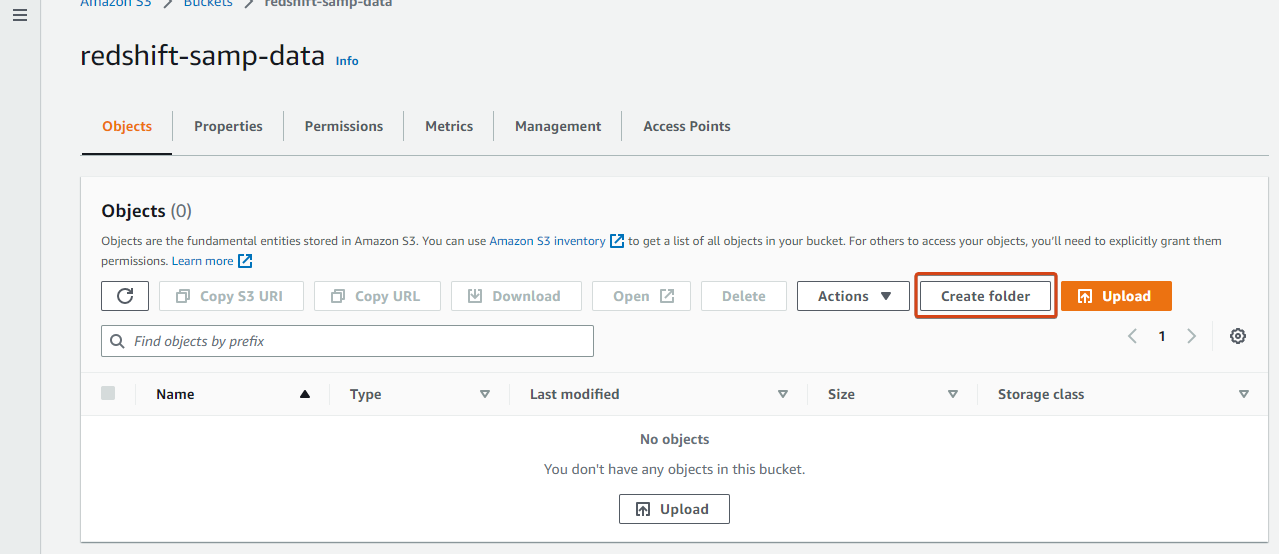
2. Next, click Create folder to initiate creating a folder in the bucket that will contain your data files.
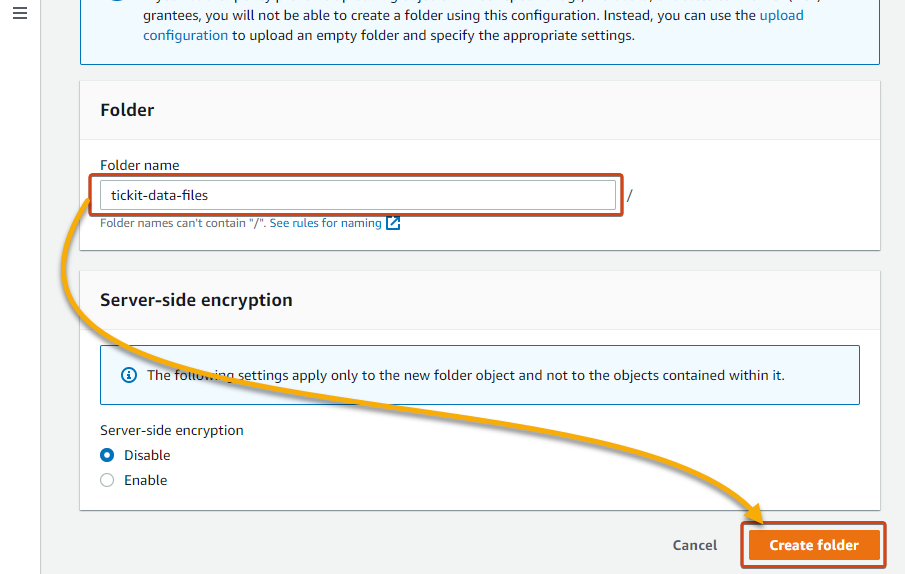
3. Enter a name for the folder (i.e., tickit-data-files), and click Create folder to create the folder.
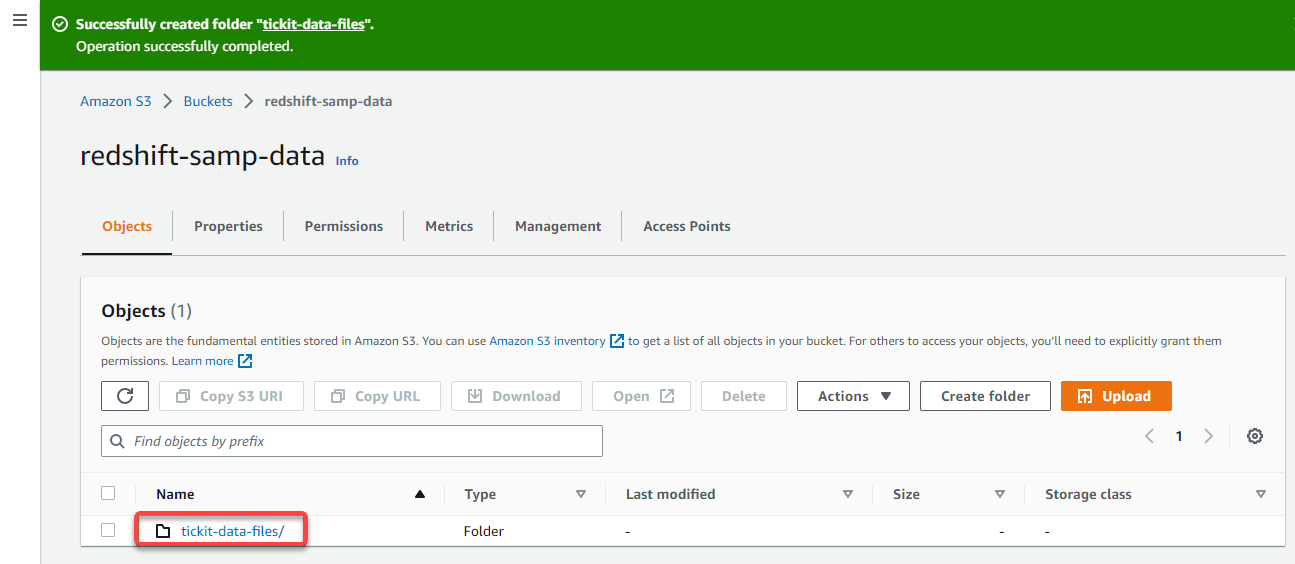
4. Now, click the folder name from the Objects table, as shown below, to navigate inside the folder.
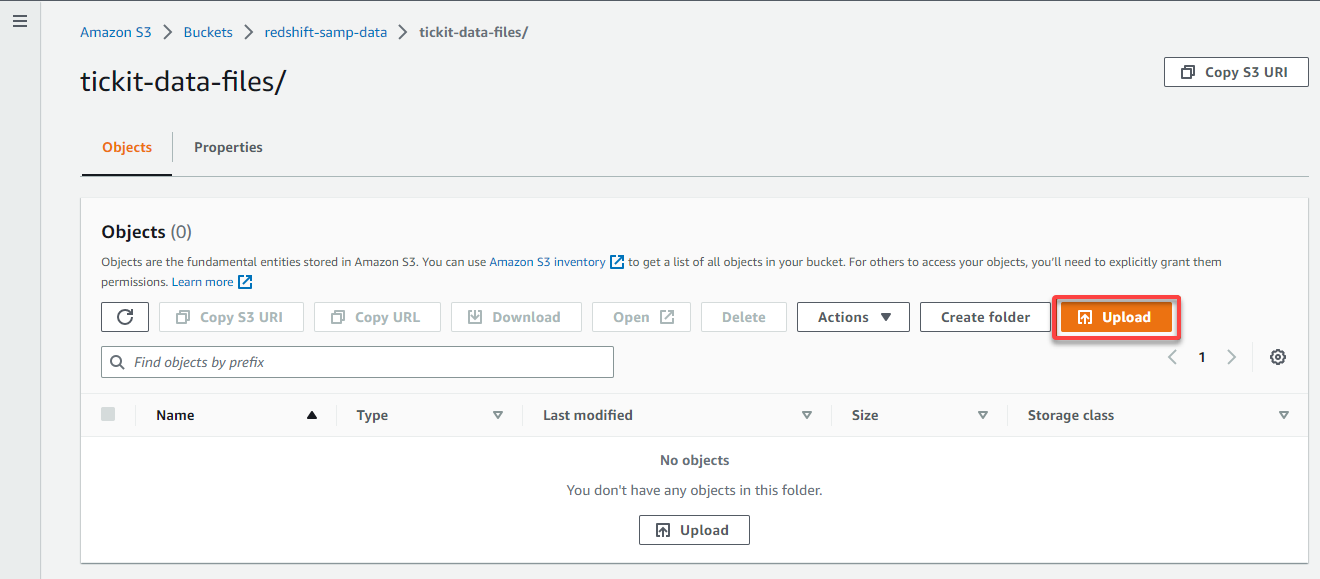
5. In the folder’s Objects tab, click Upload to access the page where you can add data files to upload.
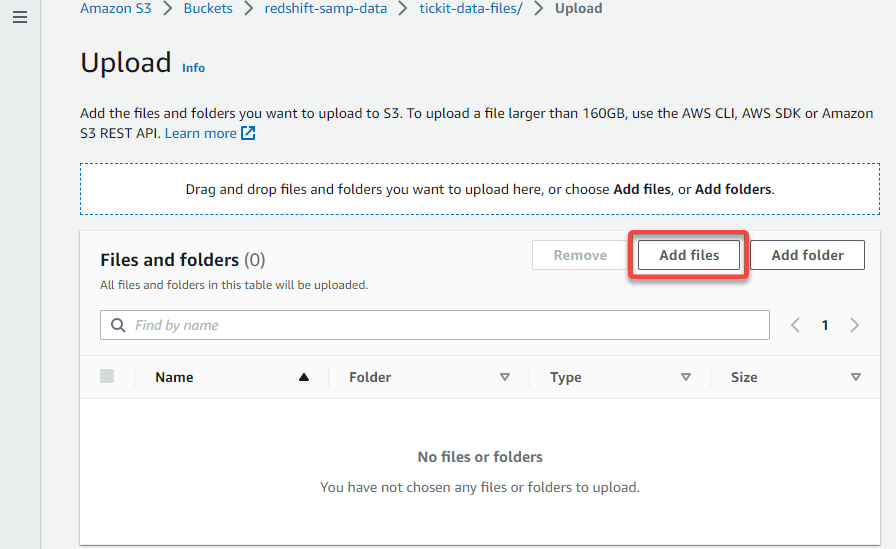
6. On the Upload page, click Add files, and locate your data files to upload to your S3 bucket.
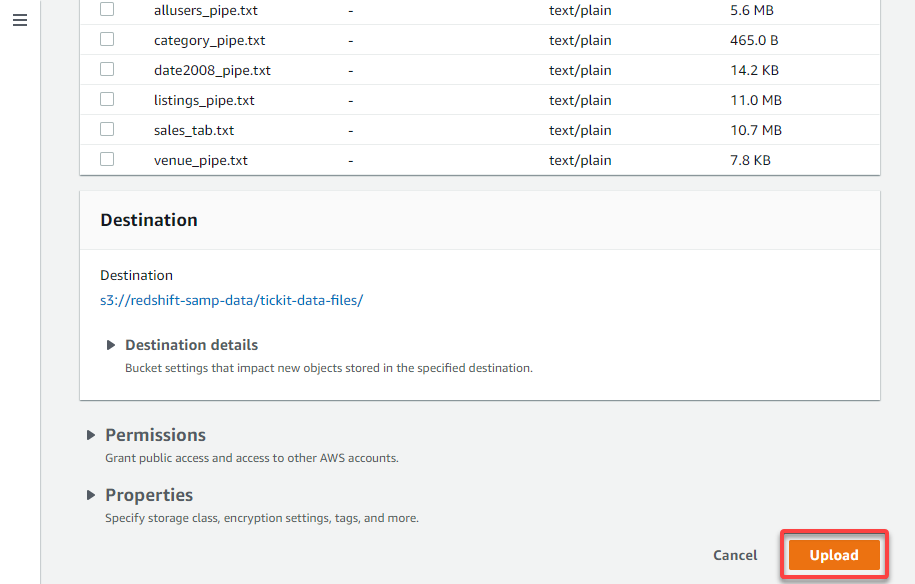
7. Now, click Upload (bottom-right) to upload the selected data files to your folder.
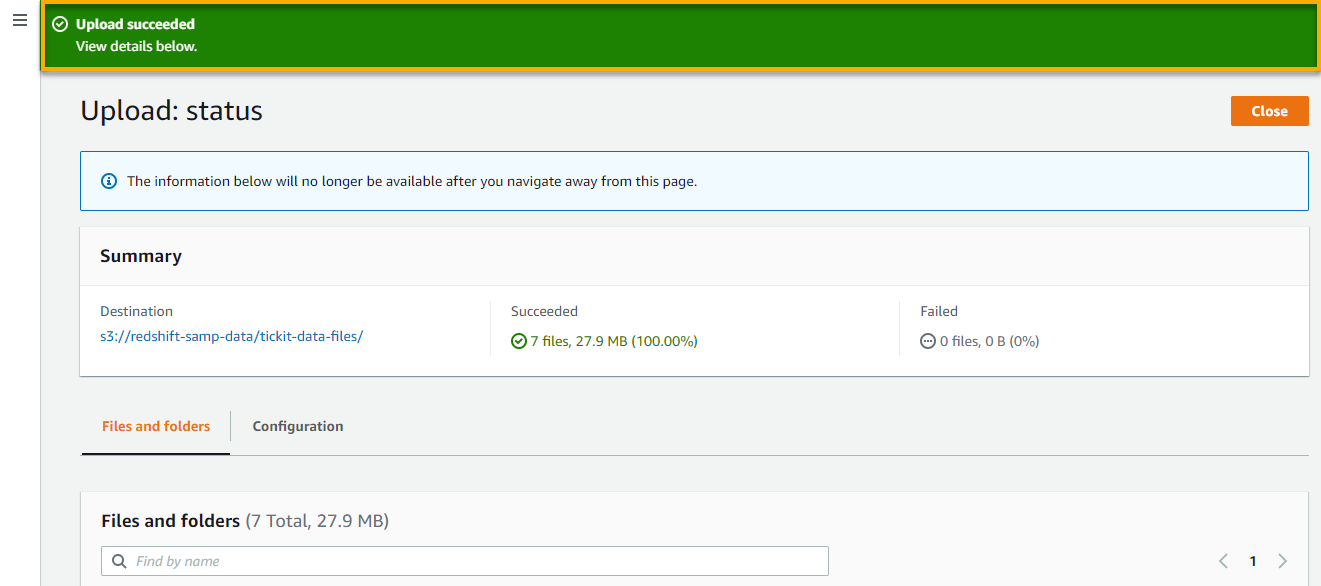
Once the upload completes, you will get a notification at the top of the page, like the one below.
Creating Tables via the Redshift Query Editor
When inserting data from the files you uploaded to your S3 bucket, you first need to create tables. How? If you already have the Redshift Query Editor up, you are good to go.
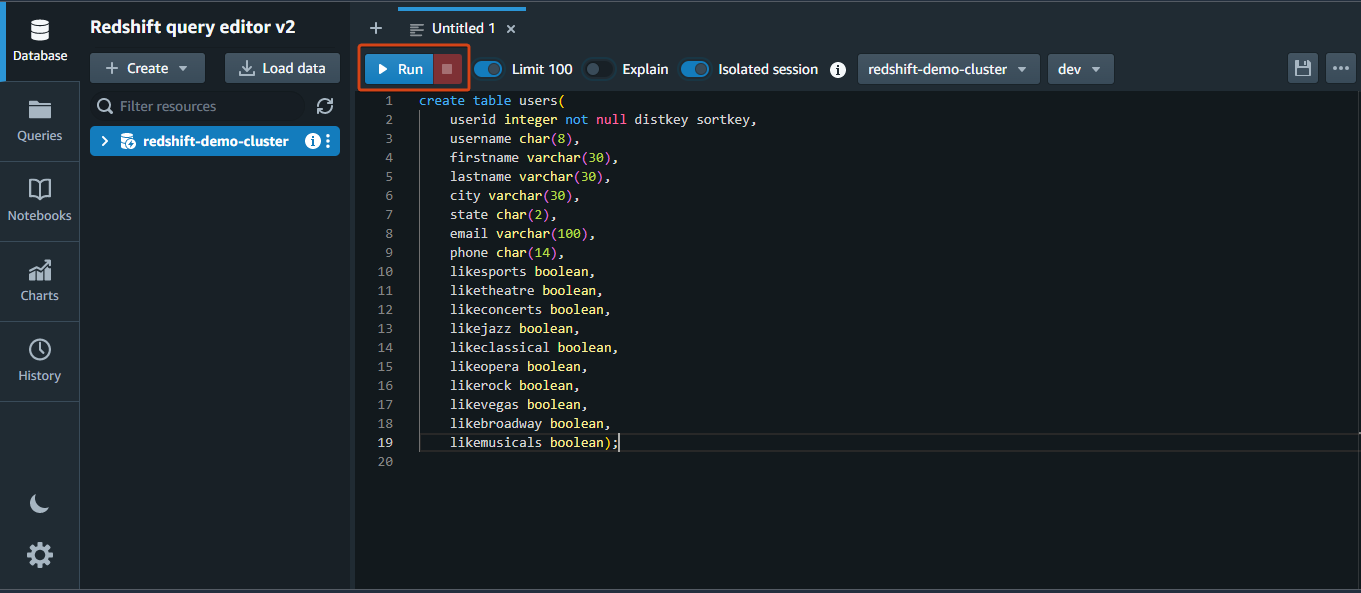
Run the following SQL statement in the query editor to create a table named users.
create table users(
	userid integer not null distkey sortkey,
	username char(8),
	firstname varchar(30),
	lastname varchar(30),
	city varchar(30),
	state char(2),
	email varchar(100),
	phone char(14),
	likesports boolean,
	liketheatre boolean,
	likeconcerts boolean,
	likejazz boolean,
	likeclassical boolean,
	likeopera boolean,
	likerock boolean,
	likevegas boolean,
	likebroadway boolean,
	likemusicals boolean);
💡 Note that the Sort and Dist keys must be thoroughly understood as they control how data is organized and indexed across all AWS Redshift nodes.
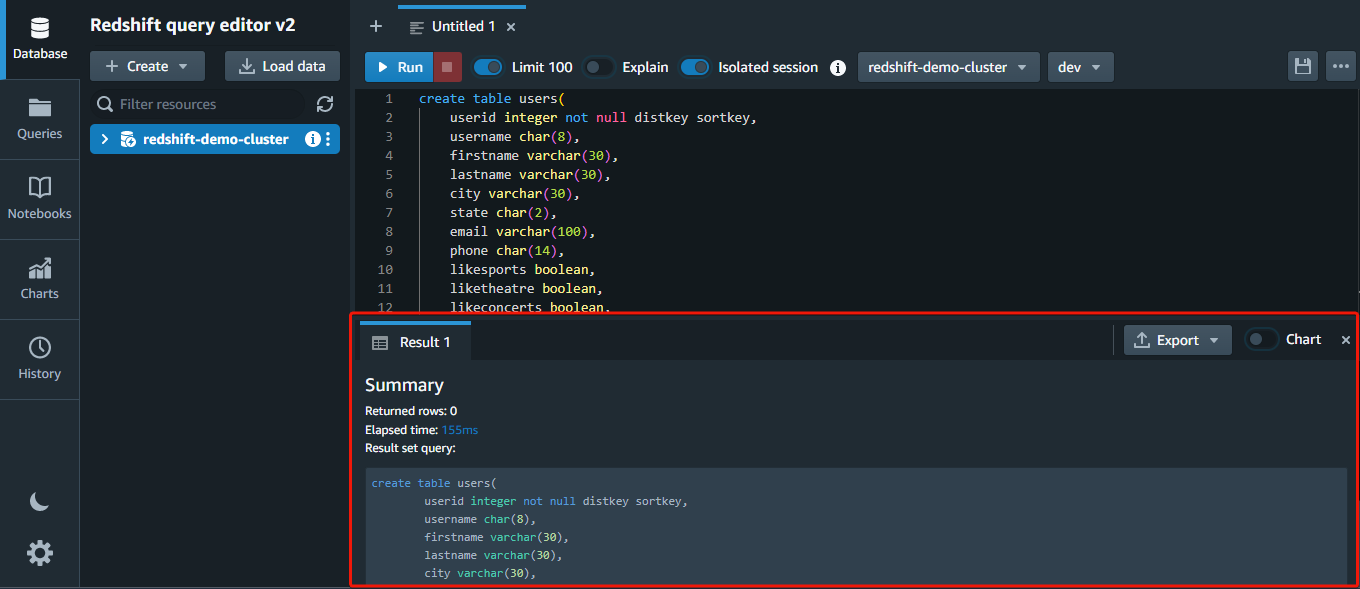
You will see a summary of the execution at the bottom after running the statements. If any statement has a problem, an error message will be shown instead.
Now, run the rest of the SQL statements below to keep creating tables.
create table venue(
	venueid smallint not null distkey sortkey,
	venuename varchar(100),
	venuecity varchar(30),
	venuestate char(2),
	venueseats integer);
create table category(
catid smallint not null distkey sortkey,
catgroup varchar(10),
catname varchar(10),
catdesc varchar(50));create table date(
dateid smallint not null distkey sortkey,
caldate date not null,
day character(3) not null,
week smallint not null,
month character(5) not null,
qtr character(5) not null,
year smallint not null,
holiday boolean default('N'));create table event(
eventid integer not null distkey,
venueid smallint not null,
catid smallint not null,
dateid smallint not null sortkey,
eventname varchar(200),
starttime timestamp);create table listing(
listid integer not null distkey,
sellerid integer not null,
eventid integer not null,
dateid smallint not null sortkey,
numtickets smallint not null,
priceperticket decimal(8,2),
totalprice decimal(8,2),
listtime timestamp);create table sales(
salesid integer not null,
listid integer not null distkey,
sellerid integer not null,
buyerid integer not null,
eventid integer not null,
dateid smallint not null sortkey,
qtysold smallint not null,
pricepaid decimal(8,2),
commission decimal(8,2),
saletime timestamp);Loading Data to Tables
You now have your tables, but they are all practically empty. After creating the tables, you can load data from Amazon S3 by using the copy command.
AWS Redshift integrates with many other AWS services, so you can quickly load data from sources such as Amazon S3 and Amazon DynamoDB. You can also analyze data using other services such as Amazon EMR and Amazon Athena.
Below is the syntax of the copy command:
copy table_name [ column_list ] FROM data_source CREDENTIALS access_credentials [options]Run the following command to load the data from the *allusers_pipe.txt* file from your S3 bucket to your users table, replacing the following:
<aws_account_id>– Your AWS account ID.<role_name>– The name of your IAM role. In this case,redshiftRole.us-west-2– The region you set for your S3 bucket.s3://redshift-samp-data/tickit-data-files– The folder path in your S3 bucket.
💡 Suppose you are worried about data security; no need to be. AWS Redshift uses advanced encryption and security measures to protect your data.
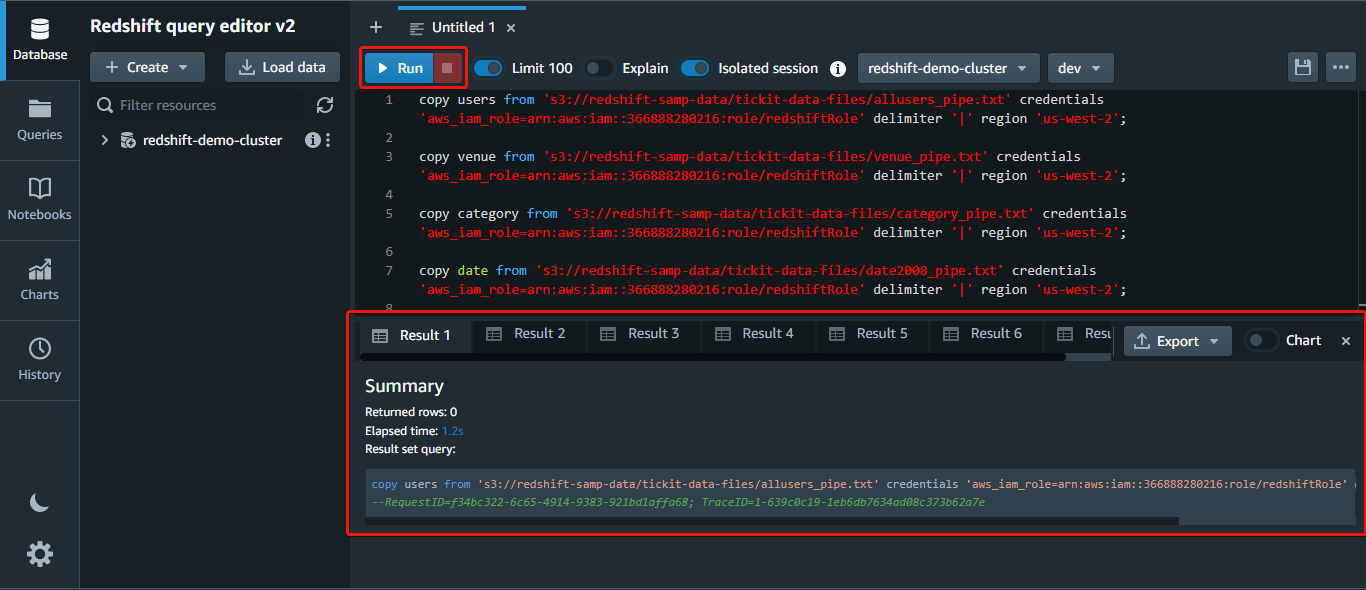
copy users from 's3://redshift-samp-data/tickit-data-files/allusers_pipe.txt' credentials 'aws_iam_role=arn:aws:iam::<aws_account_id>:role/<role_name>' delimiter '|' region 'us-west-2';
Now, repeat the same copy command to load data from the rest of the files, replacing users and allusers_pipe.txt with the corresponding table names and file names.
Querying a Cluster via the Redshift Query Editor
Now that you have loaded some data into your cluster, you can use standard SQL queries to filter, sort, and aggregate the data. For example, you can use the SELECT statement to retrieve data from your tables, the INSERT statement to add new rows to a table, and so on.
💡 Note that AWS Redshift is designed for batch-style querying and may not be well-suited for applications that require low-latency queries or high levels of concurrency.
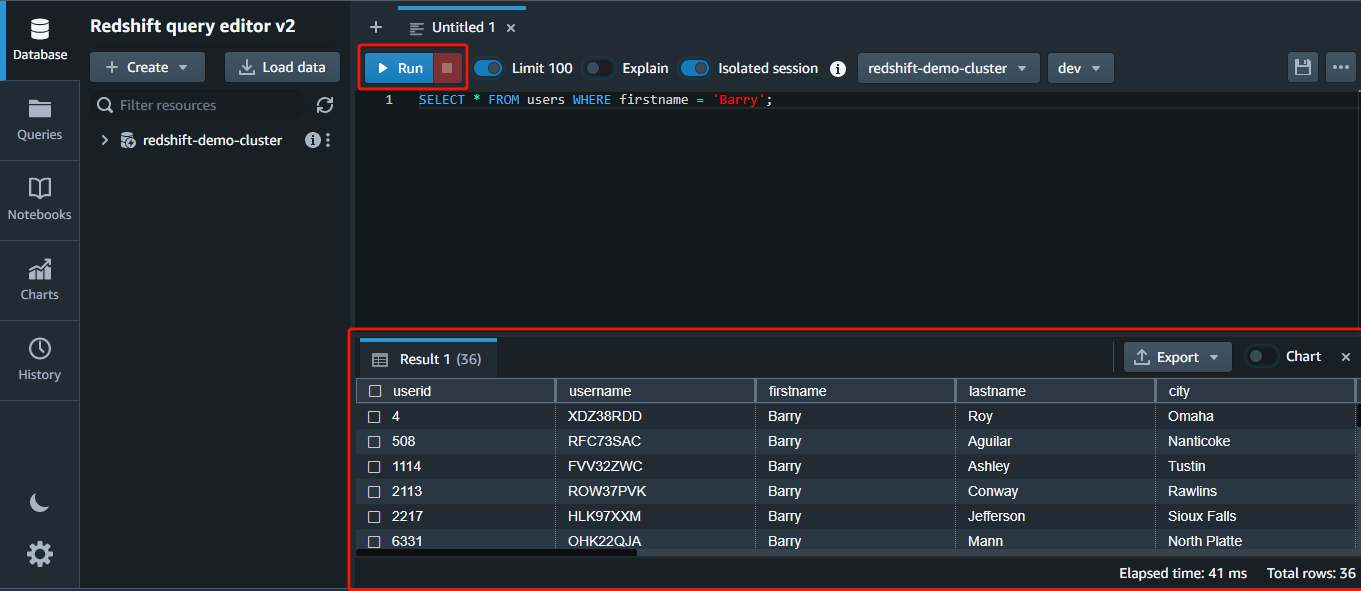
1. Run the following query in the editor to quickly return all (*) rows FROM the users table WHERE the firstname column has the value Barry.
AWS Redshift offers data compression, which reduces storage requirements, thereby reducing disk I/O and improving query performance. When you execute a query, the compressed data is read into memory, then uncompressed during query execution.
SELECT * FROM users WHERE firstname = 'Barry';💡 Redshift uses a columnar storage format, where data is organized into columns instead of rows. This behavior allows faster querying and analysis of data, as only the relevant columns need to be accessed and processed.
💡 AWS Redshift provides result caching that stores the results of frequently executed queries in memory. As a result, the results can be quickly retrieved and returned to the user without recomputing. This feature improves query performance by reducing the amount of work that the database has to perform.
2. Next, run the below query to return the sum of all (*) the values in the pricepaid column FROM the sales table.
SELECT sum(pricepaid) FROM sales;
3. Return to your cluster’s details page, and click the Query monitoring tab to view your query logs.
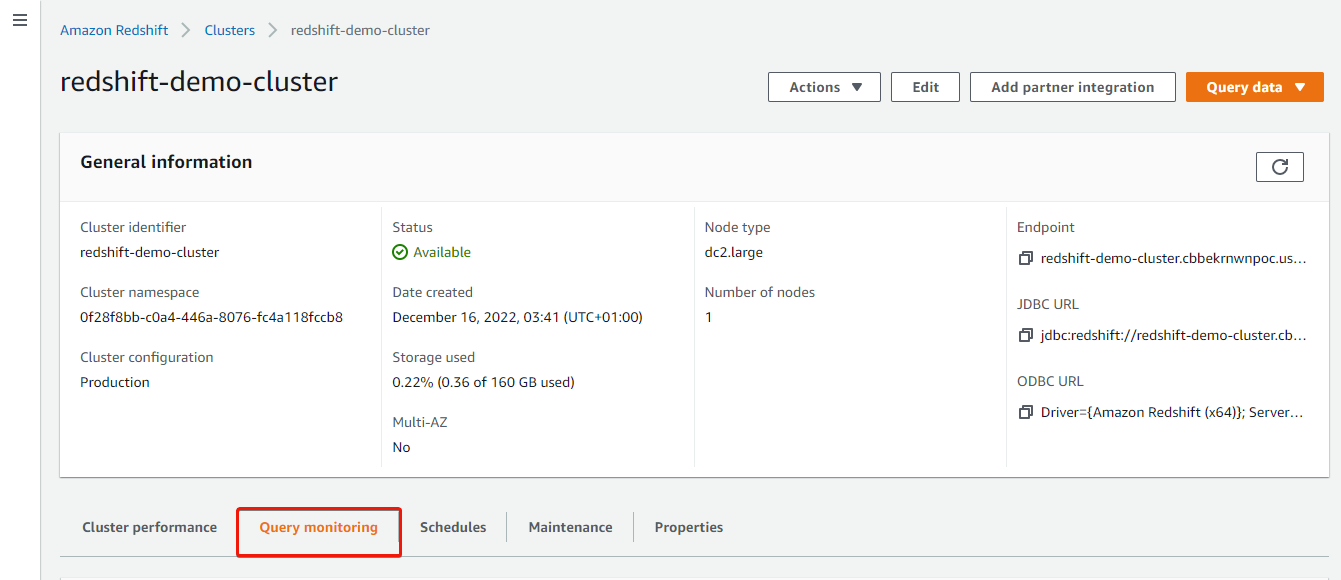
4. Now, scroll down to the Queries and loads section to view the queries you have performed so far, and click the number of the most recent query to view its execution details.
The table presented should load your most recent query at the top.
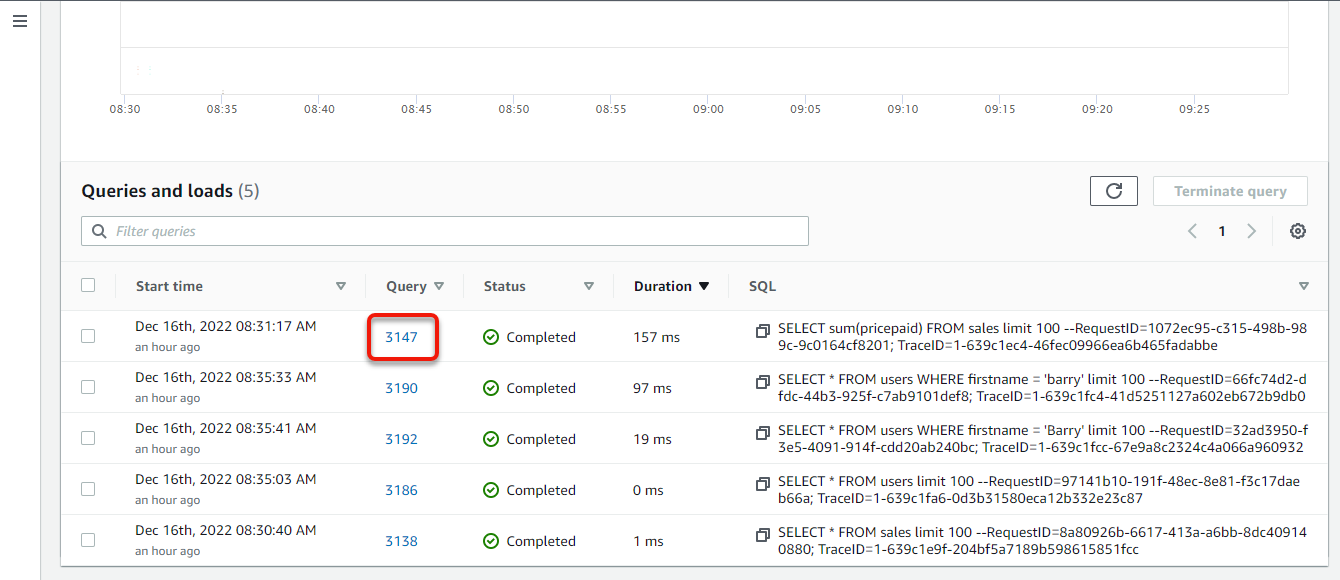
Your browser redirects to the Query details, where you can see what transpired in the query execution.
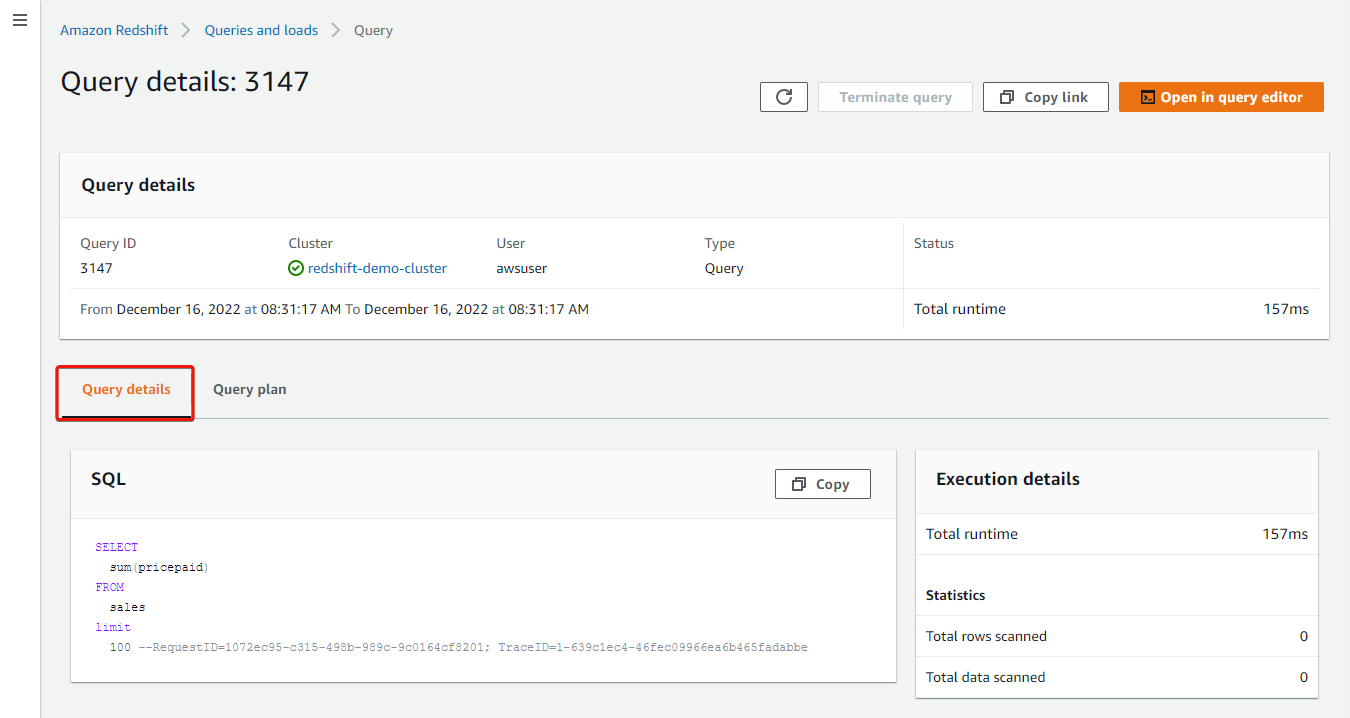
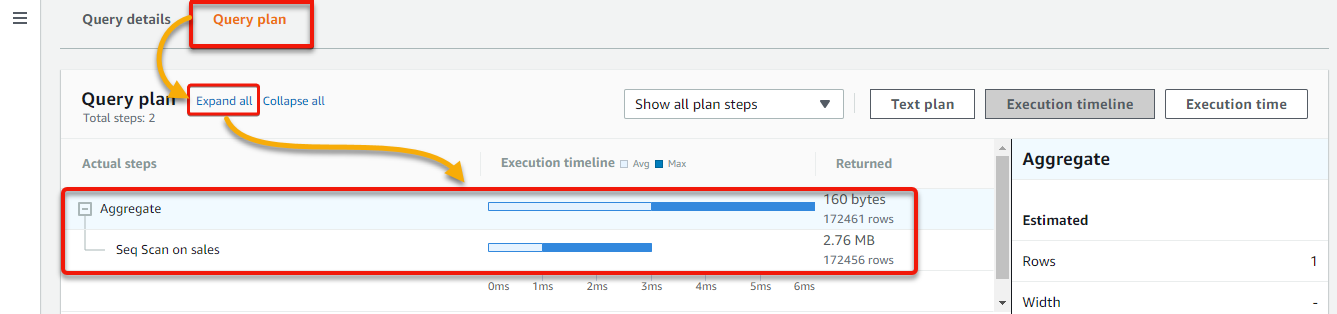
5. Lastly, click the Query plan tab → Expand all to see the actual steps and statistics for the query, and click any bar in the chart while scanning the diagram. Doing so lets you dig down into additional step specifics.
Actual query statistics are provided in the Execution timeline and Execution time views, including the length of time taken by each query step. This data can be used for query optimization or debugging.
The number of rows that the query would read or update in each step is shown in the Text plan view. You can also get performance metrics and the health status of the cluster.
Resizing an AWS Redshift Cluster
Worried about messing up the infrastructure? AWS Redshift is a fully managed service, so you can quickly scale up or down without worrying about the underlying infrastructure.
As your storage and performance needs fluctuate, you can resize a Redshift cluster. You may need to scale up to handle more data or complicated queries. Or perhaps scale down to cut costs when there is less demand for the cluster. But how? By adding or removing nodes.
To resize an AWS Redshift cluster:
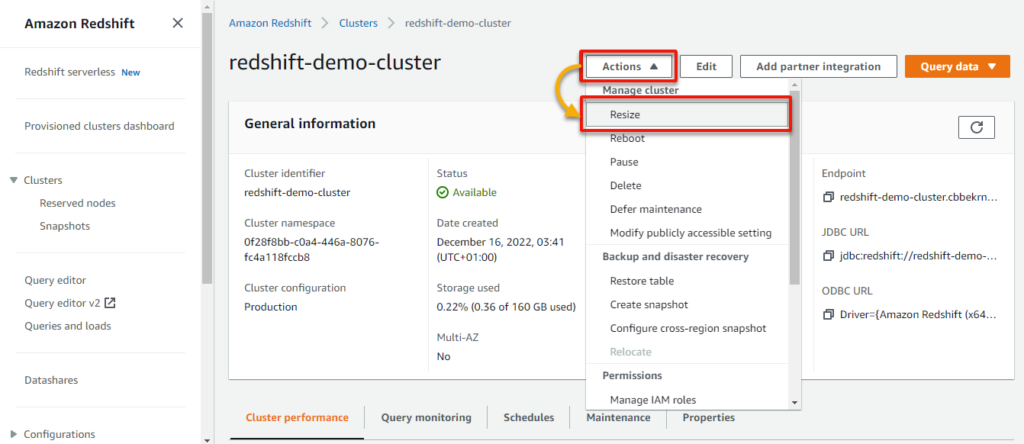
1. Return to your cluster’s detail page, click the Actions dropdown, and click Resize to initiate resizing your cluster.
2. Set the Nodes value to 2, and click Resize cluster (bottom-right) to resize your cluster with one additional node.

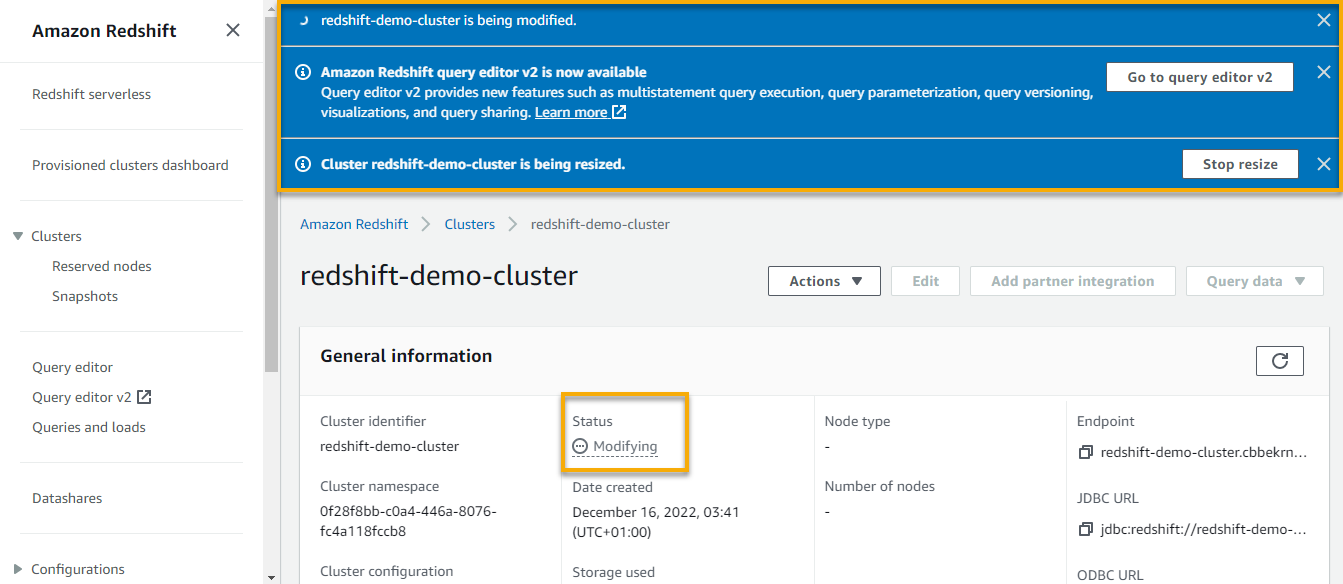
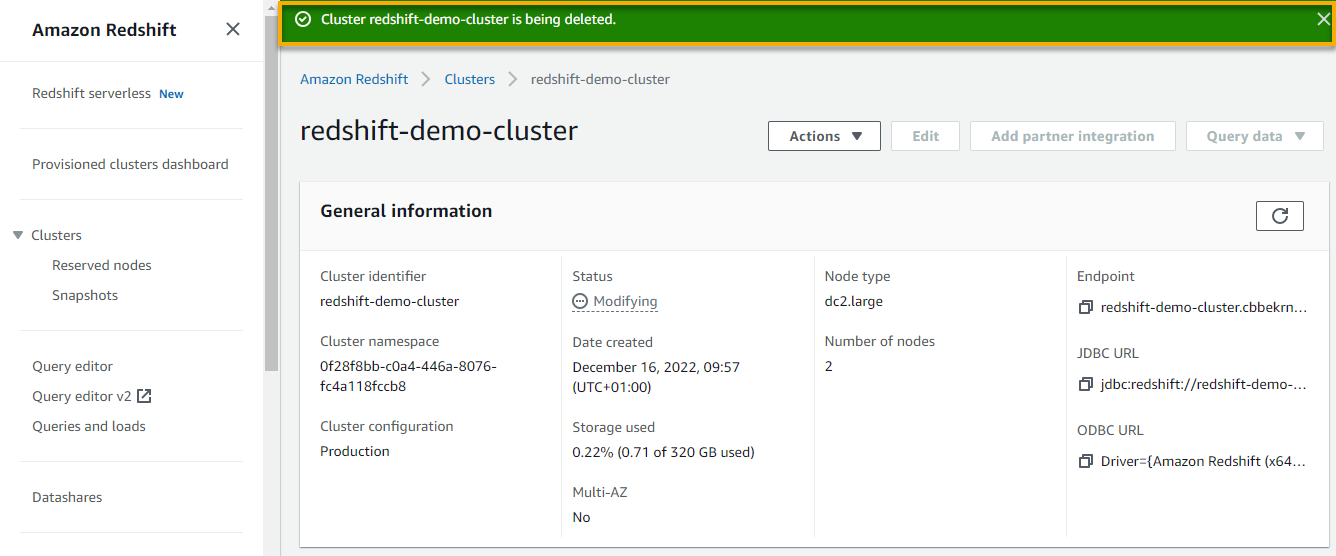
A notification appears at the top, which indicates your cluster is being resized, while the Status section of your cluster indicates it is in a Modifying state.
The process may take up to 15 or 20 minutes to resize and copy your data. Redshift terminates all connections during a resizing operation and restarts the original cluster in read-only mode.
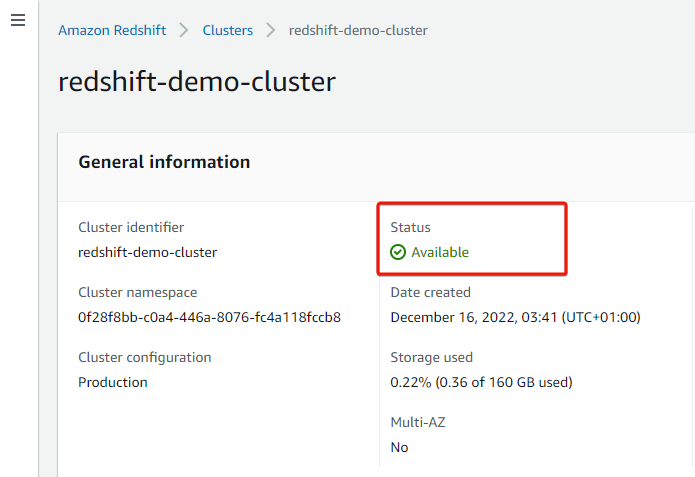
You can verify that the resize is complete when the cluster Status reads Available, as shown below.
Deleting an AWS Redshift Cluster
Keeping unnecessary clusters only leads to unwanted charges. Why not clean your resources by deleting AWS Redshift clusters that are no longer needed?
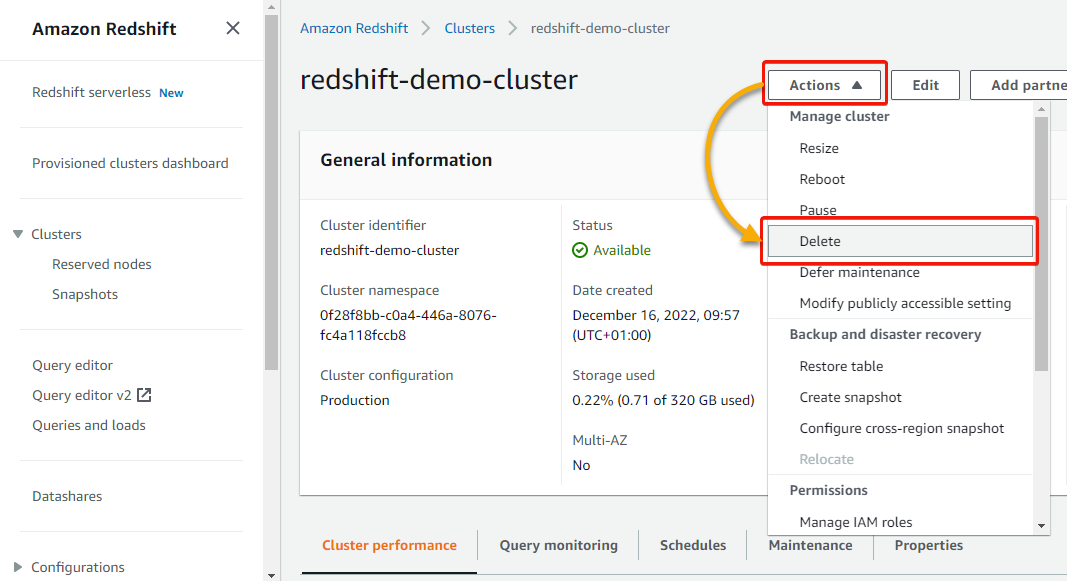
1. On your cluster’s details page, click the Actions dropdown and select Delete to delete the cluster.
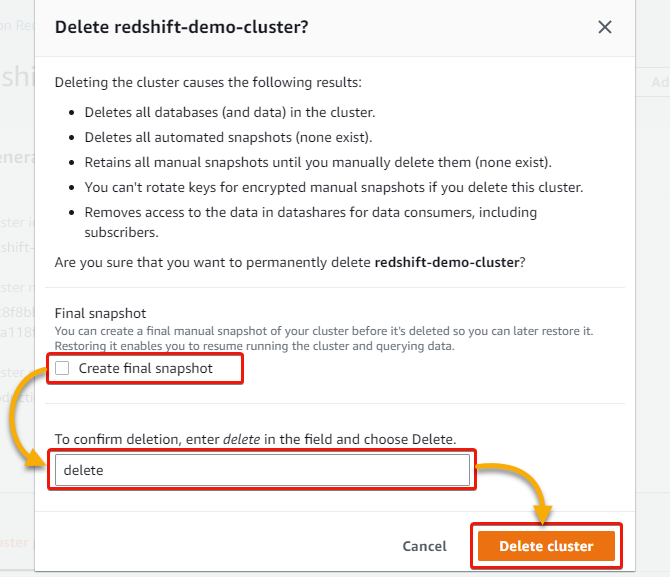
2. In the form that pops up, under Final snapshot, untick the Create final snapshot box, type Delete in the field, and click Delete cluster to confirm deleting the cluster.
Conclusion
AWS Redshift is fast, reliable, and a great way to manage your data with various features. And this tutorial helped you get started with AWS Redshift by creating your first cluster and loading data to tables with the Redshift Query Editor.
With this newfound knowledge, why not try loading and managing data to AWS Redshift with a third-party SQL tool, like SQL Workbench/J and pgAdmin?


