


As one of the most popular open-source databases on the market today, PostgreSQL is relied upon by businesses of all sizes to manage their data. But working with this complex system can be challenging. Fear not, though! This tutorial has covered you, from installing pgAdmin Ubuntu to managing your databases.
pgAdmin is a powerful tool that lets you manage PostgreSQL installations more conveniently. And in this tutorial, you’ll learn to install pgAdmin on Ubuntu and manage your PostgreSQL installation to manage your database effectively.
Ready? Dive in and start managing your database like never before!
Prerequisites
This tutorial will be a hands-on demonstration. If you’d like to follow along, be sure you have a Linux-based system – This tutorial uses Ubuntu 20.04, but other distros will also work.
Installing PostgreSQL for pgAdmin on Ubuntu
pgAdmin is a feature-rich open-source administration and development platform dedicated to PostgreSQL. But before you get started with pgAdmin, you’ll need PostgreSQL.
And since PostgreSQL doesn’t come installed with your Ubuntu system by default, you must first install PostgreSQL.
1. SSH into your Ubuntu system and run the apt update command below to update your local package repositories. This command may take a few minutes to complete, and you may be prompted to enter your user password.
apt update -y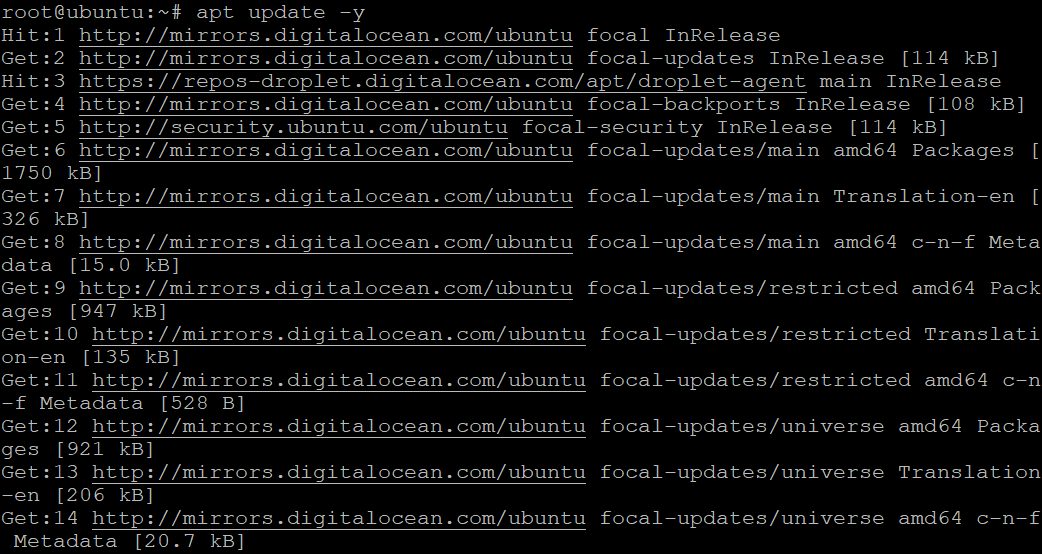
2. After the update, run the below apt install command to perform the following:
- Install PostgreSQL and its dependencies, setting PostgreSQL ready to use with pgAdmin for managing your database.
- Creates a new PostgreSQL cluster. The term “cluster” refers to all processes (databases, clients, etc.) running on a single host machine.
- Creates an administrative user (postgres) for managing your database.
apt install postgresql -y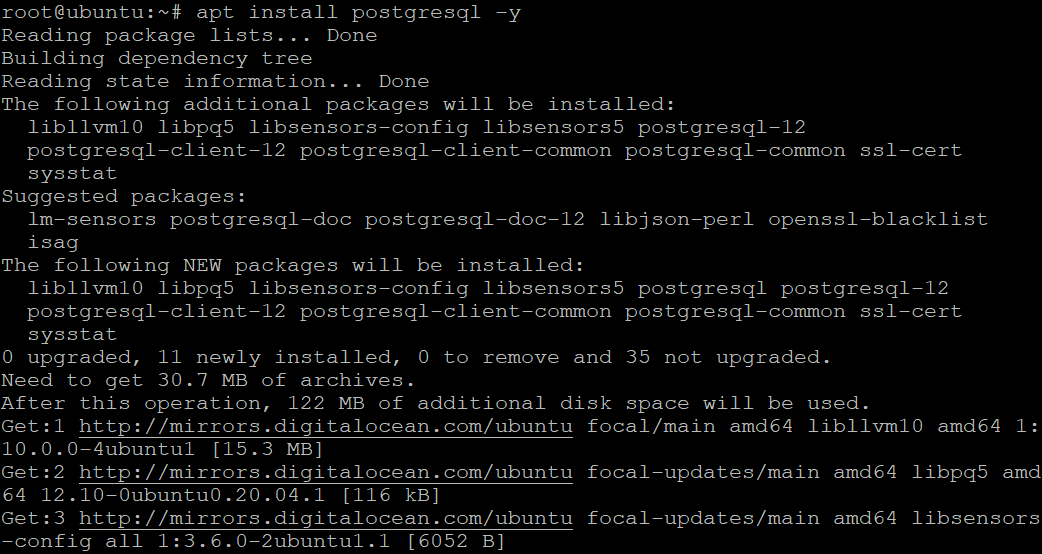
3. Once PostgreSQL has been installed, run the following systemctl commands to start and enable the PostgreSQL service to start automatically at boot time.
# Starts the PostgreSQL service
systemctl start postgresql
# Enables the PostgreSQL service to start at bootup
systemctl enable postgresql
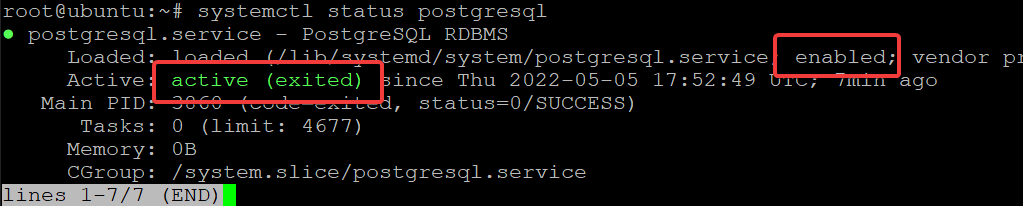
4. Now, run the below command to check the PostgreSQL service’s status.
If everything goes according to plan, you will see the following output. At this point, PostgreSQL is running on your Ubuntu system.
5. Finally, run the below pg_isready command to check if your Postgres server is ready to accept connections. pg_isready is a built-in utility for checking the connection status of a PostgreSQL database server.
sudo pg_isreadyYou will see the following output with the accepting connections message if the PostgreSQL process is ready to receive connections.
This output indicates you’ve successfully installed PostgreSQL and that it’s ready to start using pgAdmin to manage your databases.

Note that if you get an error message saying rejecting connections instead, as shown below, the service is not running. Wait for a few minutes to allow the PostgreSQL service to run and try again. If the problem persists, restart the system and try again.

Creating a PostgreSQL Database
Now that you have PostgreSQL installed on your Ubuntu system, you can create a new database you’ll work on using the pgAdmin tool. In PostgreSQL, databases are physically stored on a disk as files.
1. First, run the below commands to change to the postgres user and open the psql command-line interface for working with PostgreSQL.
# Changes to the postgres user
sudo su - postgres
# Opens the psql CLI
psql
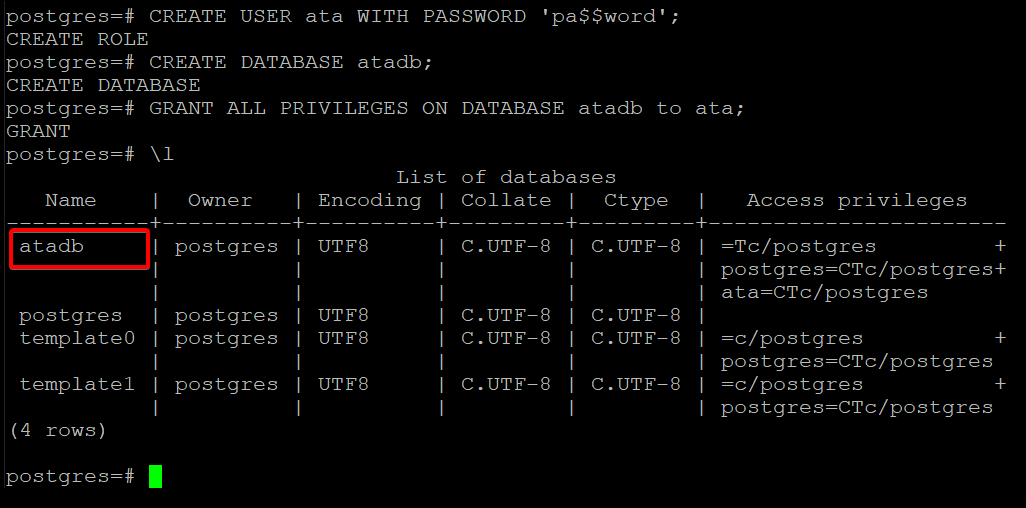
2. Next, run the below query to create a new user called ata, which has access to the database. Replace ata and pa$$word with the username and password of your choice.
CREATE USER ata WITH PASSWORD 'pa$$word';Always end every query in PostgreSQL with a semicolon (;), or else the query will not execute.

3. Run the below query to create a new database called atadb. You can replace atadb with the name of your choice.
CREATE DATABASE atadb;
4. Now, run the below query to give the new user (ata) full access to the atadb database, including creating new tables and documents.
GRANT ALL PRIVILEGES ON DATABASE atadb to ata;
5. Run the below command to list all the PostgreSQL databases.
\lYou can see the atadb database in the list below, indicating that you have successfully created and set up a new database.
5. Finally, run the below commands to quit (\q) the postgres shell and exit from the postgres account, switching back to your regular user account.
# Quits the postgres shell
\q
# Logout from the postgres account
exit
Securing the PostgreSQL Client Authentication with MD5
Just because you’re logging in to a user account with a strong password to access your database doesn’t mean that database is secure from attacks. Unfortunately, the default configuration for PostgreSQL client authentication is not that secure, allowing any valid database user name to connect clients.
An attacker could potentially gain access to your databases simply by brute-forcing a user name and password. One way to improve security when using the PostgreSQL database server is to enable client authentication using the MD5 encryption method.
To configure the PostgreSQL server to use MD5 authentication:
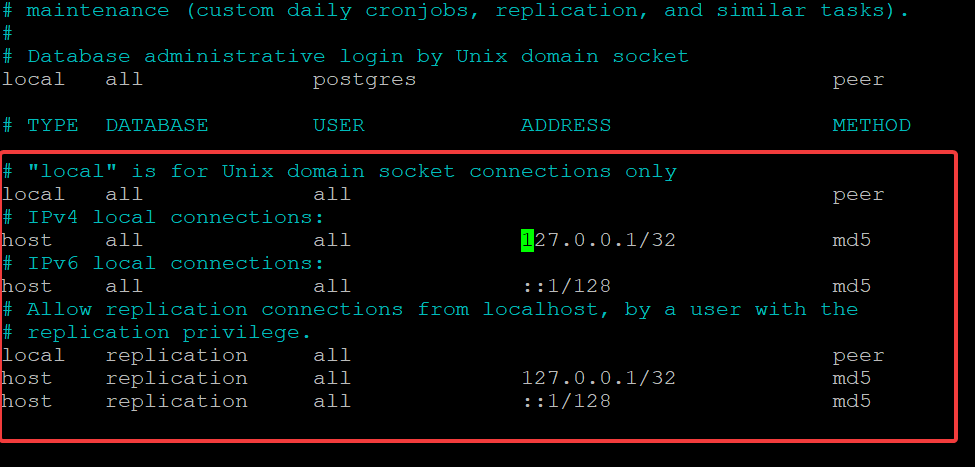
1. Open the /etc/postgresql/12/main/pg_hba.conf file in your favorite text editor.
The pg_hba.conf file controls client authentication for the PostgreSQL database server. This file contains records that specify the following:
- The authentication method to use.
- The client’s IP address range.
- The requested database and username for each connection type.
By default, the pg_hba.conf file is located in the /etc/postgresql/12/main directory of your PostgreSQL installation.
2. Next, find the following lines in the pg_hba.conf file and change them, as shown below. Once you’ve changed the values, save the changes and close the editor.
These lines tell the PostgreSQL server to use the MD5 authentication method for connections made from the localhost (127.0.0.1) and IPv6 address (::1).
If you prefer to allow connections from other computers on your network, write additional lines to allow access to each IP address or network.
3. Finally, run the below command to restart your PostgreSQL server to apply the configuration changes.
At this point, you’ve secured client authentication for your PostgreSQL database server. Each client application will now present an encrypted string called a message digest (aka “hash”) before connecting.
systemctl restart postgresql
Installing pgAdmin4 on Ubuntu
You’ve completely secured your PostgreSQL database, so now you can start using it to your heart’s content. But to better see your database data, you’ll install the pgAdmin4 GUI for PostgreSQL on your Ubuntu server.
1. Run the curl command below to import (apt-key add) the pgAdmin4 key from the pgAdmin.org repository into your Ubuntu server’s repository list. This key ensures that the pgAdmin4 package is trusted and can be installed.
curl https://www.pgadmin.org/static/packages_pgadmin_org.pub | sudo apt-key add
2. Next, run the below command to add the pgAdmin4 repository to your system. This command adds the pgAdmin4 repository to your system’s sources list.
This repository lets you install and upgrade the pgAdmin4 package via apt, Ubuntu’s standard package management tool.
sudo sh -c 'echo "deb https://ftp.postgresql.org/pub/pgadmin/pgadmin4/apt/$(lsb_release -cs) pgadmin4 main" > /etc/apt/sources.list.d/pgadmin4.list && apt update'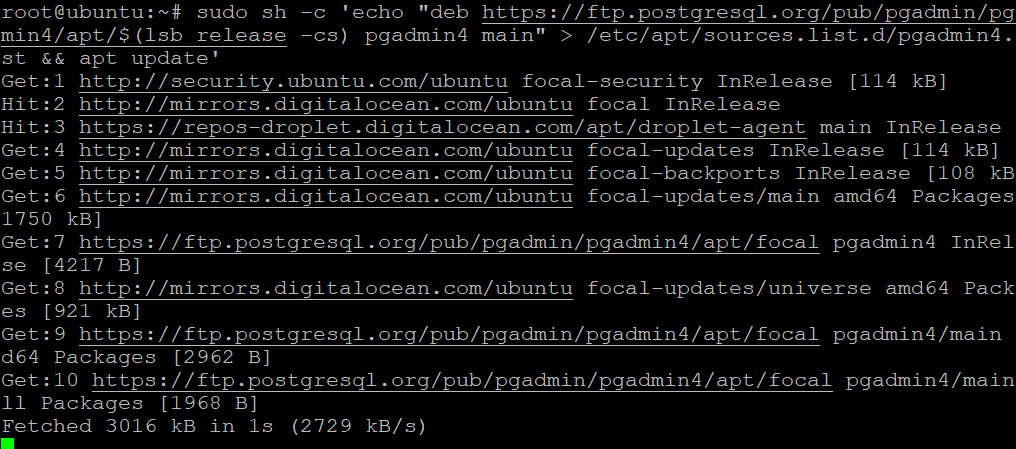
3. Finally, run the apt install command below to install the pgadmin4 package on your Ubuntu server. This command installs pgAdmin4, available in both a desktop and server edition.
The desktop edition allows you to connect to PostgreSQL database servers over a local network and start an integrated terminal console for issuing PostgreSQL commands directly from within the GUI.
apt install pgadmin4 -y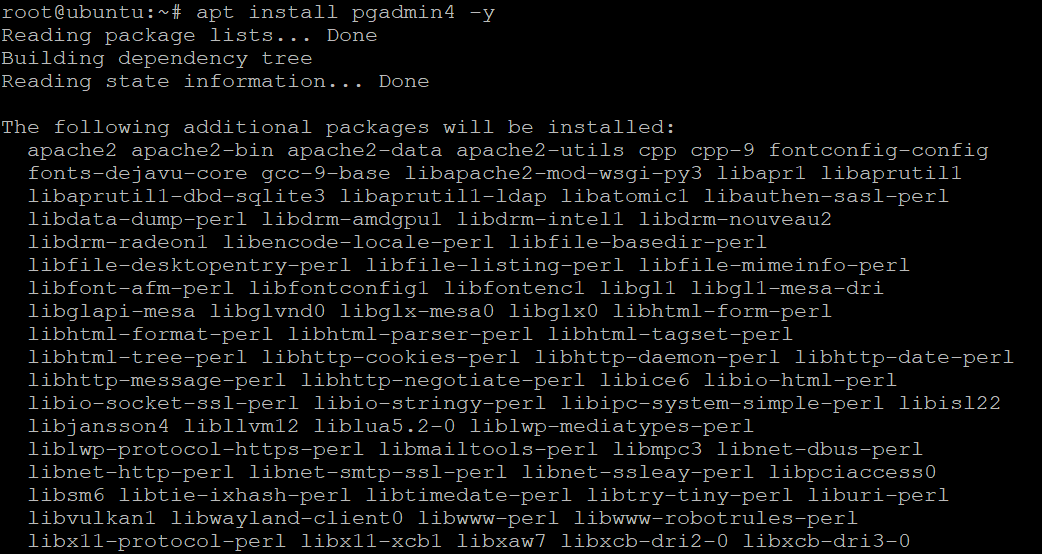
Configuring an Apache Web Server
With the pgAdmin4 GUI installed on your server, you can now start using it to manage and administer your PostgreSQL database server.
In this tutorial, you’ll configure an Apache webserver as a reverse proxy for pgAdmin4. This webserver allows you to access pgAdmin4 from any computer or device on your local network by simply browsing the pgAdmin4 URL.
In this case, Apache is a built-in web server for the pgAdmin package, which comes with its own webserver called WSGI when you install pgAdmin4.
To configure an Apache web server, you’ll use a web setup script provided by the pgAdmin4 package. This script configures a virtual host on your Apache server that proxies requests made to the pgAdmin4 URL to the localhost where pgAdmin4 is running.
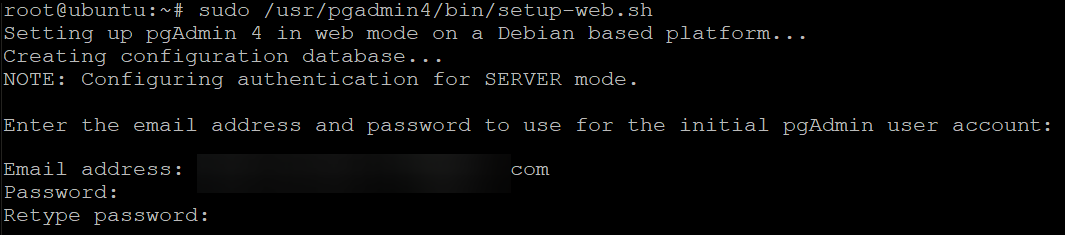
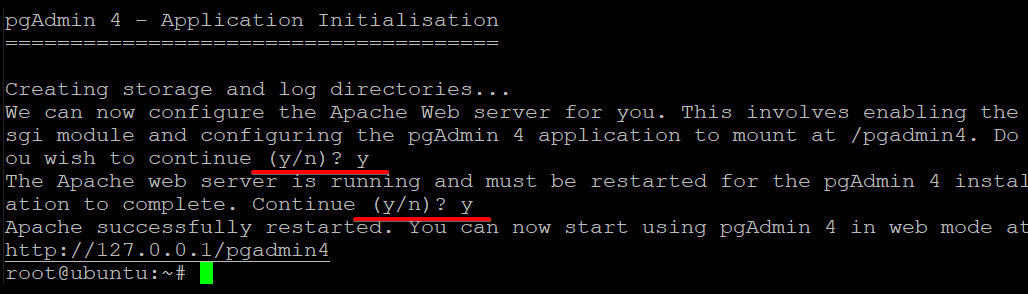
1. Run the below command to use the web setup script (setup-web.sh) to configure pgAdmin4 with Apache.
sudo /usr/pgadmin4/bin/setup-web.shThe web setup script will prompt you for a few configuration options:
- An email address you want to use as the default login for your new pgAdmin4 installation.
- A password for your login email address.
2. After setting your email and password, press the Enter key to start Apache and configure your pgAdmin4 virtual host.
3. Lastly, press y and hit Enter (twice) to restart Apache and complete the process. The script will run for a few minutes as it configures your Apache server with a new reverse proxy for pgAdmin4.
Accessing the pgAdmin4 Web Interface
If you prefer a GUI version for managing your web server, pgAdmin4’s web interface is what you need. You can access the pgAdmin4 web interface via your favorite web browser.
1. Open your web browser and navigate to your server’s domain name (or IP address), followed by /pgadmin4, as shown below, to access the pgAdmin4 web interface.
For example: http://isexample.com/pgadmin4
If your connection to your domain name works, you’ll get the pgAdmin4 login page (step two).
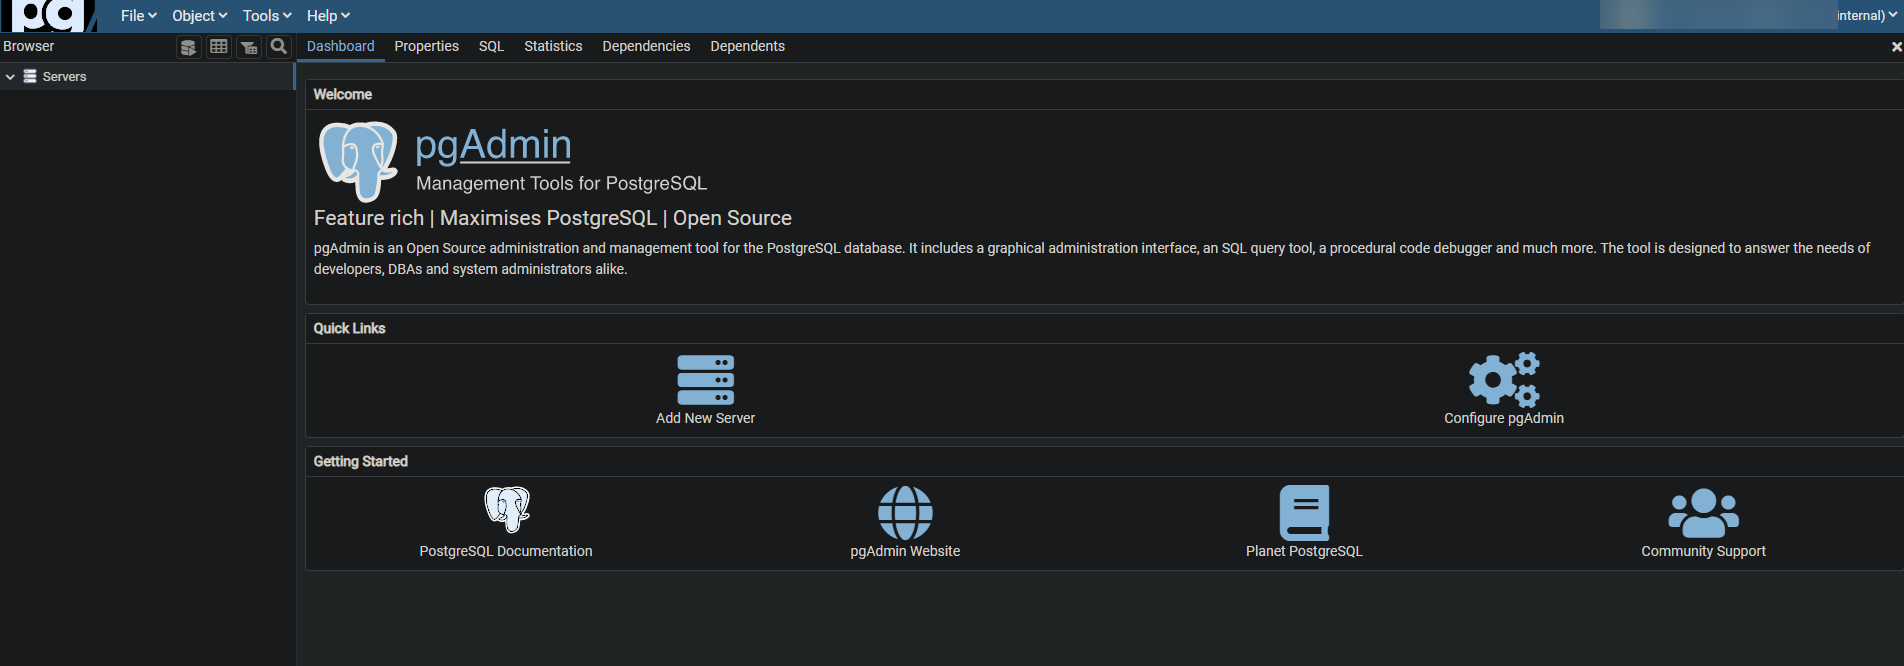
2. On the pgAdmin4 login page, provide the email and password you set in step one of the “Configuring an Apache Web Server” section, and click the Login button to log in to pgAdmin.

Once logged in, you’ll get to the pgAdmin dashboard, as shown below.
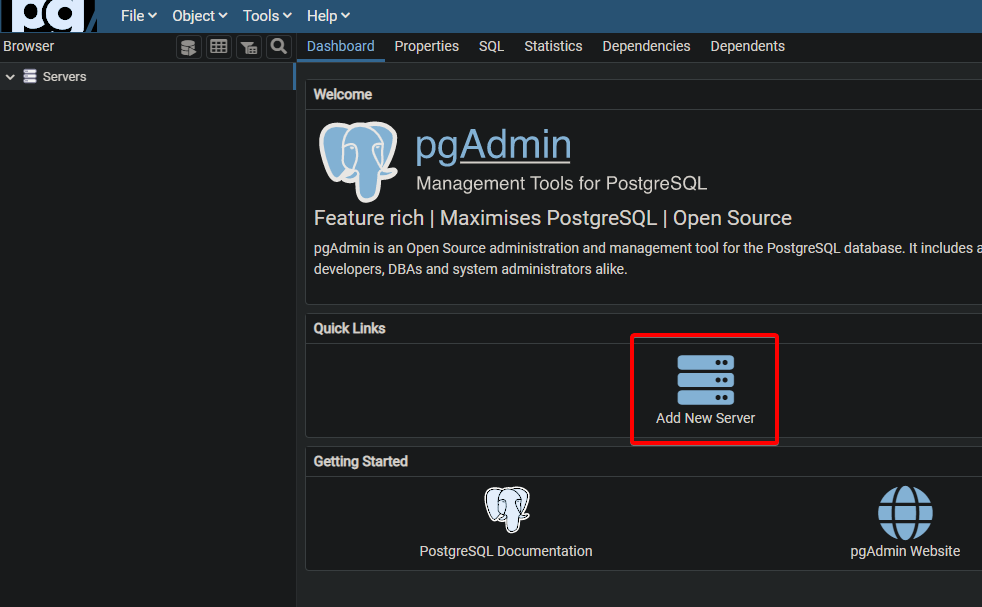
3. Click on Add New Server to create a new server connection. You’ll use the new server connection to test out the pgAdmin4 interface and get familiar with the tools and functions available.
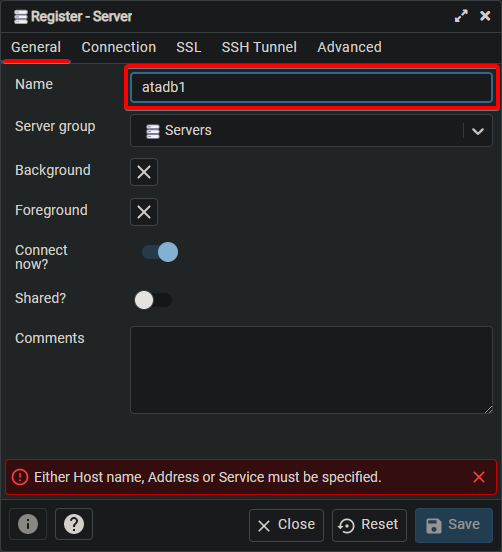
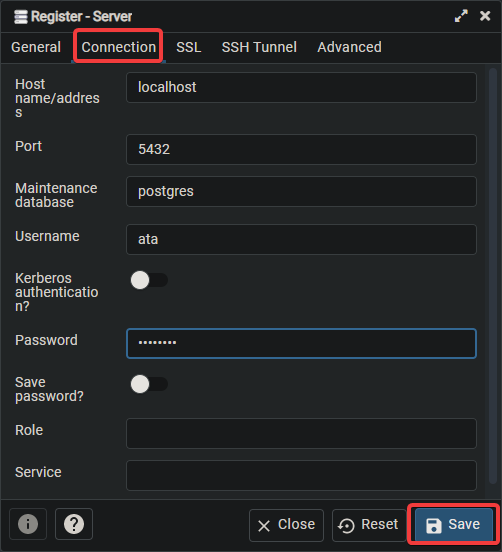
4. On the pop-up window, provide a descriptive name for your server connection under the General tab.
5. Click on the Connections tab and configure the new server connection as follows:
- Hostname/address – Enter localhost since you’ll connect to the PostgreSQL database server running on the same Ubuntu server.
- Port – Leave the port value as default. But set the appropriate value if you use a non-default port for your Postgres server instead.
- Maintenance database – Enter postgres since it’s the default database for your Postgres installations.
- Username and Password – Enter the database username (ata) and password (pa$$word) you set in step two of the “Creating a PostgreSQL Database” section.
- Keep all other settings as default, and click the Save button to save and apply the connection details.
6. Finally, click on the newly-added server connection on the Browser panel (left tree-view) to access the Postgres database management console, as shown below.
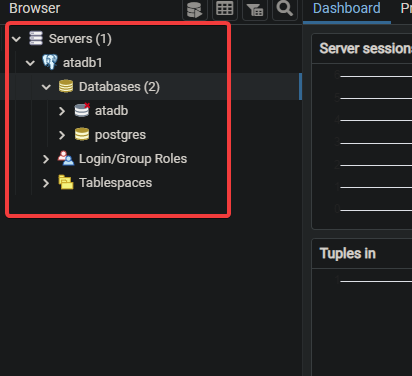
From this point on, you can now manage and monitor your PostgreSQL databases using the pgAdmin4 dashboard. Familiarize yourself with managing databases on the dashboard, which is easier and more efficient than using ad-hoc commands or a command-line interface alone.

Conclusion
This tutorial walked you through installing and configuring pgAdmin4 on an Ubuntu server. You’ve also set up a reverse proxy for the pgAdmin4 web interface accessible by domain name or IP address. And you can now confidently create and connect to PostgreSQL database servers using the pgAdmin4 dashboard.
With the intuitive interface, streamlined workflows, and comprehensive functionality, pgAdmin4 allows you to manage your databases easily and create custom queries, reports, etc. Whether you are new to working with PostgreSQL or a seasoned pro, pgAdmin4 is the perfect tool for managing your databases.
This tutorial is just a start – keep exploring pgAdmin4 to discover all its powerful features and capabilities for managing your PostgreSQL databases. Why not start with managing cluster objects and backing up and restoring databases?


