


Are you planning to install PostgreSQL on a Ubuntu server and are not sure where to start? Look no further as you’re in luck. In this tutorial, you’ll learn the different ways to install a PostgreSQL Ubuntu server and perform basic security configurations to help you get started.
Keep reading, and you’ll be running a PostgreSQL server in no time!
Prerequisites
This tutorial will be a hands-on demonstration. If you’d like to follow along, be sure you have the following.
- An Ubuntu server. This tutorial uses Ubuntu 20.04.
- A non-root user account with sudo privileges.
Install PostgreSQL on a Ubuntu
Starting on a fresh Ubuntu server installation, you can install PostgreSQL in two ways. Which way you choose depends on whether you favor convenience (fewer steps) or making sure you have the latest version.
Method 1: Install PostgreSQL on a Ubuntu (from Ubuntu Repository)
By default, Ubuntu’s repositories contain Postgres packages, which means you can install PostgreSQL Ubuntu packages using the Advanced Package Tool (APT).
The Postgres packages in the Ubuntu repositories might not always be the latest versions. If you prefer to install the latest version instead, skip to Method 2.
1. First, open a terminal window on your computer and SSH into your Ubuntu server.
2. Next, run the below command to update the package list on your Ubuntu server.
sudo apt update -y3. Install the PostgreSQL packages by executing the below command. This command will also install the postgresql-contrib (additional Postgres features) and postgresql-client (Postgres CLI).
sudo apt install -y postgresql postgresql-contrib postgresql-client4. After the installation, verify the Postgres installation status by running the below command.
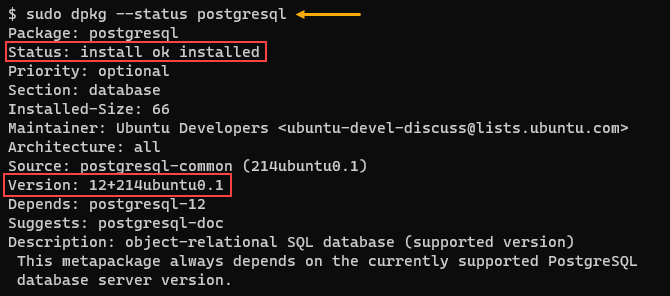
sudo dpkg --status postgresqlAs you can see below, the latest version installed from the Ubuntu repository as of this writing is version 12.
Method 2: Install PostgreSQL on Ubuntu (from the Official Repository)
Installing PostgreSQL from the official repository ensures that you’re getting the latest version. But, this installation method requires more steps when compared to installing with APT.
1. First, open a terminal window on your computer and SSH into your Ubuntu server.
2. Run the following command to create a file named /etc/apt/sources.list.d/pgdg.list. This file contains PostgreSQL’s official repository’s address specific to your Ubuntu server version.
sudo sh -c 'echo "deb http://apt.postgresql.org/pub/repos/apt $(lsb_release -cs)-pgdg main" > /etc/apt/sources.list.d/pgdg.list'3. Next, run the below command add the PostgreSQL GPG key to your package manager. APT will use this key to verify the authenticity of the packages in the repository.
wget --quiet -O - https://www.postgresql.org/media/keys/ACCC4CF8.asc | sudo apt-key add -You will see an OK response if adding the key was successful.

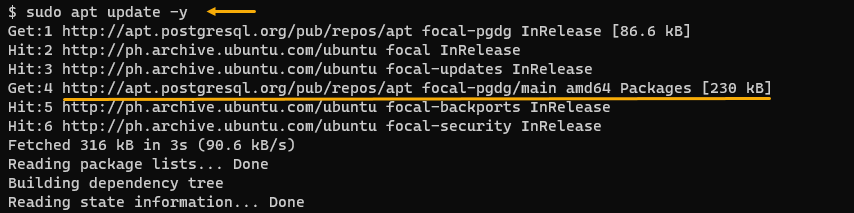
4. Now, update the package lists, so that apt knows where to find the official PostgreSQL packages.
sudo apt update -yAs you can see below, the command now includes PostgreSQL’s official repository’s address when checking for packages.
5. Install PostgreSQL on Ubuntu by running the following command. Wait for the installation to complete.
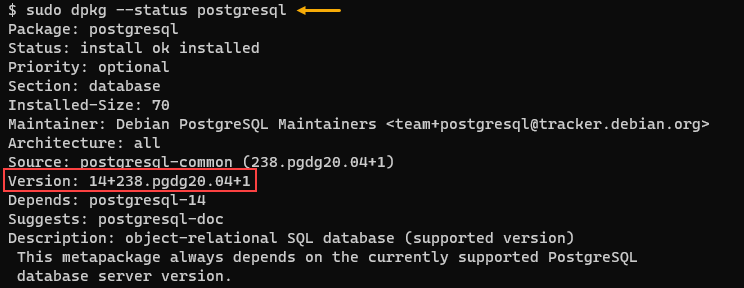
sudo apt install -y postgresql postgresql-contrib postgresql-client6. Confirm the PostgreSQL version you installed from the official repository by running the below command.
sudo dpkg --status postgresqlAs you can see below, the version from the official repository is version 14 as of this writing.
Starting and Verifying the PostgreSQL Service
Once the installation completes, run the below systemctl command to start the PostgreSQL service.
sudo systemctl start postgresql.service
Finally, verify the PostgreSQL status by running the below command.
sudo systemctl status postgresql.service
The service status should be active, as shown in the image below.

Securing the Default PostgreSQL User and Enabling Password Encryption
The PostgreSQL installation creates a default user account called postgres that has complete administrative access to PostgreSQL. But, this special account does not have a password. Any user who can log in to the Ubuntu server can access PostgreSQL as the postgres user without providing a password.
Considering that the postgres account is unprotected, the first action you should take is to set a new password. To do so, proceed as below.
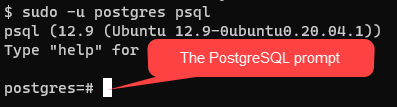
1. Log in to the PostgreSQL shell (psql) by running the below command.
sudo -u postgres psqlAs you can see below, any user who can log in to the Ubuntu server can also access the PostgreSQL database without providing a password.
2. Run the following command at the prompt to initiate a password change. Provide a strong password of your choice and press Enter.
\password
3. After setting the new password, type \q and press Enter to exit the psql shell.
4. By default, PostgreSQL sends passwords in plain text, which can be a security risk. To rectify this potential attack vector, change the PostgreSQL password authentication method to a secured one, such as md5.
Open the /etc/postgresql/12/main/pg_hba.conf file in nano for editing. This file is the main configuration file for PostgreSQL’s authentication methods.
sudo nano /etc/postgresql/12/main/pg_hba.conf5. Find the line that reads as the below.
# Database administrative login by Unix domain socket
local   all             postgres                                peer
Once you’ve located the line, replace the word peer with md5. After editing the line, your file should now look like the below image. Lastly, save the file and exit the editor.

The md5 authentication method uses a message-digest algorithm to encrypt the password before sending it to the server.
6. Restart the PostgreSQL server for the changes to take effect.
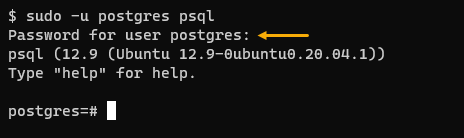
sudo systemctl restart postgresql7. Reconnect to the PostgreSQL server as the postgres user.
sudo -u postgres psqlEnter the password at the prompt and press Enter.
Creating and Deleting a PostgreSQL Database
Now that you have installed and configured your PostgreSQL server, you can now start creating a database. After all, what’s an RDBMS without a database? Follow the below steps to test your server by creating and deleting a database.
1. Log in to the PostgreSQL shell (psql) if you haven’t already.
2. Run the following command to create a new database named ata_db.
Refer to the PostgreSQL documentation to learn more about the database and the different data types.
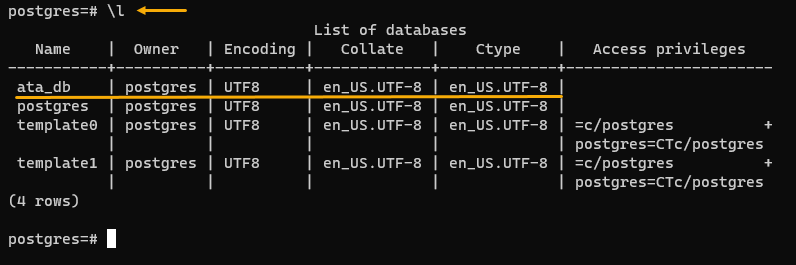
CREATE DATABASE ata_db;3. Next, confirm that you’ve successfully created the database by listing all available databases on the server.
\lAs you can see below, the new database named ata_db you created in the previous step now exists in the server.
4. Run the following command to connect to the ata_db database.
\c ata_db;The below image confirms that connecting to the new database was successful. You can see a status message saying to which database you connected and with which user account.

You can now create tables and perform the create, read, update, and delete (CRUD) actions on the database.
5. If eventually, you do not need the database anymore and need to delete it, run the following commands in psql to delete the database.
The first line disconnects from the ata_db database by switching the acting connection to the default postgres database. You cannot delete a database if it is open.
The second line deletes the database.
\c postgres
DROP DATABASE ata_db;
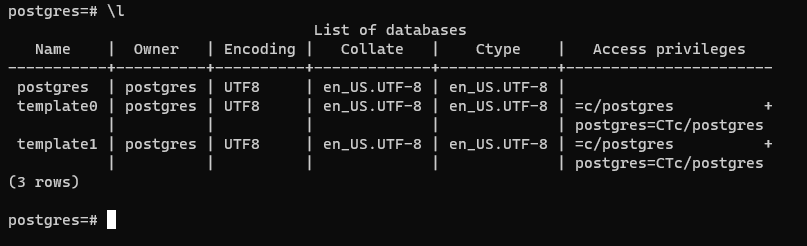
6. Finally, list all of the databases on your PostgreSQL server again. You will see that the ata_db database no longer exists, as shown below.
\lYou will see that the ata_db database no longer exists, as shown below.
Conclusion
In this tutorial, you have learned how to install PostgreSQL on a Ubuntu server and configure basic security settings. You have also learned how to create, connect, and delete a new database on your PostgreSQL server.
Keep in mind that what you’ve learned here is just the basics. There are more you can do with PostgreSQL, such as configuring SSL certificate-based authentication, creating new database users, and setting up replication.
With this new knowledge, you are now in a better position to use PostgreSQL in your applications.


