


Are you tired of managing dozens of your Ansible playbooks and hosts? But why make things difficult when you can use Ansible Tower? Ansible Tower is designed to make running playbooks and managing hosts easier with Ansible.
In this tutorial, you will learn how to install, configure, and use the Ansible Tower product to your advantage.
Level up how you manage Ansible with Ansible Tower today!
Prerequisites
This tutorial comprises step-by-step instructions. If you’d like to follow along, be sure you have the following in place:
- An Ansible controller host – This tutorial uses Ansible v2.11.7 on a Red Hat Enterprise Linux 8.4 machine.
- Python v3.6 or later installed on your Ansible controller host machine. This tutorial uses Python v3.8.10.
Installing Ansible Tower and Managing DB Credentials
Ansible Tower lets you manage Ansible in an interactive web interface, but you’ll first have to install Ansible Tower on your machine and manage its credentials to access it.
There are two ways to install Ansible Tower:
- Installing on a single machine.
- Installing in Multi-Machine Cluster with an externally managed database.
But in this tutorial, you’ll install Ansible Tower on a single Ubuntu machine:
1. Connect to your Ansible controller on a Linux host with your favorite SSH client.
2. Next, run the following commands to update proper sources and install dependent packages (epel-release curl).
sudo yum update
sudo yum -y install epel-release curl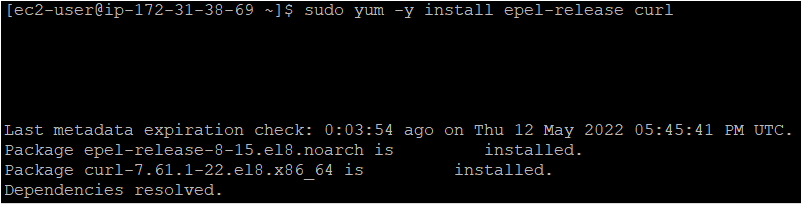
The apt or apt-get command installs the packages from apt software repositories configured in Ubuntu.
3. Create a directory named ~/ansible_tower_demo and switch to that directory. This directory will hold this tutorial’s installation files
# Create the ~/ansible_tower_demo directory
mkdir ~/ansible_tower_demo
# Change the working directory
cd ~/ansible_tower_demo
4. Now, run the below yum install command to install the PostgreSQL database where Ansible Tower can store data.
sudo yum install postgresql postgresql-contrib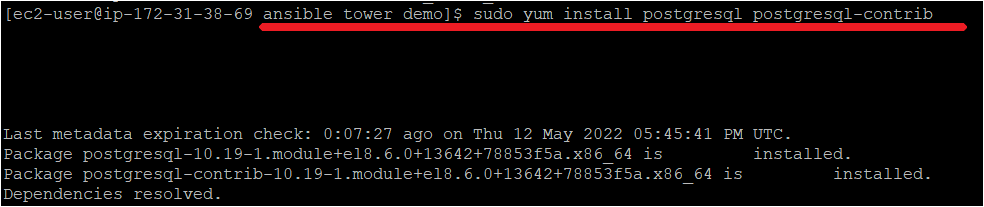
5. Execute the curl command below to download the Ansible Tower package from the Ansible release site. At the time of writing, the latest release is 3.7.3-1.
This command downloads a .tar file of Ansible Tower on your machine, which you’ll unzip in the following step.
curl -O https://releases.ansible.com/ansible-tower/setup/ansible-tower-setup-3.7.3-1.tar.gz
6. Next, run the following tar command to unzip Ansible Tower’s .tar.gz file you downloaded in step five.
tar xvfz ansible-tower-setup-3.7.3-1.tar.gz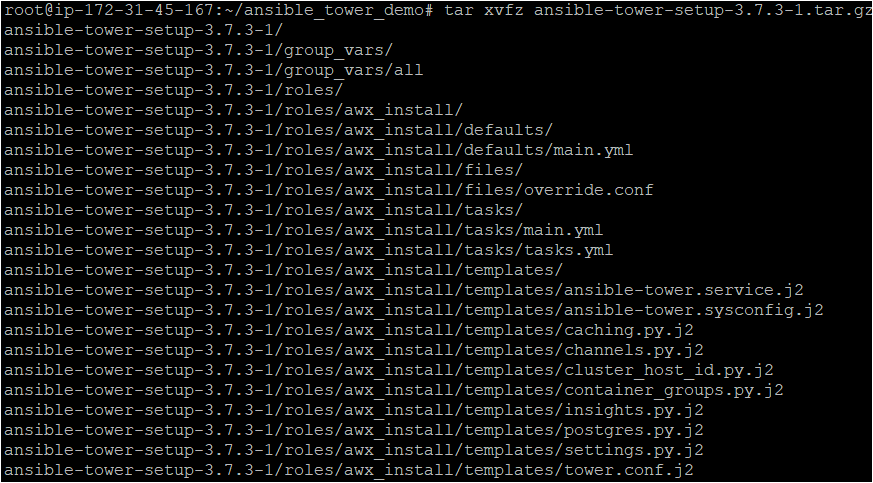
7. After unzipping the file, run the ls command to verify the package.
lsIf you successfully unzipped the package, you’ll see the Ansible Tower directory below (ansible-tower-setup-3.7.3.1).

8. Run each command below to change your current directory to the Ansible Tower setup package directory and open the inventory file in a text editor (vi).
cd ansible-tower-setup-3.7.3-1
vi inventory
Change the values in the inventory file as follows.
[tower]
localhost ansible_connection=local
[database]
[all:vars]
# Adding the admin password of the Ansible Tower
admin_password='password'
# Adding the Database name which will store data of the Ansible Tower
pg_database='awx'
# Adding the Database username
pg_username='admin'
# Adding the Database password of the Ansible Tower
pg_password='password'
# Adding the SSL Mode of the Database to 'verify-full' for client-side enforced SSL
pg_sslmode='prefer'
9. Finally, run the setup shell script (setup.sh) to start the Ansible Tower in the same directory (./). The setup takes at least two-three minutes to complete.
./setup.sh
As you can see below, the Ansible Tower setup has been completed.

Configuring the Ansible Tower
You’ve successfully installed Ansible Tower, but you still have to configure the correct passwords and configurations before using Ansible Tower.
To configure Ansible Tower, you’ll need a license, and a free trial license will suffice:
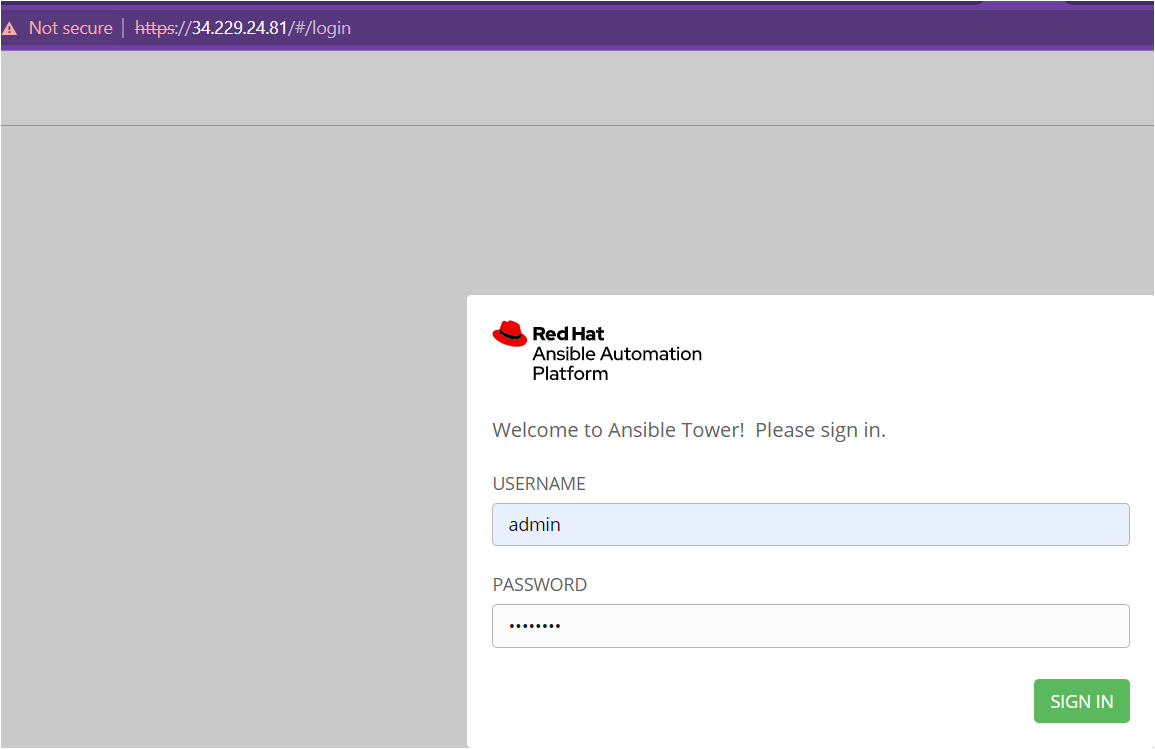
1. Open your favorite web browser and navigate to https://Tower-Server-Name/. Replace Tower-Server-Name with your server’s IP address. You’ll get to the Ansible Tower login page if all goes well, as shown below.
Provide your username (admin) and password (password), which you configured in step eight of the “Installing Ansible Tower and Managing DB Credentials” section, and click on SIGN IN.
After signing in, your browser redirects to the TOWER LICENSE page (step two).
Ansible Tower automatically installs a self-signed certificate for HTTPS communication, which may require acceptance in your browser.
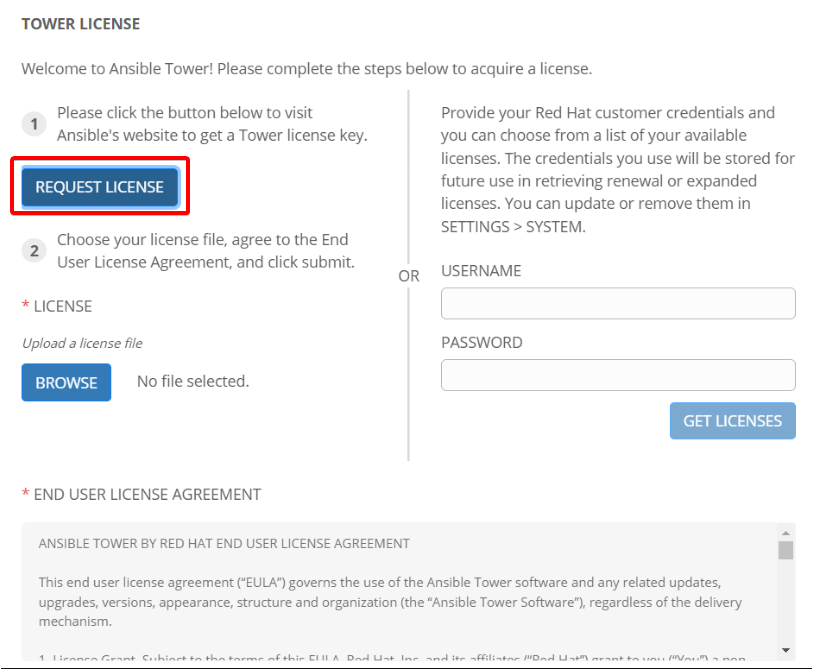
2. On the TOWER LICENSE page, click on the REQUEST LICENSE button to request a license. Your browser redirects to the Red Hat Ansible Automation Platform Trial page (step three).
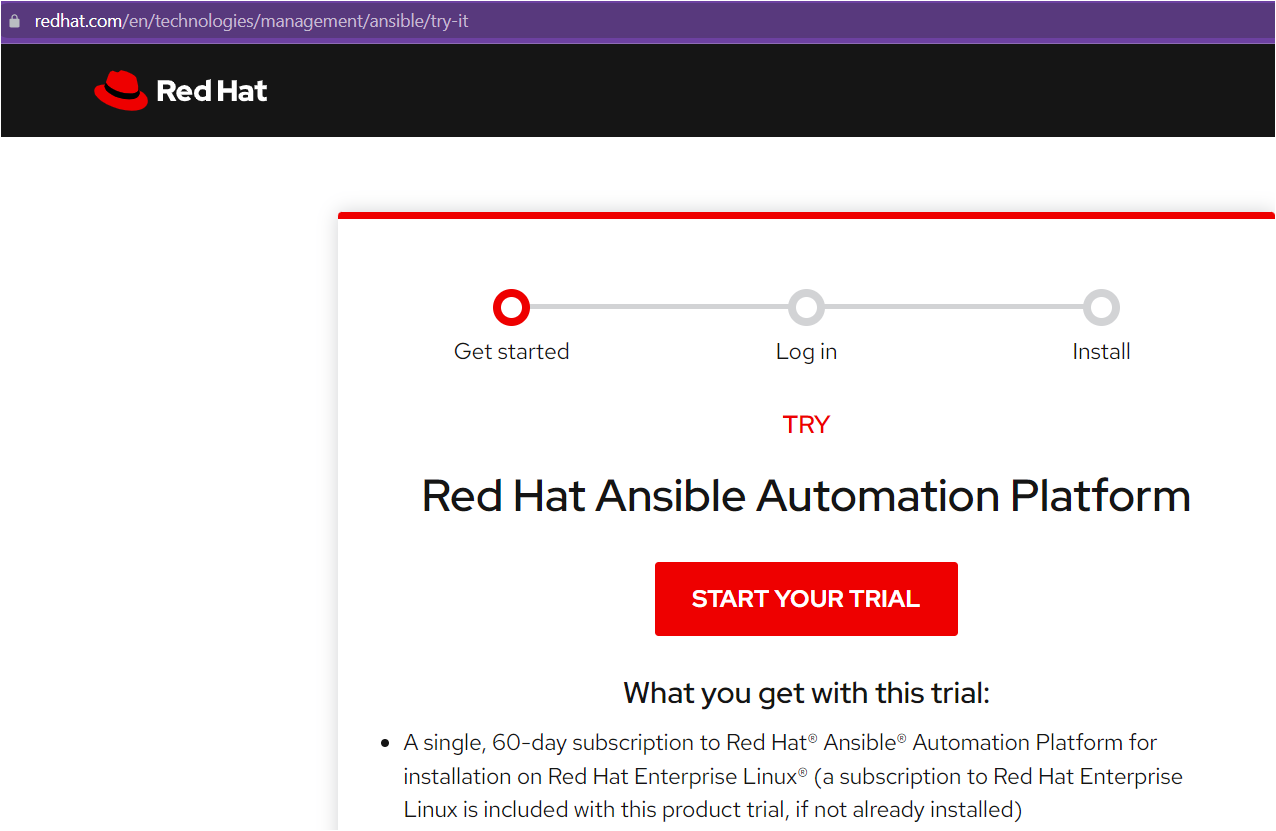
3. Next, click on the START YOUR TRIAL button, as shown below, to start your trial.
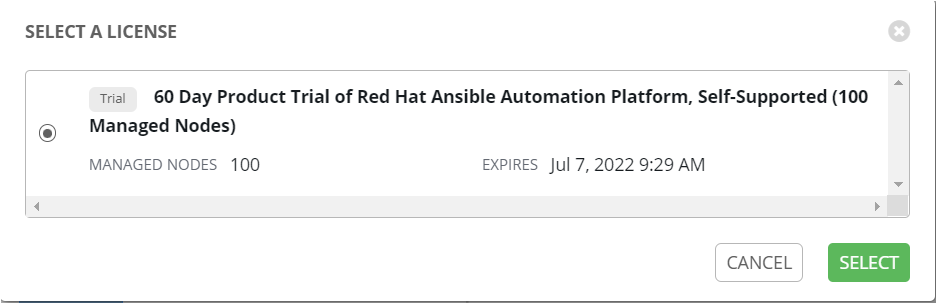
4. Now, enter your Red Hat login/email and password and click Log in, as shown below. You’ll receive a pop-up window where you can choose a license to select (step five).

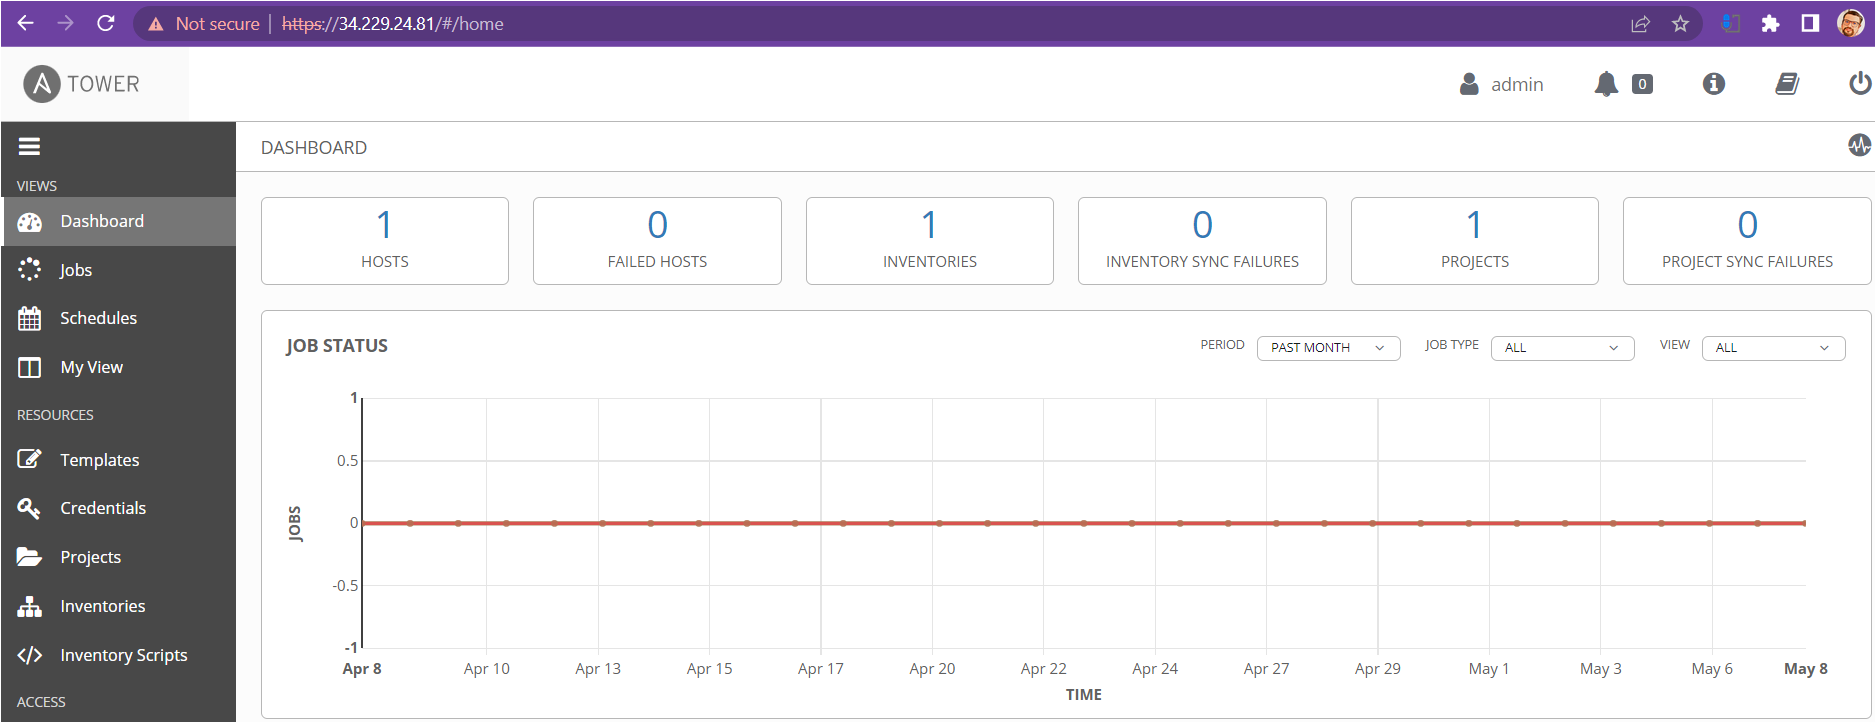
5. Lastly, choose the 60-Day Product Trial, click on the SELECT button, and your Ansible Tower Dashboard will appear.
After selecting a license, you’ll get to the Ansible Tower UI shown below.
Creating and Managing Inventories
After you’ve successfully installed Ansible Tower Dashboard UI, you’re now ready to manage multiple components of Ansible. For starters, you’ll create and manage inventories in the Ansible Tower.
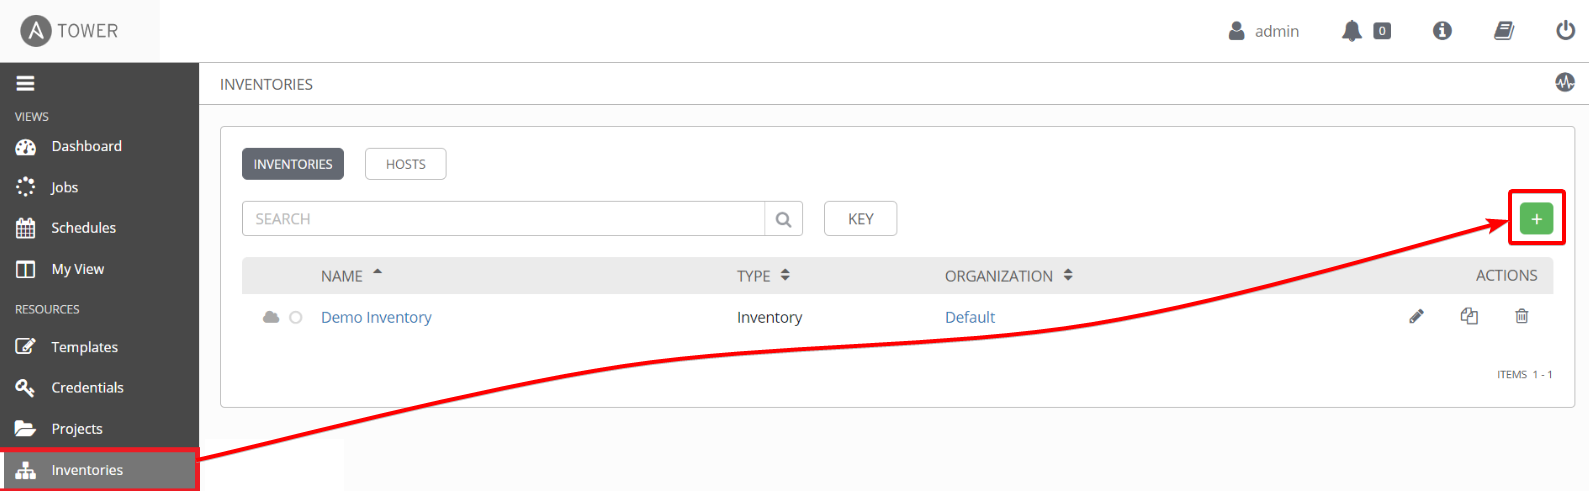
1. On the Ansible Tower Dashboard, click on Inventories to open the inventories list stored in the Ansible Tower.
Ignore the Demo Inventory, and click on the green plus (+) button to add a new inventory.
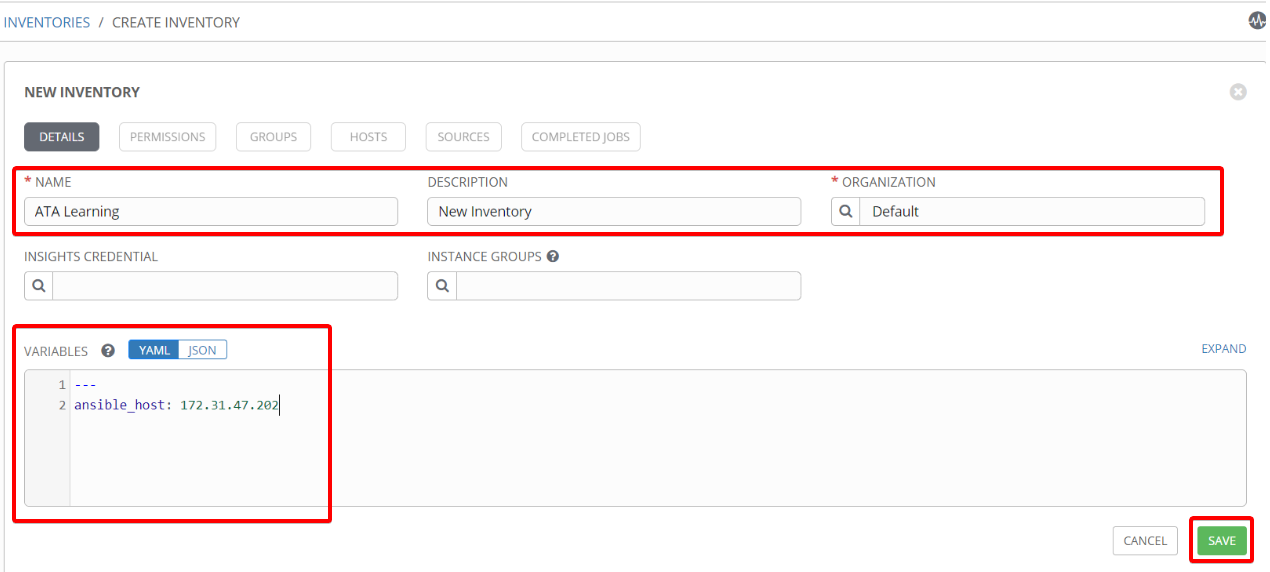
2. Next, on the CREATE INVENTORY page, specify the below parameters and click on the SAVE button (bottom-right) to save the new inventory:
- NAME – ATA Learning (You can provide a different name as you like).
- DESCRIPTION – Describe the inventory, so it’s easy to recognize among many inventories.
- ORGANIZATION – Choose the Default option. Ansible Tower creates a default organization automatically, but you can also create your own.
- VARIABLES – Provide variables in YAML or JSON format.
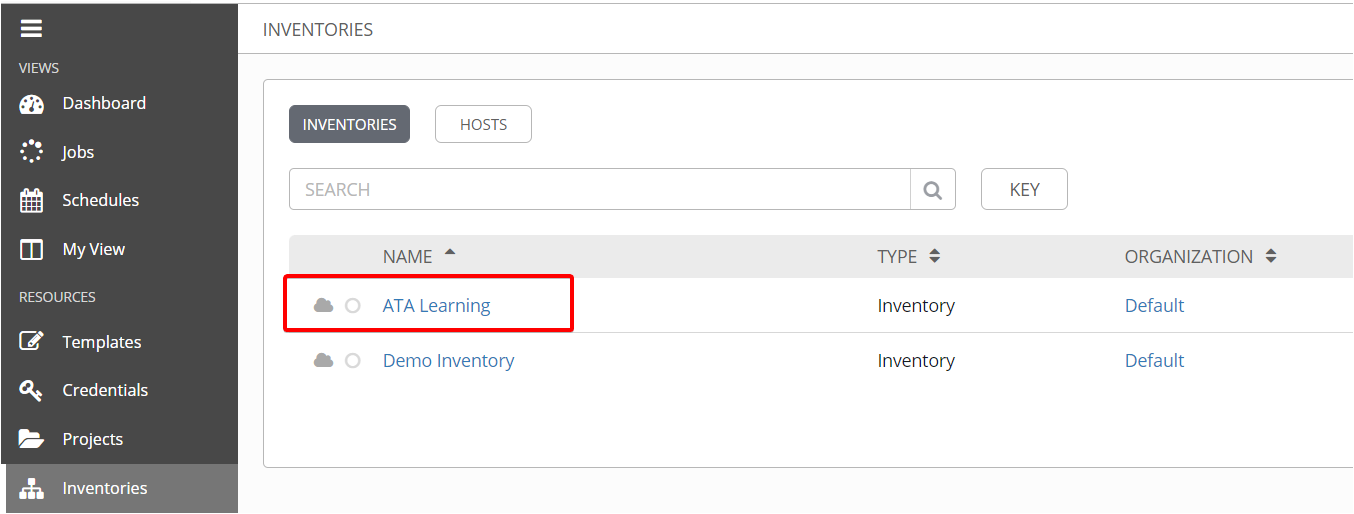
3. Finally, verify the newly-created inventory on the INVENTORIES page shown below.
Creating Users in Ansible Tower
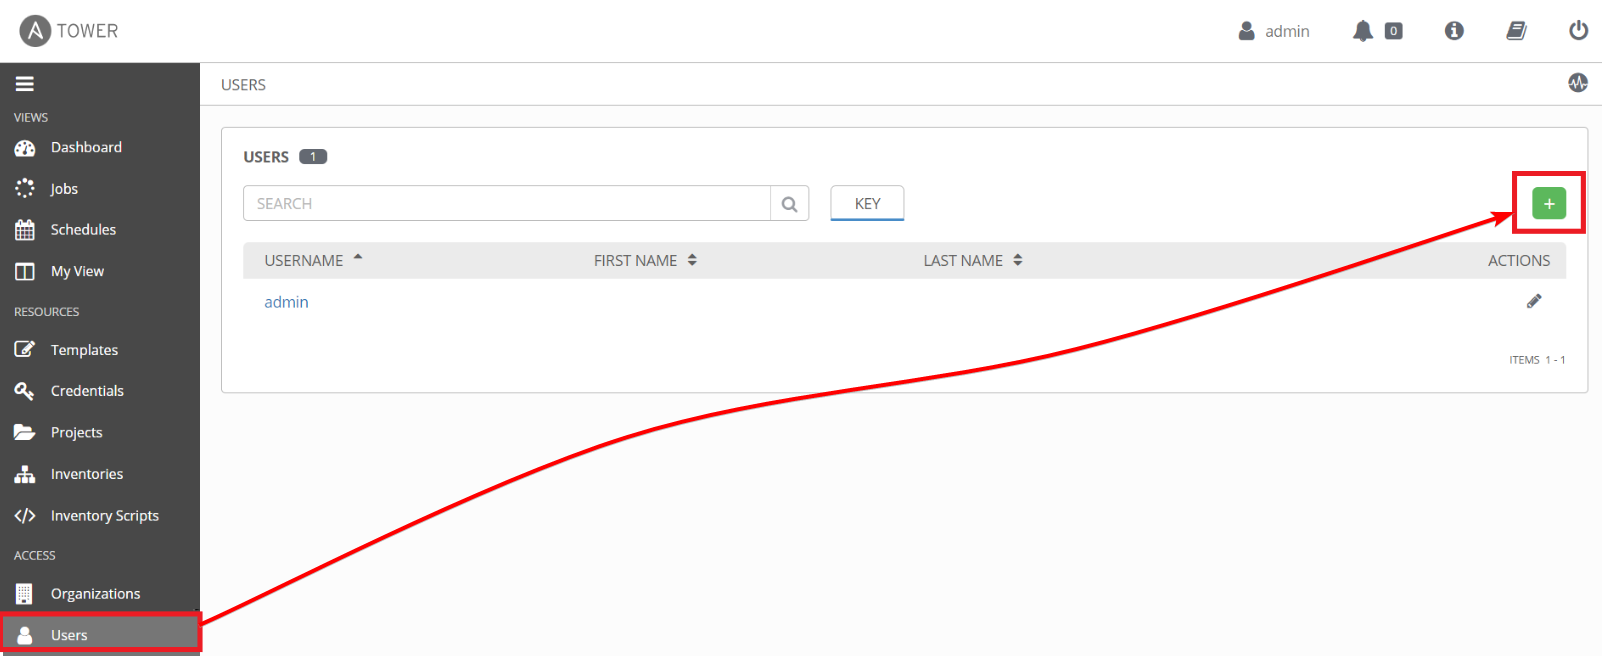
Apart from an administrator (default), do you know how one can access Ansible Tower? By adding users with appropriate permissions and credentials. Adding users is similar to adding inventories, so long as you have access to an administrator user.
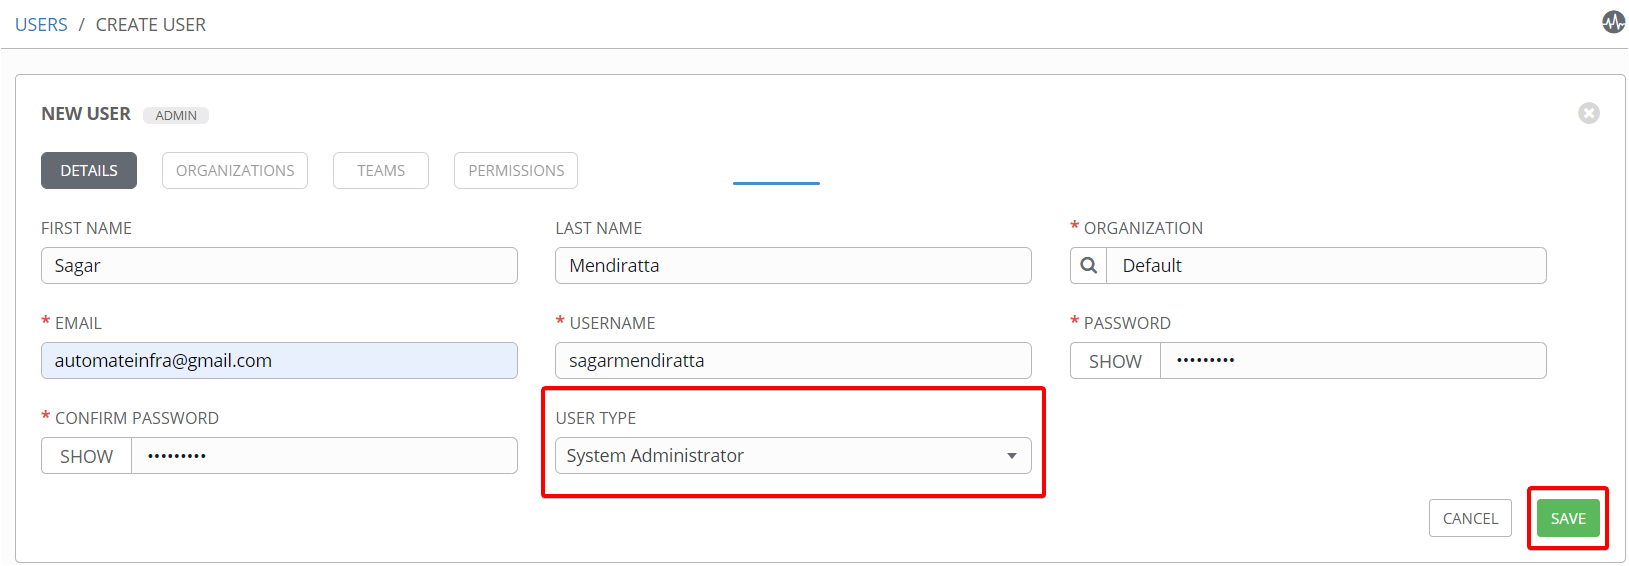
Navigate to the Users tab, and click on the green plus (+) button to create a new user.
Now, provide the required user details like in the image below. Set the user’s permission under USER TYPE, and click on the SAVE button to save the new user.
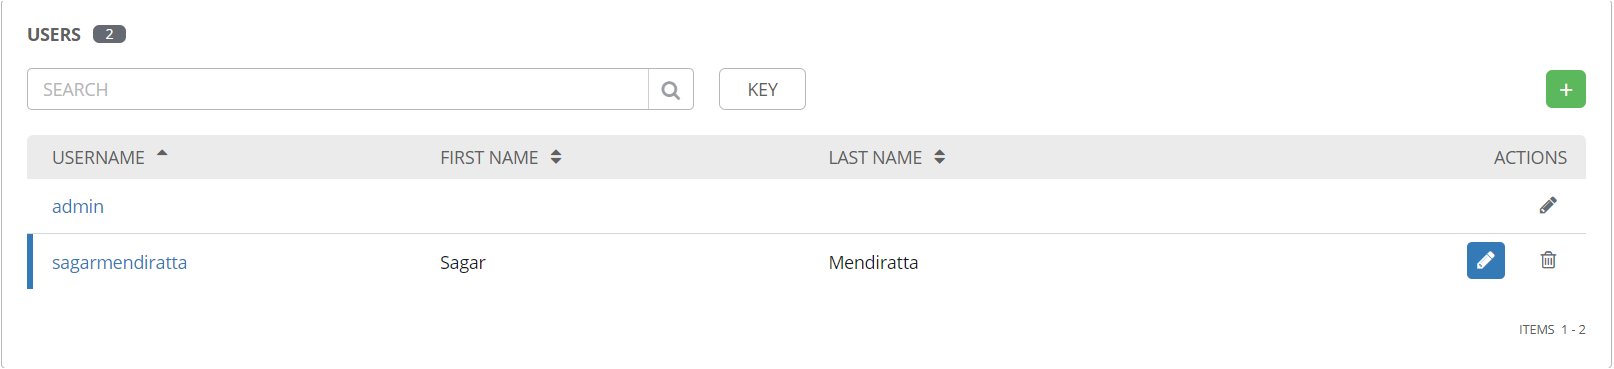
After saving the user details, apart from the admin user, you’ll see the newly-created user in the Users list, as shown below.
Creating and Running a Job
You previously created an inventory (ATA Learning), but right now, it’s just sitting there and is useless unless you call it with a job. A job is an instance of Tower launching an Ansible playbook against an inventory of hosts.
To see how jobs work, create a job in Ansible Tower with the following:
1. Run the commands below to create a playbooks directory within the /var/lib/awx/projects directory.
This directory will contain all the playbooks that you’ll configure in your job in Ansible Tower.
# Create directory
mkdir /var/lib/awx/projects/playbooks
# Change working directory
cd /var/lib/awx/projects/playbooks
2. Next, create a playbook file named ata.yml with your editor in the working directory, and populate the below code to the ata.yml file.
The below Ansible Playbook contains a task to list the directories and files of your current working directory and output it on the screen once the playbook is executed.
---
- name: "Playing with Ansible"
hosts: localhost
connection: local
tasks:
- name: "just execute a ls -lrt command"
shell: "ls -lrt"
register: "output"
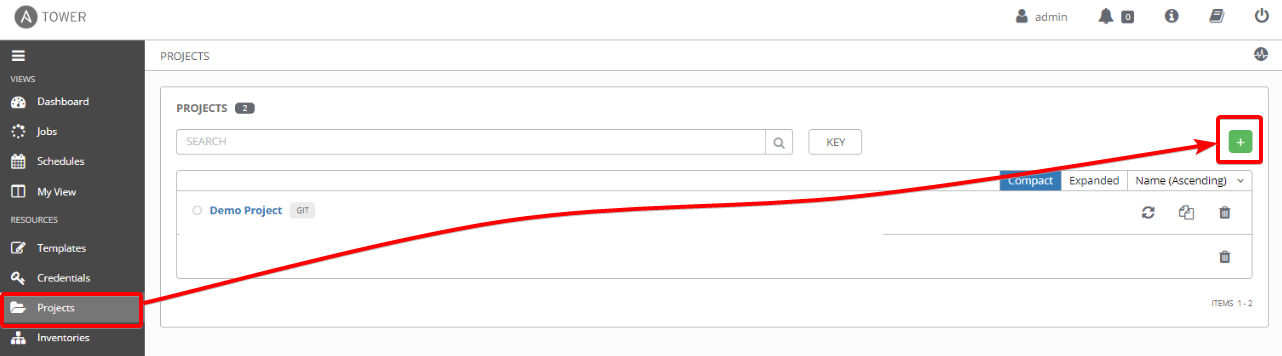
- debug: var=output.stdout_lines3. Click on the Projects tab to access the lists of available projects, then click on the green plus (+) button to create a new project.
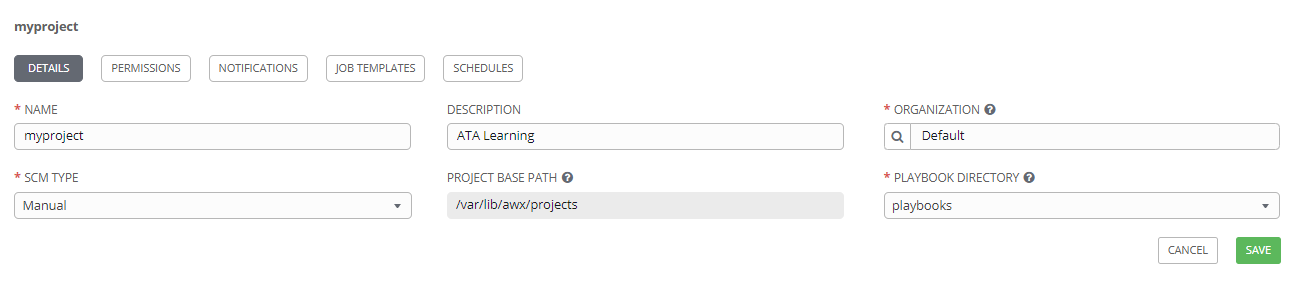
4. Provide the project details with the following, and click on the SAVE button to save the new project:
- NAME – Provide a project name as you like, but this tutorial’s project is named myproject.
- DESCRIPTION – Adding a description is optional, but it helps identify your project from too many.
- SCM TYPE – Set the SCM TYPE to Manual. With this option, you’ll create an Ansible Playbook manually on your Ubuntu machine instead of invoking it from any public or private repository.
- PLAYBOOK DIRECTORY – Set the value to the directory you created inside the /var/lib/awx/projects directory in step one (playbooks).
5. Navigate to Templates in the left sidebar, click on the plus button (+) like as you did in creating a project to add a new job template
Fill up the template form as follows:
- NAME – Set a job name you prefer, but this tutorial’s choice is myjob.
- JOB TYPE – Set the action the job will take (Run).
- INVENTORY – Choose the inventory you created in step two of the “Creating and Managing Inventories” section (ATA Learning).
- PROJECT – Specify the project’s name (myproject) you created in step four.
- PLAYBOOK – Input the playbook file (ata.yml) you created in step two.
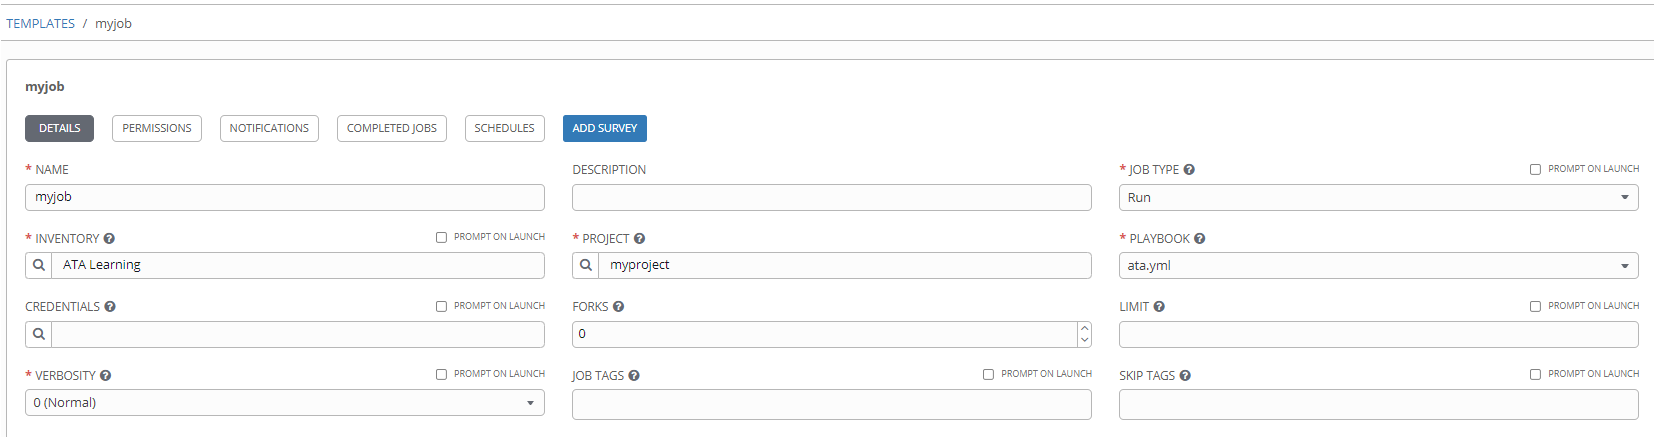
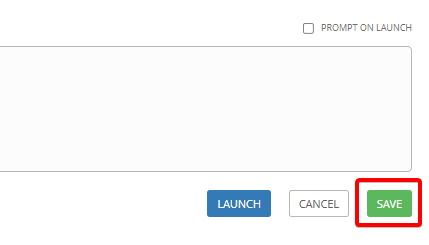
Once you’re happy with the job details, click on the SAVE button (bottom-right) to save the job.
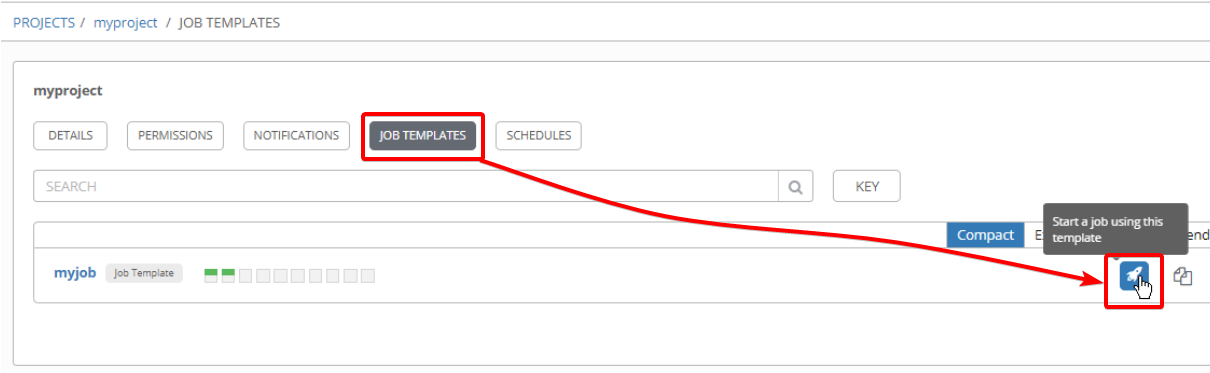
6. Finally, navigate to the JOB TEMPLATES page, and click on the launch button, as shown below, to run the newly-created job.
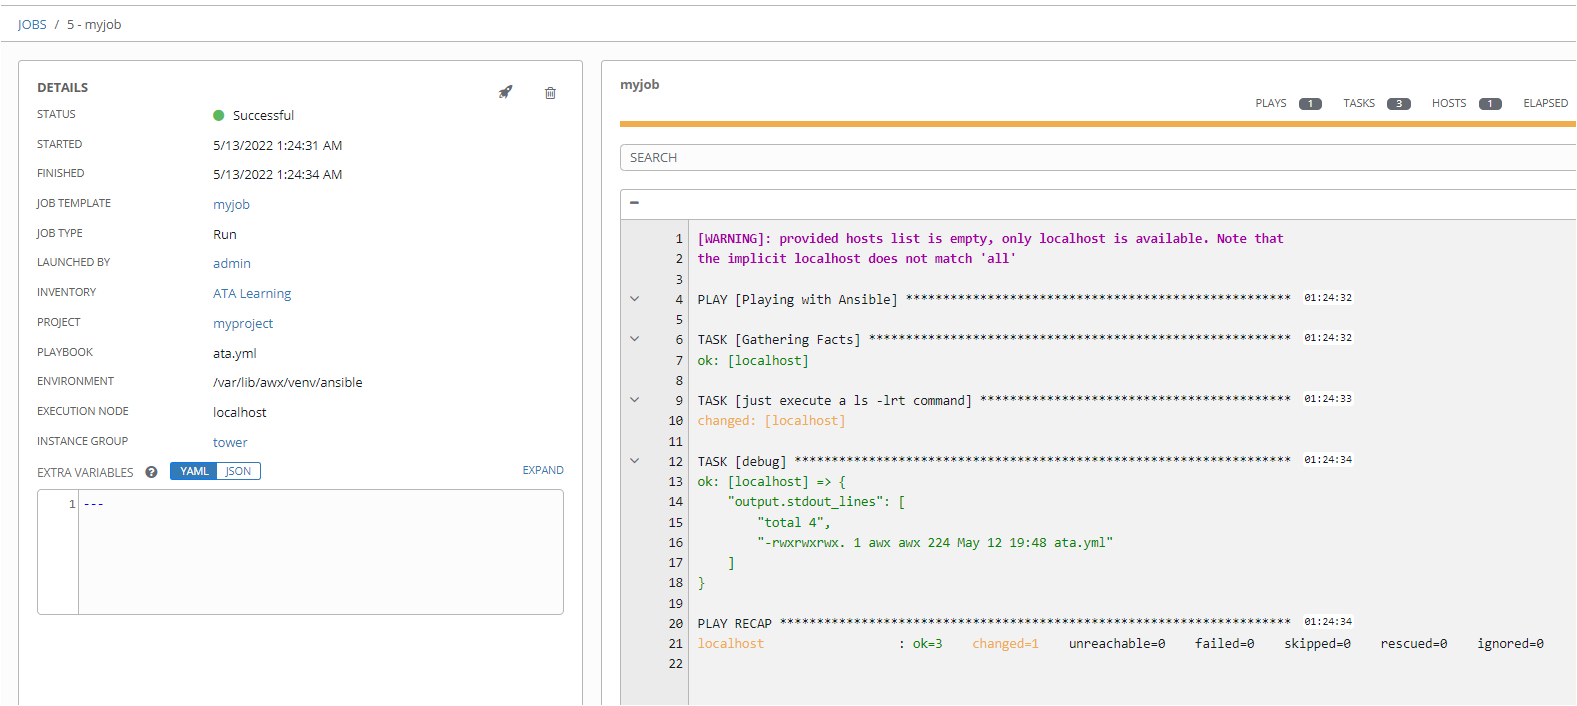
As you can see below, the job ran successfully on localhost and listed all files within the directory specified in the playbook.
Conclusion
In this tutorial, you’ve learned that the Ansible Tower is a great way to manage your Ansible Inventories and Jobs. You’ve also realized the Ansible Tower UI’s exceptional effectiveness in executing playbooks by running jobs.
Now, why not add more control to how you manage your playbooks? Perhaps learn how to work with Ansible when and other conditionals?


