

Tired of the limitations of your current Raspberry Pi OS installation? Upgrade to the versatility and power of Ubuntu on Raspberry Pi!
In this tutorial, you will learn to install Ubuntu on your Raspberry Pi, unlocking a world of possibilities for your projects. Do not let your Pi hold you back any longer.
Read on and take advantage of the full capabilities of this fantastic platform with Ubuntu!
Prerequisites
Before you get started with this tutorial, make sure you have the following in place:
- A Raspberry Pi model 3B or higher – This tutorial uses Raspberry Pi model 4B.
- An SD card (9GB or larger) to install Ubuntu onto.
- A system (a computer, laptop, or mobile device) with an SD card reader to flash the image onto the SD card – This tutorial uses a Windows 10 laptop.
- A Raspberry Pi Imager installed on your system – This tutorial uses Raspberry Pi Imager version 1.7.3.
- A card reader, a display, a power source, an HDMI cable, a keyboard, and a mouse.
Downloading the Ubuntu OS Image
Since you will be installing Ubuntu on your Raspberry Pi, you first need an Ubuntu OS image handy. You must download the official Ubuntu OS image, specifically the latest version of Ubuntu Desktop, which is version 22.10. This version is officially supported on the Raspberry Pi.
The official Ubuntu OS image comes with many pre-installed packages and tools that are useful for working with the Raspberry Pi, like Pi’s hardware and peripherals. This feature ensures you have a stable and reliable operating system once installed.
To download the official Ubuntu OS image, follow these steps:
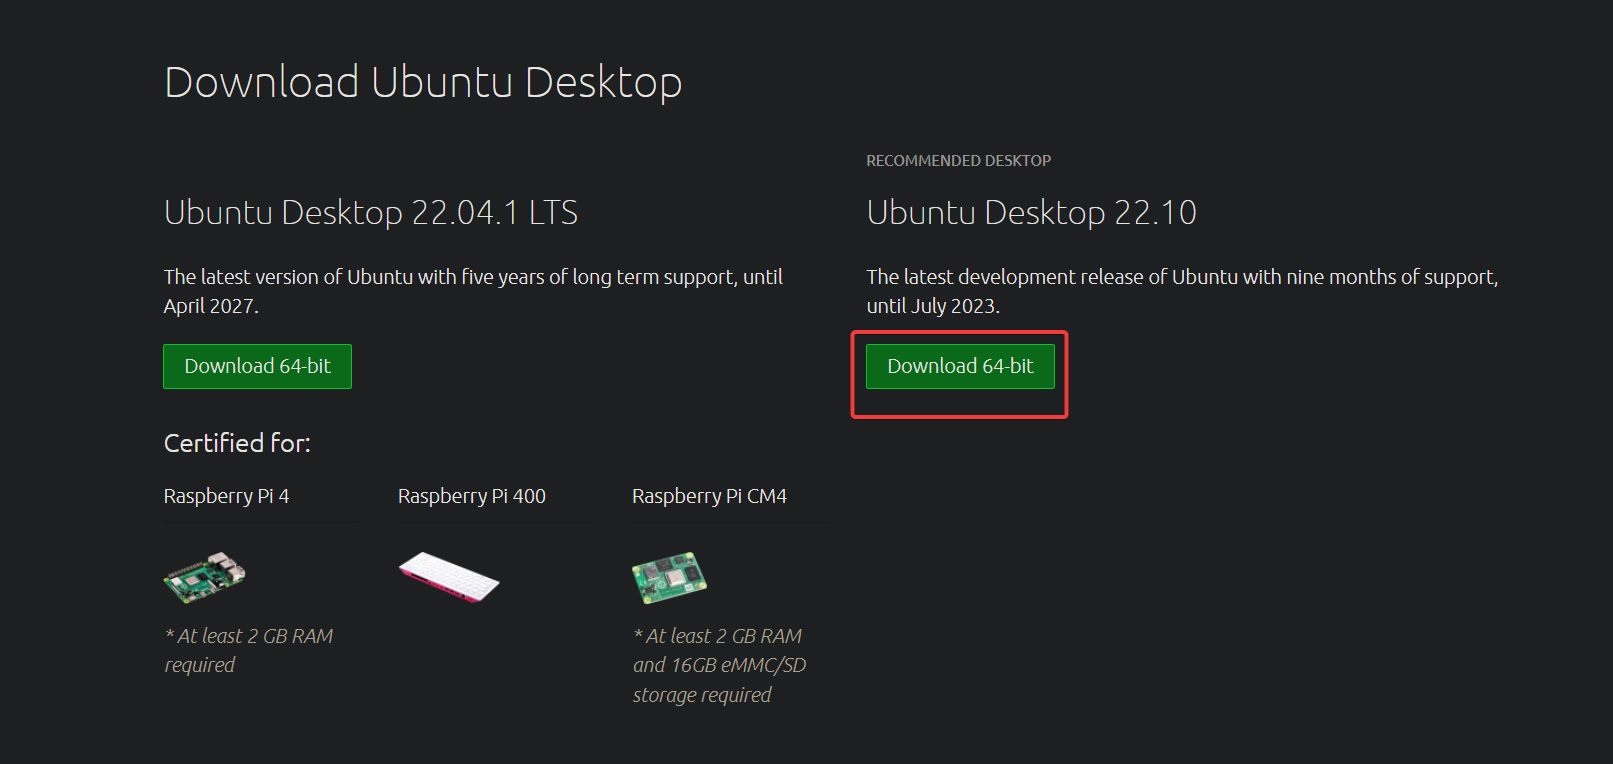
1. Open your favorite web browser, and visit Ubuntu’s OS image download page.
2. Next, click Download 64-bit under Ubuntu Desktop 22.10 to download the OS image.
3. Once downloaded, open a Git Bash terminal in the same folder as the downloaded image file.
4. Now, run the echo command below to verify the integrity of the downloaded file by checking its checksum.
When you download a file, there is always a risk that the file may be corrupted or modified during the download process, either intentionally or accidentally. This command ensures that the file was not corrupted or tampered with during the download process.
echo "c9cf57399a5e3e3a9803740f8107ef52891b7d3ac293106d3257396b75ddf7de *ubuntu-22.10-preinstalled-desktop-arm64+raspi.img.xz" | shasum -a 256 --checkIf the checksums match, you will see an OK response, as shown below, which indicates the file is safe to use.

Flashing the Ubuntu Image Onto the SD Card
When installing an OS, you cannot simply copy the installation files to the device. Instead, you need to write the installation files in a particular way the device can recognize and use to boot up the OS — flashing.
Flashing allows you to create a bootable installation media necessary for installing the OS on a device. But first, back up any data from your SD card before as flashing erases all existing data on the SD card.
To flash an Ubuntu OS image onto your SD card, follow the steps below:
1. Plug the SD card into your Windows system using the card reader.
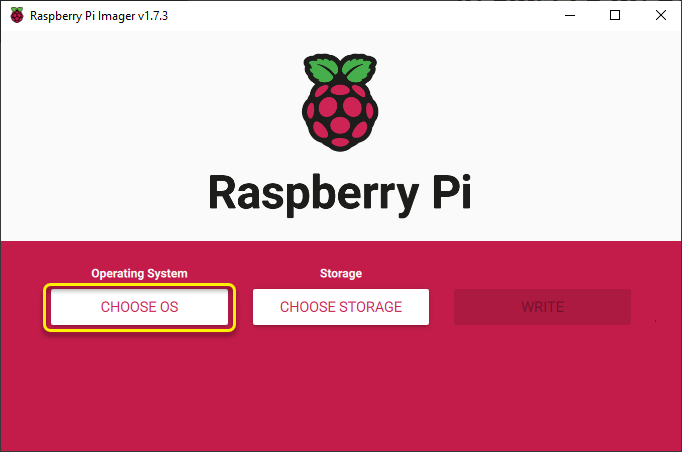
2. Open the Raspberry Pi Imager tool on your system, and select CHOOSE OS.
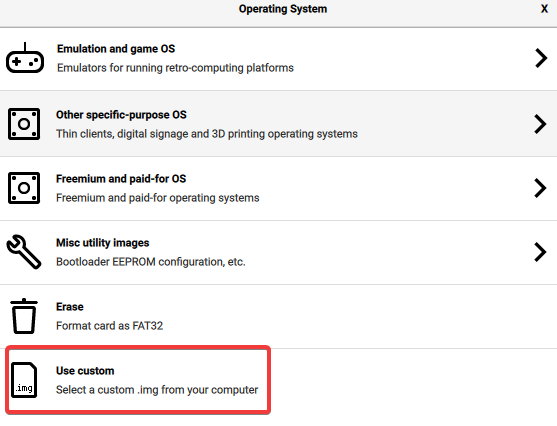
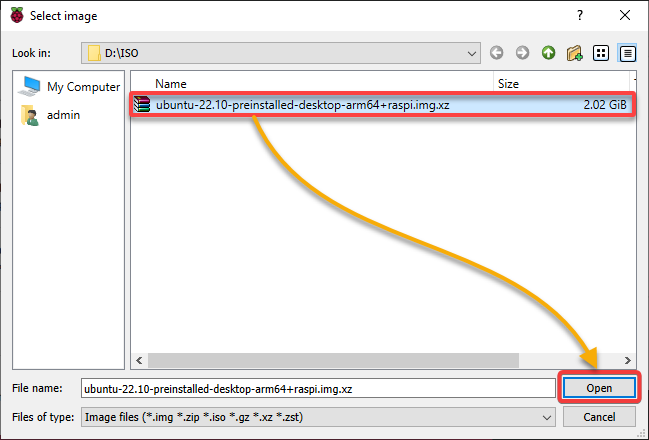
3. On the Operating System window, click the Use custom option, which allows you to select the Ubuntu image file you downloaded earlier.
4. Now, select the Ubuntu image file, and click Open to select it.
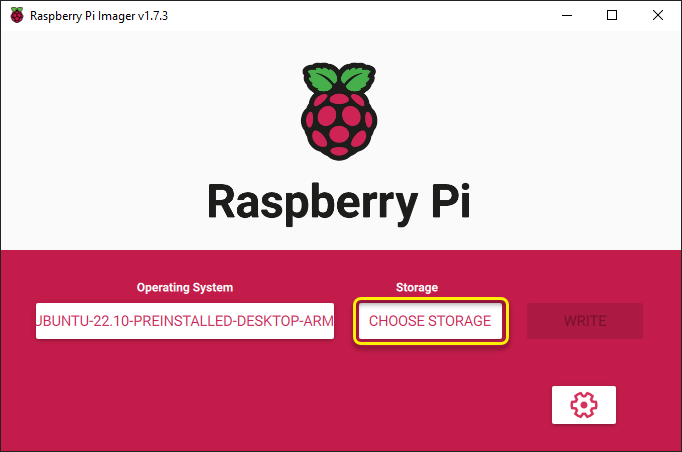
5. Once selected, click CHOOSE STORAGE to choose the destination to write the image onto.
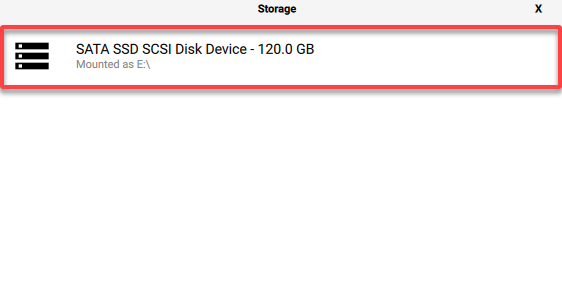
6. Choose your SD card as the destination storage to write the Ubuntu image.
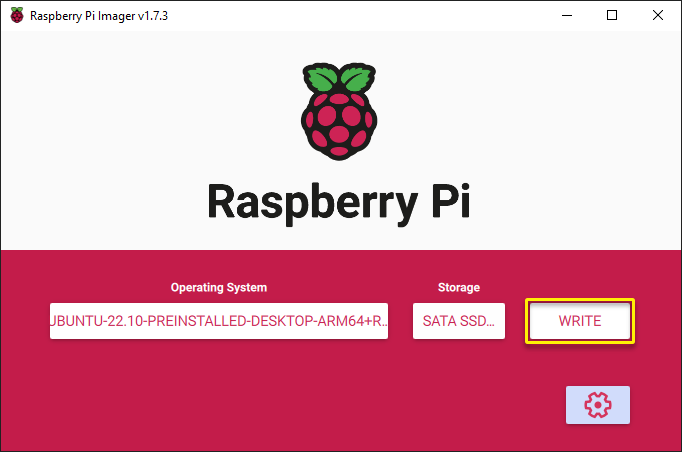
7. Click Write to start flashing the Ubuntu OS image onto your SD card.
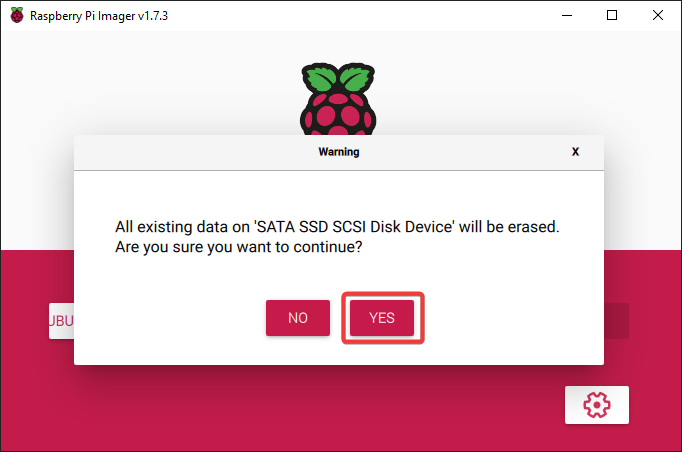
8. When prompted, click Yes to confirm writing the image.
9. Finally, click Continue and remove your SD card from the Windows computer.
Congratulations! You have now successfully flashed Ubuntu onto your Raspberry Pi!

Installing Ubuntu on Raspberry Pi
With the Ubuntu image successfully written onto your SD card, it is time to test the installed image. You will boot up and access your Ubuntu system in your Raspberry Pi.
1. Insert your SD card into your Raspberry Pi.
2. Connect your Raspberry Pi to a power source, such as a charger or a USB port on your computer.
3. Connect your Raspberry Pi to a display via an HDMI cable, then your keyboard and mouse to your Raspberry Pi via USB ports.
4. Now, turn on your display, and the Raspberry Pi should automatically boot up with Ubuntu.
Mind that the first time you boot up your Raspberry Pi with the Ubuntu image, the OS may take a few minutes to set itself up fully.
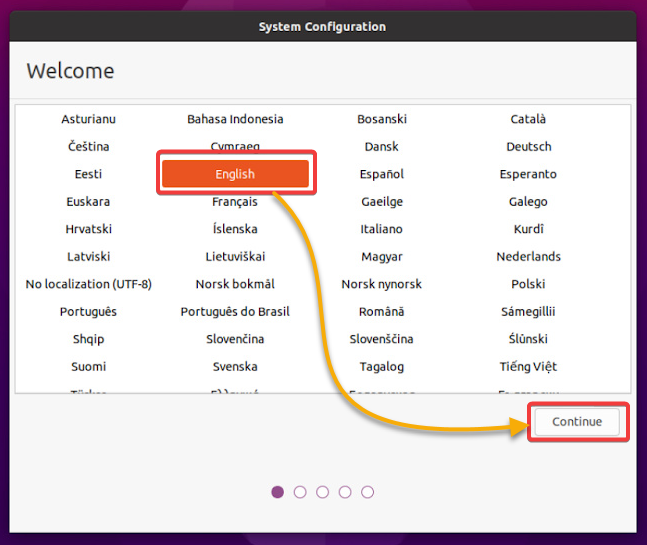
After booting up, you will see a screen similar to the one below with options to select a language.
5. Select your preferred language on the System Configuration window, and click Continue.
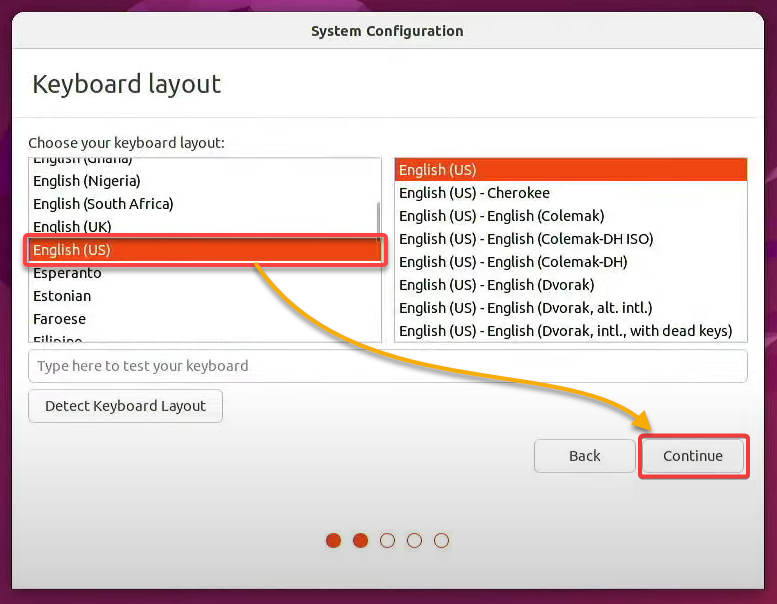
6. Next, select a keyboard layout that matches your physical keyboard, and click Continue. The system will use the keyboard layout you have chosen to interpret your input as you type.
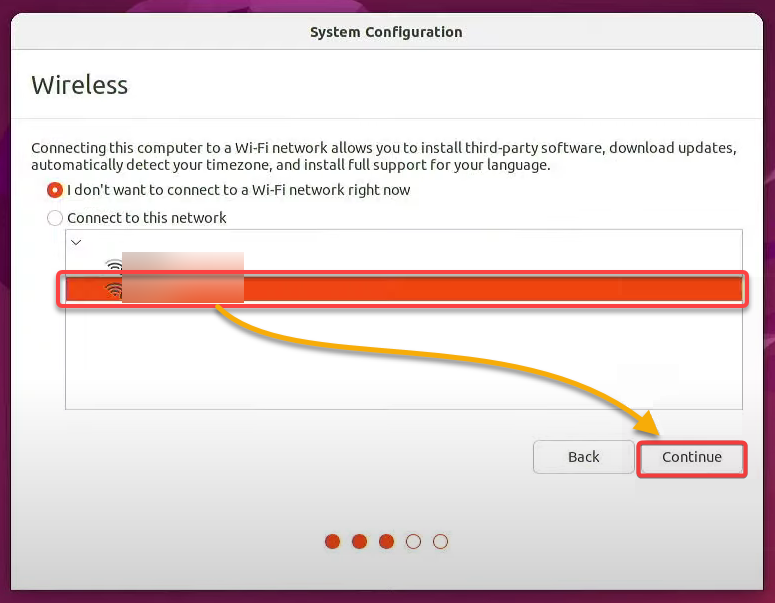
7. Select the name of the Wi-Fi or Ethernet network to connect your system to from the list of available networks, provide the password, and click Continue.
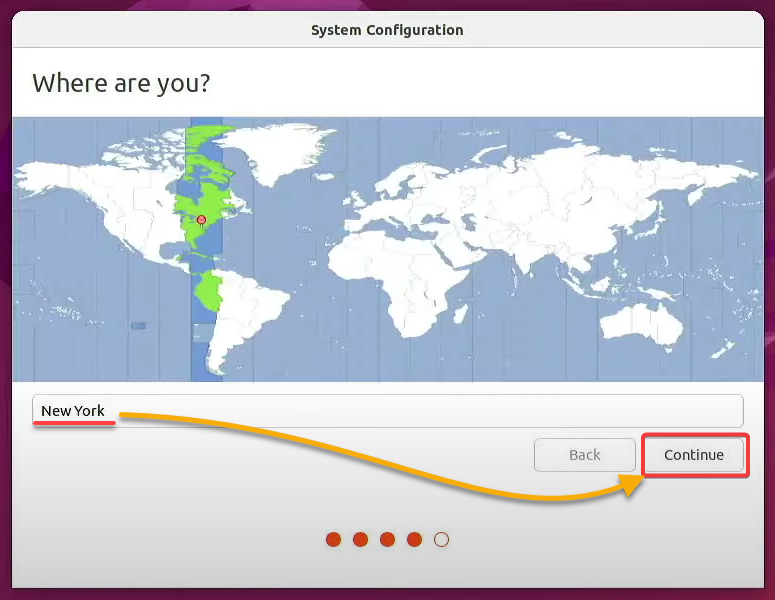
8. Select the region you are in or that is closest to your location and click Continue.
The system will use the selected region to set the correct time zone and other regional settings. You can always change the region settings later on.
9. Provide your user account information (with a strong password), and click Continue.
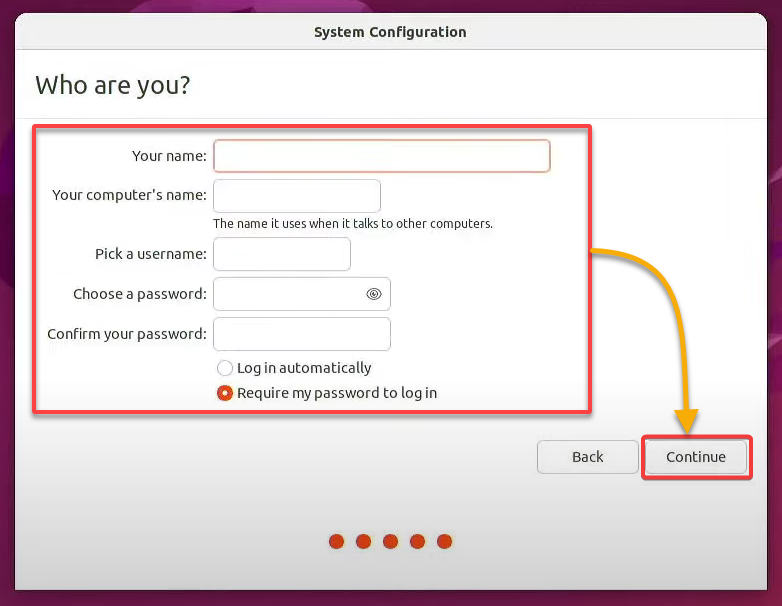
After filling up the user account information, the Ubuntu installation process will continue, which may take a few minutes to finish.

Once installed, you will be presented with the Ubuntu desktop, as shown below.

10. Finally, open the terminal, and run the below apt update command to update the system packages.
Updating the list of available packages on your Ubuntu system after installation is always a good idea. Doing so ensures you get the latest versions of software and security updates.
sudo apt update -y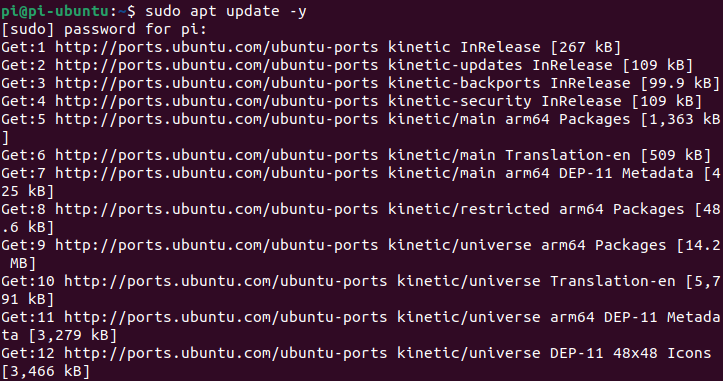
Conclusion
Sticking with the OS you are used to is fine and all. But having an alternative is a good thing, especially if it is Ubuntu on Raspberry Pi. And in this tutorial, you have learned to successfully install Ubuntu on Raspberry Pi by flashing an Ubuntu image.
Now, why not make Raspberry Pi your own and customize it to your liking? Perhaps try installing Oh My Zsh, a popular custom command-line terminal prompt for Ubuntu? Customize your terminal, make it more user-friendly, and take advantage of many features and plugins!


