

Not a fan of bloatware that comes with your operating system? Well, you are not the only one. Why not go for Ubuntu Minimal Desktop installation instead? Ubuntu Minimal Desktop is a lightweight version of the regular Ubuntu desktop, which comes with only the basic applications and packages installed.
The Ubuntu Minimal Desktop is ideal for those who want a leaner system or for those who want to install a custom desktop environment. And in this tutorial, you will learn how to install Ubuntu Minimal Desktop.
Ready? Be more confident with Linux and install a system you can truly make your own!
An older, but now unsupported method, was to utilize the Ubuntu mini installation CD. This tutorial refers to the currently supported method used during the installation of Ubuntu.
Prerequisites
This tutorial will be a hands-on demonstration. To follow along, be sure you have the following:
- A USB drive with at least 8GB of free space.
- A computer with the ability to boot from a USB drive.
- Rufus downloaded on your computer.
- A partition or drive of at least 20GB for Ubuntu installation.
- An ISO file of the Ubuntu desktop downloaded on your USB drive – This tutorial uses Ubuntu 20.04 since it is the latest LTS (Long Term Support) release.
Creating a Bootable USB Drive
Since many computers no longer come with optical disk drives, a bootable USB drive is best suited for installing an operating system like Ubuntu. A bootable USB drive is faster than using a CD or DVD to install an operating system.
Plus, a bootable USB drive is more convenient since you can keep it plugged in without worrying about losing a disc. While there are a few ways to create a bootable USB drive, you will use Rufus for this tutorial. Rufus is a free and open-source utility that lets you create bootable USB drives in a few clicks.
To create a bootable USB drive:
1. Plug in your USB drive to your computer, and launch Rufus.
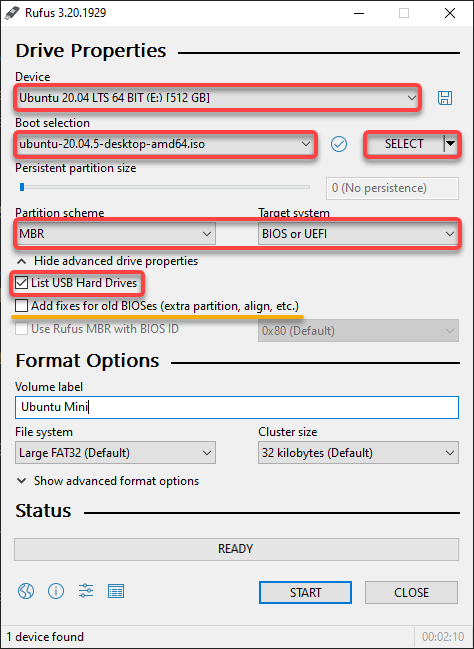
2. Once Rufus is up, configure the following Drive Properties with the following:
- Device – Select your USB drive from the drop-down field.
- Boot selection – Click SELECT and locate your Ubuntu Desktop ISO file.
- Persistent partition size – You can leave this option at default or increase the value as you need. This partition size is the amount of space on the USB drive used to store your personal files and settings.
- Partition scheme and Target system – Select MBR and BIOS or UEFI. This setting tells Rufus to format the USB drive using the MBR partitioning scheme and make the drive bootable on BIOS or UEFI computers.
- List USB Hard Drive – Tick this checkbox if you are using an external USB hard drive. Otherwise, your external hard drive will not show up. But if you are using a USB flash drive, leave this checkbox unticked.
- Add fixes for old BIOSes – This setting is for old computers that might have problems booting from a USB drive. You can leave this option unticked if your computer is relatively new (2015 or later).
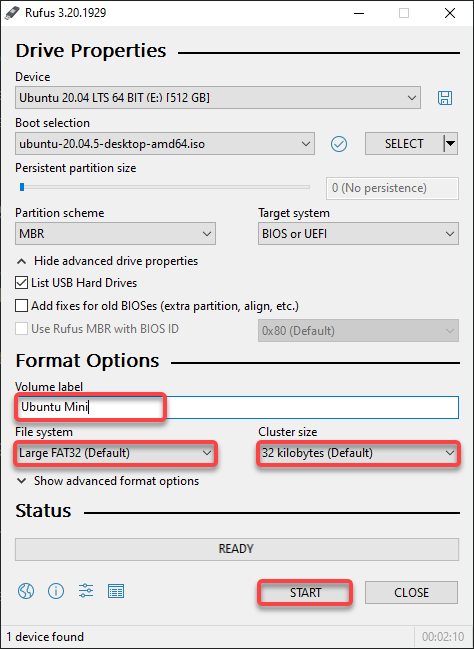
3. Next, configure the Format Options as follows:
- Volume label – Enter a name for your USB drive. This field is optional but providing a descriptive name, like Ubuntu Mini, to your USB drive is a good idea.
- File system – Select the Large FAT32 file system from the drop-down field. Rufus will use this file system to format your USB drive. Large FAT32 is an excellent all-around file system compatible with most operating systems and computers.
- Cluster size – Leave the default value of 32 KB. 32KB as it is the recommended cluster size for a FAT32 file system.
- Keep other default settings and click START to initiate formatting your USB drive.
Formatting your drive is irreversible, so ensure you have backed up any data on the drive you want to keep.
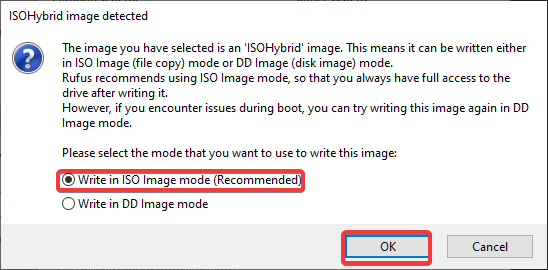
4. Now, choose the Write in ISO Image mode option, as shown below, and click OK since you are using an ISO image for this tutorial.
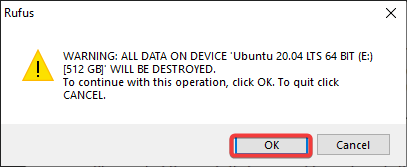
Click OK when prompted with the message below to confirm formatting the drive.
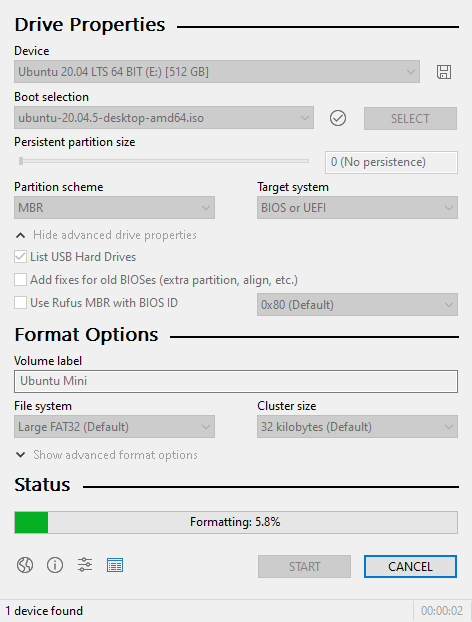
As you can see below, Rufus starts formatting your USB drive and will later copy the Ubuntu desktop ISO file to your USB drive.
This formatting process will take a few minutes, depending on the size of the ISO file and the speed of your USB drive.
Once formatted, you will see a green bar, which confirms bootable drive is ready, as shown below.
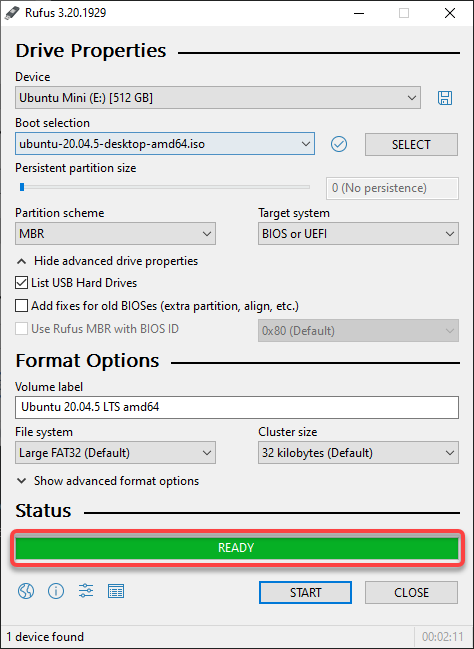
6. Finally, close Rufus and eject your USB drive. Congratulations! You have just created your bootable Ubuntu Mini USB drive.
Booting from the USB Drive
Now that you have created a bootable Ubuntu Mini USB drive, it is time to install Ubuntu Mini on your computer. But first, you must change your boot priority settings.
1. Shut down your computer and insert your USB drive.
2. Next, turn on your computer and look for a boot menu key. This key depends on your computer’s make and model. For example, you would press the F8 key on an ASUS laptop to bring up the boot menu.
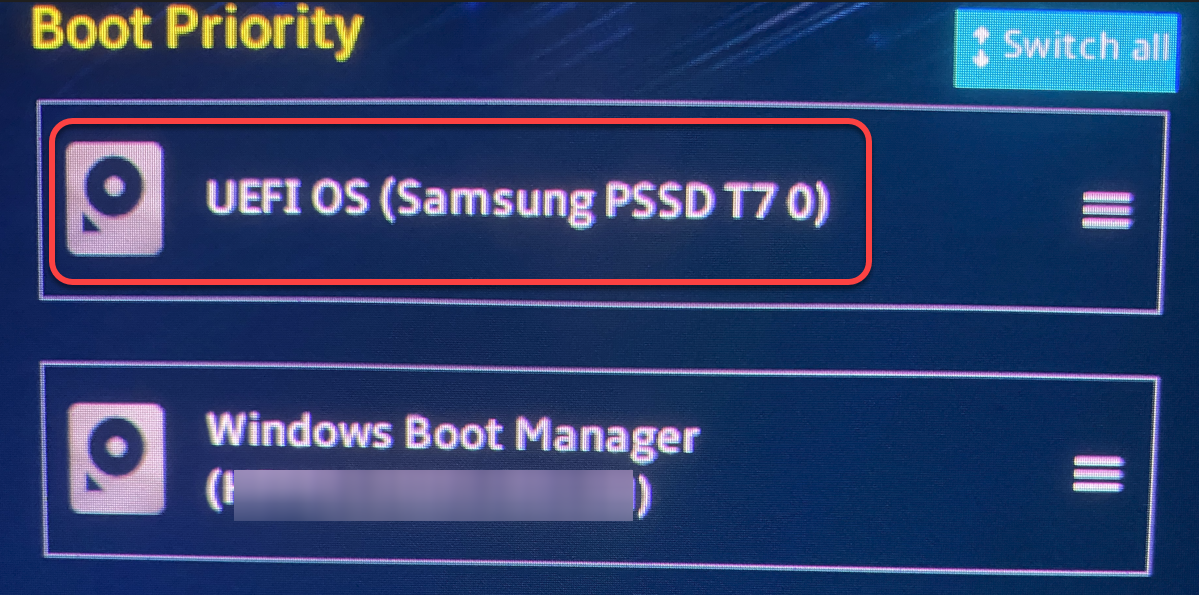
3. In the boot menu, select and move your USB drive or USB hard drive from the list of boot devices to the top, as shown below. Save your changes and exit the boot menu.
This boot priority change tells your computer to boot from the USB drive first.
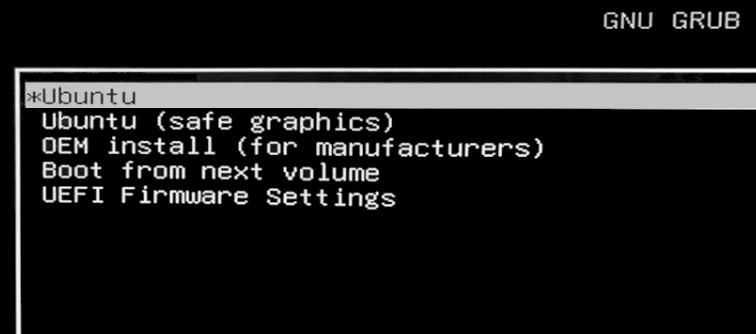
4. Now, reboot your computer, which will boot into the GRUB menu. GRUB is a bootloader that allows you to choose which operating system you want to use.
5. Select Ubuntu from the GRUB menu and press Enter.
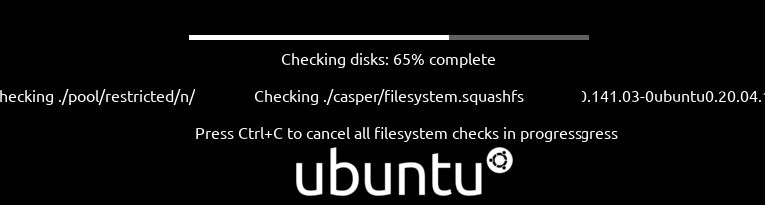
Wait for Ubuntu to check your computer’s hardware and prepare to boot into the desktop.
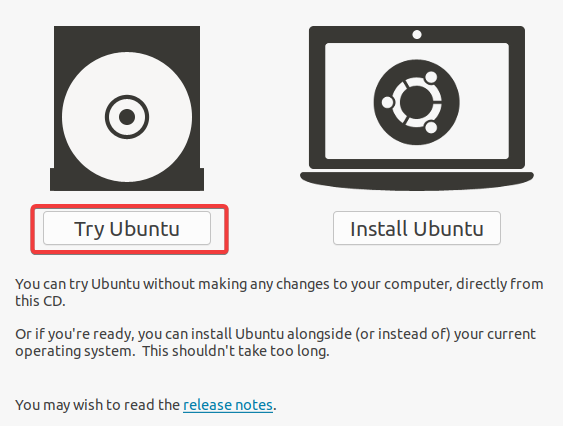
6. Click Try Ubuntu from the Ubuntu Desktop installation screen to test Ubuntu without installing it.
Installing Ubuntu Minimal Desktop
Satisfied with how Ubuntu Minimal Desktop looks and feels? If yes, then get ready to install Ubuntu Minimal Desktop.
A minimal Ubuntu installation will remove a number of packages and even categories of packages that are not necessary for the functioning of the system. This can be useful if you want to minimize the amount of data that is stored on your system, or if you want to use as few resources as possible.
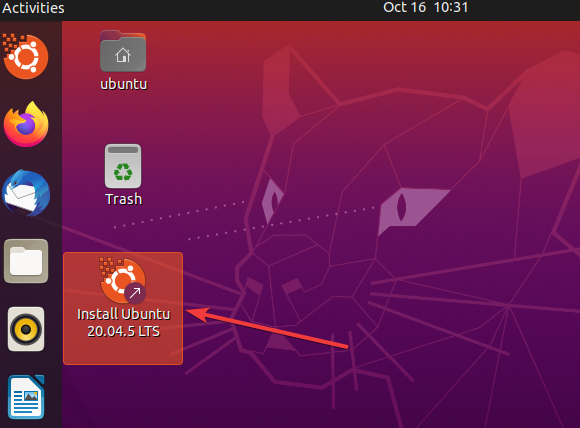
Click the Install Ubuntu shortcut on your desktop, as shown below, to bring up the Ubuntu installation screen (step two).
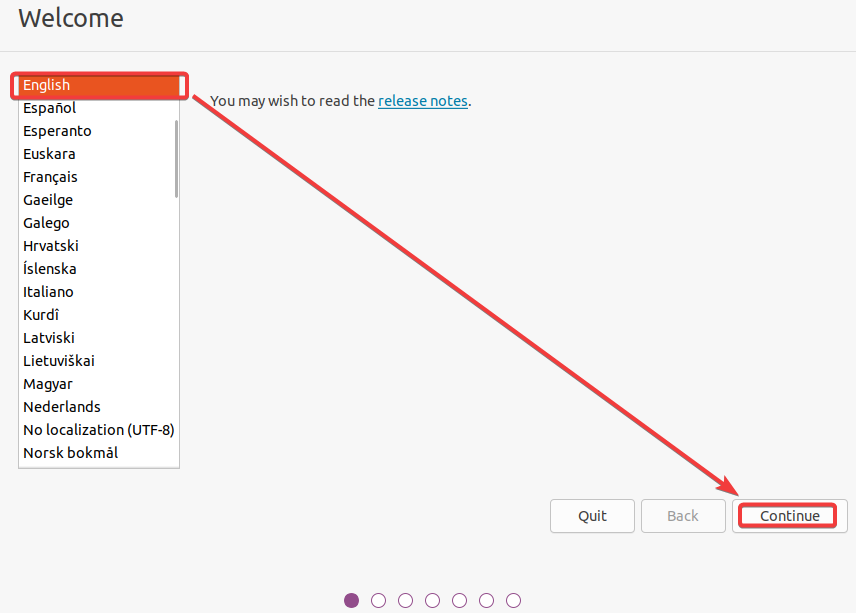
2. Select your preferred language on the Welcome page, and click Continue.
This language setting only affects the installation process and not the system language. You can change the system language post-installation.
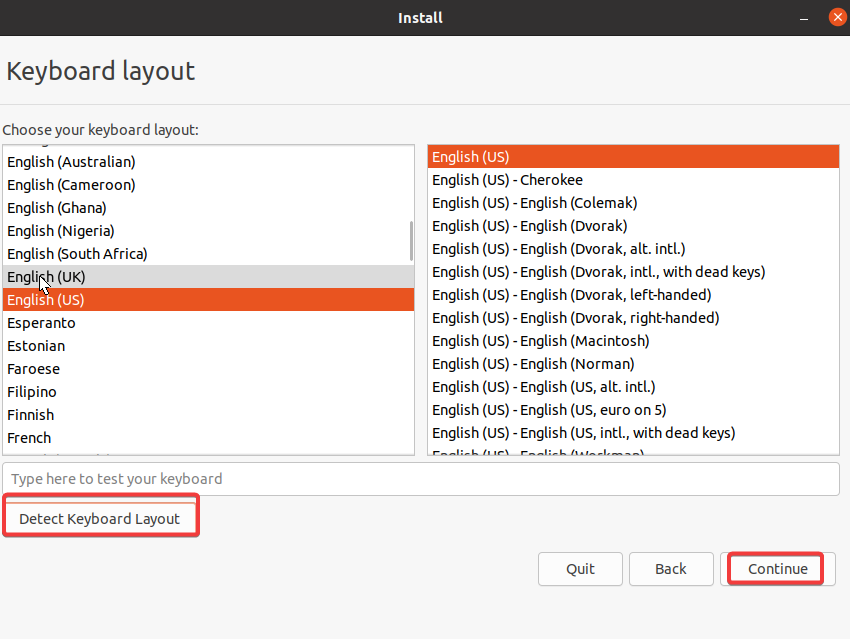
3. Select your keyboard layout and click Continue.
If unsure which keyboard layout to select, click Detect Keyboard Layout and follow the onscreen instructions. Ubuntu will try to detect your keyboard layout and preselect the appropriate one for you.
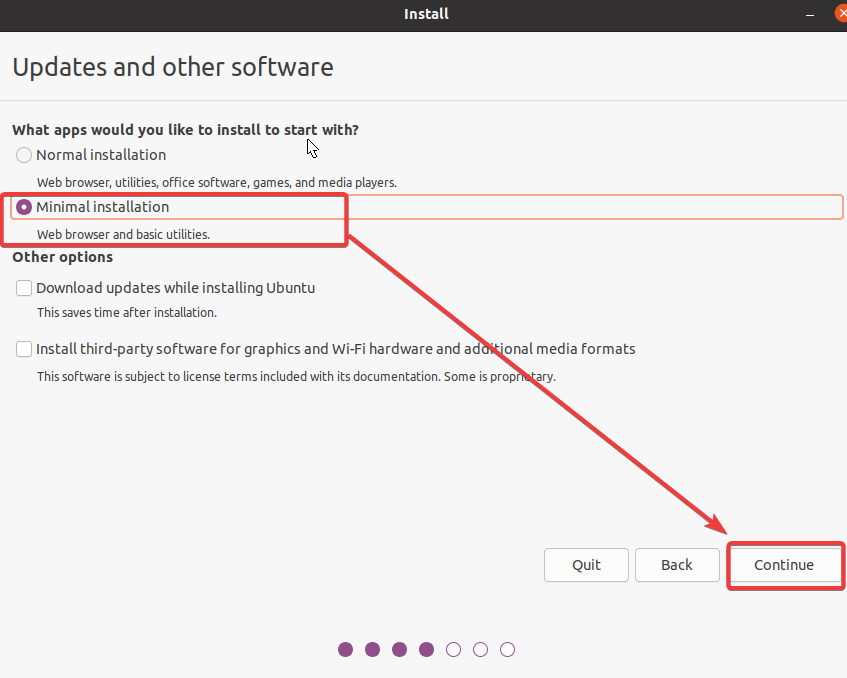
4. Now, select Minimal installation, keep other settings as is, and click Continue.
This option lets you install a minimal system with no additional software.
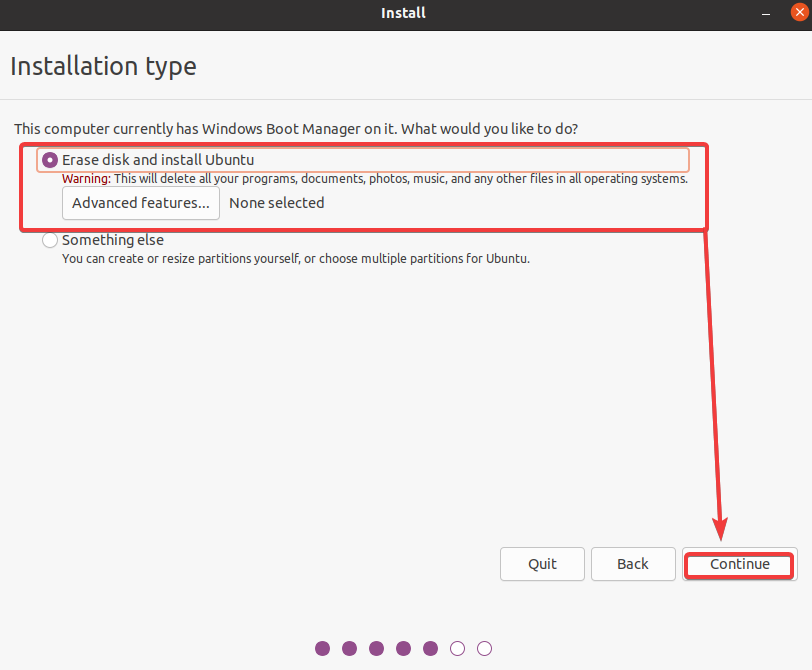
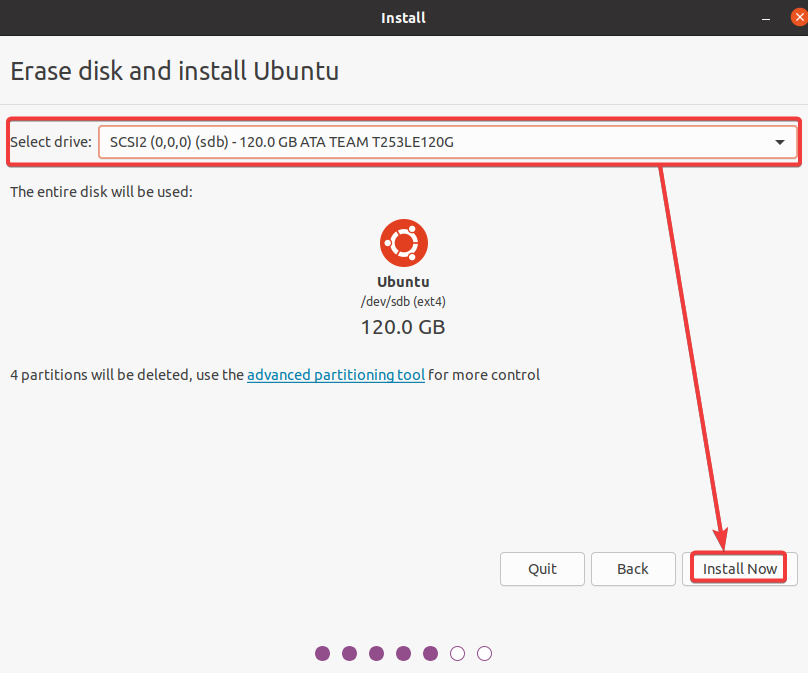
5. Select the Erase disk and install Ubuntu option to erase your hard drive and install Ubuntu completely. This option is the easiest to use and is recommended for most users.
6. Next, select the drive or partition where you want to install Ubuntu and click Install Now.
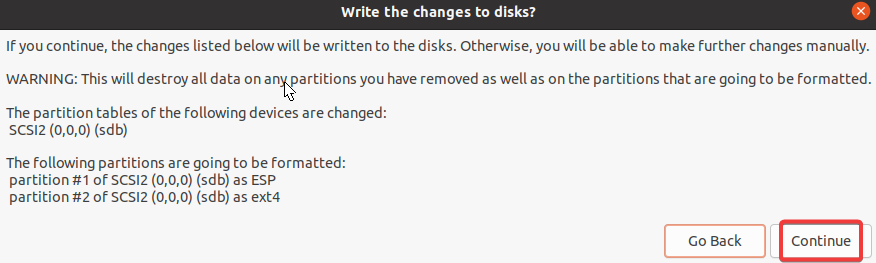
7. Click Continue when prompted with the message below to proceed with the installation.
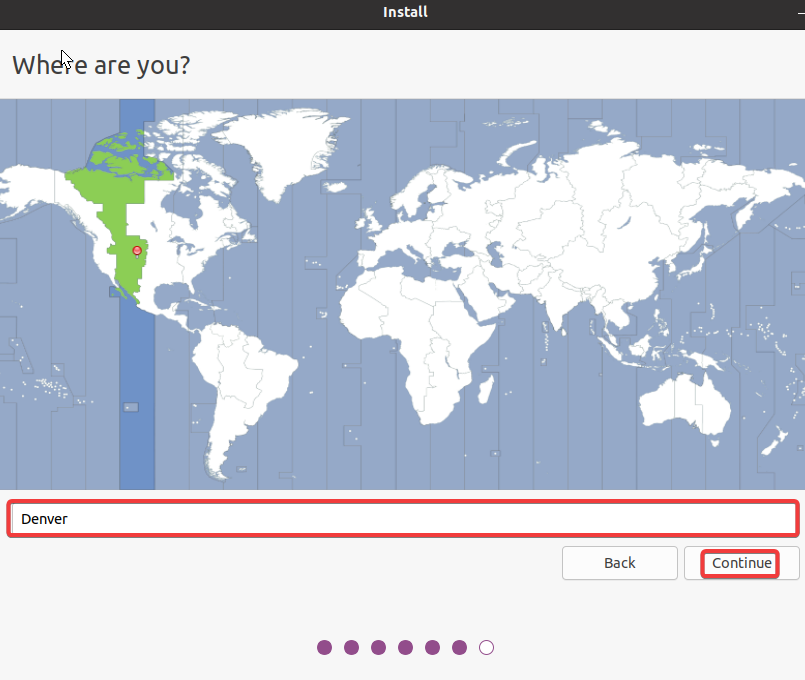
8. Select your time zone and click Continue. This setting sets your computer’s clock and calendar.
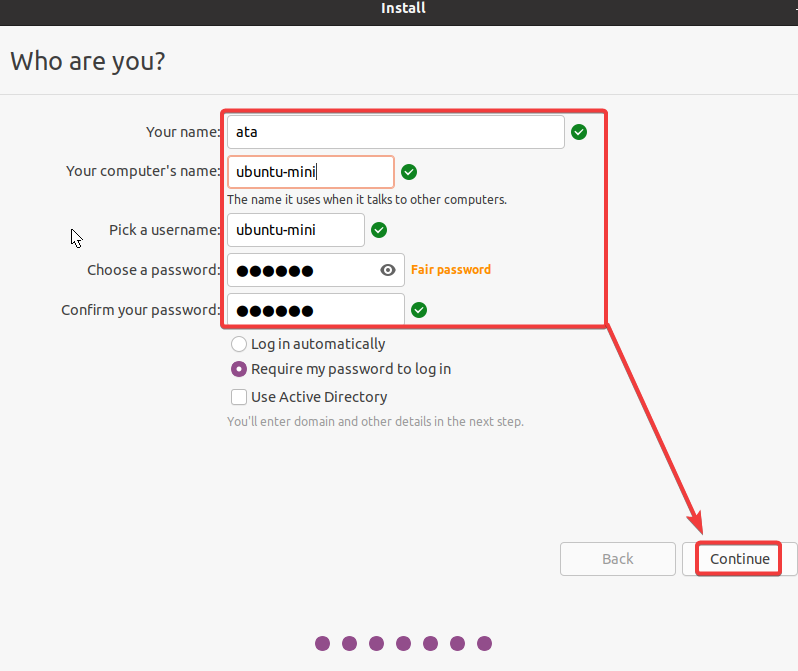
9. Now, configure the following, and click Continue to create a regular account that can run commands with administrative privileges (a sudoer account).
| Your name | Choose any name you prefer. |
| Your computer’s name | Set your computer’s name. |
| Pick a username | Input a username for your account. |
| Choose and Confirm your password | Provide and confirm a strong password. |
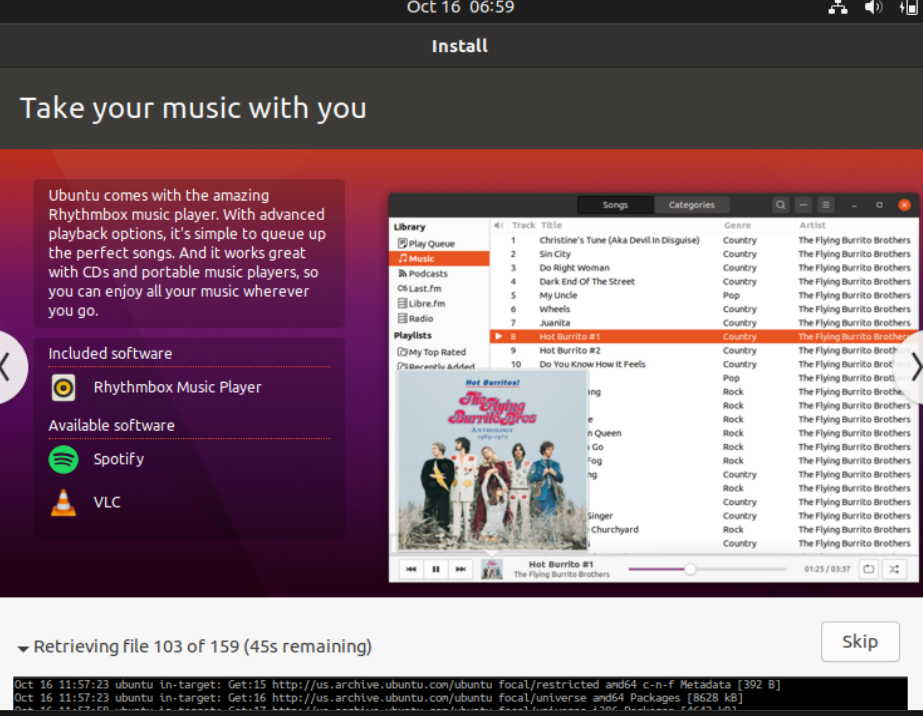
At this point, the installation process begins, which usually takes about 10-15 minutes. Sit back and relax while Ubuntu copies file to your computer and installs them.
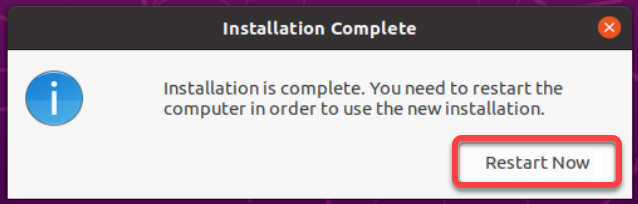
Once the installation completes, remove your USB drive, and click Restart Now on the pop-up message to reboot your computer to Ubuntu Minimal Desktop.
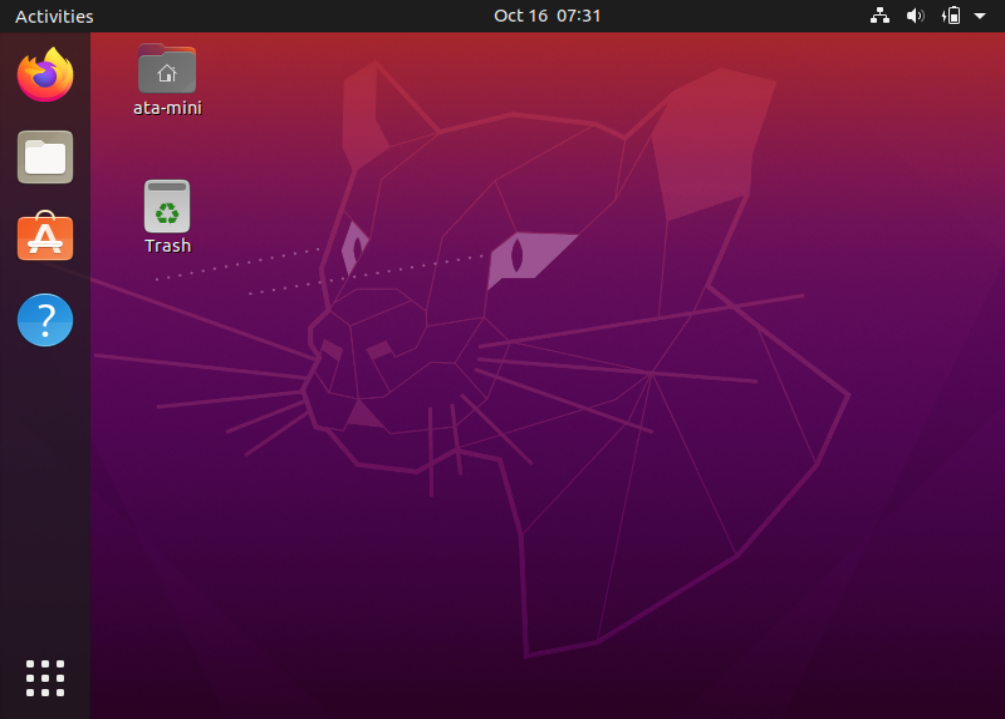
After reboot, you will see the desktop screen shown below, the same as when you previously tried Ubuntu without installation.
But this time, you will notice the Install Ubuntu shortcut is gone.
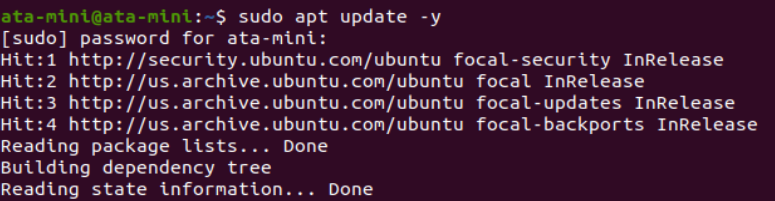
10. Finally, open your terminal and run the apt update command below to update your system.
sudo apt update -yAnd that’s it! You have successfully installed and updated Ubuntu Minimal Desktop on your computer. From here, you can start using Ubuntu and installing software.
Conclusion
Ubuntu Minimal Desktop installation is a great way to start using Ubuntu without installing all the unnecessary software. This approach can also be helpful when installing Ubuntu on a computer with limited storage space.
Now, why not customize your system yourself? Fine-tune your installation with only the software you want in your system!


