


Have you accidentally deleted files from your computer? Maybe you were practicing with using PowerShell to delete files. The next thing you know, your photos and documents are gone, and they are not in the Recycle Bin. You should give the Windows File Recovery utility a try.
Windows File Recovery or WinFR is a free tool developed by Microsoft. It claims to work beyond the NTFS filesystem and uses different modes to scan the disk for files. But does it work? And how?
In this article, you’ll learn about the WinFR tool and use it as a tool for recovering files in Windows 10.
Prerequisites
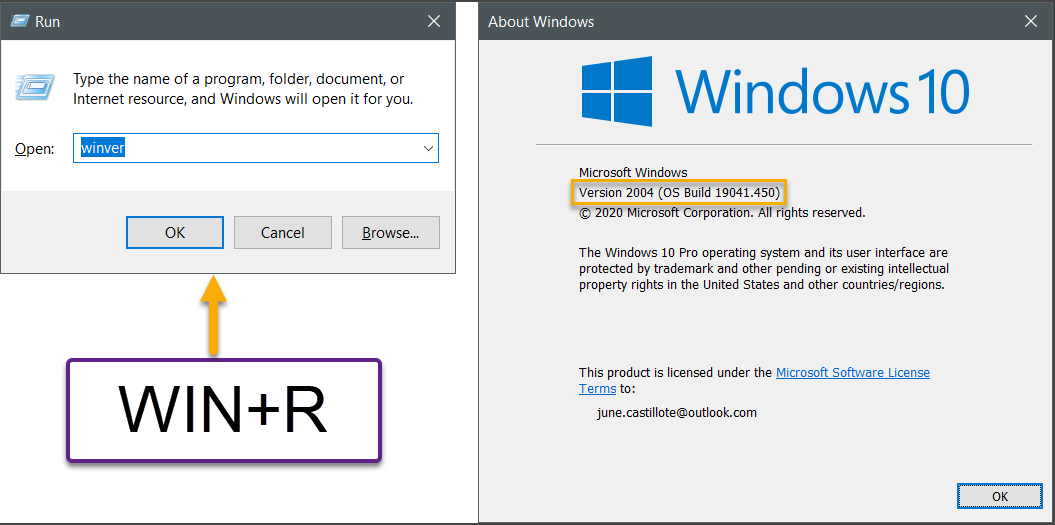
WinFR is not available to all Windows operating systems. It is only available for Windows 10 version 2004 (Build 19041.0 or higher). You’ll need to upgrade your Windows 10 version if you want to use it. This requirement also means that WinFR is not available on Windows Server OS.
Checking the Windows Version
There’s more than one way to check your computer’s Windows version. But the quickest way is to press WIN+R on your keyboard to pull up the Run dialog and type in winver. The About Windows box would appear where you can confirm the OS version.WinFR is a command-line utility that means you’ll be issuing commands in CMD or PowerShell to use it.
Installing Windows File Recovery
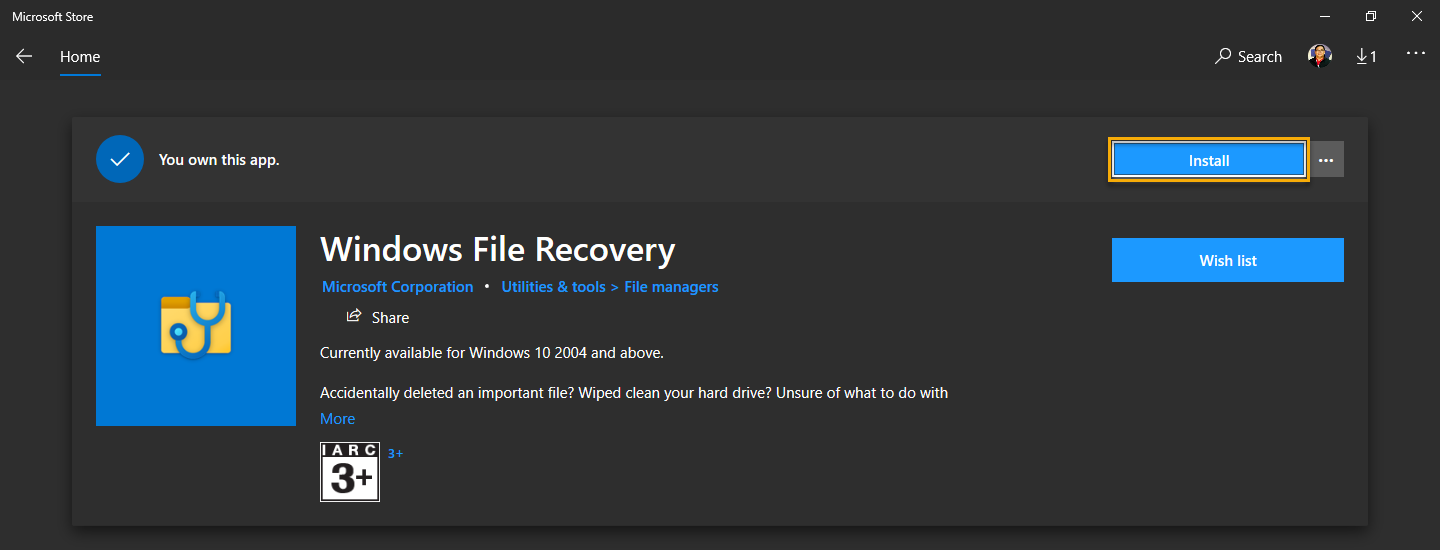
The only (official) way to install WinFR is from the Microsoft Store. As you can see from the screenshot below, once you’ve searched the store for Windows File Recovery, the installation is only a one-click process.
And that’s it. You’ve installed WinFR. But, don’t expect to find a graphical user interface. WinFR is a command-line utility that means you’ll be issuing commands in CMD or PowerShell to use it.
Understanding Usage and Options
Before you start using WinFR, you should be able to understand its capabilities and usage options. And that is what you’ll learn in this section.
What File Systems Are Supported?
WinFR supports several file systems beyond NTFS. Below is the list of supported file systems and the example storage devices.
- FAT and exFAT – SD cards, Flash or USB drives (< 4GB).
- ReFS – Windows Server and Windows Pro for Workstations.
- NTFS file system- Computers (HDD, SSD), external hard drives, flash or USB drives (> 4GB).
What Are The Different Recovery Modes?
There are precisely three recovery modes in WinFR; default, segment, signature. But what’s the difference and which one should you use? Depending on the incident you’re in, the answer might be different.
- Suppose you have a functioning NTFS volume, and the file you’re recovering was recently deleted. In that case, you should use the default mode.
- If you have an NTFS volume that was formatted or corrupted or if the file was deleted a while ago, you would use the segment mode first. And if the segment mode fails, use the signature mode.
- If you have a non-NTFS volume, only the signature mode can be used.
What Are The Syntax And Switches?
As mentioned earlier in this article, Windows File Recovery is a command-line utility. You need to follow the proper syntax and ensure that your command is accurate. The syntax for WinFR is shown below.
Note: Using the winfr command requires an elevated CMD or PowerShell. This means that you should be able to run CMD or PowerShell as an admin.
winfr <Source-drive:> <Destination-drive:> [/switches]The <Source-drive:> represents the drive to be scanned for file recovery. While the <Destination-drive:> represents the destination drive where to save the recovered files.
Note: The
<Source-drive:>and<Destination-drive:>cannot be the same. You should use a different drive to save the recovered files.
There are switches to control how WinFR will perform the file recovery in Windows 10. You’ll know these options by running the command winfr /?.
/r           - Segment mode (NTFS only, recovery using file record segments)
/n <filter>  - Filter search (default or segment mode, wildcards allowed, trailing \ for folder)

/x           - Signature mode (recovery using file headers)
/y:<type(s)> - Recover specific extension groups (signature mode only, comma separated)
/#           - Displays signature mode extension groups and file types

/?           - Help text
/!           - Display advanced features
If you read the list above, you’ll recognize that some switches are only applicable to specific modes and file systems.
How to Recover Deleted Files
Now that you’ve learned about the Windows File Recovery usage and options, its time to test what you’ve learned. It is best to test WinFR on non-operating system drives such as removable drives like USB flash drives and external hard drives.
In the succeeding examples, note that two drives will be used as a source:
- A USB flash drive (NTFS) (Drive G:)
- A micro SD card (exFAT) (Drive E:)
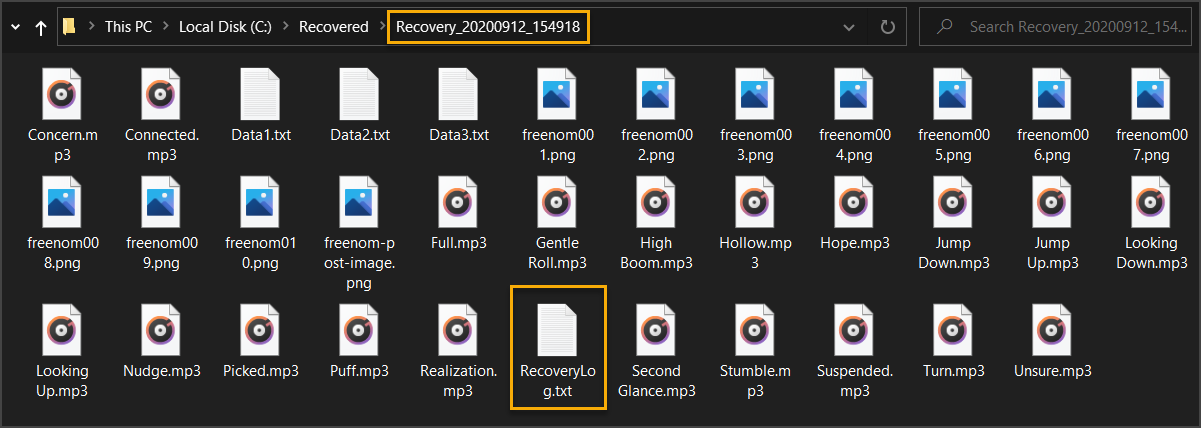
As you can see below, the source drives contain mp3, txt, and png files. All these files are deleted before testing WinFR.

Finding Out The Source Drive’s File System
Source drives can be any supported drive. Knowing the file system would help you determine the options to use with WinFR. There are several ways to get the file system information.
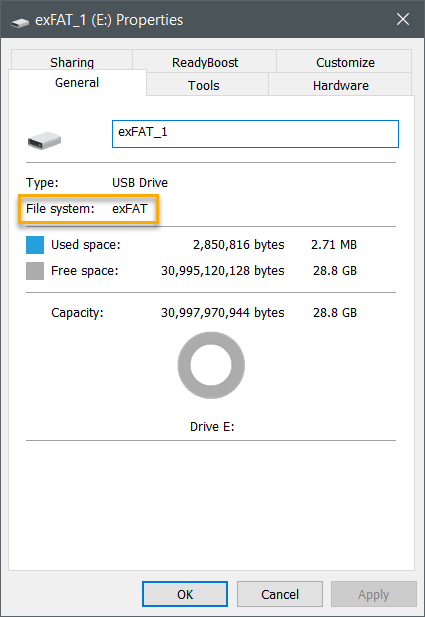
To get the file system details of individual drives, open the drive’s properties pages in Windows Explorer.
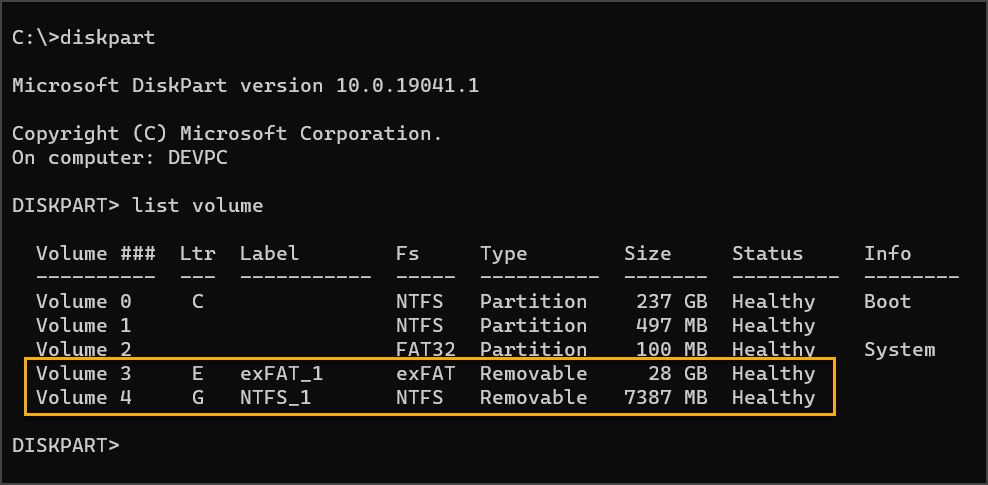
Or, to get all the disk volumes information at once, use the commands below in CMD.
diskpart

list volume
The image below shows the list of drives and their information, including which file system they are using.
Recovering Lost Files From NTFS Volumes
In this example, the winfr command will recover all deleted files from the NTFS volume (G: drive) using the default mode. The recovered files are then saved in C:\Recovered.
winfr G: C:\RecoveredThe demonstration below shows that the files were retrieved using the command above.

And when you go to the destination directory, you can see that the files were recovered and saved under a sub-directory generated by WinFR.
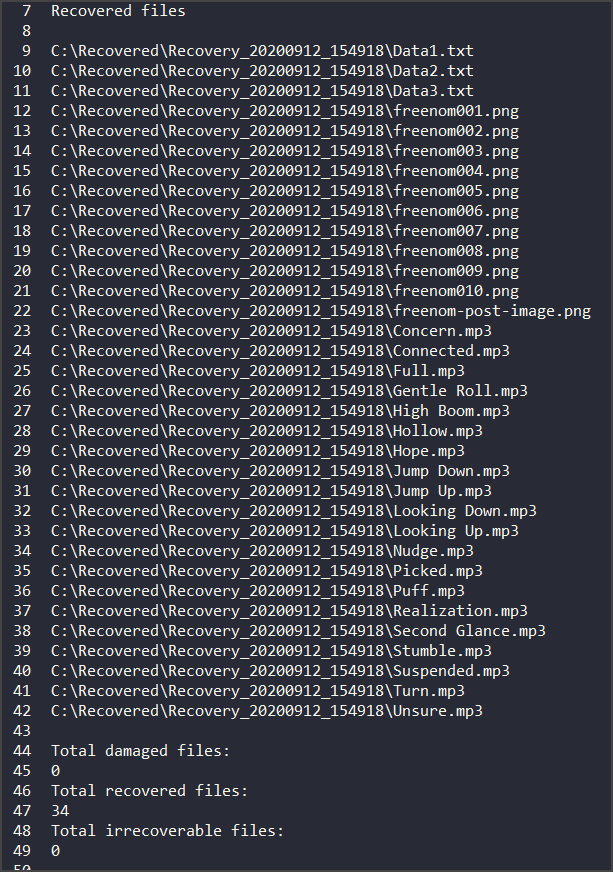
A RecoveryLog.txt file is also created that contains the summary of the file recovery operation.
If the default mode wasn’t successful, you could try running the same command but this time, append /r to make it run in segment mode.
winfr G: C:\Recovered /rThe snip below shows the recovery mode is set to the segment mode.

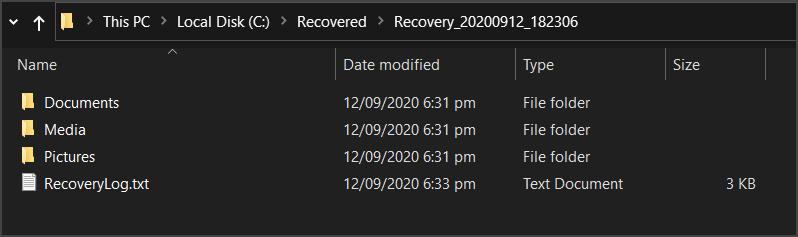
On segment mode, the recovered files are saved to the destination location as well. However, the files are grouped under separate sub-directories based on their file types. For example, all recovered *.mp3 files are saved under the Media sub-directory. The recovered *.jpg files are saved to the Pictures sub-directory, and so on.
Note: Running Windows File Recovery in segment or signature mode takes a lot longer time to complete than when run in default mode.
Recovering Deleted Files From NTFS Volumes Using Search Filters
If you don’t want to recover all deleted files, what you need to do is add a search filter when running WinFR. Adding a search filter is done by using the /n switch.
For example, to recover only *.png, you can use the command below.
winfr G: C:\Recovered /n *.pngYou can also add multiple search filters by adding another instance of the /n switch. The code below will set the search filter to recover files with *.png and *.txt file extensions.
winfr G: C:\Recovered /n *.png /n *.txtThe snip below shows the result of running the above command. As you can see, the filter is set to *.png and *.txt.
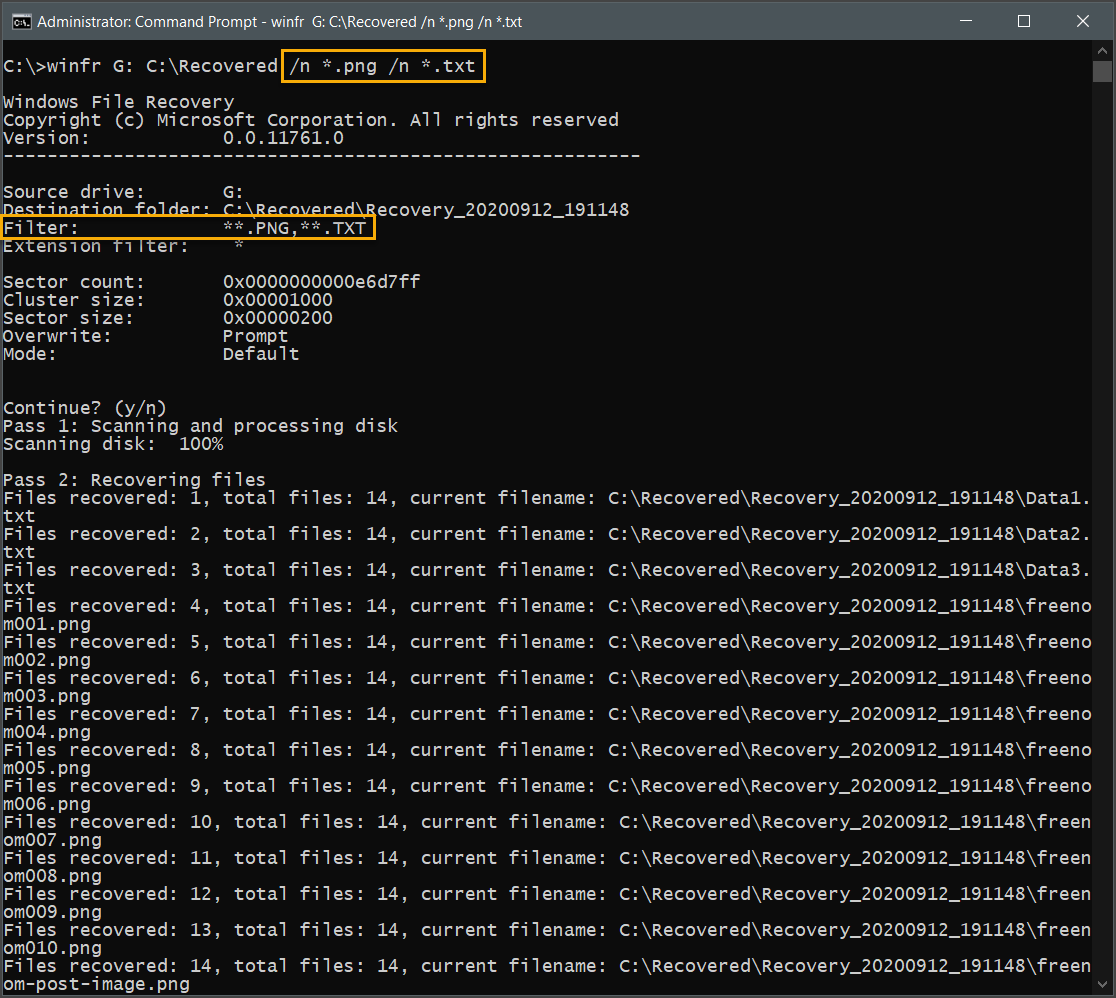
And to confirm that the search filter worked correctly, you can check the destination directory. You should be able to verify that only the intended files are recovered.

Below are some additional usage examples for search filters.
Recover files in G:\temp\data.
 When using directories as a search filter,
 make sure to append a trailing backslash character "\"
 winfr G: C:\Recovered /n \temp\data\

Recover files matching file extensions in a specific location
 winfr G: C:\Recovered /n \temp\data*.txt

Recover files in G:\Documents and Music
 When using search filters that contain spaces,
 make sure to enclose the search string in double-quotes.
 winfr G: C:\Recovered /n "G:\Documents and Music"
Recovering Deleted Files From Non-NTFS Volumes
Now on to non-NTFS volumes such as exFat and ReFS. To recover deleted files, you’ll need to use the /x switch to run Windows File Recovery in signature mode. Note that the recovery time may take time depending on the disk’s size and the number of files in signature mode.
If you run winfr without the /x switch against non-NTFS volume, you will get an error such as the one shown below.
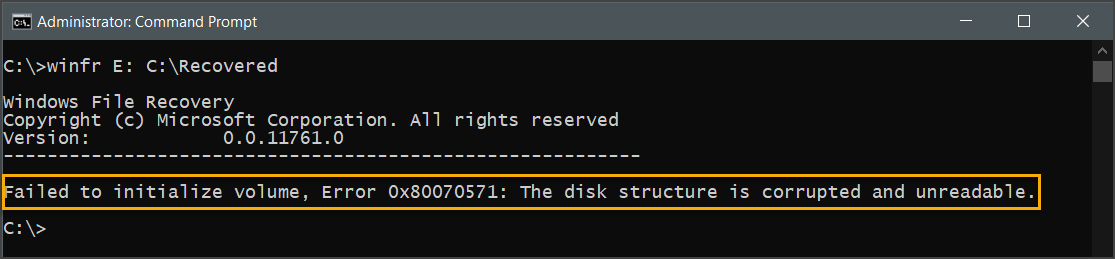
Error when running winfr in default mode against a non-NTFS volume
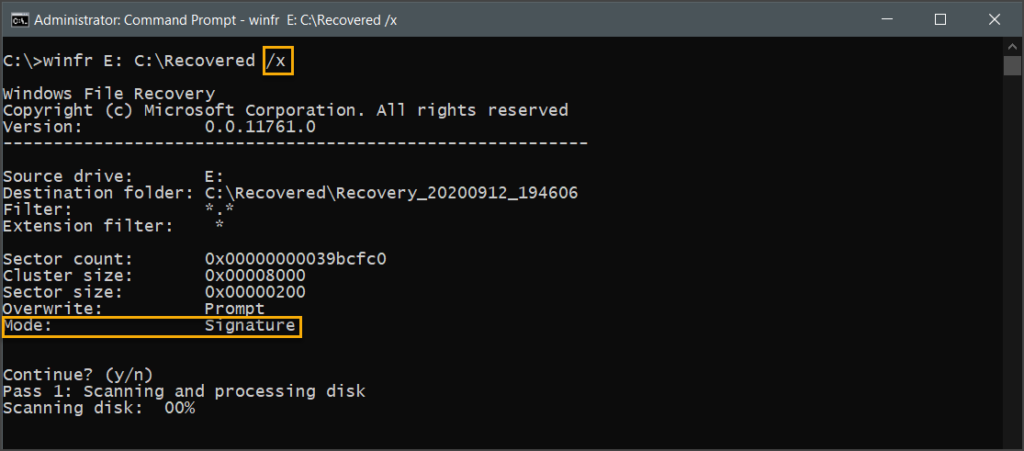
So, to correctly recover the files from an exFAT volume, use the command below.
winfr E: C:\Recovered /xThe snip below shows that winfr runs in signature mode when the /x switch is used.
Recovering Deleted Files From Non-NTFS Volumes Using Type Filters
Just like in default and segment mode, filters can be applied to signature mode as well. This is done by using the /y:<type(s)> switch.
However, you must consider that file recovery in signature mode only works for specific file types. To know what these types are, run the command winfr /#. The output of that command is shown below.
Windows File Recovery
Copyright (c) Microsoft Corporation. All rights reserved
Version: 0.0.11761.0
----------------------------------------------------------
Extension group - Extensions
-----------------------------------------
ASF - WMA, WMV, ASF
JPEG - JPG, JPEG, JPE, JIF, JFIF, JFI
MP3 - MP3
MPEG - MPEG, MP4, MPG, M4A, M4V, M4A, M4B, M4R, MOV, 3GP, QT
PDF - PDF
PNG - PNG
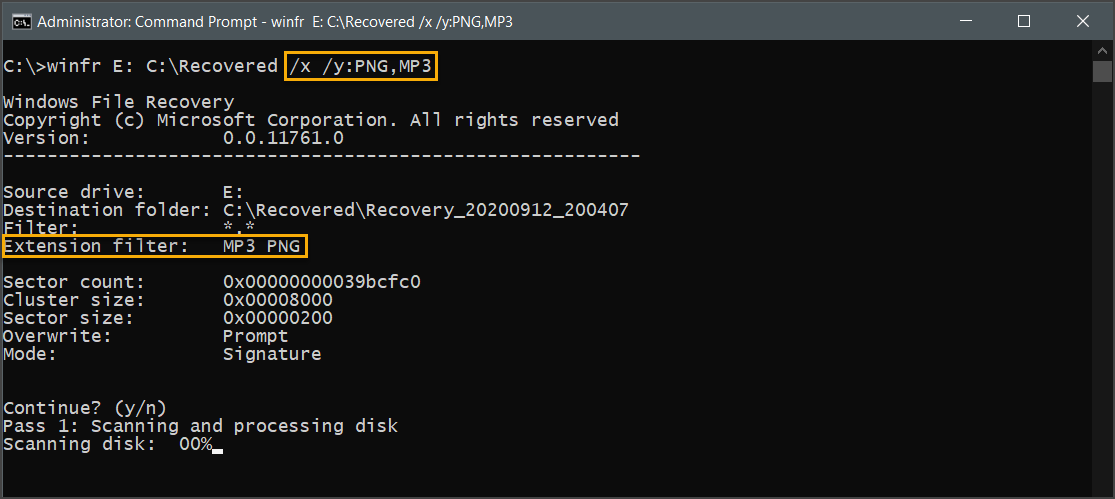
ZIP - ZIP, DOCX, XLSX, PPTX, ODT, ODS, ODP, ODG, ODI, ODF, ODC, ODM, OTT, OTG, OTP, OTS, OTC, OTI, OTF, OTHThe command below recovers files with PNG and MP3 extensions.
winfr E: C:\Recovered /x /y:PNG,MP3The snip below shows the above command in progress. As you can see, the extension filter is set to MP3 and PNG only.
Conclusion
Microsoft’s development and release of their free file recovery tool is a welcome surprise. The Windows File Recovery tool can recover deleted files from many storage types and even from disks with non-NTFS volumes.
Being a command-line tool, WinFR opens the opportunity for scripting and automated file recovery . Whether or not WinFR stacks up against third-party free file recovery tools is debatable and would need much more in-depth analysis.
Is Windows File Recovery a useful tool? Only you can answer that after being able to use it. But so far, with all the tests, it seems to be doing the job. Still, it is something that deserves to be considered an option when it comes to deleted file recovery in Windows 10.


