

Are you tired of being constrained by the rigid structure of traditional relational databases? Look no further than MongoDB on Ubuntu Linux! With its document-oriented data model and ability to handle large amounts of data, MongoDB has become a popular choice for modern applications.
This tutorial will walk you through the step-by-step process of installing MongoDB on Ubuntu Linux, so you can confidently start building your next big project.
Read on and trust MongoDB to “Build faster. Build smarter”!
Prerequisites
This tutorial houses hands-on demonstrations. To follow along, ensure you have a machine running Ubuntu Linux. This tutorial uses Ubuntu 20.04, but the steps will also work on other versions.
Adding the Official MongoDB Repositories on Ubuntu Linux
Before taking advantage of MongoDB on Ubuntu Linux, you must add the required repositories, a set of software packages, and updates provided by MongoDB. These repositories include MongoDB’s latest stable release and any necessary dependencies.
Adding the MongoDB repositories allows you to quickly install and update MongoDB via the standard package management tools, like apt.
Related: Learning Ubuntu Apt Get Through Examples
To add the official MongoDB repositories, follow these steps:
1. Open a terminal, and run the following wget command to download and add the MongoDB signing key to your Ubuntu machine’s trusted keyring. Doing so allows you to verify the integrity of the MongoDB packages you will install.
wget -qO - https://www.mongodb.org/static/pgp/server-6.0.asc | sudo apt-key add -
2. Next, run the below apt-key command to verify that the signing key has been added.
This command displays a list of the keys added to your Ubuntu machine’s trusted keyring, including the MongoDB public key you added.
sudo apt-key list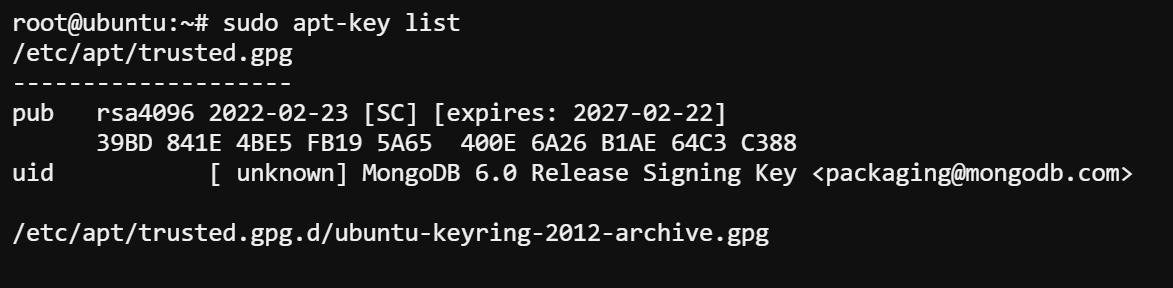
3. Run the echo command below to add the official MongoDB repositories to your Ubuntu machine’s package sources. Doing so allows you to download and install MongoDB.
echo "deb [ arch=amd64,arm64 ] <https://repo.mongodb.org/apt/ubuntu> focal/mongodb-org/6.0 multiverse" | sudo tee /etc/apt/sources.list.d/mongodb-org-6.0.list
4. Once added, run the apt update command below to update your package list. This command ensures you have access to the latest software packages and updates.
sudo apt update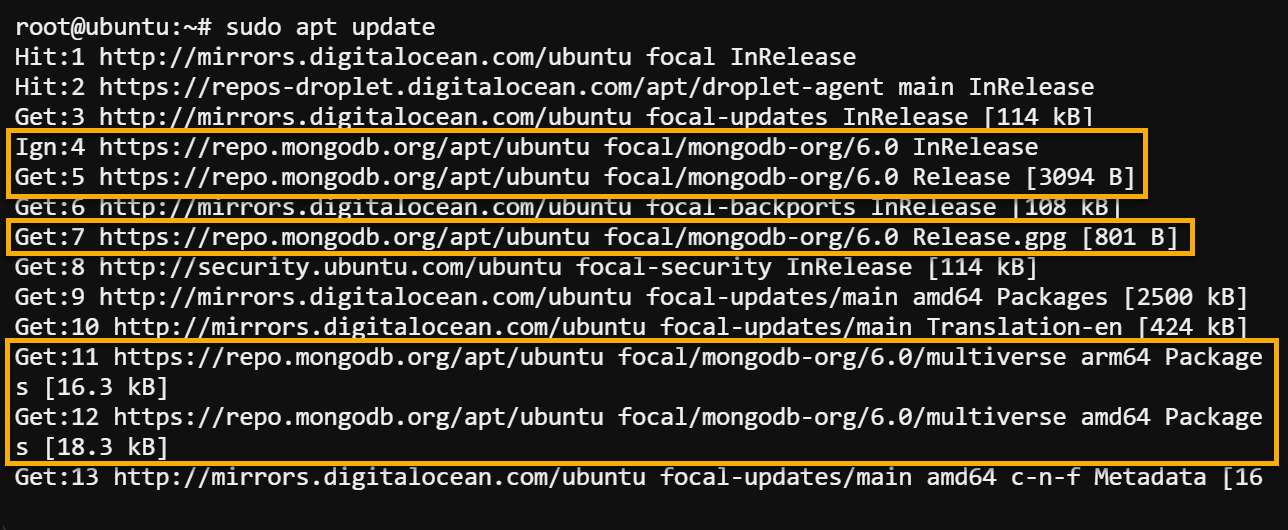
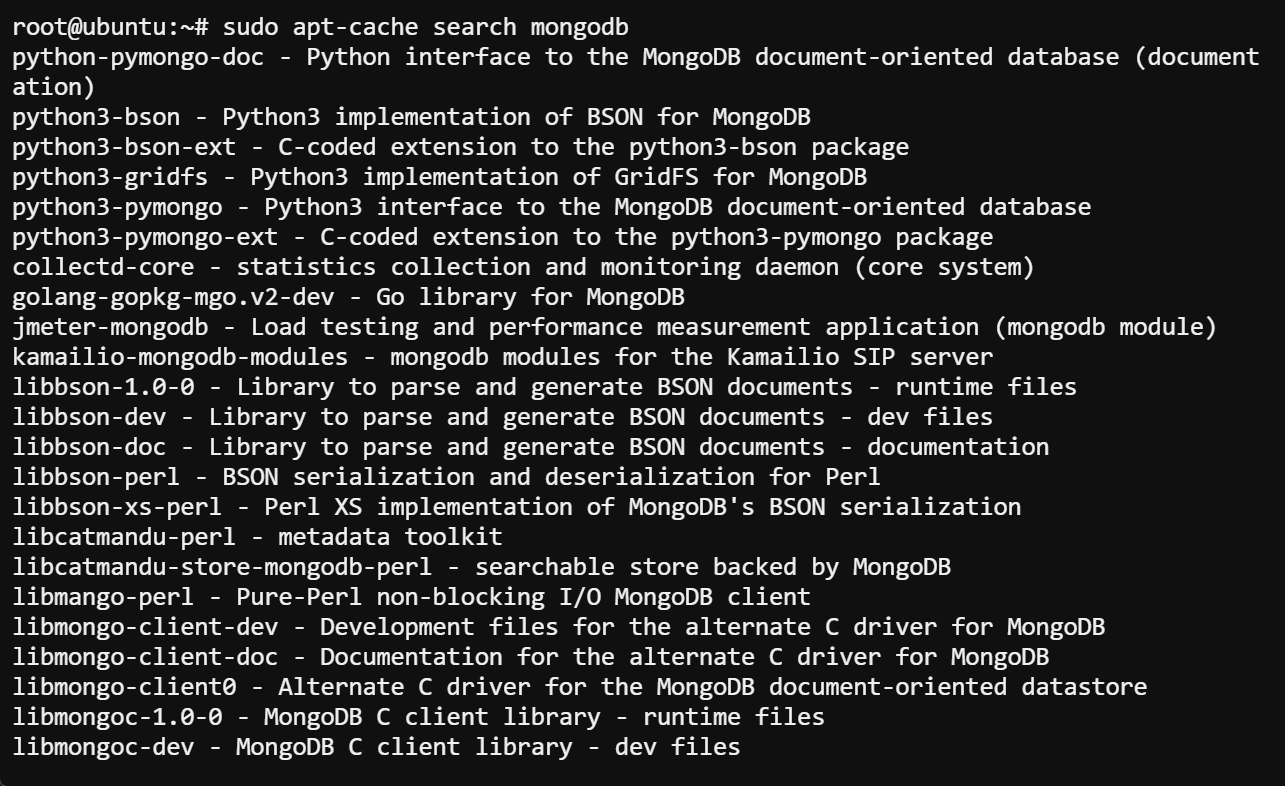
5. Now, run the below apt-cache command to verify that the MongoDB repositories have been added correctly and that your Ubuntu machine can find MongoDB packages.
sudo apt-cache search mongodbIf all goes well, you will see an output like the one below.
6. Finally, run the following apt install command to install MongoDB (mongodb-org package), which includes the MongoDB server, client, shell, and other tools on your Ubuntu Linux.
sudo apt install -y mongodb-org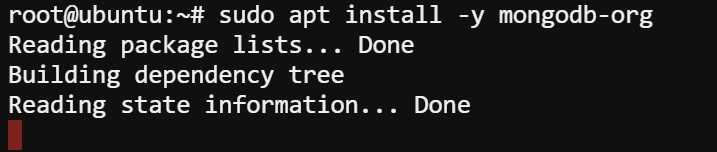
Starting and Enabling the MongoDB Service
At this point, you have successfully installed the MongoDB server. But right now, it is just quietly sitting there. Before you can use the MongoDB service, you first have to start and enable it
Run the below systemctl commands to start and enable the MongoDB service (mongod) to start on system boot time.
sudo systemctl start mongod
sudo systemctl enable mongod
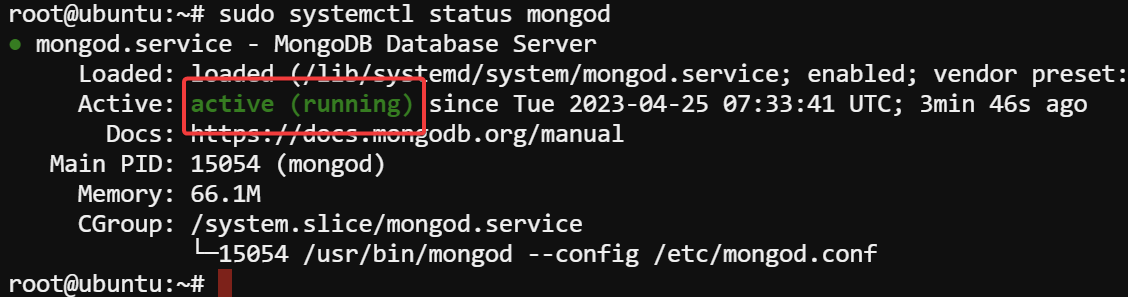
Now, run the command below to check the MongoDB service status.
sudo systemctl status mongodBelow, the output shows the MongoDB service has started and is running.
Connecting to the Database Server and Creating a Dedicated User
With MongoDB on your Ubuntu Linux machine, it is time to test the database server. How? You will connect to the database server and create a dedicated user for your applications.
1. Run the mongosh command below to connect to the database server, and opens the MongoDB shell, which allows you to interact with the database server.
Without arguments or options, the mongosh command connects to the MongoDB instance running on the default port of 27017 on the local system.
mongoshAs you can see below, you immediately connect to the database server without any authentication — yikes! This behavior comes with significant risks as it allows anyone accessing the server to read or modify data in your database.
To secure your MongoDB instance, you must create a dedicated user with appropriate roles and permissions (step two). This way, you can control who has access to the database and what actions they can perform.

2. Next, run the following use command to switch to MongoDB’s admin database, the default database for administrative tasks.
use admin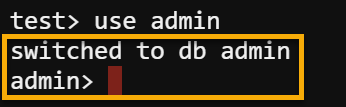
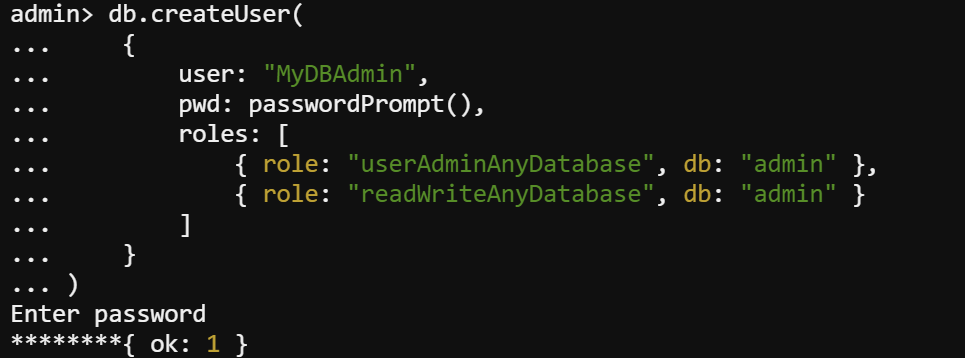
3. In the admin database, run the db.createUser() method below to create a new user with the username MyDBAdmin (which is arbitrary) and prompts you to enter a password.
The new user will be assigned the userAdminAnyDatabase and readWriteAnyDatabase roles. These roles allow users to create and manage users for any database and read from and write to any database.
db.createUser(
    {
		// Set the new user's name
		user: "MyDBAdmin",
		// Prompts for the user password
		pwd: passwordPrompt(),
		// Set the roles for the new user
        roles: [
            { role: "userAdminAnyDatabase", db: "admin" },
            { role: "readWriteAnyDatabase", db: "admin" }
        ]
    }
)
When prompted, provide a secure password to create the new user in MongoDB. Save the password to a safe place; you will need it later to log in to the database server.
4. Now, run the below command to initiate a clean shutdown of the mongod instance to avoid data loss or corruption. Doing so ensures the database is closed correctly and all data is written to disk.
db.adminCommand( { shutdown: 1 } )
5. Lastly, run the exit command to exit the MongoDB shell
exit
Enabling Authentication and Enforcing Access Control
Now that you already have a dedicated user with appropriate roles and permissions, you must secure each connection to the MongoDB server. You must enable authentication and enforce access control for all connections using a valid username and password.
To enable authentication and enforce access control:
1. Open the /etc/mongod.conf configuration file (the main configuration file for MongoDB) in your preferred text editor. This file is used to configure various settings for the mongod server process.
The mongod server process is the core component of MongoDB, responsible for the following:
- Managing and accessing the database files on disk.
- Handling client connections and requests.
- Executing database operations.
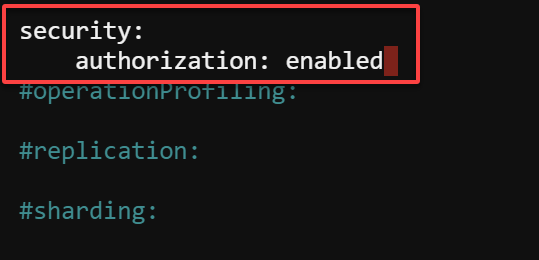
sudo nano /etc/mongod.conf2. Next, configure the following to enable authorization and enforce access control:
- Locate the
security:line in the file.
- Remove the
#character at the beginning to uncomment, and enable thesecurity:line.
- Add the
authorization: enabledline below thesecurity:line, as shown below.
3. Now, run the following command to restart the mongod service to apply the changes.
This command does not produce output, but at this point, authentication and access control have been enabled in MongoDB. Users will now need to provide valid credentials to connect to the server.
sudo systemctl restart mongodCreating a New Database
With a secure server connection, you can now create a new database and insert entries. But first, you must ensure you are not overwriting any existing database.
To create a new database, follow these steps:
1. Run the below commands to reconnect to the database server (mongosh) and switch to the admin database.
mongosh
use admin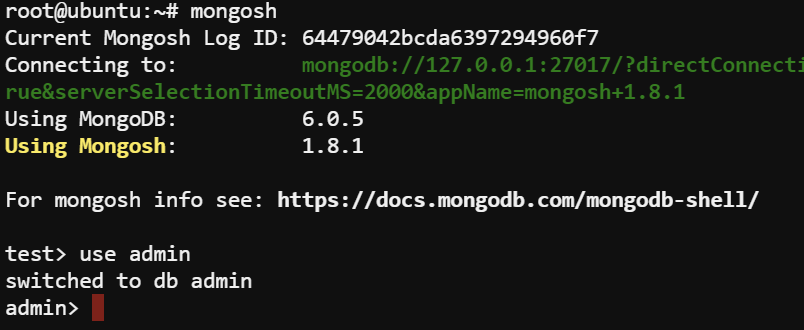
2. Next, run any command, like show dbs, to test if the authentication works.
show dbsIf the authentication and access control work, you will get an error message, as shown below, since you are not currently authenticated to perform any actions on the server.

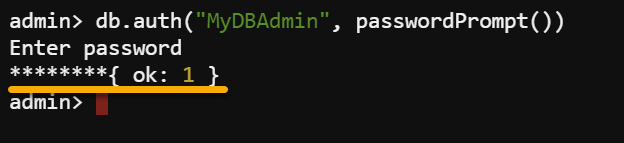
3. Run the below db.auth() method to authenticate your dedicated user (MyDBAdmin) and gain access to the server.
db.auth("MyDBAdmin", passwordPrompt())When prompted, provide the password you set for your dedicated user.
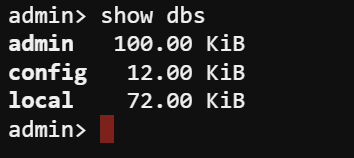
4. Once authenticated, rerun the show dbs command to display a list of all databases your user can access on the server.
show dbsThis time, the command pushes through without errors since you are now authenticated.
This example lists three databases: admin, config, and local.
5. Now, run the below use command to create a new database called my_db_demo (arbitrary).
Unlike other traditional database systems, there is no separate command to create a new database in MongoDB. Instead, you can create a new database by simply switching to it by running the
usecommand.
When you run the use command with a database name, MongoDB checks if the database already exists and switches to that database. Any subsequent commands you run will be executed in the context of that database.
But if the database does not exist, MongoDB creates a new one with the name you specified, switching to it as the active one.
use my_db_demo
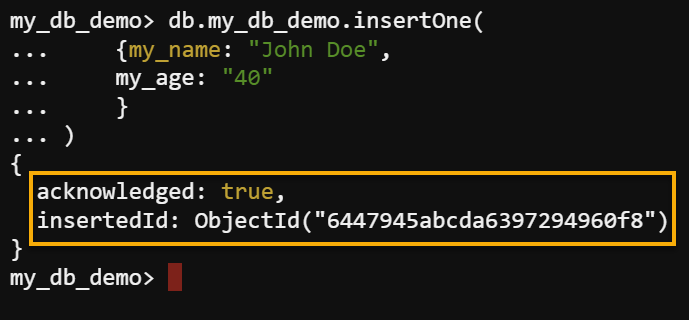
6. After creating a new database, run the following db.DB_NAME.insertOne method (where DB_NAME is the database name) to insert a new document into your database.
The document contains two fields, my_name, and my_age, with the values John Doe and 40, respectively.
db.my_db_demo.insertOne(
    {my_name: "John Doe",
    my_age: "40"
    }
)
7. With a document inserted, run the below command to verify that your database (my_db_demo) has been created.
show dbs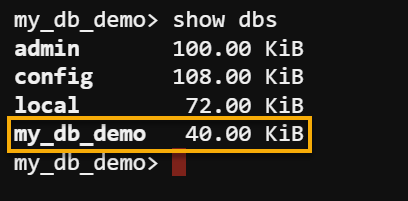
8. Once verified, run the following db.DB_NAME.find() method to retrieve the inserted data from your database.
db.my_db_demo.find( {} )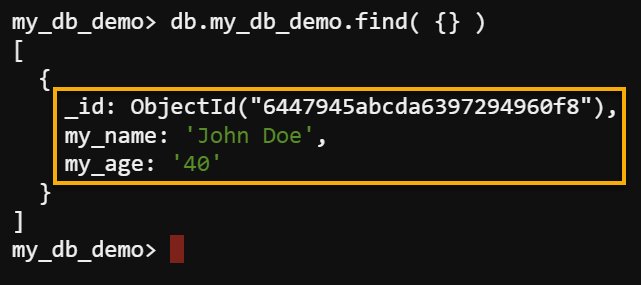
Conclusion
In this tutorial, you have learned how to set up MongoDB on Ubuntu Linux and secure it via the authentication and access control features. MongoDB is so powerful that it allows you to have a flexible database that can handle large amounts of data and scale with your growing needs.
Whether building a small project or a large-scale application, MongoDB is a great choice to help you achieve your goals. Why settle for less when you have MongoDB by your side? At this point, you can quickly start building your next big project with confidence.
With MongoDB, there are many advanced features and techniques you can explore. Not sure what to try next? Why not learn to deploy and manage MongoDB effectively with Docker?


