


MongoDB is a popular, open-source document database that provides high performance and great flexibility. But have you tried to containerize a MongoDB database for your projects? If not, then you’re in for a treat!
In this tutorial, you’ll learn how to deploy, secure, and manage MongoDB effectively with Docker. So read on and become your own master of deploying Docker MongoDB containers!
Prerequisites
This tutorial comprises hands-on demonstrations. To follow along, be sure you have the following:
- An Ubuntu machine – This tutorial uses Ubuntu 20.04 LTS
- A user with
sudopermission - Docker – This tutorial uses Docker 20.10.9
Downloading the Docker MongoDB Image
Before you can deploy and manage a Docker MongoDB container, you first need to download a MongoDB image from the Docker Hub so you can run the MongoDB container locally.
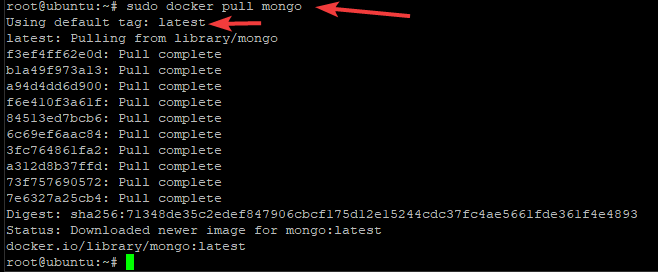
Run the docker command below to download the MongoDB Community Edition(CE) image (pull mongo), which Docker Hub is hosting. The latest version of this image at the time of writing is 4.2.
sudo docker pull mongoAs you can see below, the command automatically pulls the latest version of the image and tags it as latest.
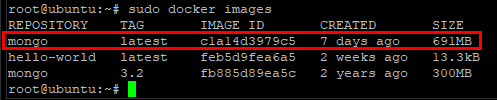
Now run the docker images command below to list all images available on your server.
sudo docker imagesBelow, you can see the MongoDB image tagged as latest.
Deploying a Docker MongoDB Container
From the MongoDB image you downloaded, you can now deploy a MongoDB container. You’ll initialize your MongoDB container with the mongo executable, create a data directory. You’ll then define the mapping between the Docker container’s data area and the host machine.
1. Run the mkdir command below to create a data directory named mongodata to store the MongoDB database and logs.
sudo mkdir -p /mongodata2. Next, execute the docker run command below to create a container given the name mymongo. In addition, the container is started with an interactive pseudo-TTY (-it), in the event that output should be shown when starting the container.
Finally, the newly created directory mongodata is bound (-v) to the internal directory, /data/db. The -d option starts the container in the detached mode, so it runs as a background process and returns the console output upon creation.
The system automatically creates the /data/db directory when you run the container to store data of the changes you make in the container. This directory runs in a similar mode to read-only and enables persistent data storage on the host system.
sudo docker run -it -v mongodata:/data/db --name mymongo -d mongoOnce the command completes successfully, you’ll see an output like the one below.

3. Finally, run the docker ps command below to identify the container’s ID and check its status. The docker ps command displays all information about the currently running container.
The
docker pscommand is comparable to the regularpscommand in Linux.
sudo docker psIn the output shown below, you can see a Ports section that lists all the ports assigned to the container for listening to incoming connections.
In this example, port 27017 is mapped to the host. The below output indicates you can access the MongoDB instance on this container via localhost:27017 from the host.

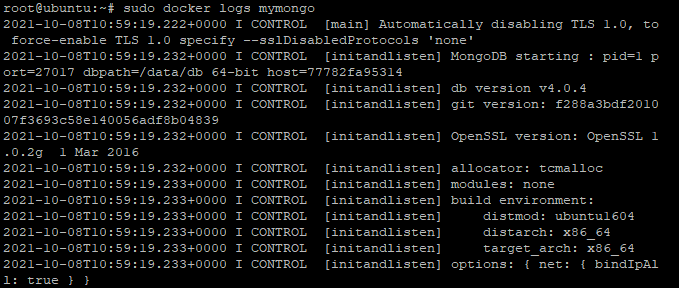
Perhaps you want to see the log file of the
mymongocontainer to determine what happened on your mongo database/instance when something went wrong with it. If so, run thedocker logscommand, like this:sudo docker logs docker-container. Replacedocker-containerwith the name of your Docker container name.
Attaching the Docker MongoDB Container to Bash Shell
You’ve just deployed a Docker MongoDB container, but how do you manage it? Do so by attaching the Docker container to the Bash shell with the docker exec command first.
Attaching your container to the Bash shell is crucial since the container is currently running in detached mode (running in the background). And if the container runs in the background, the container will neither receive any input nor display output.
Run the docker exec command below to attach your container (mymongo) to the Bash shell.
sudo docker exec -it mymongo bashWhen the command completes, your prompt will change to something like the one below. The unique alphanumeric number (77782fa95314) is the container ID.
Container IDs are essential to avoid naming conflicts and effectively identify containers between hosts, so try not to change them.

Now run the mongo command without any arguments to log into the MongoDB shell in the container (mymongo). The MongoDB shell is where you run your mongo queries/commands.
Once you are in the container, you can run any command without the
sudoprefix since you’re now a root user inside the container. Every change you make in the container will not affect your host system.
mongoBy looking at the prompt shown below, you can tell that you’re now in the MongoDB shell.

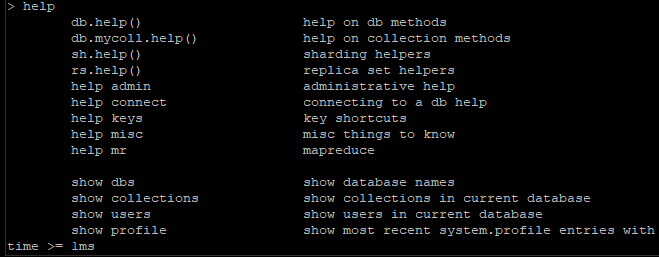
If you prefer to see all available commands in the MongoDB shell, run the
helpcommand, as shown below.
Creating an Administrative MongoDB User
After you’ve deployed a MongoDB server inside a Docker container, you’ll now create an administrative MongoDB user. An administrative user lets you connect to the MongoDB server and manage databases.
1. Log in to MongoDB shell again and run the use command below to first switch to the admin database. Doing so provides the administrative user with the right permissions to manage the databases.
use admin
Copy and paste the following code in the MongoDB prompt to create an administrative user.
The code below uses the db.createUser() method to create a user with administrative roles. The username (user) and password (pwd) below are hardcoded, which you can change based on your preference.
# Create an administrative user
db.createUser(
{
# Sets the username for the administrative user
user: "ata",
# Sets the password for the administrative user
pwd: "password123",
# Sets the roles for the administrative user
roles: [ { role: "userAdminAnyDatabase", db: "admin" } ]
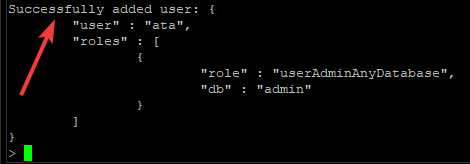
}
)If the code works, you’ll get a message like the one below in your MongoDB prompt.
3. Run the quit() query below to exit the MongoDB shell.
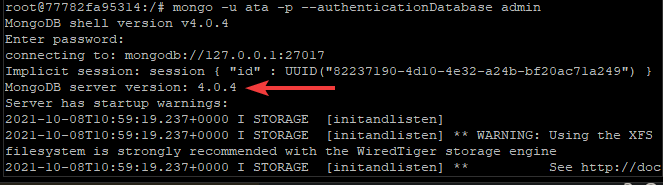
quit()4. Finally, run the following mongo command to test the administrative user you created (ata) by connecting to the MongoDB server. Enter the password for the administrative user when prompted.
mongo -u ata -p --authenticationDatabase adminAs you see below, the MongoDB server prints out the MongoDB server version if you connect to the server successfully.
Perhaps you want to test the administrative user further. If so, run the commands below to show all the users in the database.
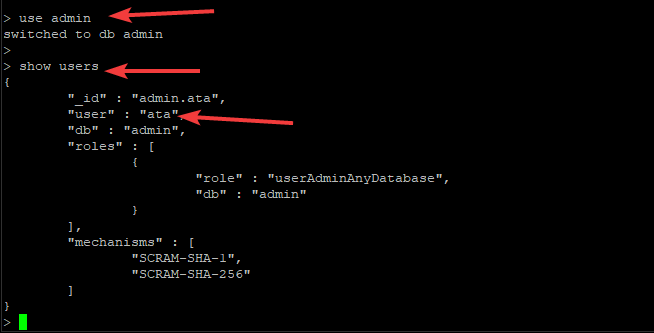
use admin
show users
Below, you can see the administrative user you created is in the list.
Creating a MongoDB Database
Managing a Docker MongoDB container wouldn’t be complete without creating a database. You’ll create a new MongoDB database that you’ll store data into via MongoDB shell.
1. From within an interactive session within the Docker container, run the show dbs command below to list all databases in your server.
show dbsBelow, you can see an admin database, a config database, and a local database. The MongoDB shell creates these databases by default in every MongoDB server.

2. Next, run the use command below to create a new database. Replace <database_name> with the database name of your choice. But for this example, the database is named linux.
The
usequery switches the current database to the one you specify if it exists. If not, theusequery creates a new database and automatically switches to it.
use <database_name>
3. Rerun the show dbs command as you previously did (step one) to see if the database you created exists.
show dbsStill don’t see the newly created database (linux) on the list? MongoDB builds the database only when you store data in it for the first time. The data may be in the form of a collection or even a document.

4. Now copy/paste the code below to the MongoDB shell and press Enter.
The code below creates a new collection named linux_version, which you can change to which name you prefer. The collection contains data in key:value pairs format.
# Using insertOne method to insert data
db.linux_version.insertOne(
	# Key:value pairs to insert to the database
	{ "debian" : "11",
	"ubuntu" : "20.04",
	"rocky linux" : "8.4",
	"alma linux" : "8"
	}
)
In the output below, you can see the linux_version collection is created and comes with an ObjectID.

5. Run the show collections command to see a list of collections and see if the new collection linux_version exists.
show collectionsYou can see below that you’ve successfully created the linux_version collection.

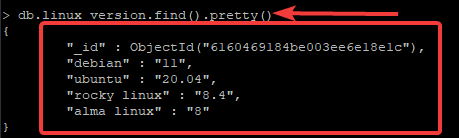
6. Finally, run the command below to view and confirm the data you inserted in the linux_version collection is correct. The pretty() method lets you view the data in a human-readable format.
db.linux_version.find().pretty()If you ever modify the data in the database, use the
Update()method.
You can see the output below is in a much readable format.
Restarting the Docker MongoDB Container
By now, you have a successfully running Docker MongoDB container. But what if you no longer have any use for the container, or what if it’s not working? A couple of Docker commands can help to stop, restart, and even remove a MongoDB Docker container.
1. Run the docker ps command below to list all running containers.
sudo docker psNote the name and container ID of the container you wish to stop, restart or remove, as shown below.

2. Next, run either of the docker stop commands below to stop a running MongoDB container.
sudo docker stop mymongo
sudo docker stop container-ID
3. Rerun the docker ps command as you previously did (step one) to check if the container has shut down.
sudo docker psAs you can see below, the container is not in the list of running containers, which indicates you’ve successfully stopped the container.

4. Now run either of the docker start commands below if you decide to restart a container.
sudo docker start mymongo
sudo docker start container-ID
5. Finally, rerun the docker ps command to see if the container is running.
sudo docker psPerhaps you have no further use for a container. If so, you must stop the container first and run the
rmcommand to remove a container, like this:sudo docker container rm mongodb. Similar to the previous examples, replacemongodbwith either the container name or container ID.
Conclusion
In this tutorial, you’ve learned how to deploy and manage a Docker MongoDB container by creating an administrator user to create a database and store data into it. You’ve realized that you can stop, restart and remove containers that you no longer need to keep your Docker images clean.
Deploying and managing MongoDB with Docker is the first step towards taking advantage of containerization technology and reducing the overhead. Why not use this first step to explore MongoDB more and see how a Docker MongoDB container can help with your projects?


