


Things can get messy quite easily while you focus on deploying your projects and testing things in Docker containers. You will find yourself needing to clean up your workspace from time to time. So why not keep your Docker environment clutter-free with docker image prune and other handy commands?
This tutorial will teach you the many ways to keep your Docker environment clean and manageable, as well as some best practices from taming potential complexities.
Let’s get started!
Prerequisites
To follow along in this tutorial, you need to have the following at your disposal:
- A Windows 10 PC – This tutorial uses Windows 10 and will be launching Docker commands in PowerShell but any OS that will run Docker is fine.
- Docker – This tutorial uses Docker Desktop v3.6.0 for the container host.
- An existing Docker container to clean up
Removing Docker Images
A Docker environment consists of many different components from images, containers, networking, and so on. You’ll find many different components to clean up. Let’s start this cleanup process by first pruning any old images you no longer need. But don’t worry, if you remove images and have a Dockerfile created that needs those deleted images, Docker will automatically download them again.
If you need to remove unnecessary images you’ve downloaded in the past, the rm command is your friend. This command removes images and containers, but the tutorial will first focus on images.
If you have one or more containers currently using the image you’d like to remove, you must first stop the containers using that image with the
docker stopcommand. For more information, check out the ATA article Use Docker Stop Containers Without Screwing Things Up!.
Note that you can’t remove Docker images unless you stop the containers that are using the image.
To remove an image with docker rm, you must first find the image ID. To do that, run the docker image ls command. The docker image ls command reads Docker and returns all images you currently have, including the ID of each image.
You can also run the
docker imagescommand to list the from the most recently created images.
docker image lsBelow, you can see the result of the docker image ls command in a table list with columns REPOSITORY, TAG, IMAGE ID, CREATED and SIZE.

Once you know the image ID, provide that image ID to the docker image rm command, as shown below. Once you’ve done so, Docker will remove the image with the specified ID.
# Remove only the images with the specified image ID
docker image rm image_id
Removing ‘Dangling’ Docker Images
As you begin to build more containers and download more images, chances are you’re going to have various images that have no associated container. These images are called ‘dangling’ or ‘stray’ images and are not currently used by Docker.
To save disk space and keep things tidy, let’s clean up all of these dangling images. To do that, run docker image prune. This command prunes or remove images that do not have a container built from them.
docker image pruneIf you’d like to remove ALL images with an associated container or not, you don’t need to find a particular image ID; run
docker image prune -ato go nuclear and remove them all.
Removing Docker Containers
Once you’ve cleaned up your Docker images, it’s time to move onto containers. Luckily, you’ll see the task of removing containers is similar to removing images using the rm command.
First, find the container ID with the docker container ls command to remove containers, as shown below. This command returns all containers, including the CONTAINER ID. The -al parameter is optional to show you all containers (running or not) and only the latest version of each container.
docker container ls -al # List all Docker containers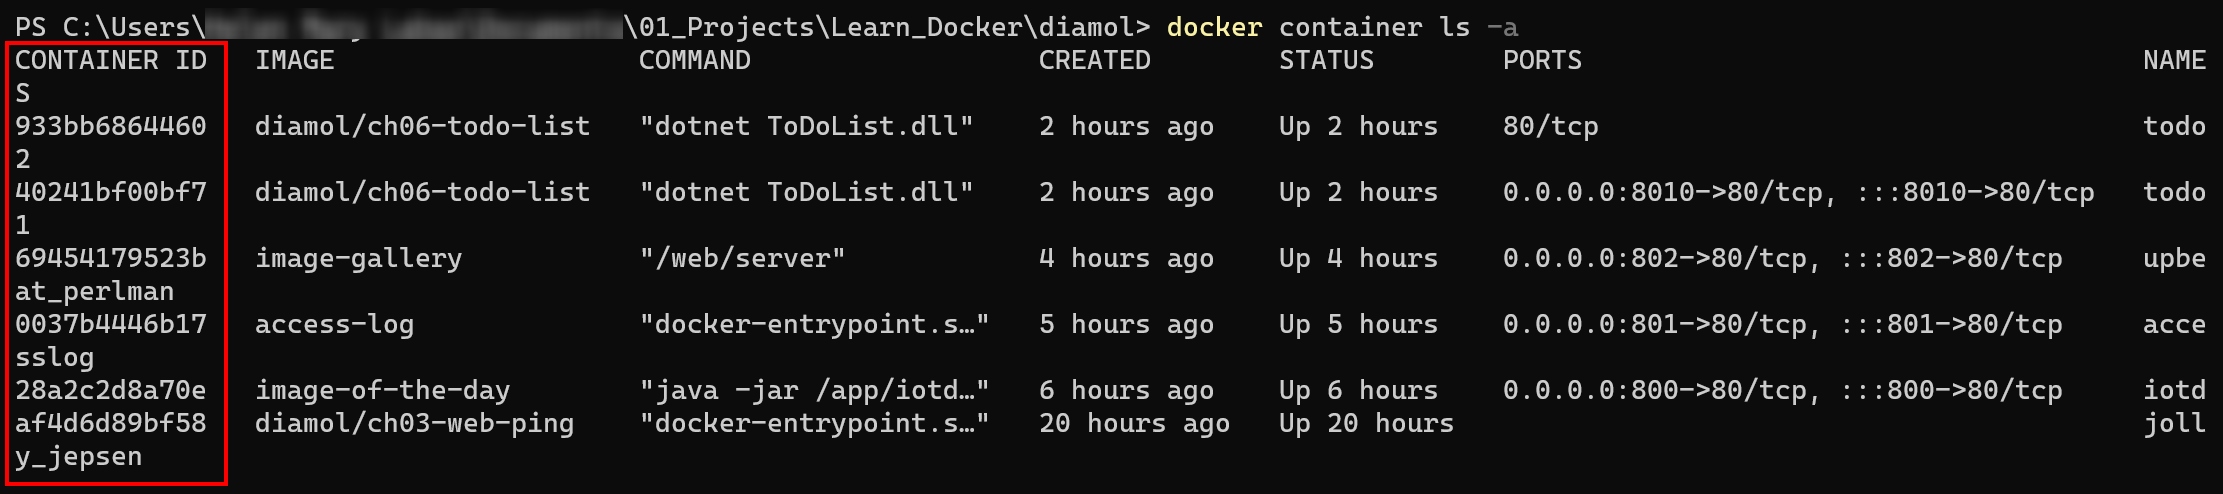
Once you know the container ID, run docker rm and pass it the container ID you’d like to remove.
# Remove only the containers with the specified container ID
docker rm container_id
You can also specify more than one container ID by separating each ID with a space, as shown below. This command removes (rm) the Alpine and the Docker 101 tutorial containers with container IDs f8ec07177218 and 6fac840d9382.
docker rm f8ec07177218 6fac840d9382Removing All Stopped Docker Containers
Perhaps you have a lot of stopped containers that are just taking up space. Like dangling images, stopped containers are not serving any purpose at the moment.
To remove all stopped containers:
1. Run the docker command below to list all (ls --all) Docker containers. Notice all of the containers with a STATUS of Exited (X) Y hours ago. All of these containers are currently being stopped.
docker container ls --all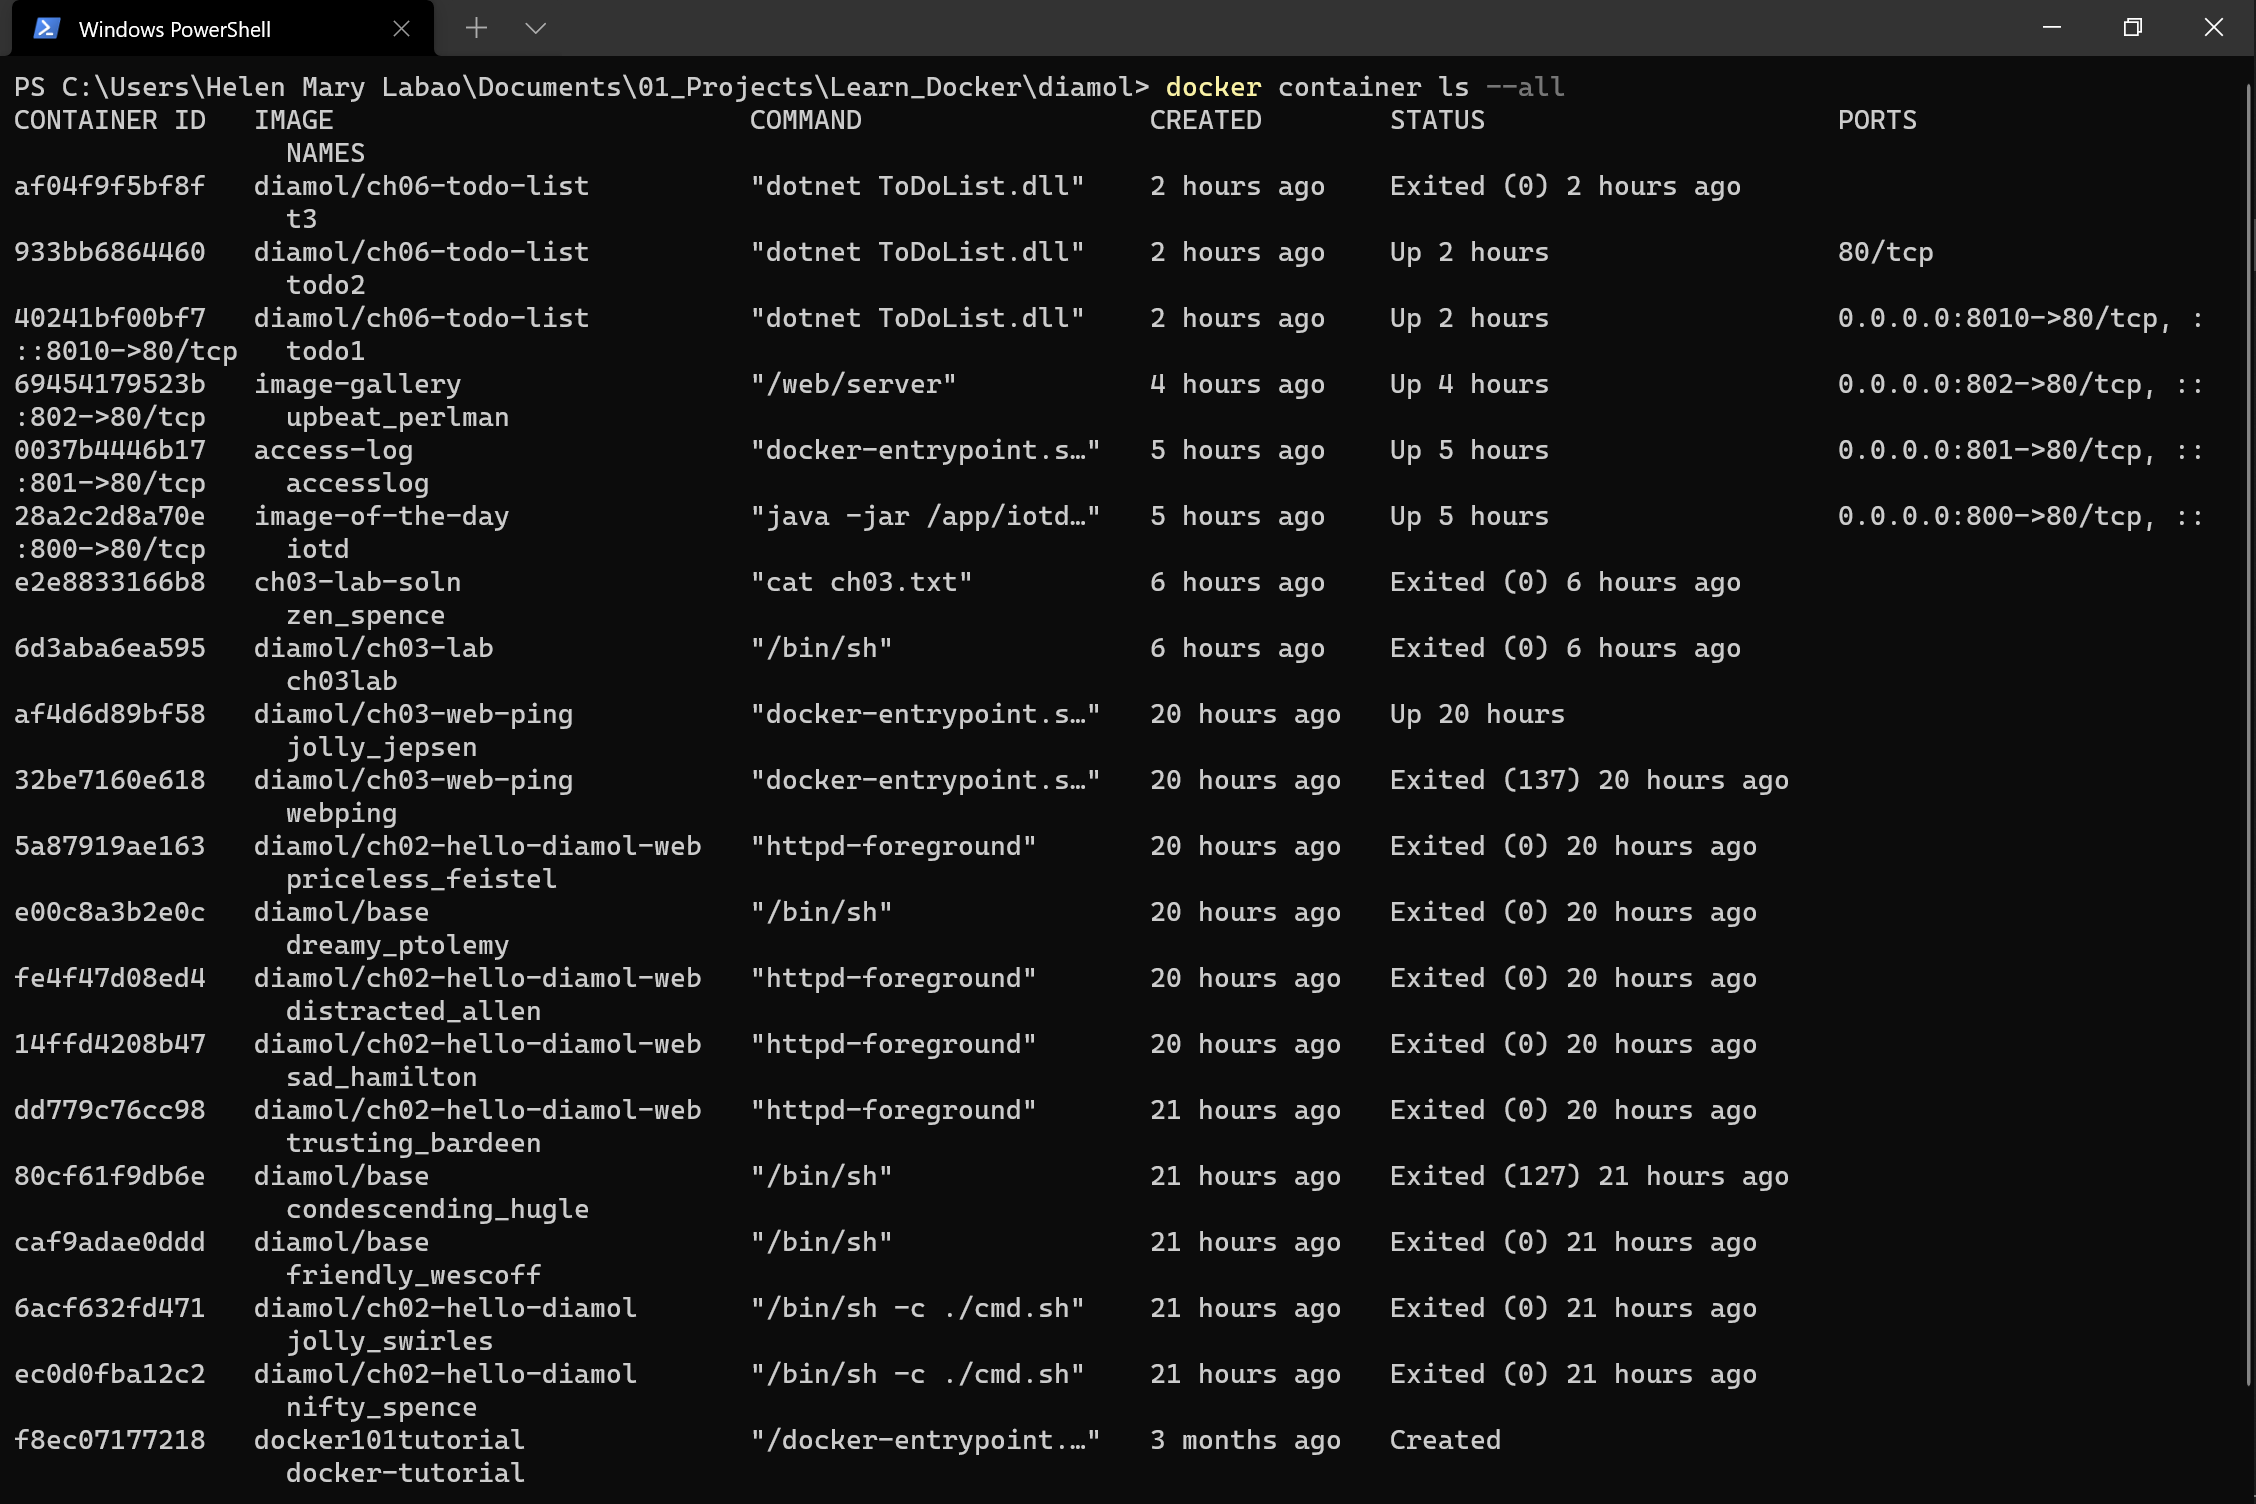
2. Now run the docker container prune command to remove all stopped containers. When this command runs, you’ll see which container IDs the command removed.
docker container prune
3. Finally, run docker container ls -a again to see that each stopped container was removed.

If you’d rather not specify one or more container IDs manually, you can also nest Docker commands using
$()to both list containers and remove them in one line withdocker container rm $(docker container ls -aq). Thedocker containercommand uses theqswitch not to return containers to the console. Once Docker collects all of the containers, it then runsdocker container rmagainst each one.
Removing Docker Containers by Filtering Rules
Perhaps you have many different containers, and removing them each by ID would be a pain. If they all have some common characteristics, you can create a filter to remove only containers matching a specific query.
To remove multiple containers matching a specific query, use the filter parameter or filtering flag on the docker container prune command. This parameter allows you to specify either an until attribute to filter containers created before a date or a label argument to match containers with/without a specific label.
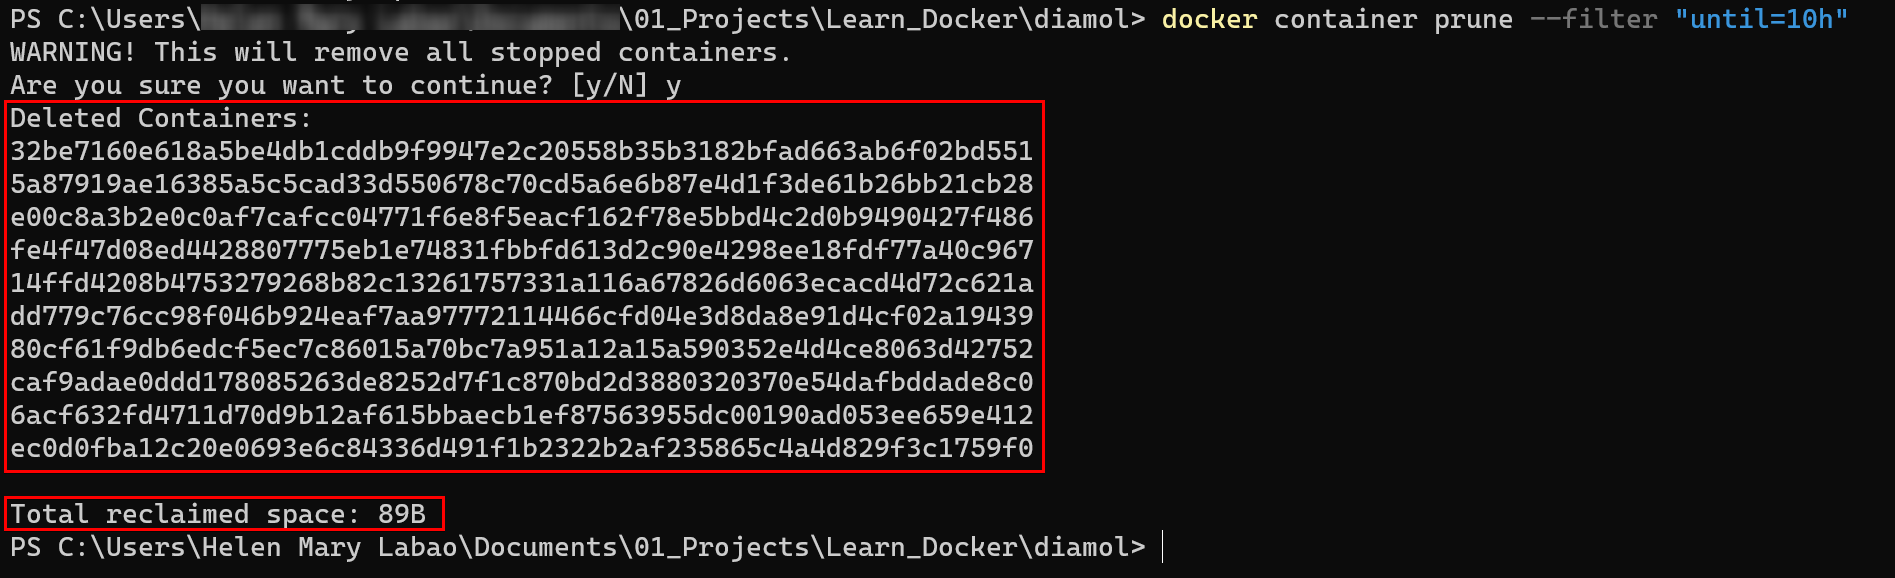
For example, you can remove all stopped containers that have been created more than 10h ago by running the command below.
docker container prune --filter "until=10h"Enter Y to confirm Docker container removal, as shown below. Once the removal is complete, you’ll see which containers are removed and the total reclaimed space.
Cleaning up Containers by Nesting Docker Commands
All of the previous commands covered required you to stop each container beforehand. But what if the containers are running? Instead of stopping each container individually, you can instead nest Docker commands in a removal command to stop all containers and remove them simultaneously.
Take extra precautions when removing running containers. The removal may impact some application or process that depends on that Docker container.
The nested docker ($(docker container) command below lists all containers quietly (-aq) in memory, including those that are currently running. The list of containers is then passed to the outer docker command to remove (rm) the containers in the list.
You can see below that executing the nested command removes all containers in one go, as shown below. So when you check the list of containers, you won’t get an output as the list is empty.

Removing Containers Automatically with the --rm Flag
The previous commands are used to remove Docker containers only after the Docker list has been cluttered. But why wait for the Docker list to be cluttered? If you are a “clean as you go” type of worker, preventive cleaning measure is just at your fingertips with the --rm flag.
The --rm flag in a docker run command is handy if you are just testing things on your machine for a brief time and not handling critical files or deployments inside that container.
The docker run command syntax below adds a Docker container with the name of your choice (container_name) and a Docker image (organization/base_image) from Docker Hub library. But then the --rm flag removes the container automatically.
docker run --rm --name container_name organization/base_imageCleaning Up Docker Volumes
Docker doesn’t just consist of images and containers. The Docker ecosystem also consists of storage volumes. Using the same general method of finding IDs and pruning items, you can clean up storage volumes too.
As with containers and images, run docker volume ls to see all of the volume IDs you have in the system.
docker volume lsBelow, you can see that in this tutorial, there are three volumes listed.

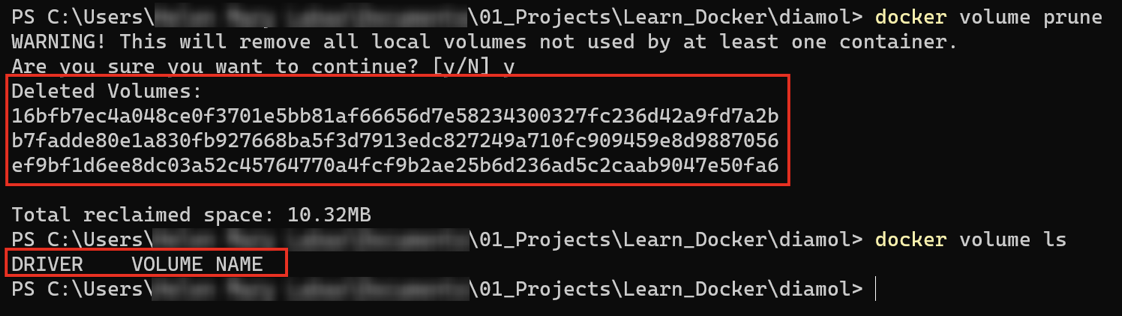
Now run the docker command below to delete all the unused volumes (volume prune).
To remove unused docker networks, run this command instead:
docker network prune
docker volume pruneBelow, you can see that the command removes all local volumes as they were not in use at the time of deletion. So when you list all the Docker volumes, you only get an empty table list.
Removing All Unused Docker Components at Once
Throughout this tutorial, you’ve been picking and choosing which Docker components to remove. Maybe you’re working in a testing environment and just want to clean everything up all at once. Instead of cleaning each component individually, clean it all up with docker system prune!
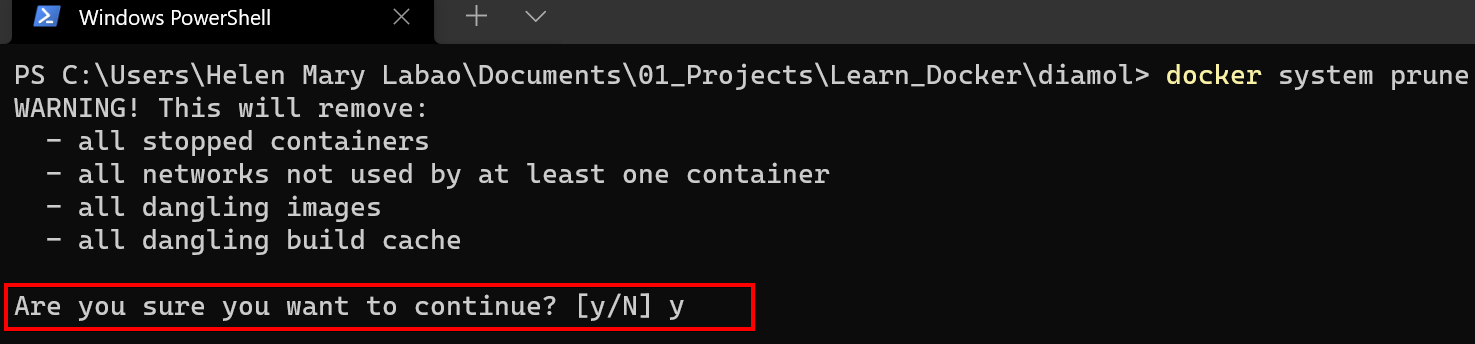
The docker system prune command removes non-running containers, unused networks, unused images, and the build cache for the Docker engine.
docker system pruneAdd the
-fflag to force or suppress the warning messages and confirm deletion of Docker system elements, like this:docker system prune -f
Below, you can see a prompt asking whether you want to continue removing Docker system elements or not. Confirm by entering Y to proceed.
Conclusion
In this tutorial, you’ve explored the numerous ways to clean up Docker images with the docker image prune command, removing containers with docker container rm, and more.
With this newfound knowledge, why not develop your own preferred methods of cleaning up your Docker images? Perhaps making a Docker asset inventory or a good tagging system that allows you to name your projects properly and avoid deleting critical images or containers?


