


Many text/code editors out in the market can help with coding for your project. But if you haven’t found one that suits your taste, why not try Sublime Text on Ubuntu?
Sublime Text is a powerful text editor with a wide range of features. And guess what? You can get Sublime Text for FREE! But mind you, being free doesn’t make Sublime Text any less than a premium tool.
In this tutorial, you’ll learn to set up Sublime Text, create a project and install plugins for additional features you can use for your project.
Read on and start coding like a pro!
Prerequisites
This tutorial will be a hands-on demonstration. If you’d like to follow along, be sure you have a Linux machine with Ubuntu installed. This tutorial uses Ubuntu 20.04 LTS, but any recent version of Ubuntu should work.
Adding the Sublime Text Repositories
Sublime Text is a powerful text editor with a wide range of features and is available for Ubuntu systems. But just like other tools, you’ll have to install Sublime Text by downloading the Sublime Text repository first.
To add the Sublime Text repository on your machine:
1. Run the wget command below to download the Sublime Text repository public GPG key to your apt keyring. A keyring is a collection of public keys used for verifying the authenticity of packages, in this case, the Sublime Text repository.
wget -O- https://download.sublimetext.com/sublimehq-pub.gpg | gpg --dearmor | sudo tee /usr/share/keyrings/sublimehq.gpg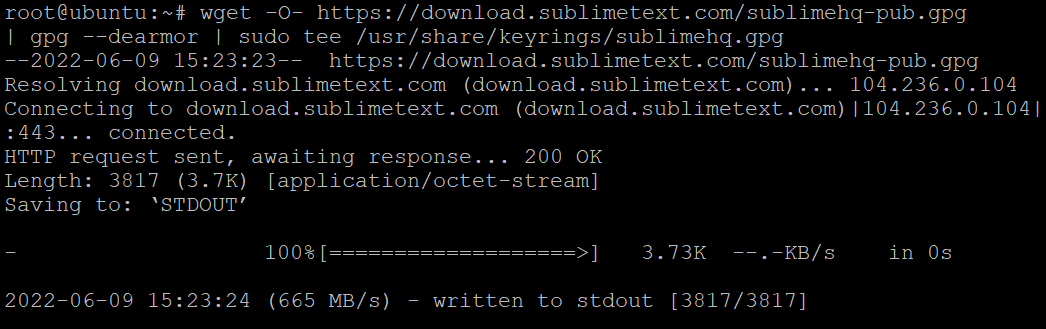
2. Next, run the below command to add the Sublime Text repository to your system’s apt sources list.
The tee command writes the output of the echo command to a file called /etc/apt/sources.list.d/sublime-text.list. Apt uses this file to know which repositories to check for software packages.
Adding the Sublime Text repository to the sublime-text.list file enables you to install Sublime Text using apt.
echo 'deb [signed-by=/usr/share/keyrings/sublimehq.gpg] https://download.sublimetext.com/ apt/stable/' | sudo tee /etc/apt/sources.list.d/sublime-text.list
3. Run apt update to update your system’s package list. This command ensures apt knows about the new Sublime Text repository you just added in step two.
apt update -y
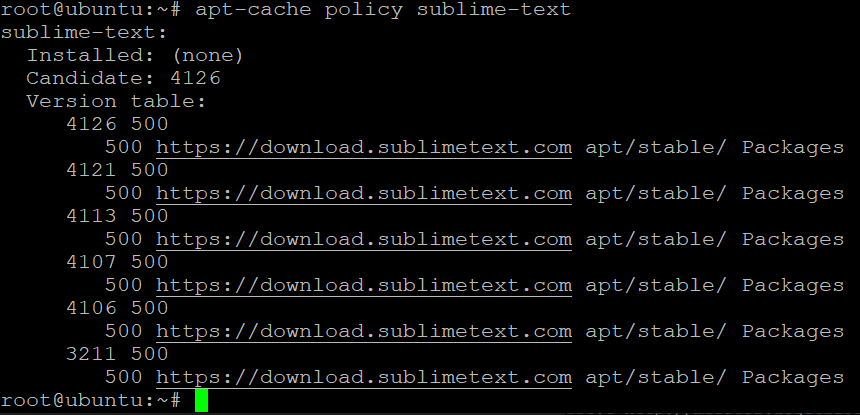
4. Finally, run the apt-cache command below to check the Sublime Text repository is configured correctly.
apt-cache policy sublime-textThe output below shows the apt policy for the Sublime Text repository.
Installing Sublime Text on Ubuntu
Now that you have added the Sublime Text repository to your system, you’re ready to install Sublime Text using the apt utility.
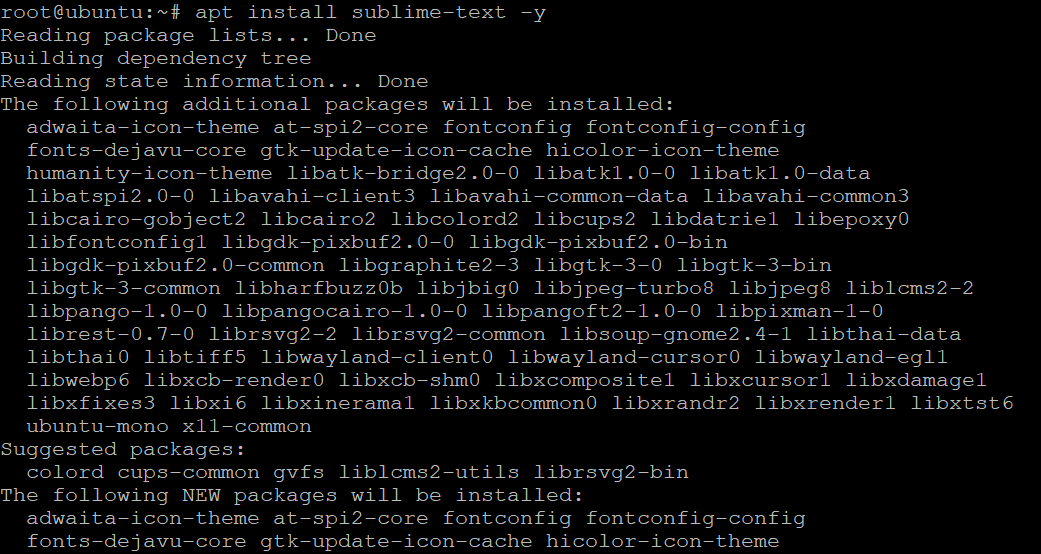
Run the apt install command below to install Sublime Text and dependencies on your machine.
apt install sublime-text -y
Now, run the following command to verify Sublime Text’s installed version.
subl --version
As of this writing, you can see below the latest Sublime Text version installed is Build 4126. Yours may be different depending on the latest release. This output confirms you’ve successfully installed Sublime Text on your machine.

Interacting with Sublime Text via Command Line Interface (CLI)
Even though Sublime Text uses GUI, you can still interact with the tool by running subl commands on your terminal. And since you’ve just installed Sublime Text, you’ll launch it for the first time.
But first, you’ll verify if Sublime Text has a symlink added to your system’s PATH environment variable to ensure interactions with Sublime Text via your terminal goes smoothly.
1. Run the following command to print the directories defined in your system’s PATH variable.
printenv | grep PATHAs shown below, one of the directories must be /usr/bin/.

2. Next, run the echo command below to check that the /usr/local/bin/subl symlink file exists. This symlink allows you to run subl commands from any directory on your system.
Some operating systems, like Windows 10, require you to set up the environment variable before using the subl command. Luckily, when you install Sublime Text on Ubuntu using apt, the environment variable is set up for you automatically in /usr/bin/.
echo /usr/local/bin/subl 
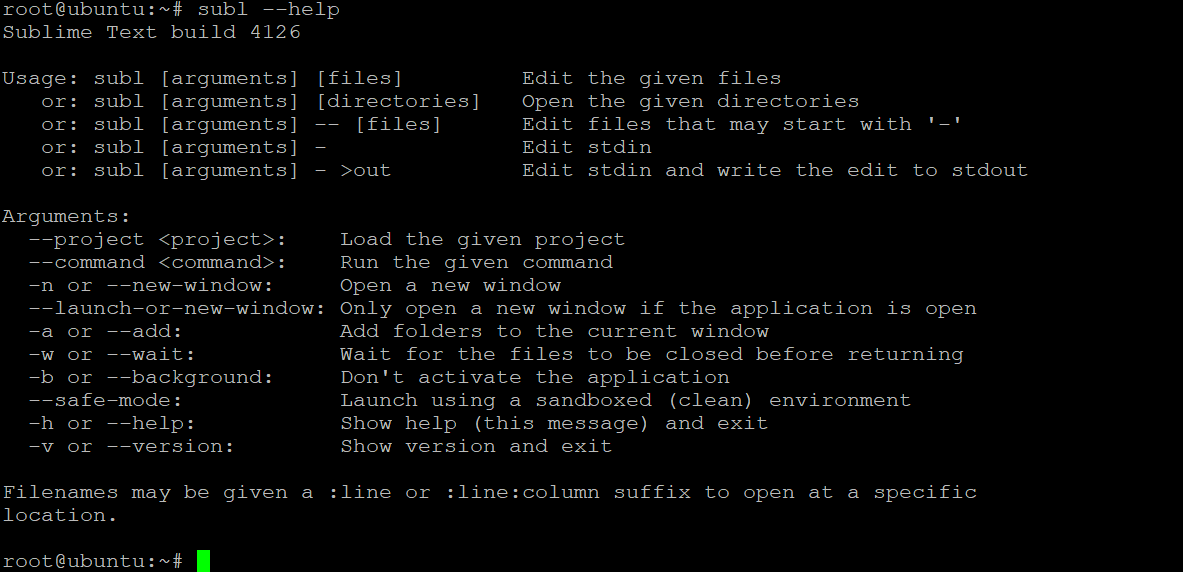
3. Now, run the command below to see the manual page for subl CLI.
Whenever you’re working in a terminal, it’s always a good idea to check the manual page to see the list of available options for a command.
subl --helpBelow, you can see arguments you can use to interact with Sublime Text via your terminal.
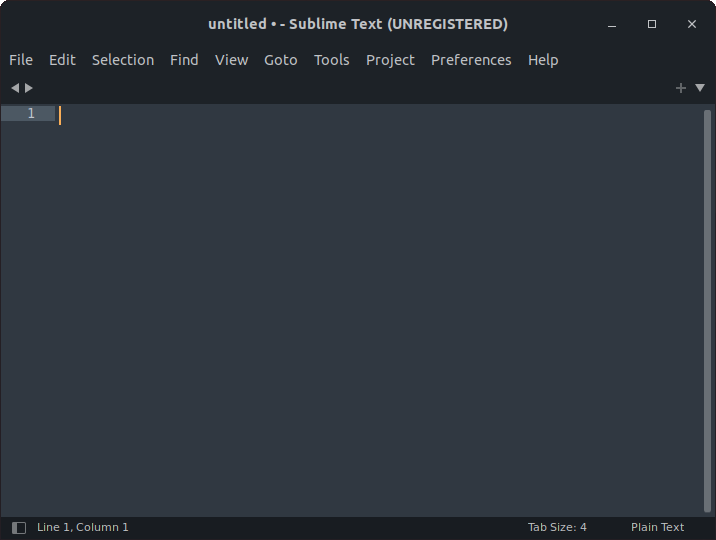
4. Finally, run the subl command below to launch the Sublime Text window.
sublIf all goes well, you’ll see the default theme of the Sublime Text window, as shown below.
Alternatively, you can search for sublime in the Dash and click on Sublime Text to launch the application.

Whichever way option you choose to launch Sublime Text is up to you. But if you’re mostly working in a terminal, running the subl command is the ideal option.
Creating Your First Project in Sublime Text
Now that you’ve installed and opened Sublime Text, it’s time to create your first project. Projects in Sublime Text are made up of two files:
- The .sublime-project file – contains the project definition and controls which folders are associated with the project. You can share this file with other users and commit to version control systems. This file can also contain settings that apply to files open in a particular window only, and build systems that apply only within that window.
- The .sublime-workspace file – contains data, including which files are opened, the contents of unsaved files, and modifications to each. Contrary to .sublime-project files, .sublime-workspace files contain data you must keep private.
To create a project in Sublime Text:
1. Run the below command to create and open a file called MyProject in Sublime Text.
subl ~/MyProject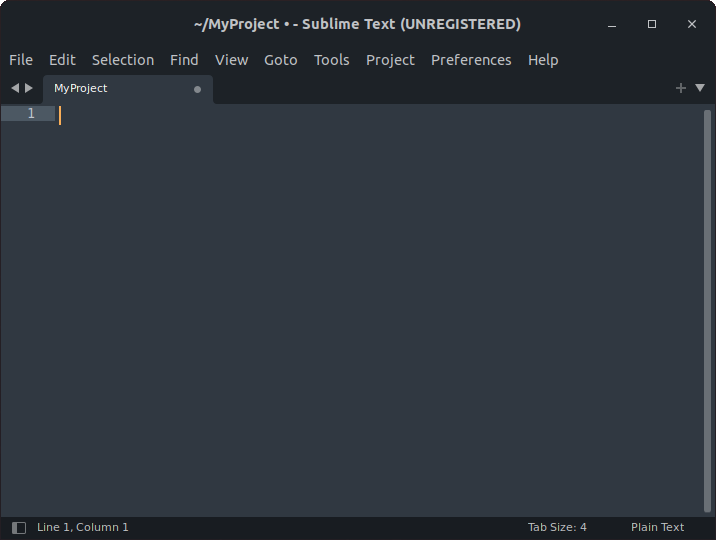
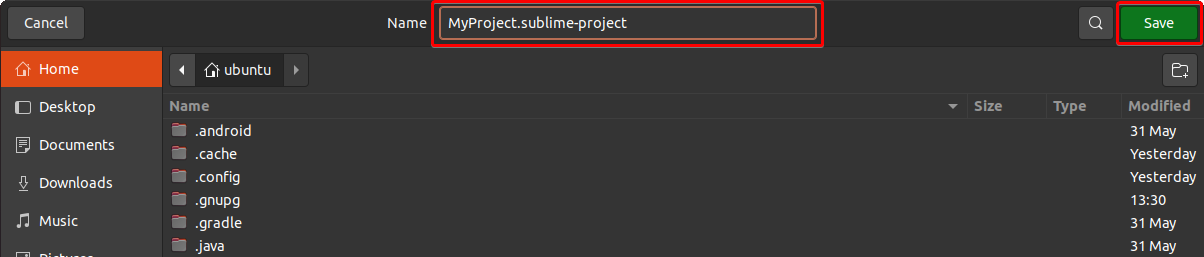
2. Next, click on the Project menu, and choose Save Project As to set a name for your project.

3. Run the ls command below on your terminal to list the files and directories in your home directory (~/).
ls ~/Below, you can verify both the .sublime-project and .sublime-workspace files for your project exist.

4. Provide a project name you like, and click Save to finalize creating your project.
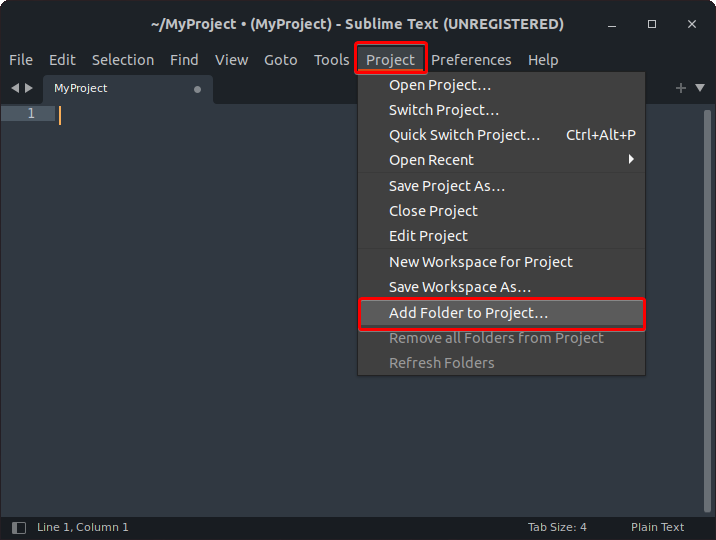
5. Now, click on the Project menu again, and choose Add Folder to Project to select the folders you like to add to your project.
6. Select all folders you’d like to add to your project and click Open.
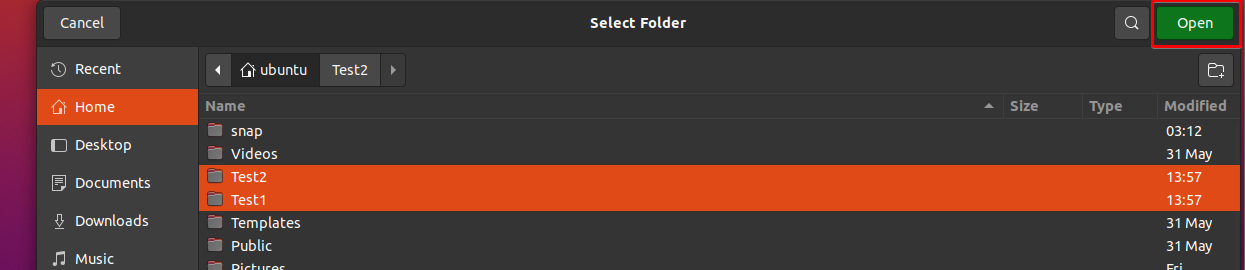
After adding the folders to your project, the left panel appears where you’ll see the list of folders associated with your project.
Congratulations! You’ve just created your first project in Sublime Text.

Installing Packages (plugins) with Package Control
Sublime Text is a great text editor, but with the help of plugins, you can make Sublime Text even better. Plugins are pieces of code that add more functionality to an application.
In Sublime Text, plugins are called packages, and Package Control is a package manager for Sublime Text that lets you find, install, and update packages. With Package Control, you don’t have to worry about manually downloading and installing packages.
But first, you’ll have to install Package Control for Sublime Text:
1. Click on the Tools menu, and select Install Package Control, as shown below, to install Package Control.
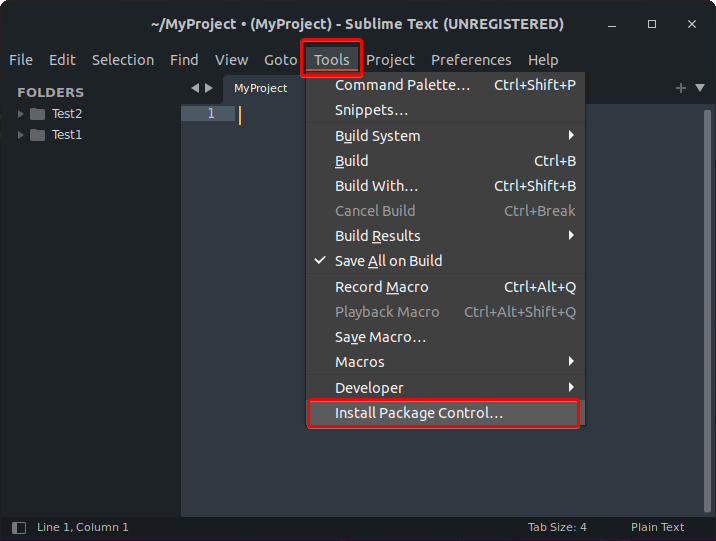
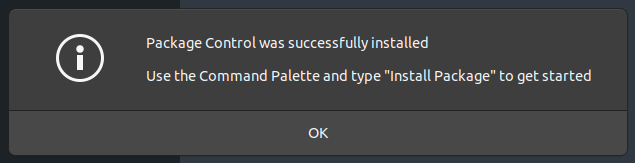
2. Once installed, restart Sublime Text.
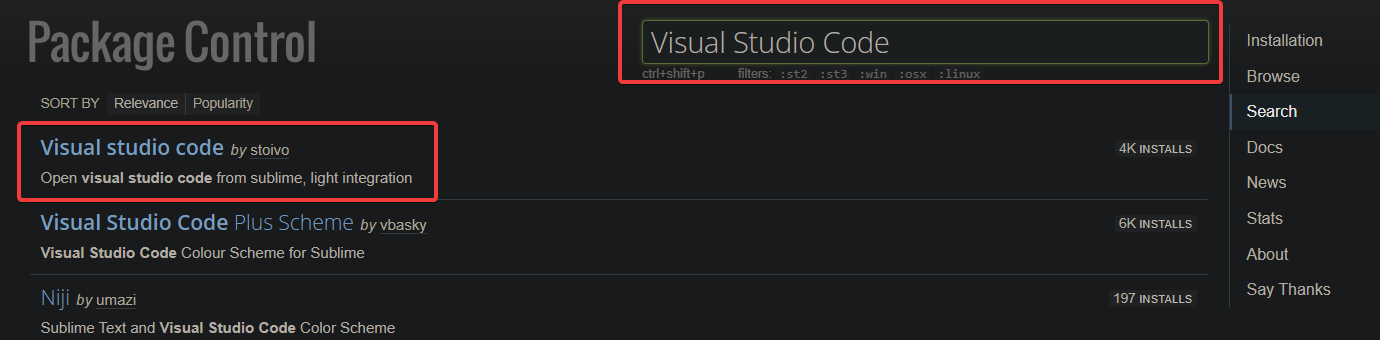
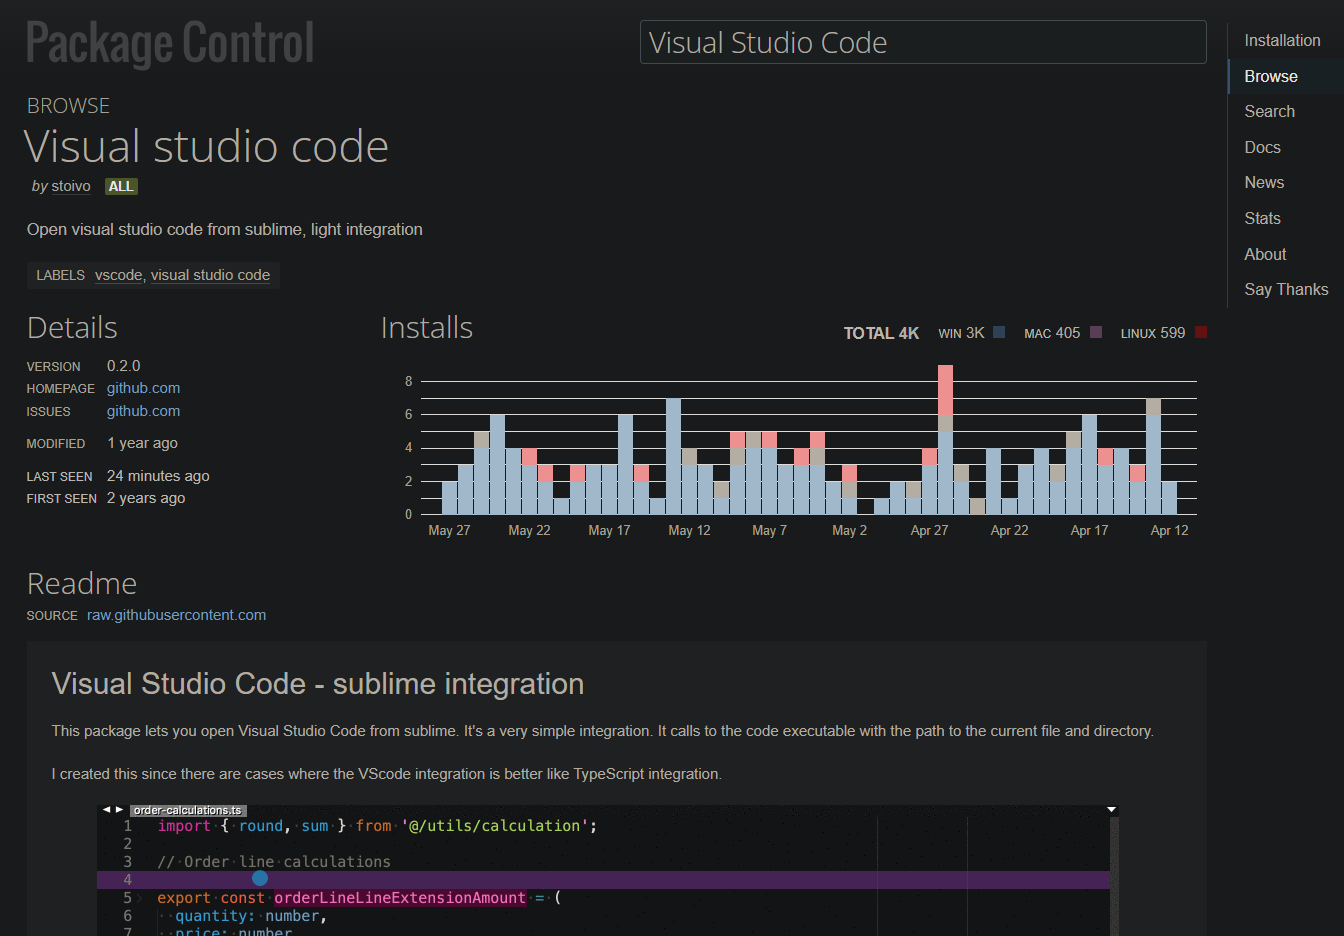
3. Now, open your favorite web browser, navigate Package Control‘s official page, and find the package you like to install. In this example, you’ll install the Visual Studio Code(VSC) package to take advantage of VSC’s outstanding features.
Search for Visual Studio Code in the search box, and choose the first Visual studio code item in the search result list, as shown below, to open the package.
Below, you can see the package details for VSC.
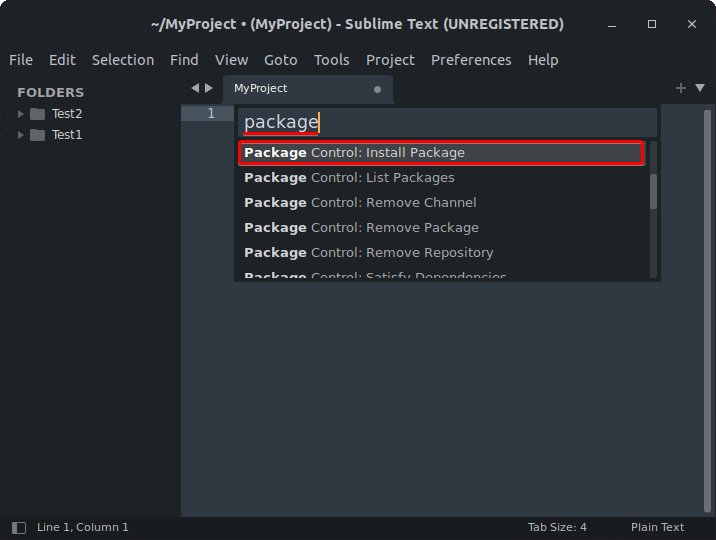
4. Switch back to Sublime Text, press Ctrl+Shift+P keys, or click on Tools —> Command Palette to open the command palette.

5. Type package in the input box, select Package Control: Install Package, and press Enter to get access to available packages you can install.
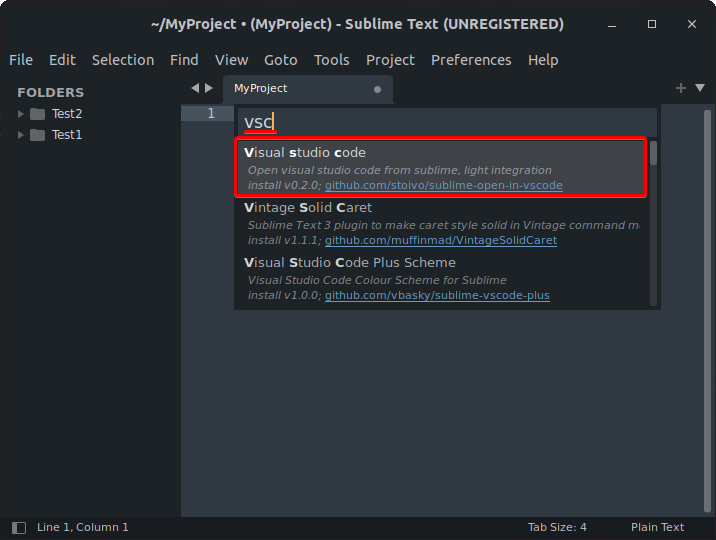
6. Now, type vsc in the new input box that appears, and select the first result from the list (Visual studio code), as shown below, to install the VSC package.
You’ll see a message that says “Installing Package” on the status bar at the bottom of the window, as shown below. You’ll know the package is installed once the message disappears.

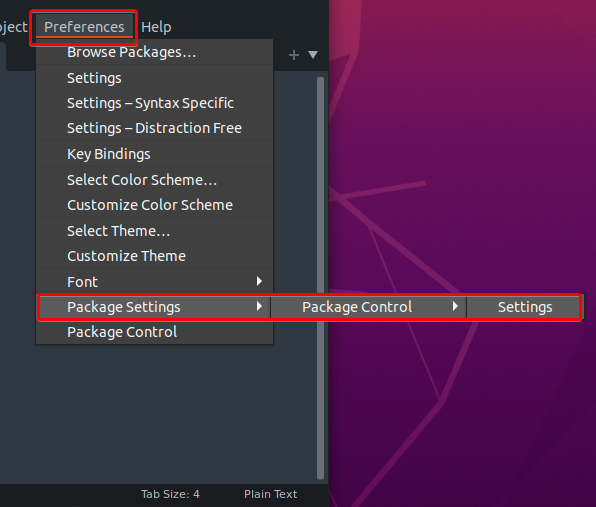
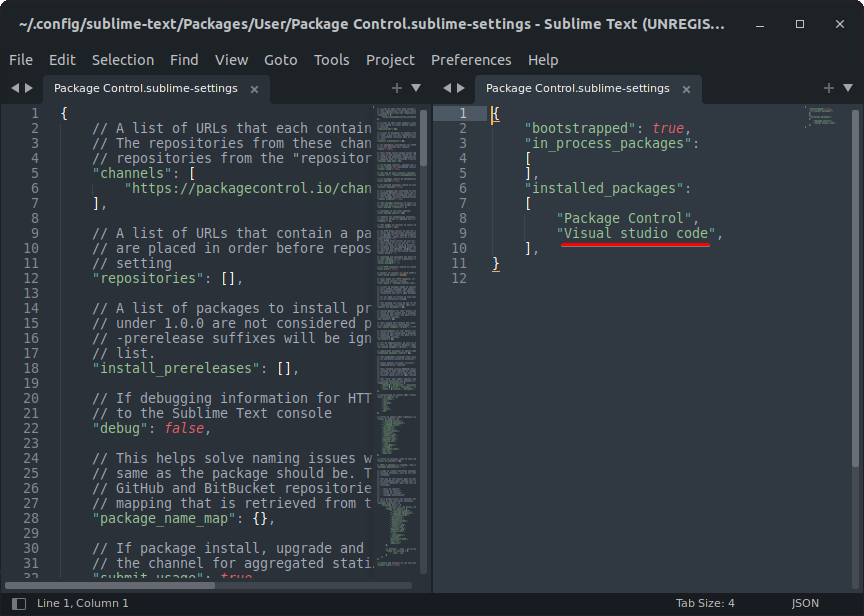
7. Once installed, click on the Preferences menu —> Package Settings —> Package Control and select Settings, and you’ll see a JSON file open in a new tab.
8. Finally, find the installed_packages section in the second column, and you’ll see your newly installed package listed, as shown below.
Now you can use all of the VSC package’s features for your project.
Conclusion
In this tutorial, you’ve learned how to install and use Sublime Text for your project on Ubuntu. You’ve installed packages with the built-in Package Control. You’re now ready to start coding in Sublime Text like a pro with these newly-acquired skills.
There are thousands of packages available, and more are being added over time, like the Nodejs package that adds support for Node.js development. So if you’re working with Node.js, install the package and start coding right away!


