


Creating and managing Hyper-V Windows 10 virtual machines (VMs) can be a useful way to solve problems for many people. Your VM can be a great testing ground for new software or projects, and you can use it to run multiple operating systems side-by-side.
Not a reader? Watch this related video tutorial!In this tutorial, you’ll learn how to create and manage Hyper-V virtual machines(VM) to get the most out of them with some of the best practices.
Ready? Read on to manage VMs like a pro!
Prerequisites
Since you will be creating a virtual machine, you will need to have a few things in place to follow along:
- A host machine running Windows 10 with Hyper-V capabilities – This tutorial uses Windows 10 21H1 as the host machine.
Note that the Hyper-V feature requires Windows 10 Enterprise, Pro, or Education edition.
- An ISO file of the OS to install, and a product key, if one is required – This tutorial uses a Window Server 2019 ISO file, but you can use other ISO as well.
- Sufficient storage space on your host machine for the VM and its OS – This tutorial allocates 50GB of storage.
- A minimum of 4GB of RAM – This tutorial allocates 8GB of RAM for the VM.
- A CPU processor supported by Intel Mode Extension or AMD-V virtualization extensions.
Enabling Hyper-V on the Host Machine
Now that you have all of the prerequisites out of the way. You can enable Hyper-V on your host machine. Learn multiple ways to enable the Hyper-V role on your host machine.
Why use multiple methods? You might be required to use a specific method to enable Hyper-V in an enterprise environment. The methods shown below are the most commonly used ones.
Using PowerShell
PowerShell is a scripting language that enables you to automate and manage Windows-based environments.
The following steps also work on Windows 11 to enable Hyper-V.
To enable Hyper-V using PowerShell, follow these steps:
1. Open PowerShell as an administrator on your host machine as you’ll need elevated privileges to enable Hyper-V.
2. Next, run the following Enable-WindowsOptionalFeature command to install the Hyper-V role on your host machine where:
- The -online parameter enables you to install the Hyper-V role on a running operating system.
- The -FeatureName Microsoft-Hyper-V parameter installs the Hyper-V role.
- And the -All parameter installs all of the sub-features of Hyper-V.
Enable-WindowsOptionalFeature -Online -FeatureName Microsoft-Hyper-V -AllIn the output below, you can see the RestartNeeded status says False, indicating that a restart is not required for the changes to take effect.
Restart your machine when the RestartNeeded status is True. But if you don’t see the RestartNeeded status, manually restart your machine for the changes to take effect.

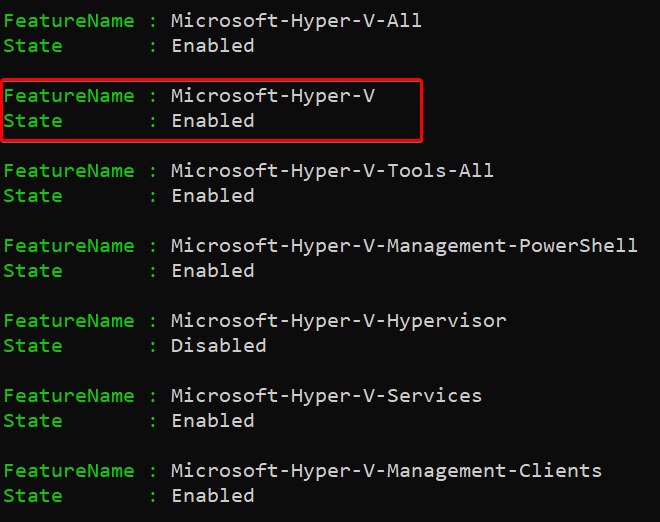
3. Run the Get-WindowsOptionalFeature command below to verify that the Hyper-V role is installed.
Get-WindowsOptionalFeature -OnlineIf you get an output like the one below, where State says Enabled tells you the Hyper-V role is enabled.
Using Command Prompt and DISM
Apart from using PowerShell, you can also use the command prompt and the Deployment Image Servicing and Management (DISM) tool to enable Hyper-V.
The DISM tool is a command-line utility that services and prepares Windows images. These Windows images include the Windows Recovery Environment, Windows Preinstallation Environment, and Windows Setup.
To enable Hyper-V using CMD and DISM:
1. Open command prompt as an administrator on your host machine.
2. Next, run the command below to install the Hyper-V role on your host machine where:
- The
/onlineparameter tells the DISM tool to service a running OS.
- The
/Enable-Featureparameter tells the DISM tool to enable a specific feature: Hyper-V (/FeatureName:Microsoft-Hyper-V).
- And the /All parameter tells the DISM tool to enable all features in the specified package.
DISM /Online /Enable-Feature /All /FeatureName:Microsoft-Hyper-V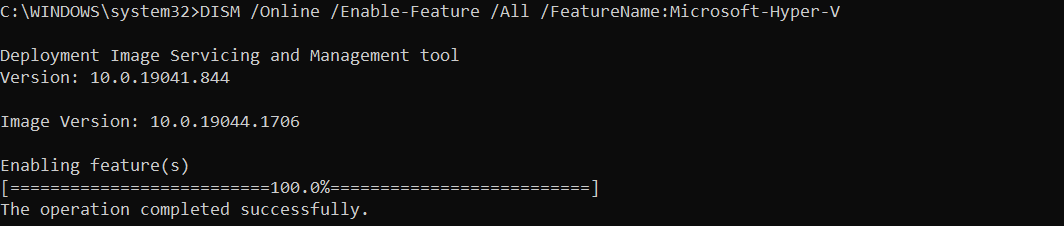
3. Restart your host machine to apply the changes.
4. Finally, run the following wmic command on the command prompt to get the version of Hyper-V Manager installed on your machine.
wmic datafile where name="c:\\windows\\system32\\vmms.exe" get versionBelow, you can see the latest version installed is 10.0.22000.708, but yours may be different.

Using the Windows Features Wizard
If you’re a fan of installing tools via GUI than in a command-line environment, you can also enable the Hyper-V role using the Windows Features Wizard. The Windows Features Wizard provides a GUI where you can enable or disable Windows features.
To enable Hyper-V using the Windows Features Wizard:
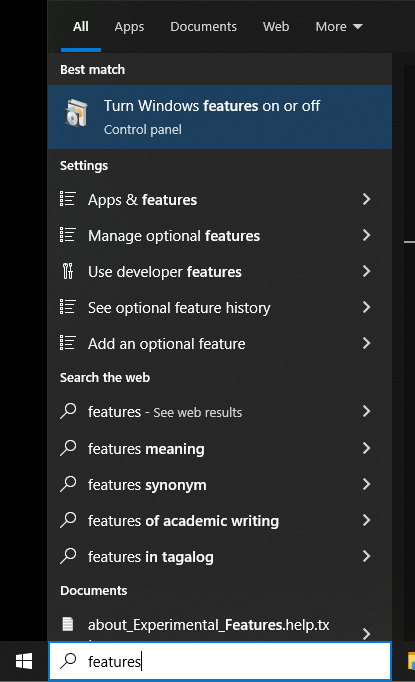
1. Search for features, and click on Turn Windows features on or off from the result, as shown below, to open the Windows Features window.
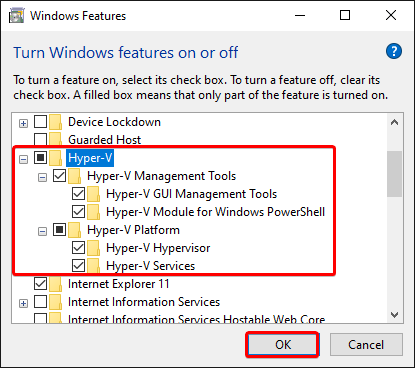
2. On the Windows Features window, scroll down the list of features and check the box next to Hyper-V, and the sub-features get checked automatically.
After checking the Hyper-V box, click the OK button to enable Hyper-V and all its sub-features.
3. Restart your machine to apply the changes.
4. Finally, search for and open Hyper-V Manager on your host machine through the Start menu.
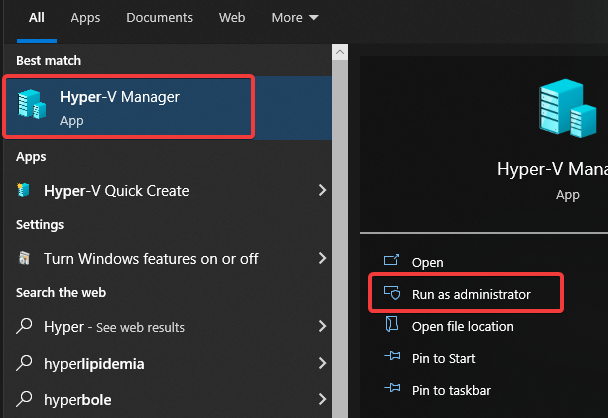
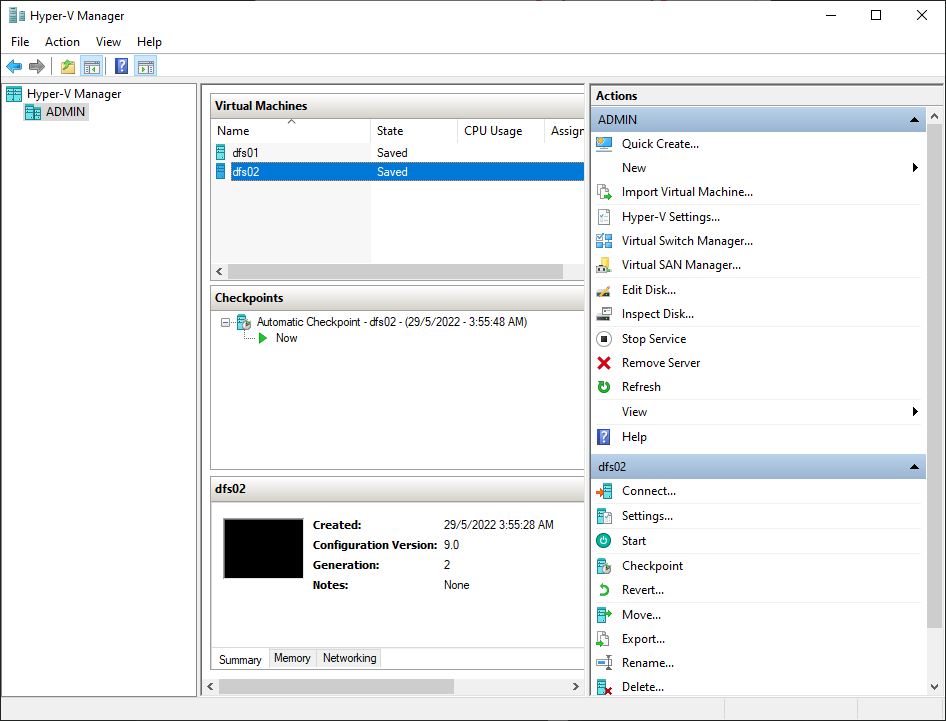
You’ll see the Hyper-V Manager window open if all goes well, as shown below.
Creating Your First Hyper-V Windows 10 Virtual Machine
Now that you have Hyper-V installed on your Windows 10 machine, you’re ready to create your first virtual machine. But what makes VMs important? A virtual machine isolates an OS and its applications from the underlying physical hardware.
Like a Docker container, a virtual machine encapsulates an entire OS. But unlike containers, VMs provide each guest OS with its own virtual hardware, including a virtual CPU, memory, storage, and networking devices.
VMs provide many benefits, including:
- The ability to run multiple operating systems side-by-side on the same hardware.
- The ability to test software and configurations in a safe, isolated environment.
- The ability to run older operating systems on newer hardware.
- Ease of management and portability of virtual machines.
To create a VM using Hyper-V Manager:
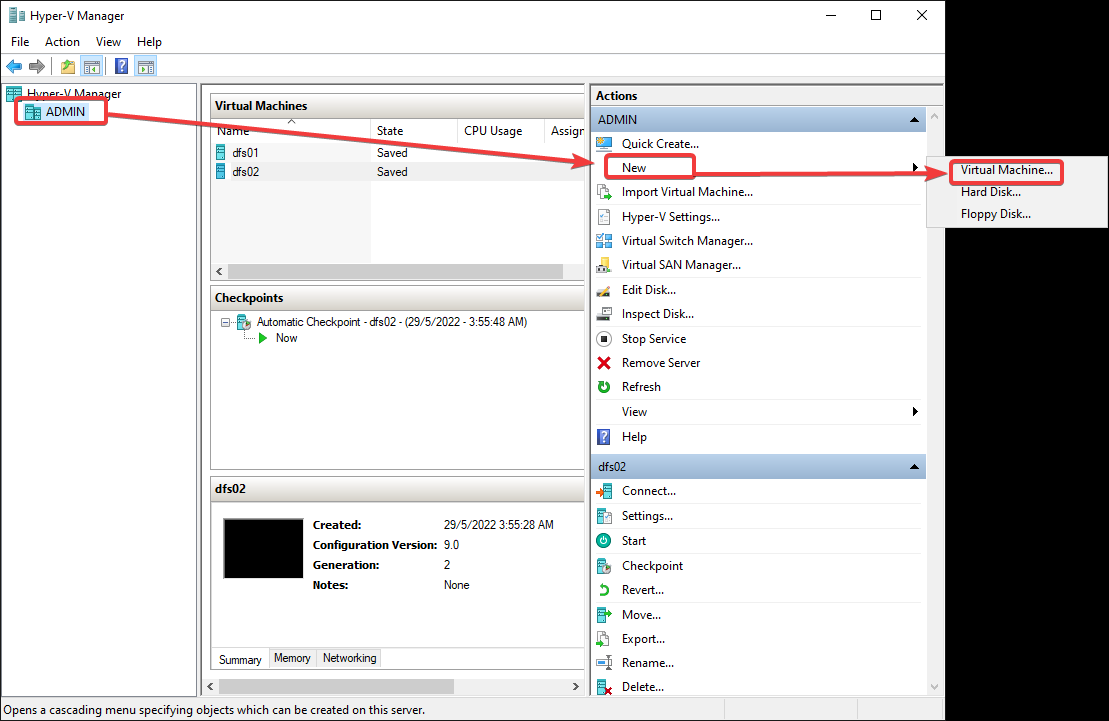
1. Select the connected server on the left pane (ADMIN) and click on New at the right panel under Actions —> Virtual Machine to initiate creating a new VM.
You can see the Quick Create option below for creating a VM from a pre-configured list of VM settings. But, this option will not help you create a VM with specific settings. And wrong settings configured can lead to big trouble. For diagnostic purposes, you must try all ways of creating VMs.
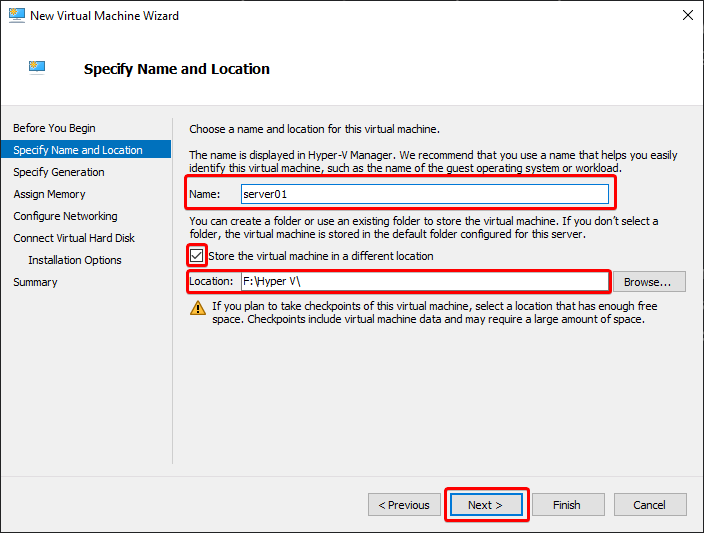
2. Next, provide the following information for your new VM’s name and location, and click Next.
- Name – Provide a descriptive name for your virtual machine (server01).
- Location – Choose the location on your disk to store your VM files. Storing these files on a separate disk from your Windows OS is recommended to minimize the risk of data loss.
This location stores all the VM files, including the configuration, virtual hard disk, and snapshots.
Ensure that the location has enough free space for your VM.
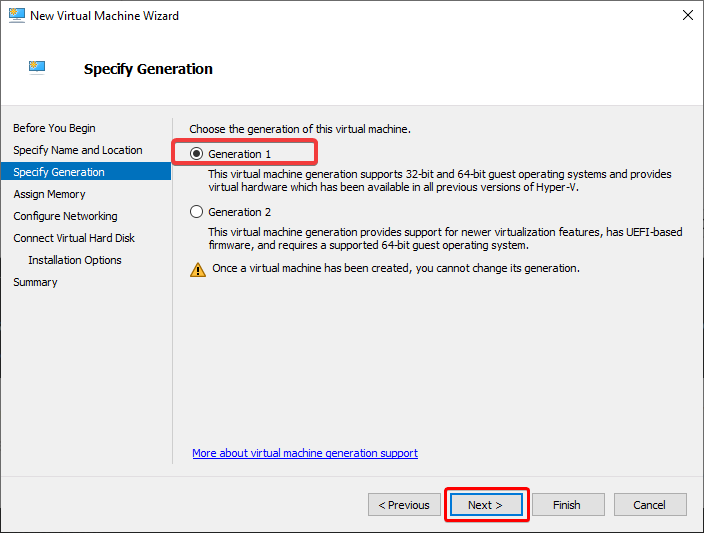
3. Keep the default generation option for your VM, Generation 1, and click Next.
If you ever plan to upload this VM to Azure, you should select Generation 2 instead. Why? Azure only supports UEFI-based boot, and Generation 1 VMs use BIOS-based boot, while Generation 2 VMs use UEFI.
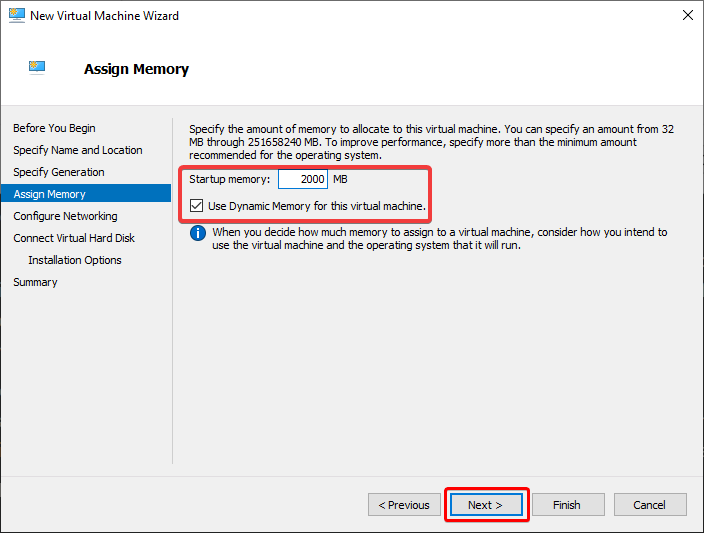
4. Now, allocate a startup memory for your VM, and click Next. The amount of memory you assign will depend on the following:
- The OS and applications you plan to run on the VM.
- The amount of memory available on your host machine.
You can assign from 32MB to 5902MB of memory, but the recommended memory to start with is at least 2000MB, then increase it as needed.
After assigning a startup memory, tick the Use Dynamic Memory for this virtual machine option. This option allows the VM to automatically adjust its memory use as needed, based on the workload. Enabling this option reduces downtime and improves performance.
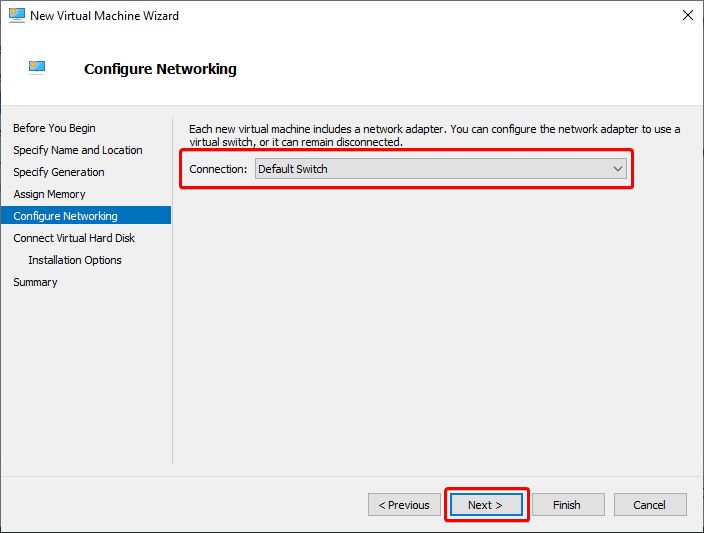
5. Select the Default Switch option since you’ll want your VM to have network access, and click Next.
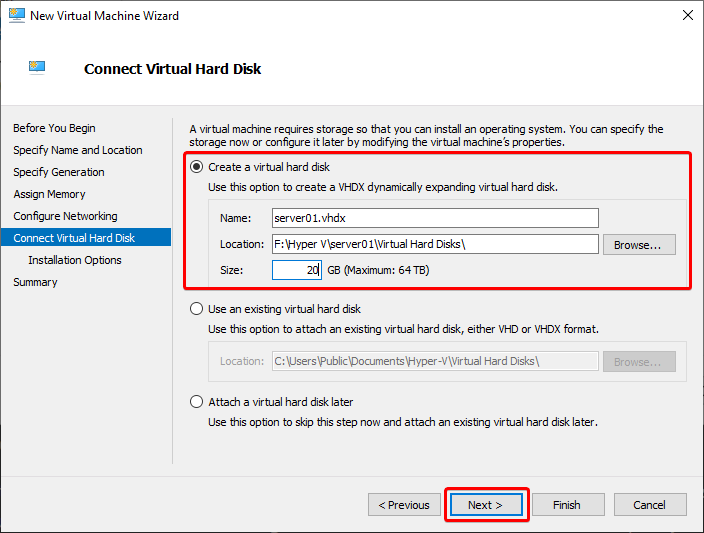
6. Next, configure the virtual hard disk as follows, and click Next:
- Leave the Create a virtual hard disk option selected.
- Leave the VM’s Name and Location values as they are automatically populated.
You can choose an existing virtual hard disk if you already have one or create a new one.
- Specify the size of the virtual hard disk. At least 20GB in size is recommended to create a virtual hard disk.
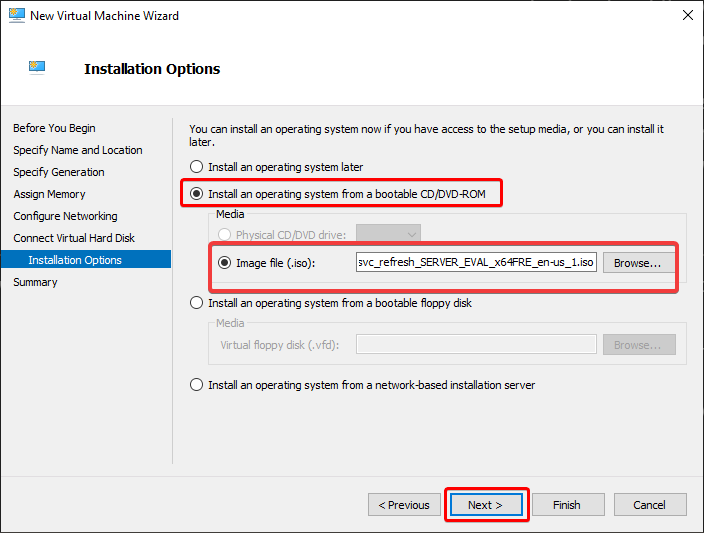
7. Configure the OS installation options with the following:
- Select the Install an operating system from a bootable CD/DVD-ROM option since you’ll install an OS from an ISO file.
- Select the Image file (.iso), and locate your ISO file.
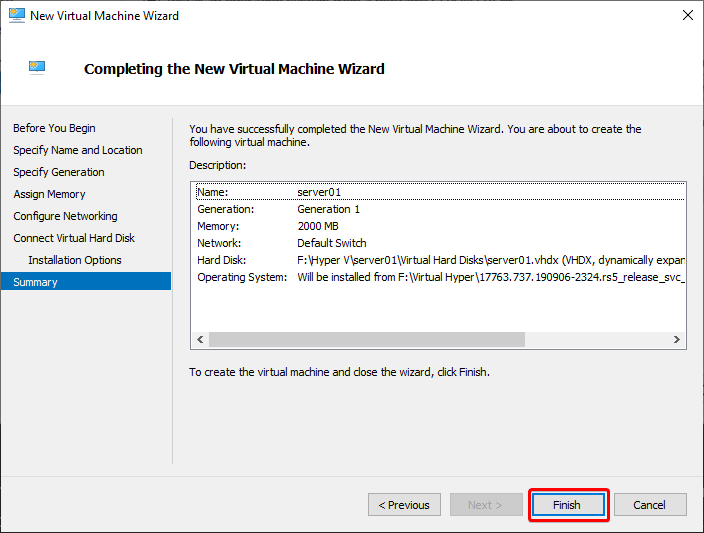
- Click Next, and you’ll see a Summary page with the settings you specified for your VM (step eight).
8. Finally, review the settings summary, and click Finish to create your VM. But if you need to change any settings, click on the Previous button instead.
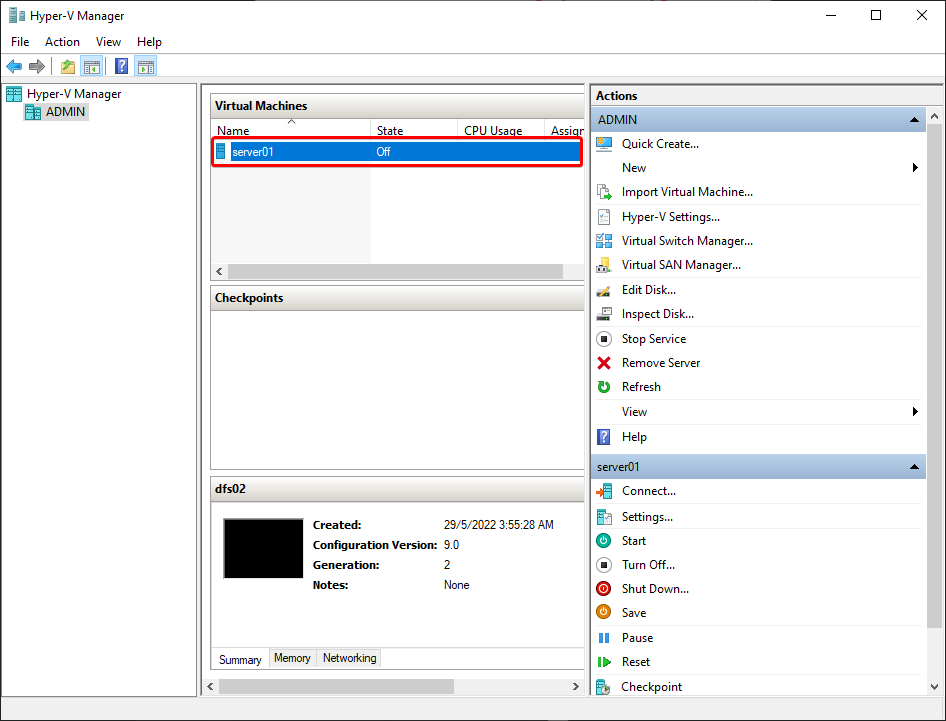
After creating your VM, you’ll see your VM listed in the Virtual Machines table in Hyper-V Manager, as shown below.
Installing an Operating System on a Virtual Machine
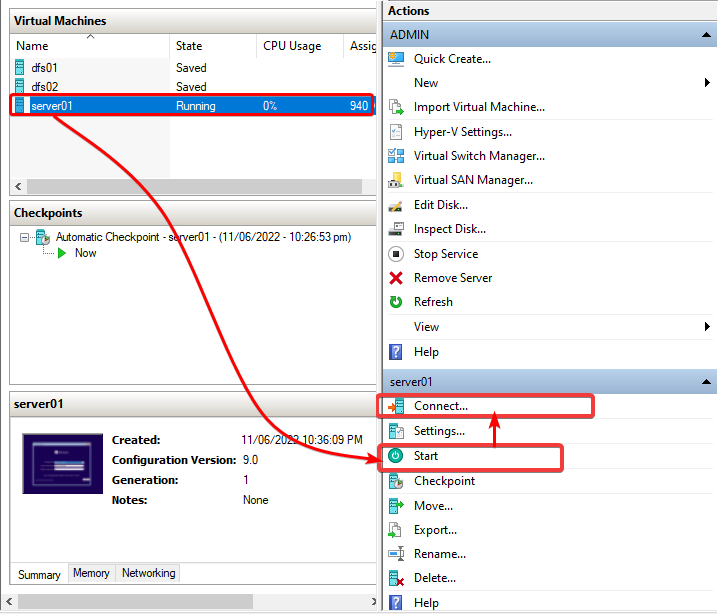
You’ve now successfully created your VM using Hyper-V. But right now, your VM is empty and doesn’t even have an OS installed.
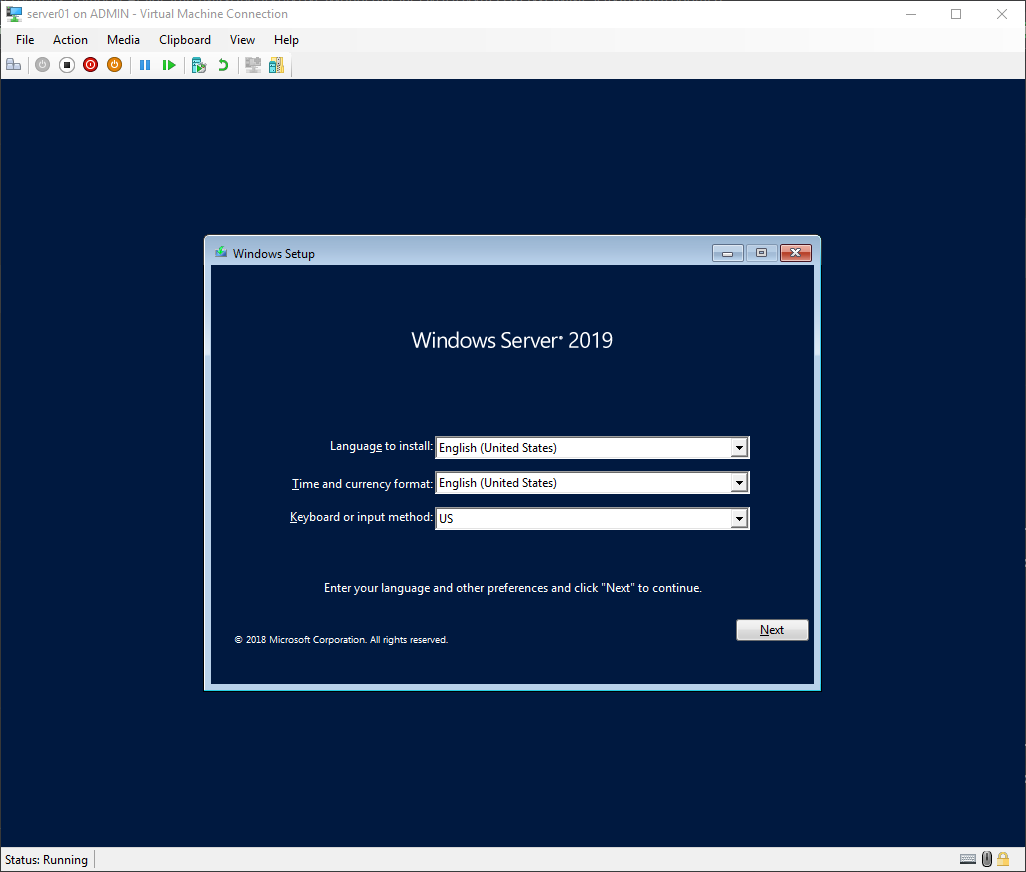
Select your VM (server01), and click on Start (bottom-right panel) to run your VM. Once running, click on Connect to access your VM in a separate window.
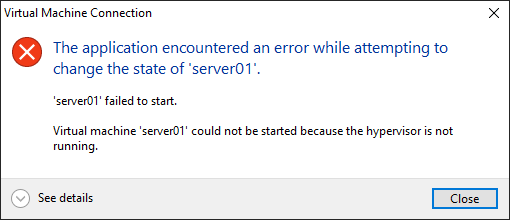
If you ever encounter the hypervisor is not running error shown below, run the below command to enable the virtualization feature on your host. After running the command, restart your host for the changes to take effect. bcdedit /set hypervisorlaunchtype auto

Now, follow the on-screen instructions to install Windows on your VM as you would on a physical machine.
Once the installation completes, you can begin using your VM! Install applications and run them inside your VM, but remember to back up your VM regularly to avoid data loss.
Starting and Stopping VMs
Now that your VM is completely running with an OS, it’s time to take a look at managing your VMs using Hyper-V Manager. Apart from creating VMs, Hyper-V Manager lets you configure and manage your virtual machines from a central location.
You will need to perform a few basic tasks to keep your VMs running smoothly. These tasks include starting and stopping your VMs and taking snapshots. But for now, you’ll start and stop your VMS and see how Hyper-V behaves while performing these tasks.
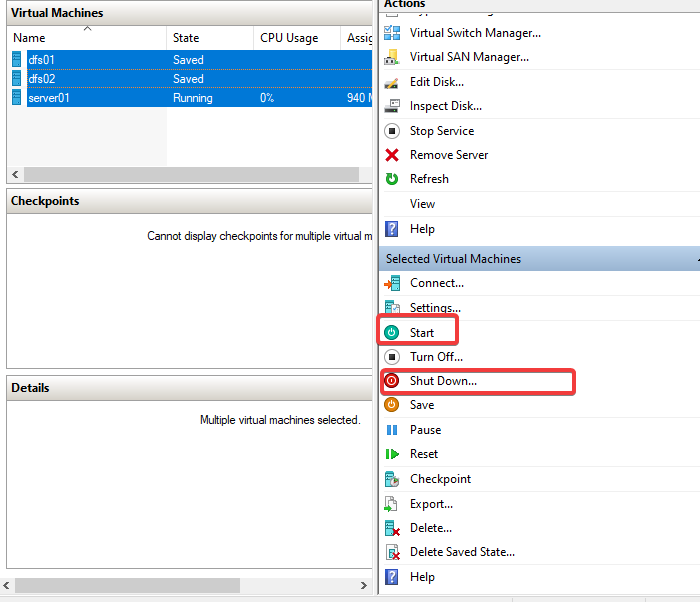
Select a VM from the list and click on either Start (Ctrl+S) or Shut down (Ctrl+P) on the right-side pane to start or stop the selected VM.
If you plan to start multiple VMs at once, you can select them all and click Start. The VMs will start one after another in the order they are listed.
Saving a VM’s State
You can save the state of a virtual machine at any time, similar to putting a physical machine into hibernation. This behavior is helpful if you need to close Hyper-V Manager or if you need to restart your computer.
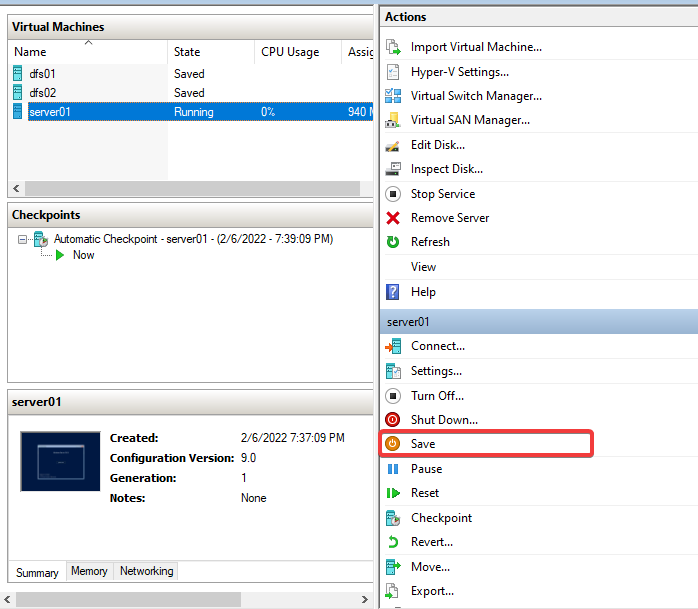
Select your VM from the list, and click on the Save button on the right-side pane to save your VM’s current state to disk, and you can resume from that state later.
Creating a VM’s Checkpoint
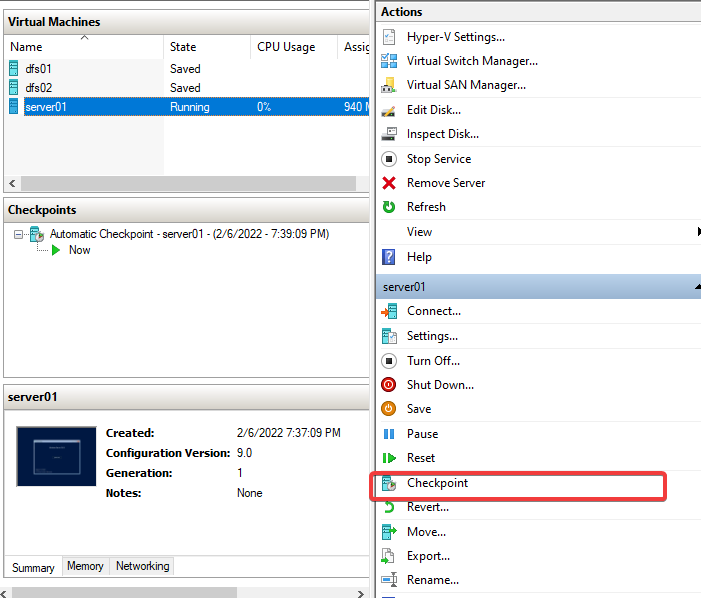
A checkpoint is a snapshot of the current state of your VM, including your VM’s configuration, disk state, and memory state. Checkpoints are useful for taking snapshots of your VMs at different points in time.
Suppose you’re testing a new software application. If so, you can create a VM checkpoint before installing the application. If the application doesn’t work as expected, you can revert to the checkpoint you created and start your VM from that point.
Select the VM from the list, and click on Checkpoint (right-side pane) to create a checkpoint for your VM.
Managing VMs via PowerShell
Hyper-V should be enough when managing your VMs, but you can also use PowerShell to manage your VMs. Why? This method is useful if you need to automate your VM creation or management. Your IaC and CI/CD pipelines will thank you for that!
1. Run the Get-Command below to see all available Hyper-V PowerShell cmdlets in a separate window (Out-GridView).
Get-Command -Module hyper-v | Out-GridViewBelow, you can see a long list of PowerShell cmdlets you can use to manage your VMs. Scroll through the list, and pick one cmdlet you like to try running on PowerShell.

2. Run the cmdlet you picked from step one to PowerShell. For instance, the Get-VM cmdlet below fetches and prints information about your VM, as shown below.
Get-VMNote down the name of the VM you like to manage, in this case, server01.

3. Run the Checkpoint-VM command below to create a checkpoint for your VM (server01).
Checkpoint-VM server01
4. Finally, run the following Get-VMCheckpoint command below to get your VM’s (server01) checkpoint in list format (Format-List).
Get-VMCheckpoint server01 | Format-List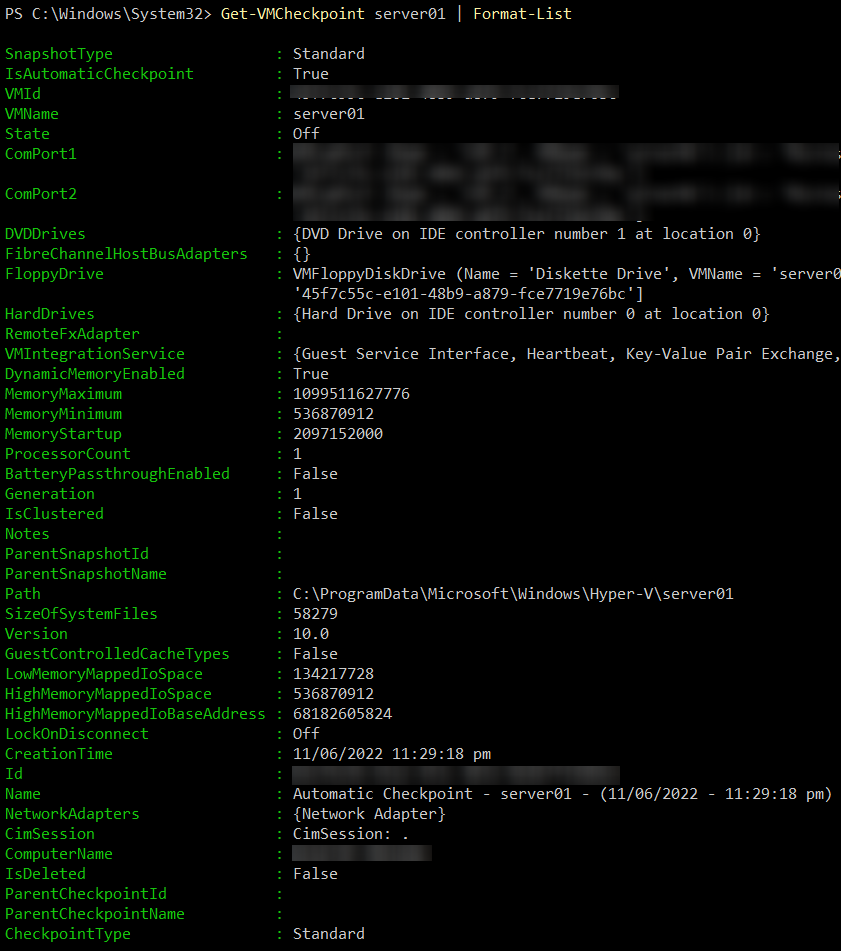
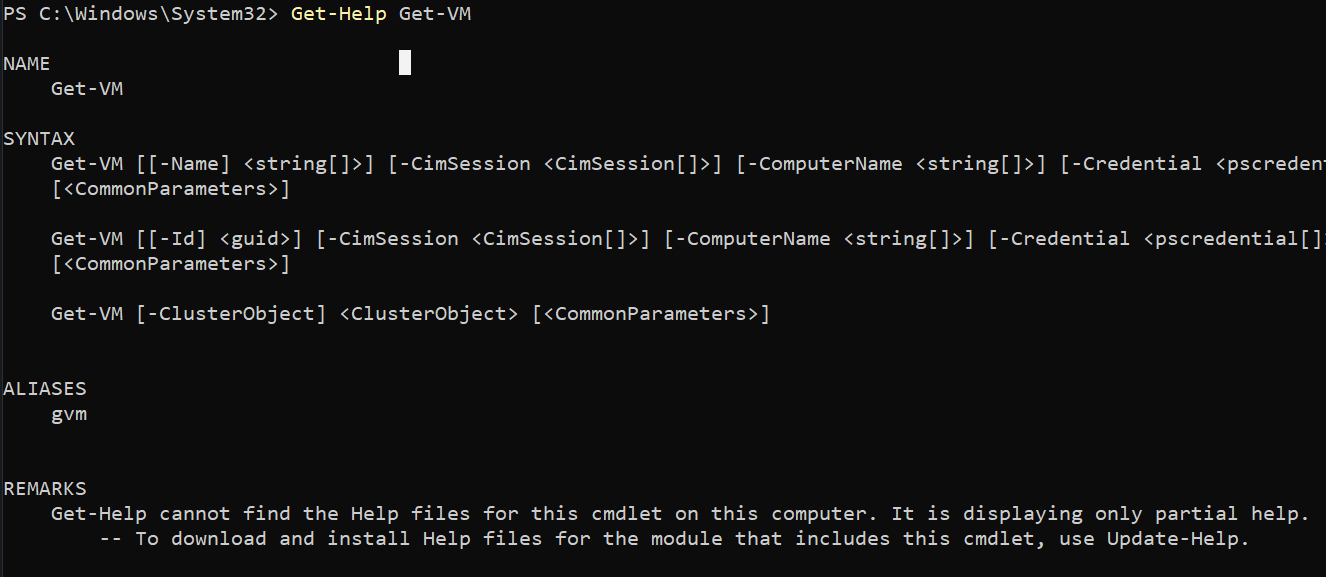
Perhaps you like to know more about how to use a cmdlet. If so, run the Get-Help cmdlet followed by the cmdlet in question (Get-VM), as shown below. Get-Help Get-VM
Conclusion
In this tutorial, you’ve learned how to create and manage your VMs with Hyper-V on Windows 10. You touched on some basic tasks you need to perform to keep your VMs running smoothly, such as starting and stopping your VMs.
You’ve realized the importance of saving the state and creating checkpoints of your VMs as failsafe so you can revert to your VM’s good state. And at this point, you now have a sound knowledge of managing your VMs.
This tutorial is just the beginning, though! You can do a lot more with Hyper-V. So, why not start creating virtual networks switch for your VM? Or configure your VM’s storage?


