


So you’ve drunk the Azure Koolaid and want to migrate your Hyper-V VMs to Azure. That’s great news! Do you know what even better news is? Azure provides a service called Azure Migrate that makes the process as easy as possible.
In this step-by-step tutorial, you’re going to learn how to migrate a Hyper-V VM with Azure Migrate by replicating the VM to Azure with Azure Site Recovery (ASR).
If you haven’t created an Azure assessment via the Azure Migrate tool yet, please head over to the How to Prep a Hyper-V VM with the Azure Migration Assessment Tool post to learn how to discover and assess your Hyper-V VMs first.
Prerequisites
If you plan to follow along, ensure you have the following in place before following this step by step tutorial:
- An Azure assessment to the How to Prep a Hyper-V VM with the Azure Migration Assessment Tool post for the Hyper-V VM(s) you intend to migrate.
- A Windows Hyper-V host – This tutorial uses a physical Windows 2016 server with the Hyper-V role installed equipped with 8GB of RAM and a dual-core i7 (2ghz) processor. To migrate VMs to Azure, your Hyper-V host must be installed on Windows Server 2019, Windows Server 2016, or Windows Server 2012 R2 with the latest updates.
- .NET Framework 4.7 or later installed on the Hyper-V host
- A Hyper-V VM – This tutorial uses a Windows 2012 R2 Server VM with 1GB of RAM a single vCPU. Any Hyper-V VM should work, though.
- An Azure Subscription – If you don’t have one, you can register for a free Azure account.
- An Azure user account with at least Contributor Role permissions to the Azure subscription and Application Administrator permissions to register AzureAD apps.
- A storage account for your migration – This tutorial will use a storage account named migndr2021.
- A virtual network for your migrated virtual machine – This tutorial will use a virtual network named mig_network and a subnet named default.
Setting Up the Azure Recovery Service Agent
Once you’ve run an Azure assessment , it’s time to install the Azure Site Recovery (ASR) Service agent on your Hyper-V host. ASR is a disaster-recovery service that manages and orchestrates server replication, failover, and Azure virtual machines’ failback. It just so happens that the Azure Migrate service uses ASR to replicate Hyper-V VM to Azure also.
To setup the ASR agent on your Hyper-V host:
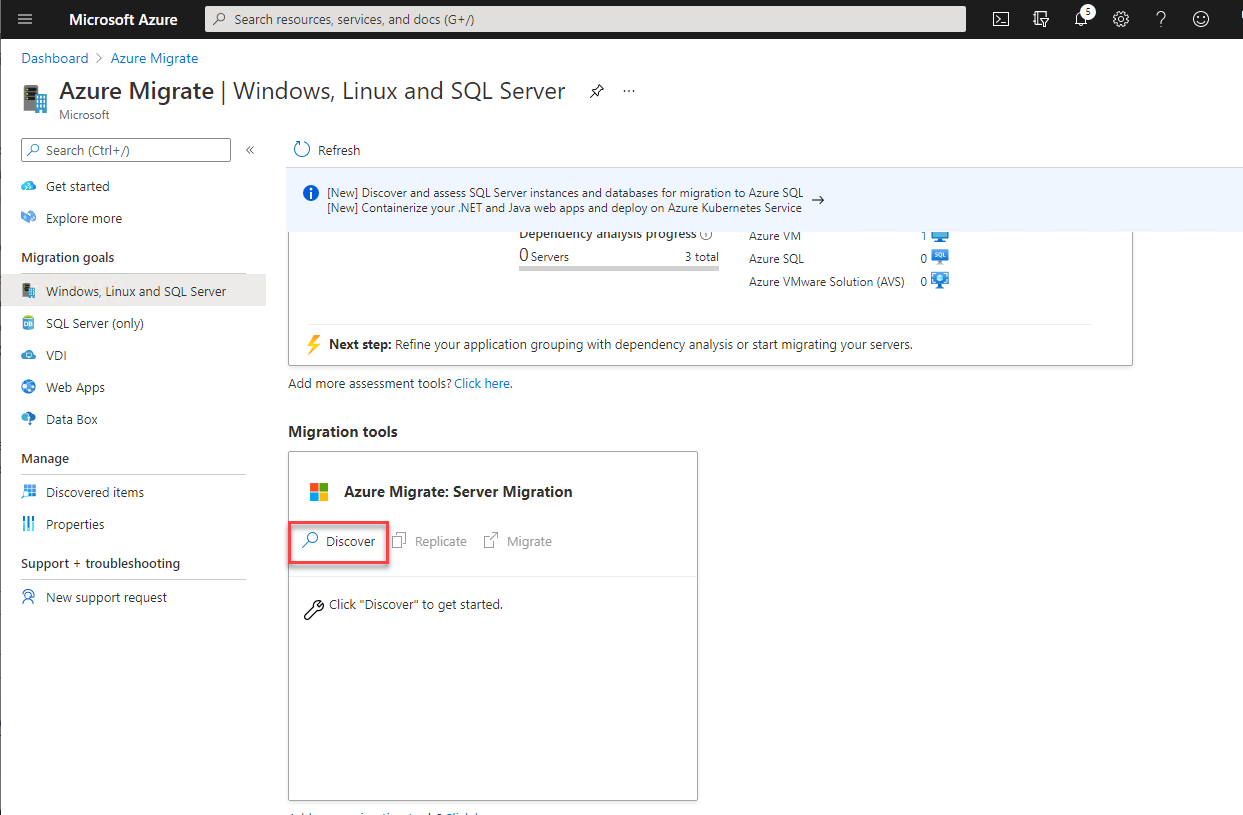
1. Open your favorite browser and navigate to the Azure Migrate hub.
2. Navigate to the Migration tools tile and click Discover. This action starts the migration process.
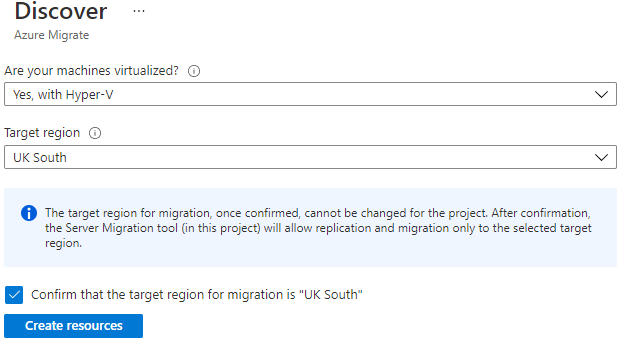
3. On the Discover page, click on the Are your machines virtualized? drop-down box and select Yes, with Hyper-V.
Specify the Azure region you intend to migrate the VMs as the Target region.
Tick the checkbox to Confirm that the target region for migration is <region> and click on Create resources. These steps begin the migration discovery process to confirm that you are using VMs and which virtualization technology you’re using.
When you start the discovery progress during a migration, Azure creates an Azure Site Recovery Vault in the background and also creates an Azure key vault to store credentials used during the migration process. Azure Migrate creates the ASR Vault in the same resource group as your Azure Migrate project. The vault is used to store information on VM and workload configuration.
WARNING: You cannot change the target region after this step. If you need to use another region for other servers, you must create another Azure Migrate project.
4. Once you’ve created the Migrate resources, click on the first Download link to download the replication provider/agent.
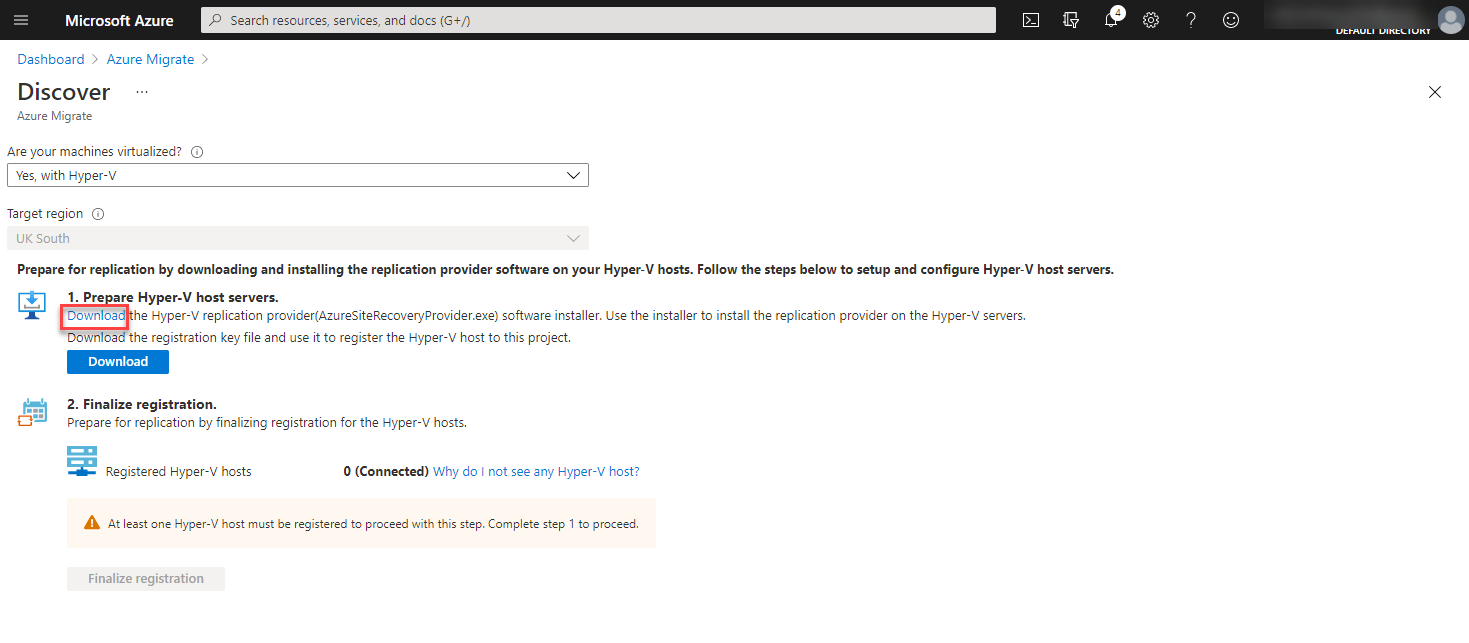
5. Copy the downloaded provider/agent (AzureSiteRecoveryProvider.exe) to your Hyper-V host.
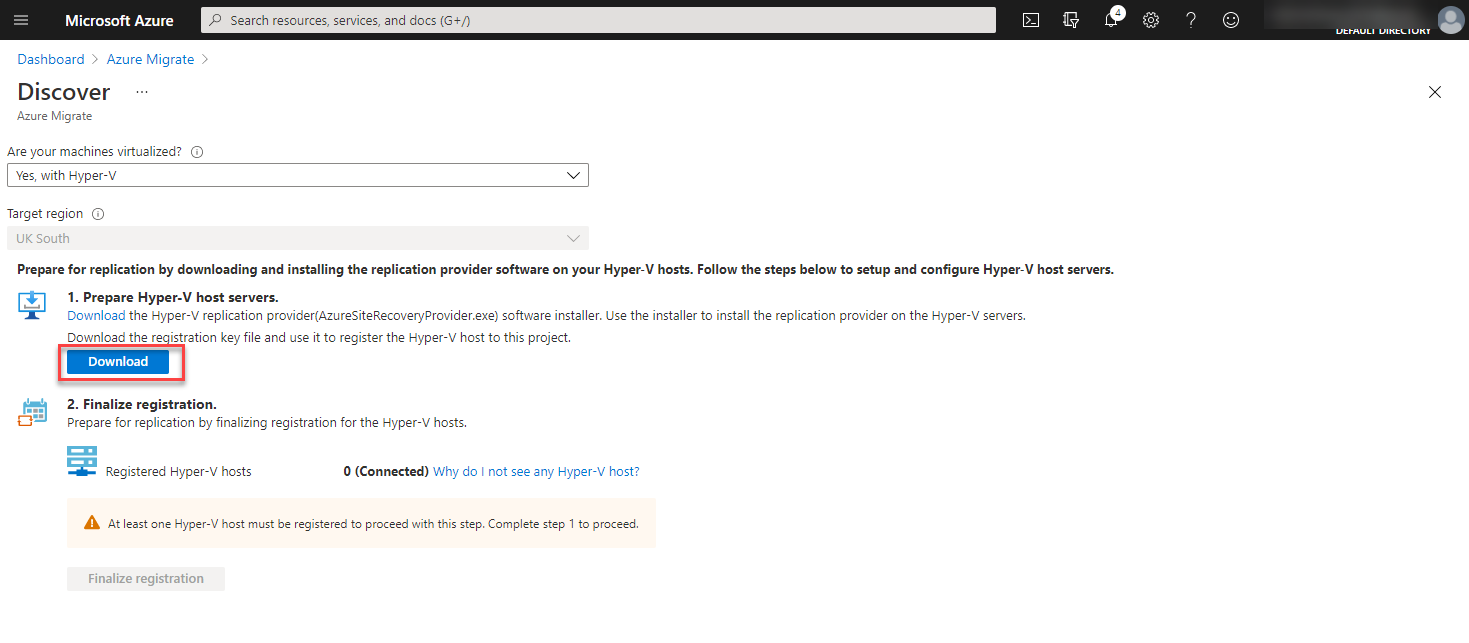
6. Now, click the Download button to generate a software registration key. This key is used to register the Azure Site Recovery software that you install in step 8.
Keep your software registration key safe because you’ll need it when you install the replication provider on your Hyper-V host.
7. Connect to your Hyper-V host(s) console and run the AzureSiteRecoveryProvider.exe installer.
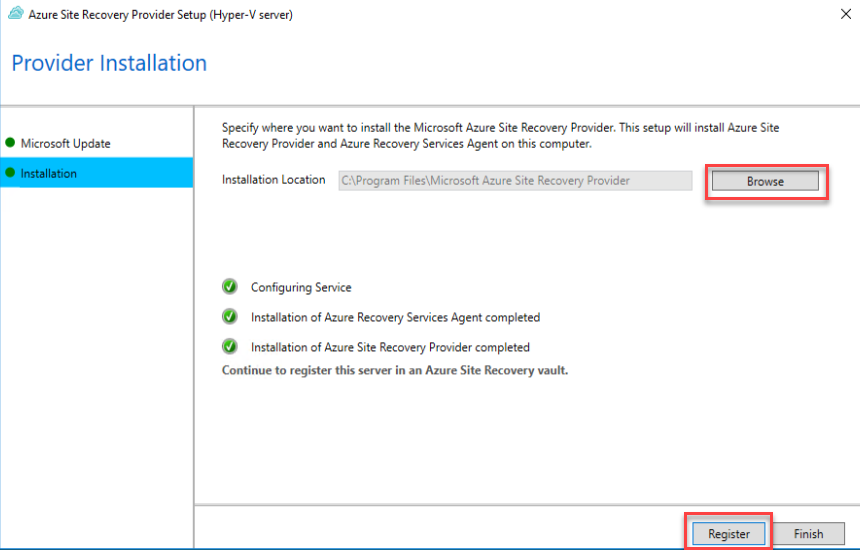
8. Click Next to accept all defaults until you reach the screen with the Register button on it, as shown below.
If you’d like to change the install location, click on Browse and change the path. This tutorial will use the default path.
Click on Register to tell the ASR agent to register the on-premises Hyper-V host with Microsoft Azure. Next, you’ll be presented with a Vault Settings screen to continue configuration.
9. On the Vault Settings screen, click on Browse, select the registration key you downloaded in step six and click Next.

10. Now, switch back to your web browser where you have the Azure Migrate hub open, refresh the page and click on Finalize Registration. You should now see 1 (Connected) next to Registered Hyper-V hosts indicating your Hyper-V host is now connected and ready to replicate VMs.

Replicating Virtual Machines into Azure
Once Azure Migrate has discovered all Hyper-V VMs, and you’ve set up the ASR agent on your Hyper-V host, it’s time to begin replicating Hyper-V VMs to Azure!
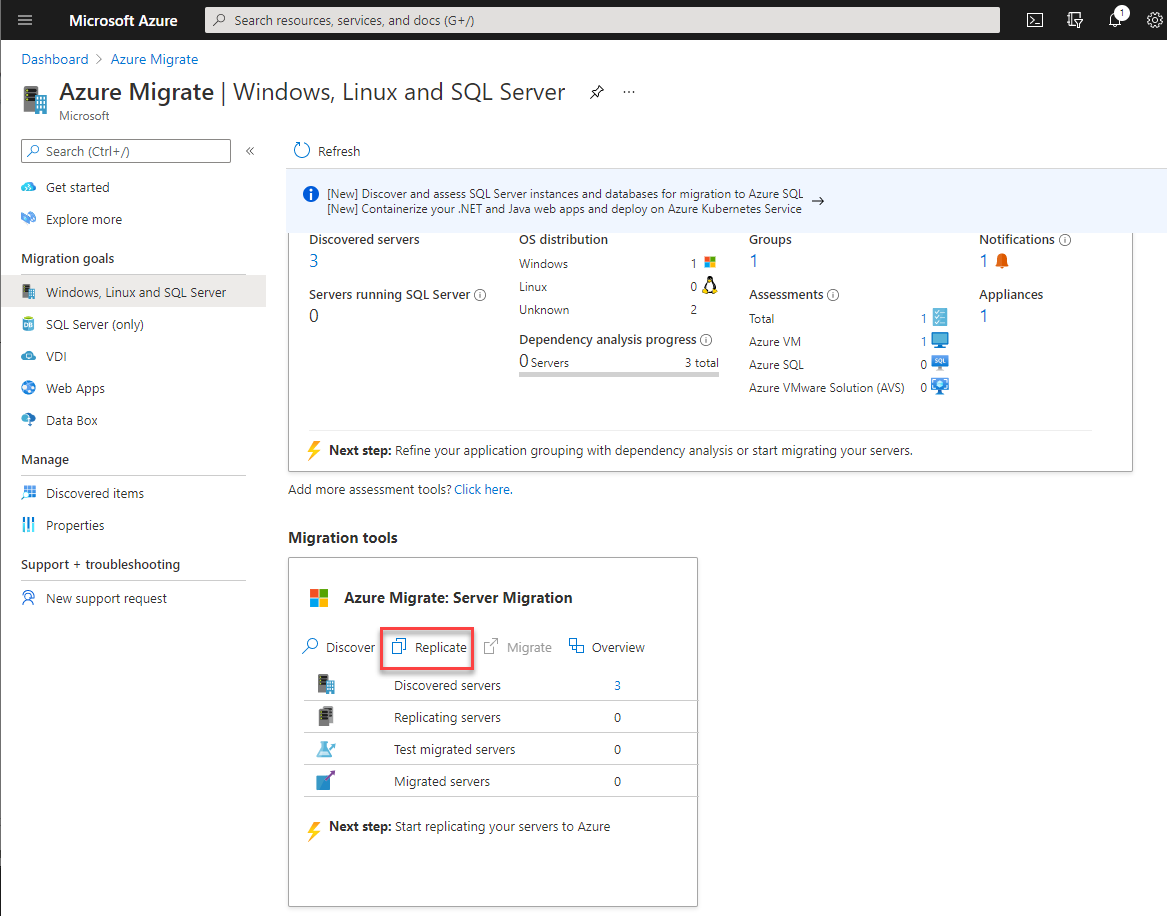
1. In the Azure Migrate hub, in the Migration tools tile, click on Replicate. This action will bring you to the Replicate page.
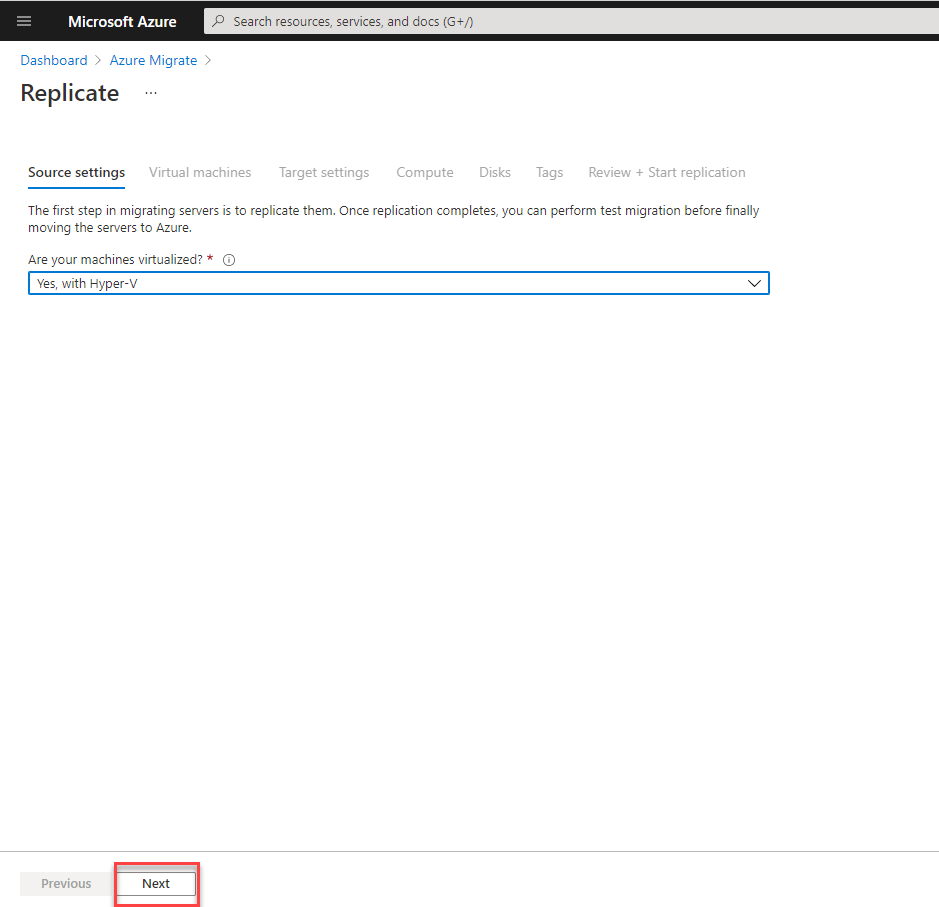
2. On the Replicate page, under the Source settings section, select Yes, with Hyper-V and click Next. This action will bring you to the Virtual Machines section.
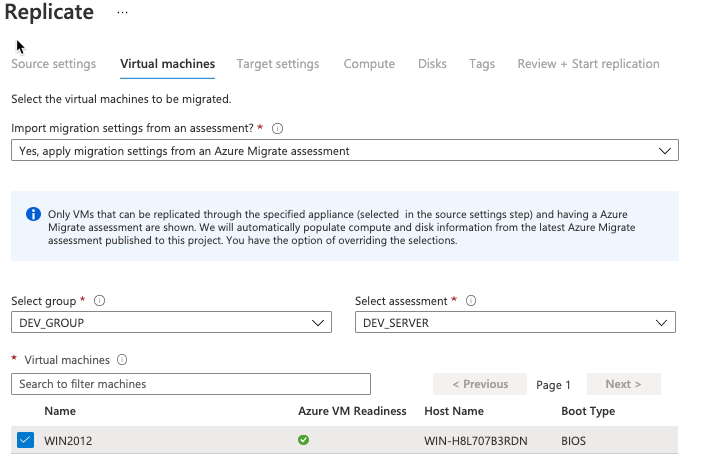
3. In the Virtual Machines section, select Yes, apply migration settings from an Azur Migrate Assessment from the Import migration settings from an Assessment dropdown box.
If you haven’t created an Azure assessment via the Azure Migrate tool yet, head over to the How to Prep a Hyper-V VM with the Azure Migration Assessment Tool post to learn how to discover and assess your Hyper-V VMs first.
- Select DEV_GROUP from the Select group dropdown box to select all VMs previously defined in that group if you followed along with the Azure assessment post.
- Select DEV_SERVER from the Select assessment box.
- Tick the checkbox next to any VMs you’d like to migrate.
- Click Next to continue. This action will bring you to the Target settings section. The Target settings define the resource group, storage account, network, and availability options Azure Migrate will apply to your virtual machines.
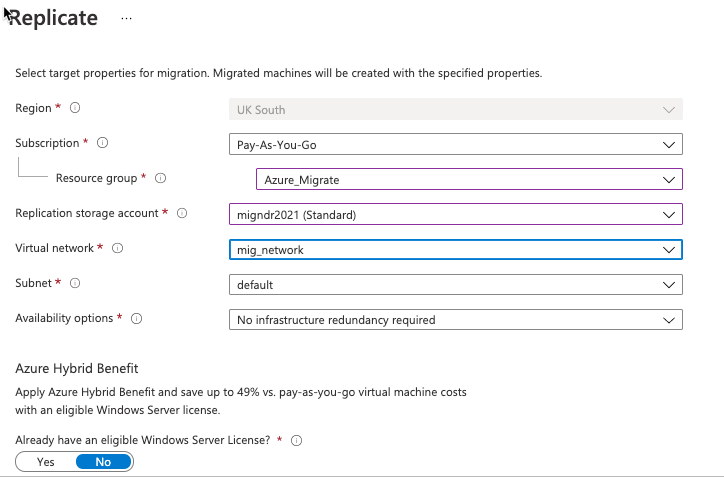
4. In the Target settings page, define each setting as shown below.
- Region – The Azure region to replicate the VM(s) too. The region is greyed out as it can’t be changed during the migration process.
- Subscription – The Azure subscription to replicate the VMs to.
- Resource group – The resource group to create the new Azure VM resources in.
- Virtual Network – The Azure virtual network that Azure Migrate will assign the VMs to.
- Subnet – The network subnet Azure Migrate will assign to the VMs.
- Availability options – Optional infrastructure redundancy to apply to the VMs. This tutorial will select No infrastructure redundancy required.
You can pin the migrated VM to a specific Availability Zone or place it in an Availability Set during this process or carry this out step post-migration if required.
- Azure Hybrid benefit – An option to enable only if you have an eligible Windows Server license.Click Next to go to the Compute section to select VM sizes to create.
5. In the Compute section, define the desired name you’d like the Azure VM to have, the size of the VM, the operating system, and the OS disk.
Leave the default Azure VM Size option to Automatically select matching size to allow Azure to select the most appropriate size for your VM based on the initial assessment.
Click Next to head to the Disks section.

6. In the Disks section, choose All selected to ensure Azure migrates all of the volumes attached to the Hyper-V VM and click Next to navigate to the Tags section.
You can migrate specific disks from your Hyper-V VM by selecting the disks you want using the drop-down in the Disks To Replicate column.

7. In the Tags section, add any tags required by your organization and click Next.

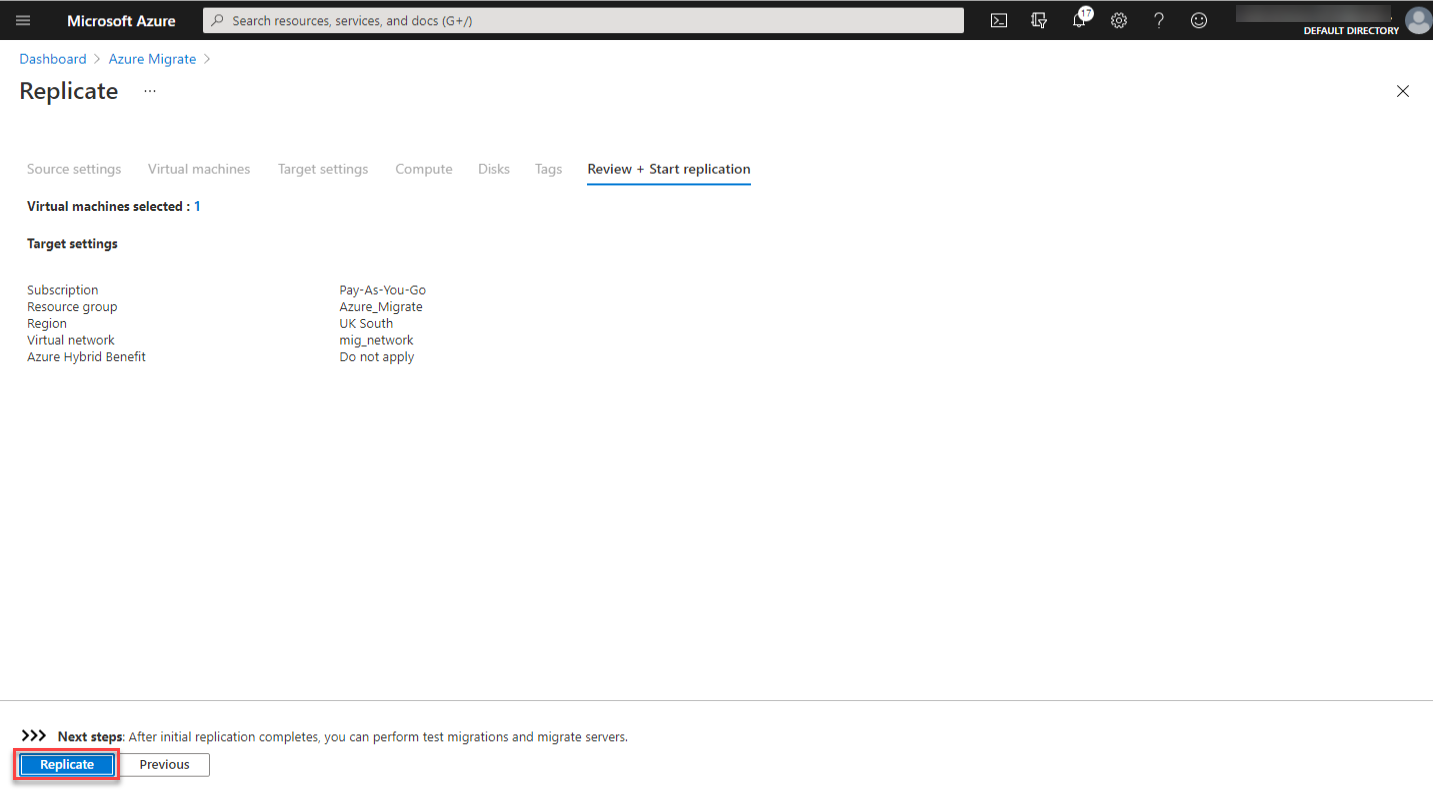
Now, on the Review + Start replication section, click Replicate to replicate the virtual machine to Azure!
9. Navigate back to the Azure Migrate hub. After a few minutes, you should see the new VM show up under Replicating Servers, as shown below.
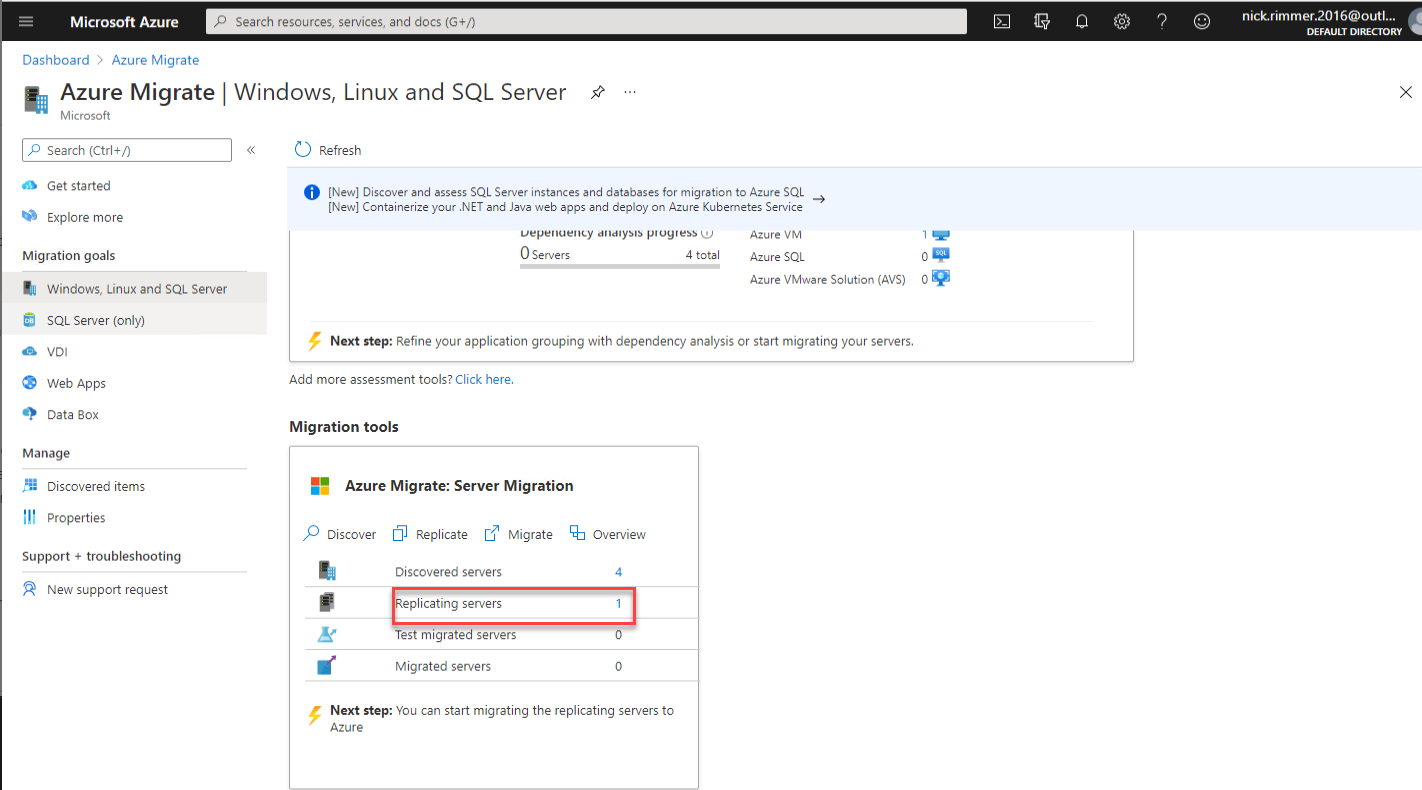
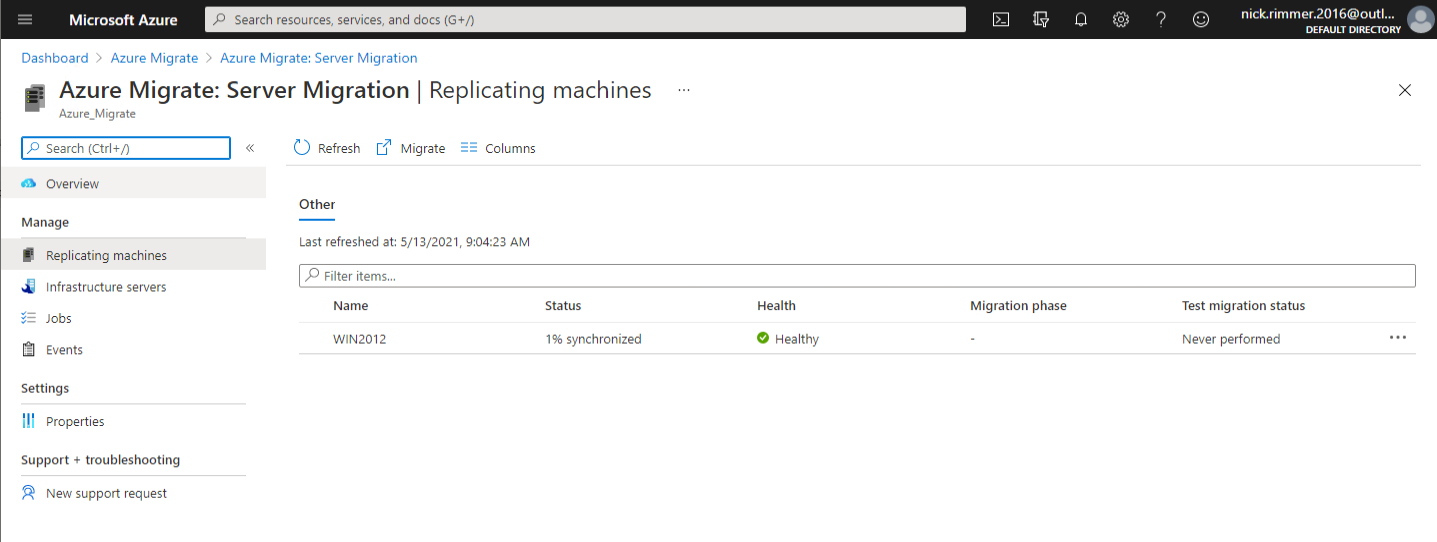
10. Click on the value to the right of Replicating Servers to open the list of currently replicating servers. You should see your server shown below.
During replication, the VM will temporarily be held in the storage account defined in step four.
Performing a Test Migration
At last! You are now ready to create a virtual machine using the replicated data from ASR. But hold on a minute! You have one more step. You should now perform a test migration. A test migration performs a dry-run to confirm that the migration will work as expected.
A test migration will have no impact on the existing on-premises Hyper-V VM(s).
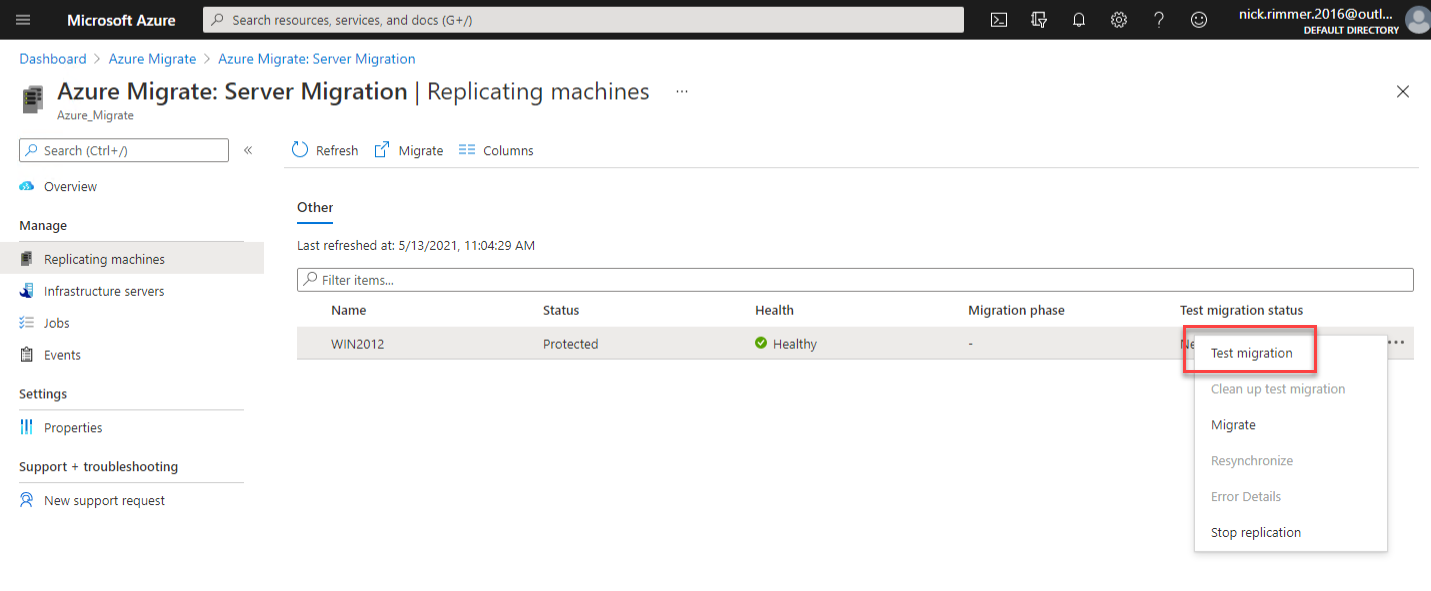
1. Navigate to the Azure Migrate hub again, and click on the Server Migration blade. Next, find the replication job you previously kicked off, click the ellipses next to the job and click Test migration.
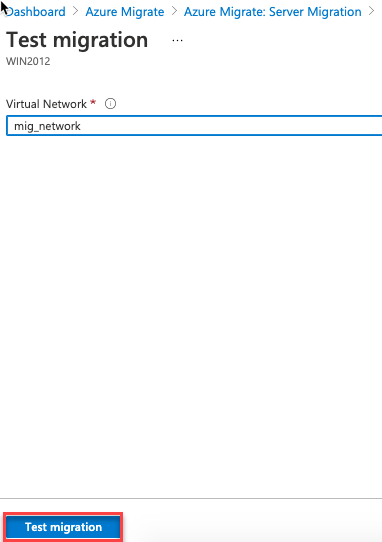
2. On the Test migration screen, select the virtual network you defined in step four of the Replicating Virtual Machines into Azure section. This tutorial is using a virtual network called mig_network. When complete, click on Test migration.
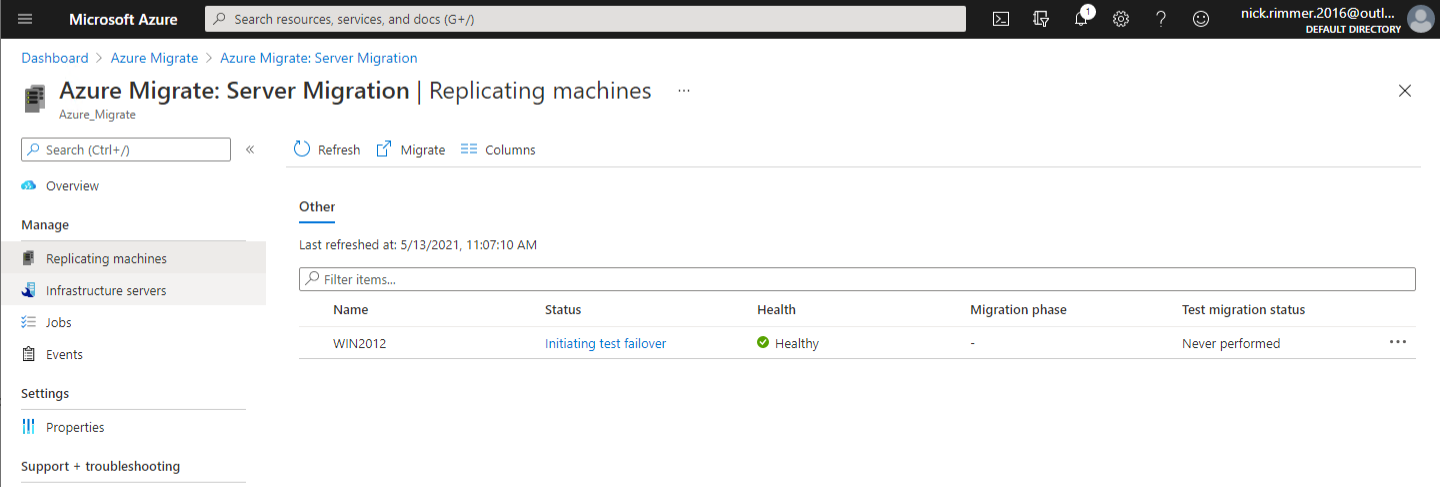
3. Once the test migration starts, click on Refresh until you see the updated Status of the test migration shown below.
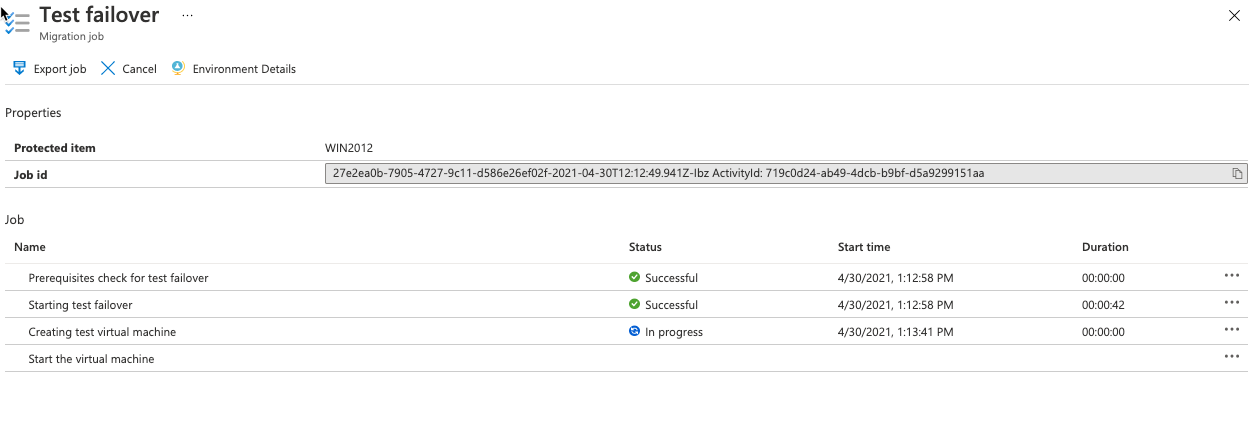
Click on the current status Initiating test failover to observe the stages of the test migration.
During this test migration process, Azure will create all of the required resources for your virtual machine and puts them in your chosen resource group.
4. When the test migration completes, navigate to the Azure Portal and open the resource group you defined to create the Azure VM(s) in. You should see the VM resource and all related resources, such as the VM’s network interface and disk.
During the test migration process, the name of the VM is appended with -test.
Click into each resource to see each resource’s configuration to review each resource without committing to the actual migration yet.

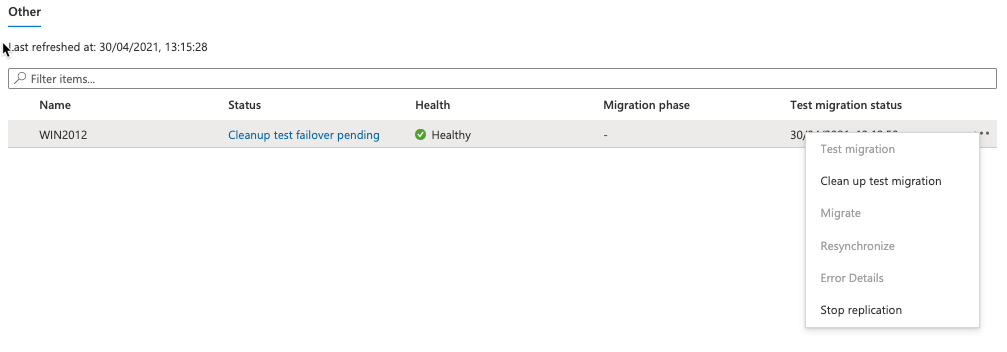
6. Finally, navigate back to the Azure migration blade, select the ellipsis next to the test migration and click Clean Up Test Migration. This action removes the test virtual machine and all associated temporary resources.
Performing a Live Migration
Congratulations! You’ve finally come to the point actually to create an Azure from an on-prem Hyper-V VM. It’s now time to perform a cutover migration which will by default shutdown the on-premises virtual machine, then perform an on-demand replication that synchronizes any VM changes since the last replication.
After the migration job completes you can view and manage your VM from the Virtual Machines blade.
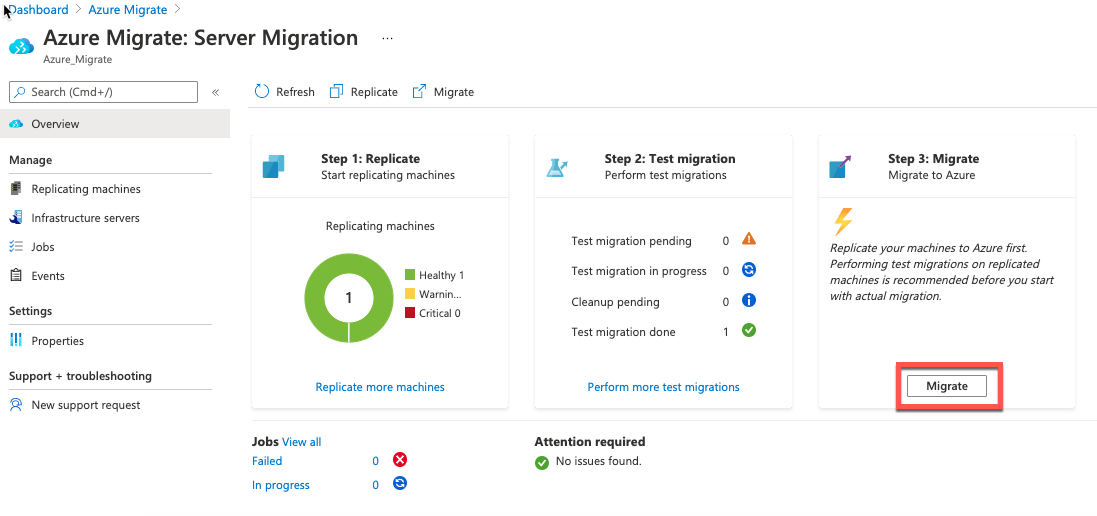
- Navigate to the Azure Migrate hub again and click on the Server Migration blade. Next, click on the Migrate button on the far right to open the migration wizard.
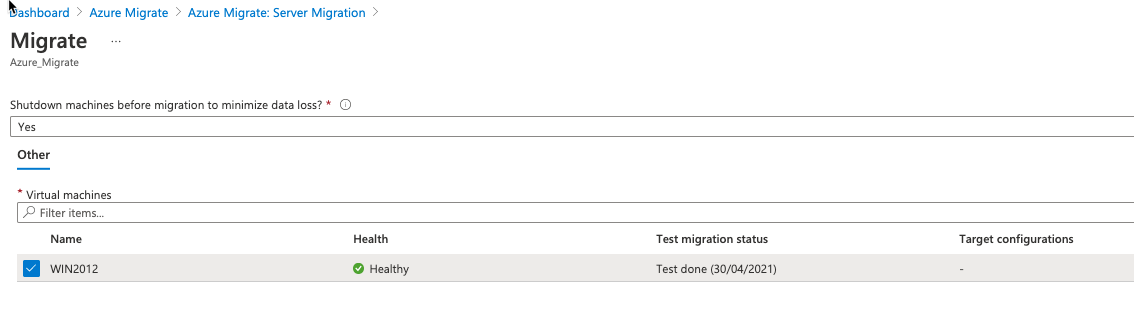
2. On the Migrate blade, optionally select Yes from the drop-down box to shut down the on-premises Hyper-V VM before migration. Shutting down the Hyper-V VM ensures that all changes to the Hyper-V VM are synchronized before Azure Migrate starts the Azure VM.
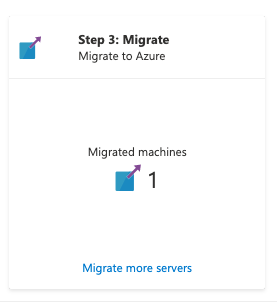
3. After a few minutes, refresh the Migrate page. You will notice that the Hyper-V VM shuts down, and the tiles on the Migrate page have now been updated to show that you have a migrated server!
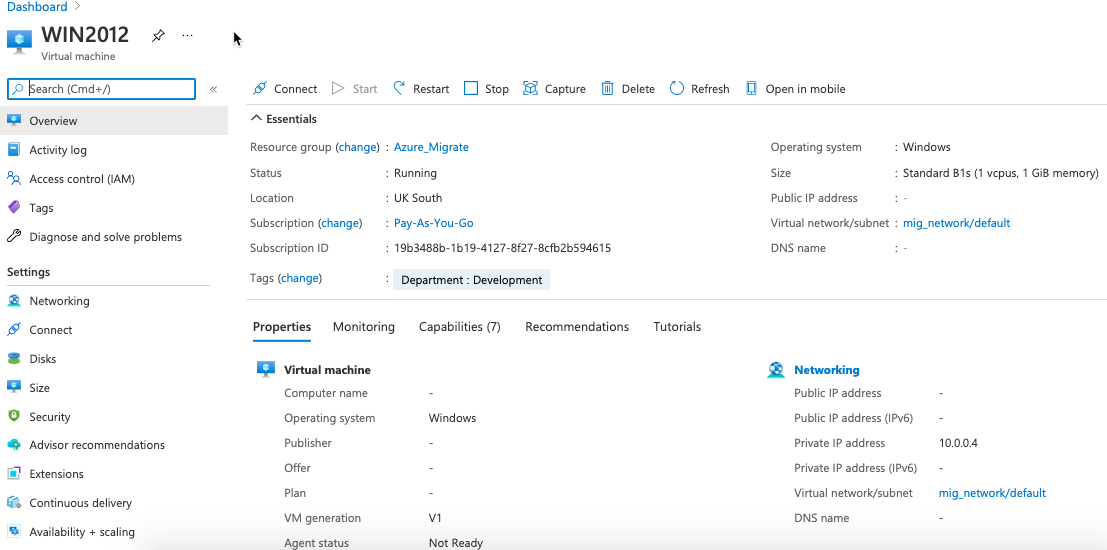
4. Finally, navigate to your resource group in the Azure Portal. You should now see that Azure Migrate created the Azure VM and all associated components just like you saw when performing the test migration.
Cleaning Up
Once you’ve successfully migrated your Hyper-V VM to Azure with Azure Migrate, you only have a couple of final house cleaning tasks to do.
- Navigate to the Azure Migrate hub again and select Azure Migrate —> Server Migration.
- Clean up the Azure Migrate migration by right-clicking on the VM that Azure Migrate just created and select Stop Migration. This action stops the on-premises synchronization, removes the VM from the running count of replicating servers, and cleans up the replication state information.
- To ensure the VM is optimized to work in Azure, install the Azure VM Windows agent. This agent is normally installed by default when creating a VM through the Azure Portal. The agent’s primary role is enabling and executing Azure Virtual Machine extensions and also managing the interaction between the VM and the Azure Fabric Controller.
- Finally, if you migrated the VM for testing purposes, don’t forget to remove the VM resources or the entire resource group.
Conclusion
In this tutorial, you have learned how to migrate a Hyper-V hosted virtual machine into Azure using the native tools provided in the Azure Migrate project portal. In addition, you’ve learned all of the steps starting from replication, test migration, and finally, a full cutover migration.
Armed with your new knowledge, you can confidently take your first steps to lift and shift those snowflake servers! So which VM will you migrate first?


