


Do you need to export Hyper-V VMs and transfer it from one host to another? How about export a VM from your development workstation to a Hyper-V host in production? If so, you’ve come to the right place!
In this article, you will learn how to export and import a virtual machine using the Hyper-V Manager and PowerShell. Ready? Let’s GO!
Prerequisites
This article will be a tutorial. If you plan on following along step-by-step, you will need the following:
- PowerShell 7 or Windows PowerShell 5.1 – This tutorial will focus on PowerShell 7, but the commands will work with Windows PowerShell 5.1.
- A Windows Server with Hyper-V enabled – This tutorial is based on the insider preview released March 2021, but any Windows Server from 2012R2 onward will suffice.
- A virtual machine guest – This tutorial is using an Alpine Linux guest because it’s light on resources. You can use any guest Operating System you like.
- A local Windows user account in the local administrators group on the Hyper-V host.
Steps to Export Hyper-V VMs
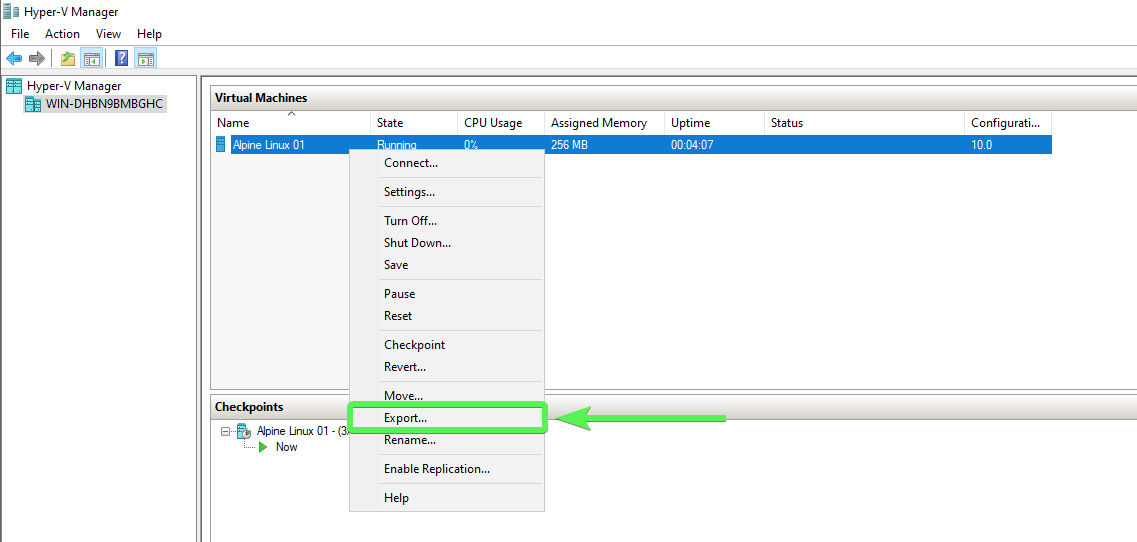
If you’re not a fan of the command-line or you just have a single VM to save to disk, the Hyper-V manager is a solid choice. Assuming you’re on your Hyper-V host and you have a virtual machine running:
1. In your Windows search menu, type “hyper”. The Hyper-V Manager console should come up for you. If so, click on it to open.
2. Find the VM to export, right-click on it and click Export.
3. Next, choose a folder to save the VM and configuration to and click on Export.
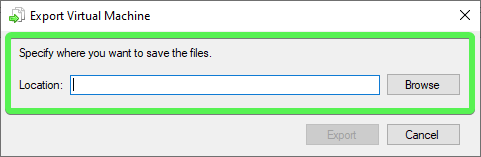
The location you choose to save should have enough storage space for the exported VM. This will vary. Remember, you can have 60 GB allocated for disk, but that doesn’t mean the VM disk has grown to 60 GB.
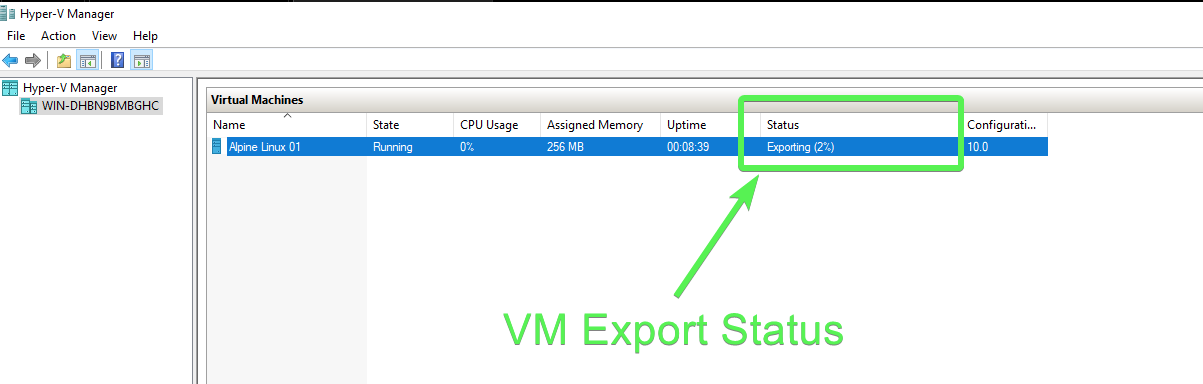
Once Hyper-V begins the export process, you will see the status of the export in the Hyper-V Manager window.
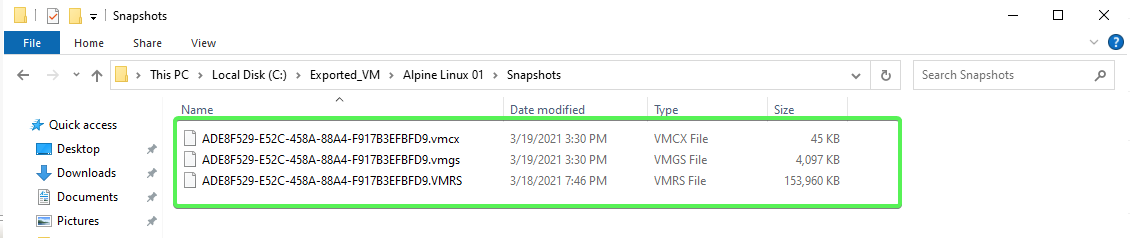
4. Now, confirm all of the required files are present. You should see three sub-folders. These sub-folders contain all the files required for the exported VM to start; Snapshots, Virtual Hard disks, and Virtual Machines.
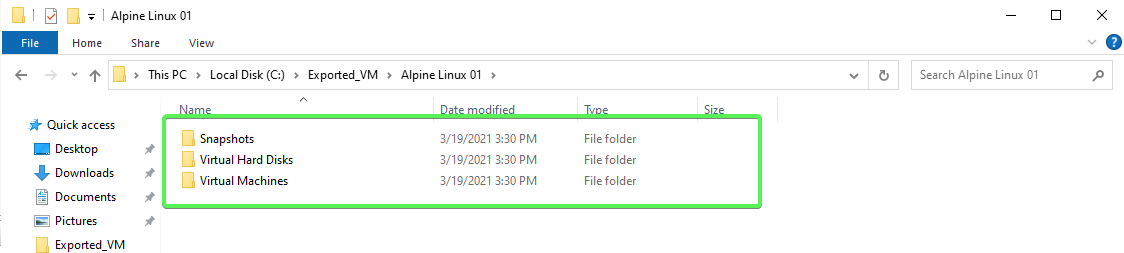
- The Snapshots folder contains snapshot information for the VM. The folder may be empty if there were no snapshots for the VM. In this folder, you will see VMCX, VMRS, and VMGS file extensions. The VMCX binary file contains configuration information specific to your exported VM. The VMRS binary file contains the VM runtime state information. Without this file, the VM cannot boot. Last but not least there is the VMGS file. Not sure what this file is for. If you know, leave a comment.
If you have prior experience with Hyper-V, you may have noticed something different about the file extensions. Starting with Windows Server 2016, Hyper-V no longer uses XML files for configuration information and instead shifted to binary files. Read more about these new extensions.
If your VM has more than one checkpoint, you will see multiple VMCX, VMRS and VMGS files for each checkpoint the VM has.
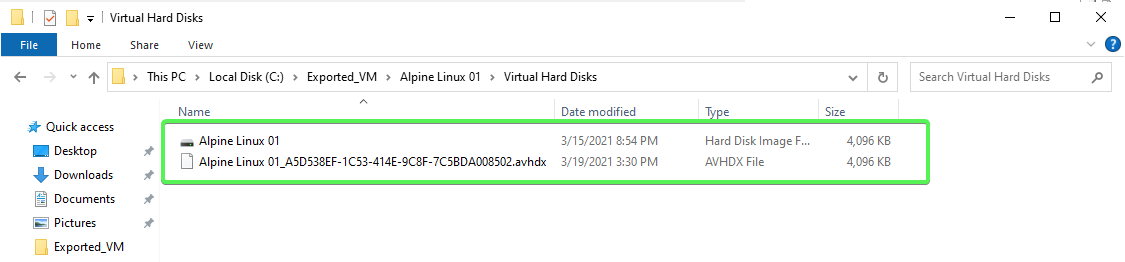
- The Virtual Hard Disks folder contains all of the hard disk image files or *.vhdx for the VM. The AVHDX or Automatic virtual hard disk file is a differencing disk used for virtual machine checkpoints. If your virtual machine has more than one checkpoint, you will see multiple AVHDX files.
- The Virtual Machines folder contains the VM configuration files used to boot the VM. Similar to the Snapshots folder, you will see VMCX, VMRS, and VMGS binary files here as well.
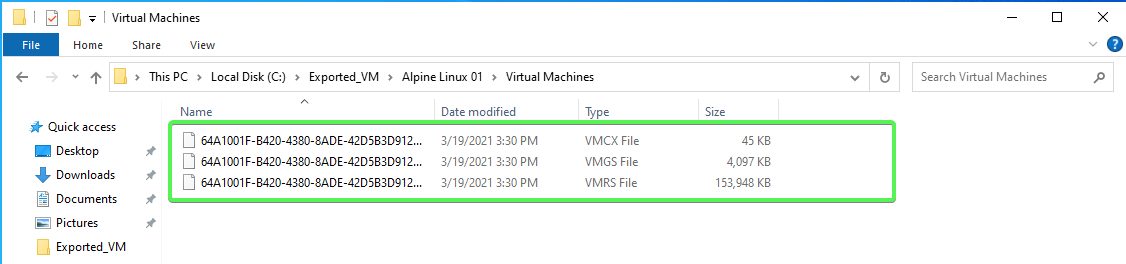
If all three folders are present and contain files, your export was successful.
Using PowerShell to Export a VM
If you’re a fan of the command-line or have a lot of VMs to export, using PowerShell to export a VM is a great option also. To export a Hyper-V with PowerShell, use the Export-VM cmdlet. To do so, assuming you’re on your Hyper-V host and your VM is offline:
1. Open up a PowerShell console.
2. Query they Hyper-V host to get an inventory of your VMs and the name of the VM to export. This tutorial will export a VM called Alpine Linux 01.
Get-VM
Export-VM command3. Create a folder to export the VM to. This tutorial will export the VM to C:\Export_VM.
New-Item -ItemType Directory -Name 'Exported_VM\' -Path 'C:\'4. Now export the VM using the Export-VM cmdlet providing the name of the virtual machine for the Name parameter, the Path to the folder to save it to, and the PassThru parameter.
The
PassThruparameter is optional to return the VM object being exported. Otherwise,Export-VMreturns no output.
Export-VM -Name 'Alpine Linux 01' -Path 'C:\Exported_VM\' -Passthru
When a VM is running,
Export-VMwill not automatically save the memory. If you’d like to save the contents of memory running in the VM, use the-CaptureLiveState CaptureSavedStateparameter withExport-VM. Learn more about the technology used to capture memory.
5. Now remove the VM from Hyper-V. Don’t worry! You have it saved!
Remove-VM -Name 'Alpine Linux 01'Using Hyper-V Manager to Import a VM
Once you’ve exported the VM, disaster has struck and the VM is gone. No worries! You have already exported it to disk. Let’s get it back. To do so, assuming you’re on your Hyper-V host again:
1. Open Hyper-V Manager.
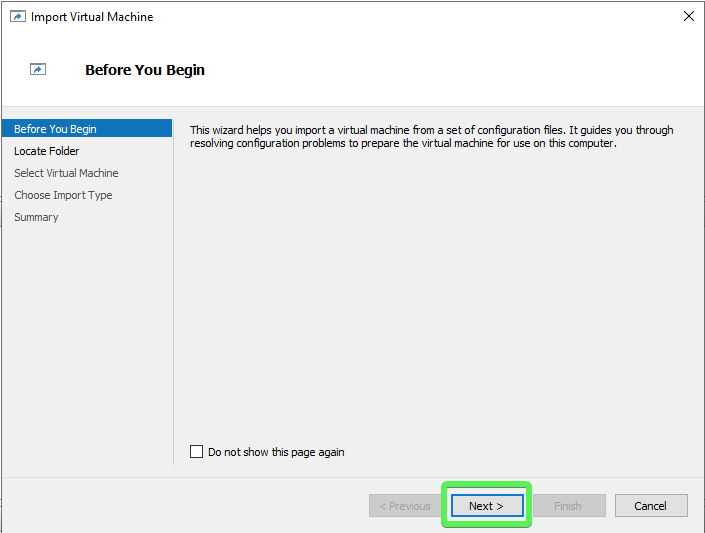
2. Click on the Import Virtual Machine menu item located on the right side of the Hyper-V Manager window. You are presented with the Import Virtual Machine wizard. Click Next.
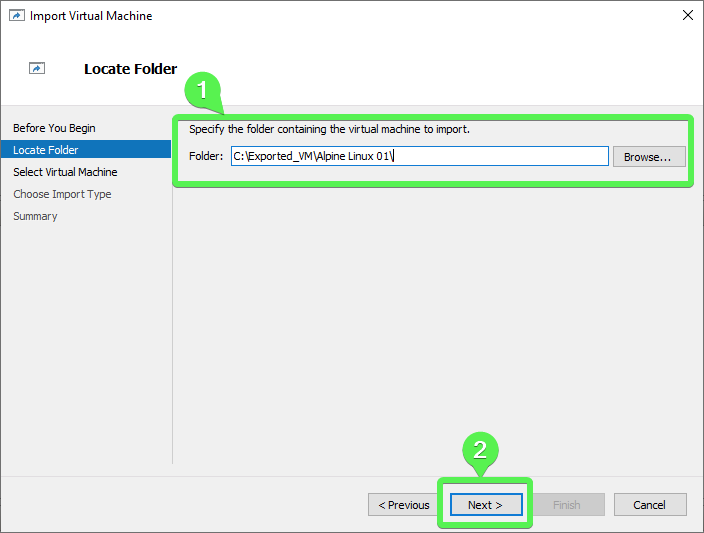
3. Next, enter the path to the exported virtual machine you want to import and click Next. For this tutorial, the VM is saved to C:\Export_VM\Alpine Linux 01.
Unlike when importing with PowerShell, the wizard will locate the VM’s VMCX file for you.
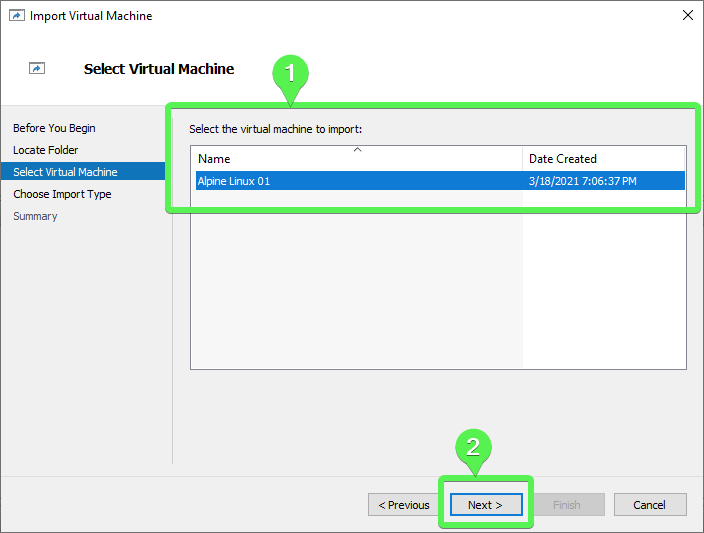
4. Once Hyper-V discovers the VM configuration files inside of the folder (in this example, C:\Exported_VM\Alpine Linux 01\Virtual Machines\), Hyper-V will ask you to select a virtual machine to import. Choose the VM you want to import and click Next.
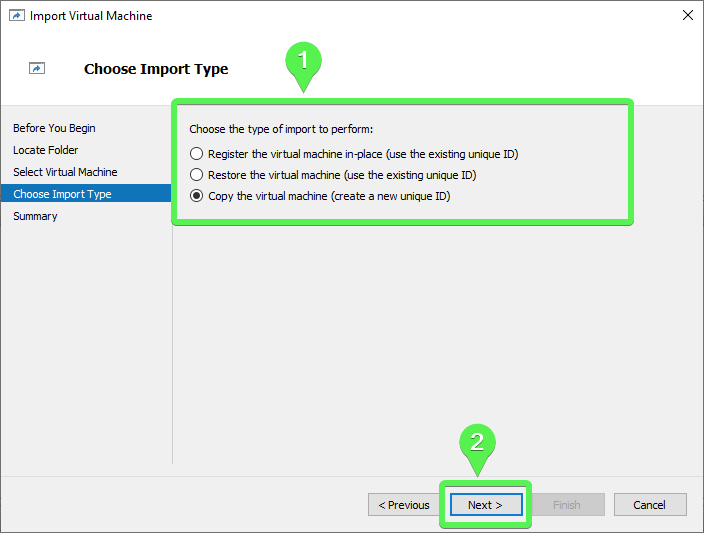
5. Next, choose the type of import you want to perform. First, let’s explore the options in more detail.
When you choose the option ‘Register the virtual machine in-place (use existing unique ID)’, you are assuming the exported VM files are in their final location, meaning you are not moving the VM to a new folder. The exported VM files become the running state of the virtual machine. The UID does not change.
The UID is what Hyper-V uses to identify a virtual machine. If Hyper-V detects the same UID is currently registered, you will receive an error.
When you restore the virtual machine, you can choose a location or use the default Hyper-V location for the exported virtual machine files to be copied to.
When you copy the virtual machine, it’s similar to restoring an exported VM, but with a new unique ID (UID). A new UID makes it possible to redeploy the same virtual machine multiple times to the same or different Hyper-V hosts.
For the demonstration, let’s select the Import Type Copy the virtual machine. Copying the VM will generate a new unique ID (UID). Each Hyper-V VM is identified by a UID. This option is fine for now so click Next.
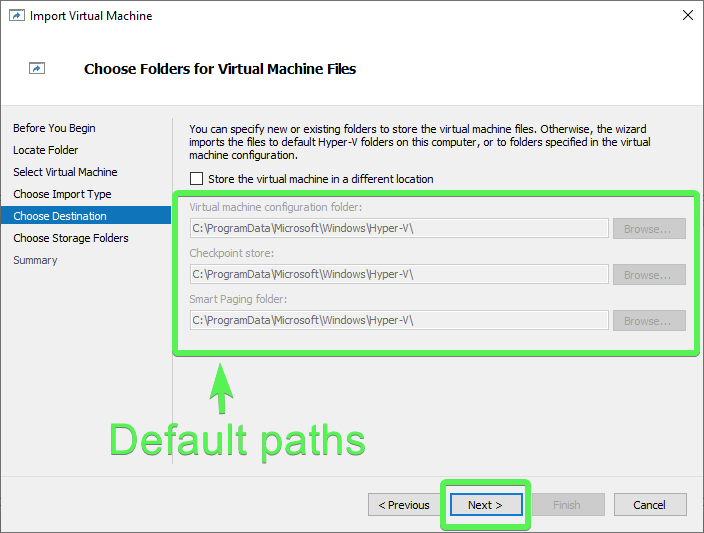
6. Since you chose the Copy option, you can change the location where the virtual machine files are stored. Click Next to accept defaults for this tutorial.
7. Finally, choose a location for the VM known as a Storage Folder. The Storage Folder is where the VHDX and AVHDX files will reside. For this tutorial, accept the default location and click Next.
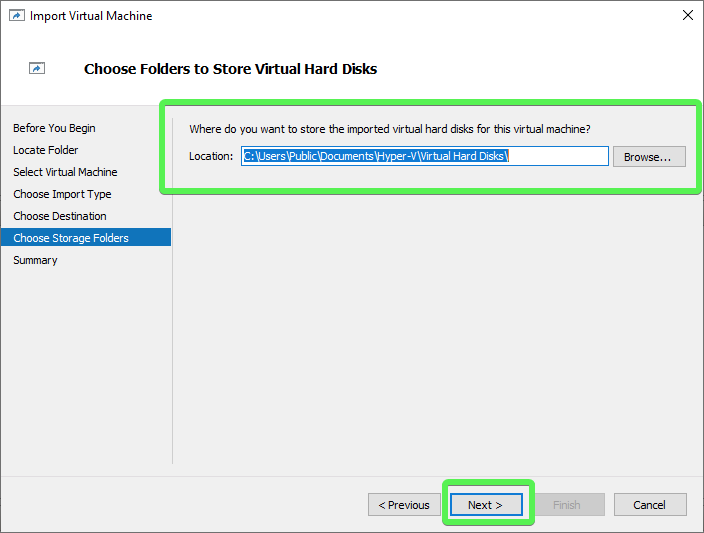
8. Review the summary page and when you are ready, click Finish to begin the import.
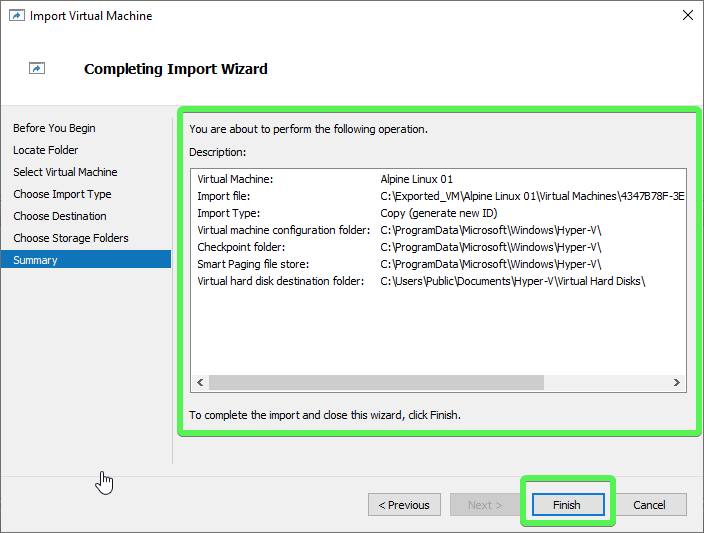
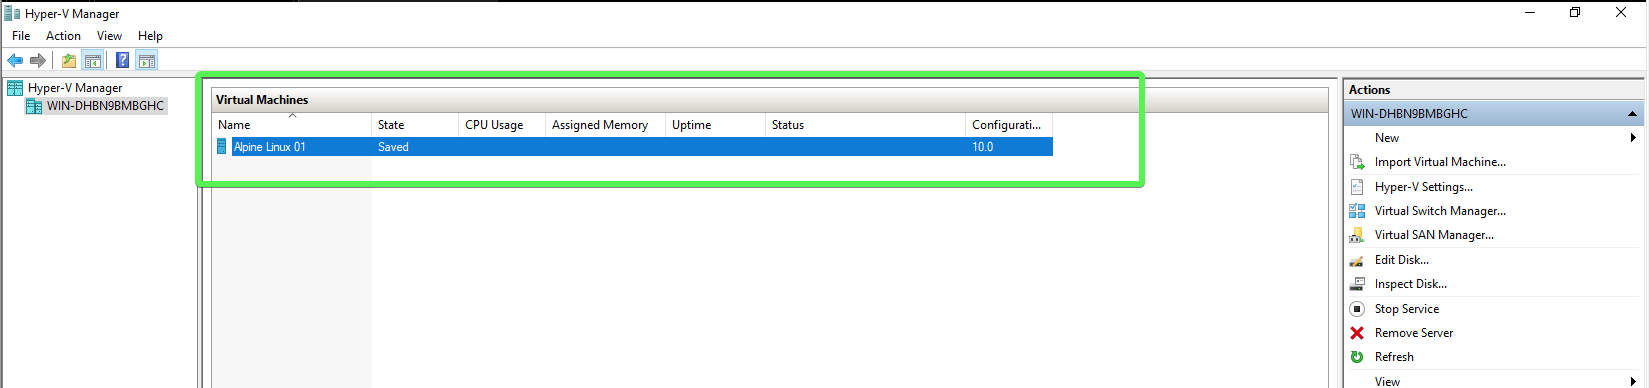
When Hyper-V completes the import, it returns to the Hyper-V Manager window, and you will now see the imported VM, as shown below.
Using PowerShell to Import a VM
If importing a VM via the Hyper-V Manager isn’t your thing, no problem. Use PowerShell! To import a VM with PowerShell, you’ll use the Import-VM cmdlet. Consider the following scenario:
You’ve exported a VM, and it is sitting in C:\Exported_VM\, and let’s say that it is accidentally deleted, or maybe it is needed on a different Hyper-V host? Since it is already exported, it is essentially backed up and can easily be imported, therefore restoring the VM.
If the Export-VM saves a VM to disk, the Import-VM cmdlet does the opposite; it reads a VM from disk and imports it into Hyper-V.
1. Assuming that you have already got a PowerShell console open and you are in the directory where you exported a VM (C:\Exported_VM). First, run the Get-ChildItem cmdlet with the Recurse switch to list out all of the files and make a note of the filename with the *.vmcx extension using the code below:
Get-ChildItem -Recurse | Where-Object -Property Name -CLike *.vmcxYou may see multiple .vmcx files dependent on whether or not the exported VM had snapshots. The only one you need in order to boot the VM is the VMCX file located in the Virtual Machines folder.
You may see output similar to the example below:

2. Next, use the Import-VM cmdlet with the Path parameter to specify the VMs configuration file (obtained in the previous step).
Import-VM -Path '.\Alpine Linux 01\Virtual Machines\.vmcx'That’s it! You’ve registered the VM in place, using the same UID that the VM had when exported.

3. Now verify the UID is the same as .vmcx file name when the VM was exported. You can use the code below to do just that by querying WMI:
(Get-CimInstance -Namespace Root\Virtualization\V2 -ClassName Msvm_VirtualSystemSettingData -Filter "ElementName = 'Alpine Linux 01'").InstanceIDYou should see similar output as the example below:

The above example was a direct import from the VM configuration file, and the VM retained the original UID. In a production environment, you may want to generate a new UID to prevent an old VM being mistaken for a new VM. That’s where the Copy parameter comes in.
Importing a virtual machine using the
Copyparameter will copy the files from the original location (C:\Exported_VM\) into the Hyper-V server’s configured paths. When used withGenerateNewId, the VM can be imported multiple times on the same Hyper-V server with a new unique identifier (UID).
Import-VM -Path '.\Alpine Linux 01\Virtual Machines\.vmcx' -Copy -GenerateNewIdThis time, the imported VM does not contain the same UID as when exported. You see the old, and new UIDs in the screenshot below:
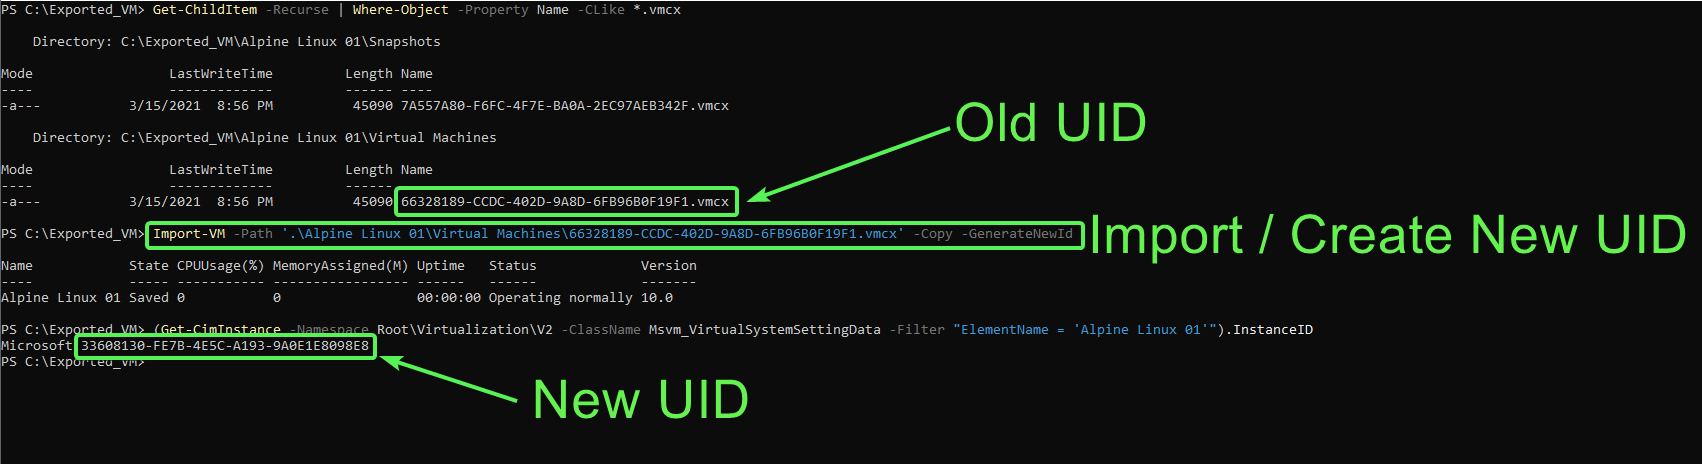
Hyper-V now copies the VM to the default paths you saw earlier importing a VM using Hyper-V Manager but gives the VM a new UID.
Next Steps
In this guide, you’ve learned how to export and import a Hyper-V VM using PowerShell and the built-in Hyper-V manager.
Now that you know how to export and import Hyper-V virtual machines try setting up Automatic Virtual Machine Activation (AVMA) to activate Windows Server virtual machines hosted on Hyper-V.


