

So you’ve decided to migrate some Hyper-V VMs to Azure, eh? You’ve got some work ahead of you, but by using the Azure Migration assessment tool (and this tutorial), you can make the process as painless as possible.
To help you traverse the complexities of moving on-prem Hyper-V VMs to Azure, Microsoft provides a unified service in Azure Migrate. This tool allows you to assess, plan and migrate VMs to Azure.
In this tutorial, you will learn how to take the first step when migrating VMs to Azure; assessment. Using the Azure Migration assessment tool, you’ll learn, step-by-step, how to set up the tool and get insight into exactly what it will take to move your Hyper-V VMs to Azure.
If you want to learn how to take the next step and actually migrate Hyper-V VMs to Azure, check out this post’s complimentary blog post How to Move a Hyper-V VM to Azure with Azure Migrate [Guide].
Prerequisites
If you plan to follow along, ensure you have the following in place before following this step by step tutorial:
- A Windows Hyper-V host – This tutorial uses a physical Windows 2016 server with the Hyper-V role installed equipped with 8GB of RAM and a dual-core i7 (2ghz) processor. To migrate VMs to Azure, your Hyper-V host must be installed on Windows Server 2019, Windows Server 2016, or Windows Server 2012 R2 with the latest updates.
- Administrator permissions on the Hyper-V host
- A Hyper-V VM to migrate – This tutorial uses a Windows 2012 R2 Server VM with 1GB of RAM a single vCPU. Any Hyper-V VM should work, though.
- Outbound Internet access through port 443 for your Hyper-V VMs.
- An Azure Subscription – If you don’t have one, you can register for a free Azure account.
- An Azure user account with at least Contributor Role permissions to the Azure subscription and Application Administrator permissions to register AzureAD apps.
- A storage account for your migration – This tutorial will use a storage account named migndr2021.
- A virtual network for your migrated virtual machine – This tutorial will use a virtual network named mig_network and a subnet named default.
Preparing Your Hyper-V Host for an Assessment and Migration
When preparing for an Azure VM migration journey, you must first ensure your Hyper-V host meets the requirements laid down by Microsoft to accommodate the migration process. To do this, Microsoft provides a handy PowerShell script to check these requirements automatically.
To execute the PowerShell script, on your local computer:
1. Download the MicrosoftAzureMigrate-Hyper-V.ps1 PowerShell script from Microsoft.
2. Copy the script to your Hyper-V host(s). This tutorial will copy the script to the Hyper-V host’s D:\software\Hyper-V Host Check directory.
3. Next, connect to the Hyper-V host via RDP and open PowerShell as an administrator or connect with PowerShell Remoting.
4. Run the MicrosoftAzureMigrate-Hyper-V.ps1 script in PowerShell.
& 'D:\software\Hyper-V Host Check\MicrosoftAzureMigrate-Hyper-V.ps1'When you execute the script, it will perform the following steps on the Hyper-V host:
- Validates that at least PowerShell v4 or above is installed.
- Validates the Hyper-V role is installed.
- Validates the server is at least Windows Server 2012 R2.
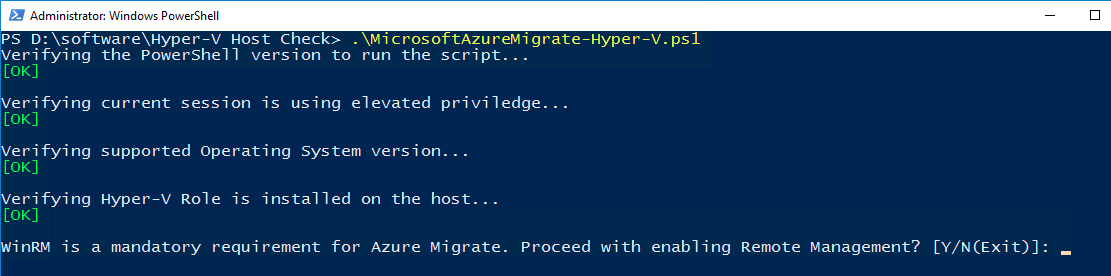
- Enables Windows Remote Management which is required for metadata collection.
- Enables PowerShell Remoting, also required for metadata collection. Make sure to enter Y when prompted.

- Delegates credentials if VHD’s are stored on remote shares. This allows access to the VHD’s for migration if they are stored on shares on remote storage.
- Offers to create a non-administrator local user for Host – Migrate communications. If you are happy with using an administrator-level account answer N otherwise answer Y to create a non-admin-level account**.**
- Checks that Data Exchange Integration Service is enabled on all VMs on the host. This provides basic metadata exchange between the virtual machine and the host.

Creating An Azure Migration Project
As you begin your first steps into migrating Hyper-V VMs to Azure with Azure Migrate, you must perform a discovery and assessment of your existing VM(s). The Azure Migrate service must first discover and “import” all of your on-prem Hyper-V VMs to understand what you intend to migrate.
To instruct Azure Migrate to begin a discovery and assessment, you must first create a migration project in the Azure Migrate hub, where you’ll spend a lot of your time.
On your local desktop:
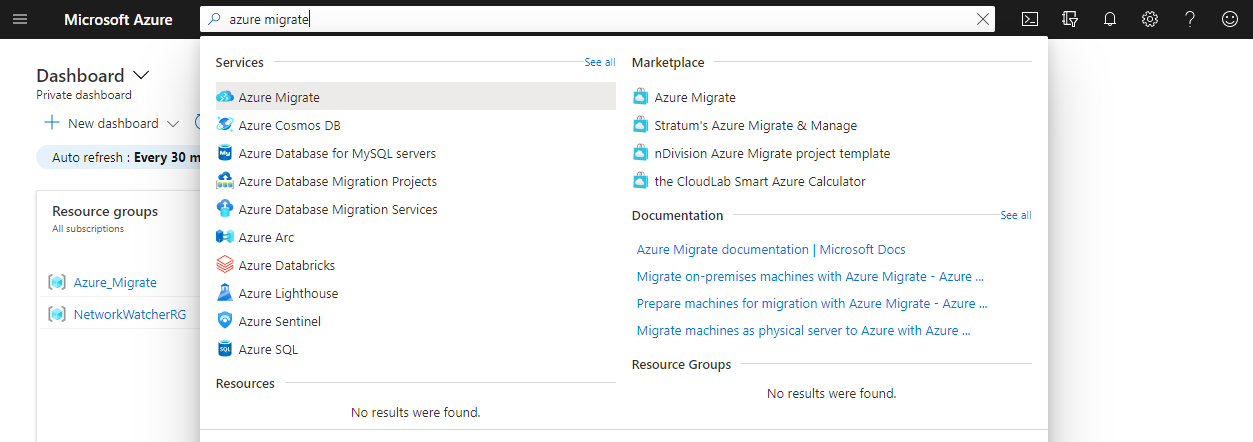
1. Open up your favorite browser and navigate to the Azure Portal.
2. In the search bar, type Azure Migrate to search for the Azure Migrate hub. This action will bring you to the Getting started page.
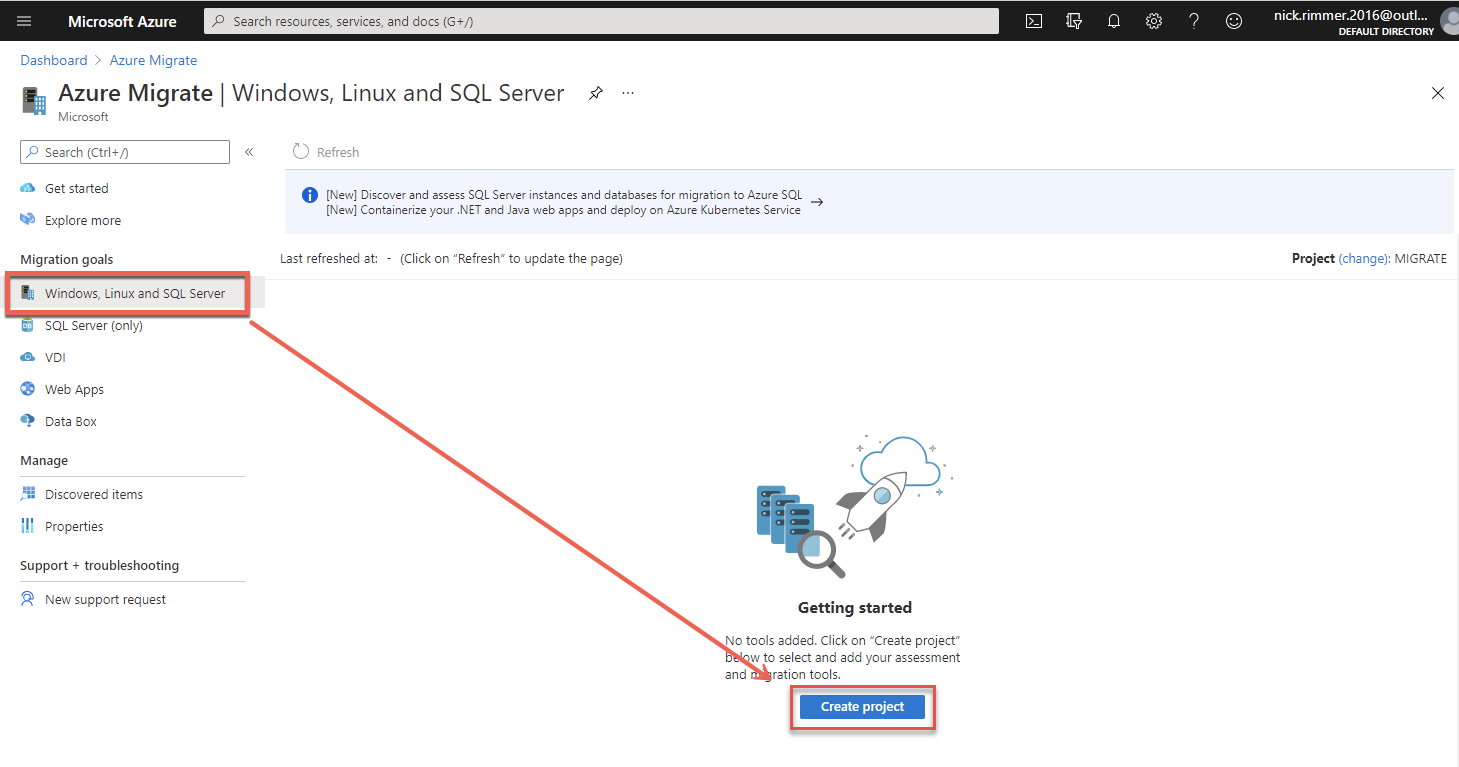
3. Once in the Getting started page, select Windows, Linux, and SQL Server on the left-hand side of the page and click on Create Project to get underway. This action will bring you to the Create project page.
Azure Migrate is a service that supports migrating many types of resources other than VMs like SQL Servers, VDI, web apps and more.
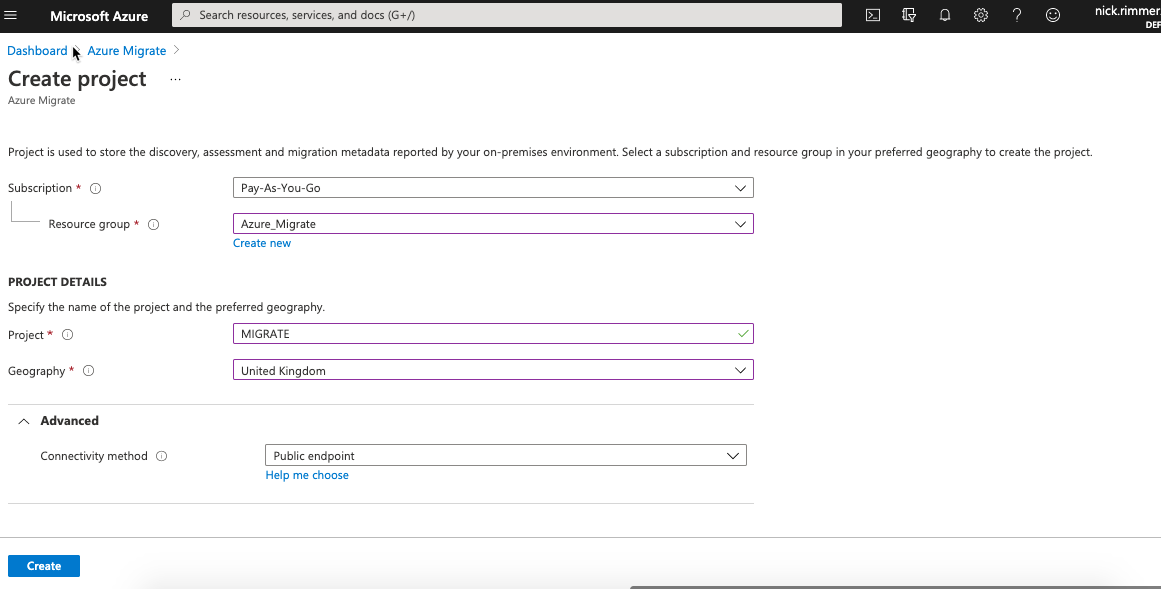
4. In the Create project page, provide some details for the project as follows:
- Subscription – The Azure subscription to create the project in.
- Resource Group – The resource group where the migrated VMs will end up in. Here you can use an existing resource group or click Create New to create a new one. For example, this tutorial will use a resource group called Azure_Migrate.
- Project – The name of the project. You can have multiple projects, each representing groups of VMs. For example, this tutorial will use a project called MIGRATE.
- Geography – The Azure region where Azure Migrates stores discovered metadata that it will generate. Choose the geography closest to you. This tutorial will use United Kingdom.
- Advanced — > Connectivity Method – If you are running the discovery, assessment, and migration of VMs over a private VPN gateway, choose Private Endpoint; otherwise, choose Public Endpoint to move your VMs over the Internet.
Once completed click on Create to create the project.
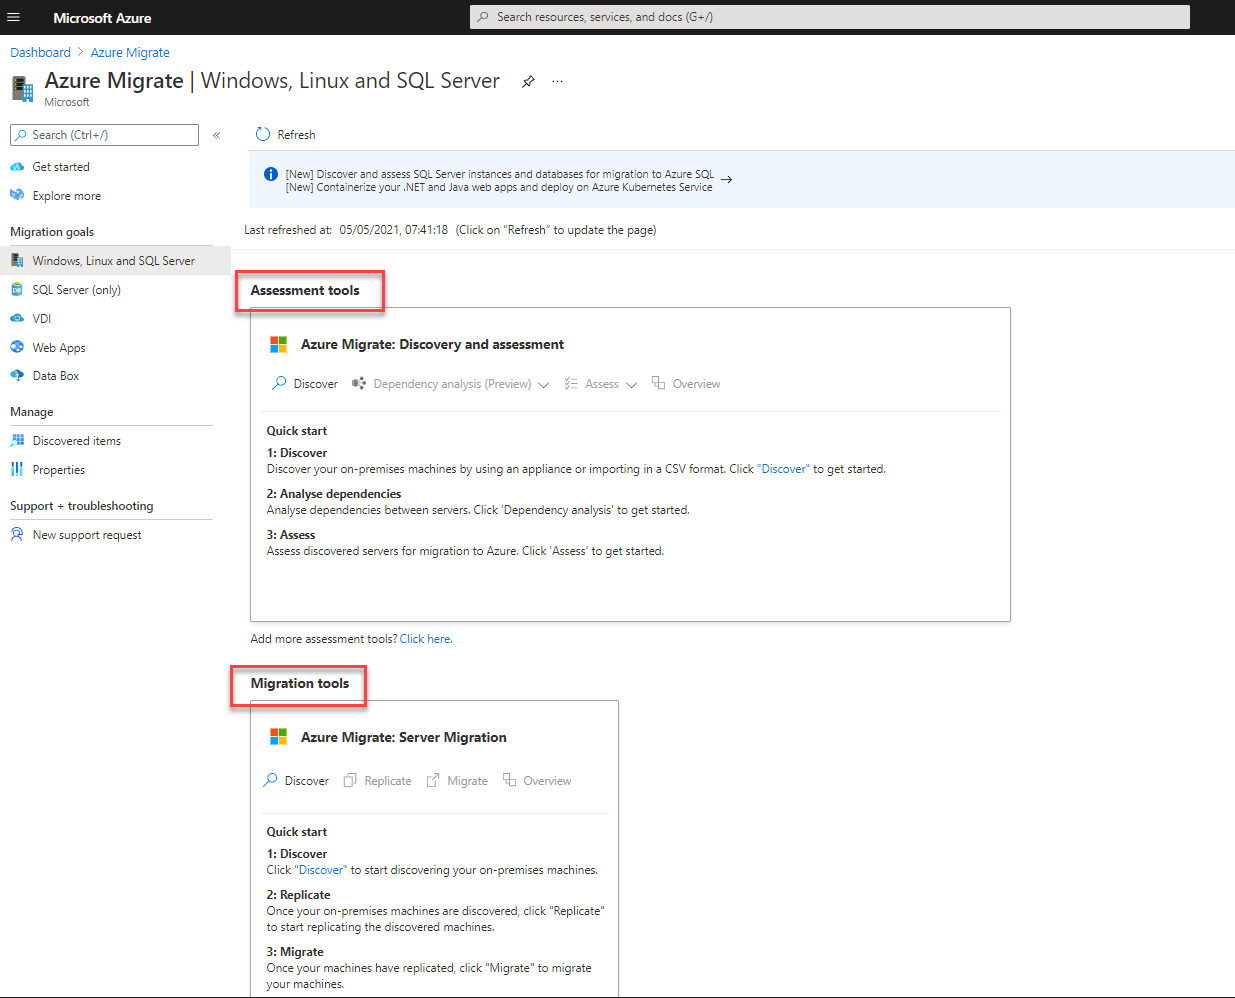
Once you’ve created a project, you will now see two tiles created in the Azure Migrate hub called Assessment Tools and Migration Tools. These tiles represent the two “phases” that you’ll need to go through to migrate Hyper-V VMs to Azure.
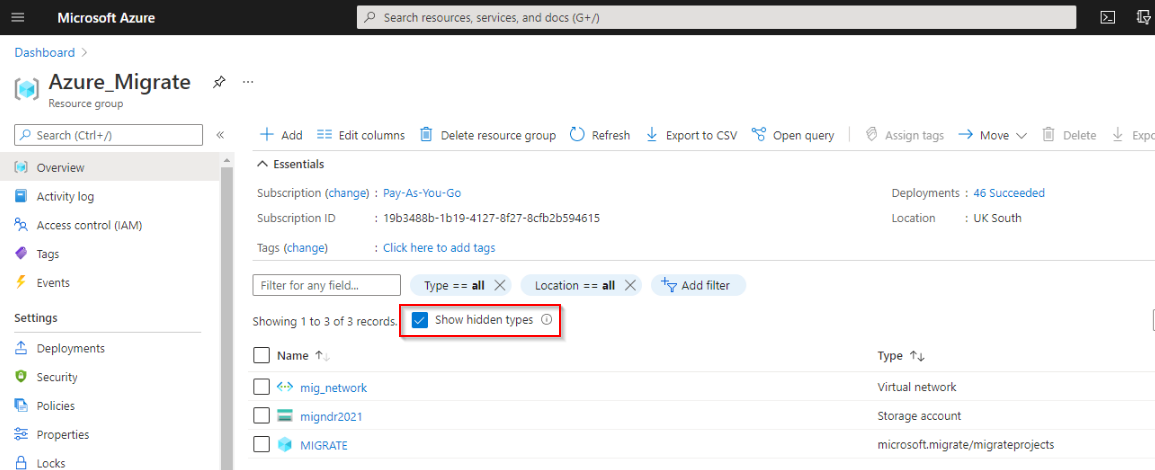
5. Now, navigate to the resource group you provided when creating the project. You should notice no resources exist unless you chose an existing resource group.
6. Select the Show Hidden Types checkbox from within your chosen resource group to display the Azure Migrate resources. You’ll see that the project creates an Azure virtual network, a storage account, and a project resource to accommodate the discovery, assessment, and eventual migration.
Azure Migrate resources are called ancillary resources, and the Azure Portal does not display these resources by default.
Downloading the Discovery Appliance
Once you’ve created the Azure Migrate project, you now must perform a Hyper-V VM discovery. This process uses a VHD with Windows Server 2016 installed called a discovery appliance. The discovery appliance has software pre-installed and configured to scan your on-premises VMs that you will use to create a new on-prem Hyper-V VM.
The discovery appliance VM can discover up to 5000 Hyper-V VMs.
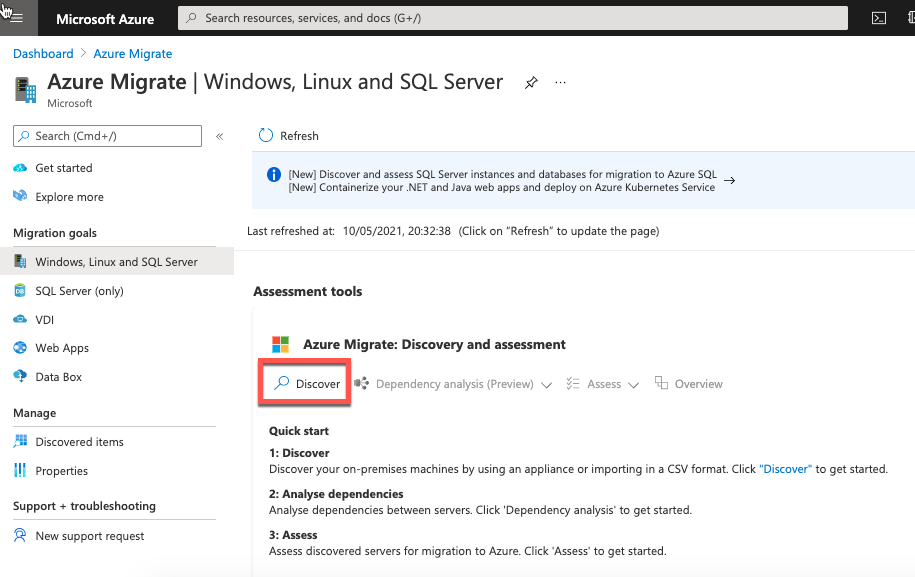
1. In the Azure Migrate hub, click on the Discover button to bring up the Discover blade.
2. On the Discover blade, click on Discover Using appliance option and select Yes, with Hyper-V under the Are your servers virtualized? drop-down.
You can also tell Azure the Hyper-V VMs you have by choosing the Import Using CSV option. This option allows you to pre-populate a CSV file with VM details and upload this to Azure. Use the appliance when possible to prevent input mistakes and to analyze VMs’ performance metrics to let Azure know VM compute and storage requirements.

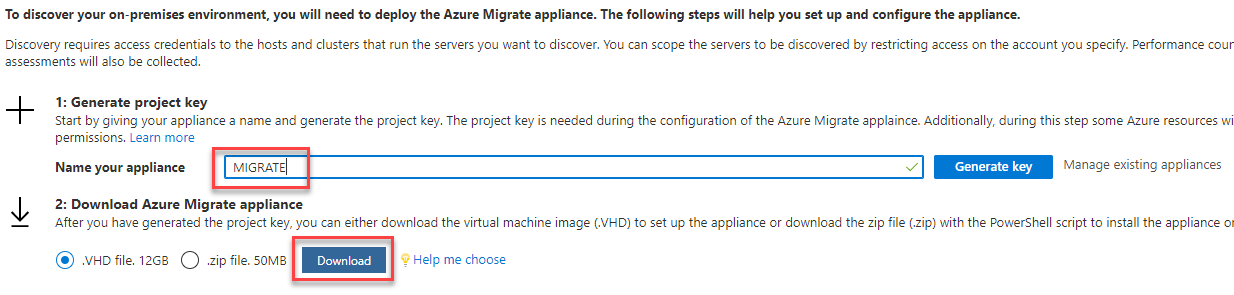
3. Next, provide the VM name in the Name your appliance box under the Generate project key section. This tutorial will use the name MIGRATE. Azure Migrate needs a key to authorize and register the on-site appliance with Azure.
The appliance name does not need to match any existing server or naming convention as it is only in use for the migration of the Hyper-V VMs.
Click the Generate Key button to create the project key and copy this key somewhere for use later. Once you’ve generated the project key, click Download to download the VHD file.
Configuring the Discovery Appliance and Running a Discovery
Once you’ve downloaded the discovery appliance VHD, you now must set it up on your Hyper-V host. To do that:
1. Import the VHD into your Hyper-V host to create the discovery appliance VM.
Although the documentation states that you need 16GB of ram and 8 vCPUs on your Hyper-V host to run the discovery appliance, this guidance is for a fully production-ready appliance. This tutorial runs on 2GB of RAM and 2 vCPUs.
2. Once you have the appliance (VM) running on your Hyper-V host, start it up.
3. Connect to the appliance in Hyper-V Manager and logon onto the appliance, open a Powershell session and type hostname keep a note of this for the next step.
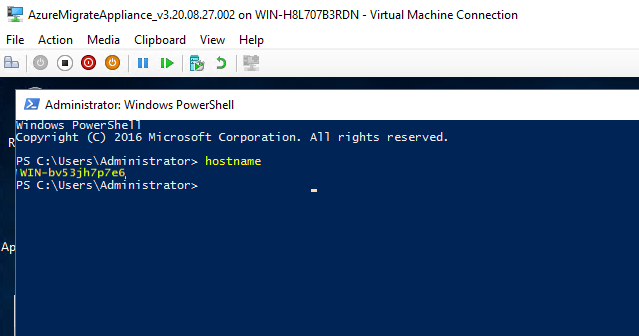
4. Now, either via the appliance’s console or on your Hyper-V host, browse to https://<hostname>:44368 to load the Appliance Configuration Manager tool.
When you created the Azure migrate project you named the appliance MIGRATE, this name is assigned to the appliance, it’s not the actual virtual machine server name. You could of course give both the same name if you wish.
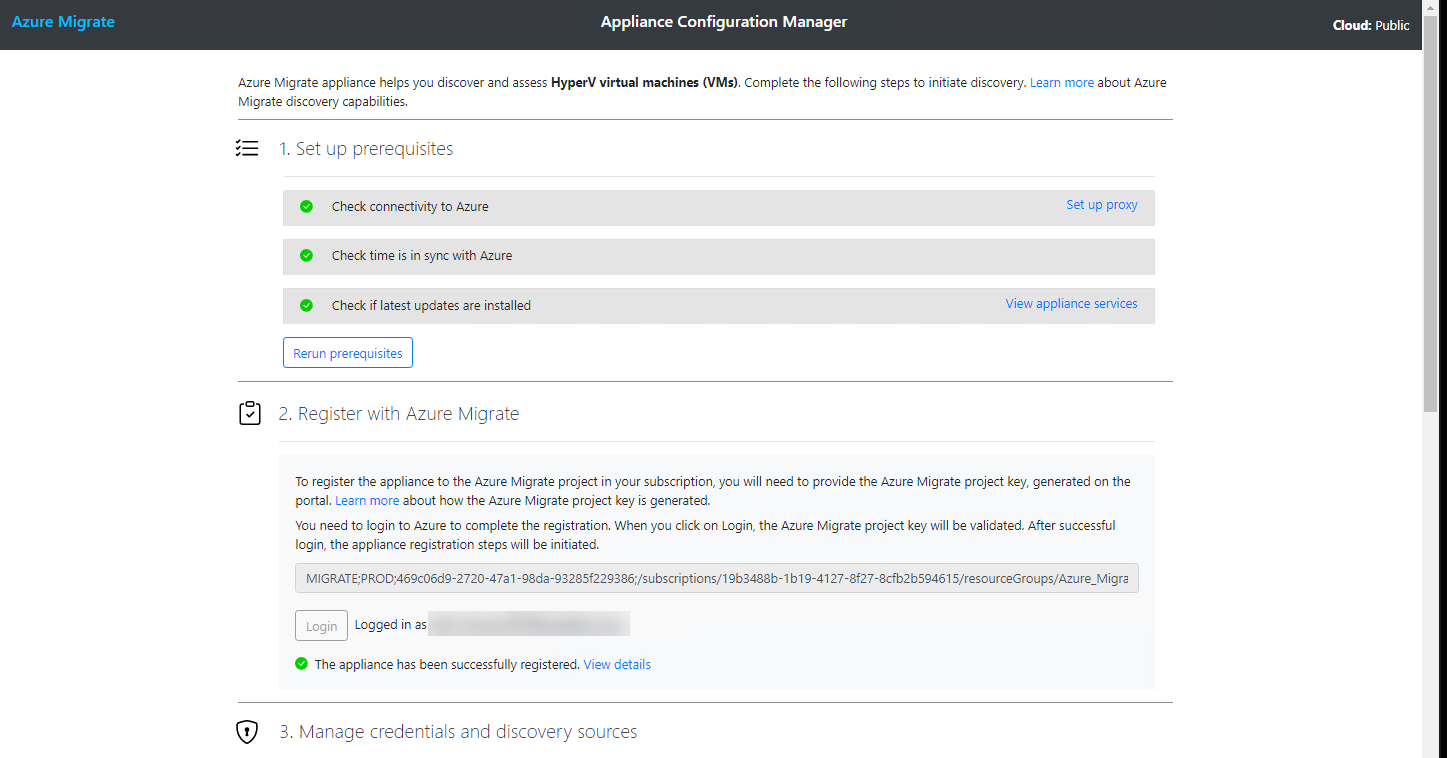
When you bring up the Appliance Configuration Manager, it will check connectivity to Azure, ensure the time is in sync with Azure and the appliance, and check if the latest updates have been deployed to your appliance. If it finds updates they will be applied straight away by the configuration manager. This process can take up to 5-6 minutes.
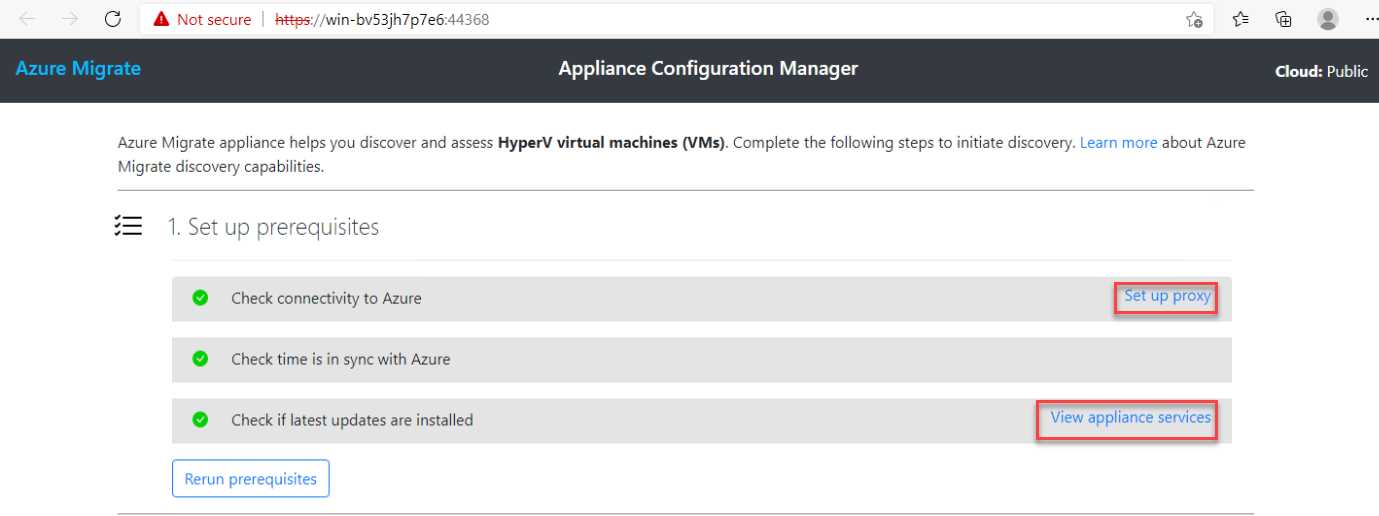
5. Click on Set up proxy if you need to configure a proxy for the appliance to connect through to get to Azure via HTTPS.
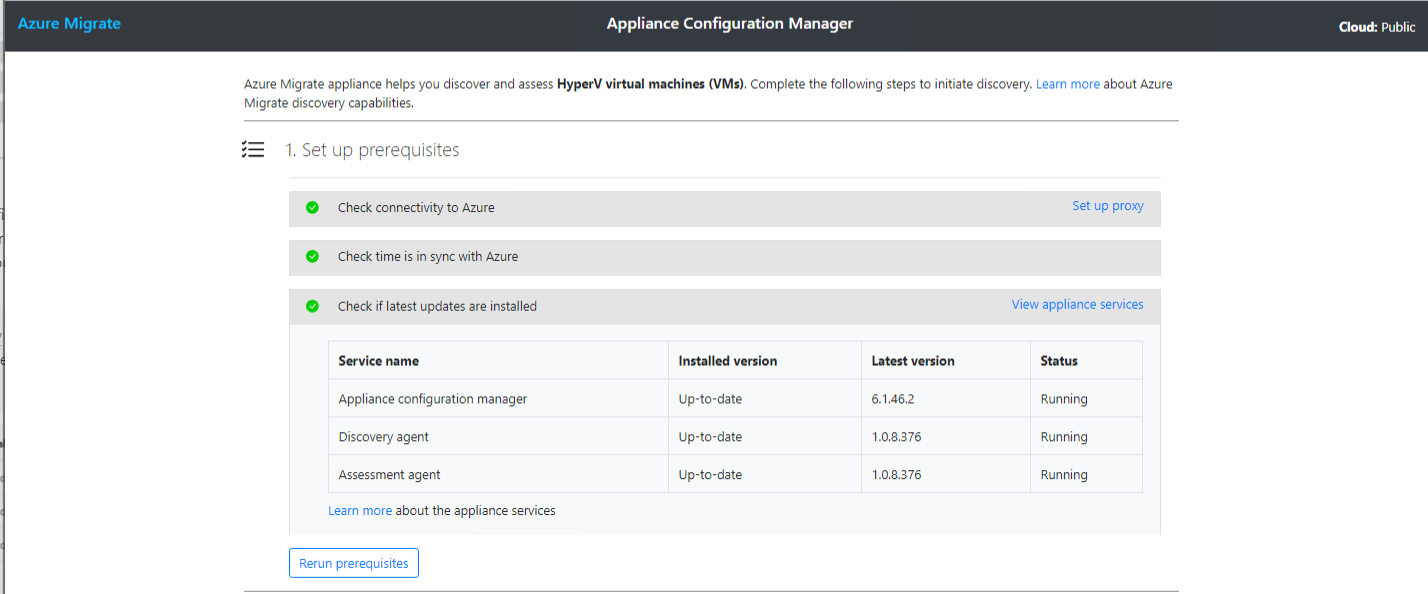
Click on View application services to see the three Windows services the appliance uses. Each of these services below should be running and show Up-to-date.
6. Now, under the Register with Azure Migrate section, paste in the project key created earlier and click the Login button. This task registers your appliance with your Azure subscription.

7. Copy on the Copy code & Login button to bring up a web browser to sign into Azure.
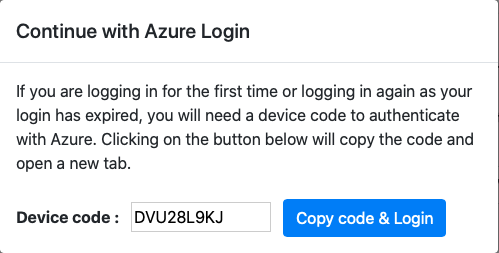
8. Provide your Azure subscription username and password. Once signed in, close the Microsoft Azure PowerShell authentication window. The appliance can now use Azure PowerShell commands to work with Azure Migrate.

9. Now, switch over to the Appliance Configuration Manager web page again and you should see the message The appliance has been successfully registered, as shown below.
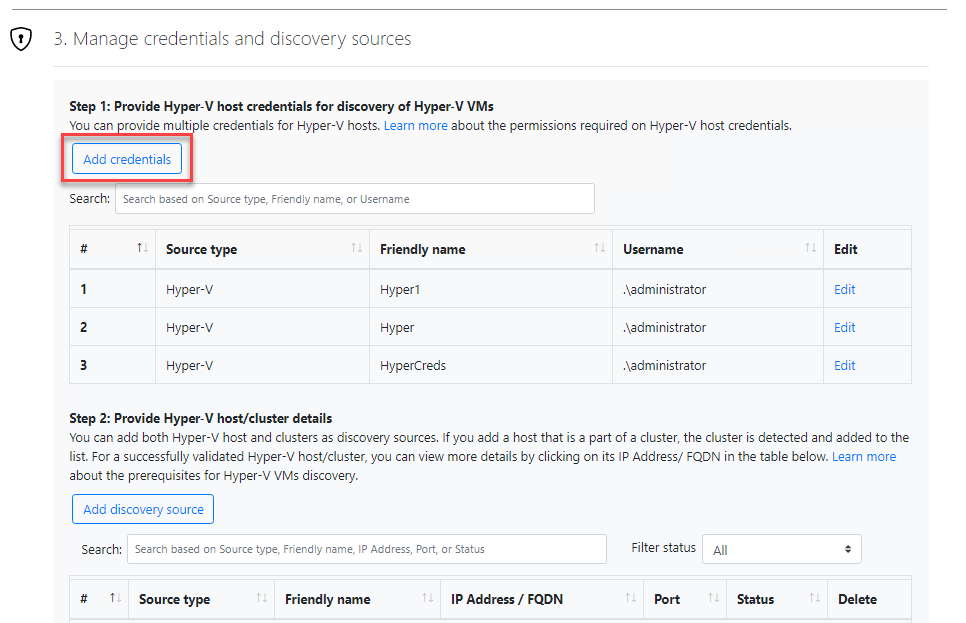
10. Next, under the Manage credentials and discovery sources section, click on the Add credentials button and provide a local username, password, and a label for a user with admin rights on the Hyper-V host. The appliance needs these credentials to authenticate to your on-prem Hyper-V hosts.
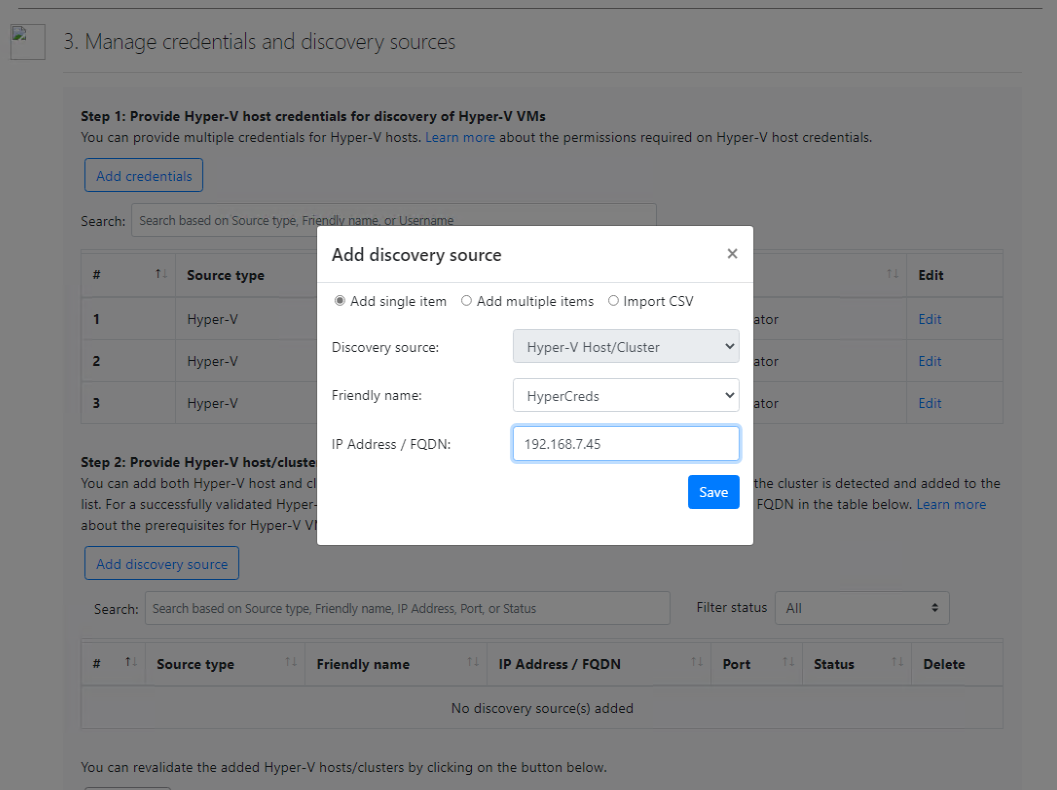
11. Click on the Add discovery source button, provide the IP address of the Hyper-V host, specify the credentials you just created and click Save. Specifying the discovery source points the appliance to your local Hyper-V host to discover VMs.
After a few moments, the appliance should validate the Hyper-V host as shown below.

You’ve now configured the virtual appliance!
12. Finally, click on Start Discovery to instruct the appliance to discover all of the Hyper-V VMs on the host you defined earlier.

Running and Reviewing An Assessment
Once you start a discovery via the on-prem Hyper-V appliance, the appliance should then begin reporting its findings back to the Azure Migrate service. If so, it’s time to start running an assessment against those VMs to build a migration plan!
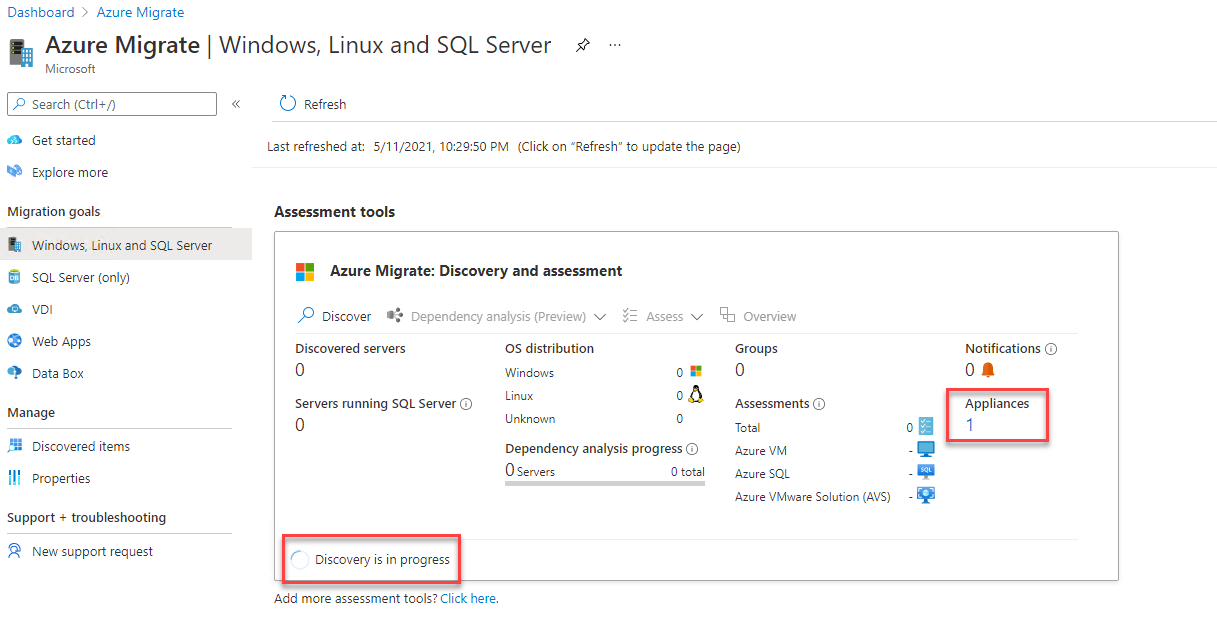
1. In your favorite web browser, navigate back to the Azure Migrate hub. You should now see that the Assessments Tools tile displays details about the virtual appliance you’ve registered, and a Discovery is in progress, as shown below.
This typically takes 2-3 minutes per virtual machine you are assessing.
Once Discovery finishes, you’ll see that the Assess drop-down, as shown below, becomes available. Click on Assess —> Azure VM to create an assessment.
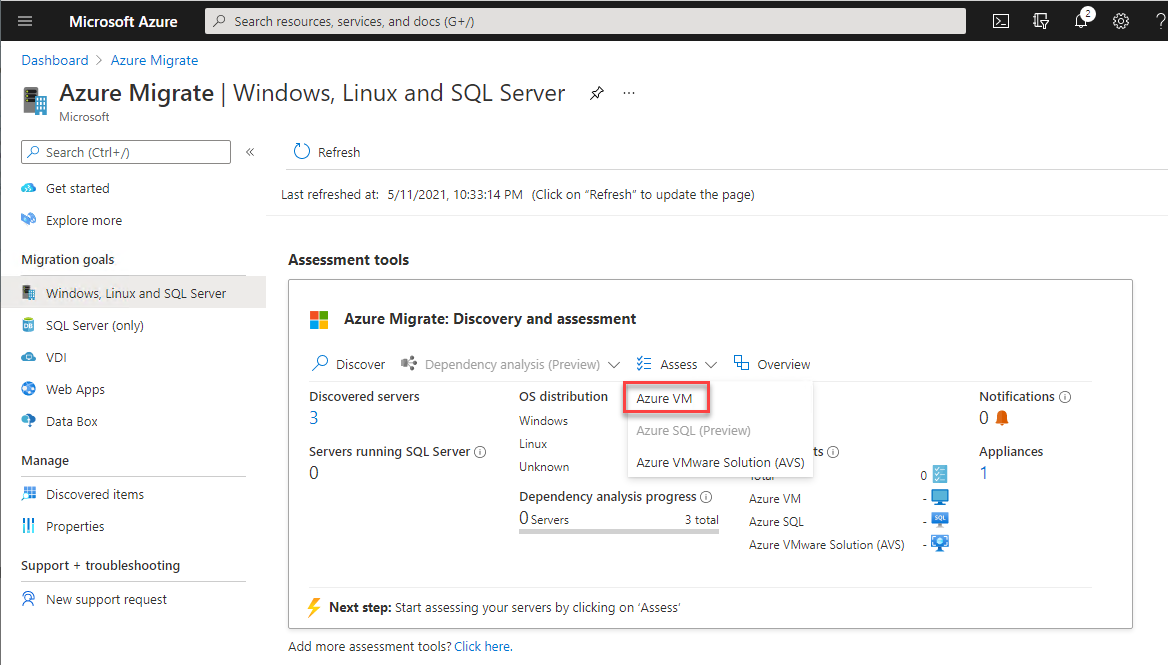
An assessment will scan all of the local appliance information sent to Azure Migrate and provide you information such as Azure readiness and some of the costs that you may expect once migrated.
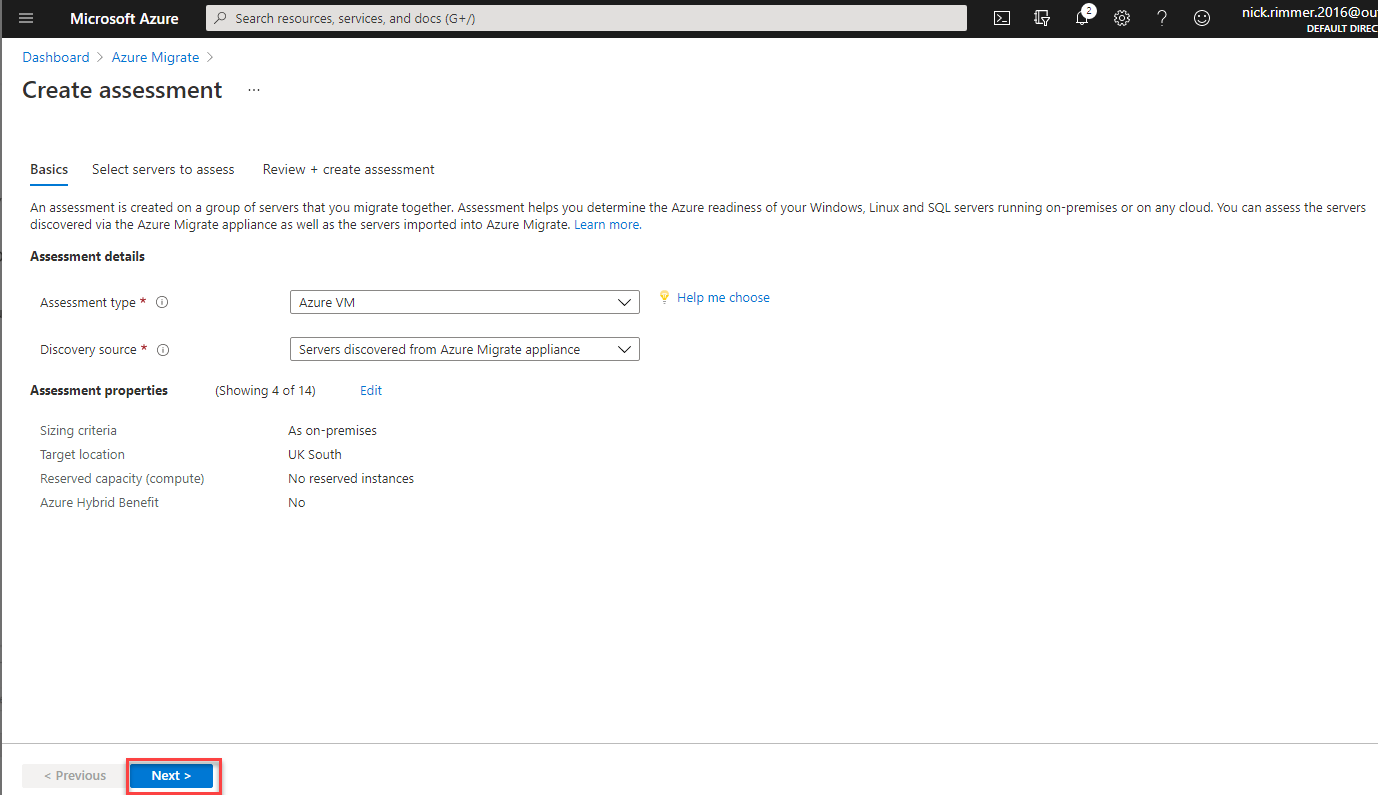
3. On the Create assessment page, select Azure VM for the Assessment type dropdown, you also have the option for Azure SQL and Azure VMWare Solution. You would choose these options when assessing a SQL database for migration or a VMware Virtual machine.
Select Servers discovered from Azure Migrate appliance for the Discovery Source. The discovery source can either be the migration appliance you deployed or a spreadsheet populated with your server details. In the case of the latter, you would select Imported Servers from the drop-down.
Click Next to open the Assessment Properties page.

4. On the Assessment Properties page, click the Edit button to open a new blade allowing you to model the costs and performance with many options.
Target Properties
- Target Location – The region where you plan to migrate the VMs to.
- Storage Type – This gives you 4 options:
- Automatic – This option will allow Azure to choose the disk for you based on throughput and IOPS. (Data gathered by the migration appliance)
- Premium managed disks
- Standard HDD managed disks
- Choose Premium Managed Disks in this tutorial
- Reserved Capacity (compute) – The Reserved capacity allows you to reserve virtual machine instances for up to 3 years at a discount of up to 82%. This option is currently only available on Pay As You Go subscriptions. In this tutorial choose to leave this option at the default of No reserved instances.

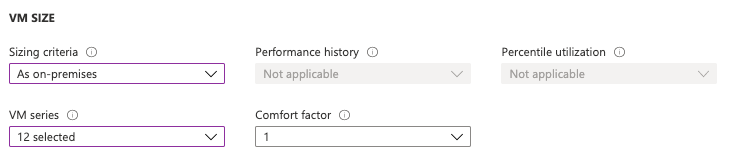
VM Size
- Sizing Criteria – This presents you with two options, Performance based which will utilize performance data from the migration appliance, or As On-premises which leaves the VM with the same memory\vCPU’s that you already have. Leave this on the default option of As on-premises. This ensures that your new VM runs with the same number of cores\memory as its current on-premises configuration.
- Performance History – This option enables you to use the migration appliance to gather performance data for either 1 day, 1 week, or 1 month. It can then be used with Sizing Criteria to get a better picture of how your VM’s perform and in turn advise on how many vCPU’s you need and also how much memory is required.
This option only appears when you select Performance Based in Sizing Criteria
- Percentile Utilization – The percentile value of the performance sample set to be considered for right-sizing.
This option only appears when you select Performance Based in Sizing Criteria
- VM Series – Include or exclude particular series of virtual machines, that Azure Migrate will select from during the migration process. This lets you override series of VM’s that you may not want to use, or your company might have a policy on only certain virtual machine types being allowed.
- Comfort factor – This is a manual buffer that can be applied on top of the virtual machine configuration selected, the comfort factor is added for scenarios such as seasonal usage, short performance bursts, and increases in future usage. For example, normally a 10-core VM with 20% utilization will result in a 2-core VM, with a comfort factor of 2 it will be a 4-core VM.
5. Once you’ve defined all of the attributes of the assessment, click on Next.
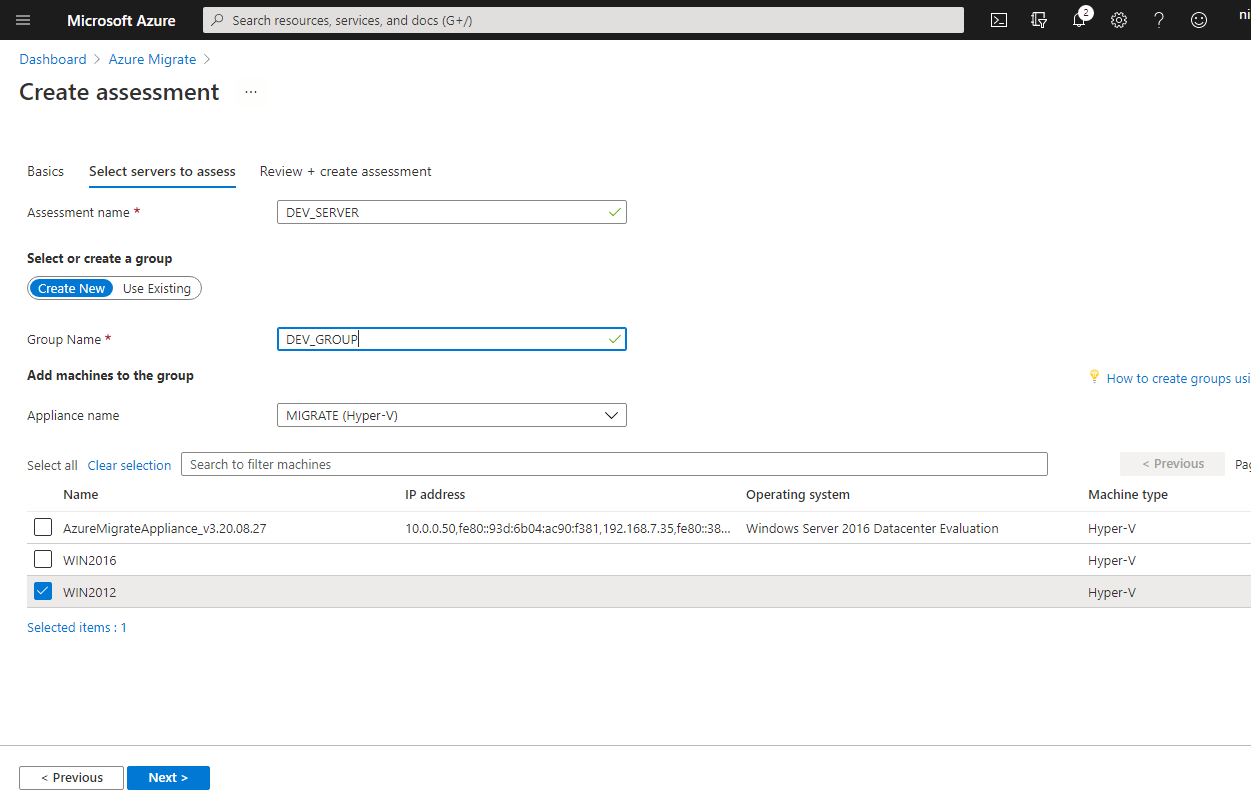
6. Now, tell the Azure assessment tool, which discovered VMs to assess under the Select servers to assess section.
- Provide an Assessment name. This tutorial will use DEV_SERVER.
- Because this is probably your first migration, click on Create New under the Select or create a group section. A group represents a set of VMs to migrate.
- Provide a Group Name. This tutorial will use the group name of DEV_GROUP.
- Select the VMs you’d like to include in this assessment from the list of VMs the appliance discovered.
- Click Next.
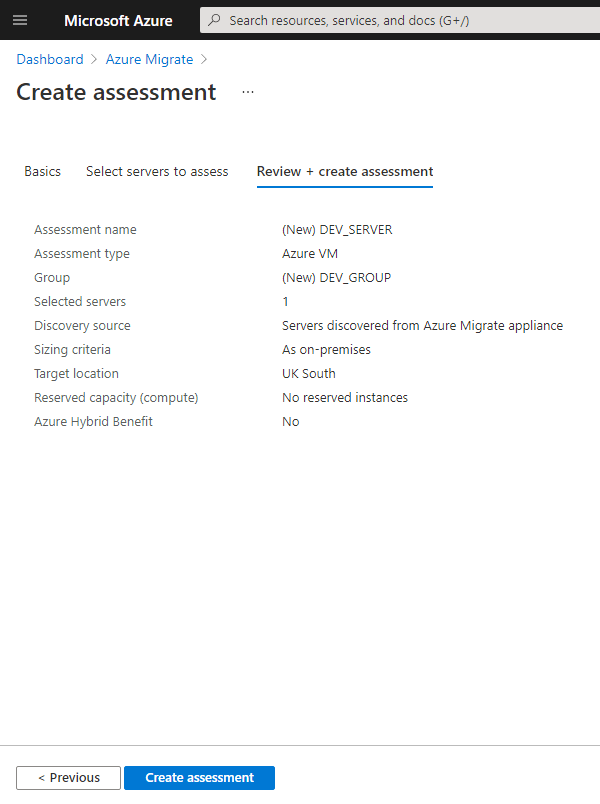
7. Click on Create Assessment to instruct Azure Migrate to start the assessment. Depending on how powerful your Hyper-V host is and your connection speed to Azure, the assessment may take a few minutes to execute.
8. While you are waiting, navigate back to the Azure Migrate hub and click on Refresh. After a few minutes, you should see an assessment show up under the Assessments section.
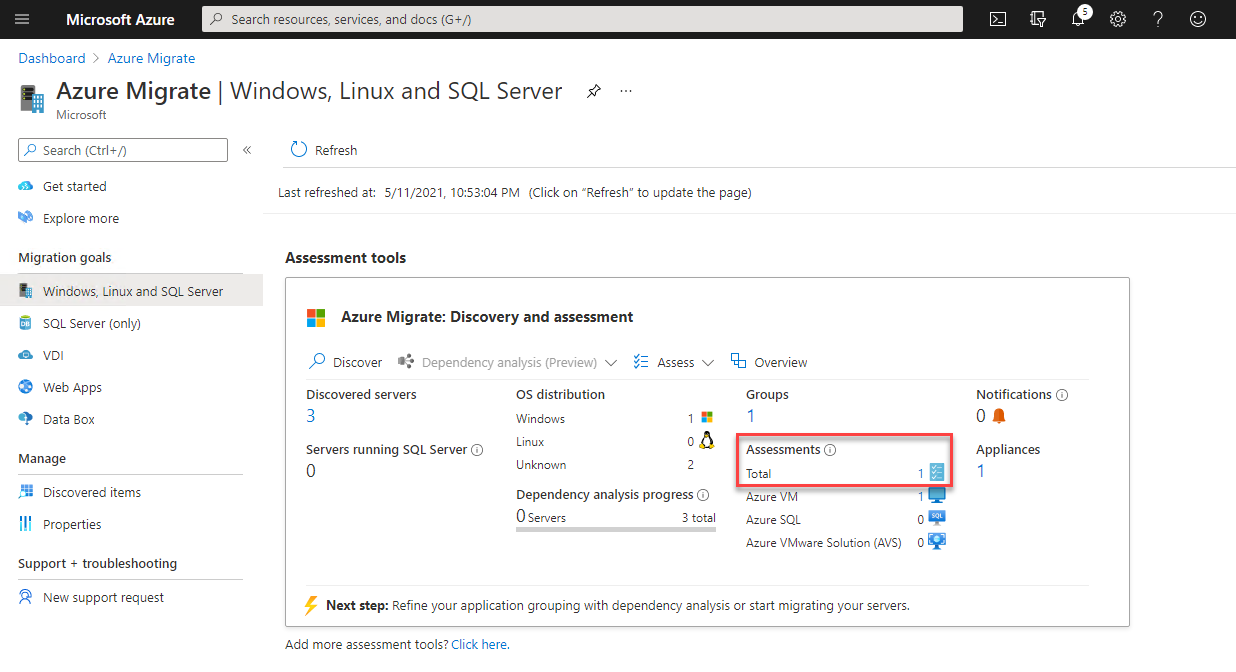
9. Now, click on the number to the right of Total which represents the number of assessments created. This action opens the Assessment list.
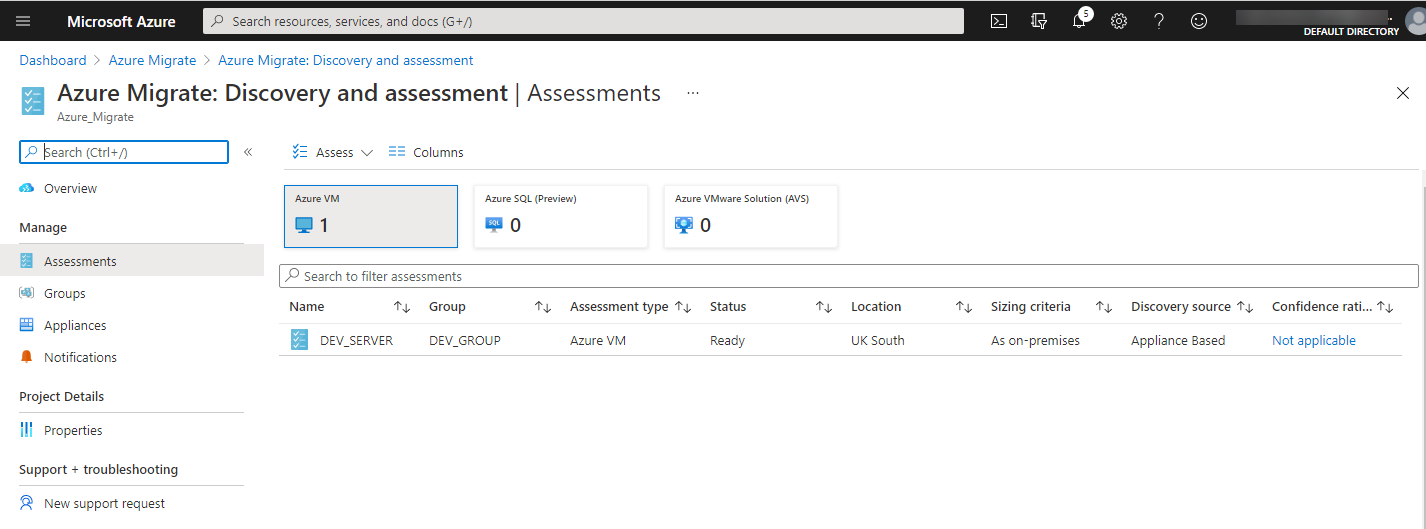
10. Click on the assessment you just invoked called DEV_SERVER, where you can see the assessment results broken down by Azure readiness, Monthly cost estimate (USD), and Storage costs.
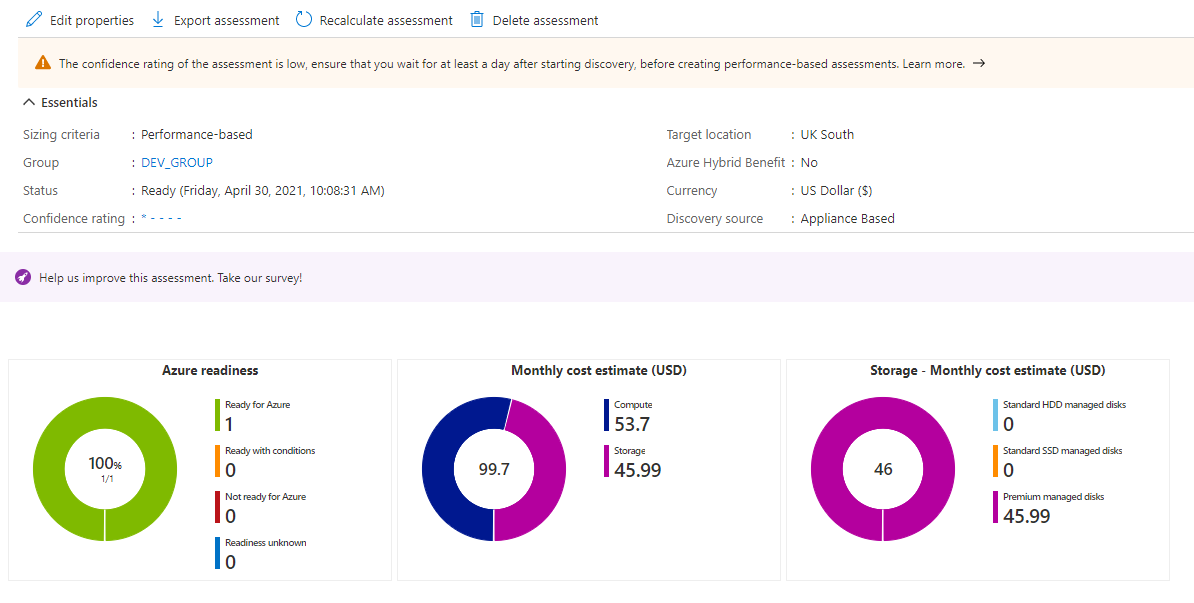
If you don’t agree with the specifications Azure Migrate recommends or want to experiment with the costs, go back to edit the assessment properties using the same steps performed in step four.
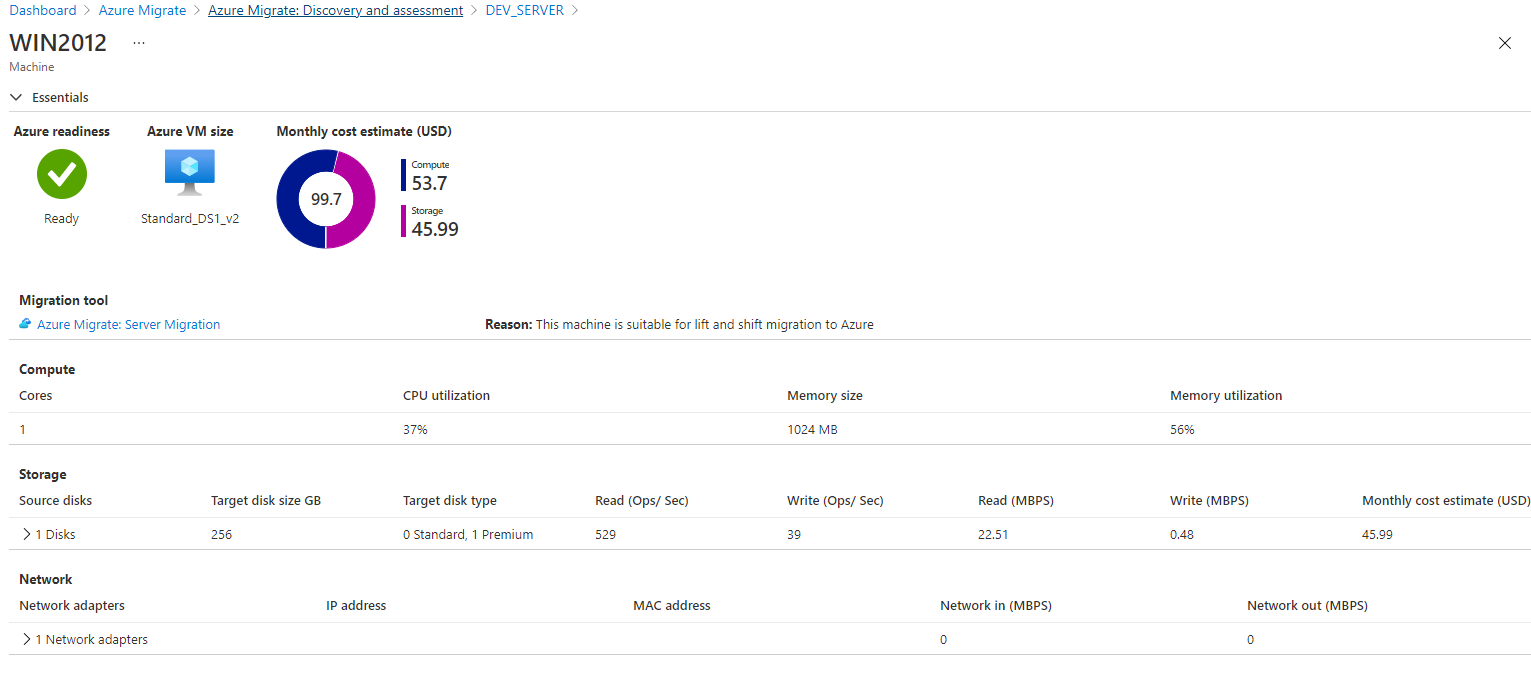
11. On the assessment page, drill down into the detail of each virtual machine in the group you defined earlier.
Conclusion
By now, you should have all the knowledge you need to discover and load Hyper-V VMs into Azure Migrate and run the Azure assessment tool. By creating an assessment, you can now begin building a Hyper-V VM migration plan!
Now that you’ve created an assessment, it’s time to get down to migrating those Hyper-V VMs into Azure! Continue to the next phase of using Azure Migrate to migrate VMs to Azure by following the How to Move an On-Prem Hyper-V VM with Azure Migrate [Guide] blog post to finish the job!


