


Hosting websites can be expensive. And if you’re looking for an outstanding web host controller, you’re in for a treat. Discover CyberPanel and install it on your server today. Why? With CyberPanel, you can get all the features of a premium host for FREE!
In this tutorial, you’ll learn how to set up CyberPanel so that you can take control of your web host smoothly in a GUI environment.
Sounds interesting? Dive in and start controlling your web host without the additional expense!
Prerequisites
This tutorial will be a hands-on demonstration. If you’d like to follow along, be sure you have the following.
- A Linux server. This tutorial uses Ubuntu 20.04.
- A user account with root/sudo privileges.
Installing CyberPanel
CyberPanel is compatible with major OSs, such as CentOS, CloudLinux, Debian, and Ubuntu. And because CyberPanel is open source software, it’s completely free to use! But before taking advantage of CyberPanel, you’ll first have to install it on your machine.
1. Open your terminal and connect to your server via SSH as the root user.
2. Next, run the following apt update command to update your server packages.
This command updates the package list and installs any available updates so that your server is up-to-date.
sudo apt update -y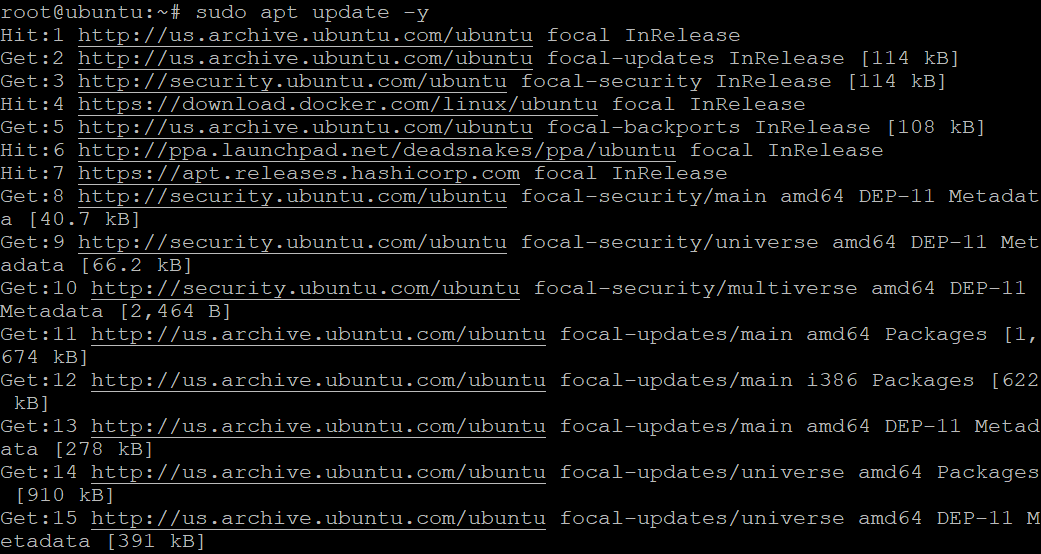
3. Run the below commands to download (wget) the latest CyberPanel’s installer script (https://cyberpanel.net/install.sh) to your current working directory. The -O flag tells the wget command to save the script as installer.sh.
If you’d like to install CyberPanel in a different location, you can specify the desired location.
The installer script is tested and updated regularly by the CyberPanel team. So you can be sure that you’re always using the latest version of CyberPanel.
The chmod command makes the script file (installer.sh) executable so you can run it on your server to install CyberPanel.
# Downloads the latest CyberPanel installer script.
sudo wget -O installer.sh https://cyberpanel.net/install.sh
# Makes the installer script executable.
sudo chmod +x installer.sh
You can use the APT package manager or compile and install the latest version of CyberPanel from the source. But installing CyberPanel is from the official CyberPanel script is always recommended.
4. Now, run the following ls command to list the contents of the working directory and verify that the installer script exists.
ls -a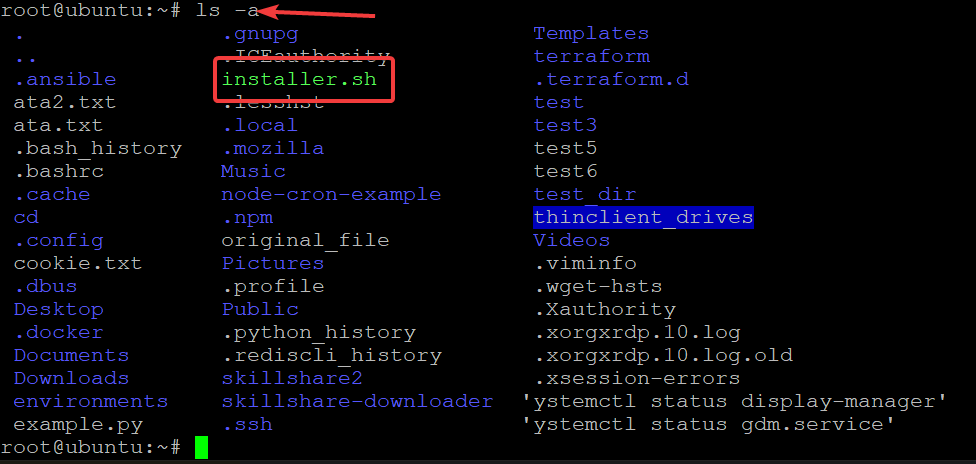
5. Run the below command to execute the installer script (installer.sh) and start installing CyberPanel on your server.
This script automatically installs all of the required dependencies and sets up the firewall so that your server is ready to use.
sh installer.shEnter 1 and press Enter during the installation to continue when you get the prompt shown below.
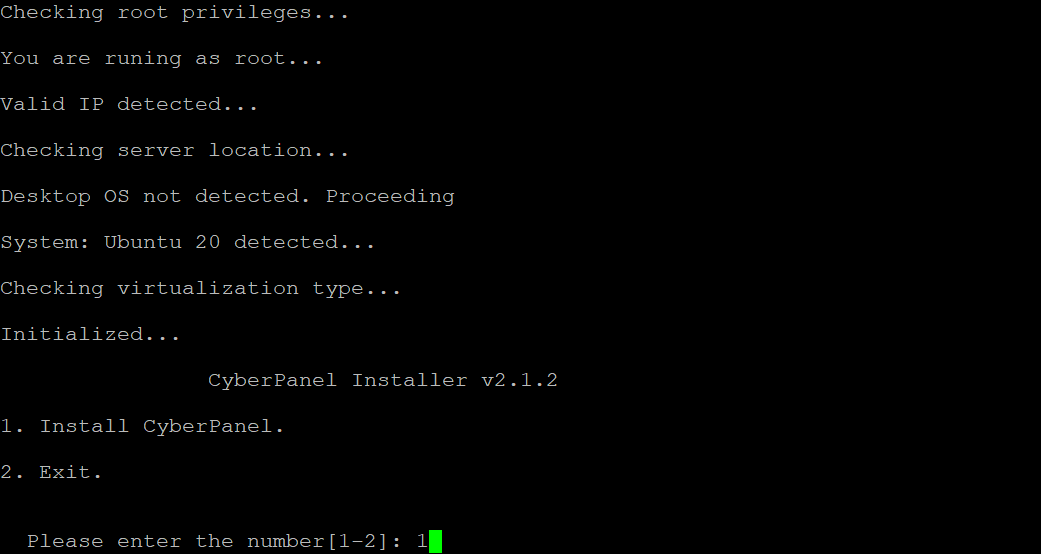
6. Next, select 1 for the free version of CyberPanel (OpenLiteSpeed) and press Enter.
CyberPanel has two versions:
- OpenLiteSpeed – is the free and open-source version of the LiteSpeed Web Server.
- LiteSpeed Enterprise – is the commercial version of the LiteSpeed Web Server.

7. Type Y and press Enter to confirm the full installation of CyberPanel.

8. After confirming full installation, type N and press Enter for local MySQL access. Installing the local MySQL server is recommended for better performance and stability.
Type Y instead and press Enter to connect to the remote MySQL server if you have a remote MySQL server.

9. Press Enter to install the latest version of CyberPanel or type a specific version. But you’ll choose the latest version in this tutorial.

10. Now, press Enter to use the default admin password, 1234567. If you like to use a different one, you can type r to generate an admin password randomly. Or type s to specify the admin password.
Note down the admin password as you’ll need it later to access your CyberPanel server.

11. Once you’ve set an admin password, type Y and press Enter to install Memcached and its PHP extension. Memcached is a free and open-source, high-performance, distributed memory object caching system. Installing Memcached enables your website to load faster.

12. Type Y and press Enter to install Redis and its PHP extension. Redis is an open-source, advanced key-value store. Redis is often used as a database, cache, and message broker so that your website gets real-time data.

13. Finally, type Y and press Enter to set up Watchdog for Web and Database services. Watchdog is a service that monitors your website and database service.
If the Watchdog detects a problem, it automatically restarts the service. Watchdog is in the beta stage, so it may not be 100% stable. But then again, Watchdog can help to keep your website running smoothly.

At this point, the installation process starts, where the script downloads the necessary files, creates the database, and installs CyberPanel.
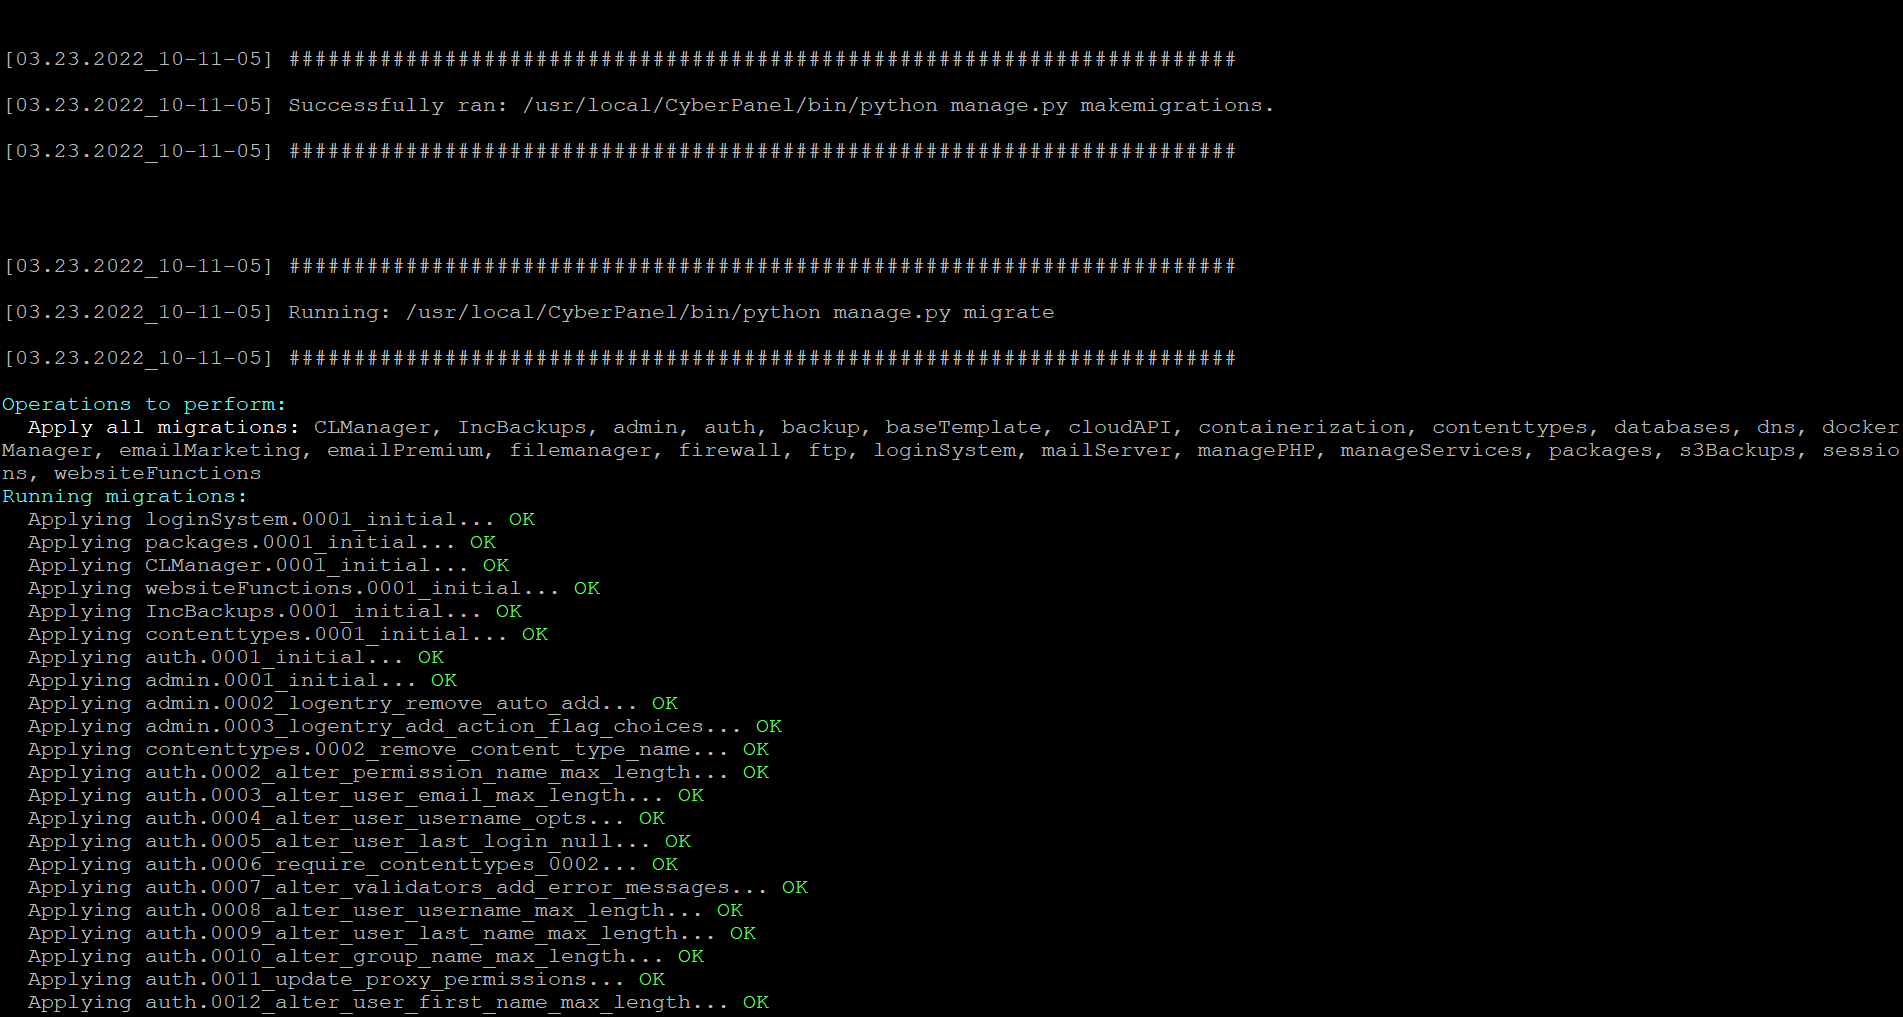
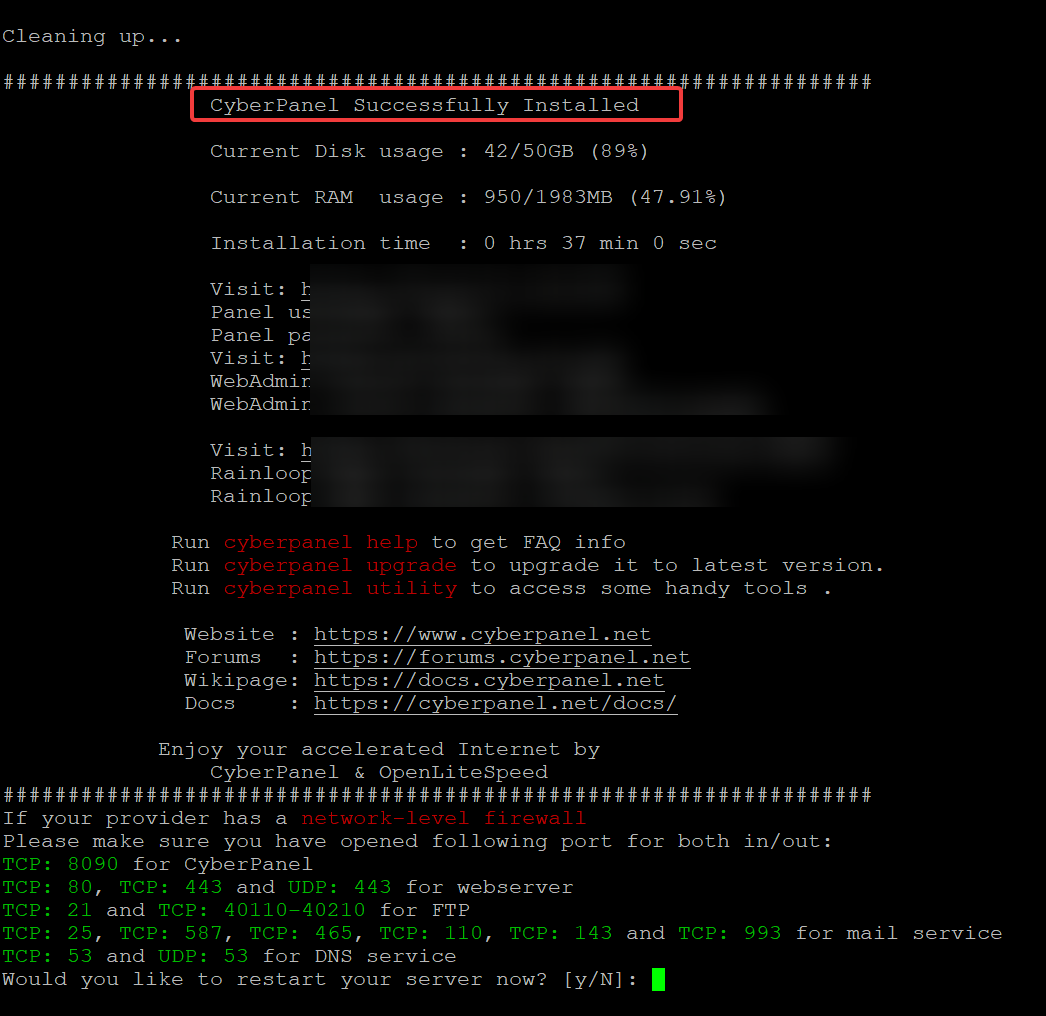
Depending on your server load, the installation process might take up to 30 minutes or more to complete. Once the installation is finished, you’ll see the following output.
Configuring the Firewall to Allow CyberPanel Traffic
Now that CyberPanel is installed, you must configure your firewall to allow CyberPanel traffic. And UFW is the default firewall included with your Ubuntu system.
UFW is the default firewall included with your Ubuntu system.
The default ports for CyberPanel are below:
- 8090/TCP – CyberPanel uses this port for web client access.
- 80/TCP, 443/TCP – CyberPanel uses those ports for web server access.
- 40110-40210/TCP – CyberPanel uses those ports for FTP protocol access.
- 25/TCP – CyberPanel uses this port for SMTP relaying — the mail server port where mail is sent from your server.
- 53/TCP – CyberPanel uses this port for DNS queries. Allowing this port on your firewall lets your server communicate with the outside world.
To allow CyberPanel traffic through your firewall, you’ll open the default ports CyberPanel uses.
1. Run the following command to open the default ports that CyberPanel uses. But you can open more ports as needed for your specific configuration.
sudo ufw allow 8090/tcp
sudo ufw allow 80/tcp
sudo ufw allow 443/tcp
sudo ufw allow 40110:40210/tcp
sudo ufw allow 25/tcp
sudo ufw allow 53/tcp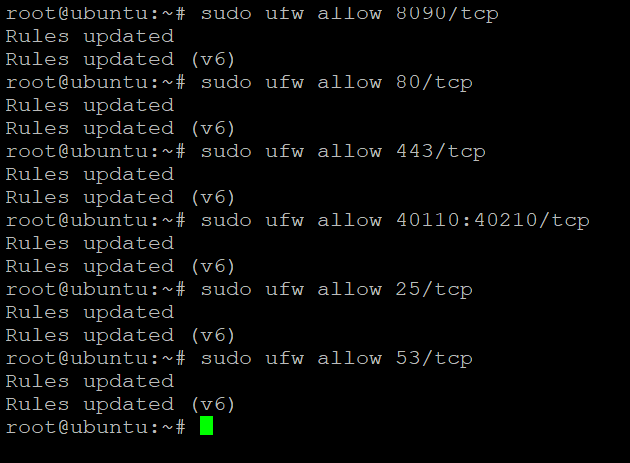
2. Next, run the ufw command below to enable your UFW firewall.
sudo ufw enableYou’ll be prompted to confirm the operation, as shown below. Type y and press Enter to proceed in enabling the firewall.

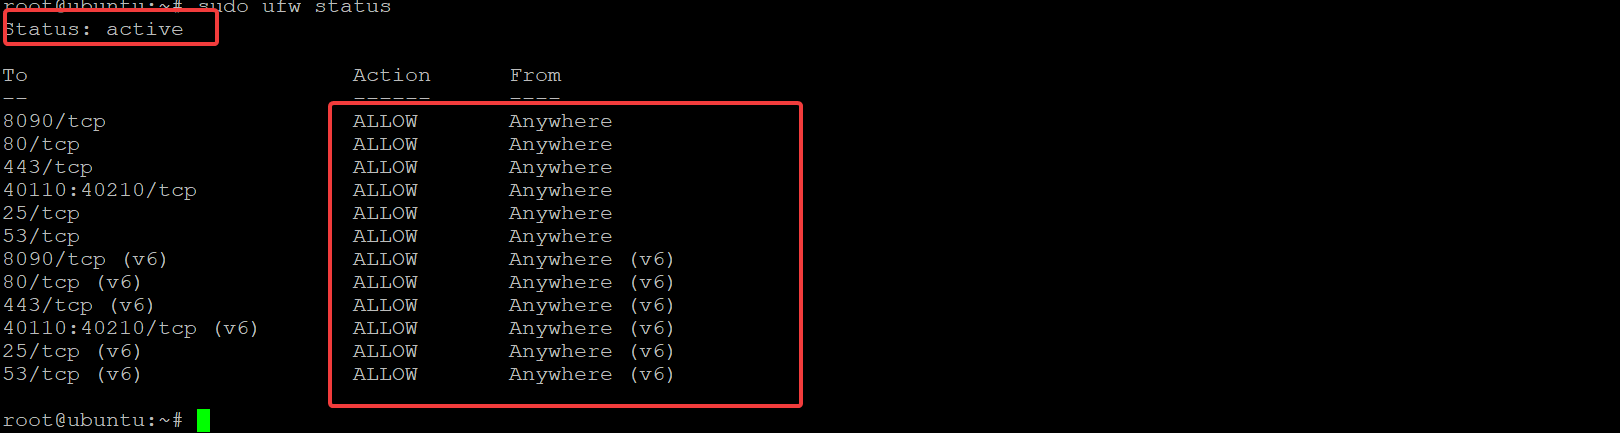
Lastly, run the following command to check the status of your firewall and verify it’s configured to allow CyberPanel traffic.
sudo ufw statusThe output shows that the firewall is active, and the ports that CyberPanel uses are open.
Accessing CyberPanel
Now that the installation is complete, you can create your website and take control of your web host. How? By accessing your CyberPanel server through a web browser.
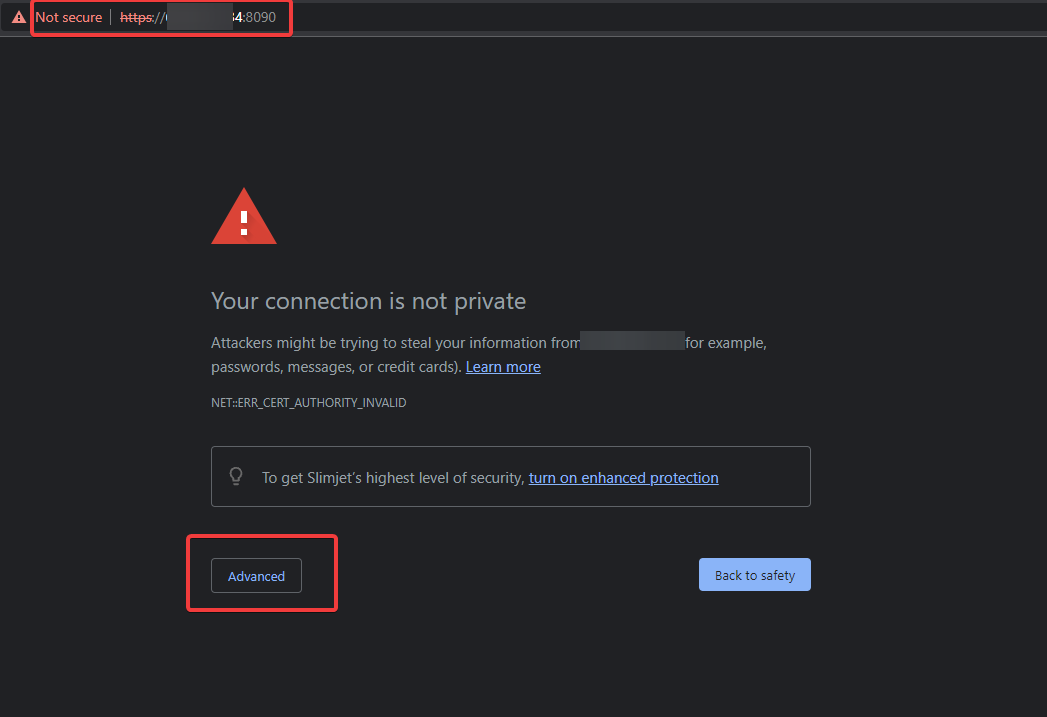
Open your favorite web browser and navigate to your server’s IP address followed by port 8090 (i.e., SERVER_IP:8090). Your browser redirects to the HTTPS version of CyberPanel by default. Since you haven’t installed a valid SSL certificate yet, you’ll see the warning message below saying Your connection is not private.
This warning is just a warm reminder to install a valid SSL certificate as soon as possible. A valid SSL certificate is required for secure communication between your server and your website users. You can safely ignore this warning and click on Advanced to proceed to the CyberPanel Login screen.
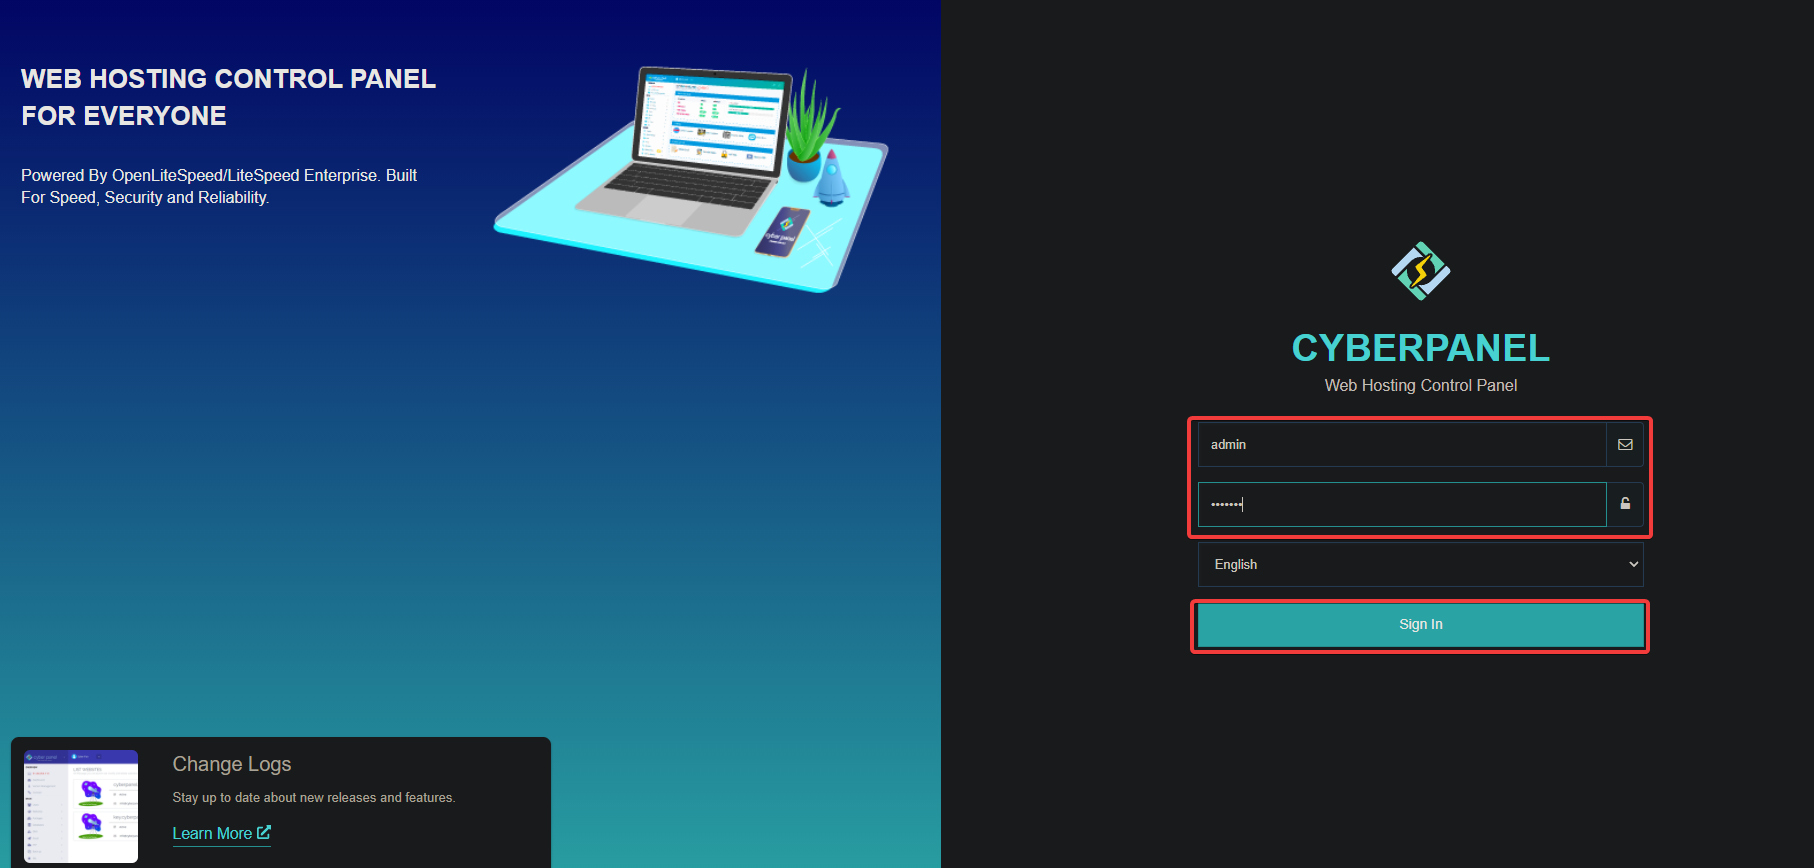
Provide the default admin username and the password you set in step 10 of the “Installing CyberPanel” section, and click on Sign In to access your CyberPanel server.
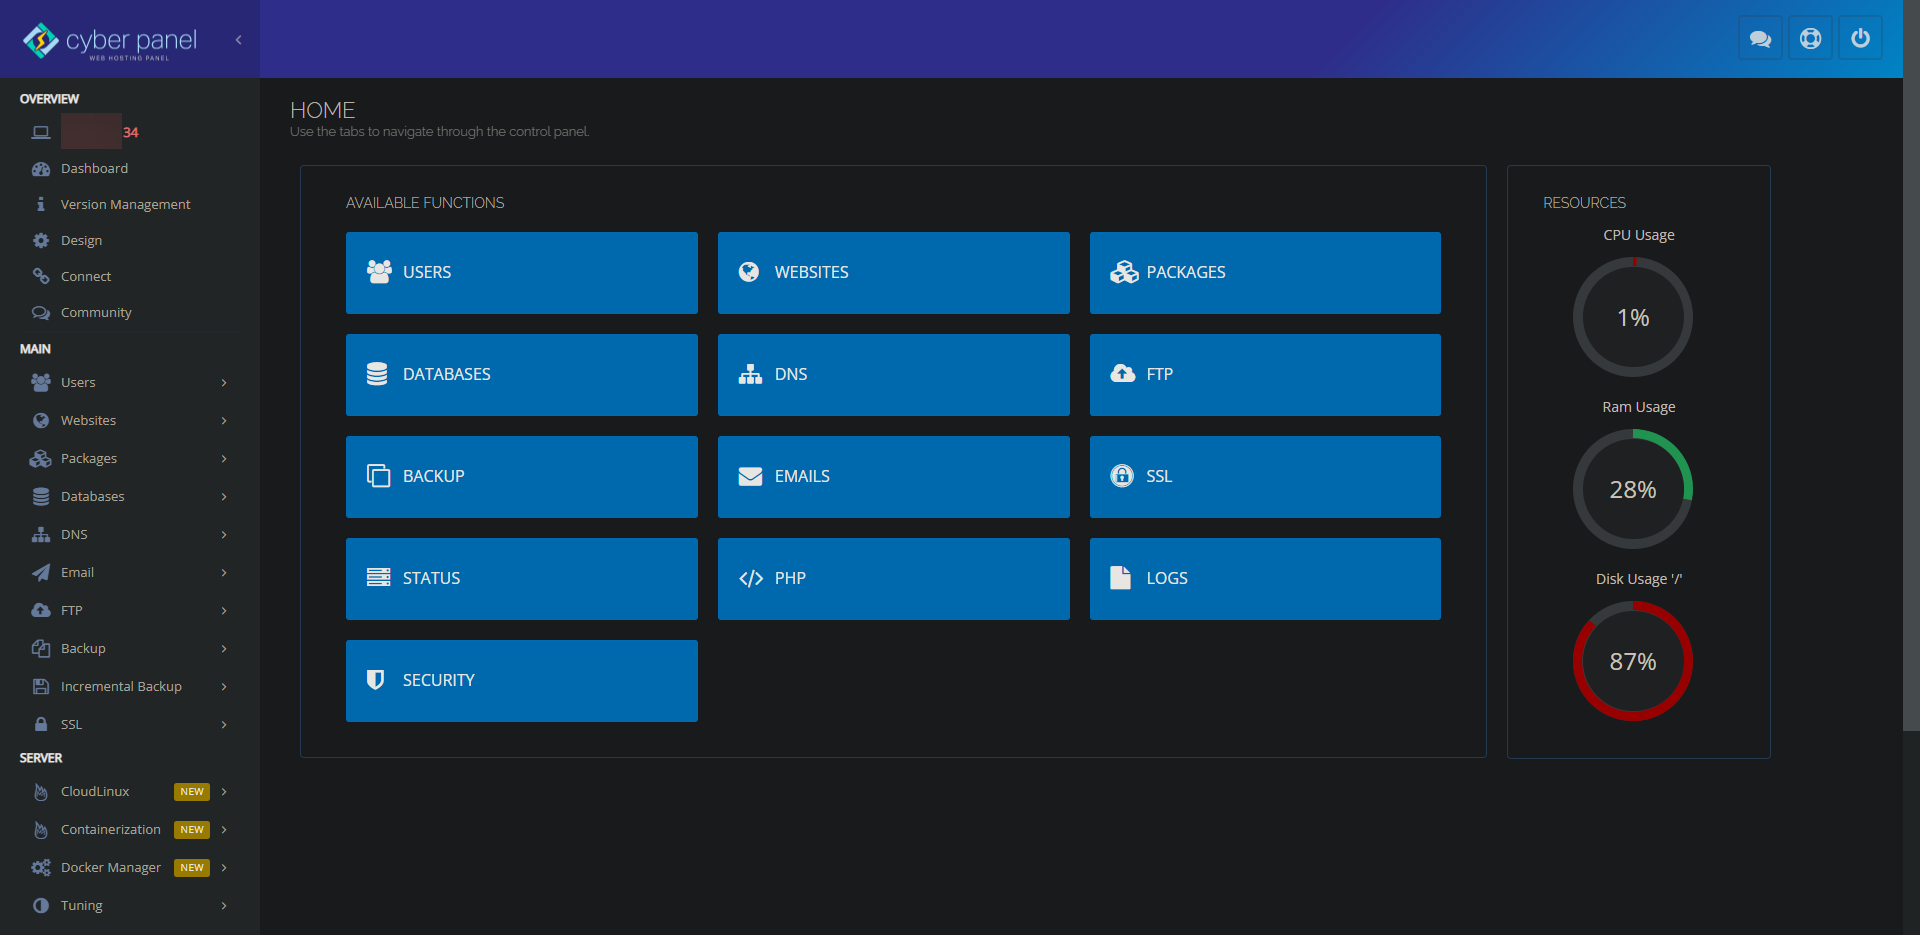
Once signed in, you’ll see the following CyberPanel dashboard.
Creating a Website With SSL Certificate on CyberPanel
You now have access to your CyberPanel server, and it’s time to create your first website to try out the features of CyberPanel.
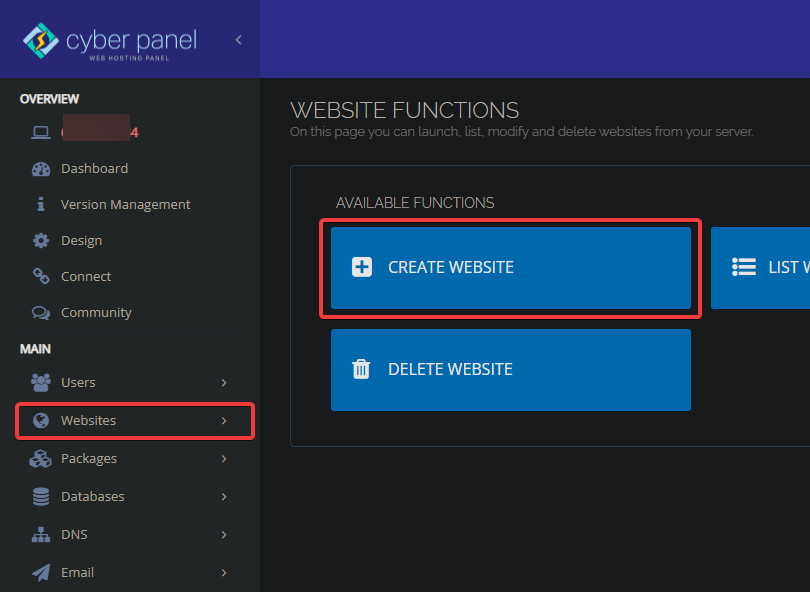
1. In your CyberPanel dashboard, click on the Websites menu on the left panel and click on Create Website.
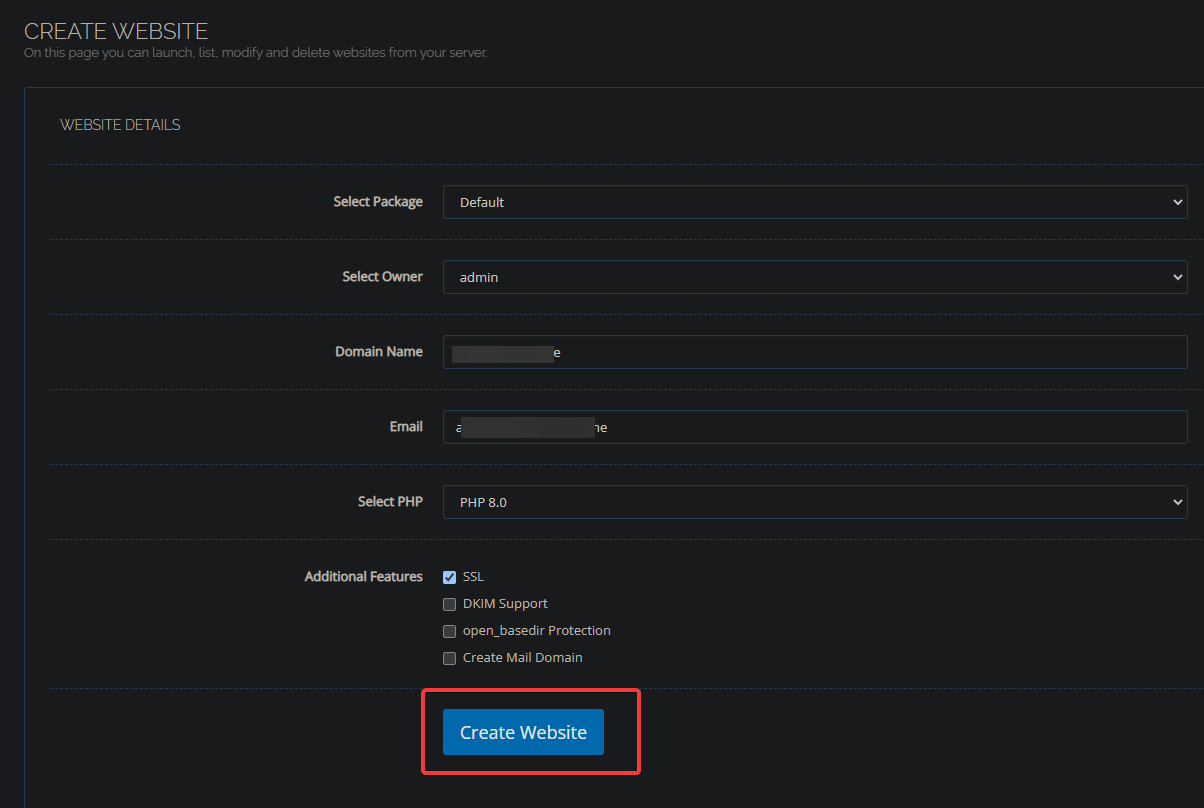
2. Next, configure your website with the following:
- Select package – Select the Default option. You can create your own package, but that topic is beyond this tutorial.
- Select Owner – Select the owner of the website (admin). You can assign different owners to this website, but that topic is beyond this tutorial since you must create a new user first.
- Domain name – Set your website’s domain name (e.g., example.com).
- Email – Set the email address of this website’s administrator.
- Select PHP – Select the version of PHP to use for this website. PHP 7.3 or higher is recommended for better performance.
- Additional Feature – Check the SSL option for this website to generate a free SSL certificate from Let’s Encrypt automatically.
- Click on Create Website to finalize creating your first website.
The website creation process will take a few minutes. Once completed, you’ll see the following page, which indicates CyberPanel successfully created your website.

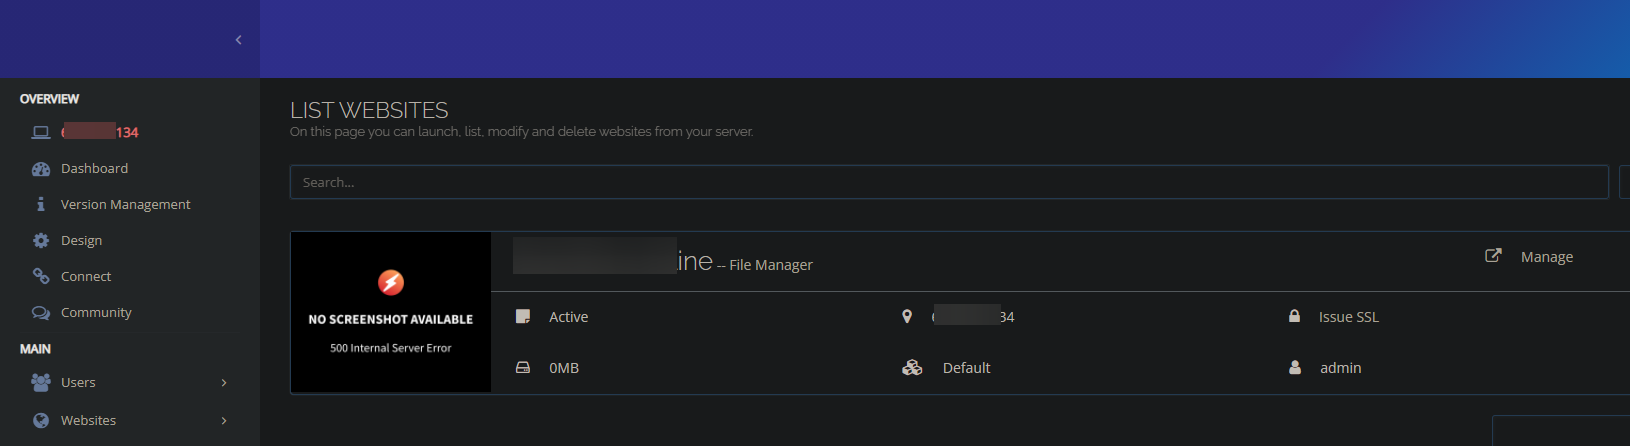
3. Click on the Websites menu again, and click on List Websites to see the list of websites on your server.
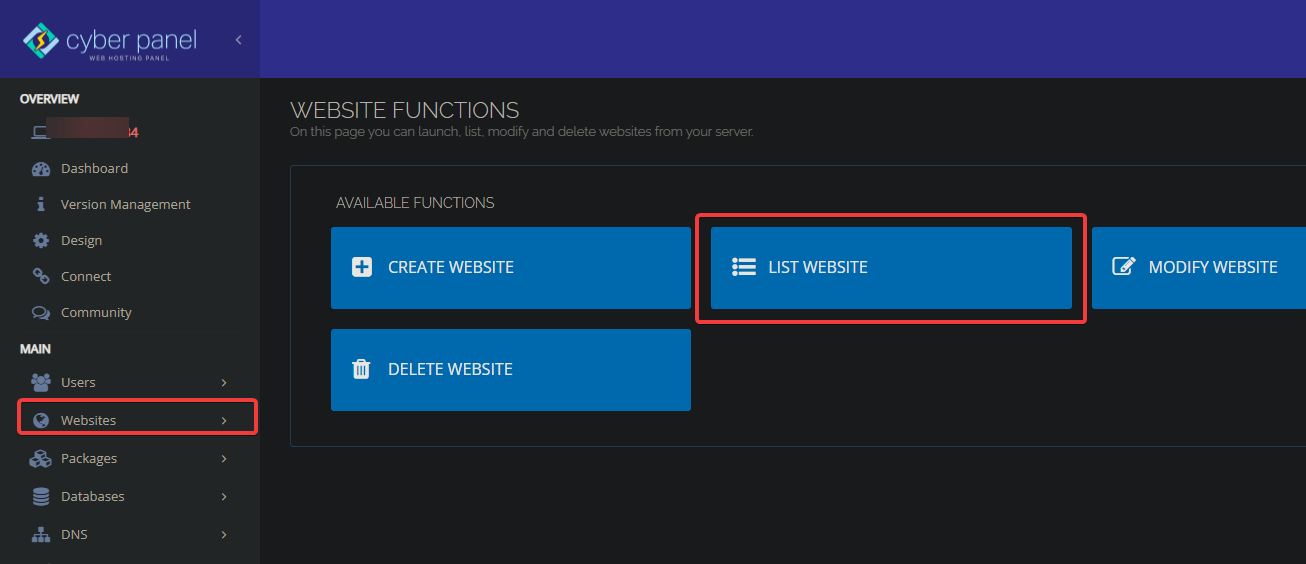
You’ll see your newly created website listed, as shown below.
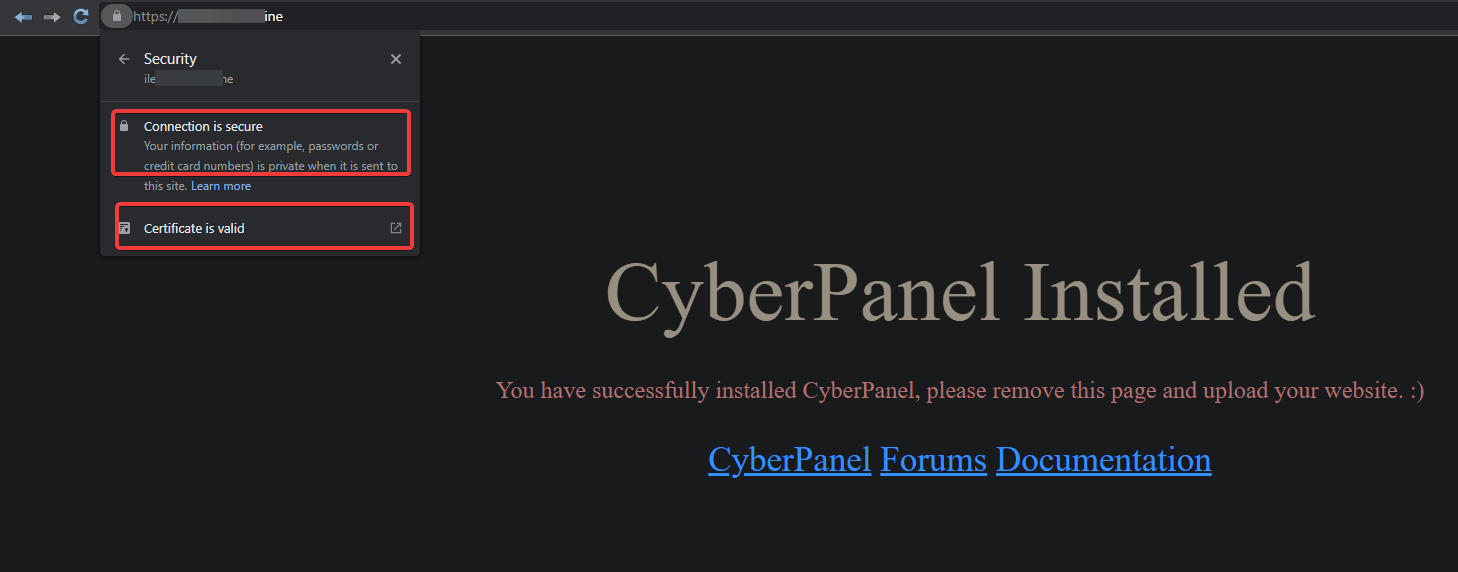
4. Finally, navigate to your domain name in your web browser, and you’ll see the following page.
Below is your website’s default page, and you can see your connection is secured with a valid SSL certificate.
Conclusion
In this tutorial, you’ve learned how to install and configure CyberPanel on a Ubuntu server and create your first website. You’ve also secured your website with a valid SSL certificate, all for free!
CyberPanel is a web hosting control panel with various features to manage your website and provides a great user experience with a straightforward interface.
Why not give CyberPanel a try for your next web hosting project? WordPress is your thing? Maybe setting up a self-hosted WordPress blog is right up your alley.


