


Are you fed up with running Ansible playbooks and Ansible command manually every time on your Ansible host controller? Why not use a web interface and make your life easier with this Ansible AWX?
AWX is an open-source web application sponsored by Red Hat that provides a user interface and API to perform all Ansible tasks. And in this tutorial, you’ll learn to install Ansible AWX on an Ubuntu box and manage inventories using Ansible AWX.
Up your game with highly effective automation using Ansible AWX today!
Prerequisites
This tutorial comprises step-by-step instructions. If you’d like to follow along, be sure you have the following in place:
- An Ansible controller host – This tutorial uses Ansible v2.11.7 on Ubuntu 20.04.4 LTS version machine.
- Docker – This tutorial uses Docker v19.03.11 on Ubuntu 20.04.4 LTS version machine.
- Python v3.6 or later installed on your Ansible controller host machine – This tutorial uses Python v3.8.10.
- A GitHub account with one private and one public repository created in GitHub that you will use to store Ansible Playbook.
Installing Dependencies and Configuring Ansible AWX
Ansible AWS was the foundation for creating Ansible Tower. Ansible AWX makes Ansible more comfortable for IT teams to use for testing; in a lab, development, or other POC environment.
Since Ansible AWS doesn’t come installed on your Linux system by default, you’ll first have to install Ansible AWS so you can run it as a multi-container using the Ansible Playbook.
1. Run each command below to update your system packages and install the docker-compose-plugin.
# Update packages
sudo apt-get update
# Install Docker Compose
sudo apt-get install docker-compose-plugin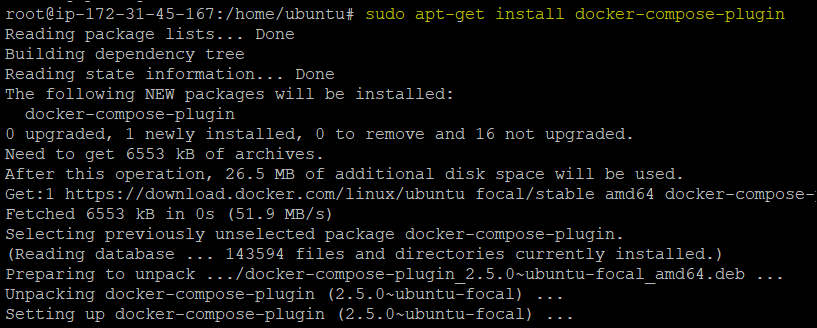
2. Next, run the following command to verify the docker compose version installed on your machine.
docker compose versionThe output below shows that the latest Docker Compose version v2.5.0 is installed, confirming Docker Compose is correctly installed.

3. Run each command below to install packages as prerequisites to work with Ansible AWX.
# Installs NodeJS as AWS has a dependency on NodeJS.
sudo apt install nodejs npm
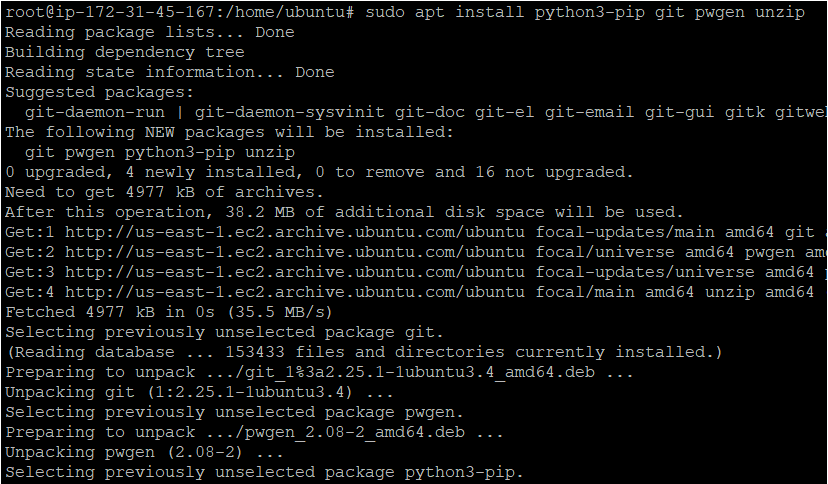
# Installs Python3, which runs Ansible Playbook later.
sudo apt install python3-pip git pwgen unzip
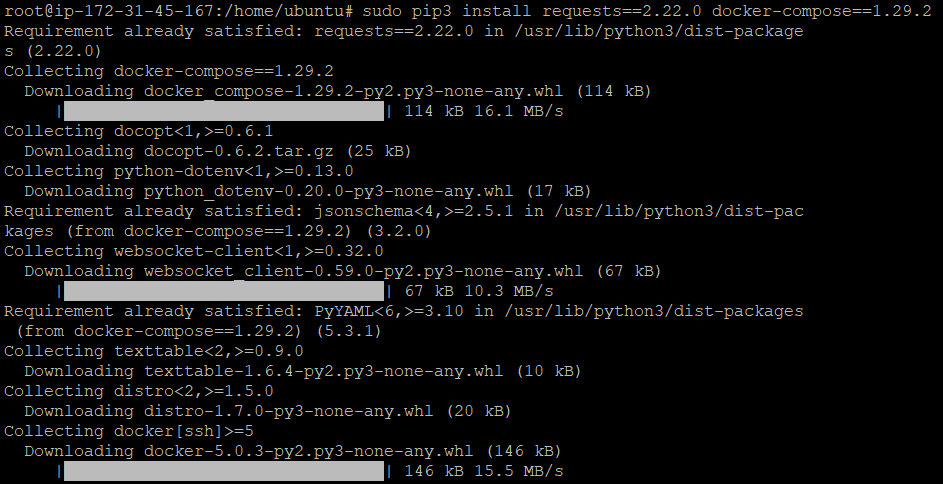
# Installs requests to allow you to send HTTP/1.1 requests easily.
sudo pip3 install requests==2.22.0 docker-compose==1.29.2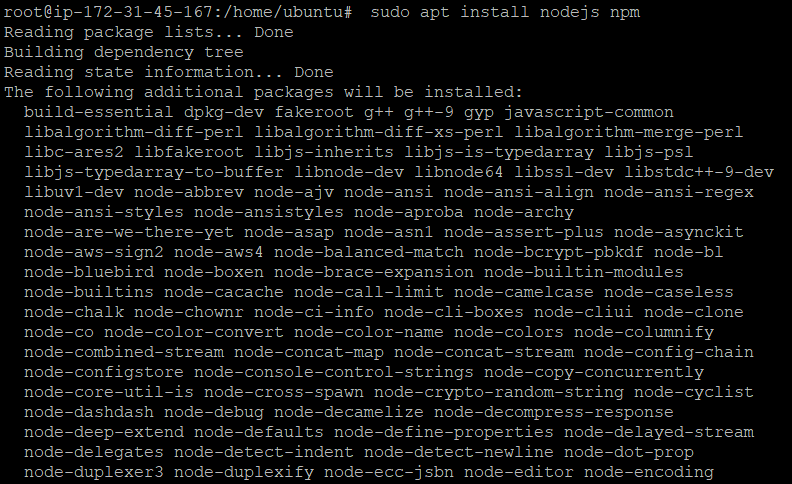
4. Now, run the following commands to download (wget) the AWX package archive from the public Git repository, and then unzip the package.
# Download the AWX package archive
wget https://github.com/ansible/awx/archive/17.1.0.zip
# Unzip the AWX package archive
unzip 17.1.0.zip
5. Run the below commands to change (cd) to the AWX installation directory (awx-17.1.0/installer/), and generate the random password (pwgen).
Your AWX installation directory (awx-17.1.0/installer/) may differ depending on the Ansible AWX version installed on your machine.
cd awx-17.1.0/installer/
pwgen -N 1 -s 30
Note down the generated password as you’ll it as a secret key in the AWX console.

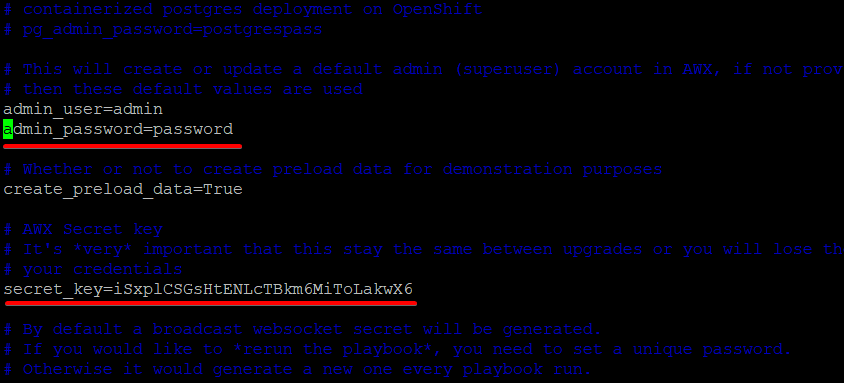
6. Lastly, in your text editor, open the inventory file within the AWX installer directory (awx-17.1.0/installer/). The inventory file contains the configurations of AWX, which will be used while logging the AWX UI.
In the inventory file, change the value of admin_password to password and secret_key with the random password you generated in step five.
Installing and Starting Ansible AWX with Ansible Playbook
You’ve configured Ansible AWX properly, and now it’s time to install it using an Ansible playbook (install.yml). The install.yml Ansible playbook comes with the Ansible AWX package you extracted. This playbook contains tasks to execute commands to build a Docker image and run multiple containers.
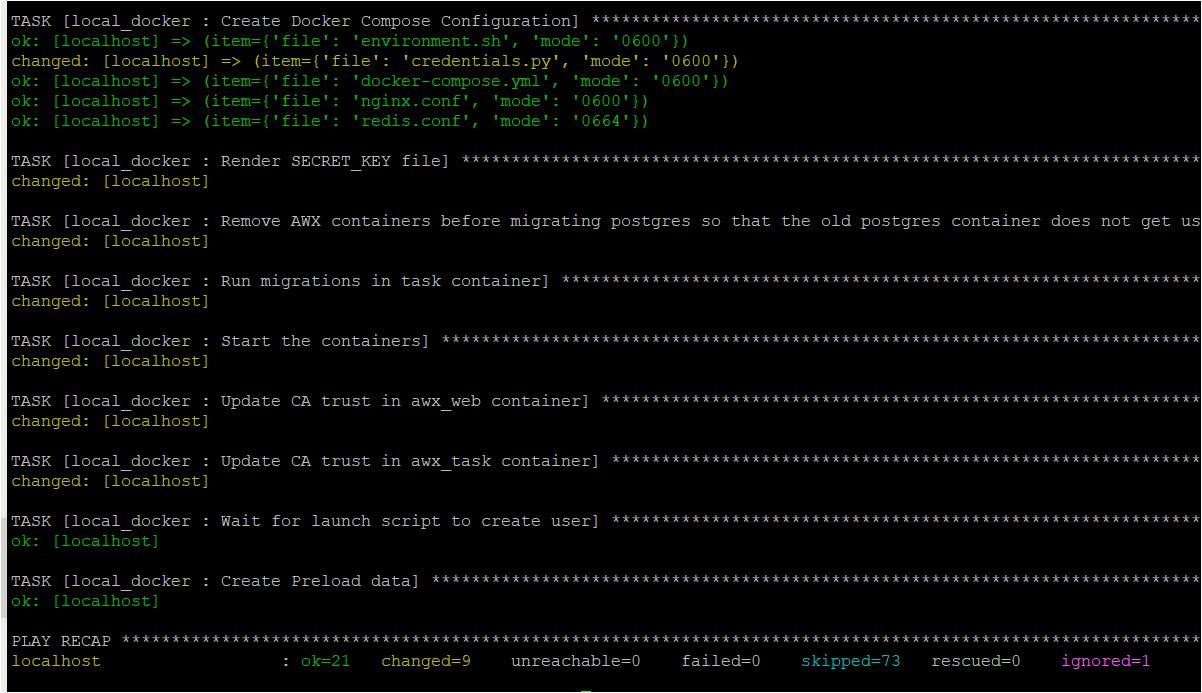
1. Invoke the ansible-playbook command below to run the install.yml Ansible Playbook.
ansible-playbook -i inventory install.yml Below, you can see that some tasks have changed status, indicating the AWX host wasn’t in the proper state and was modified to run the command.
On the contrary, other tasks show an ok status instead, which indicates they don’t require any changes.
2. Next, run the docker command below to list all available Docker containers.
docker psThe output below shows the running containers (awx_tasks, awx_redis, awx_web, and awx_postgres), confirming that AWX is installed correctly.

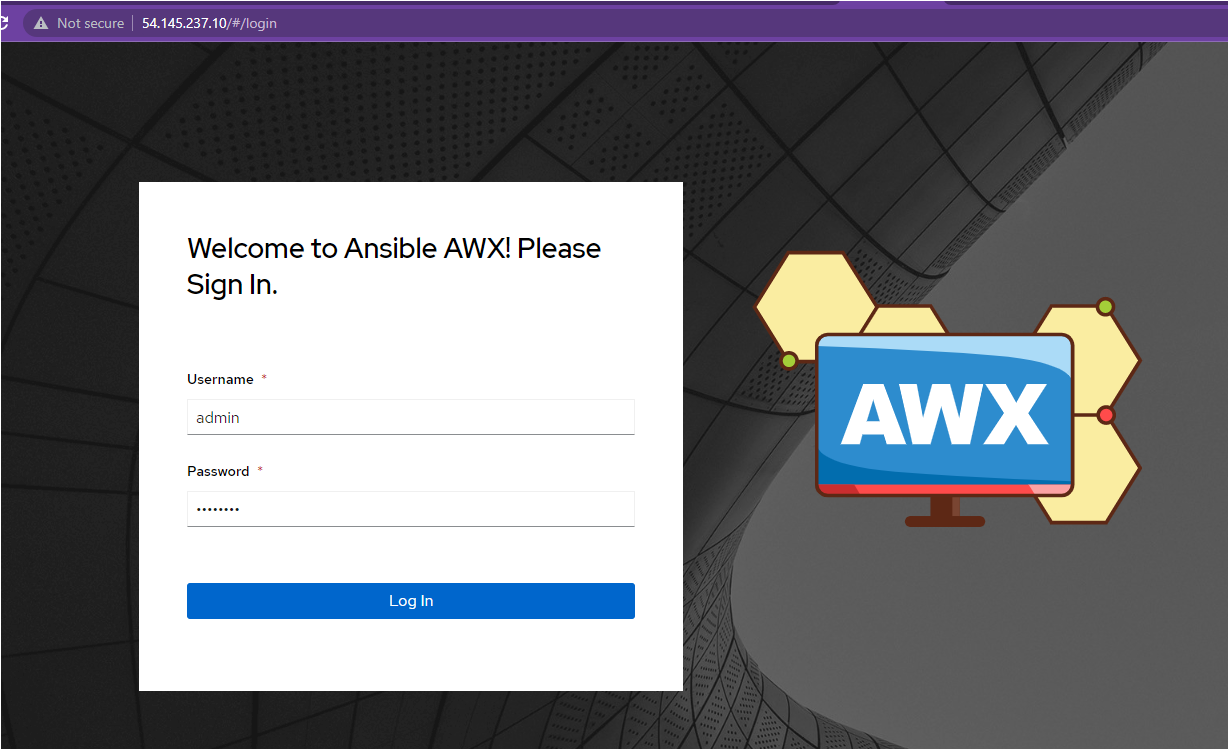
3. Finally, open your favorite browser and navigate to Ansible AWX (https://AWX-HOST-IP:80). Be sure to replace AWX-HOST-IP with your Ansible host’s IP address. You’ll see the Ansible AWX login page on your browser if all goes well, as shown below.
Provide your username (admin) and password (password), and click on Log in to access the Ansible AWX dashboard. These credentials are the ones you configured in the last step of the “Installing Dependencies and Configuring Ansible AWX” section.
AWX automatically installs a self-signed certificate for HTTPS communication which may require acceptance in your browser.
After logging in, your browser redirects to the AWX Dashboard, as shown below.

Creating and Managing Inventories
Now that you have access to the Ansible AWX dashboard feel free to work on task automation. In this tutorial, you’ll manage multiple Ansible components within Ansible AWX Dashboard. But first, you’ll have to create and manage inventories.
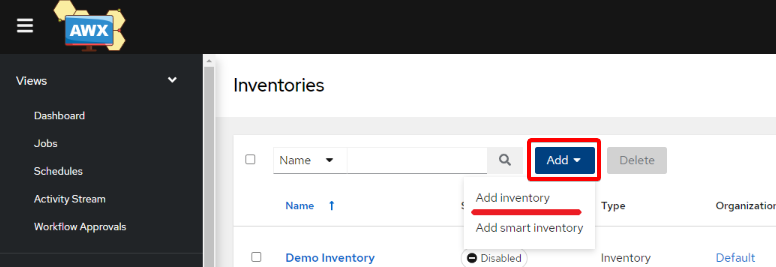
1. On the AWX Dashboard, click on Inventories to open the inventories list stored in the Ansible AWX. By default, a demo inventory is present, as shown below.
Ignore the demo inventory and click on the Add dropdown button to create a new inventory.
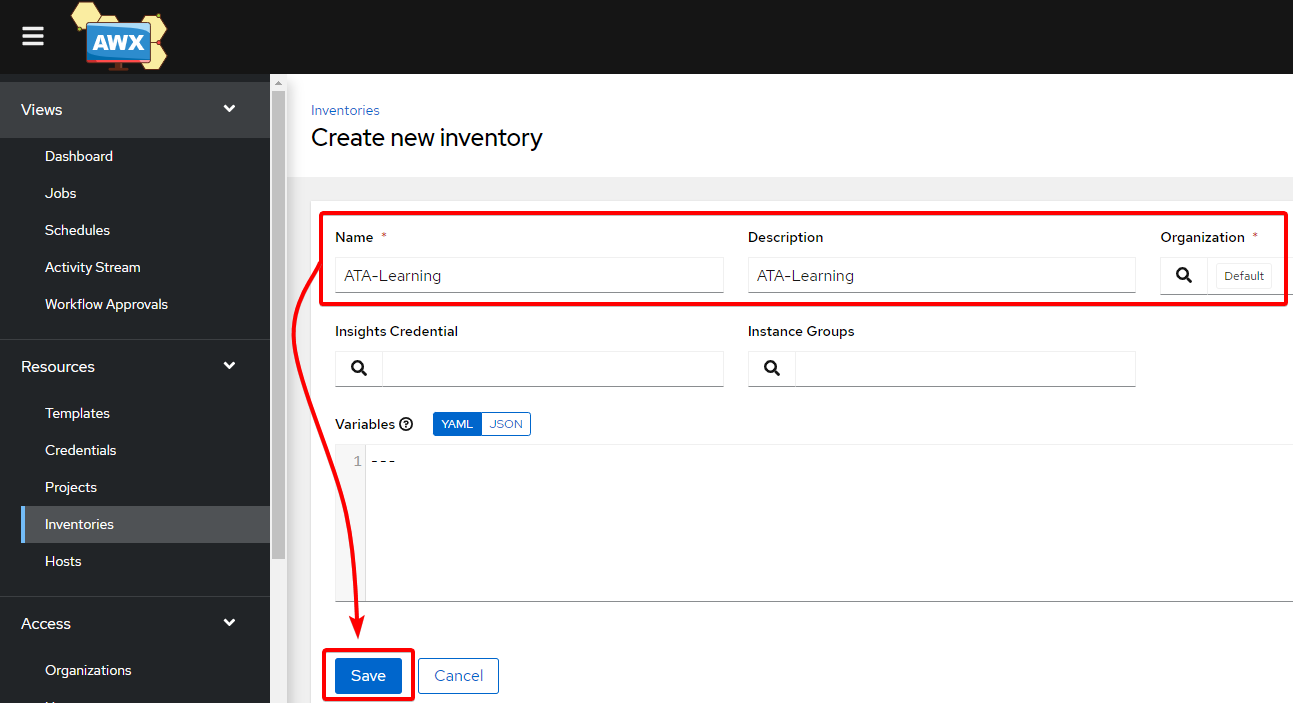
2. Next, specify the below parameters on the Create new inventory page to configure your first inventory in Ansible AWX Dashboard:
- Name – ATA Learning (You can provide the name as you like).
- Description – Describe the inventory, which is optional but helps identify inventories, among many others.
- Organization – Choose the Default option. AWX creates a default organization, but you can also create your own.
Once you specify all the above details, click on the save button as shown below.
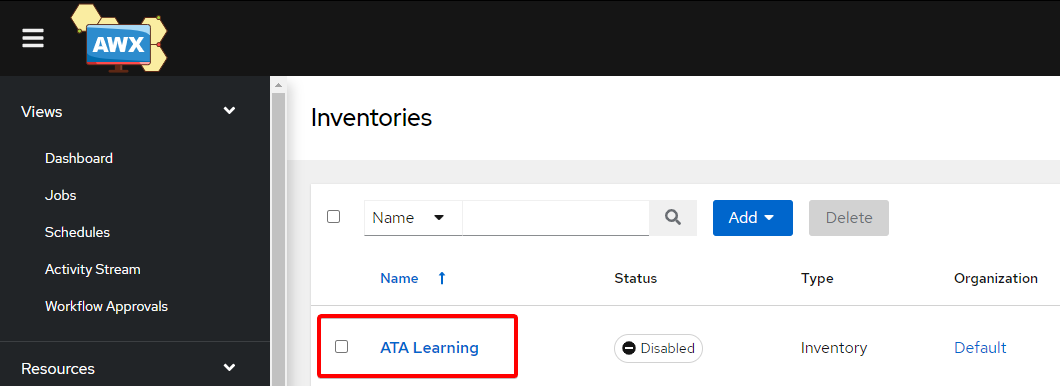
3. Lastly, click on the Inventories tab (left panel) to verify the newly-created inventory (ATA Learning) exists, as shown below.
Creating and Running Ansible Jobs
You’ve successfully configured your inventory, but it’s useless right now unless you call it with a job. A job is an instance of AWX launching an Ansible playbook against a host’s inventory. And of course, before you can call a job, you first have to create one:
To create an Ansible and run an Ansible job:
1. Create a YML file within the GitHub repository and copy/paste the below playbook. You can name the YML file as you like, but this tutorial uses the playbook called ata.yml.
---
  - name: "Playing with Ansible."
# Ansible Playbook will run on the Localhost where AWX is installed
    hosts: localhost
    connection: local
    tasks:
# Below task will execute the list of directories and files present
    - name: "just execute a ls -lrt command"
      shell: "ls -lrt"
      register: "output"
# The Output of the above task will be displayed on the Screen
    - debug: var=output.stdout_lines
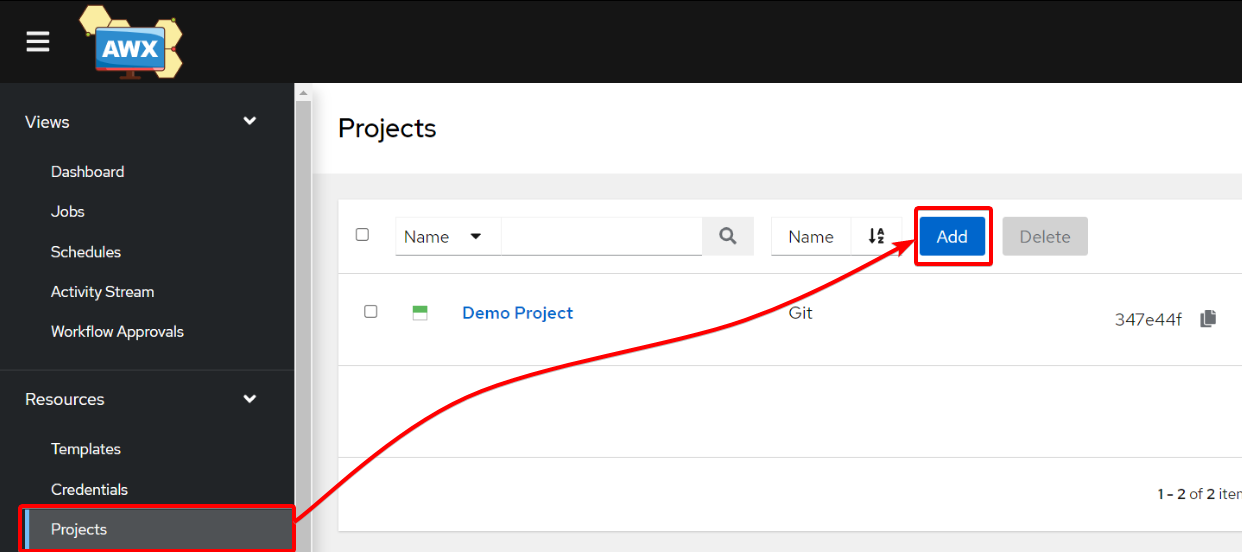
2. Jump to your Ansible AWX dashboard, and click on Projects in the left panel to access the lists of available projects. You’ll need a project before you can create a job.
Ignore the Demo Project, and click on the Add button to create a new project.
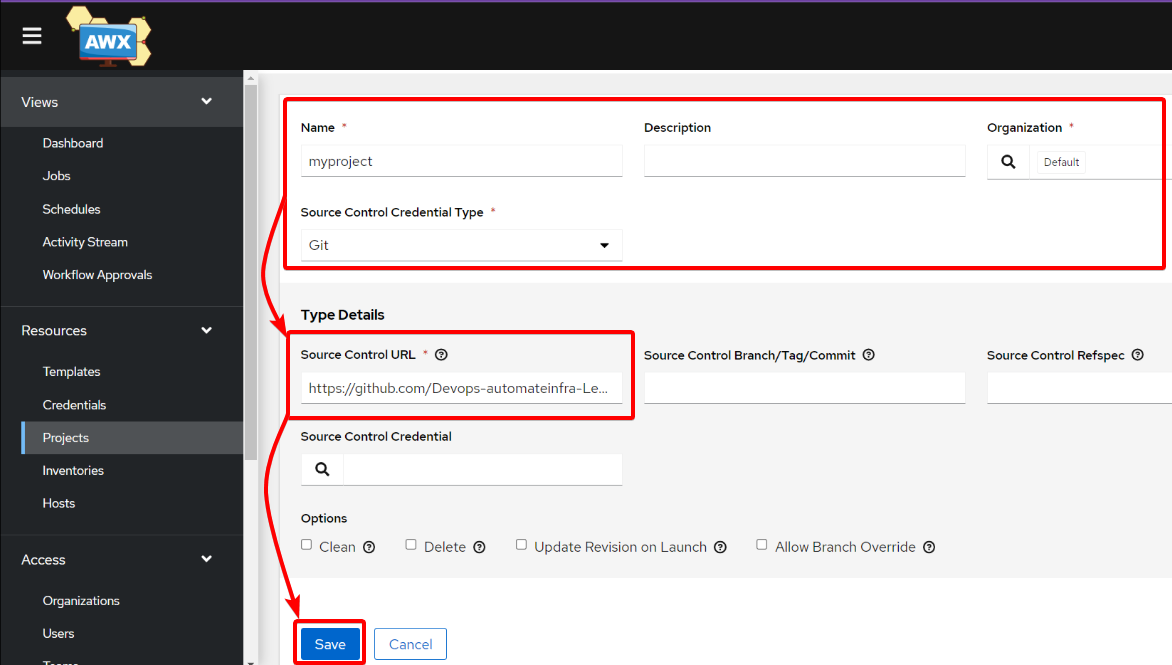
3. Provide the details of the new project with the following, and click on Save to save the new project:
- Name – The project name can be anything you like, but this tutorial sets the project’s name to myproject.
- Description – Like with your inventory, adding a description is optional but helps identify projects from one another.
- Organization – Similar to your inventory, just choose Default for the organization.
- Source Control Credential Type – Choose Git as your SCM.
- Sourced Control URL – Specify your source code’s GitHub URL.
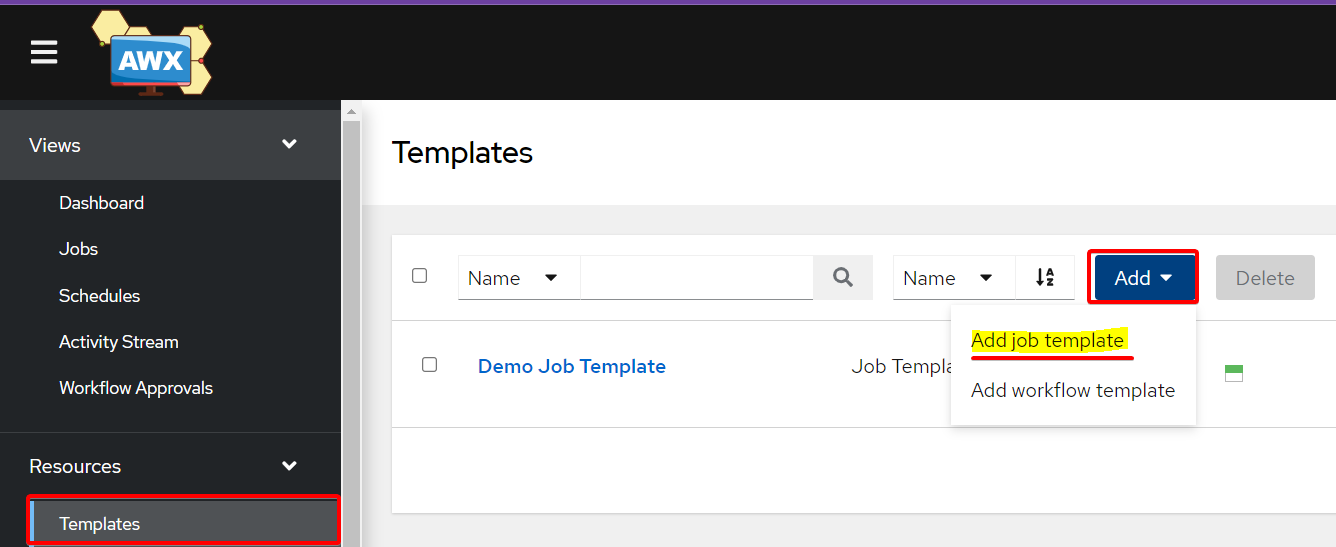
4. After creating a project, click on Templates in the left sidebar to access all available templates, as shown below.
On the Templates page, click on the Add dropdown button, and choose the Add job template option to create a template.
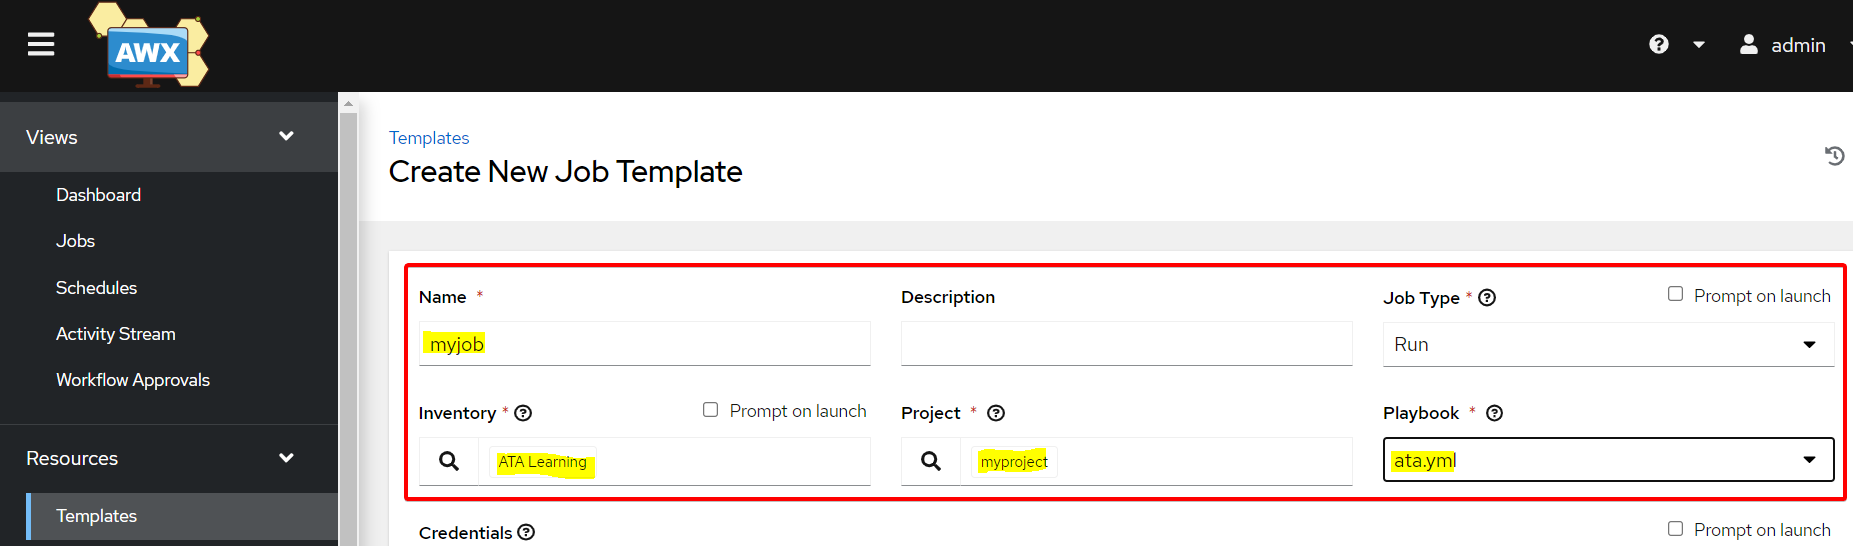
5. Now, specify the details below as follow, and click on Save at the bottom to save the new job template:
- Name – Set the name of the job template as you like, but this tutorial sets the job template’s name to myjob.
- Job Type – Set the action the job will take (Run).
- Project – Choose the project you created in step three (myproject).
- Inventory – Choose the inventory you created in step two of the “Creating and Managing Inventories” section (ATA Learning).
- Playbook – Choose the playbook you created in step one of the “Creating and Running Ansible Jobs” section (ata.yml).
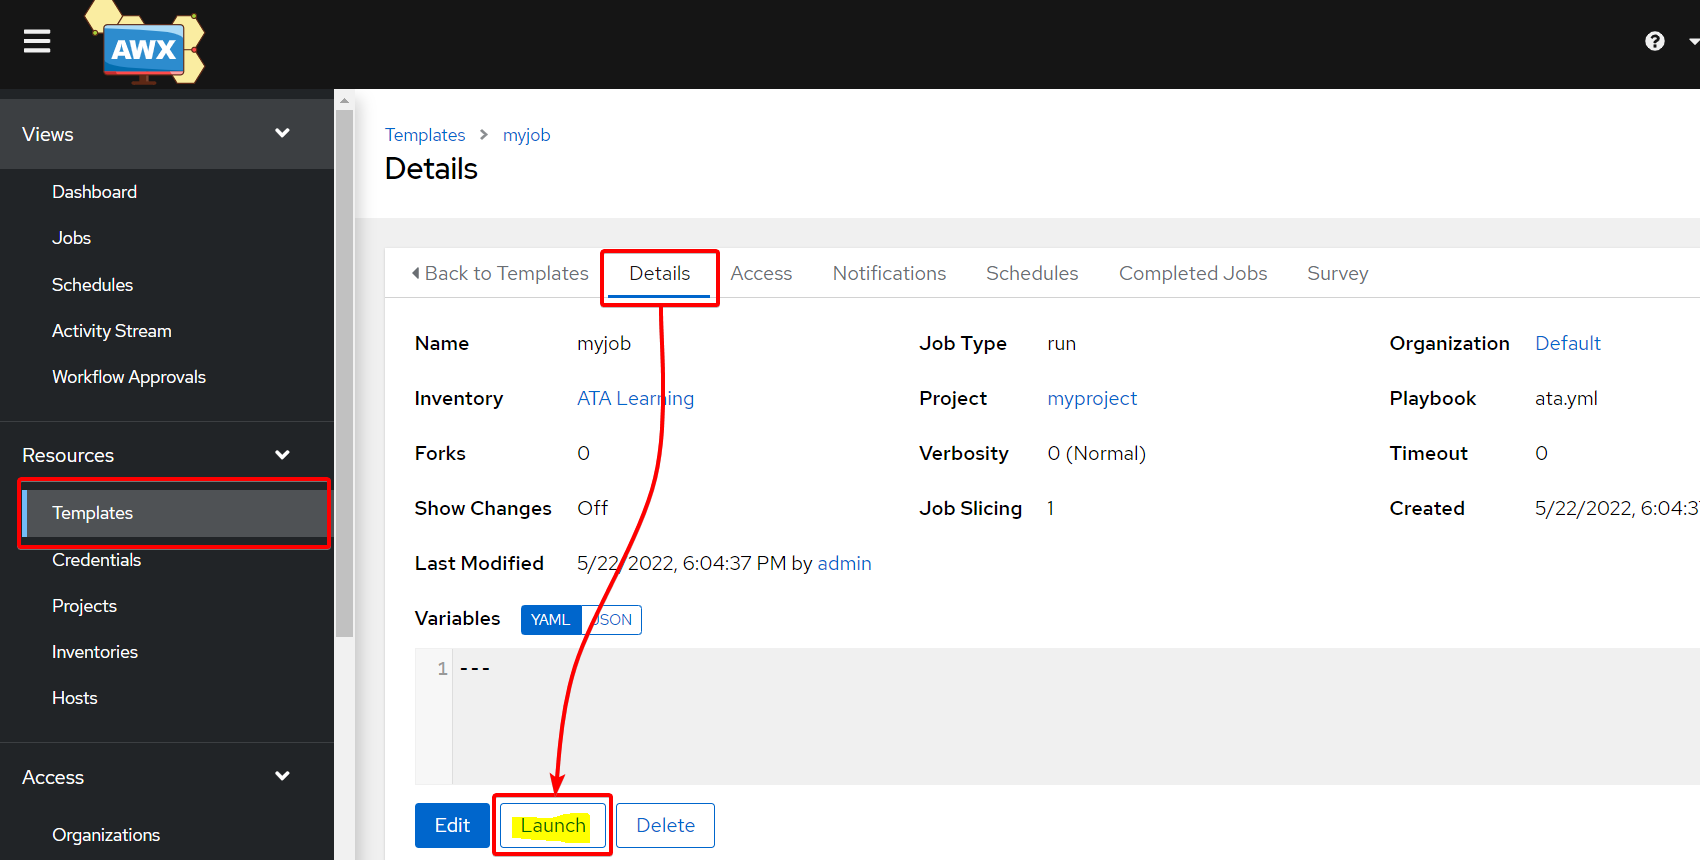
6. Finally, on the Templates page, launch the newly-created job with the following:
- Click on the job (myjob) to access the job’s information page.
- Navigate to the Details tab, where you’ll see the job’s details.
- Click on Launch at the bottom of the page to launch the job.
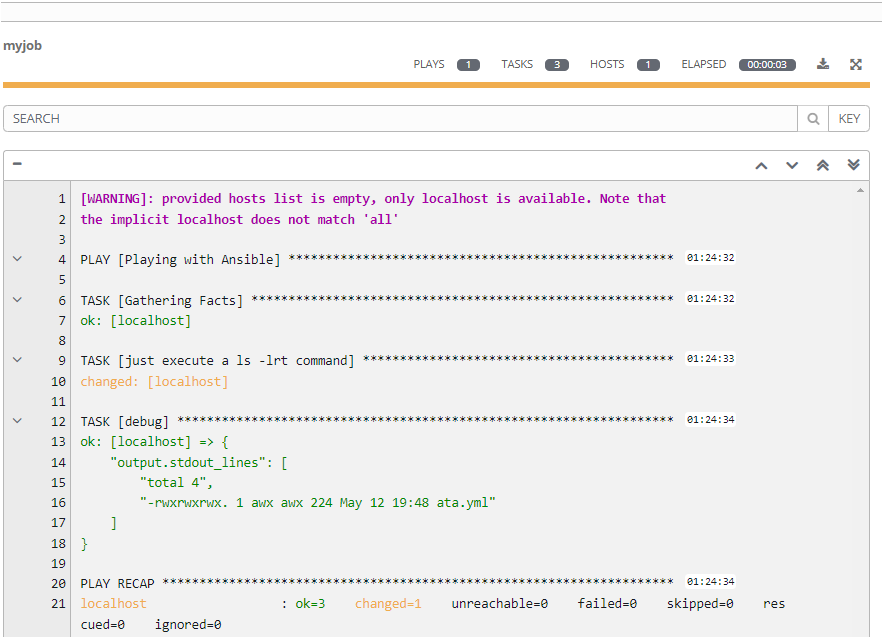
As you can see below, the Job ran successfully on localhost and listed all files within the directory specified in the playbook (ata.yml).
Conclusion
In this tutorial, you’ve taken advantage of the Ansible AWX open-source tool to manage Ansible playbooks, inventories, and playbooks with a single UI Dashboard. You’ve touched on running an Ansible Job, such as listing files on a particular directory.
Now that you have sound knowledge of the Ansible AWX software, are you willing to run all of your future Ansible playbooks using Ansible AWX? Perhaps you’d want to automate tasks by adding cron jobs?


