


Suppose you’re a network admin and wish to capture packets on a network. In that case, you can either buy a fancy expensive hardware appliance or, better yet, use Wireshark Linux Network Protocol Analyzer.
Wireshark lets you capture packets and analyze them to your heart’s content. And in this tutorial, you’ll learn to install Wireshark on Linux while going through the basics of capturing packets and analyzing them.
Read on never to miss that critical network packet again!
Prerequisites
This tutorial will be a hands-on demonstration. If you’d like to follow along, be sure you have the following.
- A Linux machine – This tutorial uses Ubuntu 20.04 LTS, but any Linux distributions will work.
Installing Wireshark on Linux
By default, the Wireshark package comes with the base repositories of Ubuntu. But the version that comes with the repositories may be an older one, so you might want to install a more recent version.
You’ll first update your system, add the official Wireshark repository, and install the latest version of Wireshark using the APT package manager.
1. First, open a terminal window, and run the command below to update your package repositories. This command will check for updates and upgrade any outdated packages on your Ubuntu system.
sudo apt update && sudo apt upgrade -y
2. Next, run the apt install command below to install the required packages to add a new repository for Wireshark.
This command will install the following:
software-properties-common– Provides theapt_add_repositoryfunction to add a PPA (personal package archive) to install software from.
apt-transport-https– Provides the apt transport layer to HTTPS repositories needed for Wireshark and future added PPAs.
When a repository is set to HTTPS, the packages are downloaded using SSL encryption. This protocol prevents eavesdroppers from capturing packets on your network and snooping in.
sudo apt install software-properties-common apt-transport-https -y
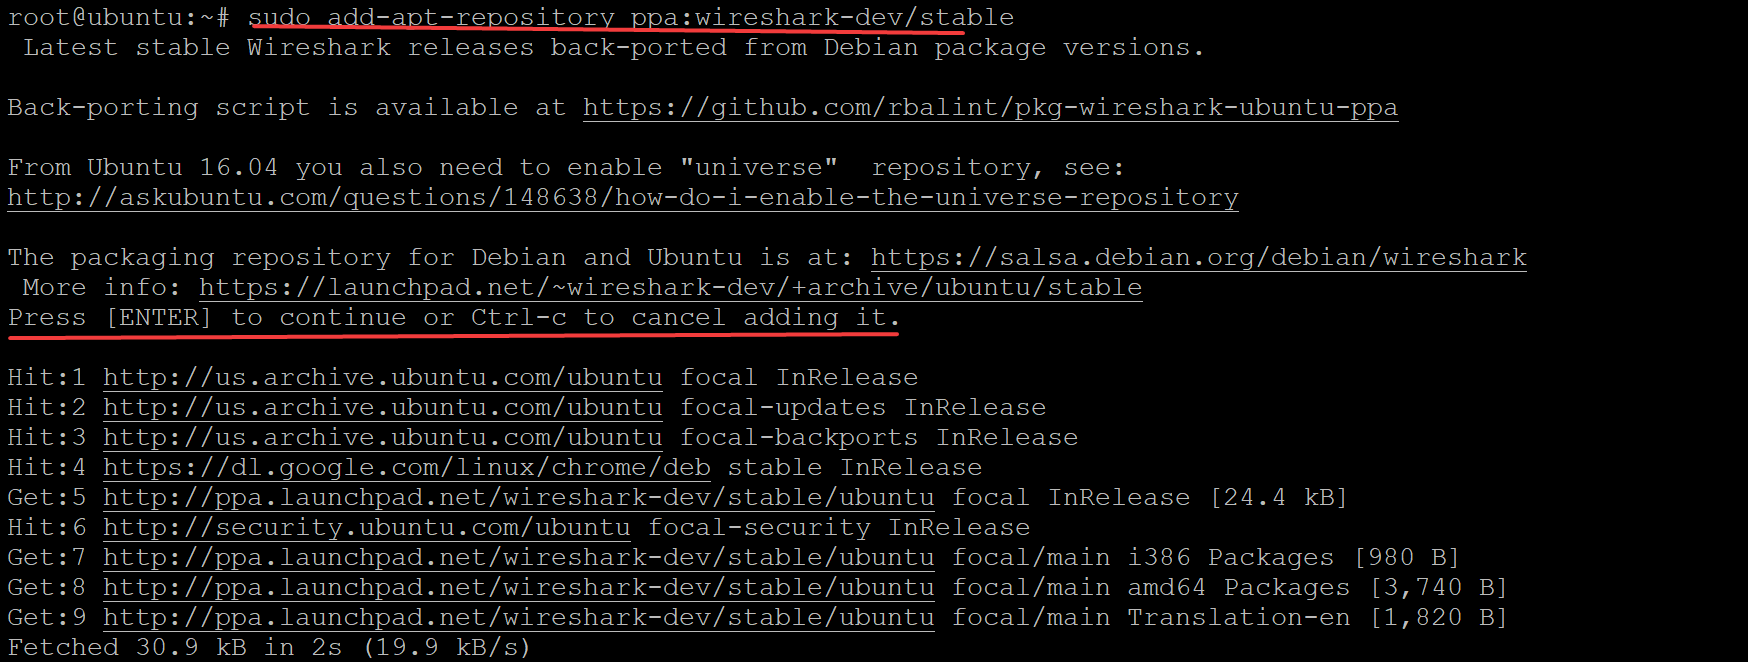
3. Run the add-apt-repository command below to add the Wireshark development team’s PPA (personal package archive) (ppa:wireshark-dev/stable) to your Ubuntu system.
add-apt-repository is a tool that allows you to add PPAs without having to edit or create a file called sources.list manually. This tool comes in handy if you plan on installing additional repositories later.
sudo add-apt-repository ppa:wireshark-dev/stablePress ENTER on your keyboard to add the new PPA, as shown below.
4. Now, run the ls command below to verify the sources.list file exists.
The sources.list file contains a list of all the PPAs your Ubuntu system can access, including the Wireshark PPA you just added.
ls /etc/apt/sources.list -l
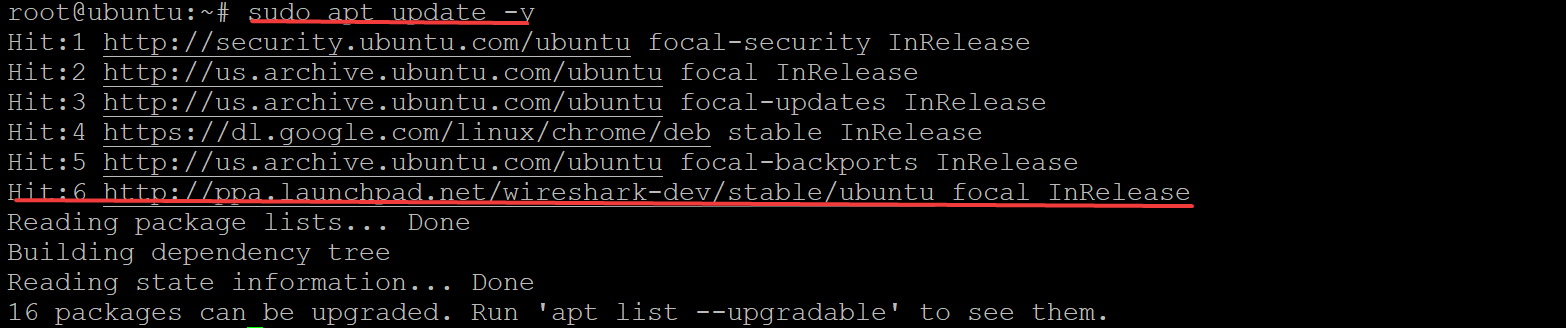
5. Rerun the apt update command below to update your system and includes the new Wireshark PPA you just added.
sudo apt update -yAs shown below, you’ll see an extra line at the end of the output, which indicates that Wireshark repositories are on your system.
6. After updating your system, run the apt install command below to install the latest stable version of Wireshark on your machine.
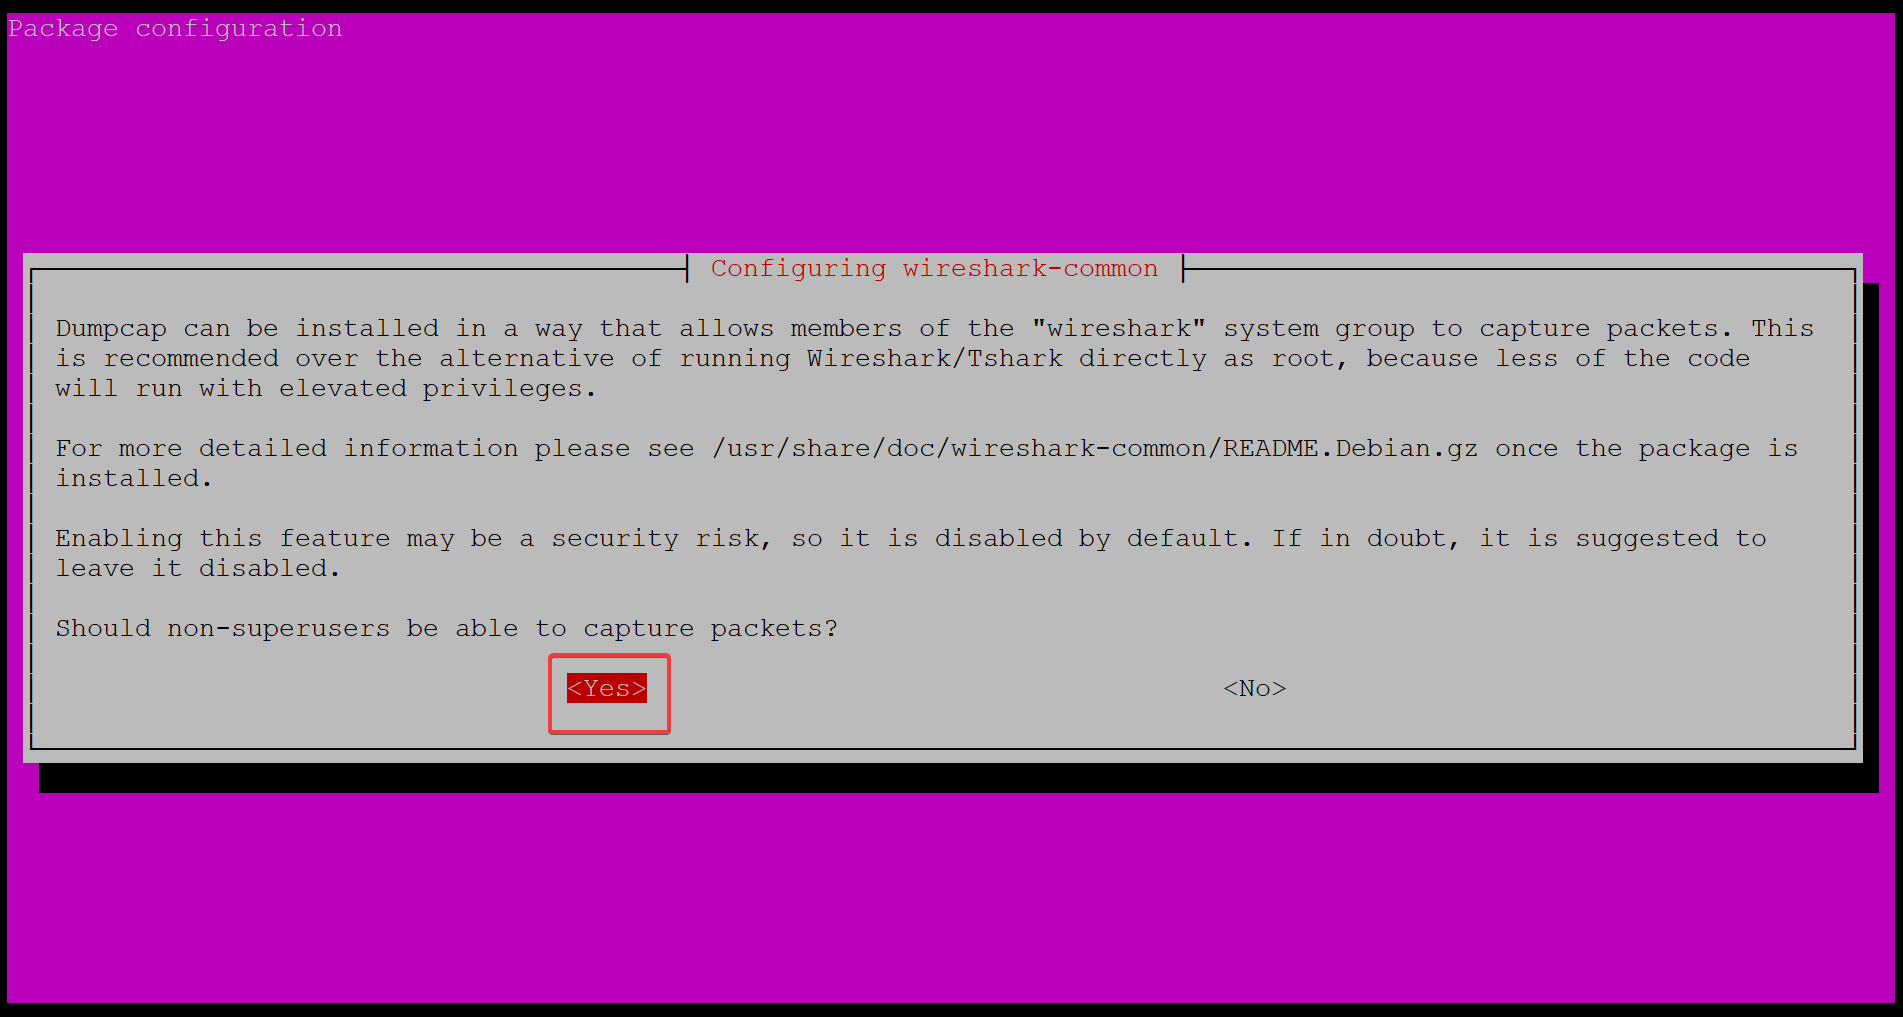
sudo apt install wireshark -ySelect Yes and press ENTER on your keyboard to continue the installation when asked to allow non-superusers be able to capture packets, as shown below.
Wireshark captures data before it’s passed to the Linux kernel, where network privileges are defined. So, when running specific commands like sudo, superusers must authenticate themselves.
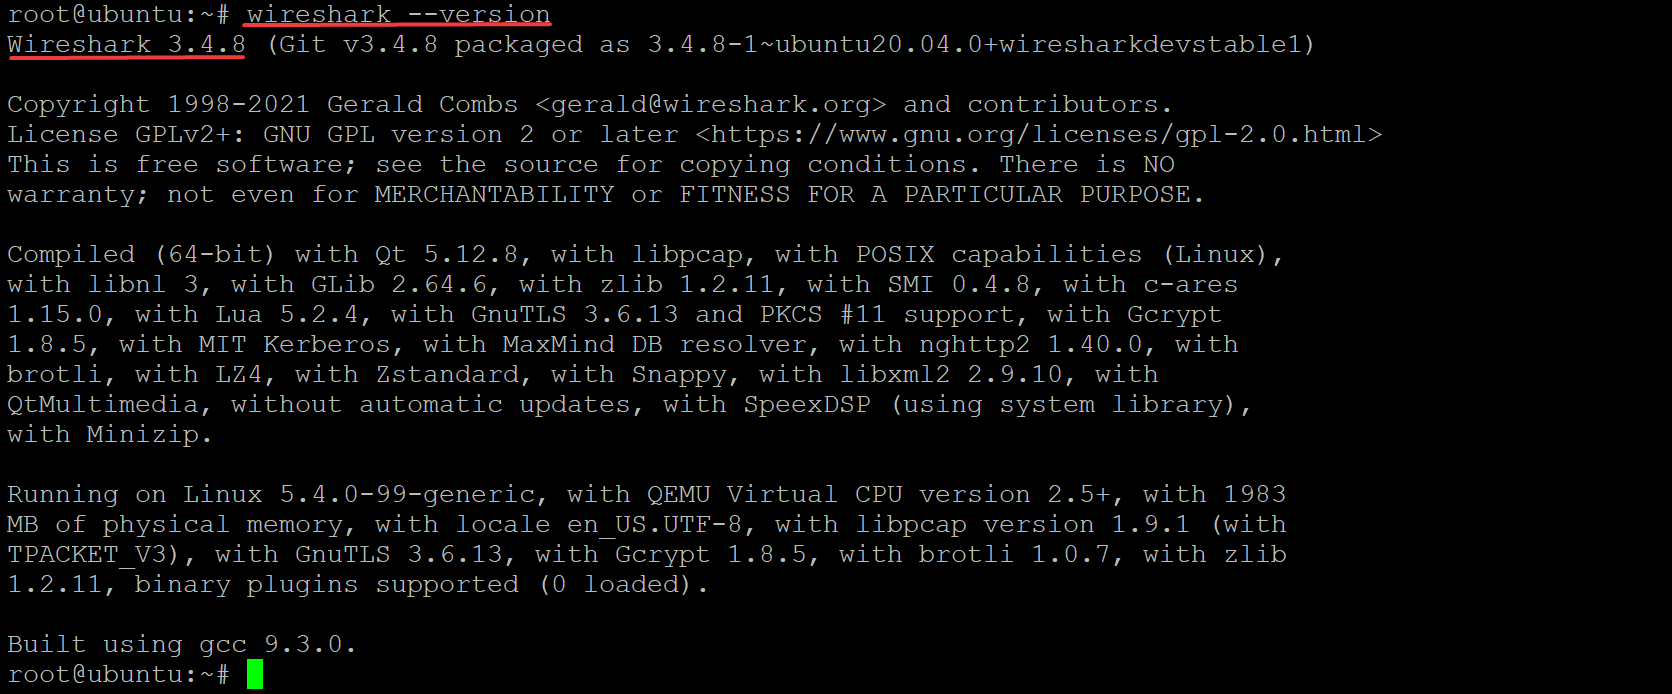
7. Finally, run the command below to check the Wireshark --version installed on your machine.
wireshark --versionAs of this writing, the latest stable version of Wireshark is 3.4.8, as shown below, but yours may be different.
Since you’re new to Wireshark, run the wireshark –help command below to see the help manual for Wireshark.
wireshark --help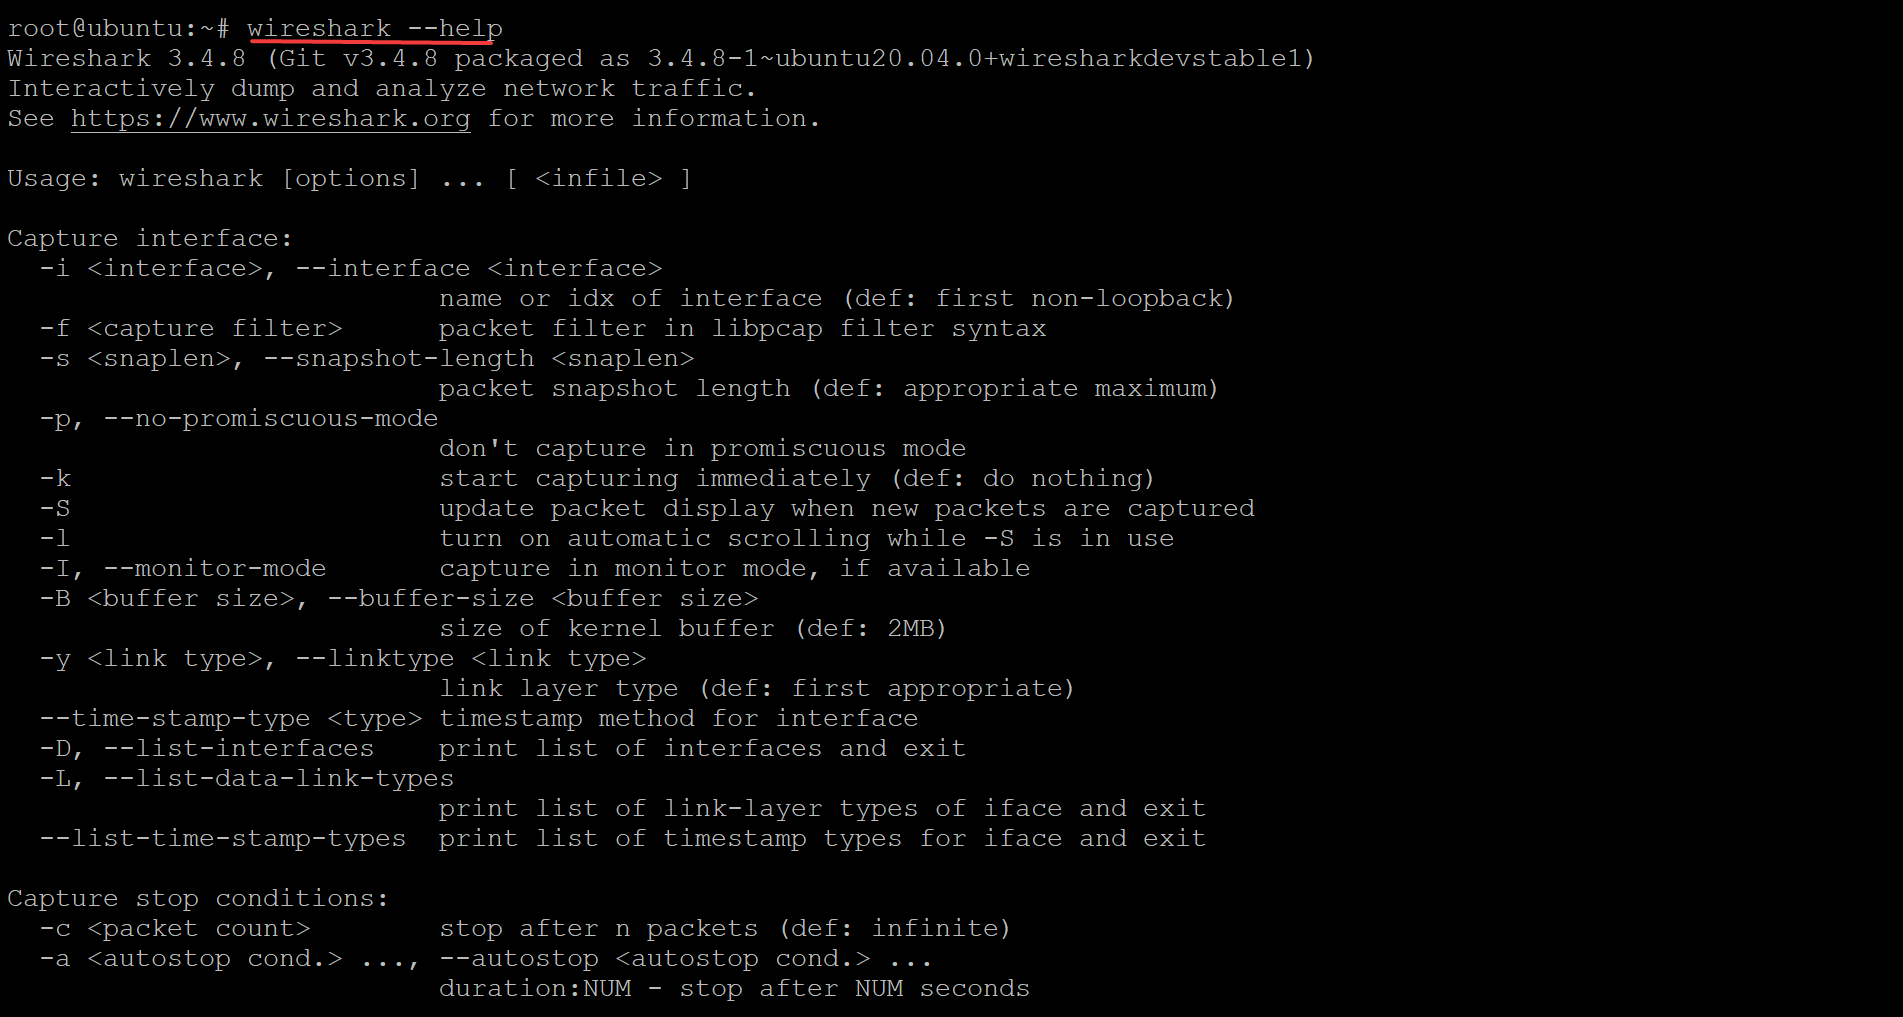
Capturing Packets using the Wireshark GUI
Now that you have Wireshark installed, you can begin capturing packets. And the good news is that Wireshark has a GUI, giving you the ability to capture and analyze packets with a few clicks. But you must first add your user to the wireshark group so you can capture packets.
1. Run the following usermod command on your system to add your username; in this case, it’s the non-root user ($(whoami)) to the wireshark group.
This command runs the whoami command with its output as an argument to the usermod command, so you can add users to groups without having to hard code group names.
sudo usermod -aG wireshark $(whoami)
2. Next, run the reboot command to restart your system for the changes to take effect. Once booted, log back in using the same user account you added to the wireshark group.
sudo reboot
3. Run the wireshark command below to open the Wireshark UI without any flags/options.
wiresharkWhen the Wireshark UI opens, you can safely ignore the nl80211 not found warning, as shown below, if the machine you’re using doesn’t have a wireless card. This warning is for troubleshooting wireless driver issues.

As shown below, you can also open the Wireshark UI from your applications finder on your Dock. Search for wireshark and launch Wireshark.

4. Click on the All interfaces show drop-down menu to choose which interfaces you want to capture packets from, as shown below. If your machine has a Wired card or a Bluetooth network adapter, you’ll see them listed too.
Select any network adapters and USB devices listed and click on the blue Wireshark icon at the toolbar to begin capturing packets. This demo uses the eth0 interface, the Ethernet card on the machine.
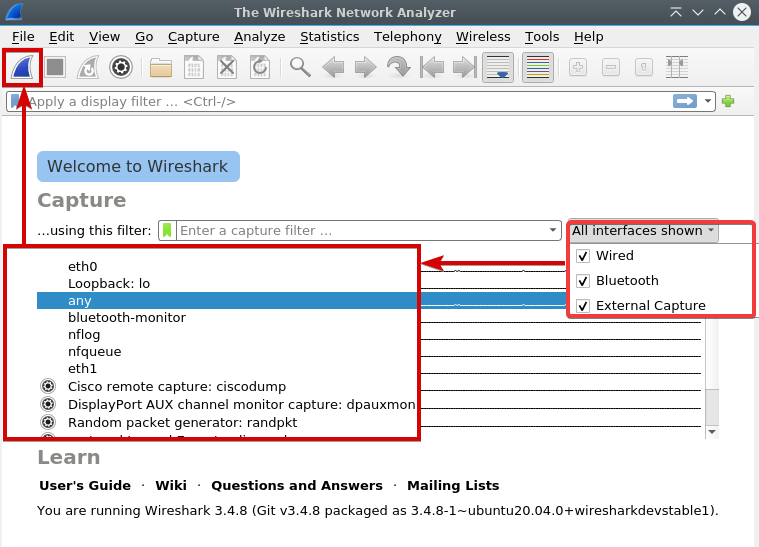
Although Wireshark lists out all the network interfaces on the system, not all of them may be active at the moment. For example, if you have a USB network adapter plugged into a laptop. The interface won’t be active unless you connect that USB device to a wireless access point at the time and broadcast packets over the air.
5. Run the basic ping command below to google.com on your terminal to test if your machine can reach the internet.
Depending on your machine’s configuration, your connection may or may not work. If you can reach google.com, your system can successfully reach the internet.
ping google.comThe Wireshark UI shows all of the packets your system sends and receives on the selected interface to the internet. And as you see below, Wireshark captured many packets from the selected interface.
Note that some machines won’t reach the internet due to firewall rules or other settings that are out of the scope of this article. You may have to set some IPTables or UF rules to allow packets to flow freely on your network or change settings during the receiving process.

6. Now, click on a packet in the packet list pane window and review more details about that packet. The tree view and byte view panes pop up automatically when you click on a packet, as shown below.
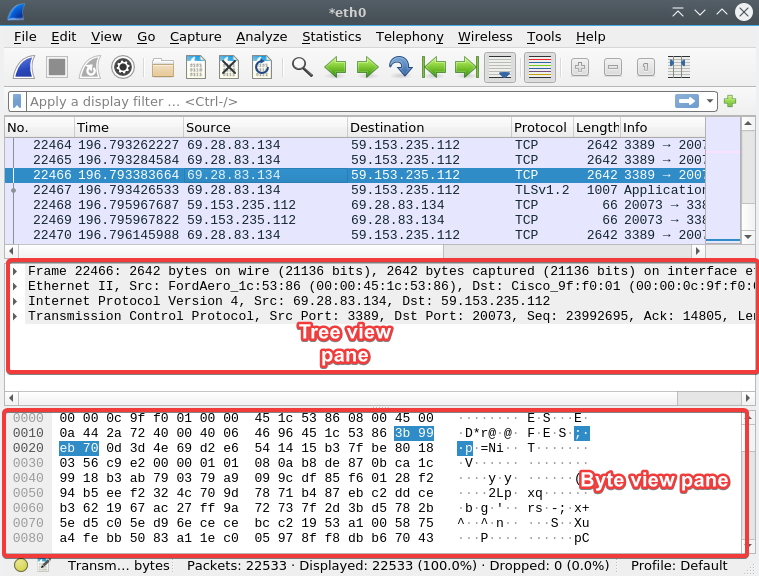
7. Click on the right-arrow button to expand any part of the tree to view more information about the selected packet. When you click on an item in the tree view pane, the byte view pane highlights how that value appears in bytes, as shown below.
Wireshark allows you to examine packets in great detail and find what’s causing your system not to reach the internet or other network issues.
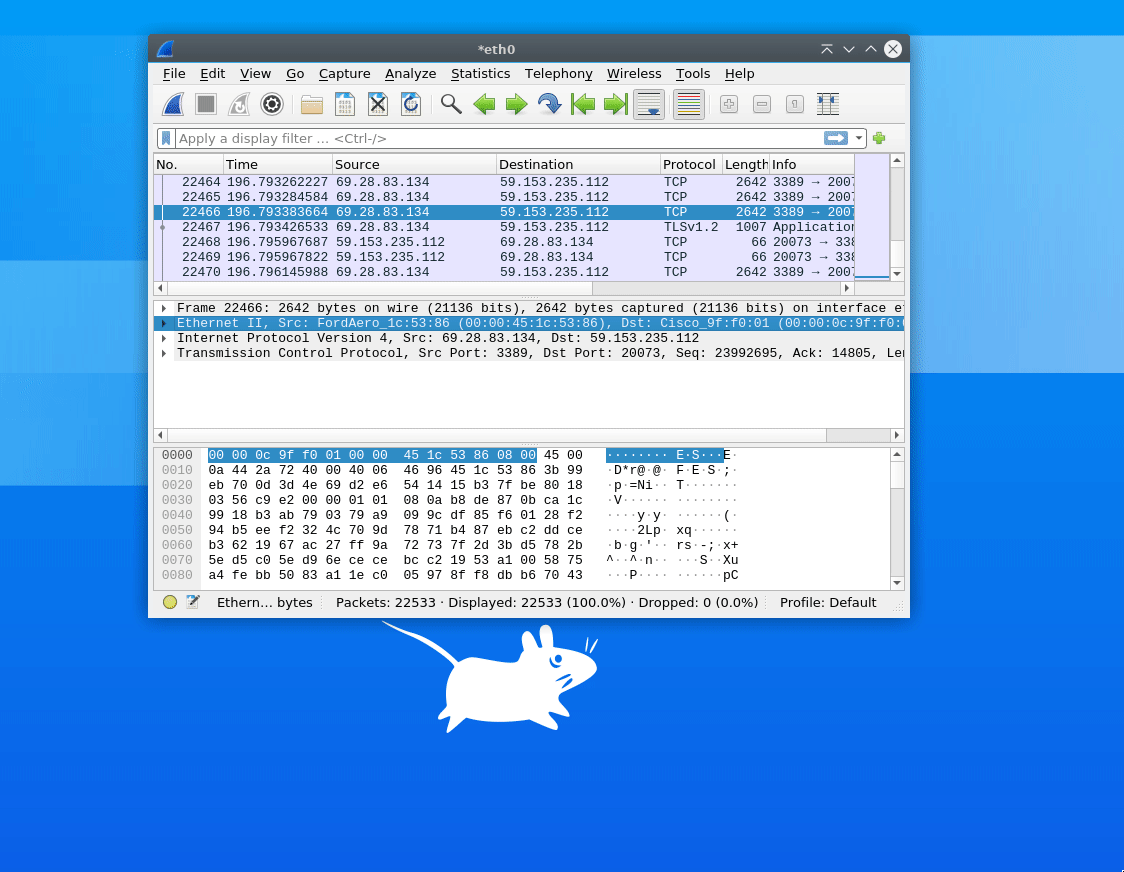
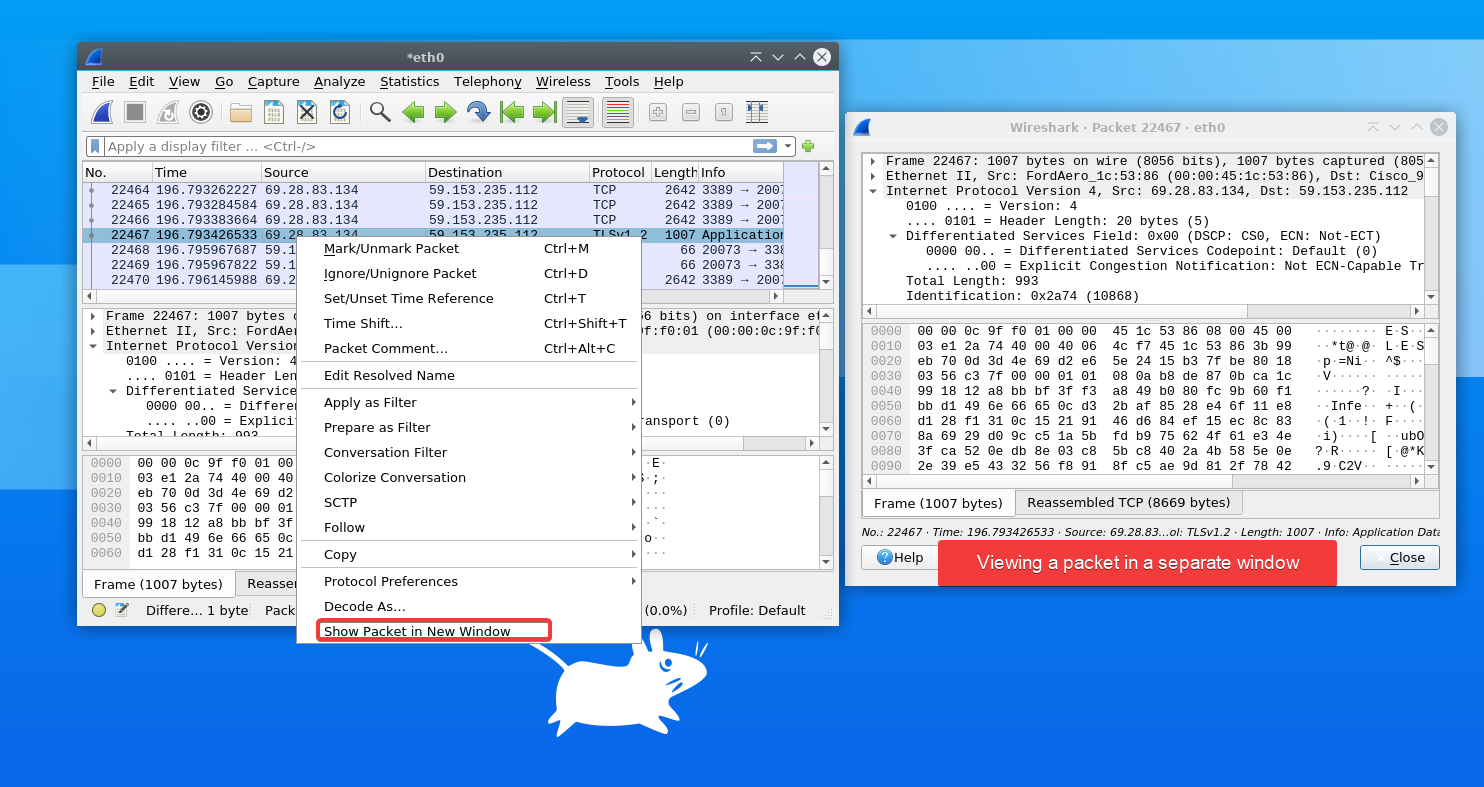
Perhaps you prefer to view the packets in an independent window for clarity. If so, right-click on a packet and select Show Packet in New Window from the context menu, as shown below.
If you have many packets to view, switching between windows is much more efficient than examining them one at a time.
Filtering Packets with Filter String and Filter Expressions
Filtering out all other packets is preferable if you know exactly what you are looking for or want to view packets based on some condition (such as the destination IP address). For instance, your server might have hundreds or thousands of packets flying by quickly. Finding what you’re looking for in a sea of packets is almost impossible.
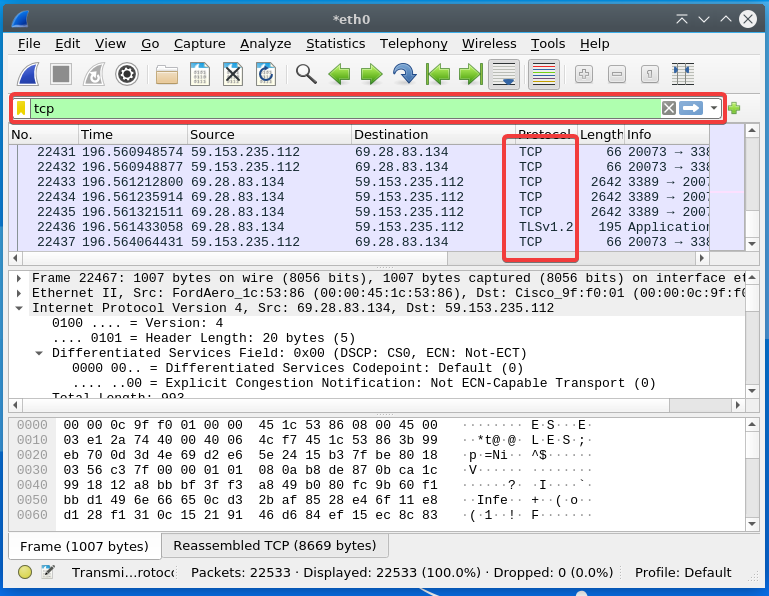
You can filter out all other packets by entering a filter string into the text box field at the top of the main Wireshark window. For example, you want to view only TCP packets to examine the headers of a TCP stream to find out why your machine cannot talk to the internet.
1. Enter tcp into the filter string field and hit ENTER, and you’ll only see packets that satisfy your filter string. Wireshark will ignore any other packet type and not be shown in the packet list pane below.
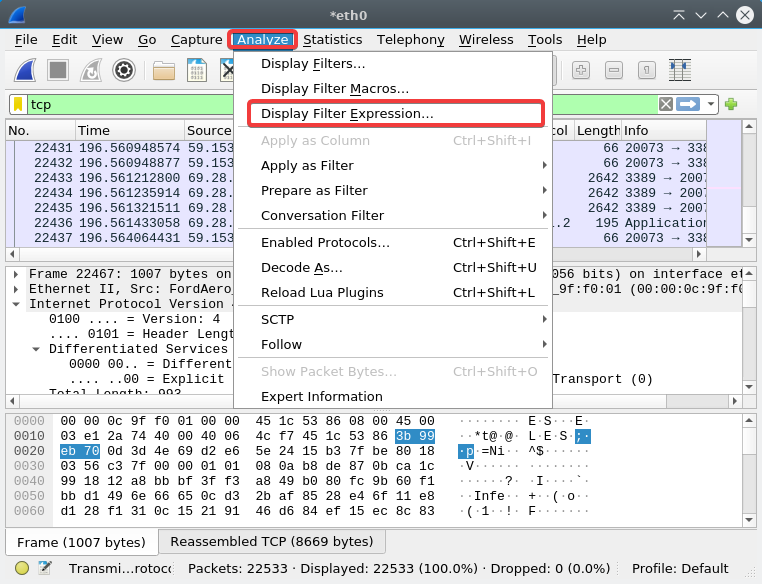
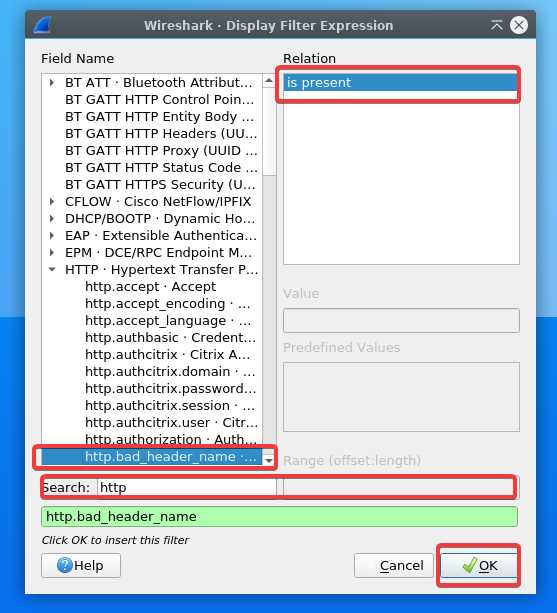
2. Next, click on Analyze —> Display Filter Expression. A new pane window pops up that allows you to do packet filtering in a more advanced way.
Below, you can see some filter expressions to find specific packets.
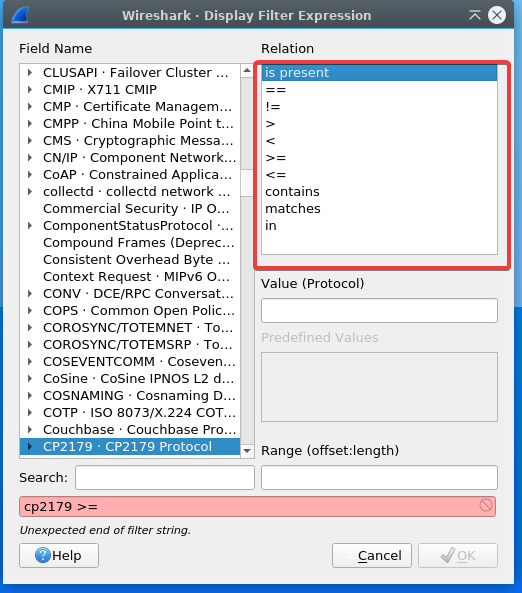
3. Finally, enter http in the search bar, click on http.bad_header_name —> is present —> OK to find illegal characters in the header name of the http request to your server from a client.
Saving Captured Packets to a File
If the problem you’re troubleshooting involves one or more packets, you can save those packets as they may come in handy for further analysis.
For example, you cannot solve a connectivity issue by watching packets live in Wireshark. But if you save those packets to a file, someone else (ISP or another networking professional) can view those packets and see what is happening on your network.
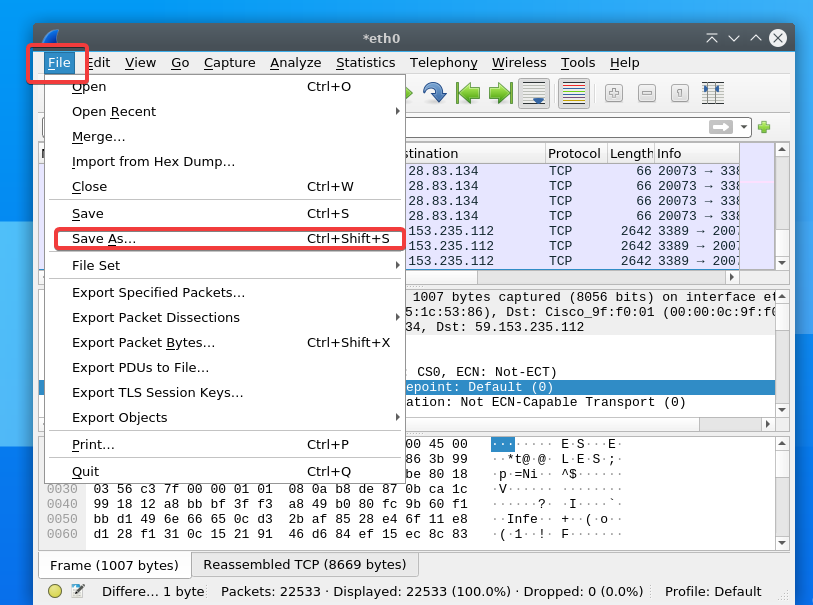
Click on the File menu —> Save As to choose the save location, and set a name for the file with a .pcap file extension (i.e., ata.pcap). Wireshark will save all packets captured in the session to the .pcap file. You can share this file with others to help troubleshoot your network problem.
Conclusion
In this article, you’ve learned how to install Wireshark on a Linux server for packet capture and analysis. You have also learned the basic Wireshark features of capture settings, different ways of filtering packets, and saving captured packets to a file.
With this newfound knowledge, you can now capture packets for troubleshooting your client-side DHCP issues or another network connectivity issue. At this point, you can already analyze packets for security purposes (checking encrypted traffic flows).


