

Managing your virtualized infrastructure via a centralized management tool may sound too good to be true. Well, say hello to the System Center Virtual Machine Manager (SCVMM).
With SCVMM, you would be walking in what seems like a fantasy land where you can effectively manage and deploy virtual machines (VMs). And in this tutorial, you will learn how to perform various management tasks in a virtualized environment via SCVMM.
Discover SCVMM and start virtualizing your dream infrastructure!
Prerequisites
Before you dive deep into the SCVMM, ensure you have the following in place:
- A domain-joined machine running a Windows Server Standard/Datacenter Edition with Hyper-V roles enabled – This tutorial uses Windows Server 2022 Datacenter Edition 64-bit.
- A Microsoft SQL Server Standard/Enterprise Edition installed – This tutorial uses Microsoft SQL Server 2017 Standard Edition.
- SQL Server Management Studio (SSMS) installed – This tutorial uses SQL Server Management Studio 19.
- Windows Preinstallation Environment and Windows Assessment and Deployment Kit (ADK) installed on your server.
Downloading and Extracting the SCVMM Setup Files
SCVMM is a Microsoft management tool that allows you to manage and deploy VMs across virtualization platforms, such as Hyper-V and VMware. But to take advantage of SCVMM, you must first download and extract the SCVMM files on your Windows Server, as follows:
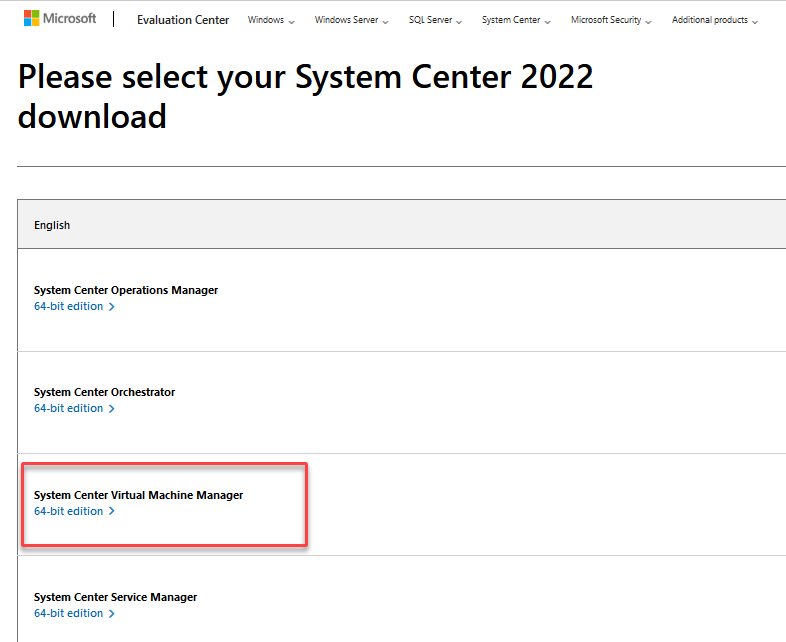
1. Open your preferred web browser, navigate to Microsoft’s official evaluation center page, and download the SCVMM installation file.
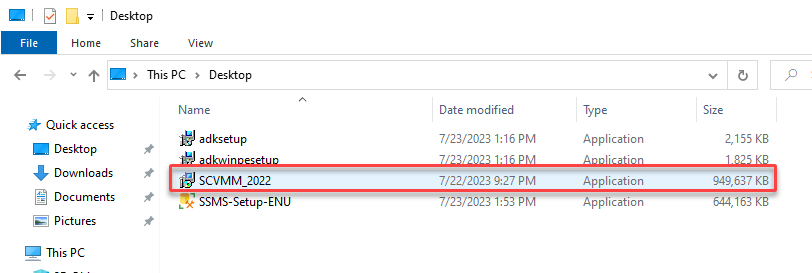
2. Next, open the SCVMM package (i.e., SCVMM_2022).
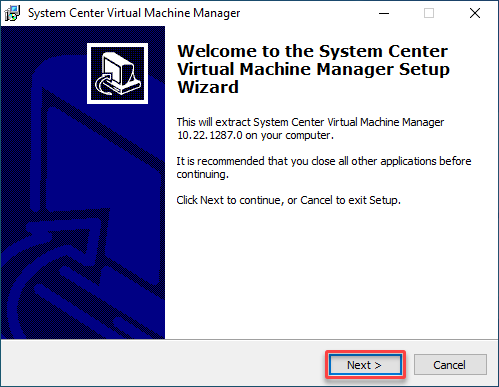
3. On the welcome screen, click Next to extract the SCVMM setup files.
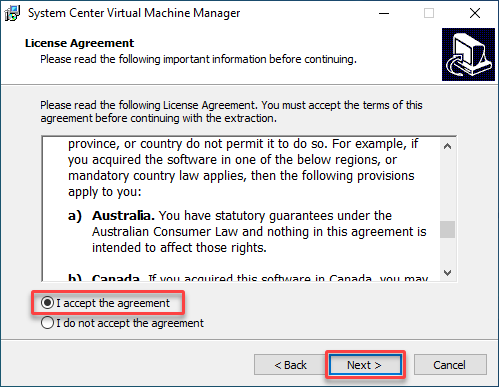
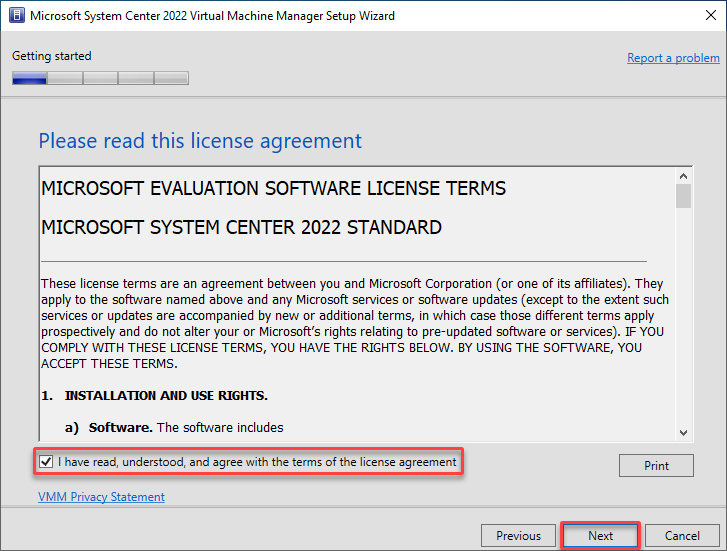
4. Now, accept the license agreement, and click Next.
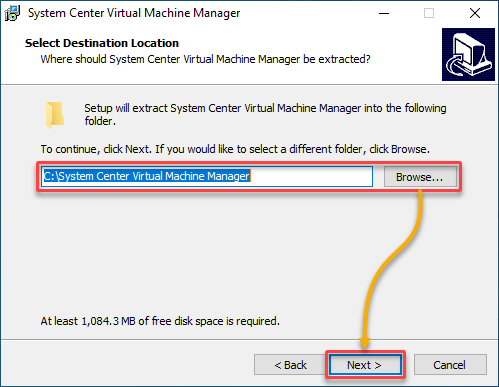
5. Choose an appropriate folder location to extract files, and click Next.
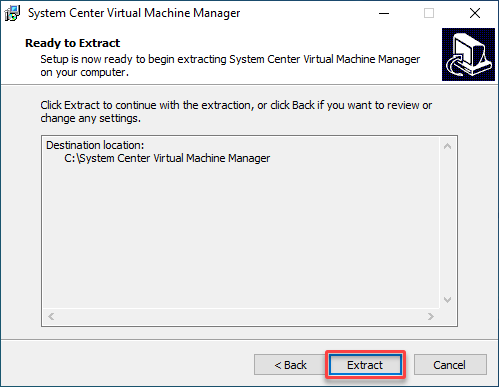
6. Confirm the settings and destination folder, and click Extract to extract the setup files.
7. Lastly, click Finish to close the wizard.
Installing and Configuring SCVMM on a Windows Server
Extracting the setup files does not automatically install SCVMM. Like any other tools/software, you must install and configure SCVMM on your Windows Server.
To install SCVMM, follow these steps:
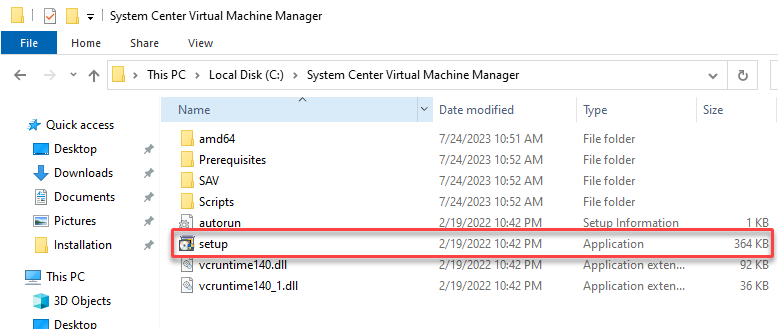
1. Open your file manager, navigate to where you extracted the SCVMM setup files, and launch the setup.exe file in the System Center Virtual Machine Manager folder.
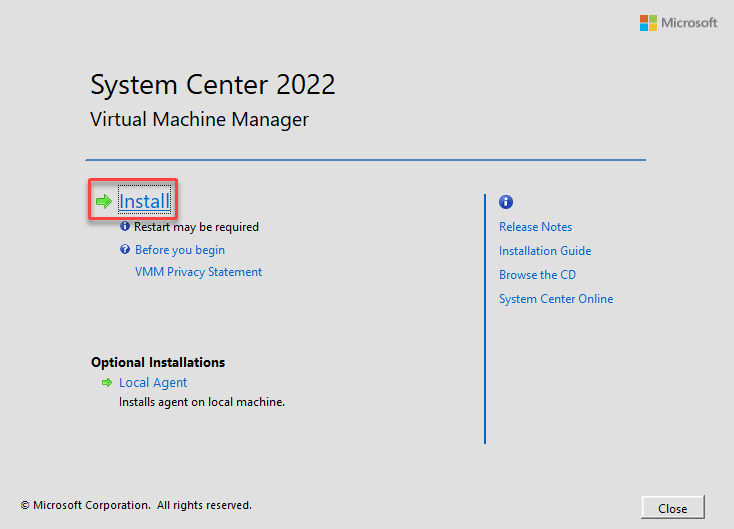
2. Next, in the SCVMM prompt, click Install to begin installing SCVMM.
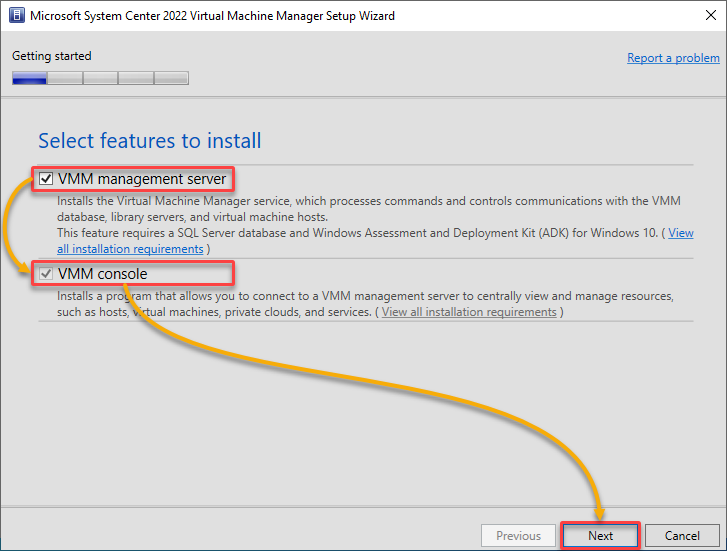
3. Tick the VMM management server box and the VMM console box that appears, and click Next.
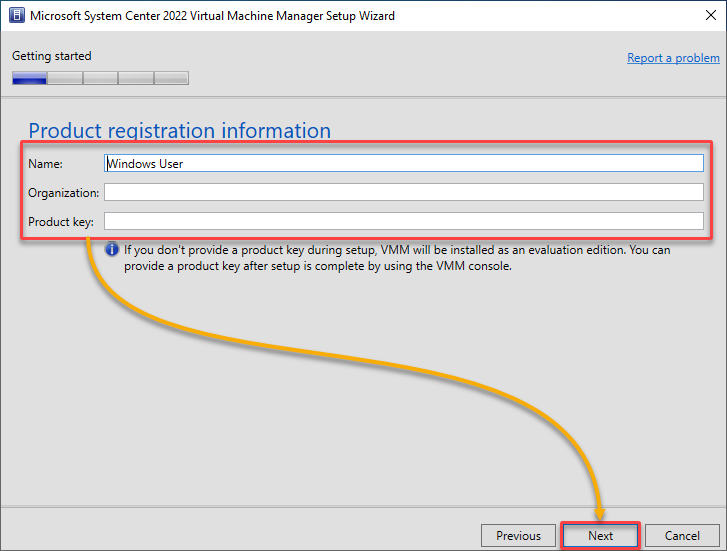
4. Fill in the Product registration information on the next page, and click Next.
5. Accept the license agreement, and click Next.
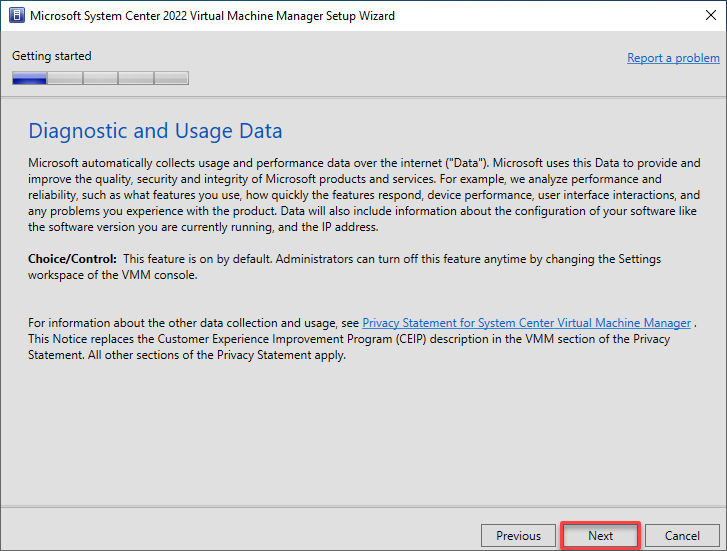
6. Read about the Diagnostic and Usage Data, and click Next.
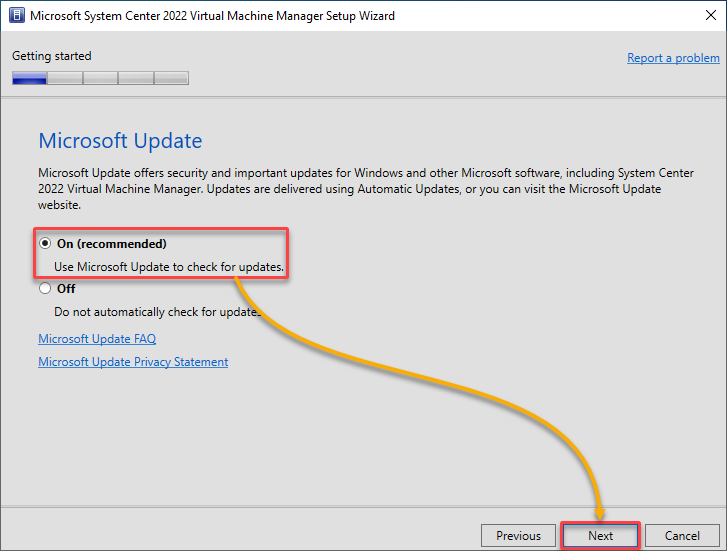
7. Turn On the Microsoft Update for updating SCVMM, and click Next.
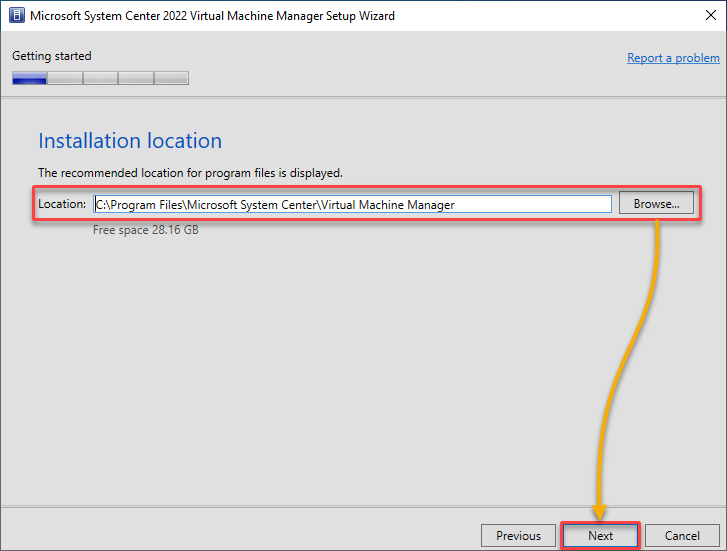
8. Choose a location to install SCVMM, and click Next.
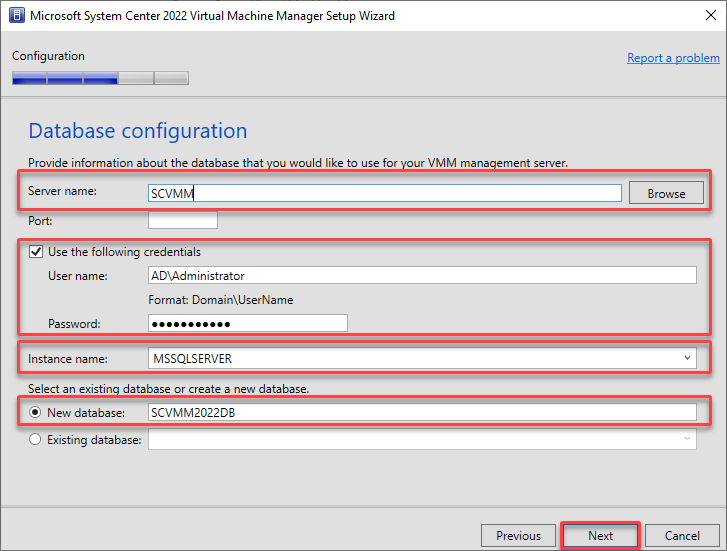
9. Configure your database, as shown below:
- Server name – Browse or input the name of your computer running your SQL Server.
- Use the following credentials – Tick this box, fill in the User name and Password of your computer running the SQL Server.
- Instance name – Choose your Microsoft SQL Server’s instance name.
- New database – Choose this option to create a new database called SCVMM2022DB (arbitrary).
Once configured, click Next to continue.
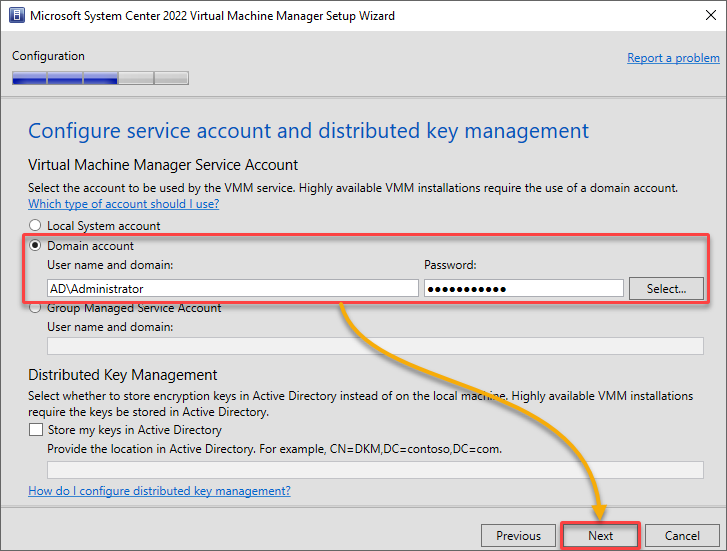
10. Next, provide your domain’s User name and Password, and click Next.
💡 Optionally, you can configure the distributed key management. Distributed key management allows the control of encryption keys for securing data across multiple locations. In SCVMM, the encryption keys are stored in the Active Directory.
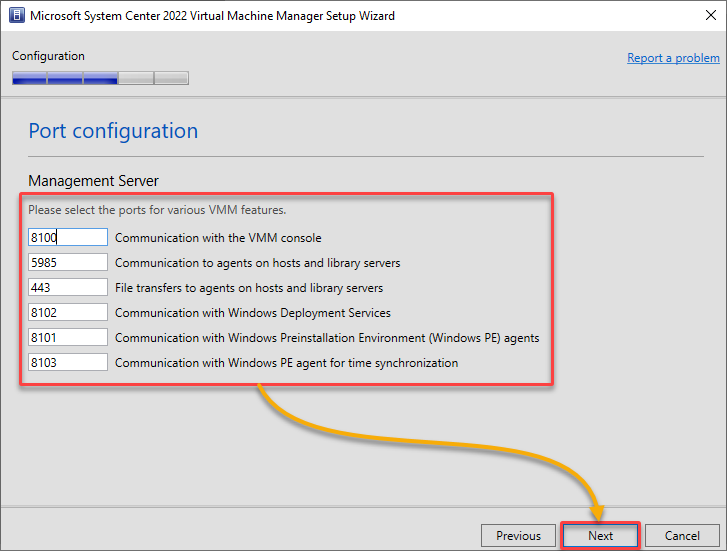
11. Now, configure or leave the default port settings, and click Next to proceed.
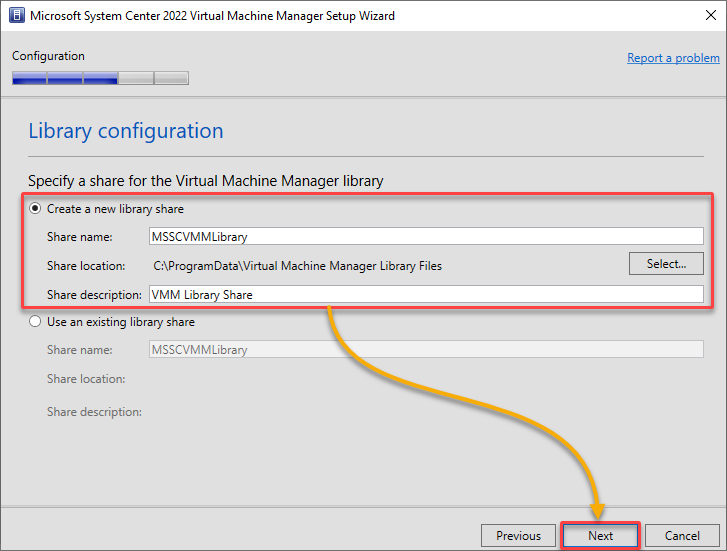
12. Choose the Create a new library share option, specify the VMM library Share name, location, and description, and click Next.
The VMM Share Library allows you to create and manage a centralized library of resources, such as VM templates, ISO images, scripts, and other files. Different SCVMM instances within your virtualized infrastructure can share and access this library.
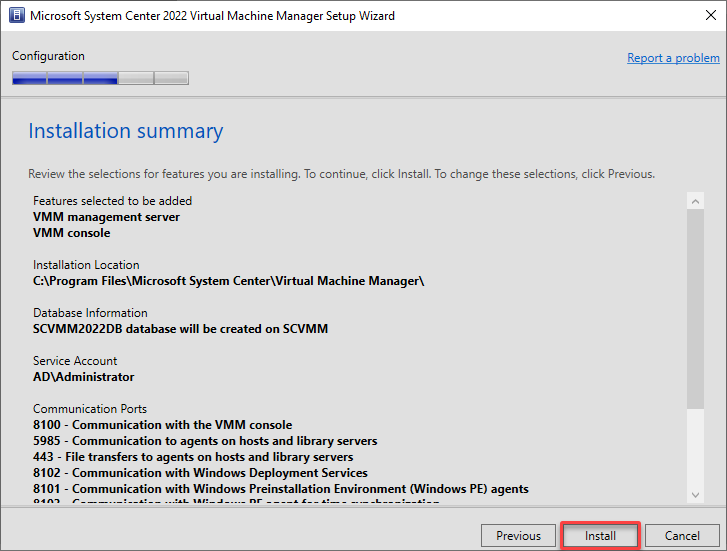
13. Verify the installation summary, and click Install.
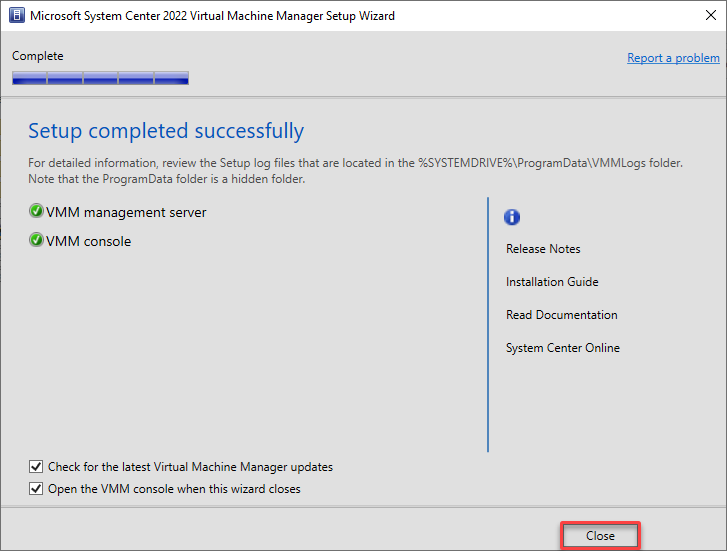
14. Once installed, click Close to exit the wizard.
Adding Virtualization Hosts
After completing the installation and initial configuration, you are almost ready to use SCVMM to manage your virtualization environment. But first, you need a virtualization host, a physical server, that runs a hypervisor and hosts VMs.
SCVMM allows you to centrally manage and administer these virtualization hosts, regardless of the underlying hypervisor technology, such as Hyper-V or VMware vSphere.
To add a virtualization host in the SCVMM, do the following:
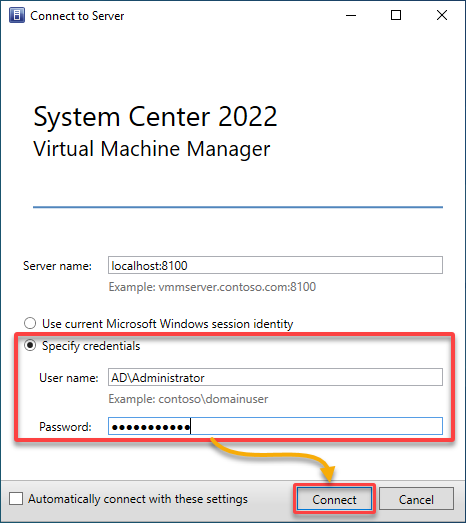
1. Launch SCVMM you installed on your Windows Server.
2. Next, provide your domain credentials to connect to your SCVMM server.
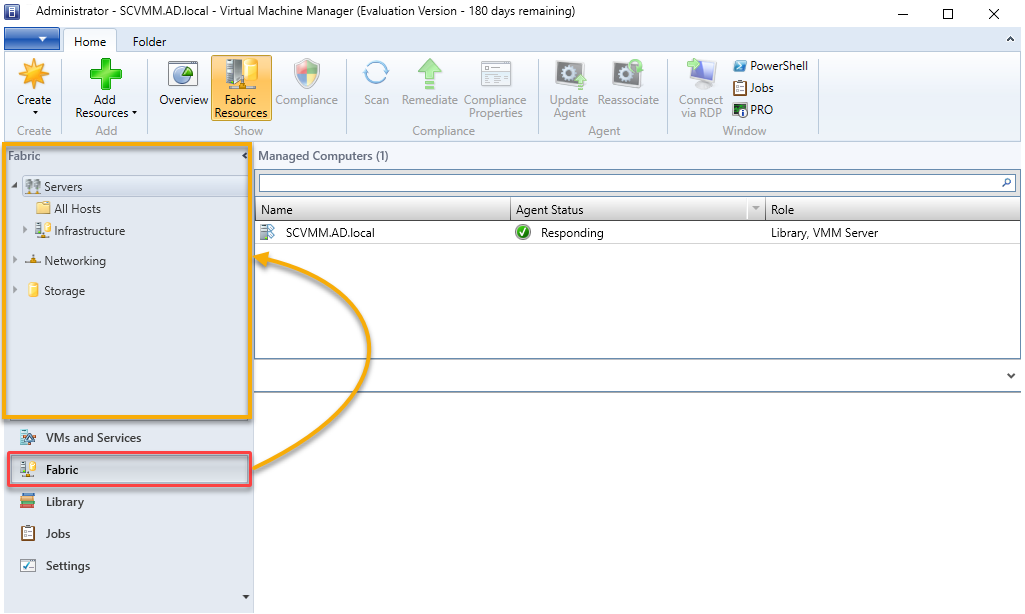
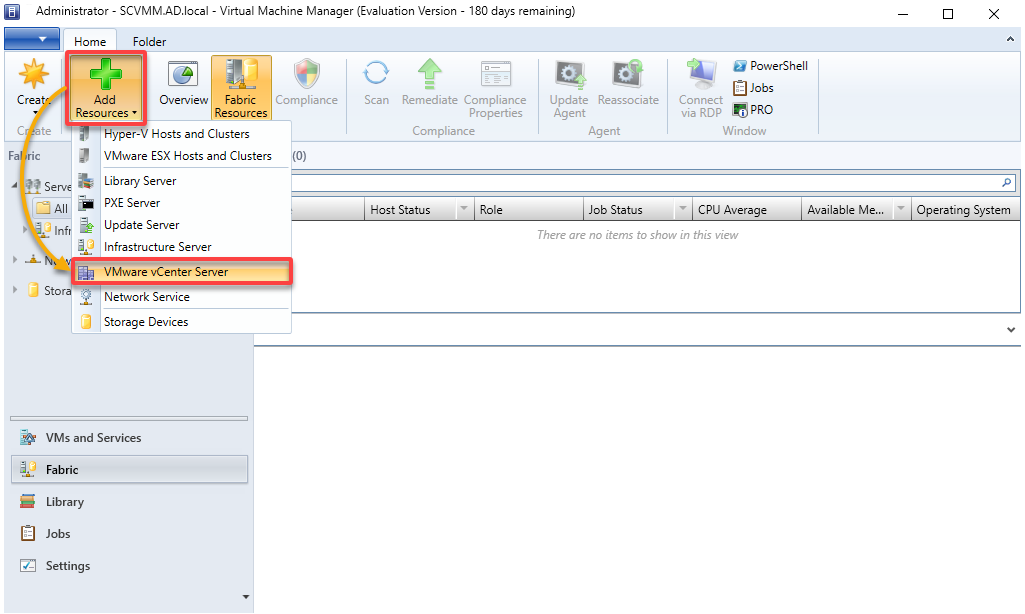
3. In the SCVMM console, navigate to Fabric (bottom-left), which opens the Fabric workspace. This workspace is where you can manage infrastructure elements, including virtualization hosts.
4. Now, click the Add Resources drop-down, and choose VMware vCenter Server to initiate adding a vCenter Server.
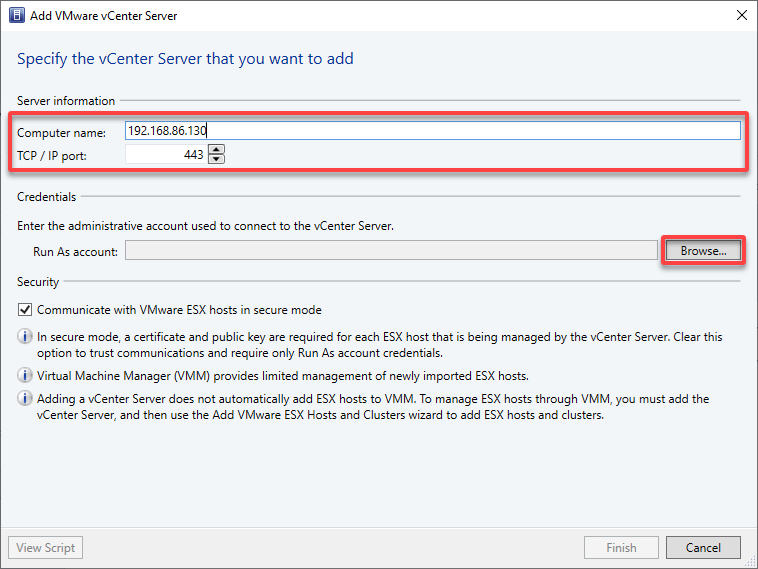
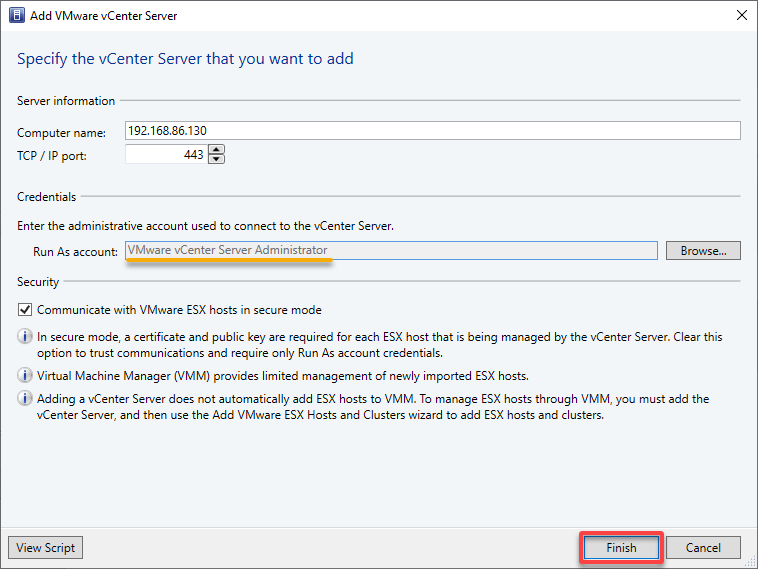
5. Specify the vCenter Server you wish to add as follows:
- Computer name – Specify the name (IP address) of your vCenter Server.
- TCP / IP port – Add the port needed to connect to the vCenter server (443 by default).
- Run As account – Click Browse to choose the administrative account you used to connect to the vCenter Server.
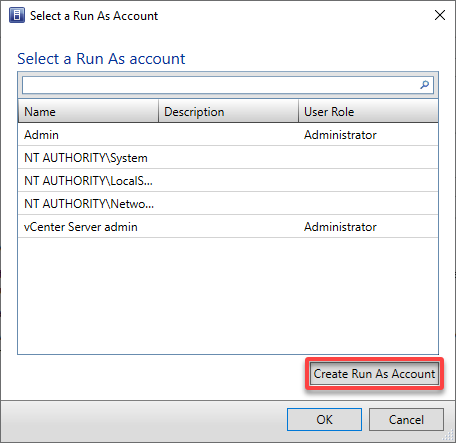
6. Select an existing user from the list on the Select a Run As Account window or click Create Run As Account to create a new one.
But in this example, click Create Run As Account to create a new user account.
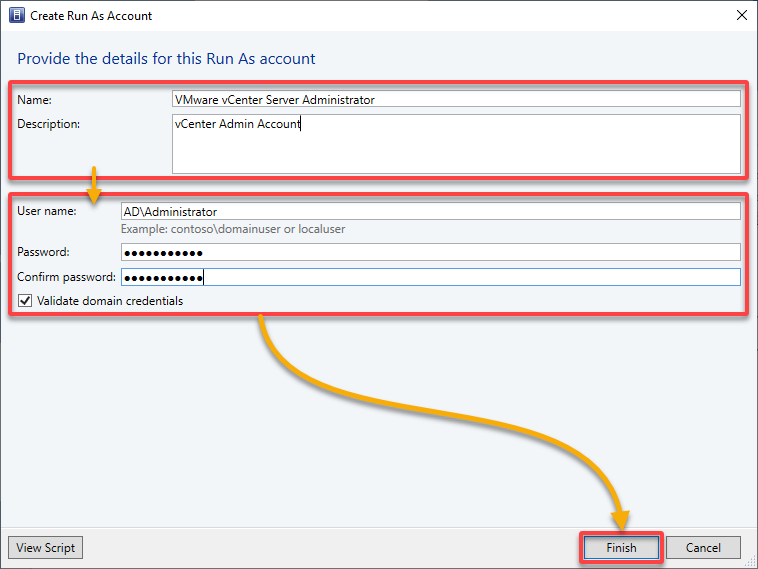
7. Provide a Name and Description for the Run As account, authenticate with your vSphere credentials, and click Finish to save the entry.
8. With the Run As account created, click Finish to add a vCenter Server.
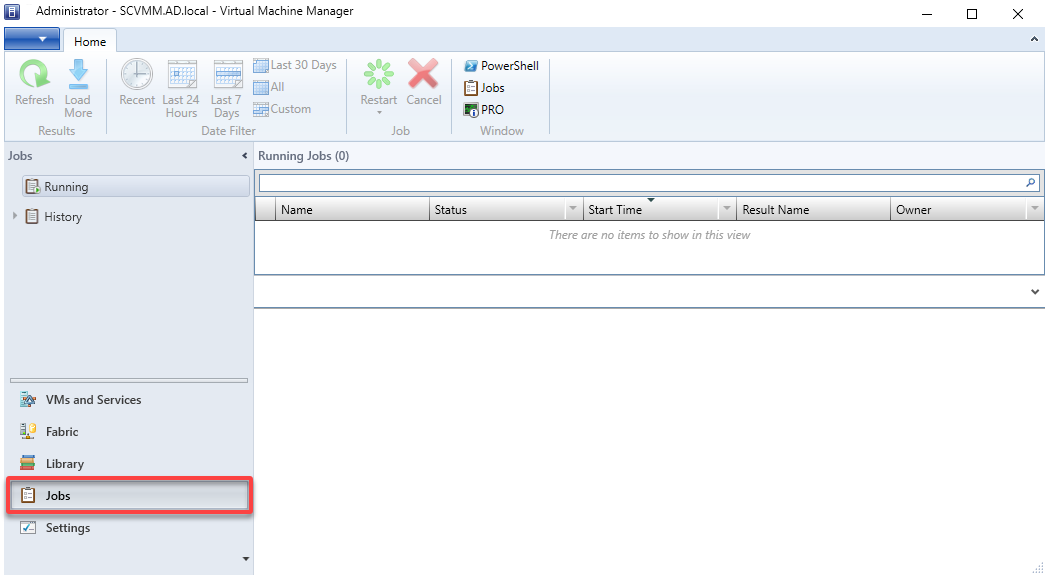
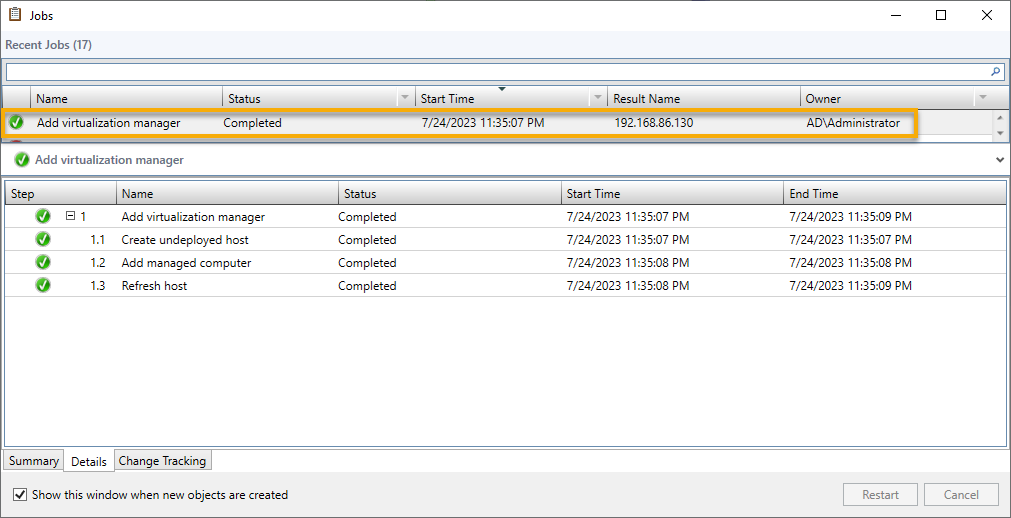
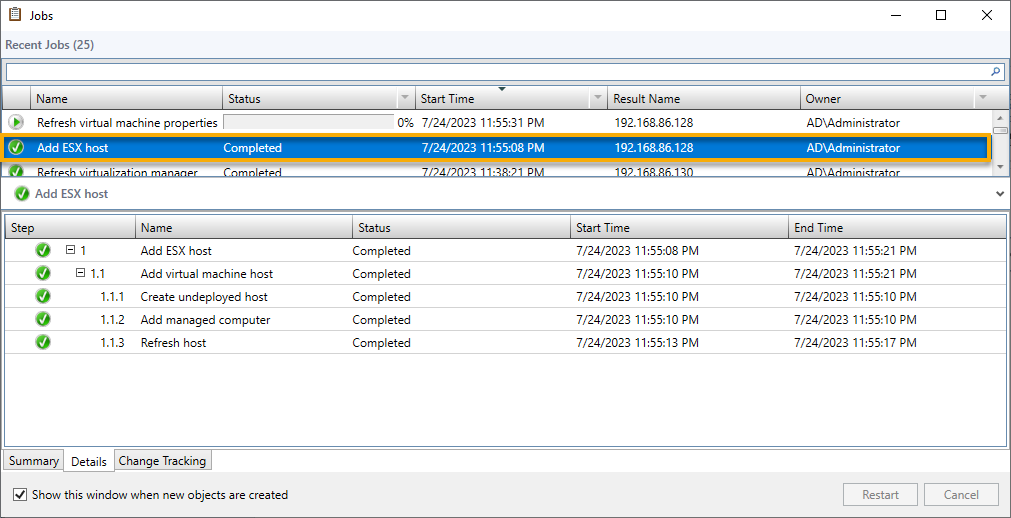
9. Navigate to the Jobs tab, as shown below, to view all jobs.
Below, you can see the Add virtualization manager job has been completed, which indicates you have successfully added a vCenter Server.
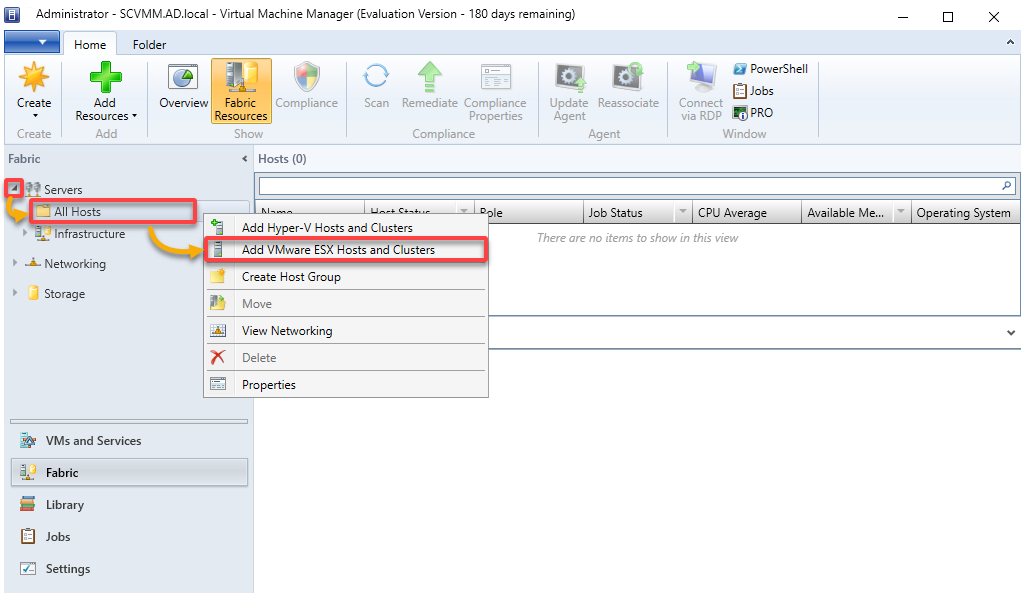
10. Under Fabric, expand Servers, right-click All Hosts, and select Add VMware ESX Hosts and Clusters. A wizard opens where you can add new ESXi host resources (step 11).
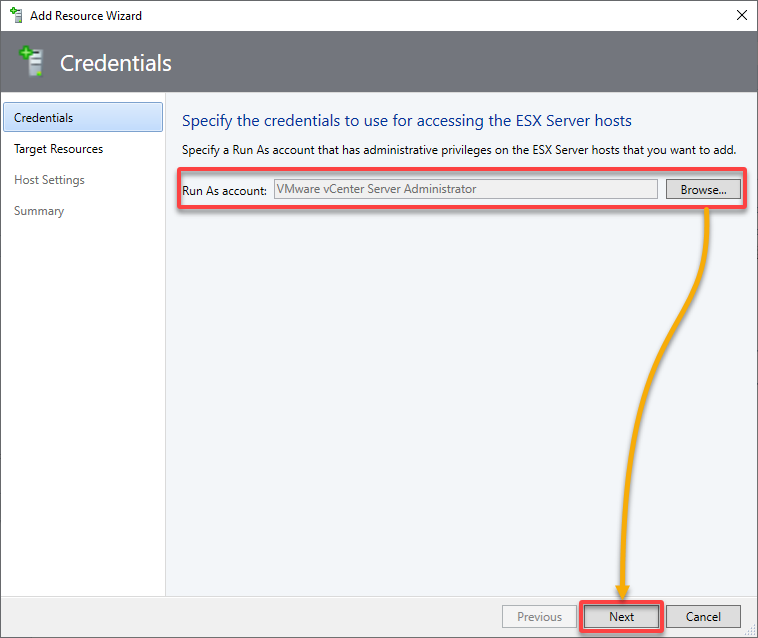
11. Select the credentials for your vCenter Server on the Add Resource Wizard, and click Next.
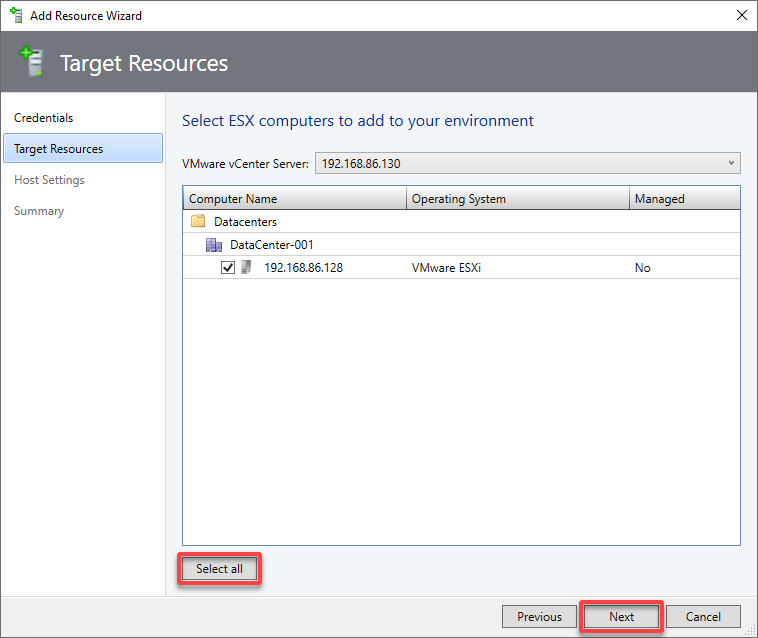
12. In the Target Resources page, click the Select all button to pull in all the hosts in the cluster, and click Next.
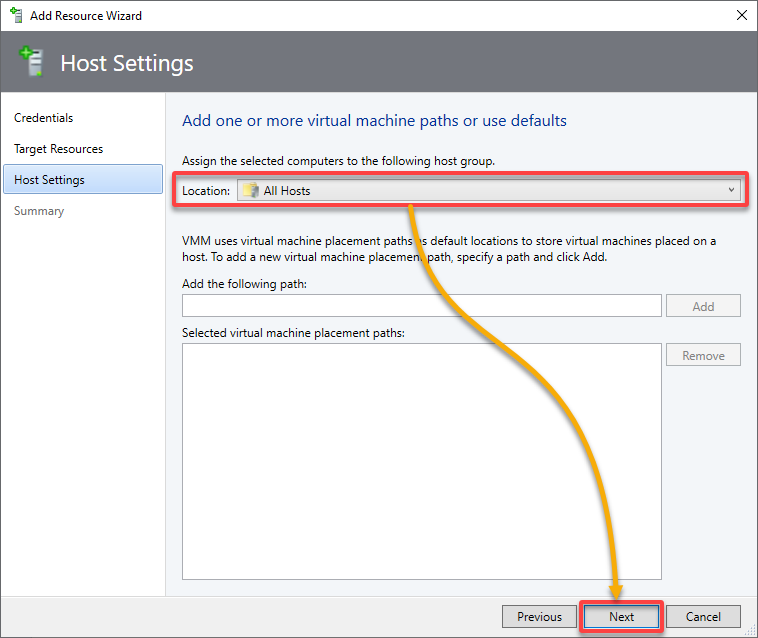
13. Select the location to import the VMware ESXi hosts, and click Next.
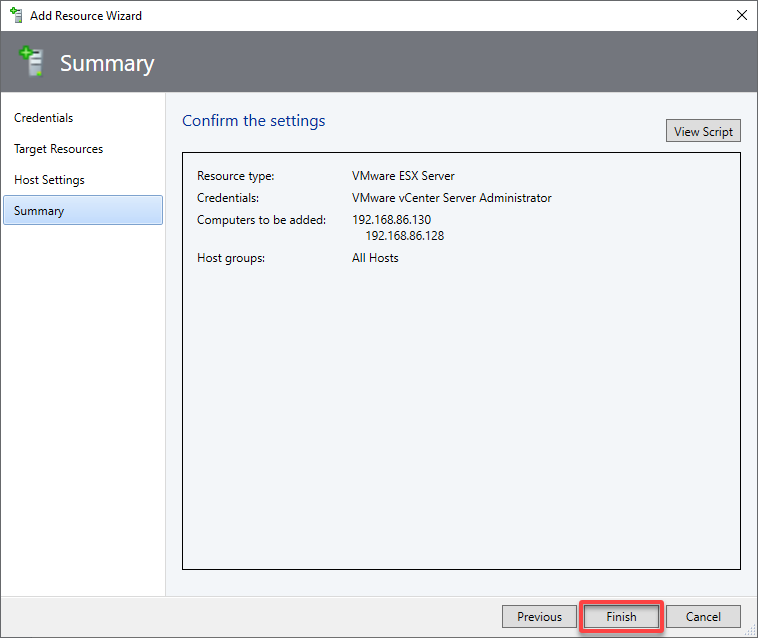
14. Review your selected settings, and click Finish to add ESXi host resources to SCVMM.
The Jobs window shows the job to add the ESXi hosts to SCVMM completed.
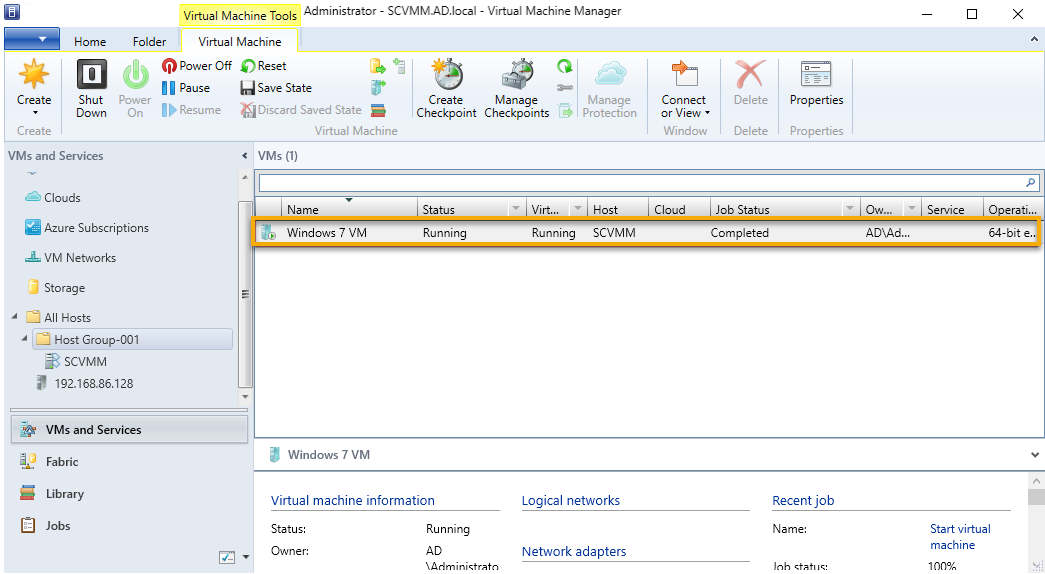
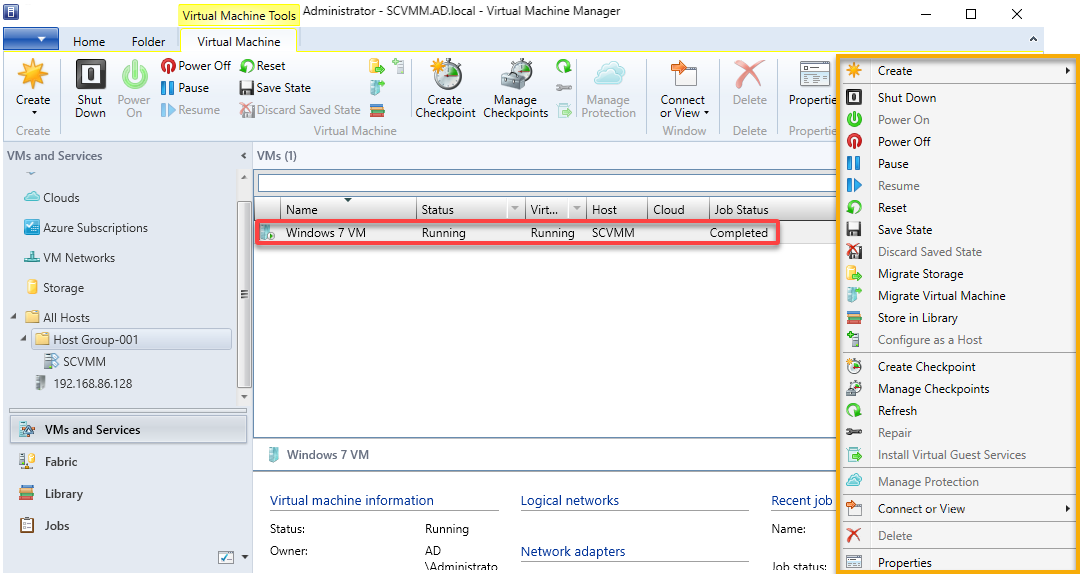
15. Ultimately, navigate to VMs and Services, and right-click on one of the VMs listed to view the available options.

Creating and Configuring Host Groups
As your virtualization hosts are now managed by SCVMM 2022, you can start creating and managing VMs through the SCVMM console. But first, you need a way to organize and manage virtualization hosts.
To create a host group, a local container, within SCVMM, follow these steps:
1. Navigate to Fabric workspace, right-click the All Hosts folder, and choose Create Host Group to create a new host group.
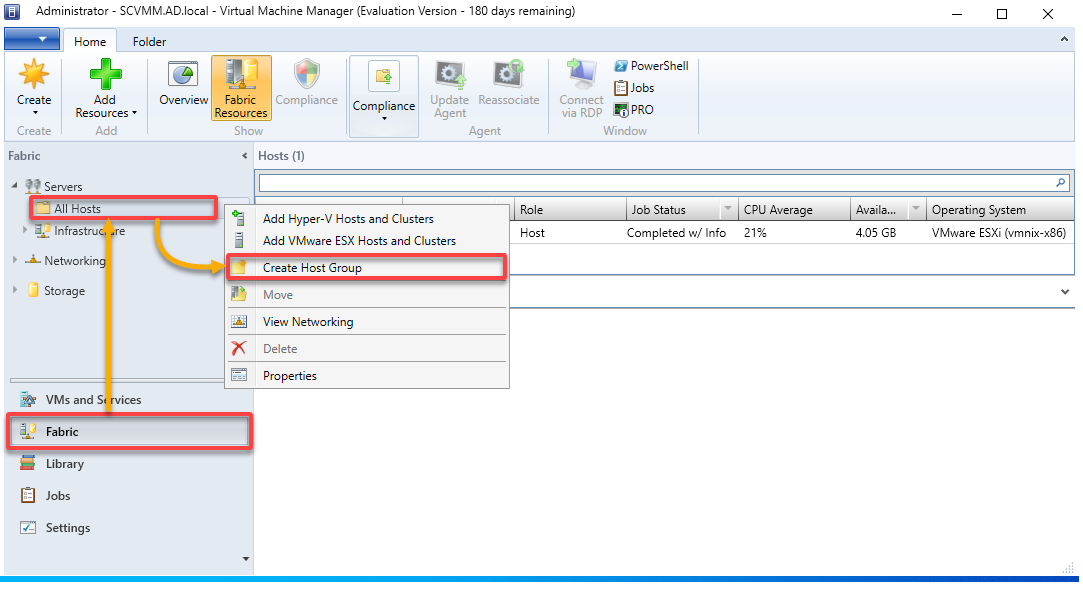
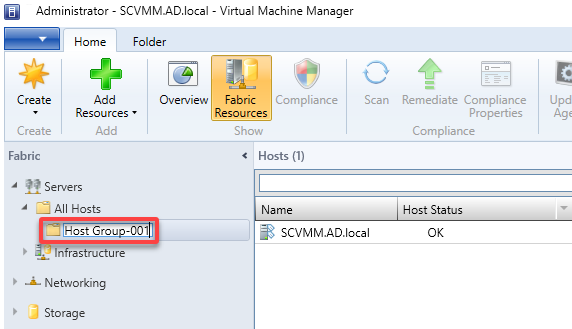
2. Next, provide a descriptive host group name (i.e., Host Group-001).
3. Right click on your newly-created host group, and select Properties to access its properties in a new window.
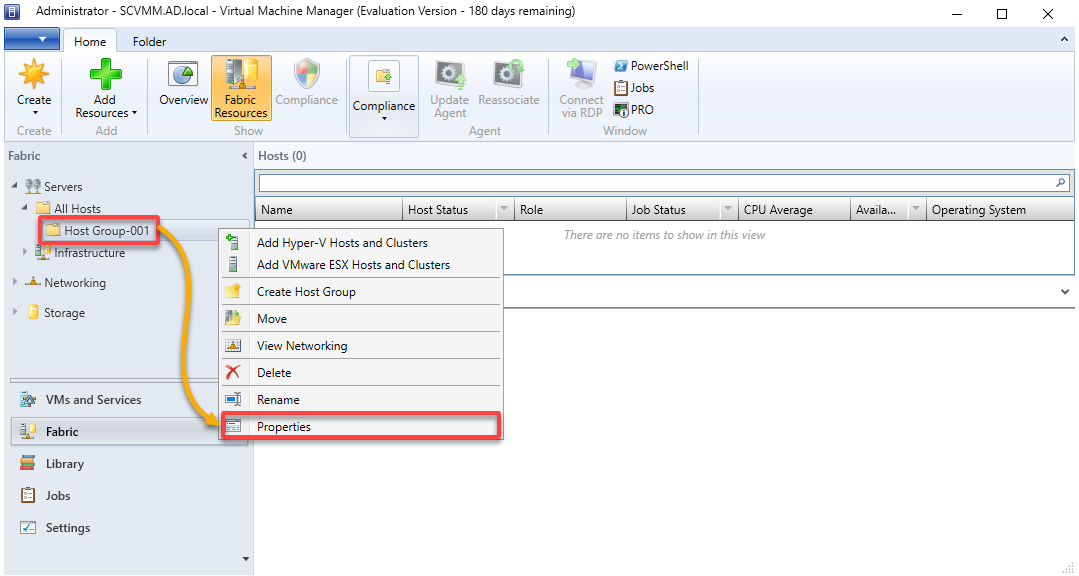
4. Now, change the Name, Location, and Description of your host group as you desire, and click OK.
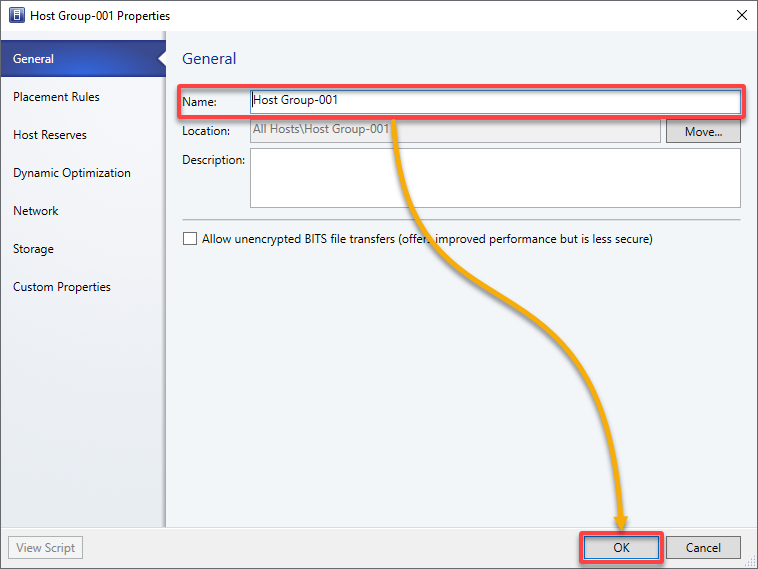
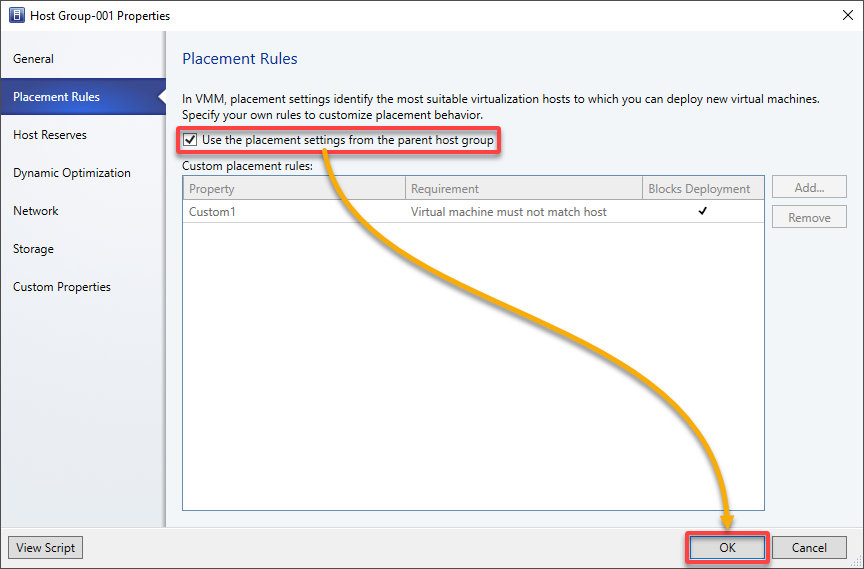
5. Leave the placement rules settings as default, where a host group uses the placement settings from the parent host group, and click OK.
💡 Optionally, configure the placement settings for the Host Group, which define the preferred host ratings, load-balancing settings, and availability options.
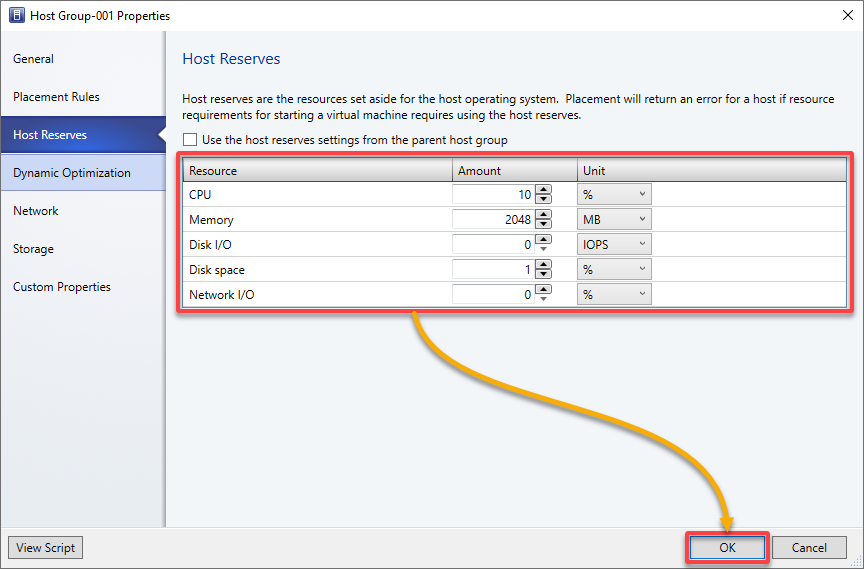
6. Under Host Reserves, configure the host reserve values for the CPU, Memory, Disk I/O, Disk space, and Network I/O, and click OK.
Host reserve settings let you specify the resources VMM sets aside for the host O/S to use.
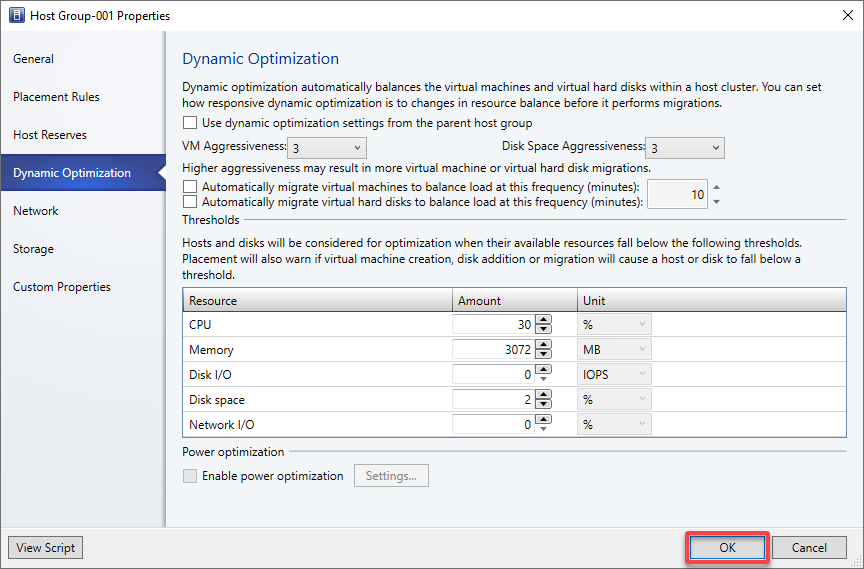
7. Configure dynamic optimization and power optimization settings, and click OK.
Dynamic optimization balances the VM’s load within a host cluster, while Power optimization enables VMM to evacuate hosts of a balanced cluster and turn them off to save power.
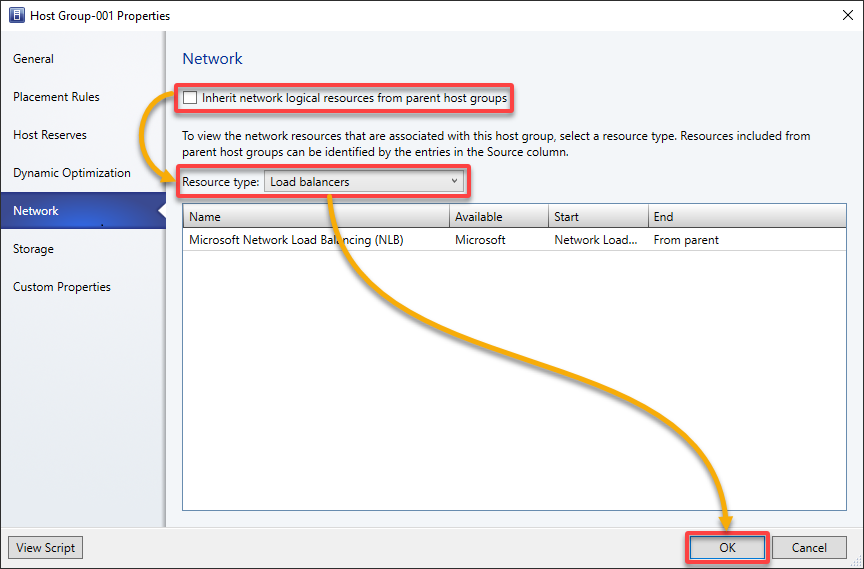
8. Configure the network settings as follows:
- Tick the box to Inherit network local resources from parent host groups.
- Resource type – Select a resource type from the drop-down to view the network resources associated with your selected host group.
Once configured, click OK to proceed.
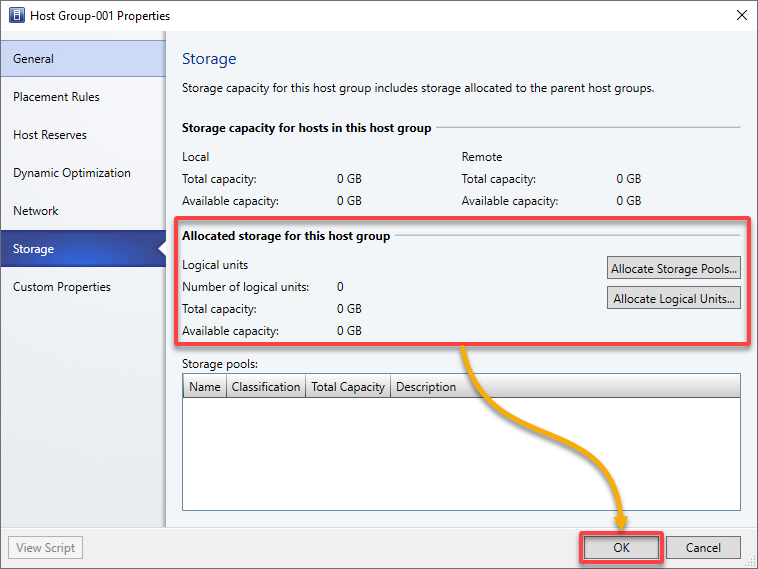
9. View and allocate storage to your host group, and click OK.
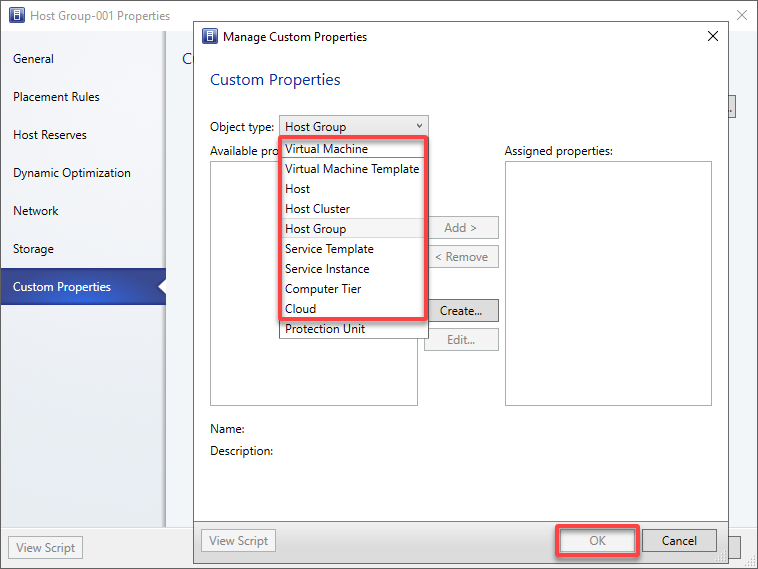
10. Manage custom properties for Virtual Machine, Virtual Machine Template, Host, Host Cluster, Host Group, Service Template, Service Instance, Computer Tier, and Cloud, and click OK.
11. Finally, click OK to save the changes.

Assigning a Host to an Existing Host Group
With a host group created in SCVMM, you must assign a host to the host group, so you can quickly manage and apply common settings to multiple hosts simultaneously.
This setup helps streamline your virtualized infrastructure management and simplifies configuring networking, storage, and other host-specific settings across a group of hosts.
To assign a host to your host group:
Right click on the host to assign to your host group and select Move to Host Group to initiate assigning the host.
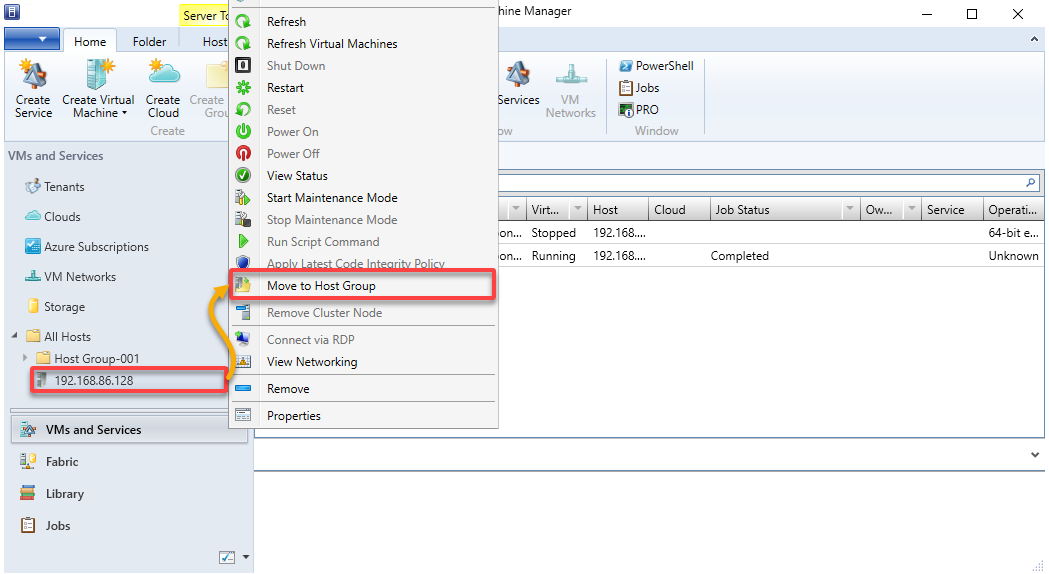
Now, choose the target host group from the Parent host group drop-down list, and click OK to confirm.
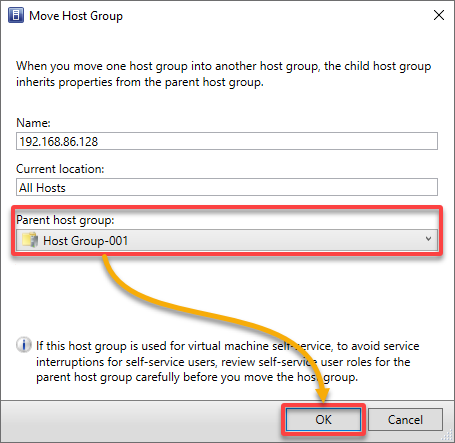
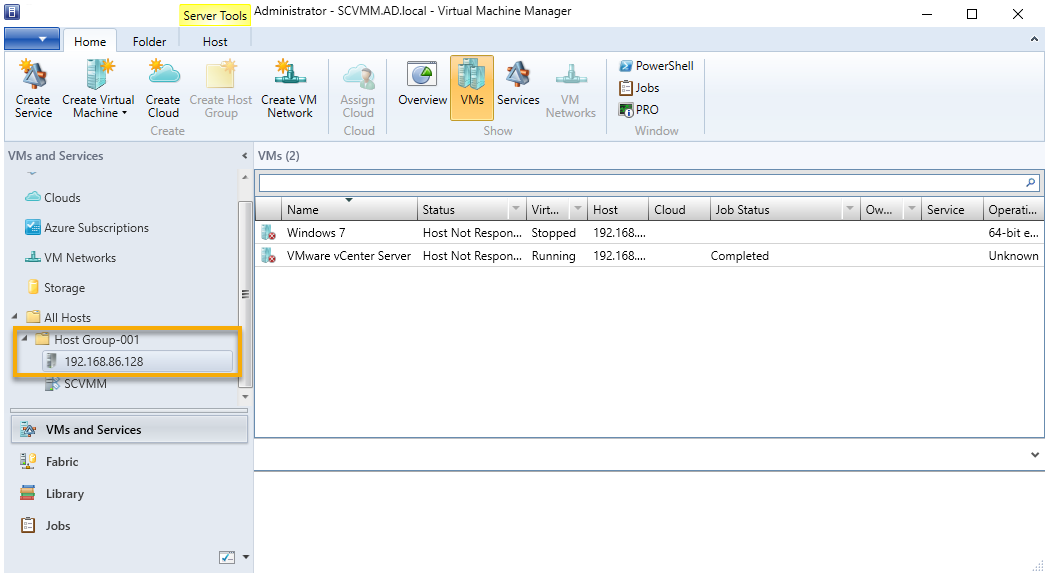
After confirming the move, the host is assigned to the new host group. The host is listed under the corresponding host group, as shown below.
Creating and Deploying VMs in SCVMM
In SCVMM, VMs form the fundamental units of virtualized infrastructure you can create, manage, and operate. With SCVMM’s cross-platform management capabilities, you can create VMs for physical-to-virtual (P2V) and virtual-to-virtual (V2V) migrations.
To create a VM in SCVMM, follow these steps:
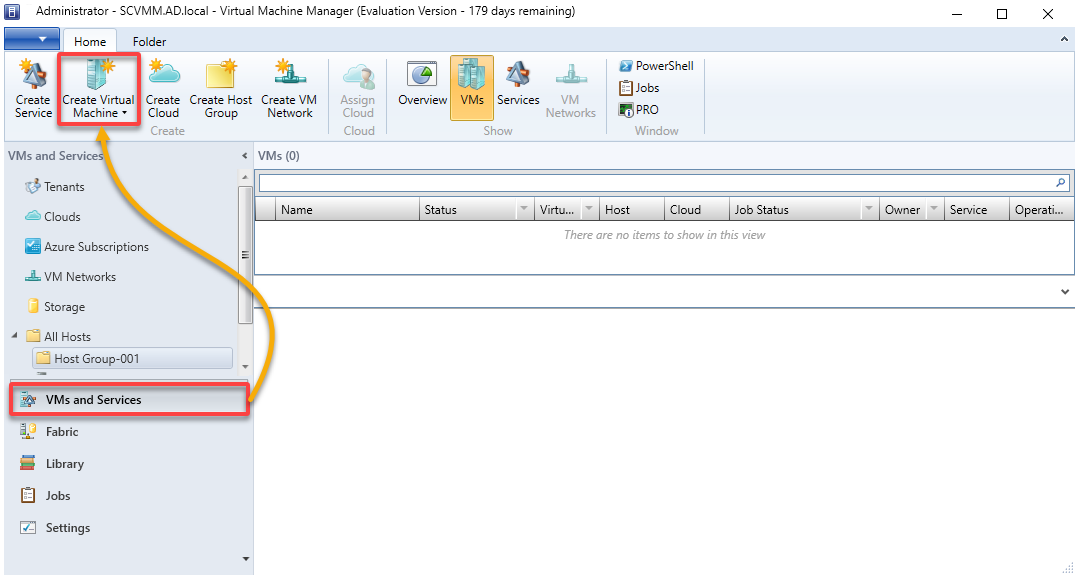
1. Navigate to VMs and Services (left pane), and click Create Virtual Machine in the toolbar to initiate creating a new VM.
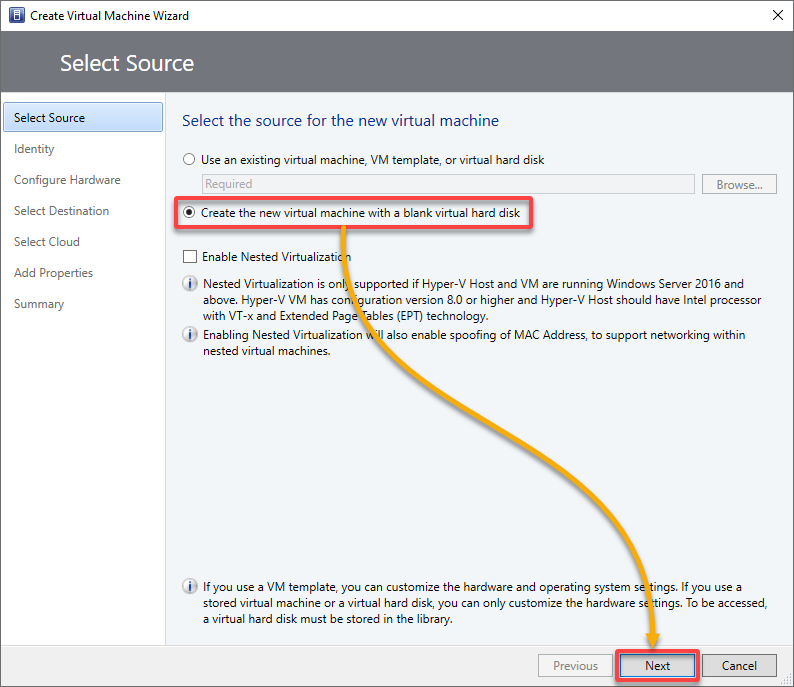
2. In the wizard below, choose the Create the new virtual machine with a blank virtual hard disk option since you are creating your first VM, and click Next.
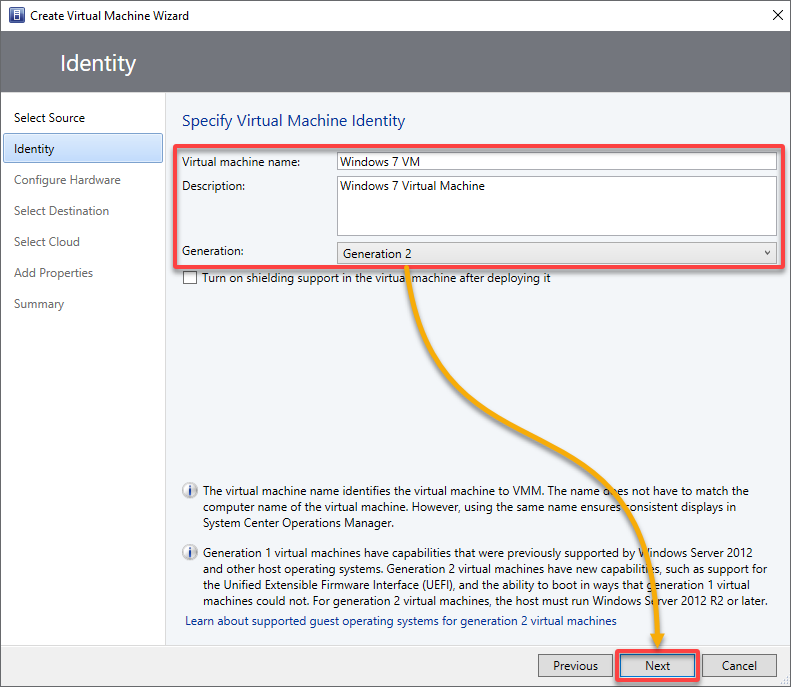
3. Next, configure the VM identity as follows:
- Virtual machine name – Specify a unique name for your VM.
- Description (optional) – Distinguishes your VMs from one another.
- Generation – Choose one below depending on your virtualization environment’s specific needs and the guest OS’s compatibility requirements.
| Generation 1 | VMs are better suited for legacy or less demanding workloads. |
|---|---|
| Generation 2 | VMs offer more modern features and are better equipped to handle newer OSes and security requirements. |
Once configured, click Next to proceed.
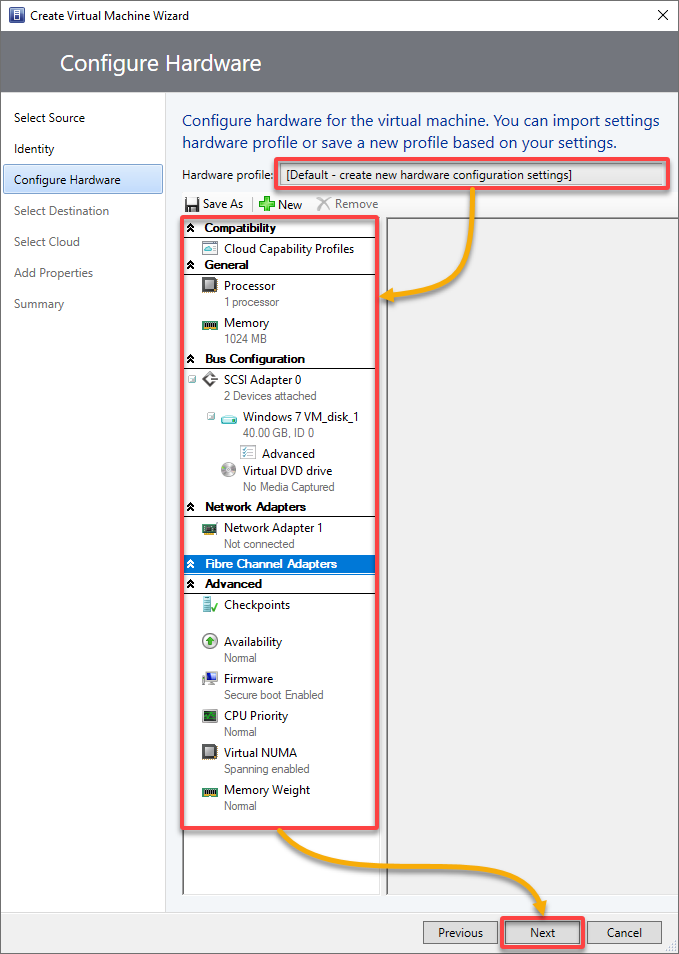
4. Now, select the profile from the Hardware profile list or configure the hardware settings manually, and click Next.
The hardware settings differ depending on your chosen Generation machine (Generation 1 or Generation 2).
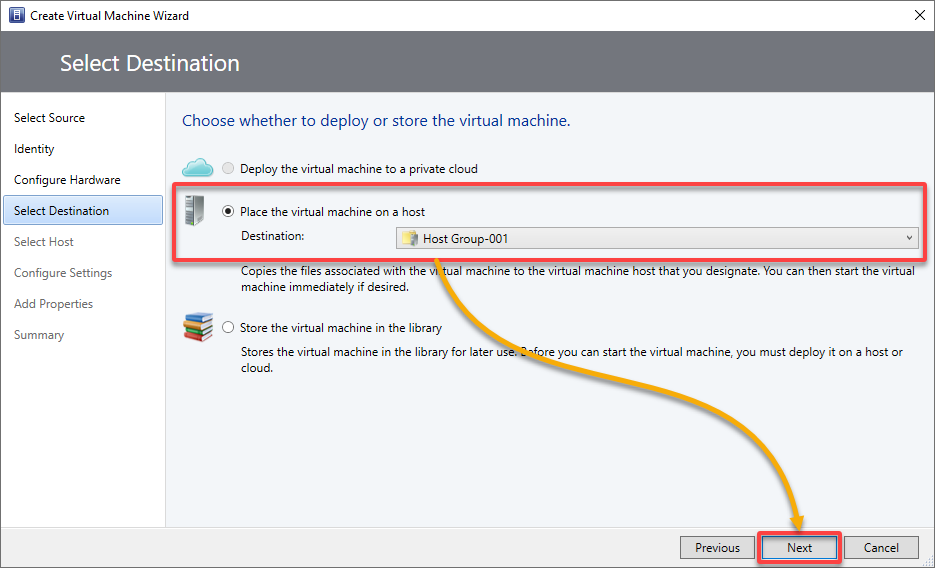
5. In the Select Destination page, specify how the VM should be deployed, and click Next.
This tutorial’s choice is to deploy the VM on a specified destination host.
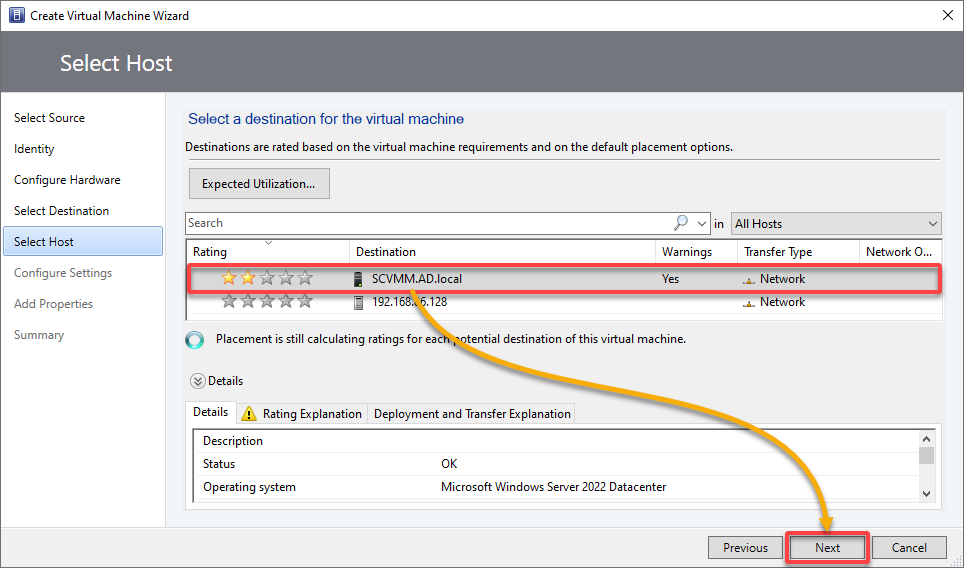
6. View the ratings, choose the host to deploy the VM, and click Next.
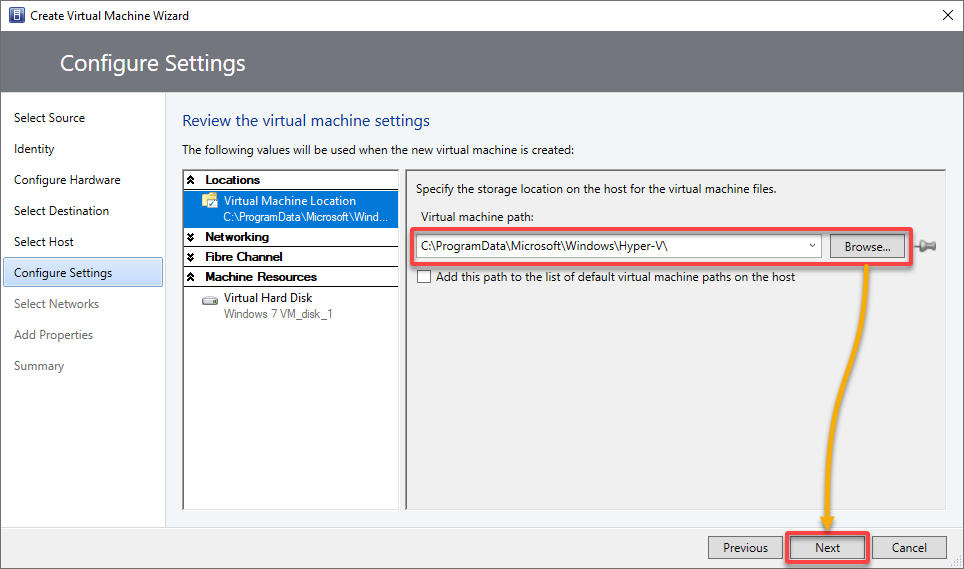
7. Next, review the VM settings, accept the default VM path on the host or specify a different location, and click Next.
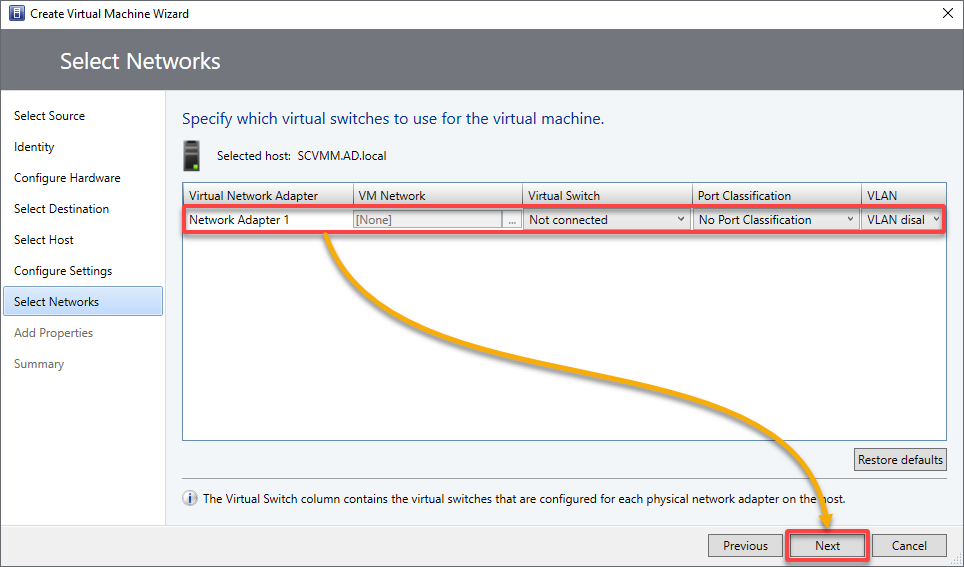
8. In Select Networks, select the network adapter that appears, and click Next.
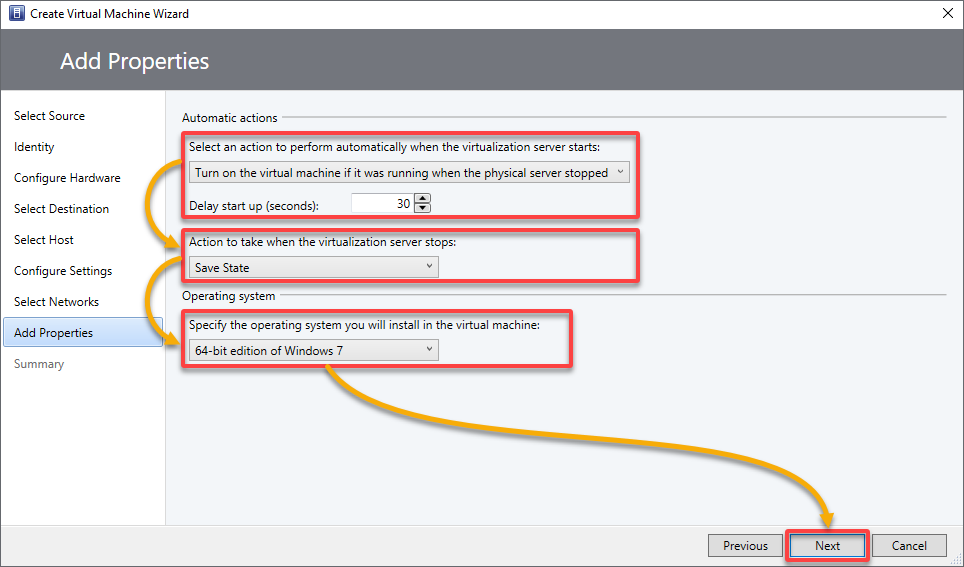
9. Configure the Automatic actions to take when the host starts or stops and the OS to install on your VM, and click Next.
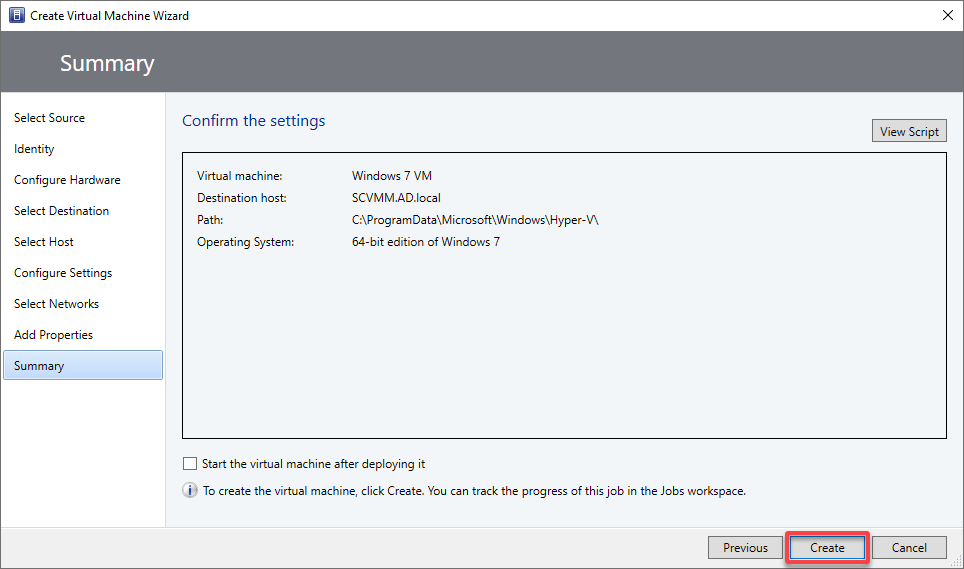
10. Lastly, review your selected settings and click Create to finalize creating your VM.
Below, you can see your newly-created VM in the list within a host group.
Optionally, you can right-click your VM, as shown below, and modify its configuration and properties as necessary.
💡 Note that some changes require you to restart your VM for the changes to take effect. Additionally, always ensure that you have appropriate permissions and resources and understand the impact of your changes to VM properties.
Creating a Logical Network
Your VM is running but must be connected to your physical network infrastructure. Worry not, though! SCVMM provides tools to create, manage, and configure virtual networks efficiently.
You will connect your VM to your physical network infrastructure by creating a logical network, a physical network in your datacenter. Logical networks provide an abstraction layer allowing you to define and manage VM networking for VMs independently of the underlying physical infrastructure.
To create a logical network, follow the below steps:
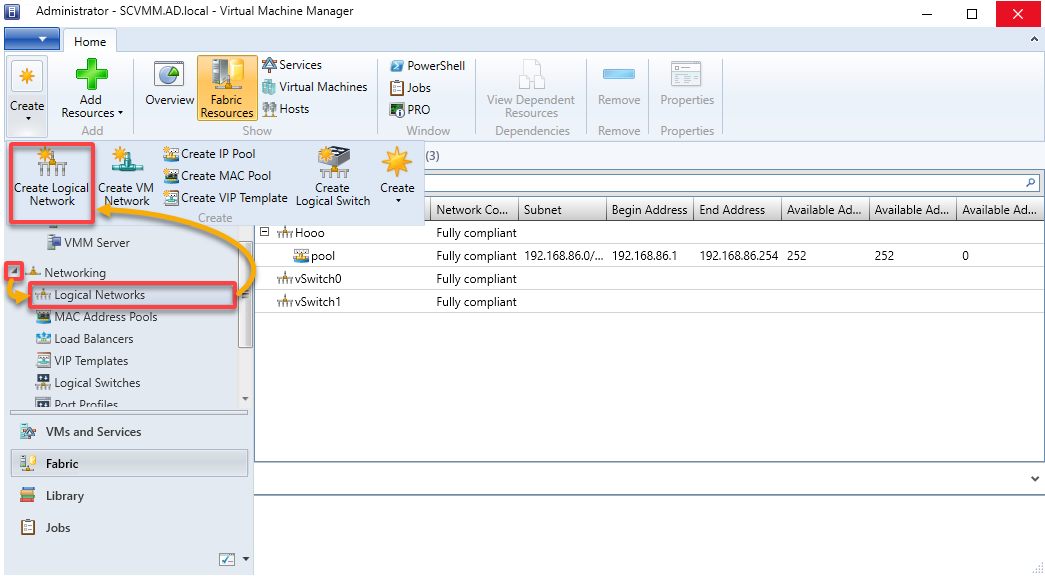
1. In the Fabric workspace, expand Networking, select Logical Networks, and click Create Logical Network to configure your new logical network.
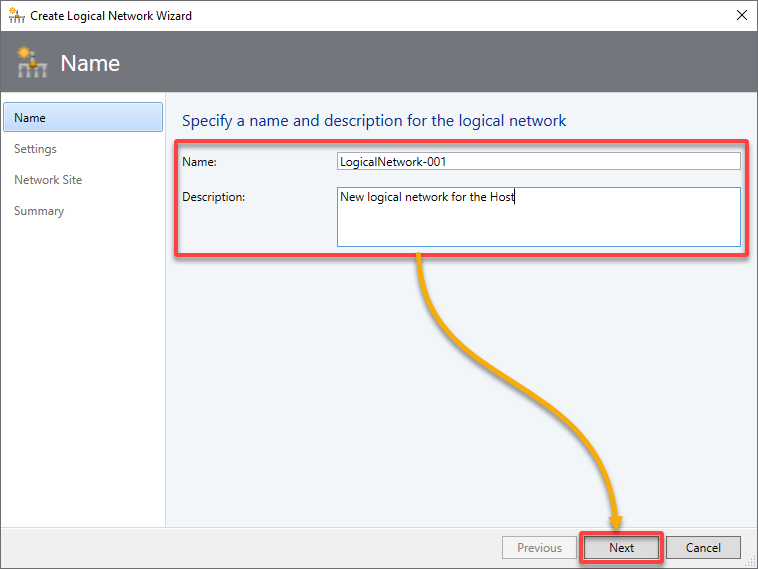
2. Next, provide a descriptive Name and Description for your logical network, and click Next.
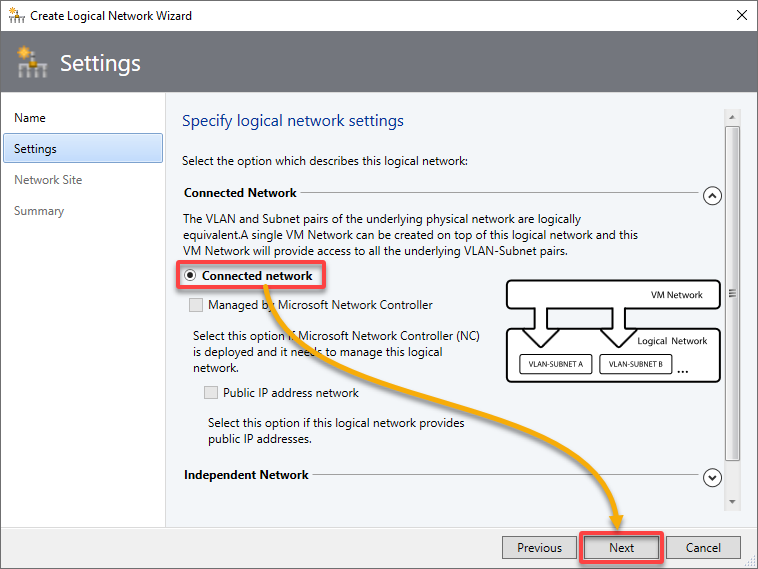
3. Select the Connected network option to link your logical network to your physical network infrastructure, and click Next.
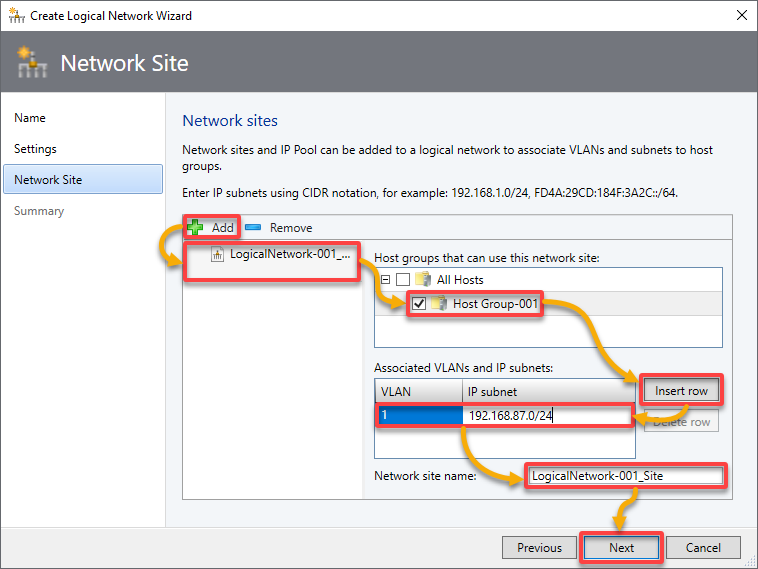
4. On the Network Site page, add a network site to your logical network as follows:
- Click Add, select your logical network (LogicalNetwork-001), and select your host group (Host Group-001) from the list.
- Click Insert row, and enter the VLANs and IP subnets to assign to the logical network definition.
- Name your logical network, and click Next to continue.
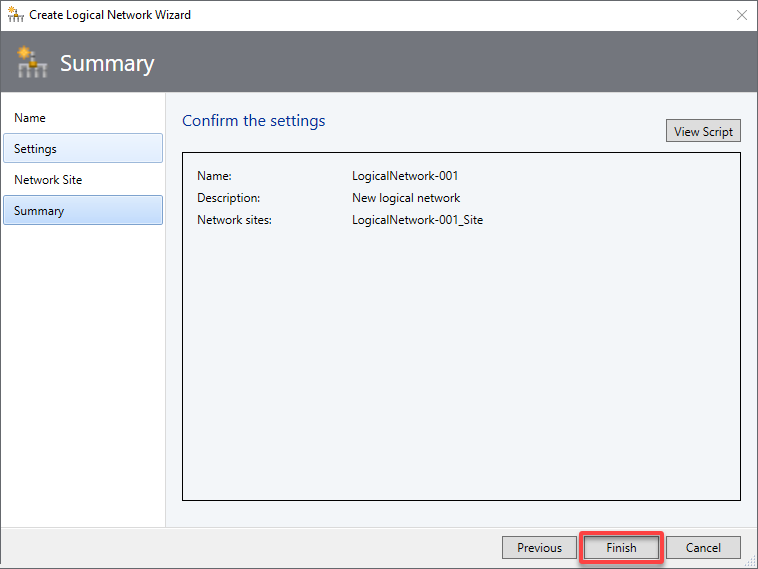
5. Review your selected settings, and click Next to create your logical network.
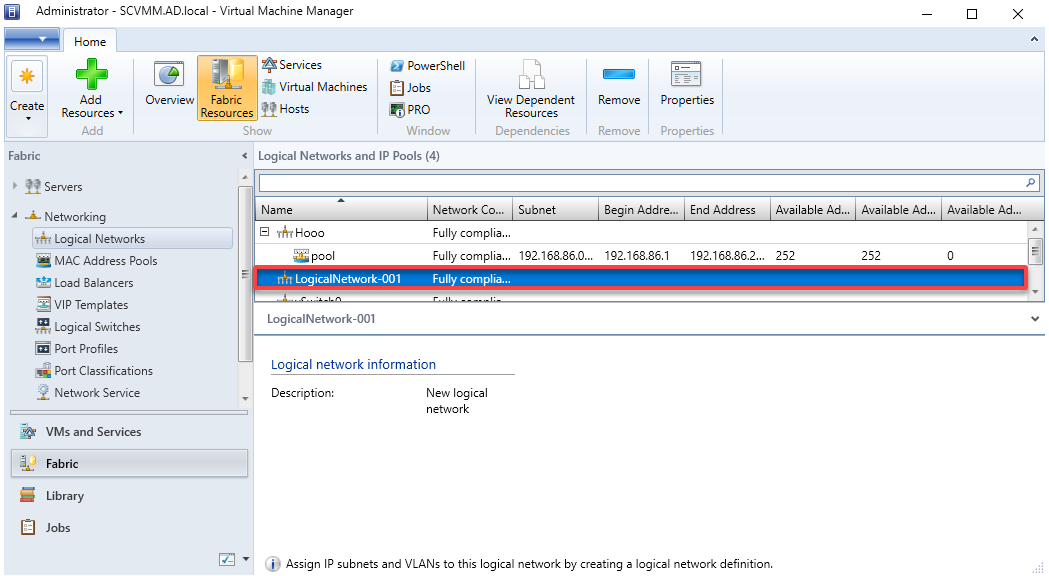
6. Finally, select your newly-created logical network to view its network information and verify the correct settings.
Creating IP Address Pools
Unfortunately, IP address conflict is a thing, so you must ensure IP address assignments for your VMs are in place. How? You must create IP address pools to automatically assign IP addresses to your VMs for quicker network management.
SCVMM allows you to define IP address pools for different logical networks to ensure efficient IP address utilization.
To create IP address pools in SCVMM:
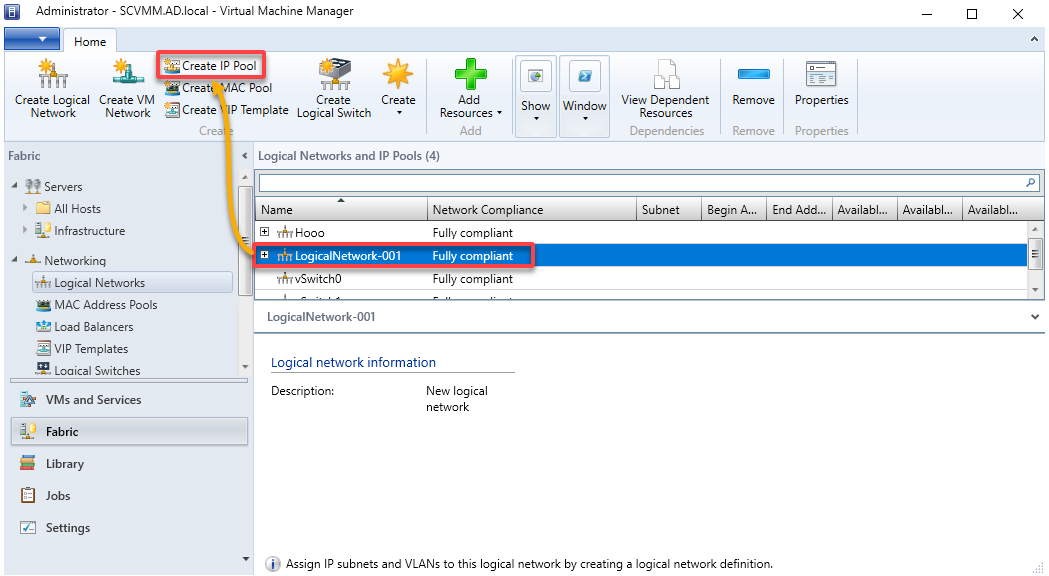
1. In the Logical Networks table, select your logical network (LogicalNetwork-001) where you wish to create the IP pool and click Create IP Pool.
A wizard appears where you will configure your new IP pool (step three).
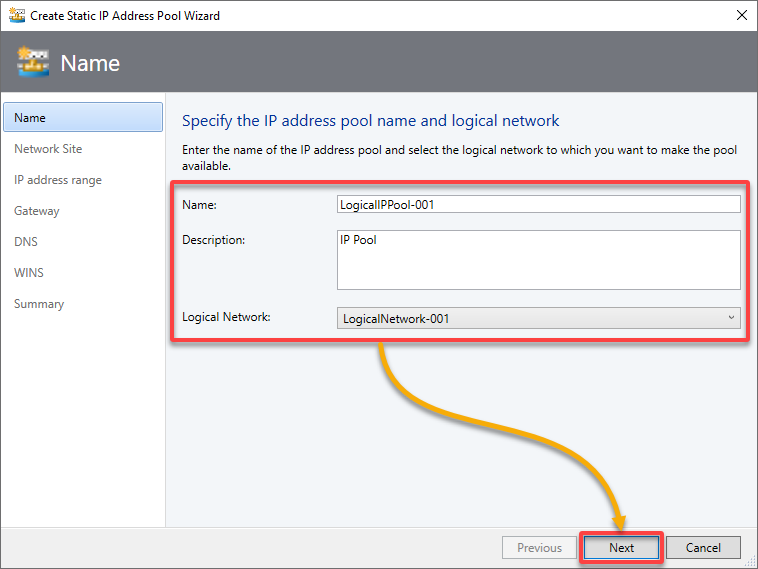
2. In the wizard below, specify a Name and Description (optional) for the new IP address pool, select your Logical Network, and click Next.
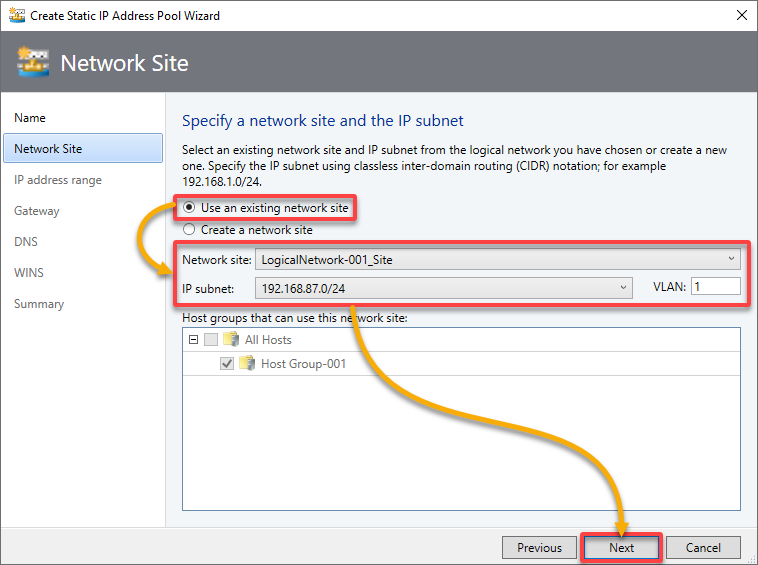
3. Now, in Network Site, choose to Use an existing network site, select the IP subnet (or create a new site) from which to create the pool, and click Next.
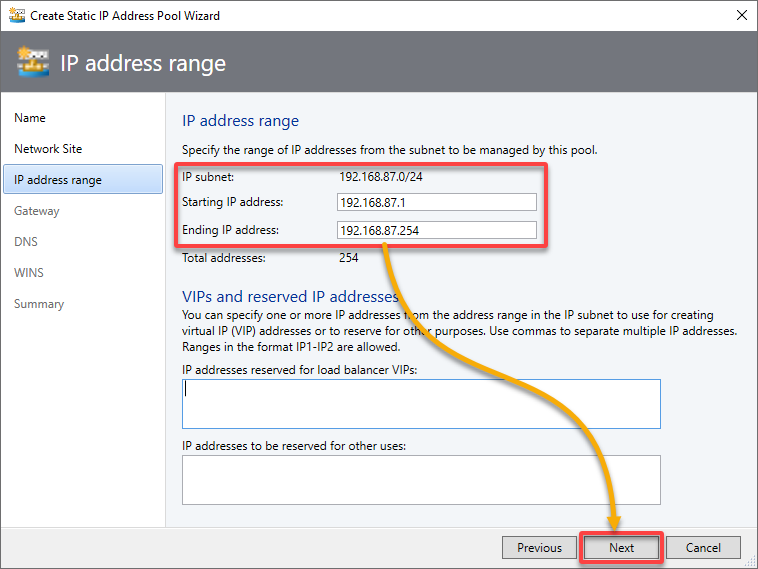
4. For the IP address range, provide the Starting and Ending IP address for the IP pool (which must be contained within the subnet), and click Next.
💡 Optionally, specify the IP address range you want to reserve for VIPs under the VIPs and reserved IP addresses section.
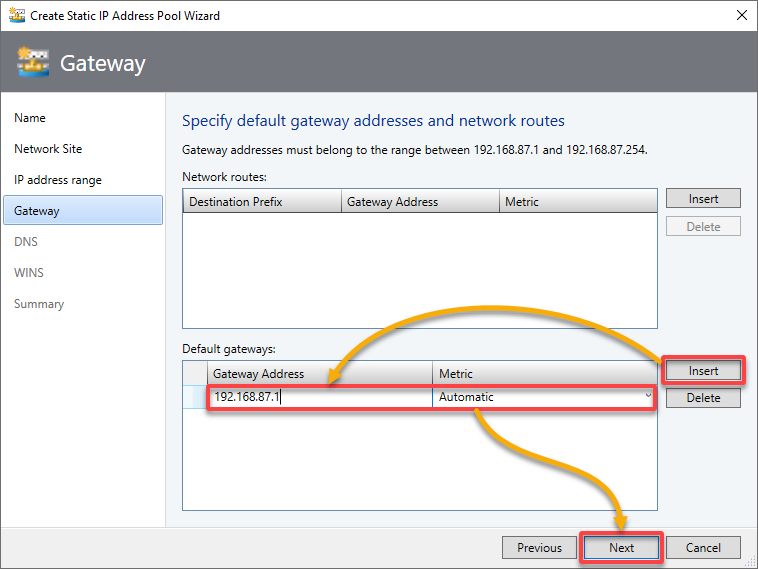
5. On the Gateway page, click Insert, specify one or more default gateways and the metric, and click Next.
The default gateway address must be in the same subnet range as the IP address pool but does need to be part of the pool.
6. For the DNS settings, Insert specific DNS-related information, and click Next.
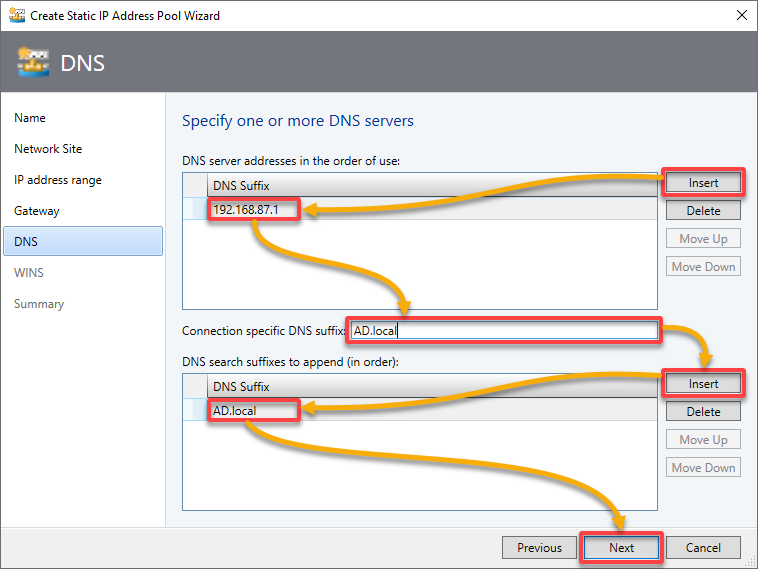
7. Skip specifying a Windows Internet Name Service (WINS) server, and click Next to continue since you will not need one in this tutorial.

8. Review your selected settings, and click Finish

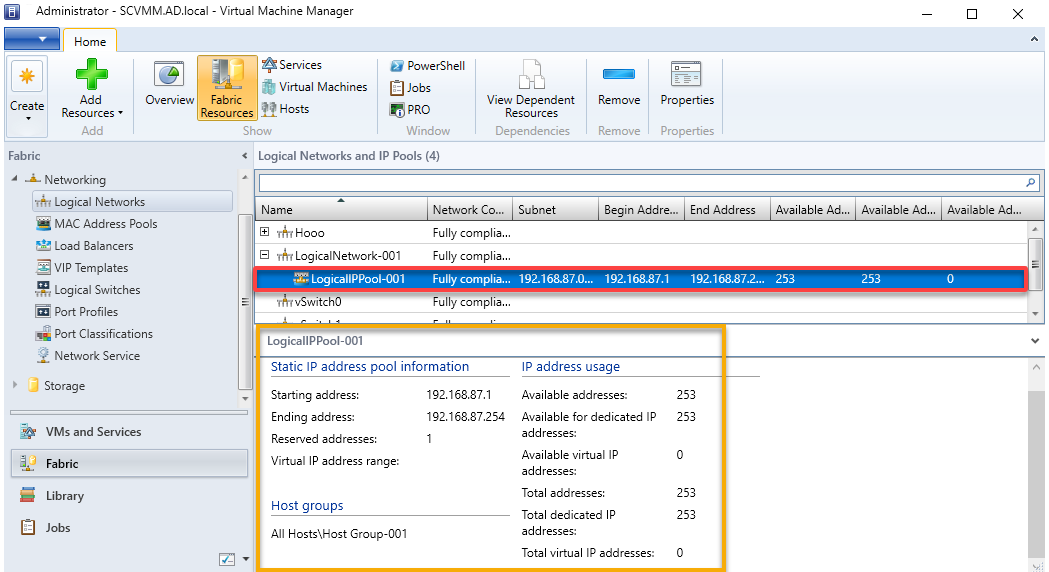
9. Now, expand the subnet where you created your IP address pool, and select the IP Address pool. Doing so lets you view the static IP address pool information in the SCVMM console.
💡 By configuring IP address pools in SCVMM, you reduce the manual effort involved in assigning IP addresses. Moreover, you ensure efficient IP address utilization within your virtualized environment.
Configuring SCVMM for an External Virtual Network
With an IP address pool created, you must enable communication and internet access for your VMs to interact with the outside world. How? By connecting your logical network to an external virtual network.
To make logical networks available to VMs on an external virtual network:
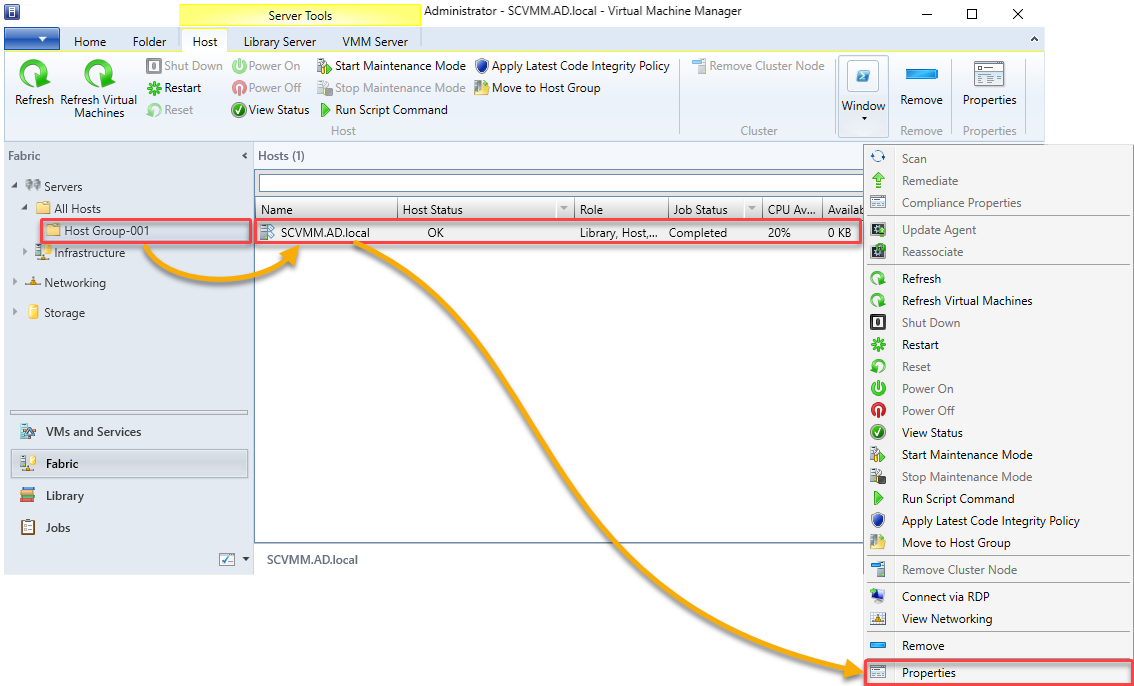
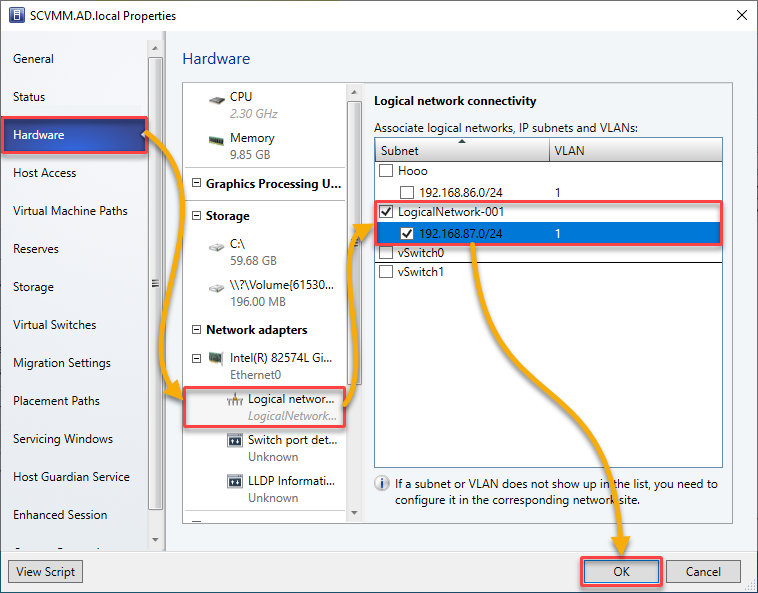
1. Navigate to your host group (Host-Group-001), right-click on your host, and choose Properties.
2. Next, navigate to the Hardware tab (left pane), and configure the following:
- Select the physical network adapter to use for the logical network.
- Tick the box beside the logical network name to associate with your selected adapter.
Once configured, click OK to proceed.
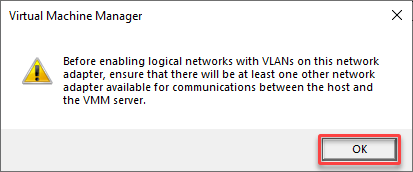
3. Click OK when prompted to enable the logical network.
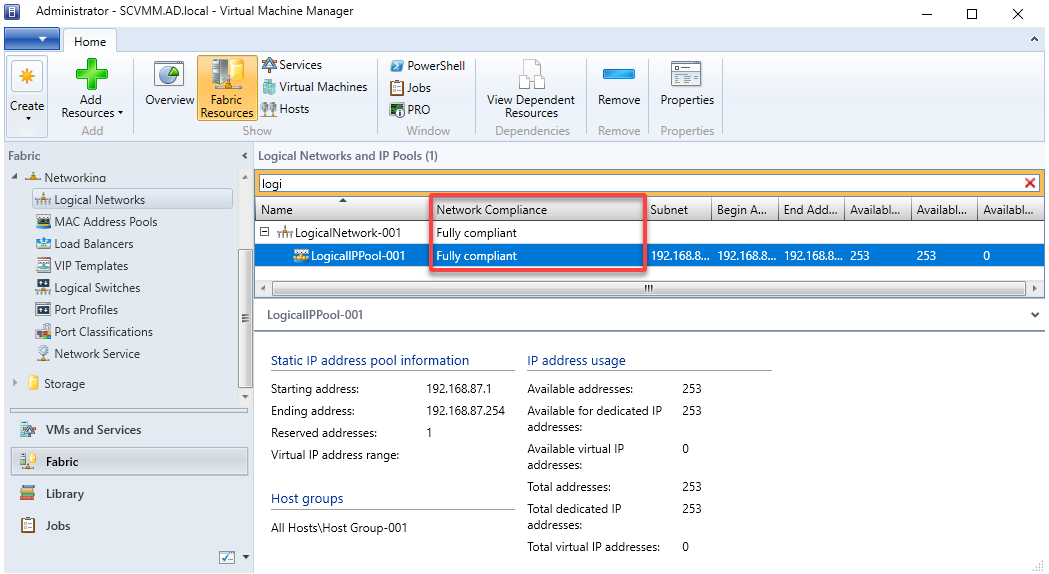
4. Finally, verify that the Network Compliance status of your logical network is Fully compliant, as shown below.
Conclusion
Throughout this tutorial, you have learned to leverage various features the SCVMM provides to administer and manage your virtual infrastructure effectively centrally.
With a solid understanding of SCVMM’s capabilities, why not consider integrating your SCVMM with Azure and Hybrid Cloud? Explore deploying and managing VMs in both on-premises and Azure Cloud environments!


