


Since the demand for remote access has grown globally, have you chosen a remote desktop solution that works best for you? Why not set up AnyDesk? This guide will guide you to Remote Desktop Raspberry Pi with AnyDesk.
AnyDesk provides a secure and intuitive way to remotely access and control Raspberry Pi devices. And in this tutorial, you will learn how to install and establish a remote desktop connection with your Raspberry Pi.
Discover how to access and fully control your Raspberry Pi from anywhere securely!
Prerequisites
Before you proceed with setting up AnyDesk on your Raspberry Pi, make sure you have the following in place:
- A Raspberry Pi device connected to your network – This tutorial uses Raspberry Pi 4.
- A device to remotely access your Raspberry Pi – This tutorial uses a Windows 11 PC.
- A stable and reliable internet connection for both devices.
- SSH access enabled on your Raspberry Pi, or you can connect it to a monitor or TV.
Downloading the AnyDesk Remote Desktop for Raspberry Pi
One of the standout features of AnyDesk is that the development team has specifically optimized the software for the Raspberry Pi. AnyDesk has a dedicated version designed to run natively on the Raspberry Pi platform.
This optimized build of AnyDesk delivers excellent performance, boasts low latency, and offers bandwidth-efficient communication.
To download AnyDesk for your Raspberry Pi, follow these steps:
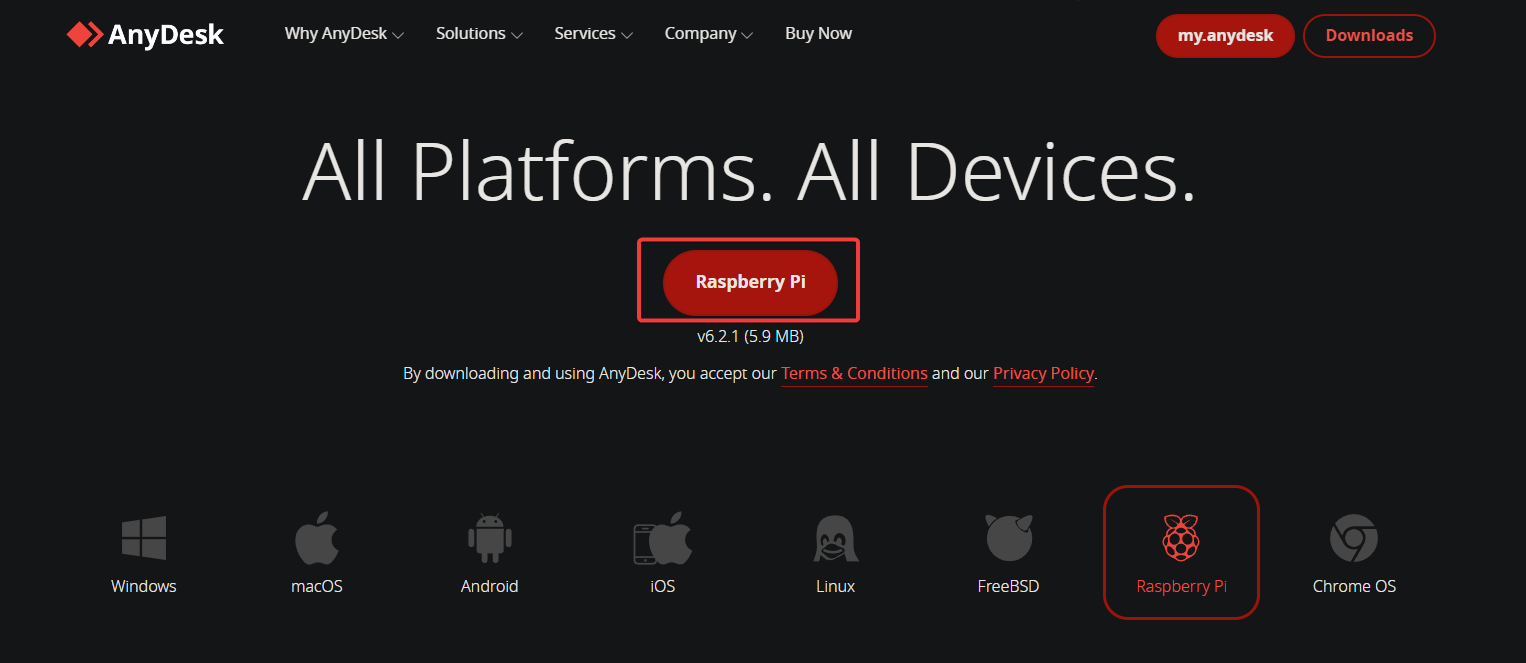
1. Open your favorite web browser, and visit the official AnyDesk download page.
2. Locate the Raspberry Pi button on the download page, and copy the link.
The download link provides you with the latest version of AnyDesk for Raspberry Pi devices. At this time of writing, the latest version is v6.2.1.
3. Next, SSH into your Raspberry Pi using a terminal window or connect it to a monitor and keyboard.
4. Now, run the wget command below to download the AnyDesk DEB package (anydesk_6.2.1-1_armhf.deb) to your current directory.
Ensure you replace the download link in the command with the one you copied from step two.
wget https://download.anydesk.com/rpi/anydesk_6.2.1-1_armhf.deb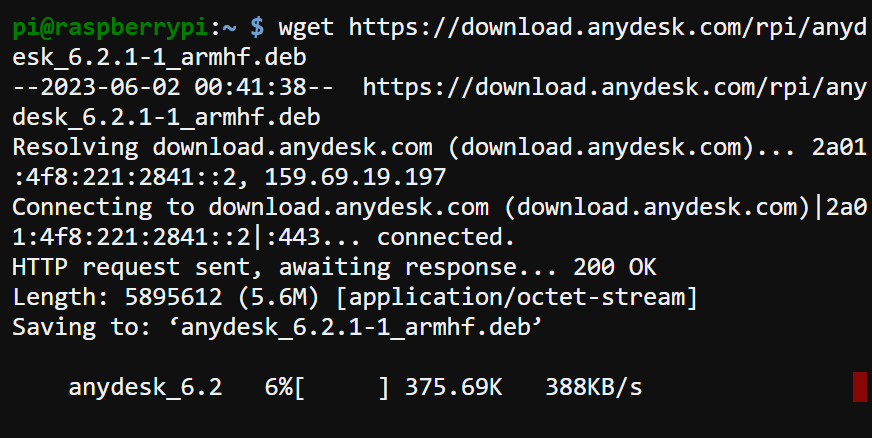
5. Lastly, run the ls command below to verify the downloaded DEB package (anydesk_6.2.1-1_armhf.deb).
ls -l anydesk_6.2.1-1_armhf.debIf the DEB package exists, you will see its details, as shown below, confirming the successful download.

Installing the AnyDesk Remote Desktop via DEB Package
Now that you have the DEB package downloaded, you are ready to install AnyDesk remote desktop for Raspberry Pi. Since you are working on a DEB package, you must ensure all dependencies are satisfied before installing the package.
To install AnyDesk via its DEB package:
1. Run the below apt update command to update your system packages. This command ensures that all your packages are up-to-date and there is no conflict when installing AnyDesk.
sudo apt update -y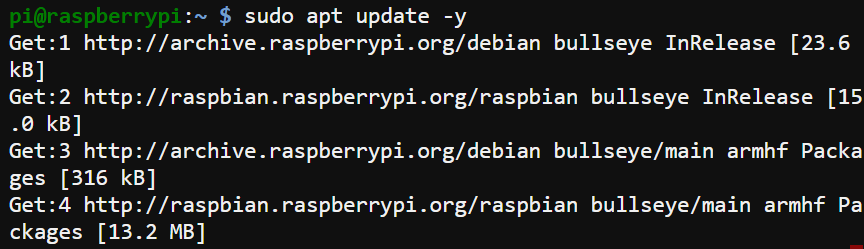
2. Next, execute the following apt install command to install the necessary dependencies for AnyDesk. These dependencies are essential for the following:
- Handling ZIP archives
- Providing an interface between the graphics hardware and the OS.
- Enabling applications to render graphics seamlessly
sudo apt install libminizip1 libegl1-mesa -y
3. After installing dependencies, run the dpkg command below to install AnyDesk via the DEB package you downloaded (anydesk_6.2.1-1_armhf.deb).
Note that the installation process might take some time to complete.
sudo dpkg -i anydesk_6.2.1-1_armhf.deb
If you encounter dependency issues, run the following apt-get command to fix them. Otherwise, skip this command, and jump to step four.
sudo apt-get -f install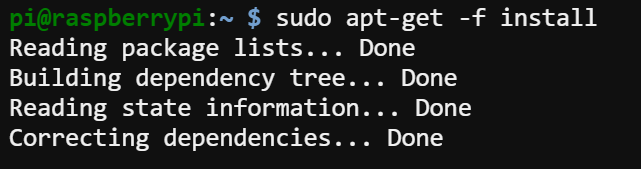
4. Now, run the below anydesk command to check the --version of AnyDesk installed on your system
anydesk --versionThis output confirms you have successfully installed AnyDesk, and you can jump to the “Establishing a Remote Desktop Connection with AnyDesk” section.

Did you get an error saying anydesk: error while loading shared libraries, as shown below instead? If yes, continue reading the following section to fix the error.

Fixing the “Loading Share Libraries” Error
If you received the loading share libraries error, you can fix it. This error commonly occurs when a dependency mismatch or the necessary libraries are not installed.
💡 If your installation went smoothly, you could skip to the “Establishing a Remote Desktop Connection with AnyDesk” section.
AnyDesk relies on the libpolkit-gobject-1.so.0 shared library for certain operations related to authentication and authorization. If this library is missing or inaccessible, AnyDesk cannot function properly and kicks off the error message.
To resolve this error, the suggested steps involve adding the armhf architecture, installing the required libraries, and creating symbolic links:
1. Run the following command, which does not provide output but modifies the dpkg configuration file to include the armhf architecture. Doing so enables the apt package manager to handle ARM packages.
sudo dpkg --add-architecture armhf2. Next, execute the below apt install command to install the required libraries for resolving the shared library error.
Below is a quick breakdown of the libraries to install:
| Library | Function |
|---|---|
libpolkit-gobject-1-0:armhf | This library supports PolicyKit, which is used for authentication and authorization purposes in Linux systems. |
libraspberrypi0:armhf, libraspberrypi-dev:armhf, and libraspberrypi-bin:armhf | These libraries are specific to the Raspberry Pi and provide low-level access to various hardware components, such as the GPU, video codecs, and other peripherals. |
libgles-dev:armhf and libegl-dev:armhf | These libraries support OpenGL ES (GLES) and EGL, which are essential for graphics rendering applications, including AnyDesk. |
sudo apt install libpolkit-gobject-1-0:armhf libraspberrypi0:armhf libraspberrypi-dev:armhf libraspberrypi-bin:armhf libgles-dev:armhf libegl-dev:armhf
3. Once installed, run each of the following commands, which do not produce output to the terminal, but create symbolic links for the required libraries. Creating symbolic links ensures that the shared libraries are accessible to AnyDesk.
sudo ln -s /usr/lib/arm-linux-gnueabihf/libGLESv2.so /usr/lib/libbrcmGLESv2.so
sudo ln -s /usr/lib/arm-linux-gnueabihf/libEGL.so /usr/lib/libbrcmEGL.so
4. Now, reboot your Raspberry Pi, and rerun the below command to check AnyDesk’s version installed.
anydesk --versionYou can see below that version 6.2.1 has been installed successfully without any errors.

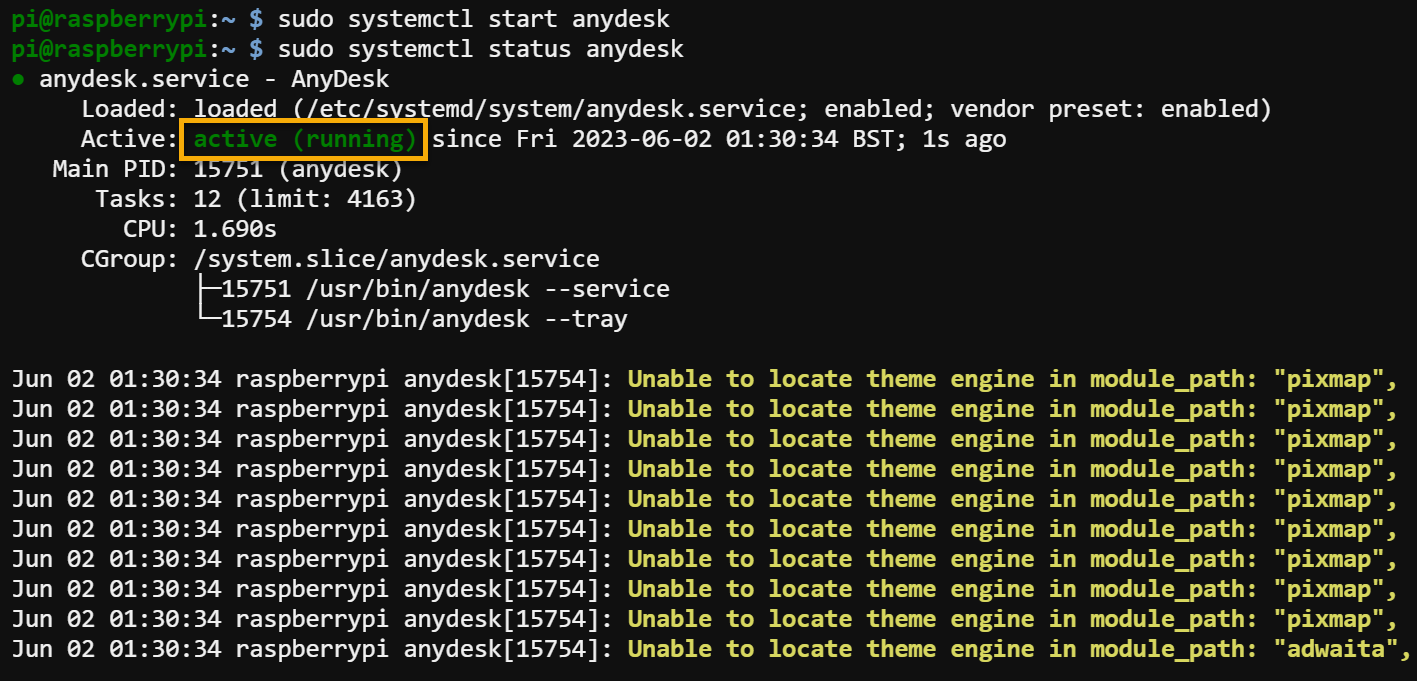
5. Lastly, run the below commands to start and check the status of the AnyDesk service.
sudo systemctl start anydesk.service
sudo systemctl status anydesk.service
If all goes well, you will the AnyDesk service status is active (running), as shown below.
Establishing a Remote Desktop Connection via AnyDesk
At this point, you have successfully installed and configured AnyDesk on your Raspberry Pi. But you will never know if AnyDesk works unless you try establishing a remote connection.
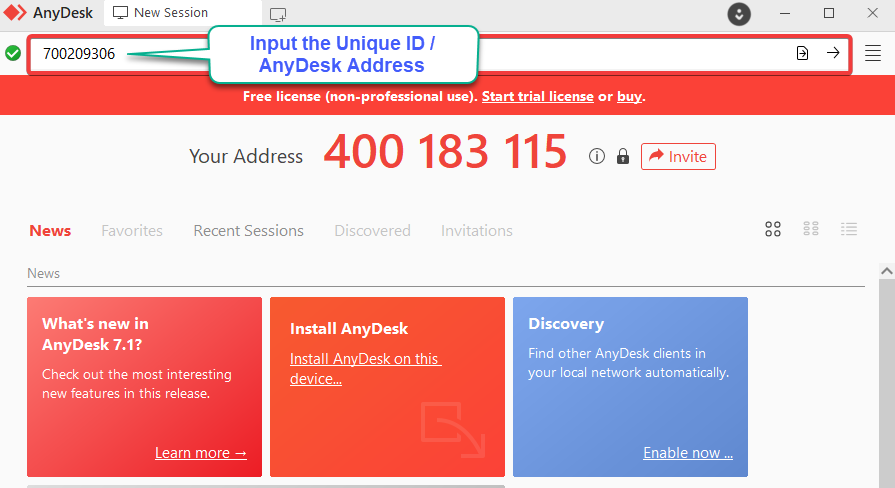
Before connecting remotely via AnyDesk, you will need the Unique ID assigned to your Raspberry Pi, also known as the AnyDesk address or Alias. Each installation of AnyDesk automatically generates a unique nine-digit ID that serves as the Pi’s address on the network.
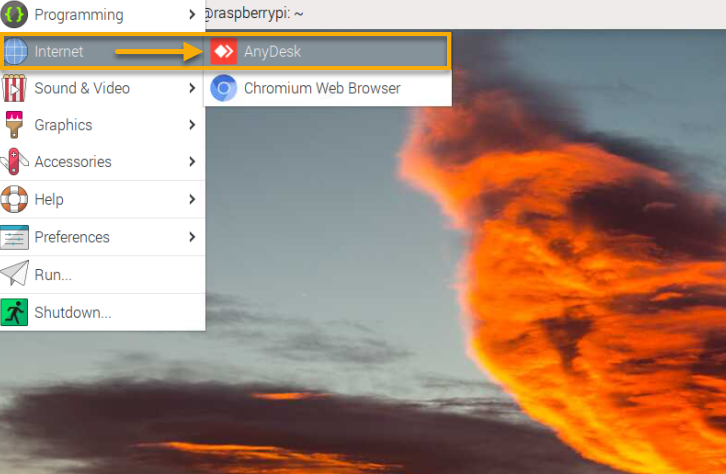
To establish a remote desktop connection via AnyDesk:
1. Open AnyDesk on your Raspberry Pi from the main menu (top-left) → Internet → AnyDesk.
2. Once AnyDesk opens, copy your Pi’s Unique ID or AnyDesk address, as shown below.

3. Download, install, and open the AnyDesk application on your Windows PC.
4. Now, input the Unique ID you copied from your Raspberry Pi into the designated field at the top and hit Enter. Doing so initiates the remote desktop connection to your Raspberry Pi.
5. Finally, click Accept on your Raspberry Pi to authorize the remote desktop connection.
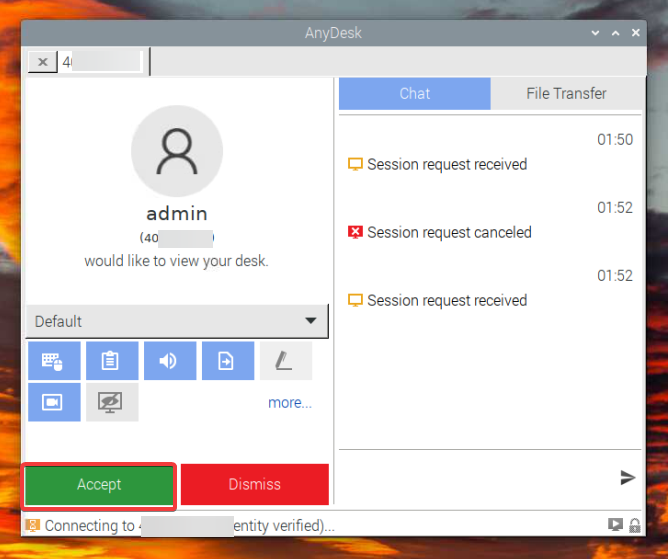
If successful, you can now access and control your Raspberry Pi from your Windows 11 PC device, as shown below.

Conclusion
AnyDesk is a feature-packed remote desktop software that offers secure, high-performance, and reliable connections for accessing your Raspberry Pi remotely. And in this tutorial, you learned how to install and configure AnyDesk for a remote desktop on Raspberry Pi.
You can now successfully establish a secure remote desktop connection to gain access and control your Raspberry Pi from any location.
Why not try the remote file transfer feature or multi-display mode? Discover more about AnyDesk and see how it can help work better or collaborate with others from anywhere!


