

Do you plan to try a Windows OS without replacing an existing one? Why not install Windows for Raspberry Pi? Raspberry Pi, an incredible tool for learning, experimenting, and building, becomes even more potent with this ability to run Windows 11.
Installing Windows for Raspberry Pi can be tricky. But fear not! This tutorial will walk you through the steps, demystify the process, and help you get Windows running on your Raspberry Pi in no time.
Read on to unleash the full potential of your Raspberry Pi with Windows 11!
Prerequisites
This tutorial houses hands-on demonstrations. To follow along, ensure you have the following in place:
- A Raspberry Pi 3 or above – This tutorial uses a Raspberry Pi 4.
- A spare SD card or SSD USB drive with free space larger than 16GB.
Installing Pi-Apps to Set up Windows for Raspberry Pi
There are a few challenges to overcome when running Windows for a Raspberry Pi. Windows 11, for example, is not officially supported on the Raspberry Pi platform. Unlike Linux distributions, Windows 11 is not natively compatible with Raspberry Pi’s ARM architecture.
No worries, though! Third-party tools like Windows on Raspberry (WoR) let you create a custom image of Windows 11 that works on your Raspberry Pi’s hardware. But first, you must install the Pi-Apps software package, a collection of Raspberry Pi tools, including WoR.
Open a terminal on your Raspberry Pi, and run the below apt update command to update the package list.
Alternatively, if you are on a headless Raspberry Pi, SSH into the device.
sudo apt update -y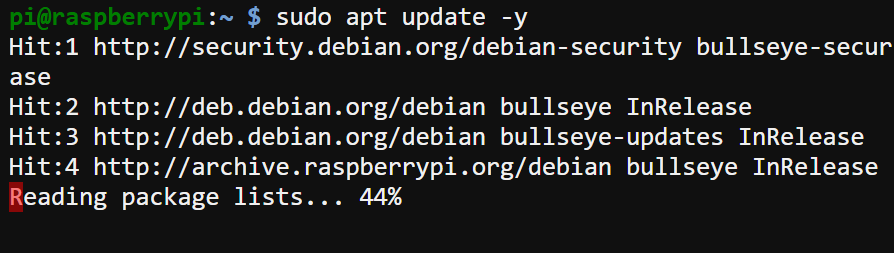
Now, run the following wget command to install Pi-Apps on your Raspberry Pi.
This command downloads the installation script (install) directly from the Botspot GitHub repository and runs it using the bash shell.
sudo wget -qO- <https://raw.githubusercontent.com/Botspot/pi-apps/master/install> | bash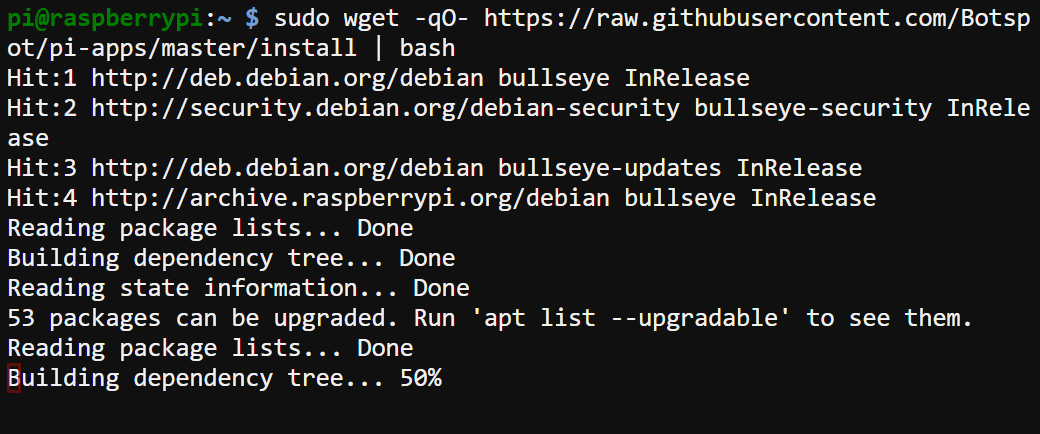
Installing the WoR Flasher Tool Using Pi-Apps
With the Pi-Apps installed, the next step is to install WoR Flasher. This tool lets you flash your SD card or SSD USB drive with the resource files for running Windows 11 to your Raspberry Pi.
To install WoR Flasher via Pi-Apps, follow these steps:
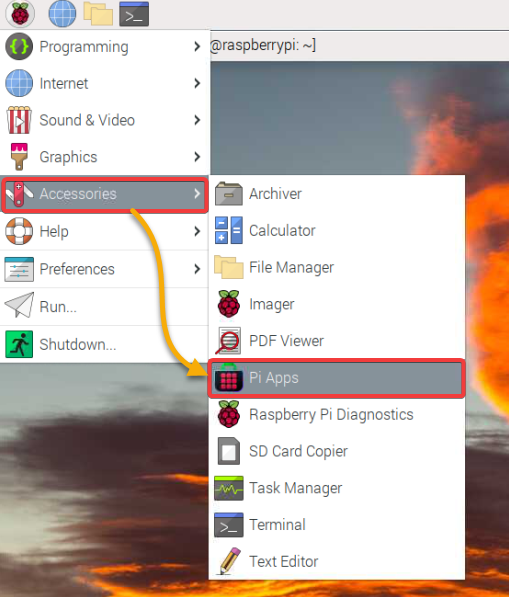
1. Launch Pi-Apps under the main menu → Accessories → Pi Apps.
2. Next, select Windows Flasher from the list of tools, and click Install on the Window Flasher details window to install the WoR Flasher.
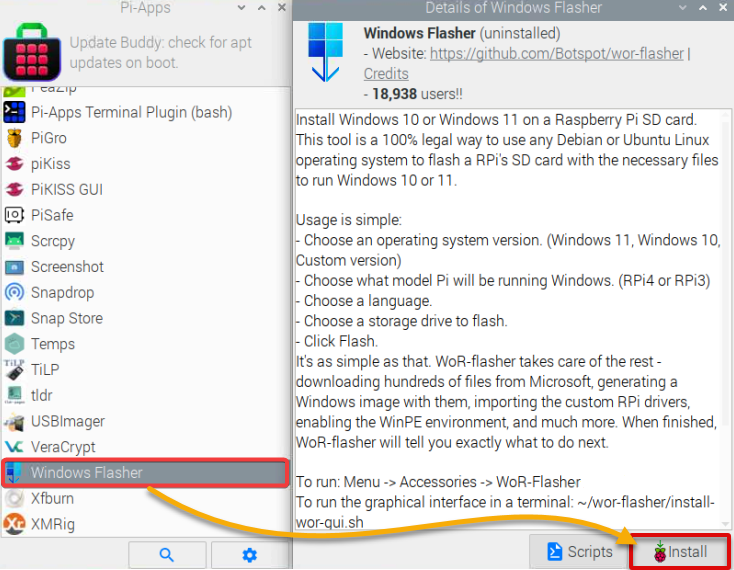
3. Now, wait for the installation to complete, which may take a few minutes, depending on your internet speed.

Creating a Windows 11 Bootable USB Drive for Raspberry Pi
With the WoR Flasher installed, you are almost ready to boot a Windows 11 that works on your Raspberry Pi’s hardware. Installing a Windows 11 system to a Raspberry Pi device was difficult until WoR Flasher came in to use.
In this tutorial, you will create a bootable USB drive for Windows 11 via the WoR Flasher. This tool 100% legally downloads all proprietary Windows components straight from Microsoft’s update servers.
The downloaded Windows OS is unlicensed, just like a regular Windows ISO. This installation can be activated via an activation key or logging in with a pre-licensed Microsoft account.
To create a Windows 11 bootable USB drive:
1. Insert your spare SD card, or SSD USB drive into your Raspberry Pi.
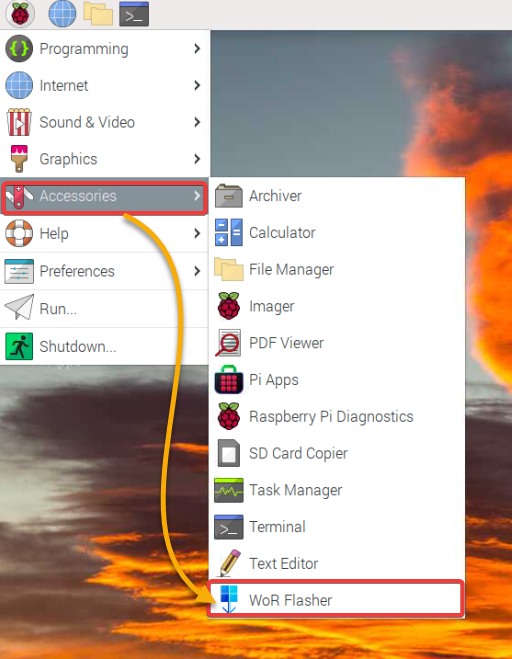
2. Next, launch the WoR Flasher from the main menu, as shown below.
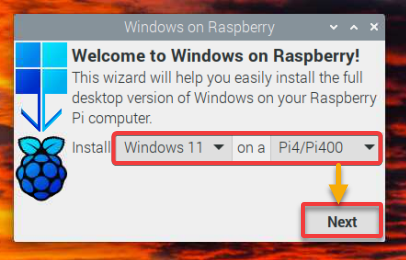
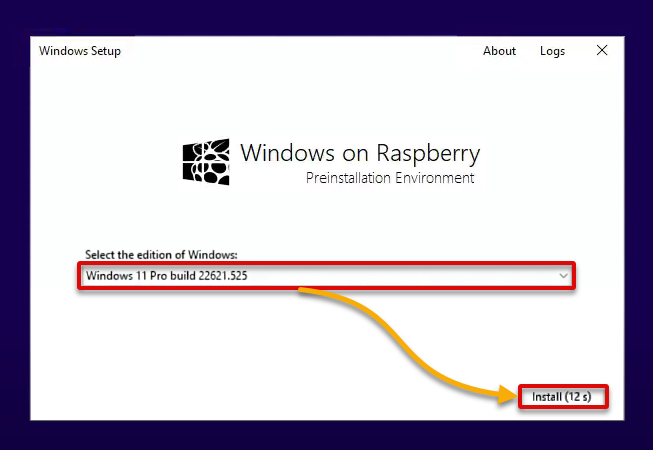
3. Select the version of Windows (Windows 11) you wish to install and the Raspberry Pi model you have from the dropdown fields, and click Next to continue.
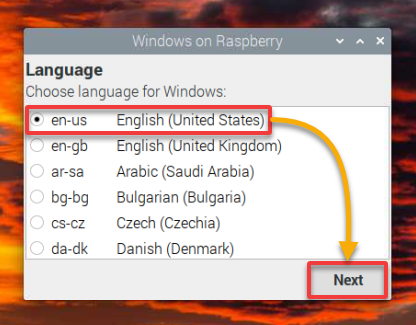
4. Select the language to use for the installation process, and click Next.
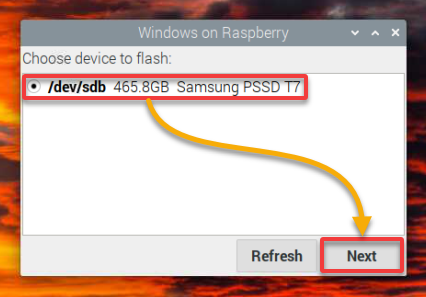
5. Now, select your SD card or SSD USB drive from the list of target devices and click Next.
Ensure you choose the correct device from the list of target devices to avoid accidentally overwriting data on the wrong device.
6. Review the installation summary, keep the settings as is, and click Flash to create the custom image and flash your SD card.
This overview shows the advanced settings and options WoR will use to install Windows 11 on your Raspberry Pi.
But you do not need to change these advanced settings in most cases. WoR is designed to automatically detect and use the best settings for your Raspberry Pi’s hardware and use them during installation.
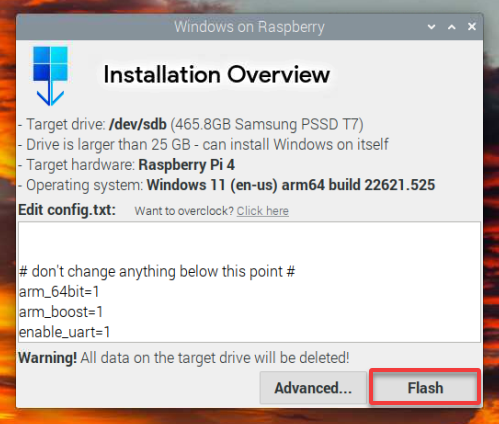
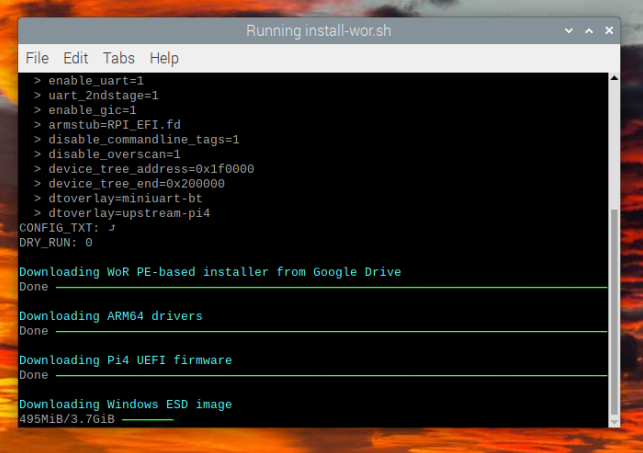
Image creation takes some time, depending on the size of the Windows 11 ISO file and the speed of your SD card or SSD USB drive.
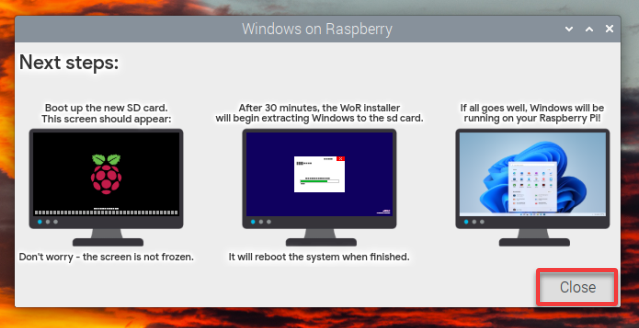
7. Lastly, click Close to exit out of the WoR Flasher’s GUI once the flashing completes.
Booting up and Installing Windows 11 on Raspberry Pi
With a custom image of Windows 11 at your disposal, you are ready to install Windows 11 for your Raspberry Pi. But first, you must replace your Raspberry Pi SD card with your Windows 11 bootable USB drive.
To install Windows 11 on your Raspberry Pi, follow these steps:
1. Shut down your Raspberry Pi, remove your Raspberry Pi SD card, and insert your Windows 11 bootable USB drive into your Raspberry Pi.
Never remove a USB drive or SD card from your Raspberry Pi while it’s still in use or when data is being written. Doing so can cause data corruption and may damage the storage device.
2. Next, power up your Raspberry Pi, and if everything goes correctly, you will see a similar booting screen, as shown below.
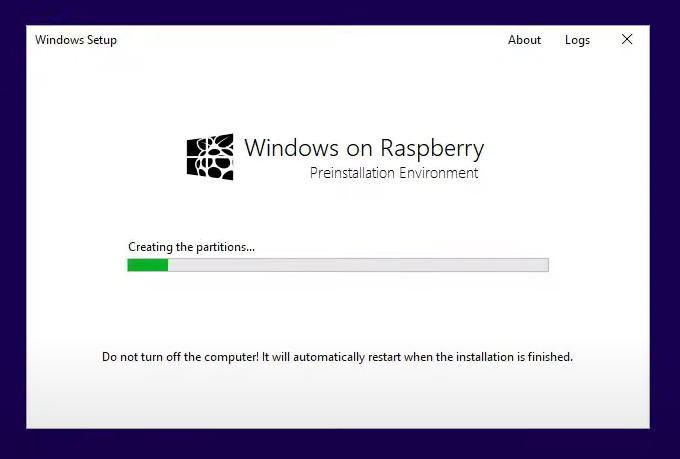
3. Click Install to start the Windows 11 installation process.
4. Now, follow the on-screen prompts to complete the installation process, as you would on any other Windows machine.

During installation, do not turn off your Raspberry Pi or disconnect the power supply, as doing so can lead to data corruption and system instability.
Accessing and Configuring Windows 11 on Raspberry Pi
Now that you have successfully installed Windows 11 on your Raspberry Pi, it is time to access and tweak it for better performance.
To access and configure Windows 11 on your Raspberry Pi:
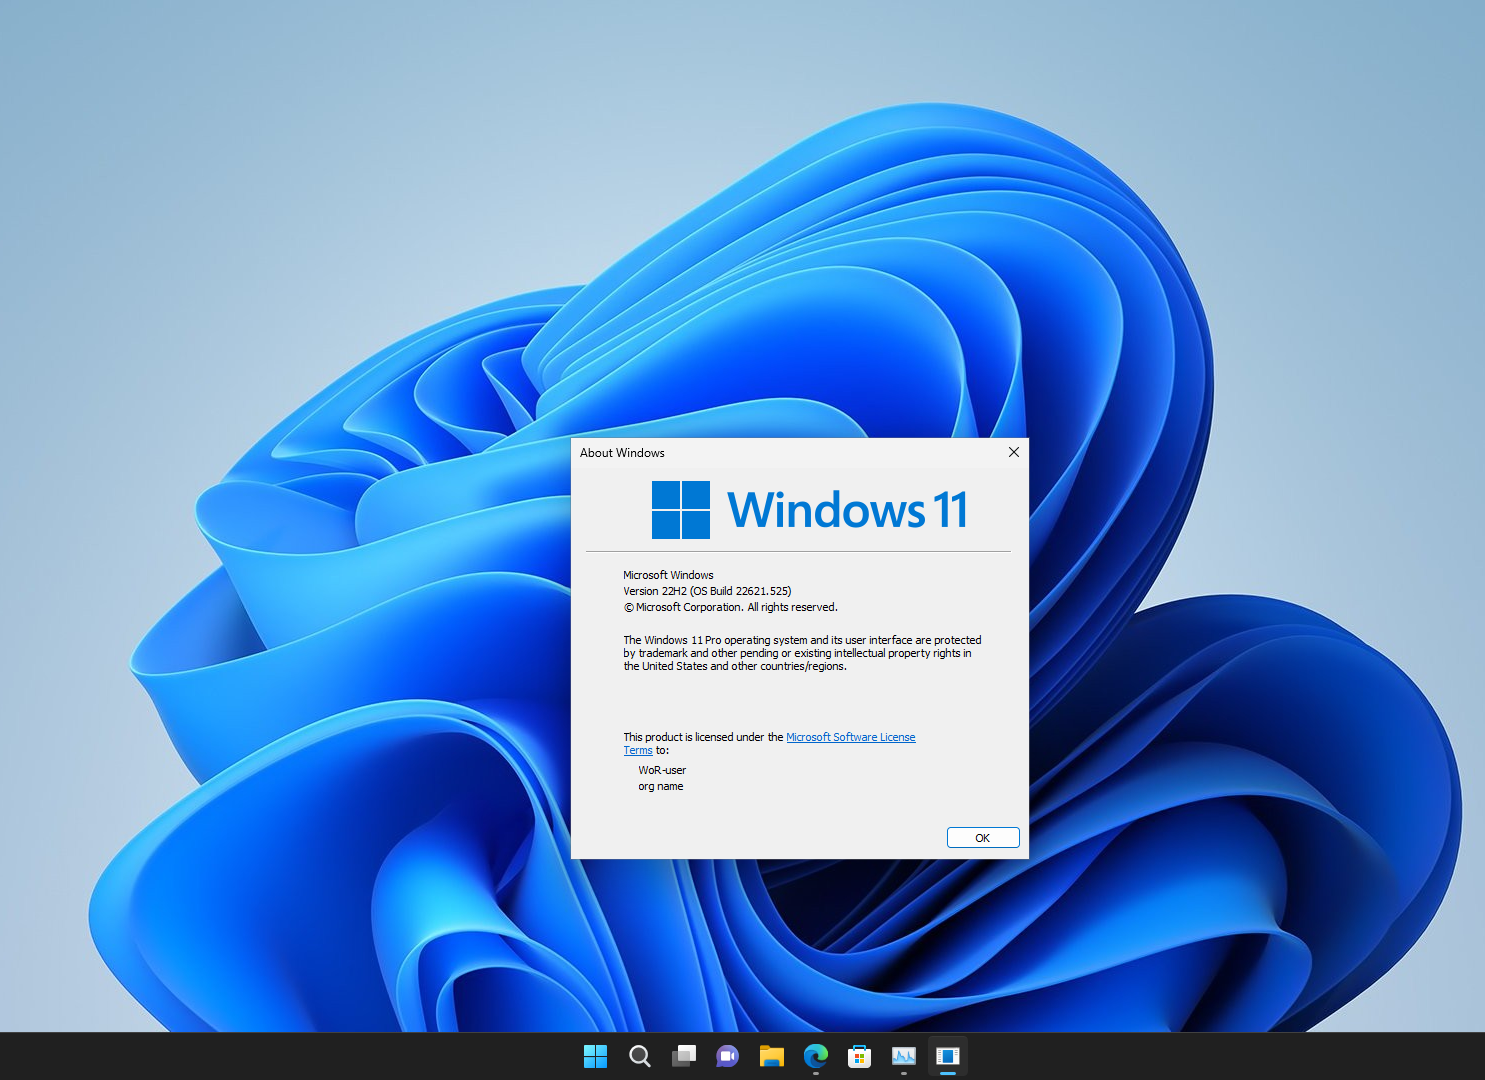
1. Power on your Raspberry Pi and wait for Windows 11 to boot up, and you will see the Windows 11 desktop, as shown below.
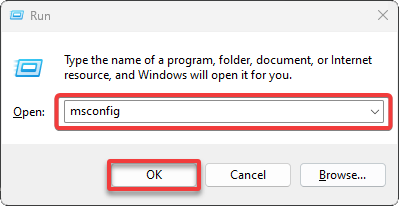
2. Press the Win+R keys to open the Run dialog box, type msconfig in the text field, and click OK to open the System Configuration window.
The System Configuration window is where you can make various tweaks to improve the performance of Windows 11 on your Raspberry Pi.
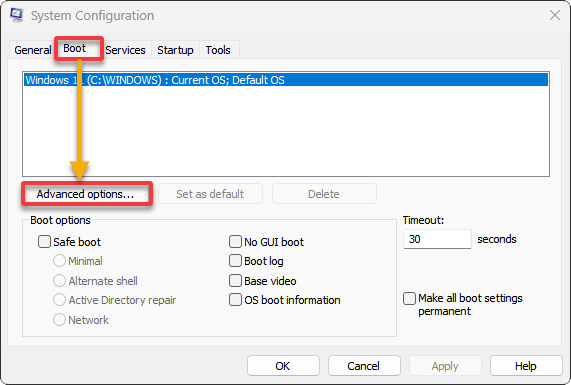
3. On the System Configuration window, click Advanced options under the Boot tab to see all BOOT Advanced Options.
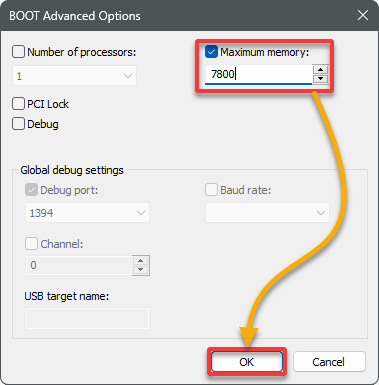
One of the most effective tweaks is increasing the maximum memory that Windows can use when running applications, significantly improving performance.
4. Now, tick the Maximum memory box, set the value slightly lower than your Raspberry Pi’s total memory, and click OK to save the changes.
For example, if your Raspberry Pi has 8GB of RAM (8000 MB), you can set the maximum memory to 7800 MB.
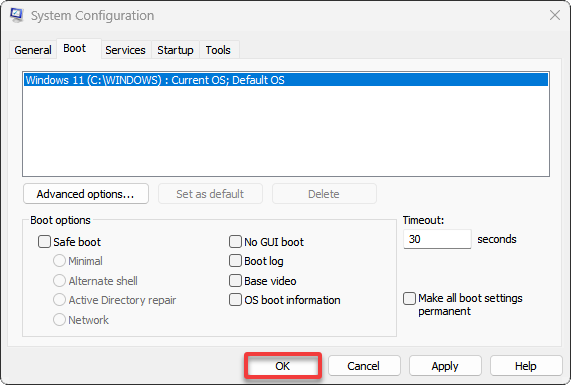
5. Click OK in the System Configuration window to save the changes.
6. Finally, restart your Raspberry Pi for the changes to take effect and see the improvement as you work in different applications.
Conclusion
Congratulations! You have successfully installed Windows 11 for Raspberry Pi using the Pi-Apps and WoR Flasher. You have turned your credit card-sized computer into a powerful, versatile machine that runs the latest version of Windows.
What comes next? With Raspberry Pi’s small size and low power consumption, why not integrate it into various projects, from home automation to robotics? How about learning to connect your Raspberry Pi to Azure IoT Hub? The combination of Windows 11 and Raspberry Pi opens up a world of possibilities, limited only by your imagination!


