


Facing the challenge of maintaining a resilient PostgreSQL database in the ever-changing landscape of digital demands? If the term “Patroni” resonates with your tech aspirations, you’re on the verge of unlocking a solution that elevates PostgreSQL into a fortress of high availability.
Certainly, a challenge awaits, but fear not – you’re embarking on a transformative journey to constructing an unwavering PostgreSQL cluster. Envision a future where database disruptions are mere blips, and your PostgreSQL setup stands as the epitome of reliability.
Get ready to fortify your PostgreSQL environment into an unshakeable bastion!
Prerequisites
Before you jump on implementing high availability for PostgreSQL, ensure that you have the following in place:
- Five (or more) Linux servers – This tutorial uses Debian 12 servers, each with a non-root user with sudo/administrator privileges as follows:
| Hostname | IP Address | Used as |
|---|---|---|
| postgres01 | 192.168.5.20 | PostgreSQL Server |
| postgres02 | 192.168.5.21 | PostgreSQL Server |
| postgres03 | 192.168.5.22 | PostgreSQL Server |
| etcd | 192.168.5.15 | Cluster Data Store |
| haproxy | 192.168.5.16 | Load Balancer |
- A client machine (Linux, Windows, or MacOS) with a PostgreSQL client installed.
Installing PostgreSQL Server and Patroni
With all the prerequisites met, picture this moment as laying the foundation for a robust, fail-safe database environment. The goal is to create a high-availability PostgreSQL deployment via PostgreSQL 15. But first, you must install the required packages (PostgreSQL Server and Patroni) on all your PostgreSQL servers.
Patroni is a Python-based application for creating high-availability PostgreSQL deployment in your data centers, from bare-metal to Kubernetes. Patroni is available on the official PostgreSQL repository and supports PostgreSQL servers 9.5-16.
To install PostgreSQL Server and Patroni, carry out the following:
💡 NOTE: Complete the following operations on PostgreSQL servers. In this case,
postgres01,postgres02, andpostgres03.
1. Open a terminal and run the curl command below, which has no output but adds the GPG key for the PostgreSQL repository to /usr/share/keyrings/pgdg.gpg.
💡 This tutorial uses a root account for command execution to ensure demonstration compatibility. But remember that employing a non-root account with sudo privileges is highly advisable. With a non-root account, you must prefix your commands withsudofor enhanced security and best practices.
curl -fsSL <https://www.postgresql.org/media/keys/ACCC4CF8.asc> | sudo gpg --dearmor -o /usr/share/keyrings/pgdg.gpg2. Next, execute the following command, which does not provide output but adds the PostgreSQL repository to the list of package sources in the /etc/apt/sources.list.d/pgdg.list file.
sh -c 'echo "deb [arch=amd64 signed-by=/usr/share/keyrings/pgdg.gpg] <https://apt.postgresql.org/pub/repos/apt> $(lsb_release -cs)-pgdg main" > /etc/apt/sources.list.d/pgdg.list'3. Once added, run the below apt update command to refresh your package index and retrieve newer package information.
apt update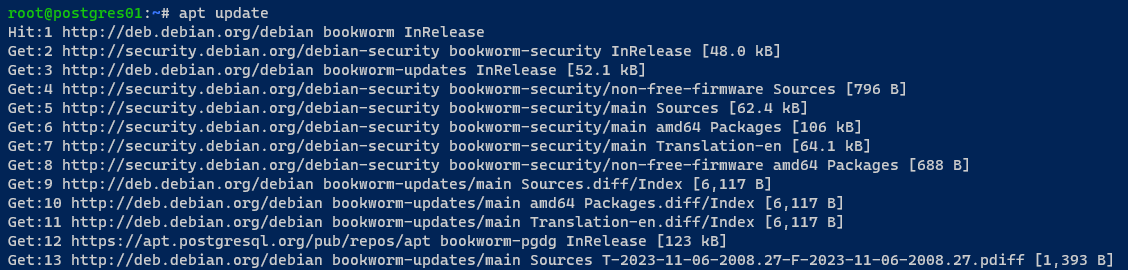
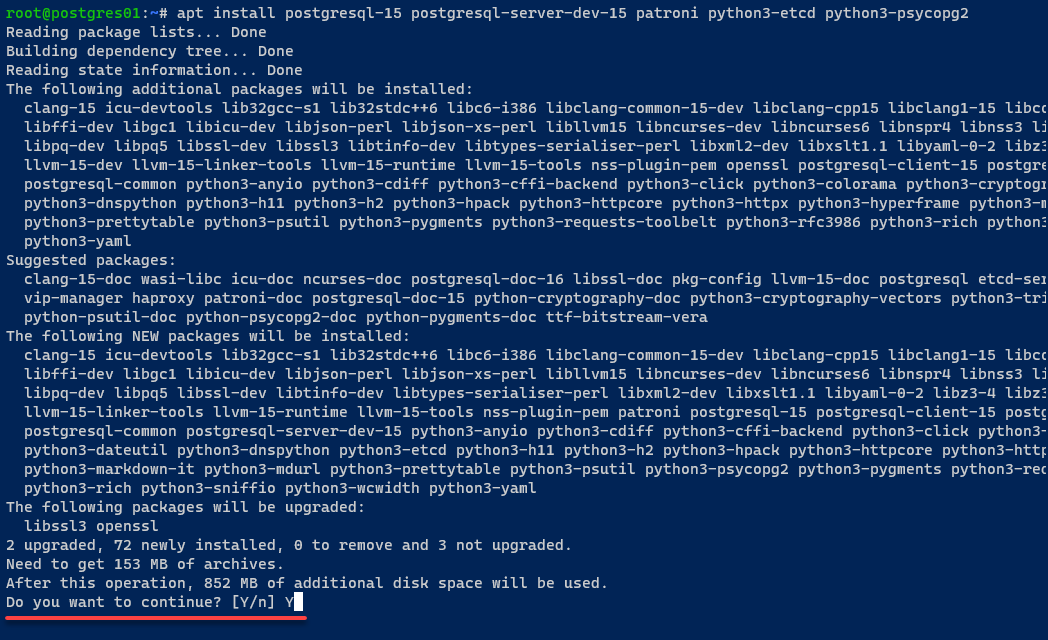
4. Once the updated, execute the following command to install the following packages:
postgresql-15– The PostgreSQL database management system version 15.patroni– An open-source solution for high availability in PostgreSQL, a template for PostgreSQL HA clusters using Python and etcd.python3-etcd– A Python client library for interacting with etcd, a distributed key-value store. This library allows Python applications to communicate with and manage etcd clusters.python3-psycopg2– A PostgreSQL adapter for Python 3, connecting Python applications and PostgreSQL databases.
apt install postgresql-15 postgresql-server-dev-15 patroni python3-etcd python3-psycopg2Input Y to proceed with the installation when prompted.
5. With the packages installed, run each command below, which has no output to the terminal but performs the following:
- Stop the
postgresqlandpatroniservices. On Debian/Ubuntu, thepostgresqlandpatroniservices are automatically started after installation. - Create a
symlinkfor PostgreSQL binary files to the/usr/sbindirectory. Doing so ensurespatronican execute PostgreSQL binary files for creating and managing PostgreSQL.
systemctl stop postgresql patroni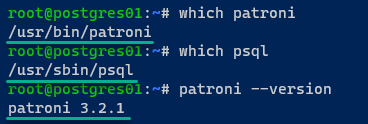
ln -s /usr/lib/postgresql/15/bin/* /usr/sbin/6. Lastly, execute the following commands to verify the binary path for patroni and psql, and installed --version of patroni.
which patroni
which psql
patroni --version
Below are the paths to the patroni (/usr/bin/patroni) and psql (/usr/sbin/psql) binary files; the Patroni version installed is 3.2.1.
Setting up and Configuring the etcd Server
Now that you have PostgreSQL Server and Patroni installed, you need a backbone that solidifies the coordination among your PostgreSQL servers for seamless high availability. You’ll set up and configure etcd, a key-value data store.
This key-value data store is the silent architect behind the scenes, ensuring data related to your PostgreSQL cluster deployment is securely stored and efficiently managed.
💡 NOTE: Be sure to install etcd on a separate server. In this example, etcd is installed on the etcd server.
To install and configure etcd, follow these steps:
1. On your etcd server, execute the command below to update the repository index and get the latest package information.
apt update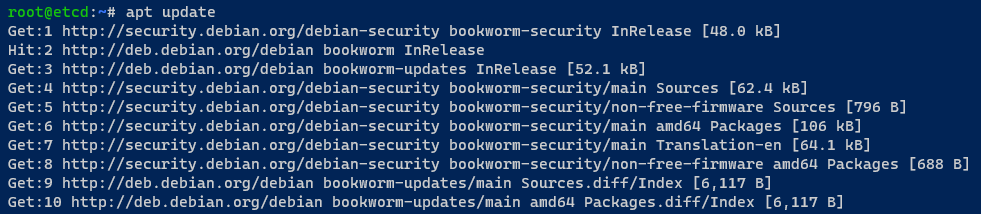
2. Next, run the below command to install the etcd on your server.
apt install etcd-server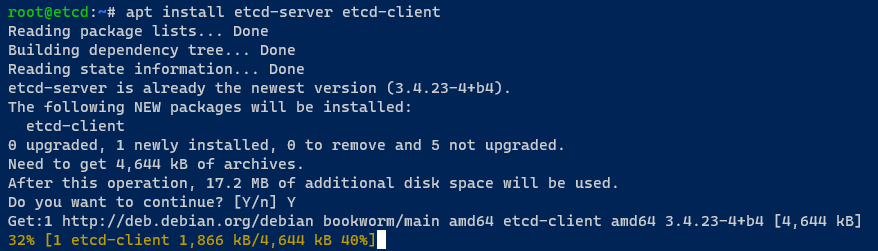
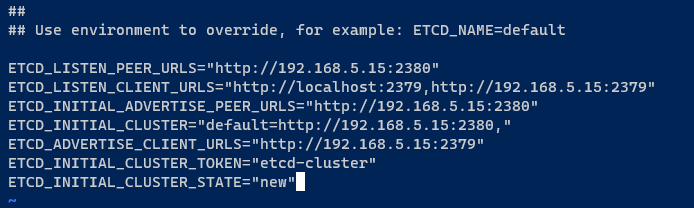
3. Once you’ve installed etcd, open the default configuration /etc/default/etcd using your preferred editor, and insert the following configuration.
This configuration sets up a single etcd cluster, so ensure you change the IP address 192.168.5.15 with your internal IP address.
ETCD_LISTEN_PEER_URLS="<http://192.168.5.15:2380>"
ETCD_LISTEN_CLIENT_URLS="<http://localhost:2379>,<http://192.168.5.15:2379>"
ETCD_INITIAL_ADVERTISE_PEER_URLS="<http://192.168.5.15:2380>"
ETCD_INITIAL_CLUSTER="default=http://192.168.5.15:2380,"
ETCD_ADVERTISE_CLIENT_URLS="<http://192.168.5.15:2379>"
ETCD_INITIAL_CLUSTER_TOKEN="etcd-cluster"
ETCD_INITIAL_CLUSTER_STATE="new"
Save the changes, and exit the editor.
4. Now, run the systemctl command below to restart etcd and apply your modifications.
This command has no output, but you’ll verify the changes in the following step.
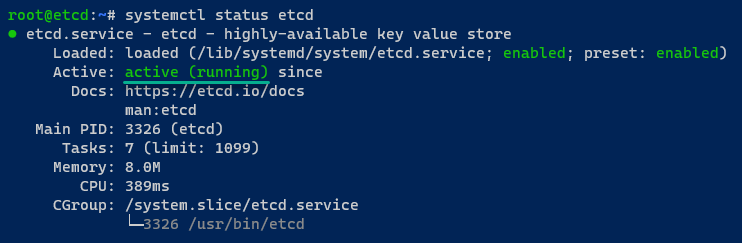
systemctl restart etcd5. Once the etcd restarts, verify the etcd service is running and enabled.
systemctl is-enabled etcd
systemctl status etcd
If the etcd service is running, you should see an output active (running). When enabled, you will see the output enabled, which also means etcd will start automatically at boot.
6. Lastly, run the following etcdctl command below to verify the list of available servers on the etcd cluster.
etcdctl member listIn this case, etcd runs as a single-node cluster on a local IP address http://192.168.5.15:2379/.

Bootstrapping PostgreSQL Cluster via Patroni
With the etcd server now firmly in place, you stand at the threshold of the next crucial phase. By initiating the bootstrapping process using Patroni, you elevate your PostgreSQL configuration into a robust and fault-tolerant cluster.
💡 Be sure to backup your database first if you’re deploying a PostgreSQL cluster on an existing PostgreSQL server.
To bootstrap your PostgreSQL cluster via Patroni, perform the following on each PostgreSQL server:
1. Open Patroni’s default configuration (/etc/patroni/config.yml) in your text editor, and add the following configuration.
Ensure you replace the name option’s value with the hostname of your PostgreSQL server (i.e., postgres01), but do not close the editor yet.
This configuration sets up your PostgreSQL cluster named postgres.
# Scope of PostgreSQL
scope: postgres
# Namespace for the PostgreSQL database
namespace: /db/
# Name of the PostgreSQL instance
name: postgres01
2. Next, add the configuration below to set up the Patroni REST API to run at 192.168.5.20:8008.
You must ensure each of the PostgreSQL servers within the cluster can connect via API. Thus, change the IP address 192.168.5.20 with the respective IP address of each PostgreSQL server.
# Patroni REST API Configuration
restapi:
    # The IP address and port on which the REST API should listen
    listen: 192.168.5.20:8008

    # The IP address and port to which clients should connect
    connect_address: 192.168.5.20:8008
3. Add the configuration below to enable integration with etcd. In this case, the etcd server is running on IP address 192.168.5.15.
# Patroni Etcd Configuration
etcd3:
    # The host address and port of the Etcd server
    host: 192.168.5.15:2379
4. Now, add the configuration below to bootstrap the PostgreSQL server via initdb.
This configuration sets up the default rules and settings for client authentication (pg_hba.conf) and a new user admin with the password admin.
Be sure to input the IP addresses of the PostgreSQL cluster to the pg_hba section and change the default admin password in the users section.
# Patroni Bootstrap Configuration
bootstrap:
    # Configuration parameters for distributed configuration store (DCS)
    dcs:
        ttl: 30
        loop_wait: 10
        retry_timeout: 10
        maximum_lag_on_failover: 1048576
        postgresql:
            # Use pg_rewind during bootstrap
            use_pg_rewind: true

    # Initdb configuration
    initdb:
        - auth: scram-sha-256
        - encoding: UTF8
        - data-checksums

    # pg_hba.conf entries for replication and general access
    pg_hba:
        - host replication replicator 127.0.0.1/32 scram-sha-256
        - host replication replicator 192.168.5.20/0 scram-sha-256
        - host replication replicator 192.168.5.21/0 scram-sha-256
        - host replication replicator 192.168.5.22/0 scram-sha-256
        - host all all 0.0.0.0/0 scram-sha-256

		# Adding default user admin with password admin
		users:
        admin:
            password: admin
            options:
                - createrole
                - createdb
5. After configuring how PostgreSQL starts, insert the following configuration to set up how PostgreSQL runs on each server.
As for the postgres01 server, the PostgreSQL will run on IP address 192.168.5.20 with the data directory /var/lib/patroni.
In addition, this configuration creates a new user called replicator for replication operation, and the postgres user as superuser/administrator with the password (secretpassword).
Ensure you change the IP address and the default password (secretpassword).
# Patroni PostgreSQL Configuration
postgresql:
    # PostgreSQL server listening address and port
    listen: 192.168.5.20:5432
    # Connect address for PostgreSQL clients
    connect_address: 192.168.5.20:5432
    # Data directory for PostgreSQL
    data_dir: /var/lib/patroni
    # Path to the pgpass file
    pgpass: /tmp/pgpass

    # Authentication configuration
    authentication:
        # Replication of user credentials
        replication:
            username: replicator
            password: rep-pass
        # Superuser credentials
        superuser:
            username: postgres
            password: secretpassword

    # Additional PostgreSQL parameters
    parameters:
        # Directory for Unix socket
        unix_socket_directories: '.'
        # Password encryption method
        password_encryption: 'scram-sha-256'
6. Insert the following configuration to set up tags for your PostgreSQL server that determine its behaviors on the cluster, save the changes, and close the file.
# Patroni Tags Configuration
tags:
    # Prevents a node from being promoted in case of failure
    nofailover: false
    # Prevents the load balancer from considering this node
    noloadbalance: false
    # Prevents a replica from being created by cloning
    clonefrom: false
    # Prevents synchronous replication from being enforced
    nosync: false
7. With the configurations saved, run the commands below to collectively prepare the Patroni data directory, ensuring it’s appropriately owned and secured for PostgreSQL’s use.
These commands do not provide output, but this step is crucial in setting up a PostgreSQL database cluster with Patroni for high availability.
# Create the directory for Patroni data
mkdir -p /var/lib/patroni
# Set ownership of the Patroni data directory to the PostgreSQL user
chown -R postgres:postgres /var/lib/patroni
# Set permissions on the Patroni data directory for security
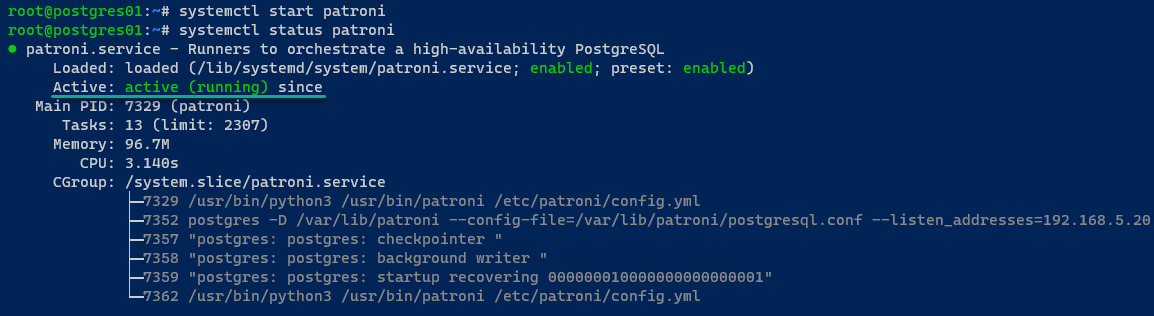
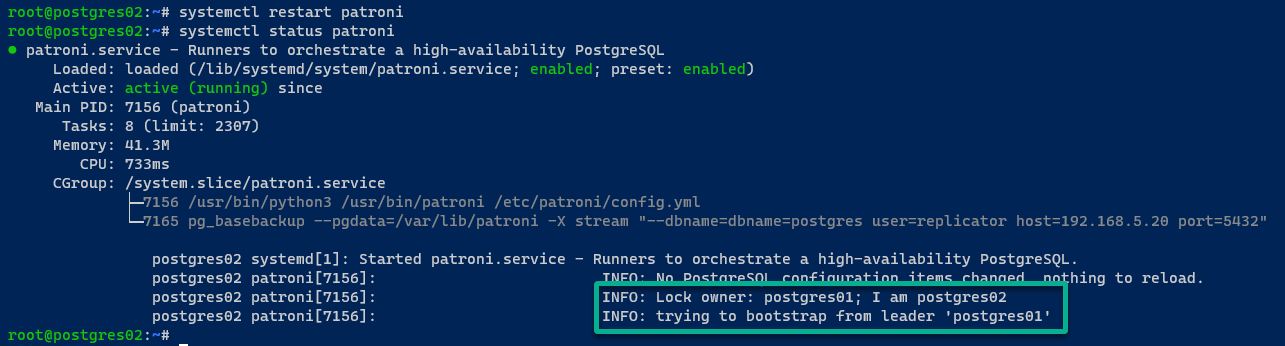
chmod 700 /var/lib/patroni8. Next, execute the systemctl commands below to start and verify the patroni service.
systemctl start patroni
systemctl status patroni
On the postgres01 server, the PostgreSQL server runs, and the cluster initializes. Also, the postgres01 server is selected as the cluster leader.
On the postgres02 server, the PostgreSQL server starts via Patroni and joins the PostgreSQL cluster via REST API.
If all goes well, you’ll see the following message:
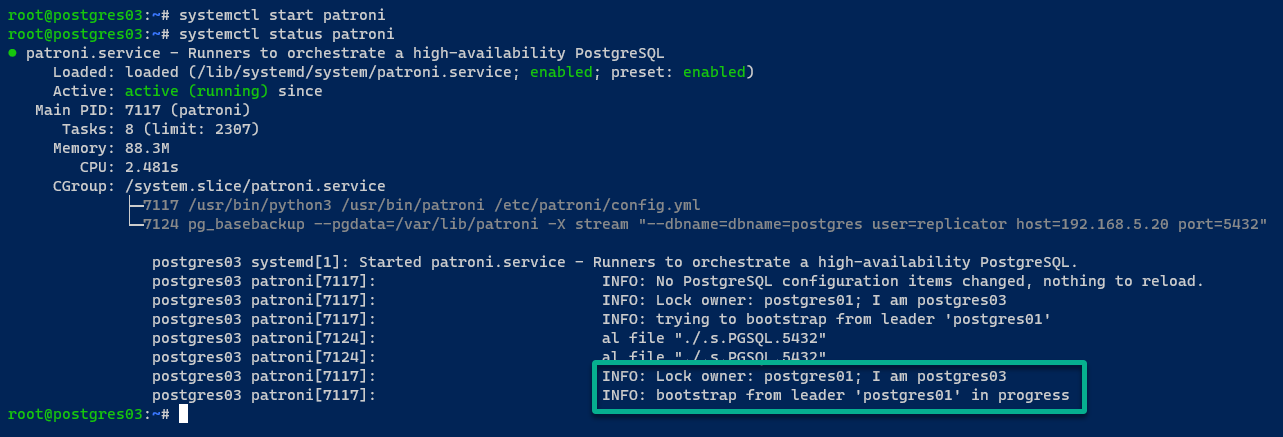
On the postgres03 server, the output is similar to the postgres02 server’s.
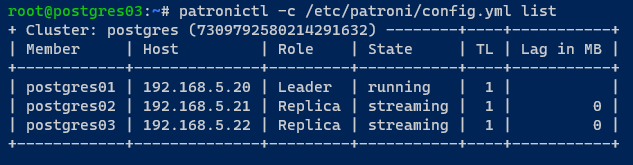
9. With your PostgreSQL cluster initialized, execute the following patronictl command to display a list of PostgreSQL instances managed by Patroni.
patronictl -c /etc/patroni/config.yml listIn the following output, you can see your PostgreSQL cluster (postgres) runs.
Notice that your cluster runs with three members: postgres01 as cluster Leader, postgres02, and postgres03 as Replica with mode/state streaming.
10. Lastly, run the systemctl command below to disable the automatic start of the postgresql service during system boot.
This command has no output if successful but is crucial since Patroni controls the new PostgreSQL server.
sudo systemctl disable --now postgresqlInstalling and Configuring HAProxy as a Load Balancer
With your PostgreSQL cluster deployed, how can you make it accessible from clients and enable failover when a problem occurs? The solution is HAProxy as a load balancer before your PostgreSQL cluster.
HAProxy is your linchpin that enables your PostgreSQL cluster to handle varying workloads, distribute requests intelligently, and maintain high availability.
💡 NOTE: Install HAProxy on a separate server. In this case, the HAProxy server is installed on the haproxy server with an IP address of 192.168.5.16.
To install and configure HAProxy as a load balancer for the PostgreSQL cluster, proceed with these steps:
1. Open the /etc/hosts file using your preferred text editor, insert your PostgreSQL servers’ IP addresses and hostnames, save the changes, and close the file.
192.168.5.20    postgres01
192.168.5.21    postgres02
192.168.5.22    postgres03
2. Next, run the command below to update your package index.
apt update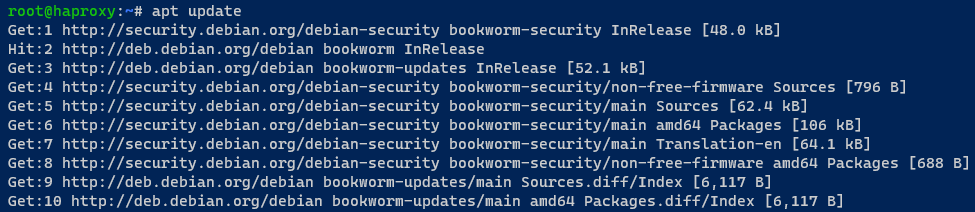
3. Once updated, execute the below command to install the haproxy package to your system.
apt install haproxy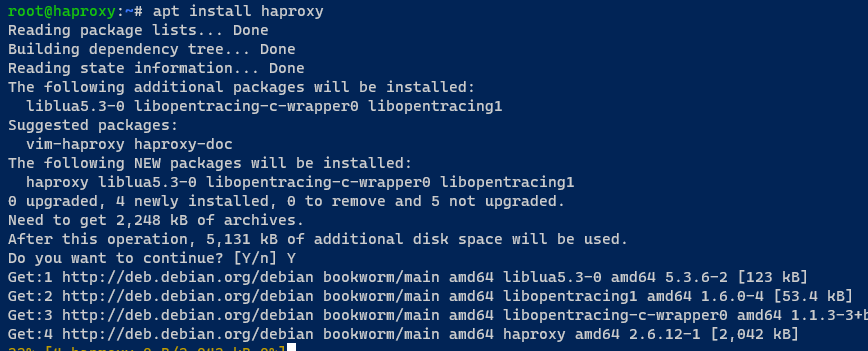
4. Now, run the following command to backup the default HARPOXY configuration to /etc/haproxy/haproxy.cfg.orig.
This command does not produce output but is a precautionary measure before making any modifications.
mv /etc/haproxy/haproxy.cfg /etc/haproxy/haproxy.cfg.orig5. Next, create a new file called /etc/haproxy/haproxy.cfg using your preferred editor, and insert the following configuration. Ensure you replace each PostgreSQL server IP address with yours, save the file, and close the editor.
This HAProxy configuration sets up HAProxy as a load balancer for your PostgreSQL cluster with two proxies, as follows:
stats– This block runs on port8080and monitors HAProxy server performance and backends.postgres– This block is the load balancer configuration for the PostgreSQL cluster.
# Global configuration settings
global
    # Maximum connections globally
    maxconn 100
    # Logging settings
    log 127.0.0.1 local2

# Default settings
defaults
    # Global log configuration
    log global
    # Set mode to TCP
    mode tcp
    # Number of retries
    retries 2
    # Client timeout
    timeout client 30m
    # Connect timeout
    timeout connect 4s
    # Server timeout
    timeout server 30m
    # Check timeout
    timeout check 5s

# Stats configuration
listen stats
    # Set mode to HTTP
    mode http
    # Bind to port 8080
    bind *:8080
    # Enable stats
    stats enable
    # Stats URI
    stats uri /

# PostgreSQL configuration
listen postgres
    # Bind to port 5432
    bind *:5432
    # Enable HTTP check
    option httpchk
    # Expect status 200
    http-check expect status 200
    # Server settings
    default-server inter 3s fall 3 rise 2 on-marked-down shutdown-sessions
    # Define PostgreSQL servers
    server postgres01 192.168.5.20:5432 maxconn 100 check port 8008
    server postgres02 192.168.5.21:5432 maxconn 100 check port 8008
    server postgres03 192.168.5.22:5432 maxconn 100 check port 8008
6. With HAProxy configured, run the systemctl commands below to restart and verify (status) the haproxy service.
systemctl restart haproxy
systemctl status haproxy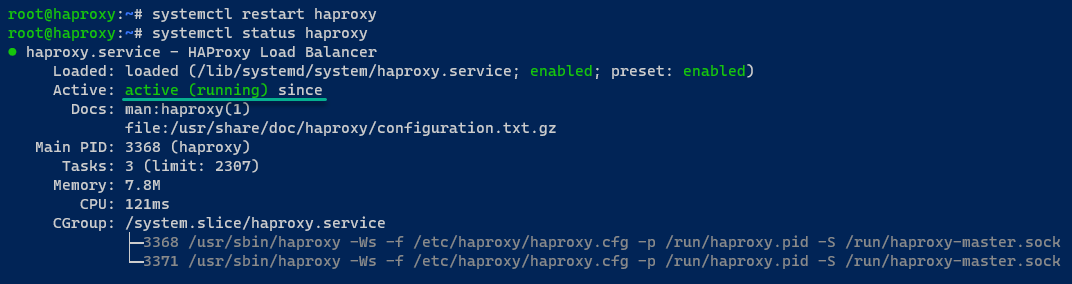
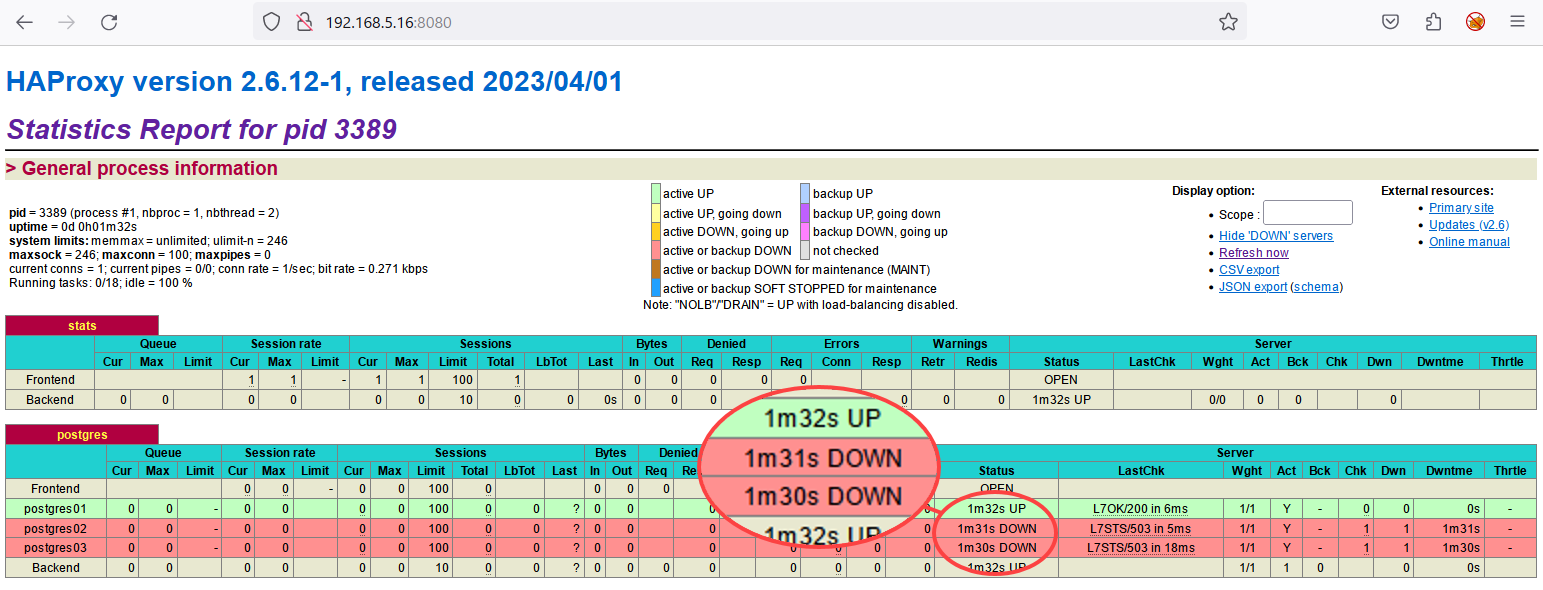
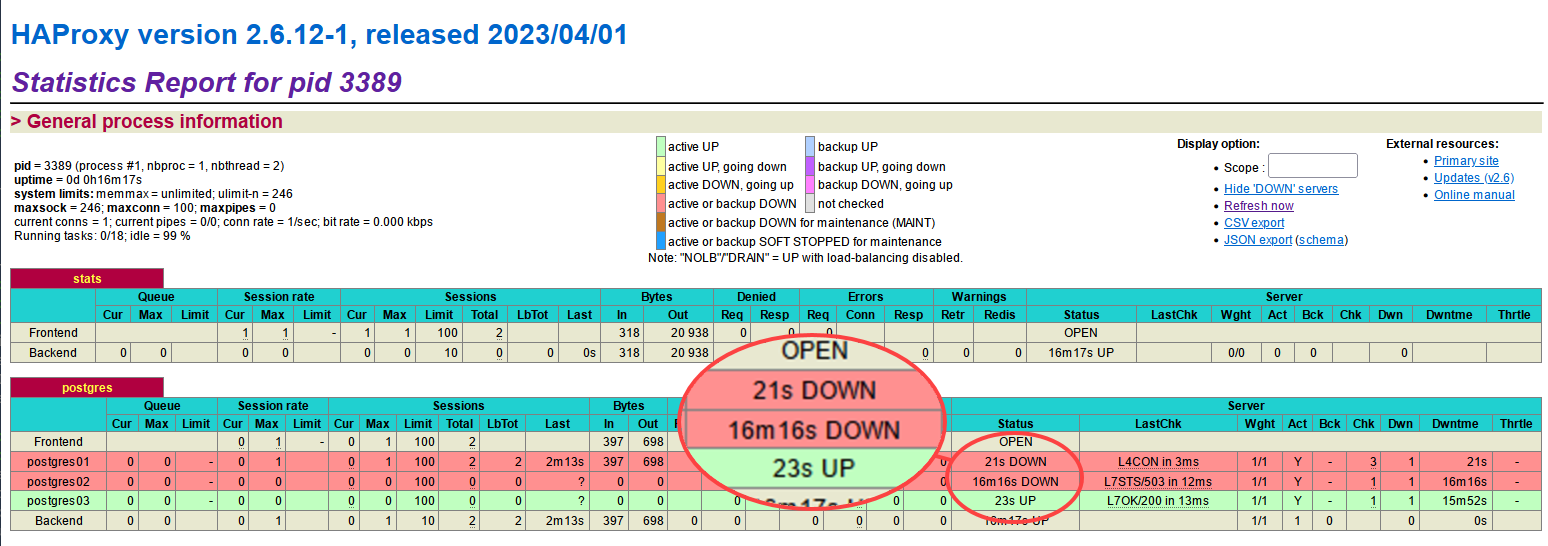
7. Lastly, open your preferred web browser and visit the HAProxy IP address with port 8080 (i.e., http://192.168.5.16:8080/). In the output below, you can see the following:
In the output below, you can see the following:
- The stats proxy for monitoring HAProxy status.
- The postgres proxy is the load balancer for the PostgreSQL cluster.
Notice the postgres02 and postgres03 servers are marked as down because both are running in streaming mode.
Testing the PostgreSQL Cluster’s Failover
Emerging from setting up HAProxy as your trusty load balancer, it’s now time to put your PostgreSQL cluster to the test. This crucial step will reveal the resilience of your high-availability setup. You must ensure that your PostgreSQL cluster remains robust and responsive even in the face of potential failures.
To test your PostgreSQL cluster’s failover, you’ll connect to the cluster from your client machine and verify the failover operations with the following steps:
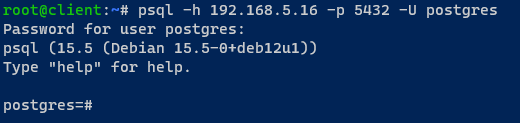
1. Log in to your client machine, open a terminal, and run the psql command below to connect to the PostgreSQL via HAProxy load balancer.
psql -h 192.168.5.16 -p 5432 -U postgresInput your PostgreSQL password when prompted. You can find the necessary password information in the /etc/patroni/config.yml file.
2. Once connected, run the following query to find which PostgreSQL server you’re connected to, and quit the current PostgreSQL session.
SELECT inet_server_addr() AS hostname;
quit
If your PostgreSQL installation is successful, you’ll be connected to the postgres01 server.

3. Now, switch to the postgres01 server, run the following commands to stop the patroni service, and list the status of the PostgreSQL clusters.
This step lets you test the PostgreSQL failover.
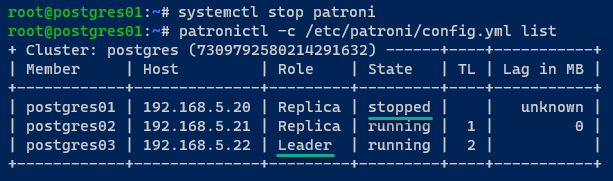
systemctl stop patroni
patronictl -c /etc/patroni/config.yml list
You can see the state of the postgres01 server changed to stopped, and the new cluster leader is delegated to the postgres03 server.
4. Return to the HAProxy monitoring stats, and you’ll see the postgres01 server is DOWN, while postgres03 is now UP.
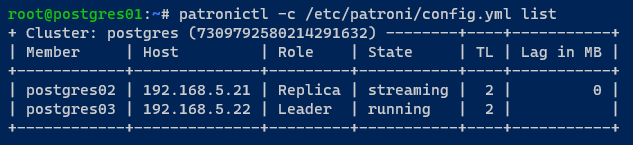
Alternatively, run the following patronictl command to verify the PostgreSQL cluster status.
patronictl -c /etc/patroni/config.yml listAs you can see below, the postgres01 server is no longer in the cluster.
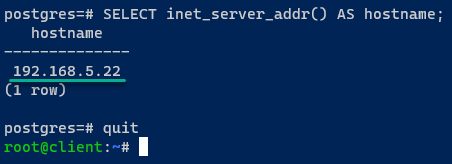
5. Switch back to the client machine, and run the below psql command to connect to the PostgreSQL server via HAProxy.
psql -h 192.168.5.16 -p 5432 -U postgres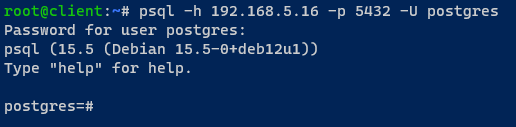
6. Once connected, run the following query to verify the current PostgreSQL server you’re connected to.
SELECT inet_server_addr() AS hostname;
quit
If the failover is successful, you’ll be connected to one of the servers running, which in this case is postgres03.
Conclusion
Embarking on this journey, you immersed yourself in the complexities of ensuring high availability for your PostgreSQL database, employing the powerful combination of Patroni and HAProxy. Navigating seamlessly through the setup stages of PostgreSQL and Patroni, you adeptly handled the nuances of configuring the etcd server.
Your orchestration skills came to the forefront as you built a resilient PostgreSQL cluster with Patroni and fine-tuned the art of load balancing using HAProxy. The culmination of this high-stakes adventure was the thorough testing of your PostgreSQL cluster’s failover capabilities.
Consider expanding your expertise as you reflect on your achievements in establishing a robust and fault-tolerant PostgreSQL environment. Why not explore implementing Patroni with Kubernetes for a more dynamic environment? Or delve into the intricacies of setting up PostgreSQL High Availability across multiple data centers?


