

One fundamental aspect of working with data in Kubernetes is the concept of volumes. Kubernetes volumes enable containers to store and access data beyond a container’s lifetime.
In this tutorial, you will explore and learn about the different types of Kubernetes volumes and their use cases, diving deep into their configuration and best practices.
Indulge yourself in leveraging your Kubernetes volumes effectively!
Prerequisites
Before jumping to Kubernetes volumes, ensure you have a Kubernetes cluster running to follow along in this tutorial’s hands-on demonstrations. This tutorial uses kind to run a cluster.
Configuring Short-lived Storage Within a Pod (emptyDir)
Effectively engaging Kubernetes volumes is crucial for building resilient and scalable applications in Kubernetes clusters. One factor that makes Kubernetes stand out is that it supports a plethora of volume types, like emptyDir, a simple yet powerful tool in Kubernetes.
This volume type provides temporary and short-lived storage within a pod, like having a temporary scratchpad, which containers within the same pod can read from and write to.
To configure an emptyDir volume, you need to define it in the pod’s YAML specification:
1. Create a YAML file in your preferred editor, and populate the following configuration setting. This tutorial calls this file empty-dir.yaml, but you can name it differently.
The configuration below defines a pod named ngnix-webserver that runs an nginx container image and includes an emptyDir volume.
apiVersion: v1
kind: Pod
metadata:
  # The name of the pod.
  name: nginx-webserver
spec:
  containers:
    - name: nginx
      # This pod will use an NGINX container image.
      image: nginx
      volumeMounts:
        # Specify the name of the volume to use as a volume mount.
        - name: cache
          # Specify the mount path.
          mountPath: /cache
  volumes:
    # The volume name
    - name: cache
      # The volume type
      emptyDir: {}
          # Uncomment the below and configure the size of the emptyDir volume
          # sizeLimit: 500Mi
2. Next, run the following commands to apply the empty-dir.yaml configuration, and get the list of pods available.
kubectl apply -f empty-dir.yaml
kubectl get pods
3. With a pod created, run the below kubectl exec command, which does not provide output, but writes some data to the emptyDir volume inside the container.
This command writes the text "Hello, Kubernetes!" to a file named myfile.txt (arbitrary) located in the /cache directory within the container.
kubectl exec -it nginx-webserver -- /bin/sh -c 'echo "Hello, Kubernetes!" > /cache/myfile.txt'4. Now, execute the command below inside the container to read and display the data of the myfile.txt file from the emptyDir volume.
kubectl exec -it nginx-webserver -- /bin/cat /cache/myfile.txtIf all goes well, you will see the following message.

5. Lastly, run each command below to perform the following:
delete– Delete thenginx-webserverpod.exec– Attempt to read themyfile.txtfile to verify if theemptyDirvolume still exists.
kubectl delete pod nginx-webserver
kubectl exec -it nginx-webserver -- /bin/cat /cache/myfile.txt
The output below verifies that the emptyDir volume and other resources associated with the nginx-webserver pod no longer exist since the pod has been deleted.
Data stored in an emptyDir volume is tied to the pod’s lifecycle. Once the pod is terminated or restarted, the data within the emptyDir volume is lost forever.
This volume type is mainly used as a local cache or as a buffer for temporary data storage before moving to a more permanent storage solution.

Configuring a Direct File and Directory Access (hostPath)
Instead of relying on the emptyDir volume, which becomes inaccessible when the associated pod is deleted, you can opt for a more persistent solution. How? Configure a hostPath volume type that allows direct access to files and directories on the host node’s filesystem from within the pod.
By mounting a specific directory into the pod, the data stored within the host remains accessible even if the pod is deleted and recreated.
To configure a direct file and directory access:
1. Create a new YAML file called hostpath-pod.yaml, and add the configuration below.
This configuration defines the following:
- Create a pod named
hostpath-podwith a single container using thebusyboximage. - Mount the
/var/tmp/busyboxdirectory from the host node’s filesystem into the container at the/datapath using thehostpathvolume.
Conclusively, this configuration allows the container to directly access and manipulate the files within the /var/tmp/ directory on the host node.
apiVersion: v1
kind: Pod
metadata:
  # The pod's name.
  name: busybox-pod
spec:
  containers:
    - name: busybox
      # This pod will use a busybox container image.
      image: busybox
      # Tells the busybox image to run the container using "/bin/sh" as the shell,
      # create a file "hello.txt" in a directory "/data", write the text 'hello k8s'
      # and then sleep for 3600 seconds, "One hour" before exiting.
      command: ["/bin/sh", "-c", "echo 'hello k8s' > /data/hello.txt && sleep 3600"]
      volumeMounts:
        # The name of the volume to be used
        - name: hostpath-volume
          # The mount path
          mountPath: /data
  volumes:
    # The volume name
    - name: hostpath-volume
      # The volume type
      hostPath:
        # The existing path to be used by the pod
        path: /var/tmp
💡 When using a
hostPathvolume, ensure the path already exists in the Node. Otherwise, you will encounter an error. Worry not; you can create a path from the pod configuration file when necessary.
2. Next, run the following commands to apply the hostpath-pod.yaml file’s configuration, and get all pods available.
kubectl apply -f hostpath-pod.yaml
kubectl get pods
3. Execute the commands below sequentially if you are using a local Kubernetes cluster to view the contents of the hostPath volume on your Kubernetes node.
Ensure you replace <your-node> with the name of your Kubernetes node.
# Execute an interactive Bash session inside the Node
docker exec -it <your-node> Bash
# Change directory
cd var/tmp/
# List the contents of the current directory.
ls
# Display the contents of the hello.txt file.
cat hello.txt
💡 Alternatively, run the
ssh <node-name>command instead of the docker exec if you are using a cloud-based cluster.
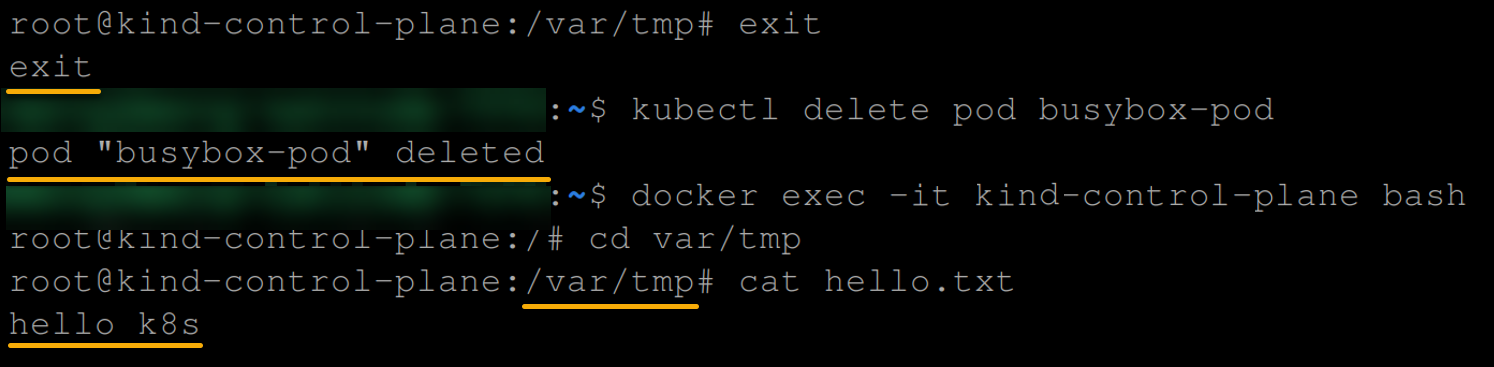
4. Now, run each command below to delete your pod (busybox-pod) and view (cat) the contents of the hello.txt file.
# Terminate an interactive Bash session inside the Node
exit
# Delete the busy-box pod
kubectl delete pod busybox-pod
# Execute an interactive Bash session inside the Node
docker exec -it <the-name-of-your-node> bash
# Change the current directory to /var/tmp/.
cd var/tmp/
# Display the contents of the hello.txt file.
cat hello.txt
The output below shows the contents (hello.txt) of the hostPath volume, even if the pod using that volume has been deleted.
But remember to consider backup measures and handle critical data when using the hostPath volume type. Why?
The hostPath volume type is tightly coupled with the pod’s lifecycle — when the pod is deleted, the hostPath unmounts. As a result, in the event of a node failure, the data stored on the host may be lost.
Persisting Data via the PersistentVolumeClaim (PVC)
Instead of using a potentially risky HostPath volume, consider the more robust PersistentVolumeClaim (PVC) volume type. In Kubernetes volumes, PVCs enable dynamic provisioning of storage resources, automatically creating PersistentVolumes (PVs) based on specified criteria.
This feature simplifies storage management and ensures data preservation even if pods or nodes are deleted. Additionally, PVCs allow multiple pods to share a file system for data sharing and synchronization.
To configure a persistent volume, follow the steps below:
1. Create a YAML file (i.e., pvc.yaml) and input the following configuration.
This configuration creates a PVC named my-pvc (arbitrary) that requires ReadWriteOnce access mode. As a result, the PVC can be mounted by a single pod for reading and writing and requests for 1Gi of storage capacity.
💡 PVCs are commonly used for stateful applications that require persistent storage. They are ideal for databases like MySQL, PostgreSQL, or MongoDB, providing durable storage across pod restarts or rescheduling.
apiVersion: v1
# Kubernetes resource type
kind: PersistentVolumeClaim
metadata:
  # The PVC name
  name: my-pvc
spec:
  accessModes:
    - ReadWriteOnce
  resources:
    requests:
      # The amount of storage needed by the PVC from a PV
      storage: 1Gi
2. Next, execute the following command to apply the configuration in the pvc.yaml file, which creates a PVC.
# Apply the configuration from the pvc.yaml file
kubectl apply -f pvc.yaml
# List all PVCs
kubectl get pvc
# List all PVs
kubectl get pv
Once you create a PVC, Kubernetes automatically searches for an available PV that matches the PVC’s criteria.
If a suitable PV is found, it will be bound to the PVC; else, it will be pending, as shown in the output below.

3. Create another YAML file (i.e., pv.yaml) and populate the below configuration, which creates a PersistentVolume named my-pv with a hostPath storage type.
apiVersion: v1
# The Kubernetes resource type
kind: PersistentVolume
metadata:
  # The PV name
  name: my-pv
spec:
  # The storage type
  storageClassName: hostpath
  capacity:
    # The amount of storage available for the PV
    storage: 5Gi
  accessModes:
    - ReadWriteOnce
  hostPath:
    # The already existing path to store data in the host file system
    path: /mnt/data
💡 Remember, the
hostPathwithPersistentVolumelets you access a directory or file from the host machine’s filesystem. But this configuration does not preserve data in case of pod or node deletion. Instead, consider other types of PVs like network-based storage solutions or cloud provider-specific storage options.
4. Now, run each command below to apply the pv.yaml file’s configuration and view the pv and the current pvc status.
# Apply the pv.yaml configuration
kubectl apply -f pv.yaml
# View all PVs
kubectl get pv
# View all PVCs
kubectl get pvc
The output below shows that the PV was created, and the PVC is now bound to the PV.

5. Create another YAML file (i.e., postgres-statefulset.yaml) and add the following configuration.
This configuration creates a StatefulSet with one replica running a PostgreSQL container image and a corresponding service to expose the database externally.
apiVersion: apps/v1
kind: StatefulSet
metadata:
# The name of the statefulset
name: postgres
spec:
serviceName: postgres
selector:
matchLabels:
app: postgres
# The number of replicas
replicas: 1
template:
metadata:
labels:
app: postgres
spec:
containers:
- name: postgres
# Specifies this statefulset should use a Postgres container image
image: postgres
env:
# Sets the Postgres user environment variable
- name: POSTGRES_USER
value: "admin"
# Sets the Postgres password environment variable
- name: POSTGRES_PASSWORD
value: "12345"
imagePullPolicy: "IfNotPresent"
ports:
# Specifies the container port
- containerPort: 5432
volumeMounts:
- name: data
mountPath: /var/lib/postgresql/data
volumes:
# Specifies the volume name
- name: data
# Specifies a pvc volume type
persistentVolumeClaim:
claimName: my-pvc
---
apiVersion: v1
# Kubernetes resource type
kind: Service
metadata:
# The service name
name: postgres
labels:
app: postgres
spec:
selector:
app: postgres
ports:
# Specifies the protocol used for the port
- protocol: TCP
name: http
# The port to export
port: 5432
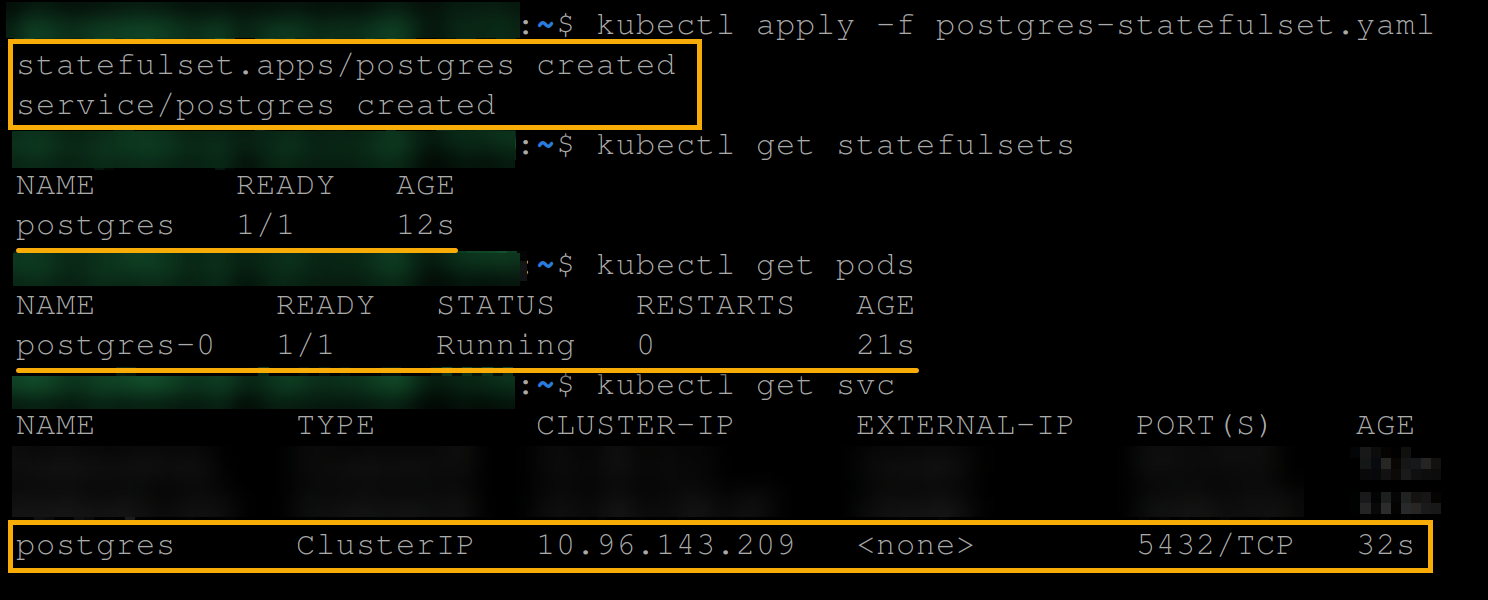
targetPort: 54326. Next, run the below commands to create and view the postgres statefulsets and service (svc)
# Apply the postgres-statefulset.yaml configuration
kubectl apply -f postgres-statefulset.yaml
# View all statefulsets
kubectl get statefulsets
# View all pods
kubectl get pods
# View all SVCs
kubectl get svc
The output below shows that the PostgreSQL statefulset, pod, and service are created.
7. With a statefulset made, run the following command to get the bash shell into the postgres-0 pod. Doing so initializes creating data in the postgres-0 pod to verify data persistence.
# Get the Bash shell into the postgres-0 pod
kubectl -it exec postgres-0 -- bash
# Switch to the admin user
psql --username=admin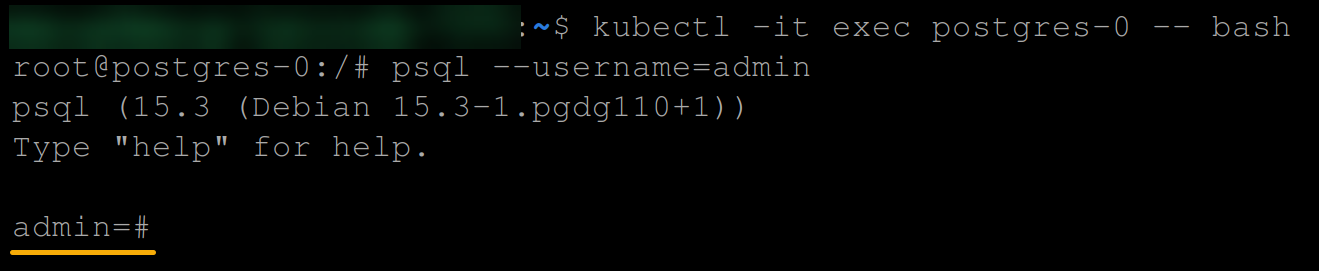
8. Now, run the following commands to create a database called records (arbitrary) and exit out of the postgres-0 pod.
# Create a database called records
create database records;
# Logout from the admin user
\q
# Exit the postgress shell
exit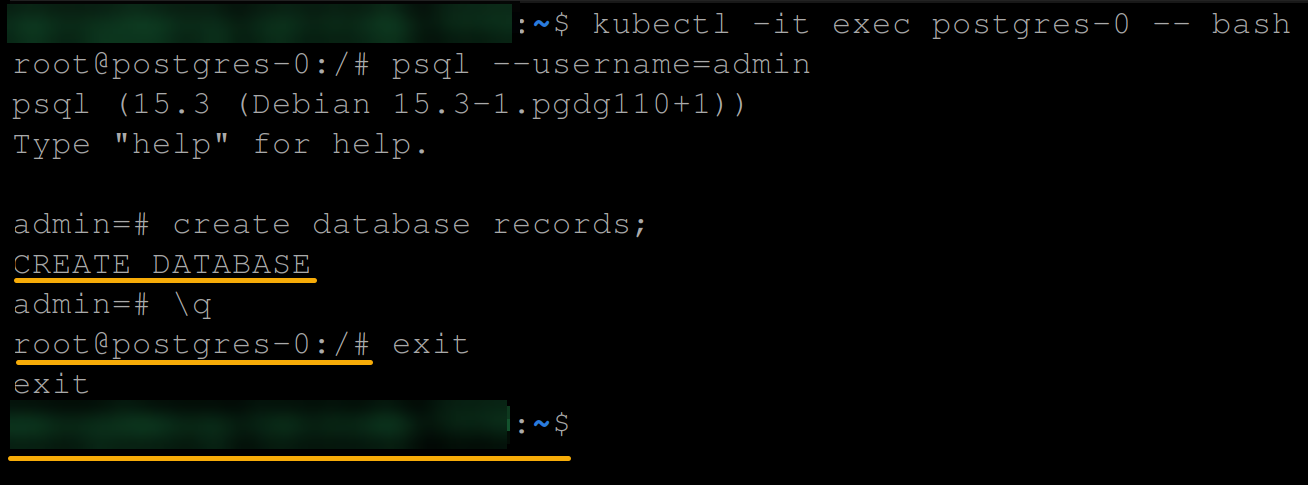
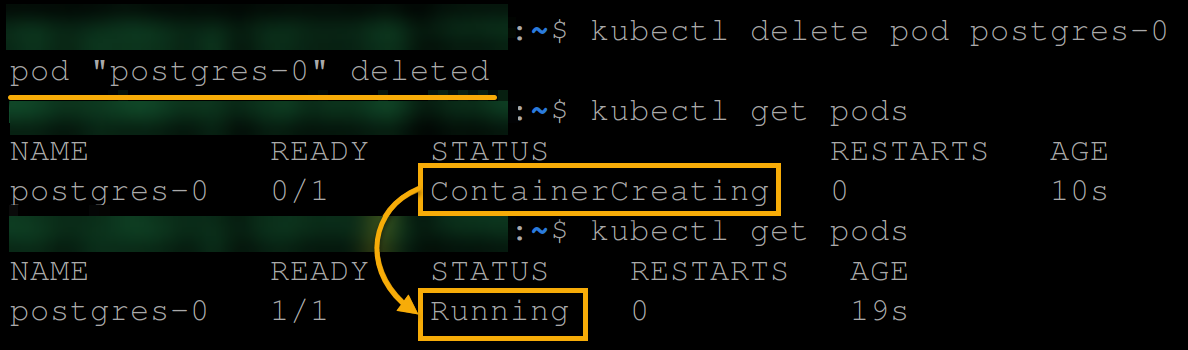
9. After creating a database, run the below commands to delete and re-create the postgres-0 pod to test if the database created within the PostgreSQL pod remains intact.
# Delete the postgres-0 pod
kubectl delete pod postgres-0
# Re-create the postgres-0 pod
kubectl get pods
# List all pods
kubectl get pods
Below, you can see the pod’s status changed from ContainerCreating to Running, which confirms the pod has been recreated successfully.
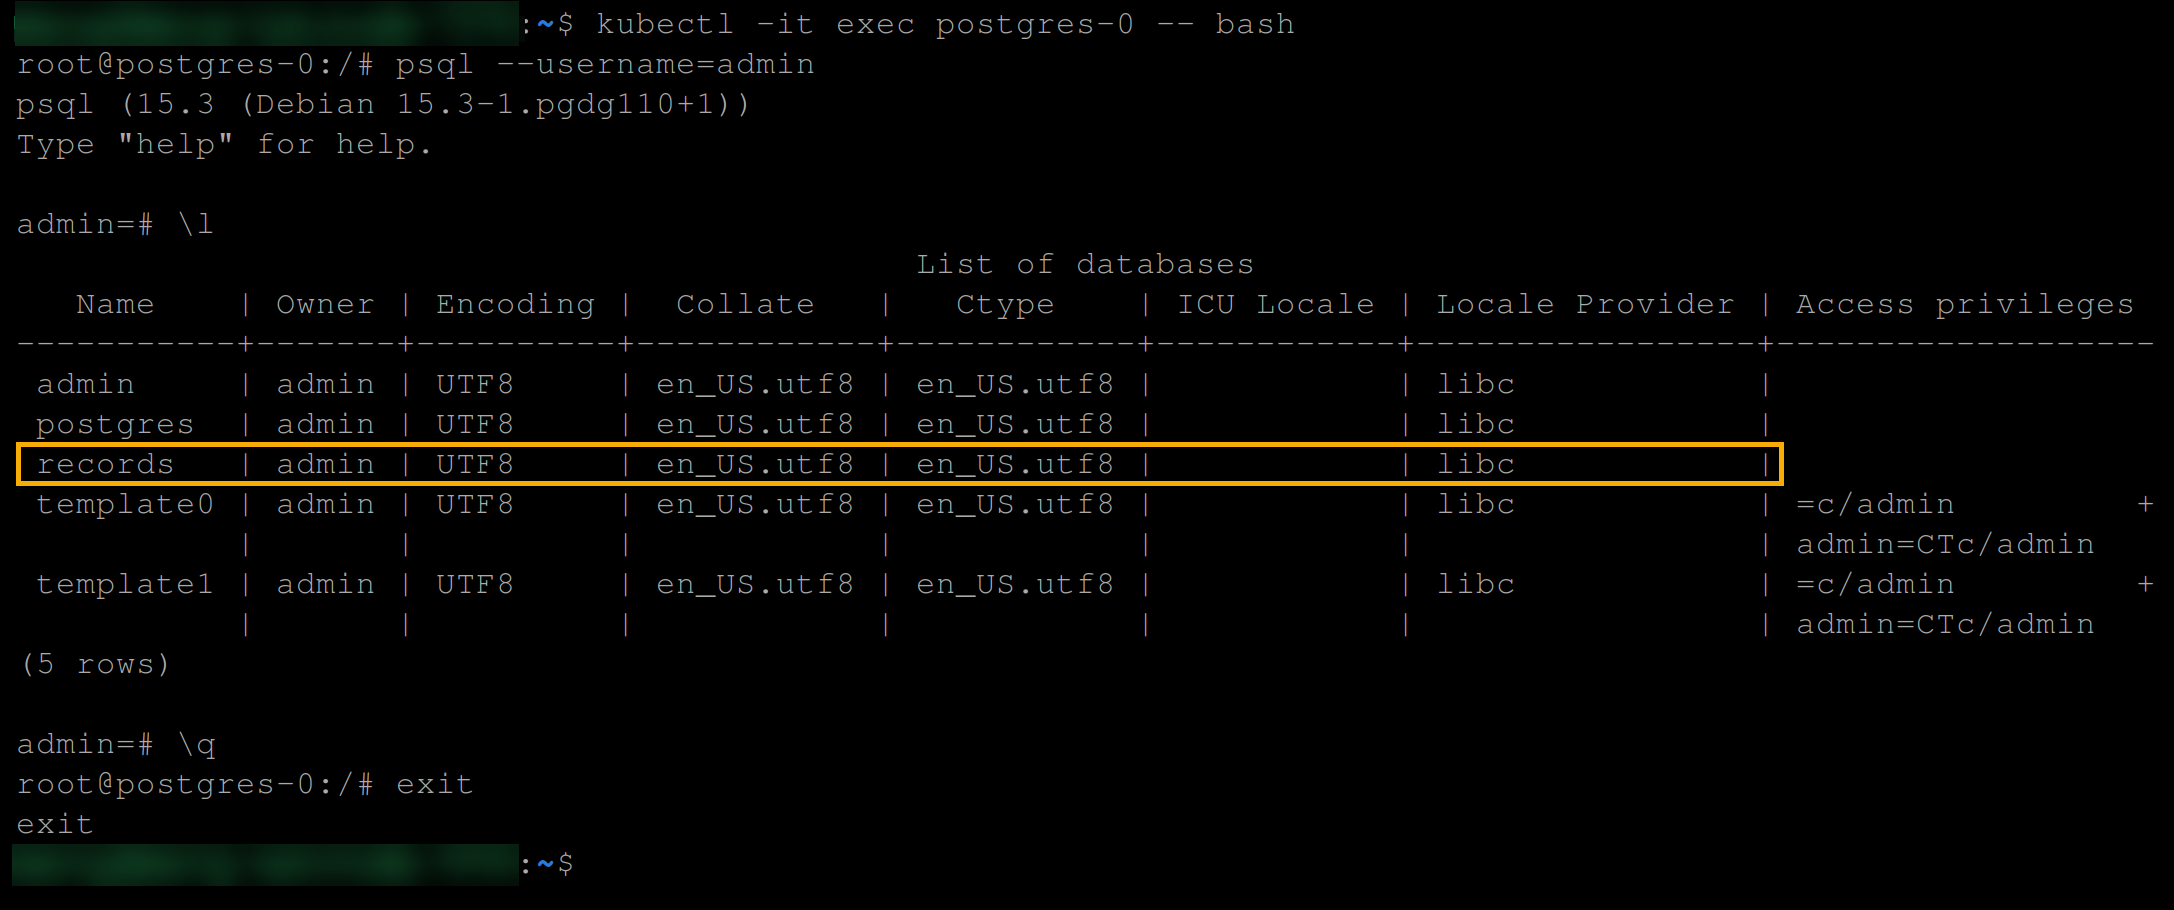
10. Ultimately, execute the commands below to get the bash shell into the postgres-0 again, and confirm if the database you created in step eight still exists.
# Get the bash into the postgres-0 pod
kubectl -it exec postgres-0 -- bash
# Switch to the admin user
psql --username=admin
# List all databases
\l
As you can see below, the records database persists, which is what persistent volumes and claims provide out of the box.
Injecting Configuration Settings Into Pods (ConfigMap)
Besides using fixed configurations, you can also inject configuration settings as files in your application using the ConfigMap volume type. This volume type is a key-value store that holds configuration settings, environment variables, or other configuration data that your application needs.
To see how to inject configuration settings:
1. Create a configuration file called nginx.conf, and populate the following code, which configures an NGINX server to listen on port 8080 instead of the default port 80
events {
    # Specify event-related settings here
    # For example:
    # worker_connections  1024;
}

http {
    server {
        # Configures the server to listen on port 8000
        listen 8080;

        location / {
            root /usr/share/nginx/html;
            index index.html;
        }
    }
}
2. Next, run the following commands to create a configmap from the nginx.conf file.
This command stores the contents of the nginx.conf file in an nginx-config ConfigMap, which can be referenced by pods or other resources in the Kubernetes cluster.
# Create a ConfigMap based on a configuration file
kubectl create configmap nginx-config --from-file=nginx.conf
# List all ConfigMaps
kubectl get configmap
3. Create another file called nginx.yaml (arbitrary) and add the following configuration, creating an nginx pod with an nginx container.
Additionally, this configuration mounts a configMap (nginx-config) as a volume inside the container at the /etc/nginx/nginx.conf path. The mounted ConfigMap allows the nginx container to access the configuration file (nginx.conf).
apiVersion: v1
kind: Pod
metadata:
  # The pod's name
  name: nginx
spec:
  containers:
    - name: nginx
      # Specifies that this port should use an NGINX container image
      image: nginx
      ports:
        # Specifies the container port
        - containerPort: 8080
      volumeMounts:
        # The volume name to use as a volume mount
        - name: my-nginx-config
          mountPath: /etc/nginx/nginx.conf
          subPath: nginx.conf
  volumes:
    # The volume name
    - name: my-nginx-config
      # The volume type
      configMap:
        name: nginx-config
        items:
          # The key the pod should use from the config map
          - key: nginx.conf
            path: nginx.conf
4. Now, execute the commands below to create and view the nginx pod.
kubectl apply -f nginx.yaml
kubectl get pods 
5. With the nginx pod running, execute the below to view the NGINX webserver welcome page on port 8080. This command forwards port 8080 of the nginx pod to a local port on your machine.
kubectl port-forward pod/nginx 8080:8080
6. Lastly, open your favorite web browser, and navigate to your localhost to access the NGINX web server on port 8080 (http://localhost:8080).

Encoding and Passing Secure Data to Pods (secret)
Since passing raw data poses security risks, why not securely encode and inject data? The secret volume type allows you to securely store and manage sensitive information, such as passwords, API keys, and TLS certificates.
Secrets are base64-encoded data that are stored in the Kubernetes cluster and can be mounted as volumes inside pods, deployments, and statefulsets.
To secure data with the secrets volume type:
1. Execute the below command to edit the nginx.conf to listen on port 8000 and convert the contents of the file to base64 format.
base64 -w0 nginx.confTake note of the converted content, as you will need it for your secret volume type configuration.

2. Next, create a new file called secret.yaml (or name it differently), and input the following configuration settings. Make sure you replace <base64-encoded-content> with the converted content you noted in step one.
This configuration creates a secret object called nginx-secret-config, where you will store the content of the nginx.conf file as a base64-encoded value.
apiVersion: v1
kind: Secret
metadata:
  # The secret's name
  name: nginx-secret-config
# Secret file
type: Opaque
data:
  # Secret key and base64 encoded value
  nginx.conf: <base64-encoded-content>
3. Now, run the following commands to create and view the secret object specified in the secret.yaml file.
kubectl apply -f secret.yaml
kubectl get secrets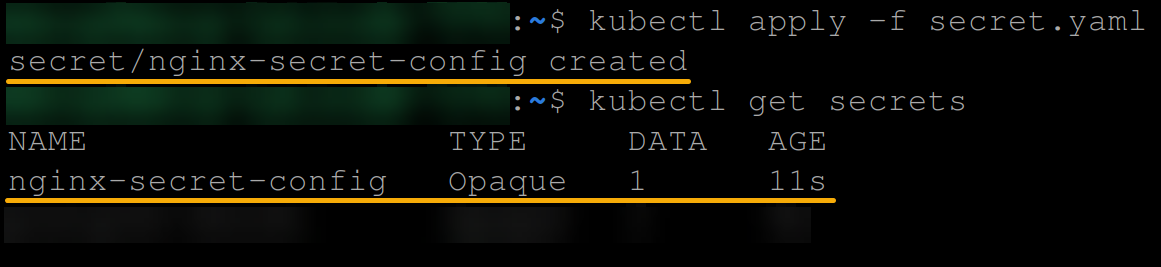
4. Create another YAML file named nginx02.yaml (arbitrary), and add the following configuration. This configuration performs the following:
- Creates a
podwith annginxcontainer that listens on port8000. - Mounts a specific file (
nginx.conf) from a secret namednginx-secret-configinto the container at the/etc/nginx/nginx.confpath.
In conclusion, this configuration allows the NGINX container to access the sensitive configuration stored in the secret object.
apiVersion: v1
kind: Pod
metadata:
  # The pod's name
  name: nginx-02
spec:
  containers:
    - name: nginx
      # Specifies the container image to use
      image: nginx
      ports:
        # Specifies the container port as configured in the nginx.conf file
        - containerPort: 8000
      volumeMounts:
        # The volume to use as a volume mount
        - name: my-nginx02-config
          # The mount path
          mountPath: /etc/nginx/nginx.conf
          subPath: nginx.conf
  volumes:
    # The volume name
    - name: my-nginx02-config
      # The volume type
      secret:
        # The secret's name
        secretName: nginx-secret-config
        items:
          # The key contained in the secret to be used by the pod
          - key: nginx.conf
            path: nginx.conf
5. Execute the following commands to create and view the pod specified in the nginx02.yaml file.
kubectl apply -f nginx02.yaml
kubectl get pods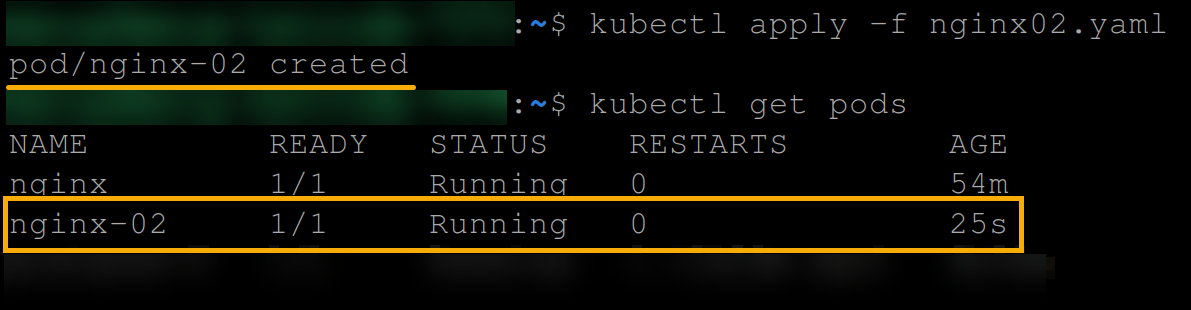
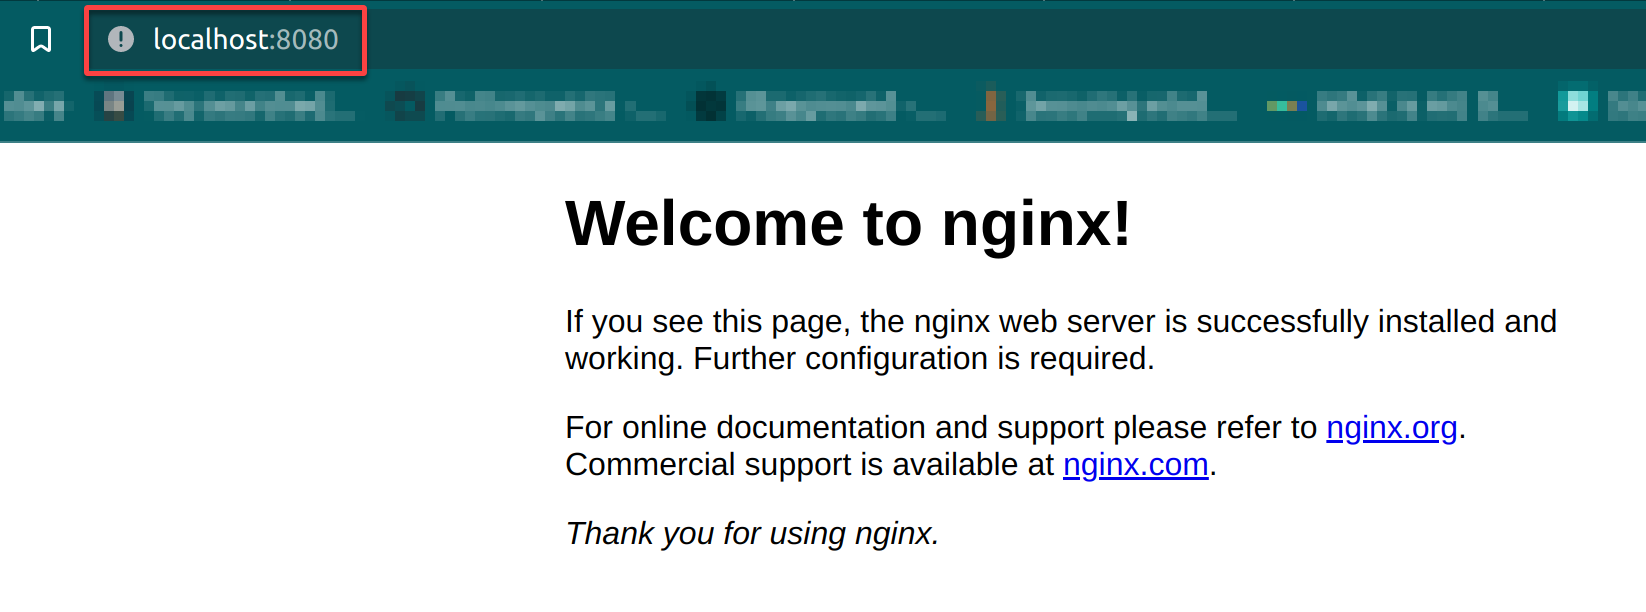
6. With the new pod created, run the command below to forward port 8000 of the NGINX pod to a local port on your machine.
kubectl port-forward pod/nginx 8000:8000
7. Finally, navigate to your localhost in your web browser to access the NGINX web server on port 8000 (http://localhost:8080).
If all goes well, you will see the NGINX welcome page, as shown below.
Conclusion
Throughout this tutorial, you have learned what Kubernetes volumes are and how they help persist data for your applications. With many type of Kubernetes volumes at your disposal, you can now confidently persist your data for PostgreSQL database using a PVC.
Now, why not explore using a network-based storage solution, like a Network File System (NFS) Server?


