

There are many methods for setting up Kubernetes clusters. If you are interested in exploring other ways to spin up a Kubernetes cluster, why not turn to kubeadm? Kubeadm is a tool for bootstrapping Kubernetes clusters so that you can have all the necessary components in one place.
In this tutorial, you will learn how to set up Kubernetes cluster and join nodes with kubeadm for deployment.
Read on and start building Kubernetes clusters with minimal dependencies!
Prerequisites
This tutorial comprises hands-on demonstrations. To follow along, be sure you have two virtual machines (VMs) as master and worker with at least the minimum specifications below:
| Node | Specifications |
| kmaster | 2GB RAM and 2CPUs |
| kworker | 1GB RAM and 1CPU |
This tutorial uses Ubuntu 22.04 LTS distribution, but any OS will work.
Setting up kubeadm Requirements on All Nodes
Before setting up a kubeadm cluster, there are some requirements to be addressed on all nodes. These requirements are disabling UFW and swap, full connectivity amongst machines, and opening some ports.
To set up the kubeadm requirements, perform the following steps on both master and worker nodes:
1. Open a terminal, and run the below command to log on as a root user to ensure unrestricted access to your VMs.
sudo su -2. Next, run the following ufw command to disable your UFW firewall.
ufw disableThroughout this tutorial, only the outputs on the master node are displayed, since outcomes on both nodes are practically the same.

3. With the UFW disabled, run the command below to check if you have swap turned on.
swapon -sWhen swap is turned on, you will get a swap partition outputted, like in the screenshot below. Otherwise, when swap is off, the command outputs nothing.

4. Now, run the below commands, which do not produce output, but turn off swap (swapoff) and remove it (/swap/d) from /etc/fstab.
# Turn off swap
swapoff -a
# Prevent swap partition from automatically mounting after a reboot
sed -i '/swap/d' /etc/fstab
5. Once swap is off, run each command below to update the sysctl settings for Kubernetes networking.
# Enable kernel modules - for IPtables to see bridged traffic
cat <<EOF | sudo tee /etc/modules-load.d/k8s.conf
overlay
br_netfilter
EOF

sudo modprobe overlay
sudo modprobe br_netfilter

# Configure sysctl params required by setup; params persist across reboots
cat <<EOF | sudo tee /etc/sysctl.d/k8s.conf
net.bridge.bridge-nf-call-iptables  = 1
net.bridge.bridge-nf-call-ip6tables = 1
net.ipv4.ip_forward                 = 1
EOF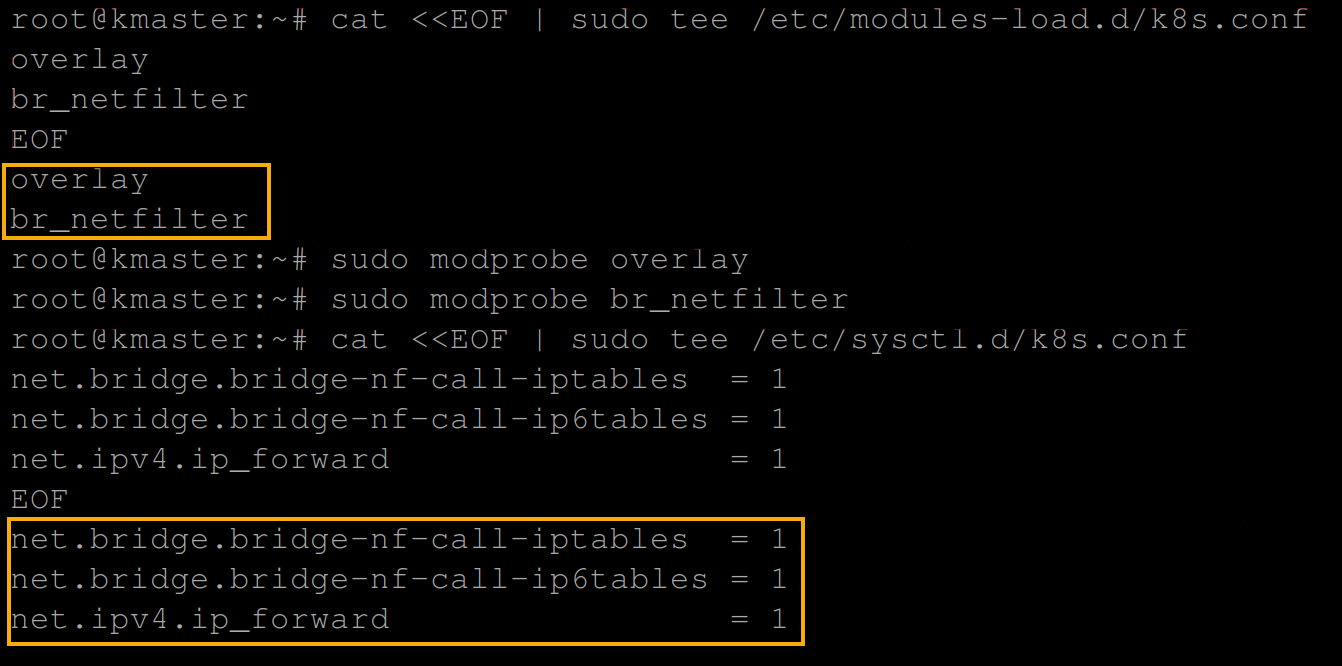
6. Next, run the below sysctl command for the update to take effect without a reboot.
sysctl --system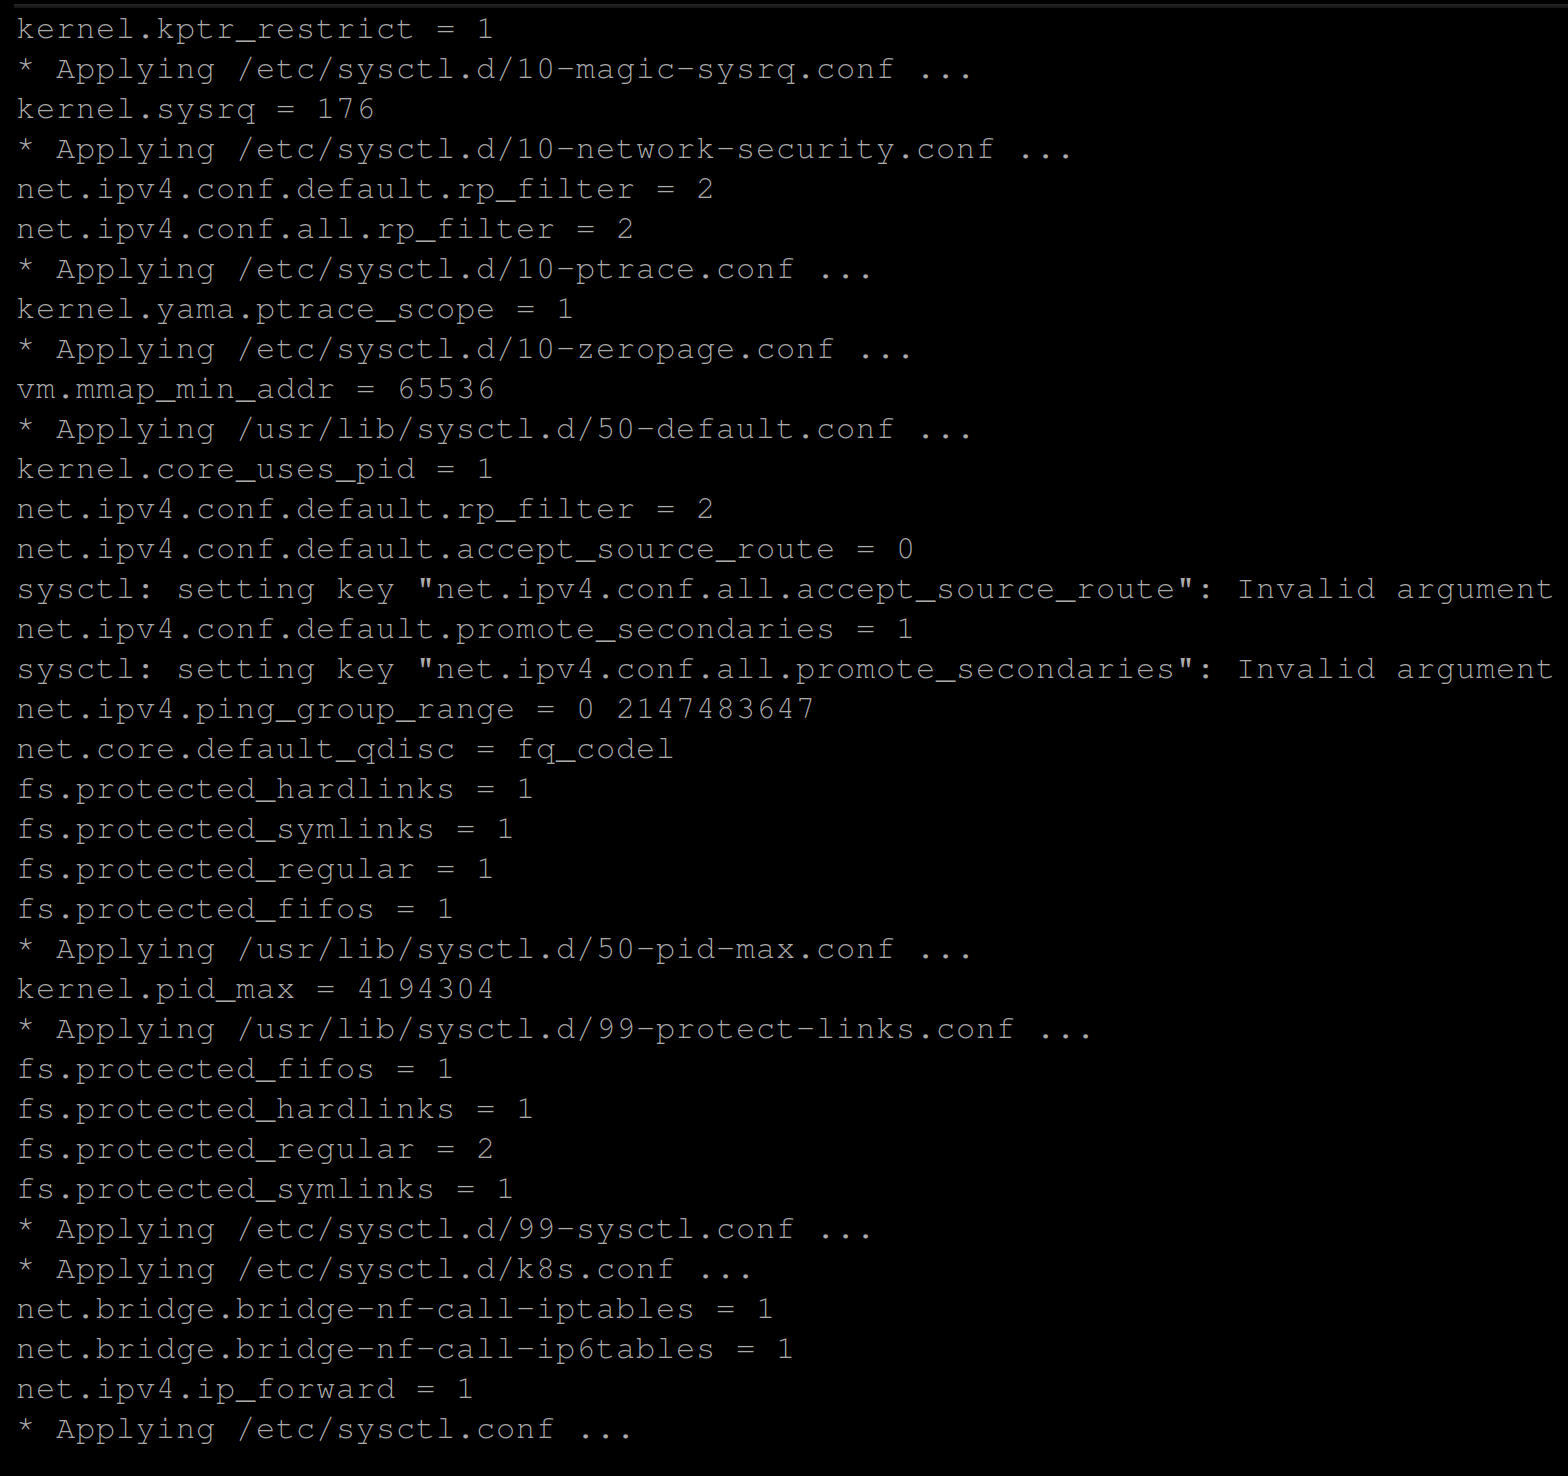
Installing a Container Engine and Kubernetes Components
With the requirements out of the way, you need to make kubeadm able to run containers in pods. In this tutorial, you will install the CRI-O container runtime.
To install CRI-O as your container runtime, complete the steps below on both master and worker nodes:
1. Run the below commands to add the cri-o repository from openSUSE.
OS=xUbuntu_22.04
CRIO_VERSION=1.26
echo "deb https://download.opensuse.org/repositories/devel:/kubic:/libcontainers:/stable/$OS/ /"|sudo tee /etc/apt/sources.list.d/devel:kubic:libcontainers:stable.list
echo "deb http://download.opensuse.org/repositories/devel:/kubic:/libcontainers:/stable:/cri-o:/$CRIO_VERSION/$OS/ /"|sudo tee /etc/apt/sources.list.d/devel:kubic:libcontainers:stable:cri-o:$CRIO_VERSION.list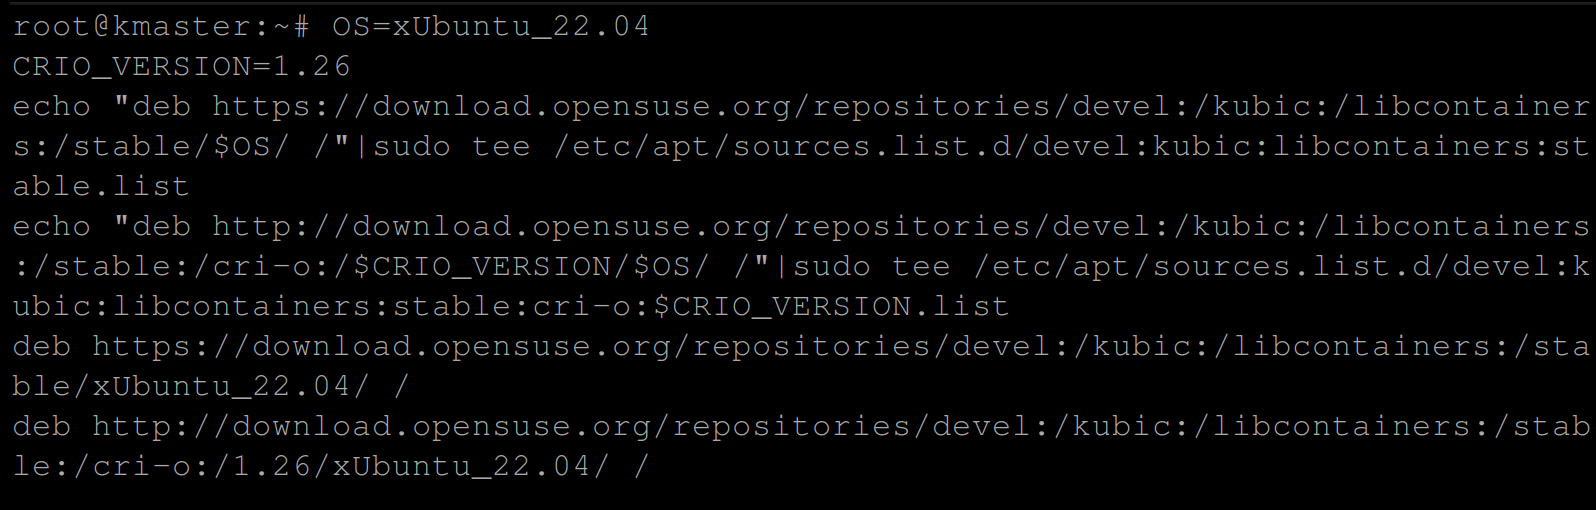
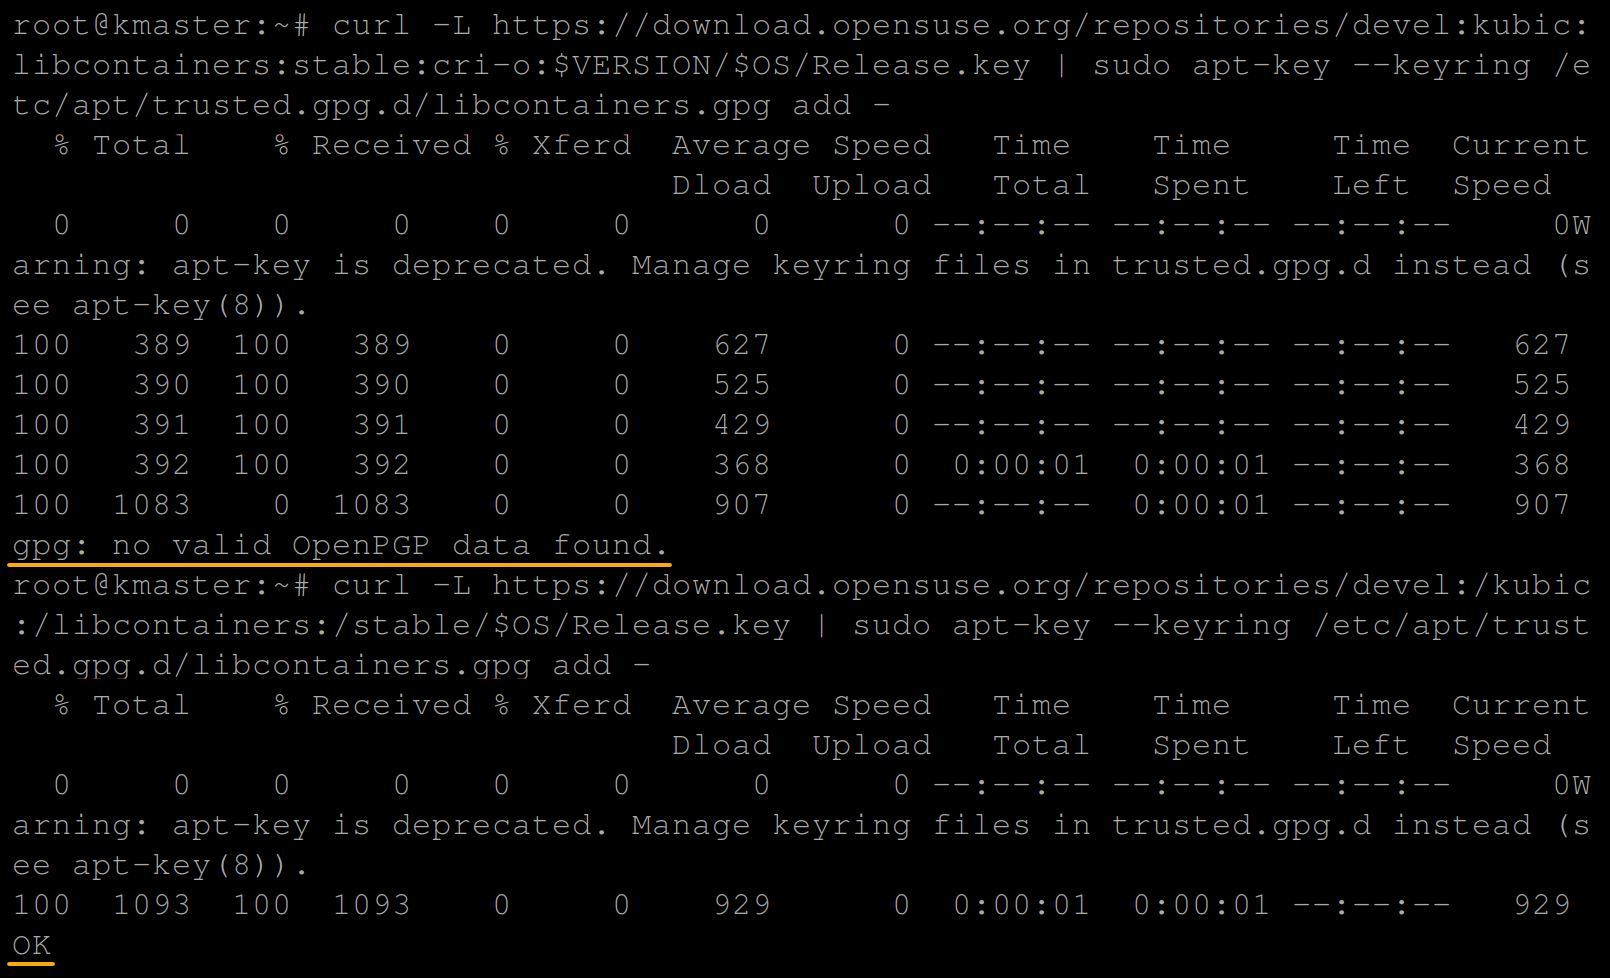
2. Next, run each curl command below to add the cri-o gpg Release.key to verify the download package.
curl -L https://download.opensuse.org/repositories/devel:kubic:libcontainers:stable:cri-o:$VERSION/$OS/Release.key | sudo apt-key --keyring /etc/apt/trusted.gpg.d/libcontainers.gpg add -
curl -L https://download.opensuse.org/repositories/devel:/kubic:/libcontainers:/stable/$OS/Release.key | sudo apt-key --keyring /etc/apt/trusted.gpg.d/libcontainers.gpg add -
You should have the below output once the gpg release key has been added:
3. Once verified, run the following commands to update your VM’s package index and install cri-o.
apt-get update
apt-get install cri-o cri-o-runc cri-tools -y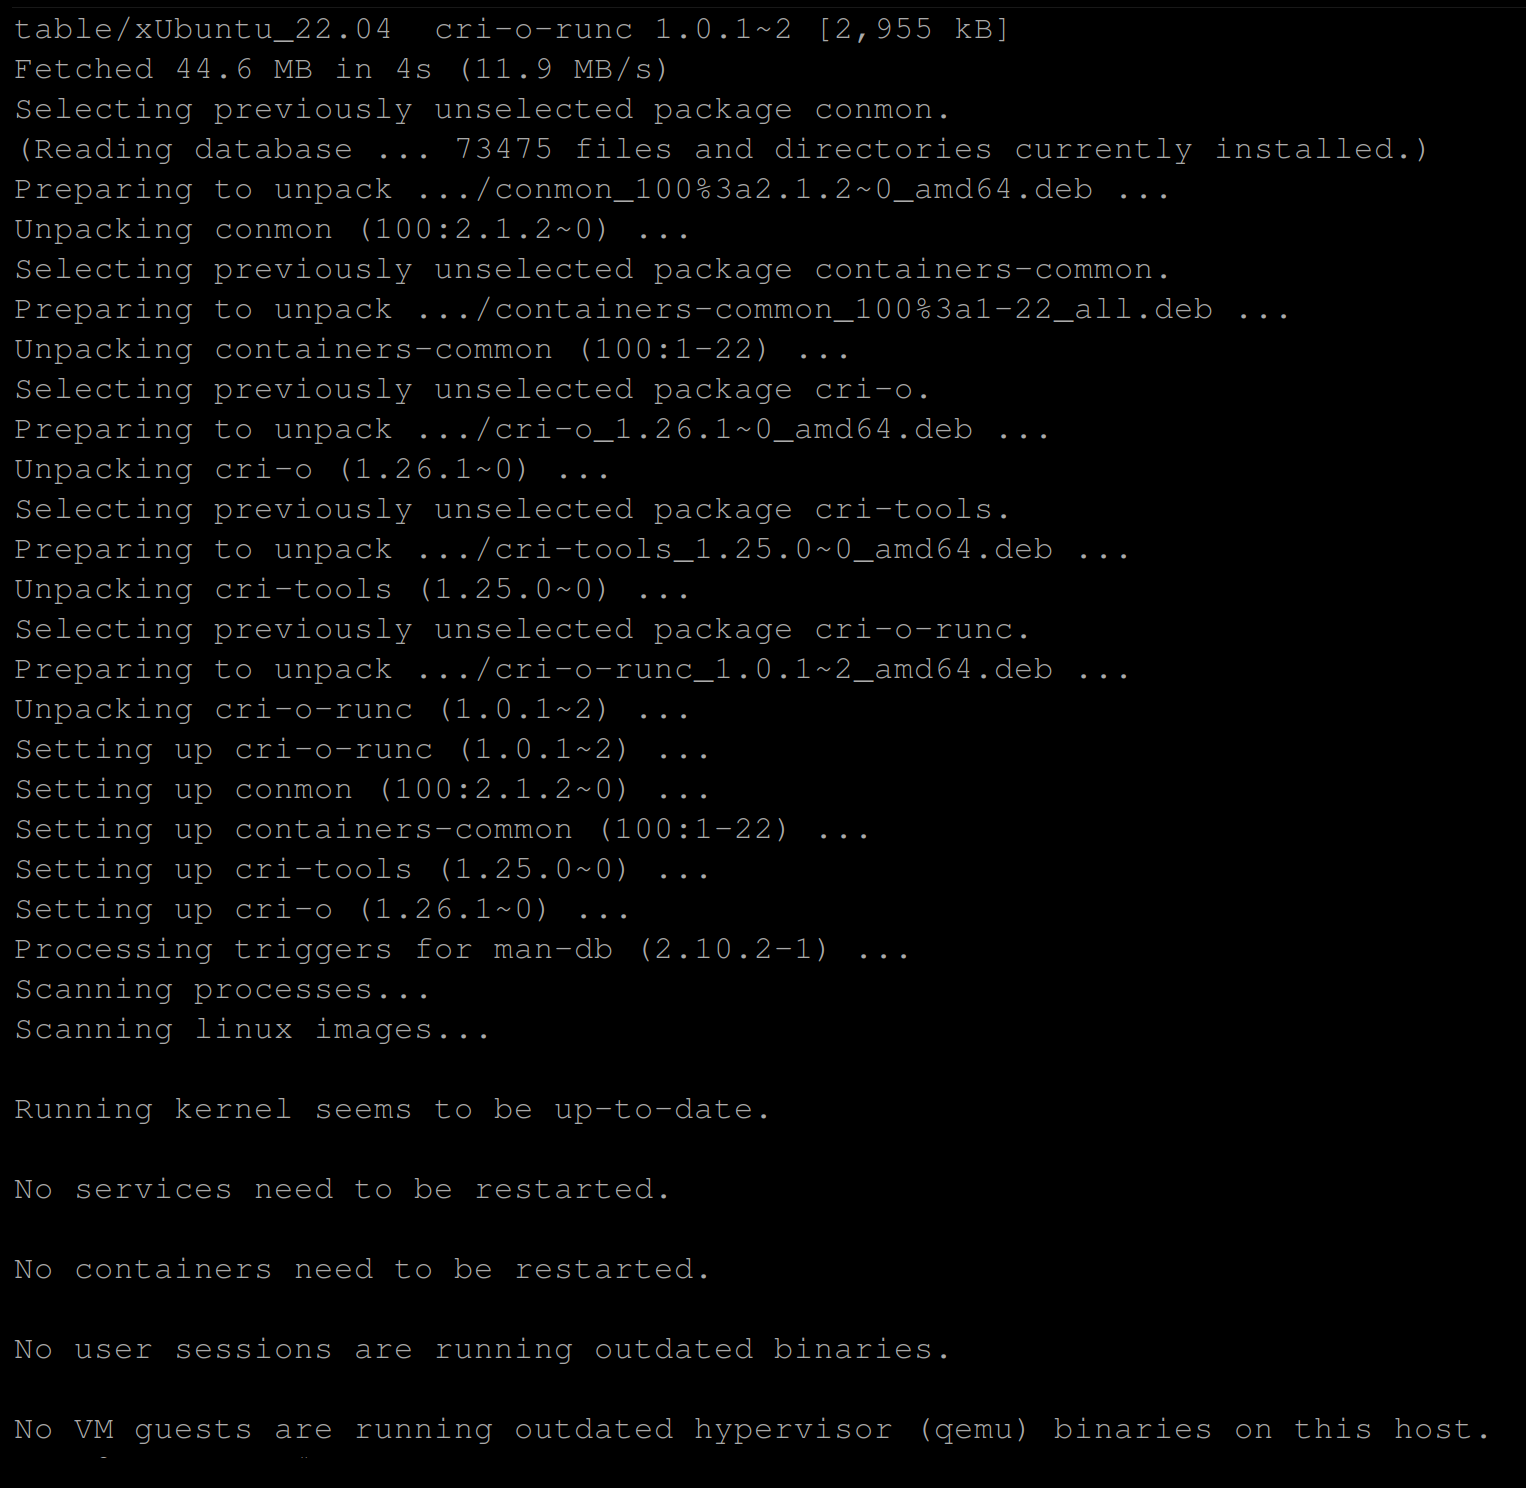
4. Now, run the systemctl commands below to reload systemd confirmations (daemon-reload) and enable the cri-o utility to start on reboots.
systemctl daemon-reload
systemctl enable crio --now
5. Once CRI-O is enabled, run the below crictl command (the CLI used to interact with CRI-O) to verify the CRI-O installation.
crictl info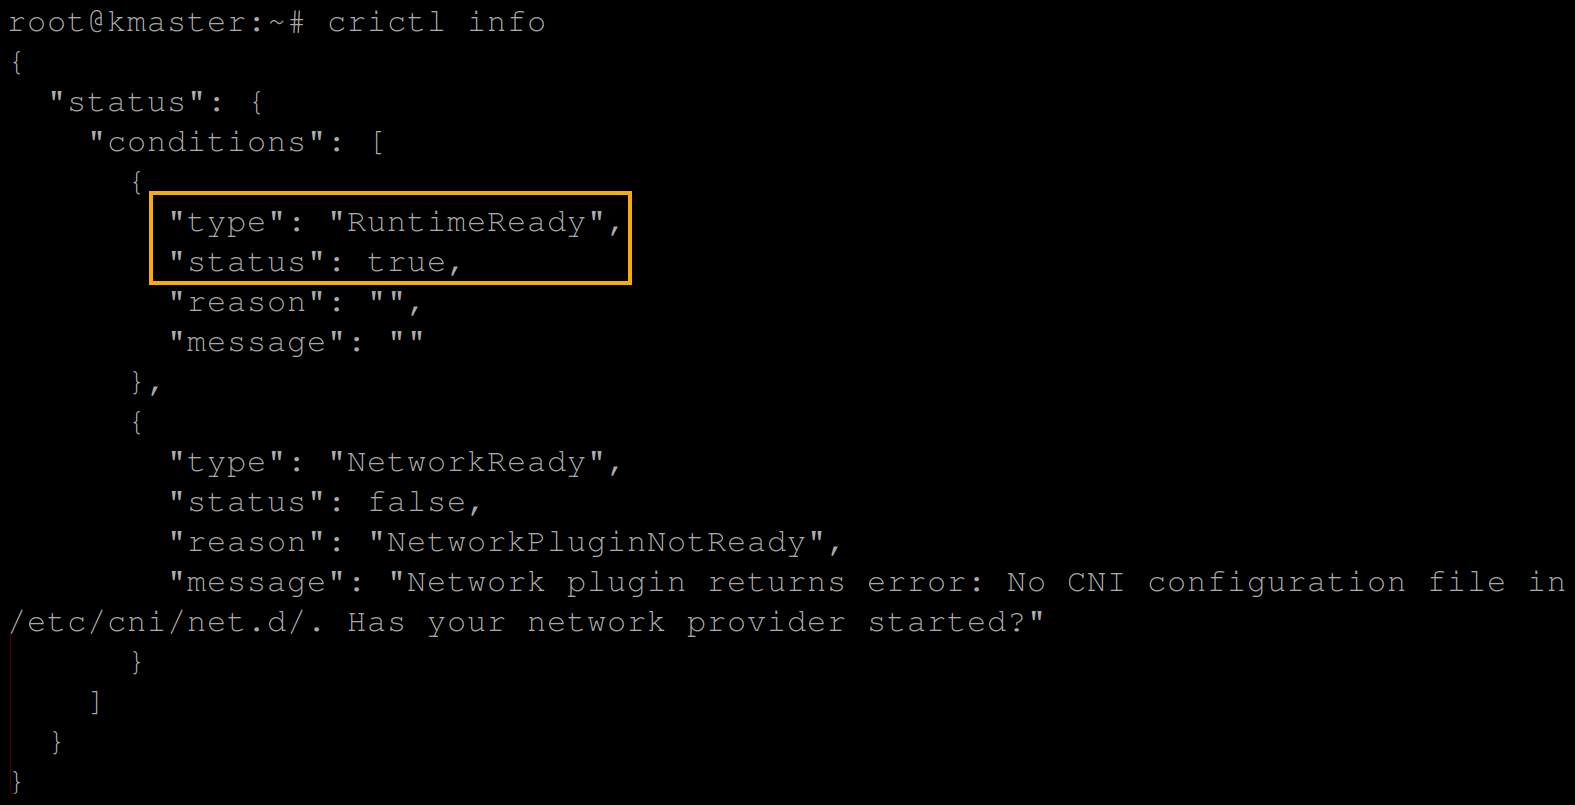
6. Lastly, run the below commands to add the Apt repository and install kubeadm and other Kubernetes components as follows:
- kubelet – A Kubernetes controller (node agent) that runs on each node. This controller provides an interface between the container runtime (CRI-O, in this case) on each node in the cluster and the Kubernetes control plane.
- kubectl – A command line tool that lets you use the Kubernetes API for communicating with a Kubernetes cluster’s control plane.
# Add the Apt repository
curl -s https://packages.cloud.google.com/apt/doc/apt-key.gpg | apt-key add -
echo "deb https://apt.kubernetes.io/ kubernetes-xenial main" > /etc/apt/sources.list.d/kubernetes.list

# Update the system package index
apt update
# Install Kubernetes components
apt install -y kubeadm=1.23.0-00 kubelet=1.23.0-00 kubectl=1.23.0-00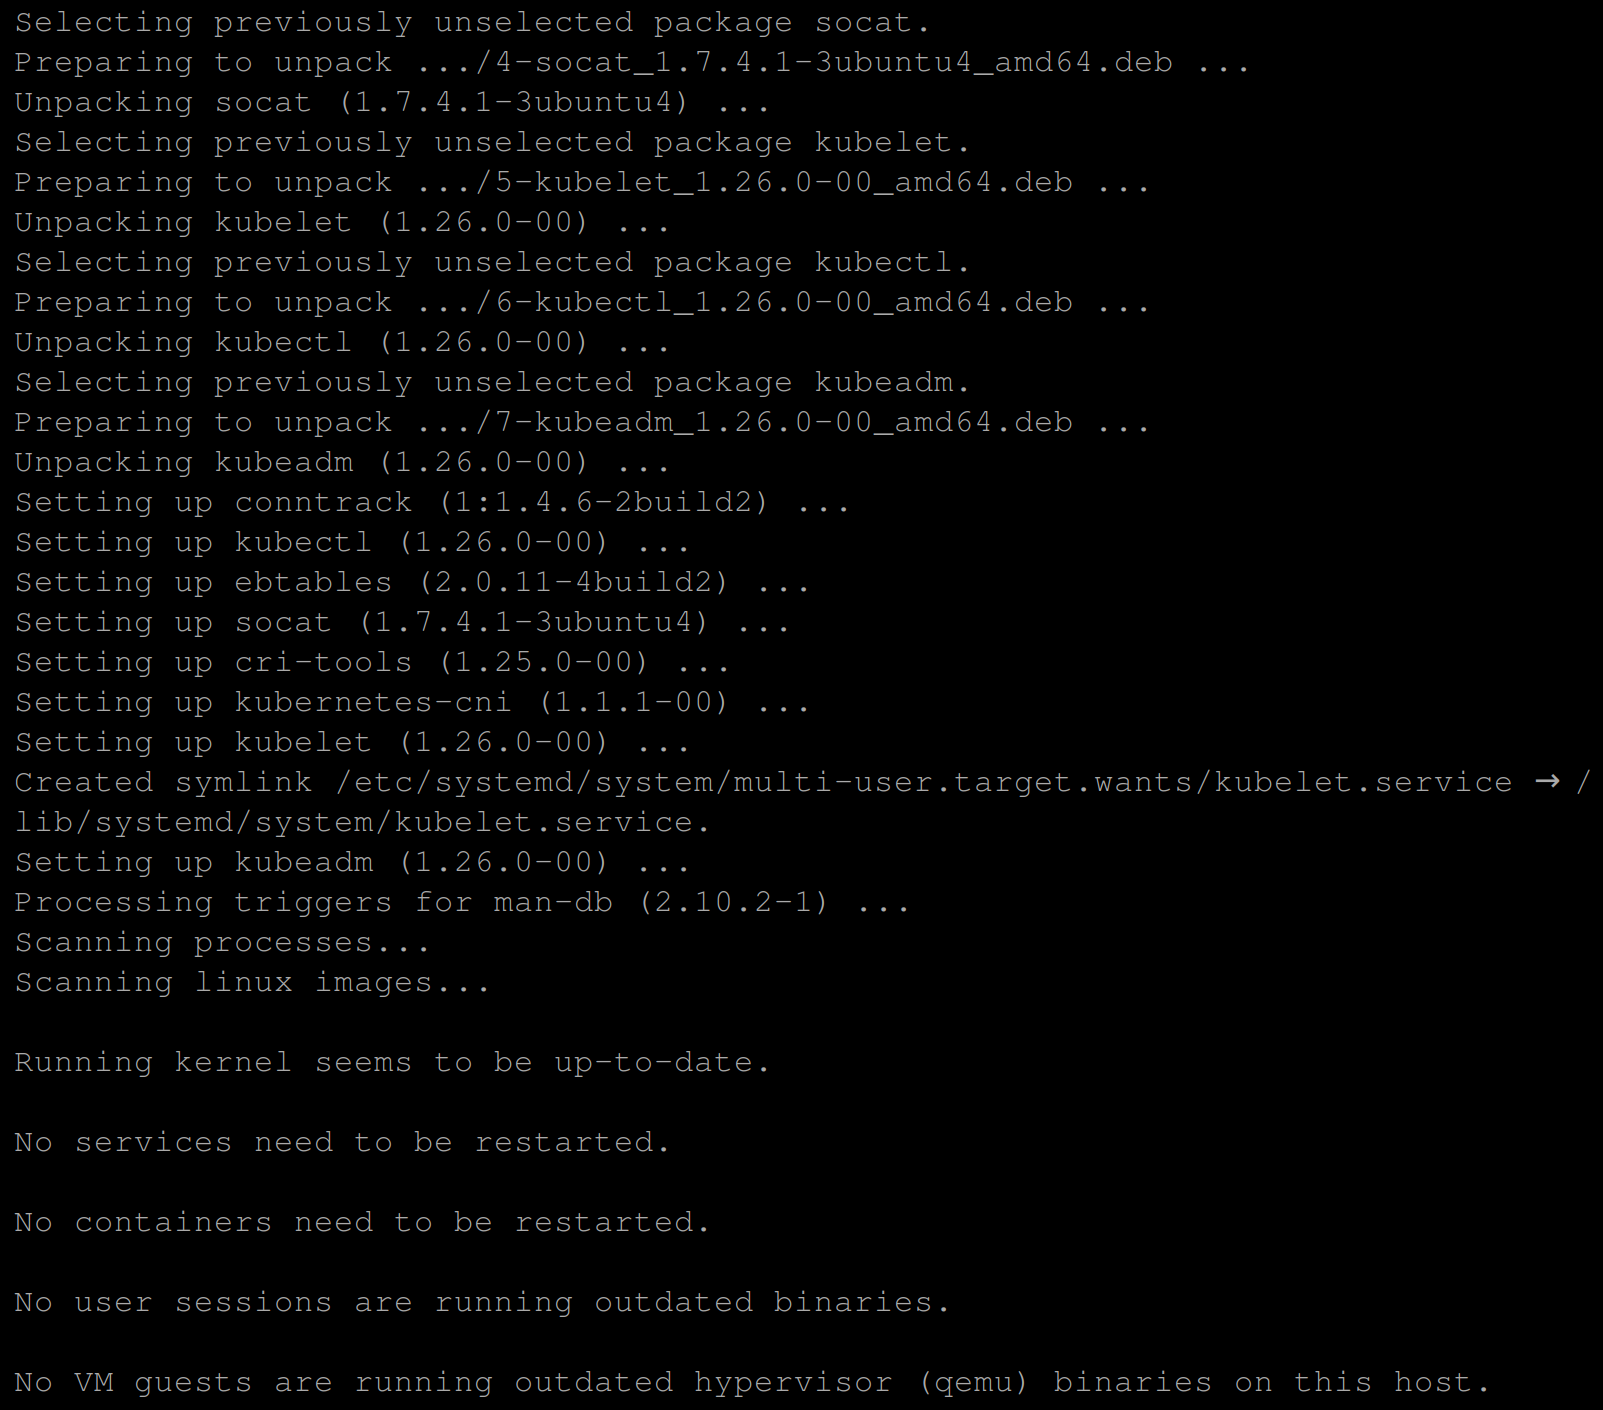
Initializing a Kubernetes Cluster
With a container runtime and Kubernetes components installed on both VMs, you can initialize a Kubernetes cluster via one of the Kubernetes controllers, kubelet.
To initialize a Kubernetes cluster, execute the steps below on your master node:
1. Run the below commands to enable the kubelet service and initialize the master node as the machine to run the control plane components. These components include etcd (the cluster database) and the API Server.
# Enable the kubelet service
systemctl enable kubelet
# Lists and pulls all images that Kubeadm requires
kubeadm config images pull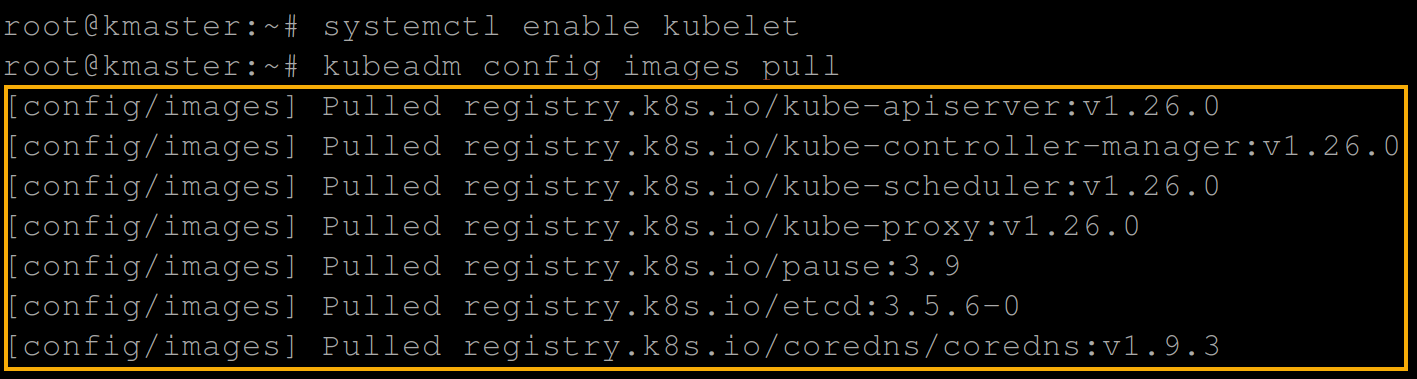
2. Next, run the following kubeadm command to initialize (init) a Kubernetes cluster on the master node using the following:
- The container CRI-O endpoint or path to the CRI-O Unix domain socket (–cri-socket unix:///var/run/crio/crio.sock).
kubeadm init --pod-network-cidr=192.168.0.0/16 --cri-socket unix:///var/run/crio/crio.sock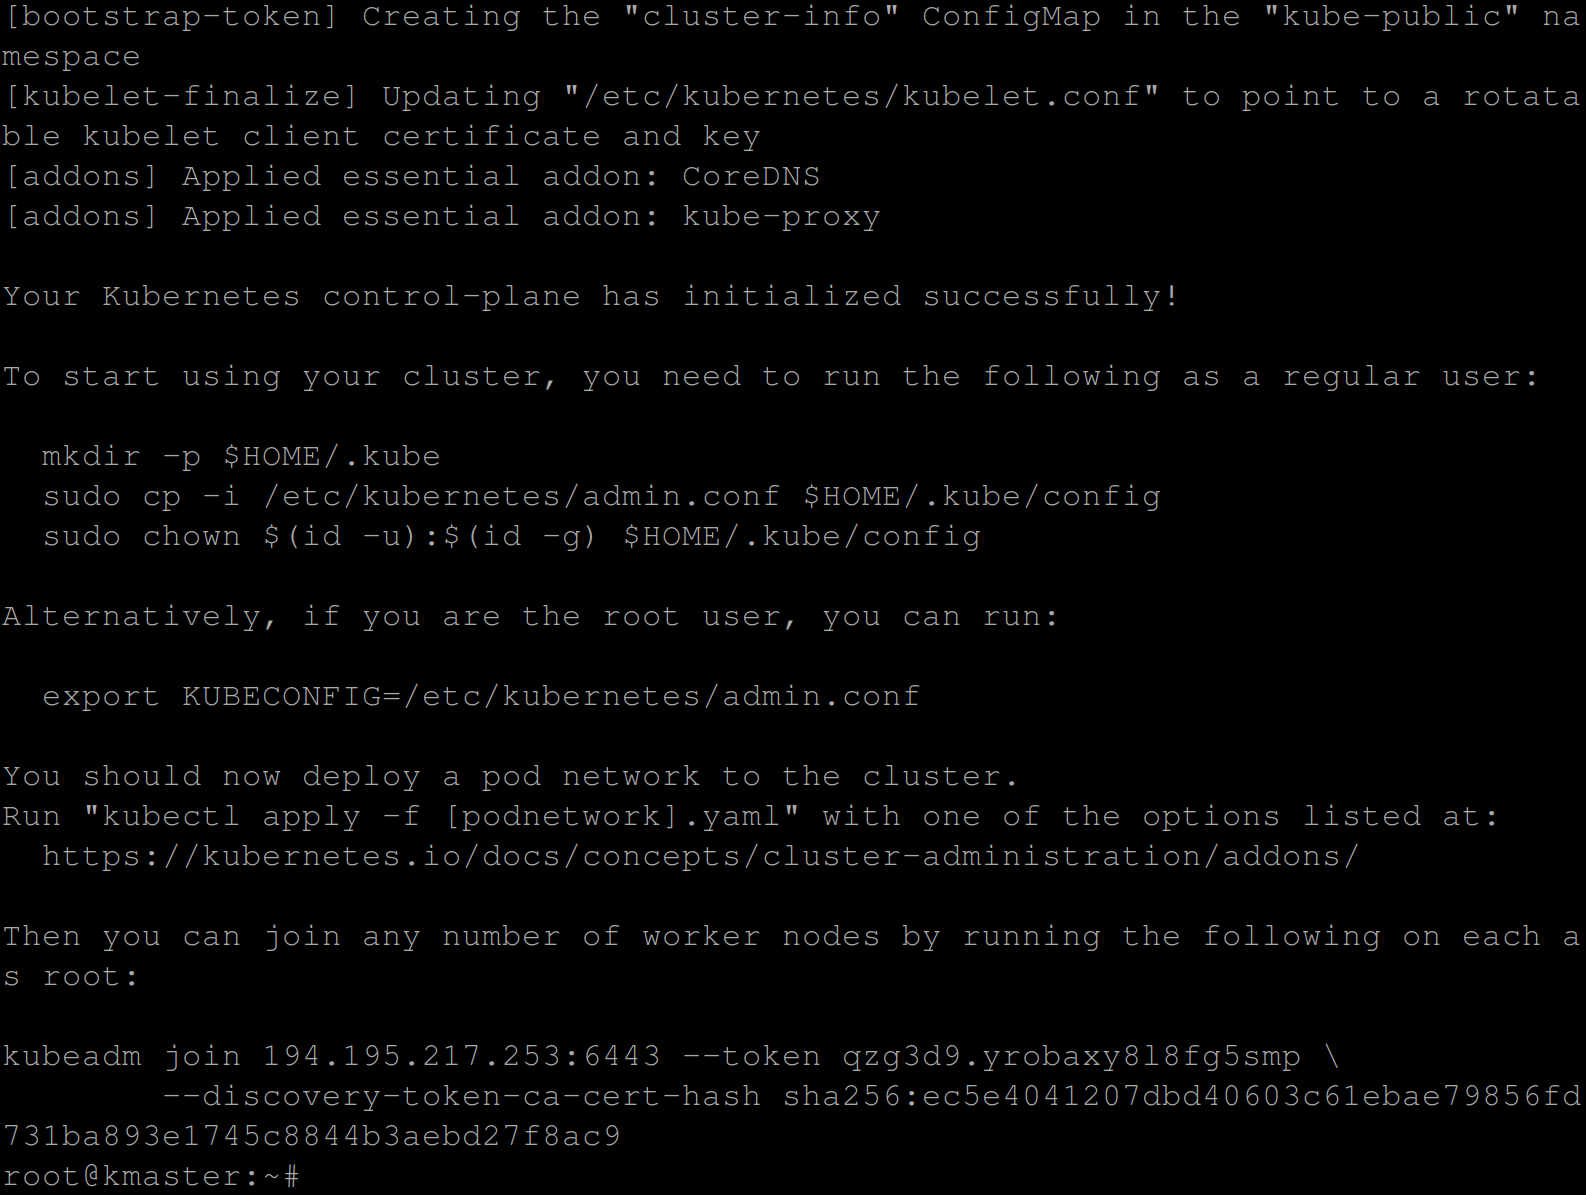
3. Now, run the below commands to export KUBECONFIG, which allows you to interact with the Kubernetes cluster and deploy the calico network.
# Marks an environment variable to be exported to child-processes.
export KUBECONFIG=/etc/kubernetes/admin.conf
# Deploy the calico network.
kubectl apply -f https://raw.githubusercontent.com/projectcalico/calico/v3.25.0/manifests/calico.yaml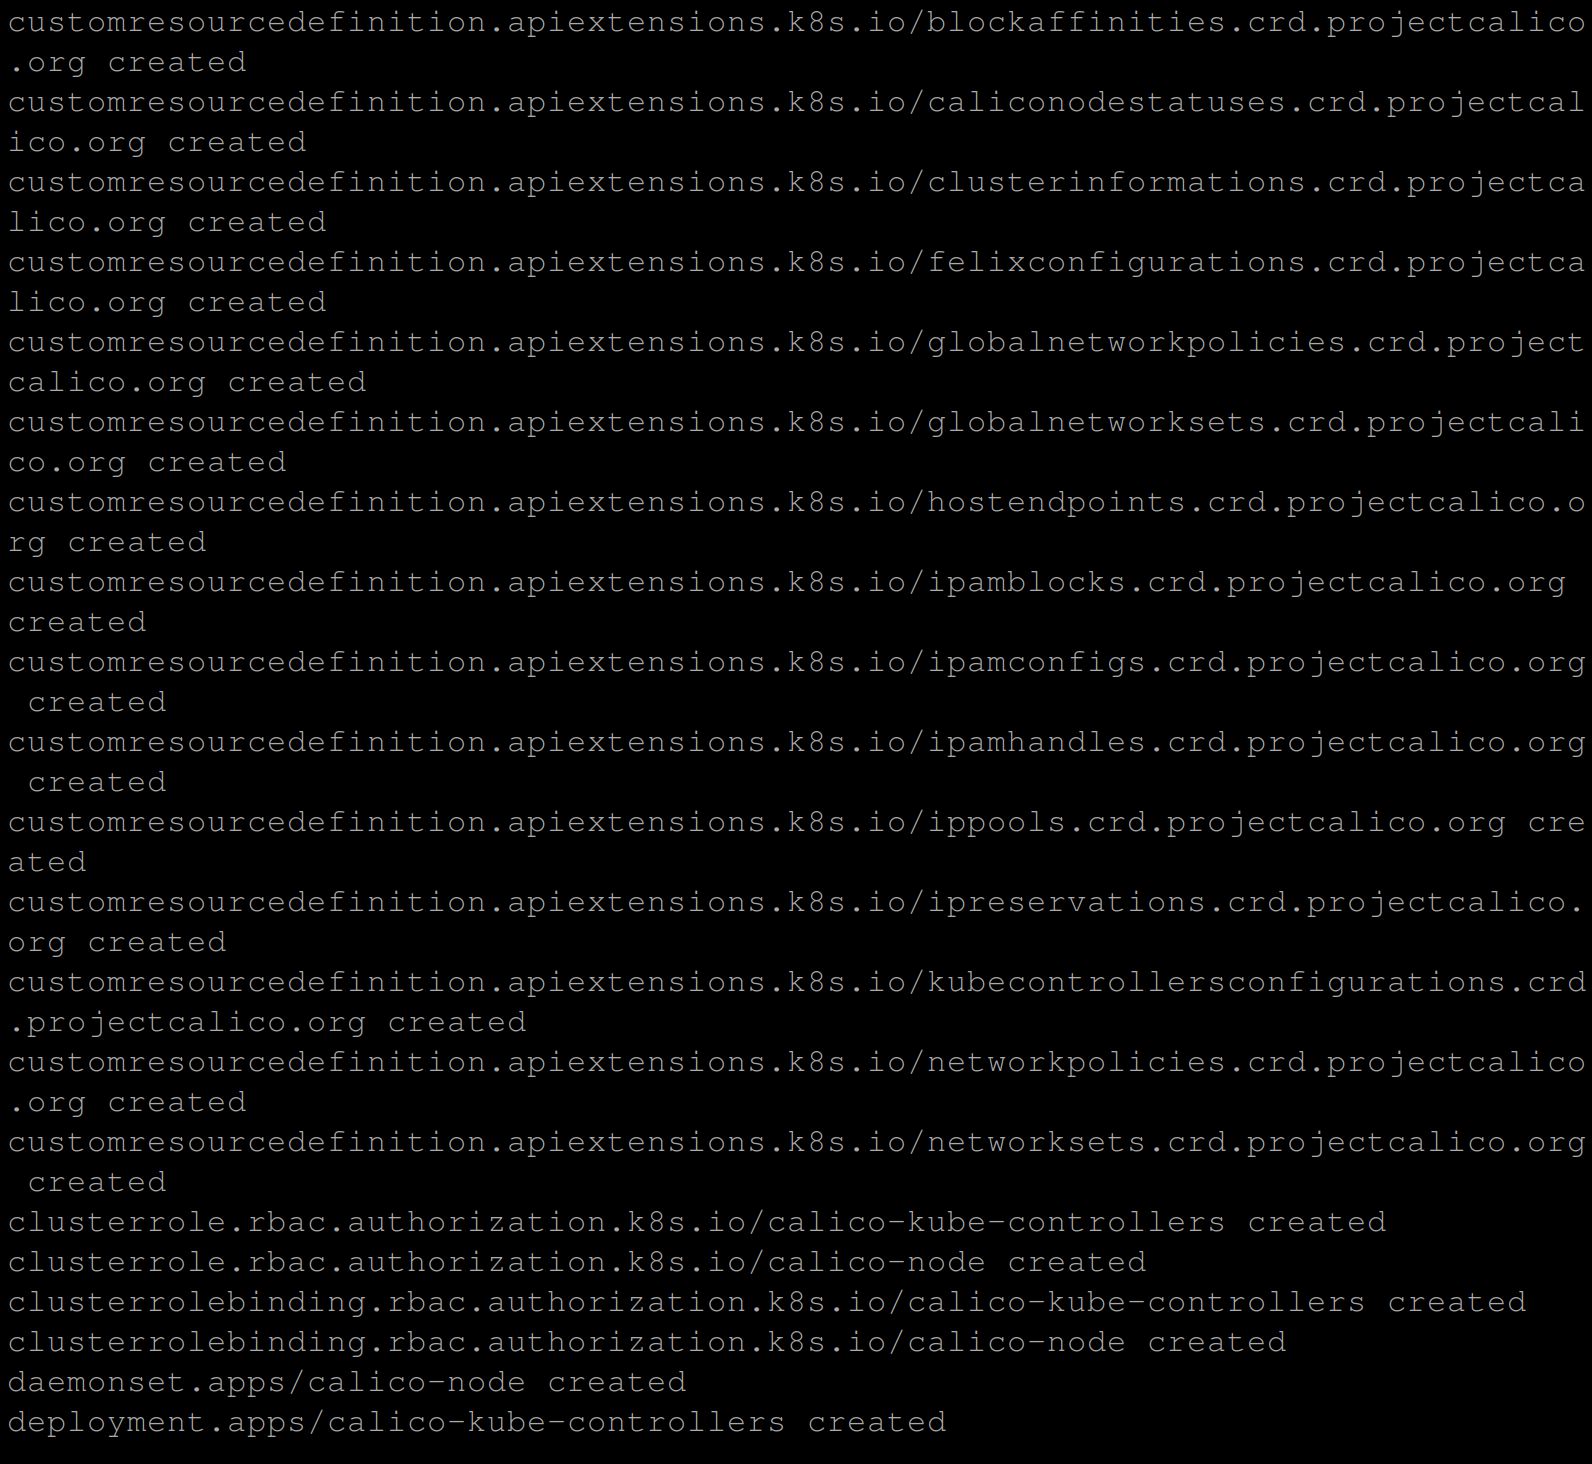
Joining the Worker Node with the Master Node
Since you have already initialized a Kubernetes cluster on the master node, there is no need to do the same on the worker node. Instead, you will join the worker node with the master node.
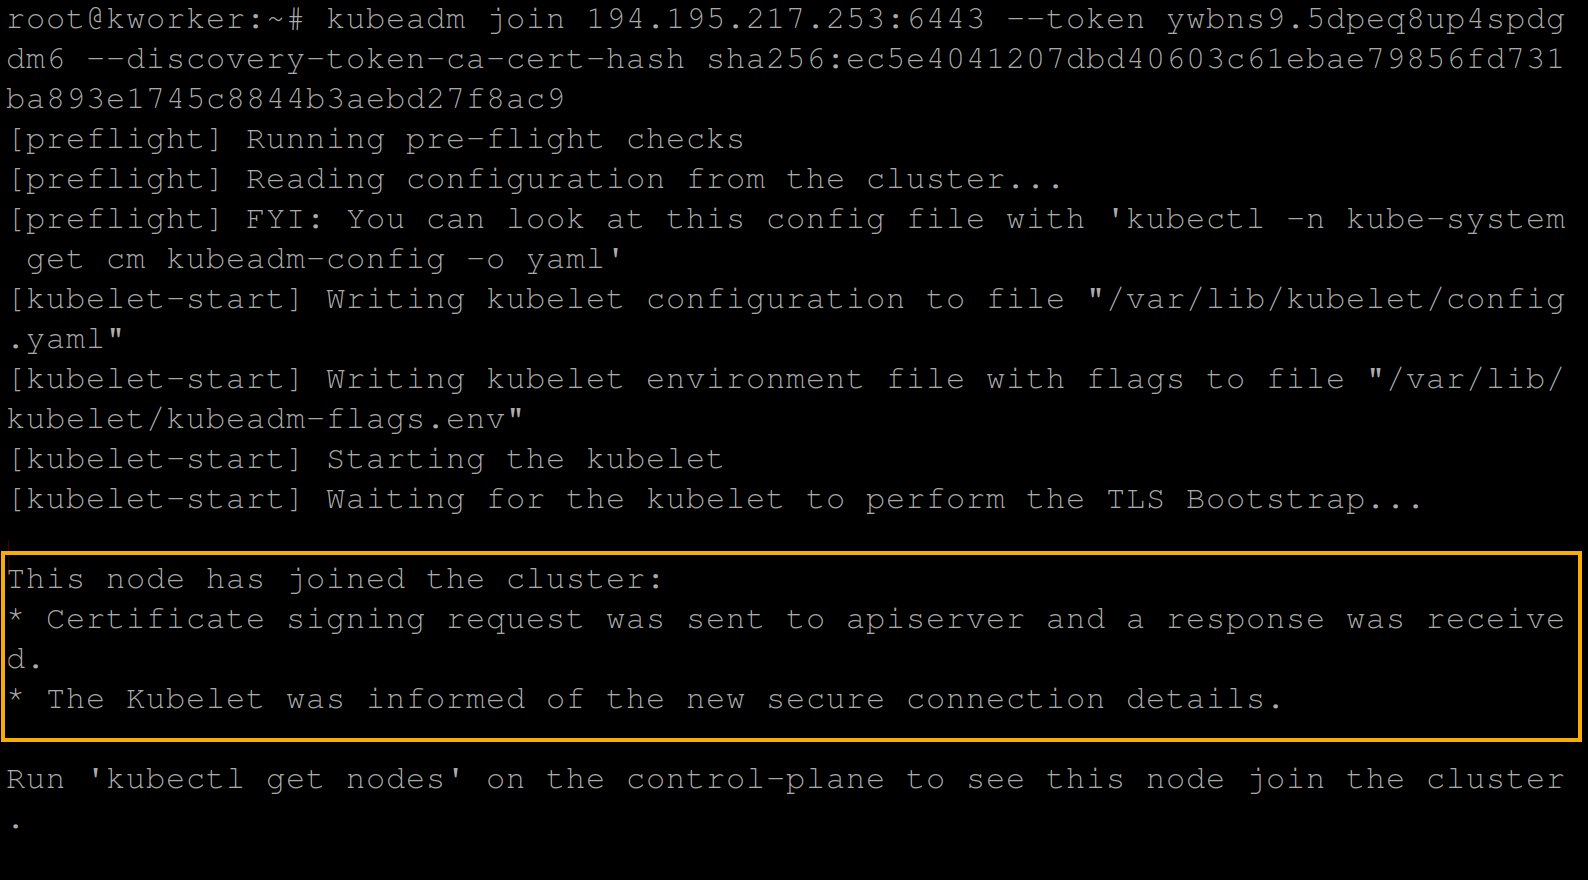
1. Run the below command on the worker node to create a token, and prints a join command (–print-join-command) you will use to join the worker node with the master node.
kubeadm token create --print-join-commandCopy the join command, as shown below.

2. Next, run the join command you copied in step one.
3. Once joined, run the following command to get the nodes available in your cluster.
kubectl get nodesYou will see the master node (kmaster) and the worker node (kworker).

4. Now, log out from both the master and worker nodes.
5. Open a terminal in your local machine, and run the following command to copy (scp) the kube config file from your master node to your local machine.
You will need this configuration file to access the cluster and interact with it.
scp [email protected]:/etc/kubernetes/admin.conf ~/.kube/config
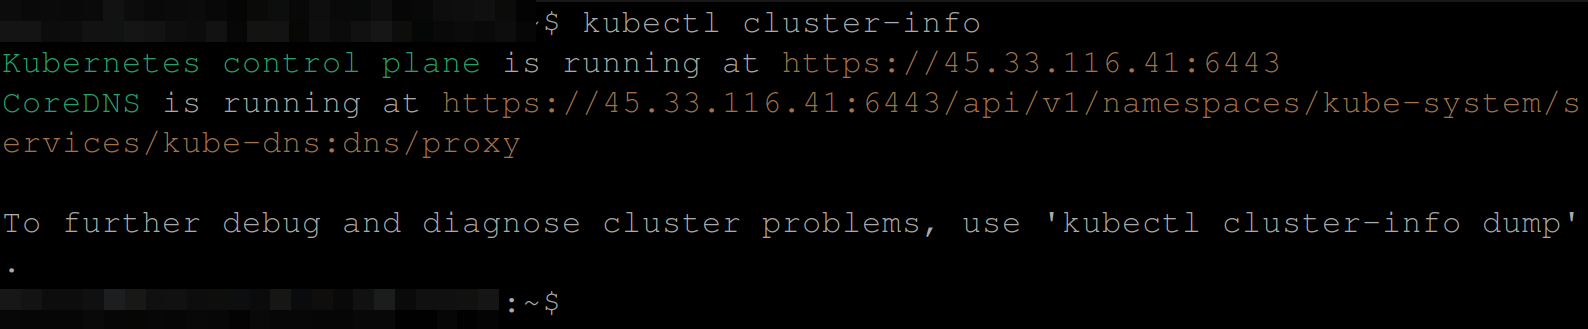
6. Next, execute the following command to see if the cluster has been accessed by your local machine and is running.
kubectl cluster-infoIf the cluster runs, you will see an output similar to the one below.
This output indicates that the kubeadm cluster is running on the master node (kmaster 43.33.116.41) on port 6443.
7. Finally, run each of the below commands to check the Kubernetes version and get all available nodes.
kubectl version --short
kubectl get nodes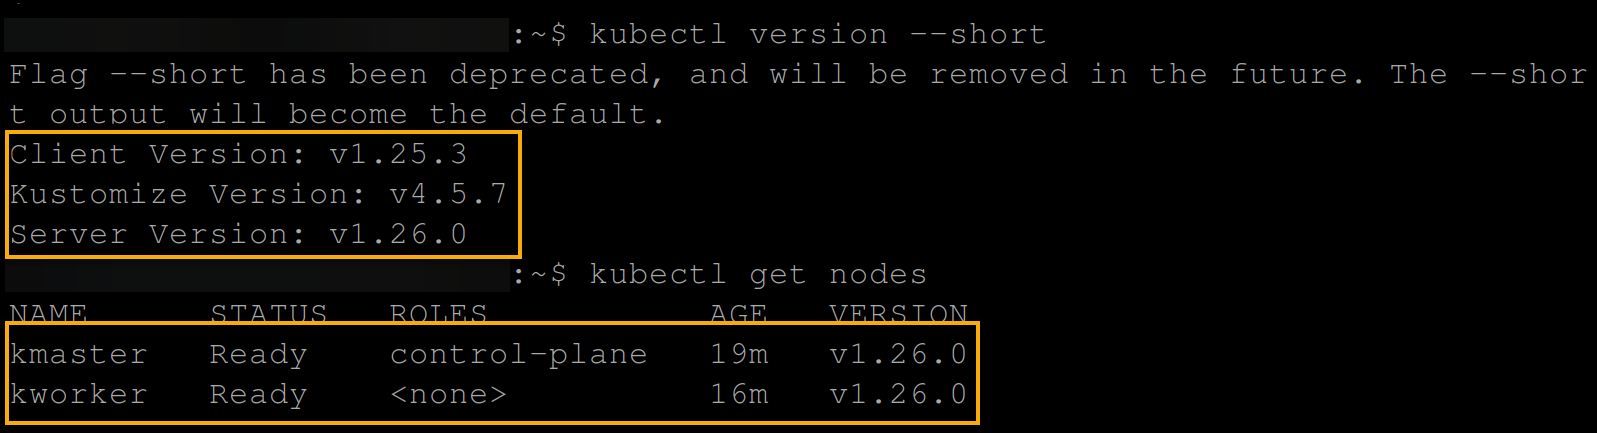
Creating a Deployment for Testing the Cluster
With your cluster set up, you are now ready to test your cluster. But first, you need to deploy an NGINX web server for testing.
To create a deployment to test your cluster, follow the steps below:
1. Run the following command on your local machine to deploy an nginx web server.
kubectl create deploy nginx-web-server --image nginx 
2. Once deployed, run the below command to expose the deployment as NodePort making the deployment accessible over a web browser.
kubectl expose deploy nginx-web-server --port 80 --type NodePort
3. With the deployment exposed, run the command below to get all resources available in your Kubernetes cluster.
kubectl get allBelow, you can see the NGINX pod and deployment running alongside the ClusterIP and the NodePort service.

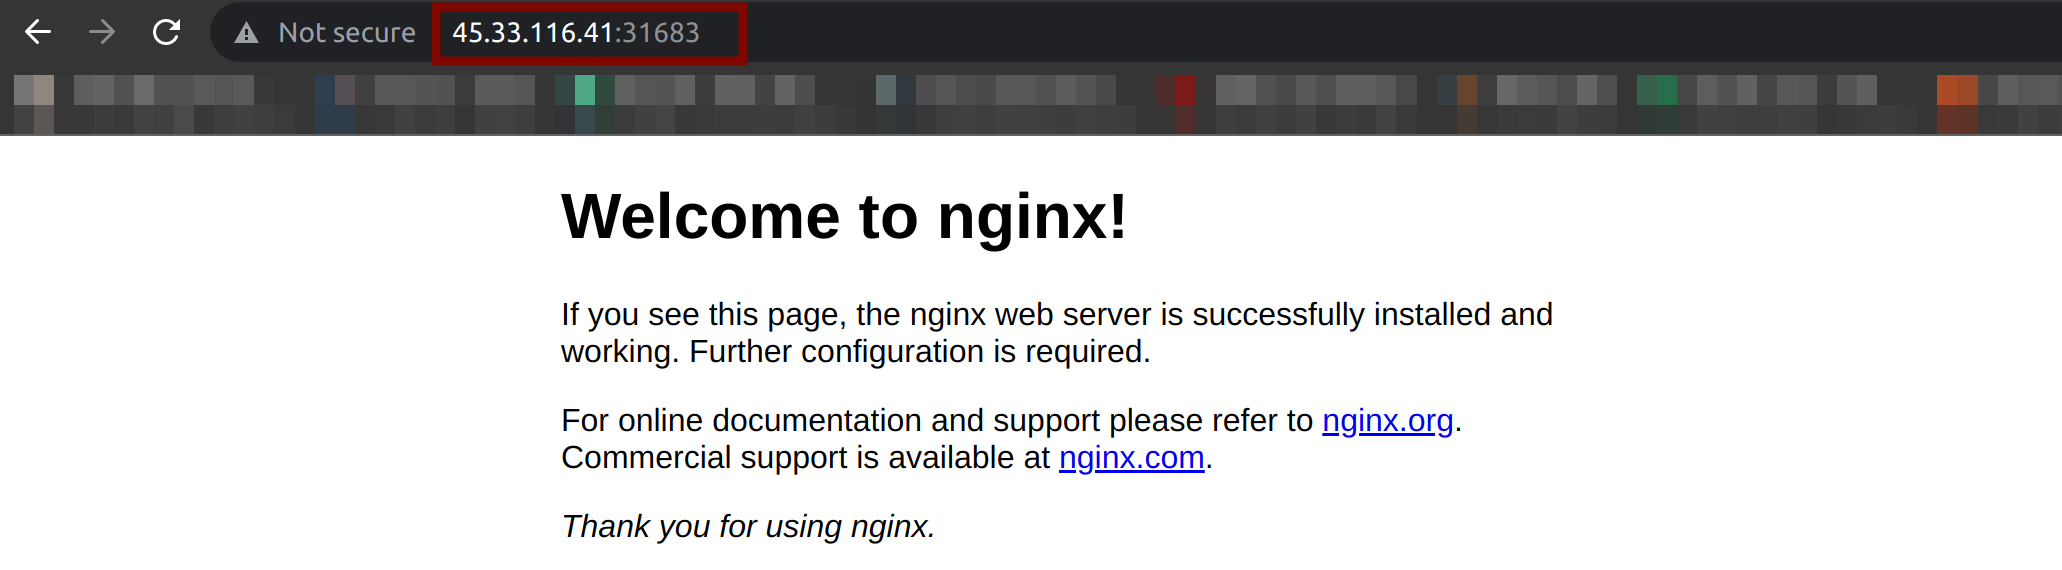
4. Now, visit either the master’s or worker’s IP address, followed by port 31863, like shown below, to view the NGINX web server welcome page.
# KMASTER_IP:NODEPORT_SERVICE_PORT
http://45.33.116.41:31683/

OR

# KWORKER_IP:NODEPORT_SERVICE_PORT
http://45.33.119.106:31683/
If all goes well, you will get the following pages for the master and worker nodes.
Conclusion
In this tutorial, you have learned how to create a Kubernetes cluster with kubeadm, join nodes and create a deployment for testing via the CRI-O container runtime. With kubeadm, you can now confidently create minimum viable Kubernetes clusters that will pass the Kubernetes Conformance tests.
You now have a fully functional Kubernetes cluster, so why not learn how to upgrade your cluster when a new Kubernetes version is released?


