


In the vast landscape of programming languages, not all can seamlessly blend speed, reliability, and modern syntax. If you’ve found yourself frustrated by compromises made to pursue high-performance development, you’re not alone. In such instances, installing Rust precisely emerges as the start of a transformative solution.
This tutorial is your ticket to unlocking the full potential of Rust on Ubuntu, ridding of performance bottlenecks.
Keep reading and watch your programs run with the swiftness you desire!
Prerequisites
Ensure your digital workspace is finely tuned with the following to follow along in this tutorial:
- An Ubuntu system – This tutorial uses Ubuntu 20.04 LTS.
- A non-root user with sudo privileges.
- cURL installed.
- Visual Studio Code (VSCode) installed.
Preparing the Ubuntu Environment for Installing Rust
With the prerequisites met, you’re almost set to embark on a coding journey. But like a hiker checking their gear before a trek, you must ensure your Ubuntu environment is in good shape.
Preparing your Ubuntu environment involves updating package lists, upgrading installed packages, and installing dependencies for Rust to work smoothly. After all, you wouldn’t want your code to crash more often than your friend’s outdated dad jokes.
To prepare your Ubuntu environment for installing Rust, follow these steps:
Open a terminal and execute the following apt commands to ensure your system’s package list is up-to-date. These commands update the package lists and upgrade the installed packages on your system.
sudo apt update && sudo apt upgrade -y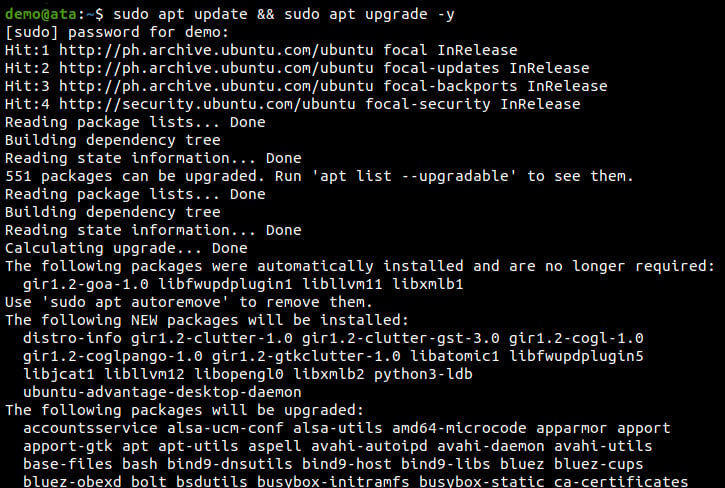
Now, run the below command to install the essential tools and libraries for building and compiling software on Ubuntu.
sudo apt install -y build-essential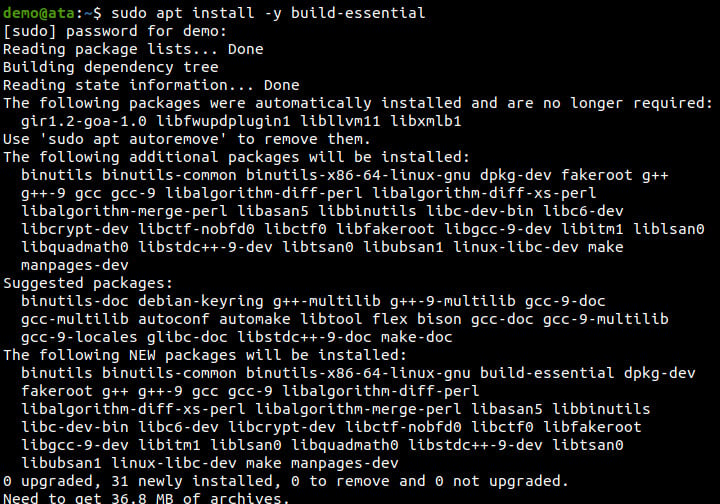
Downloading and Installing Rust
Now that you’ve fortified your Ubuntu environment, it’s time to infuse your coding space with a language renowned for its performance and reliability. You’ll download and install Rust on your system to harness its speed and efficiency for your coding projects.
To download and install Rust, carry out the following:
1. Run the below curl command to download the Rust installation script from the official source (https://sh.rustup.rs) and execute the script (| sh).
curl --proto '=https' --tlsv1.2 -sSf https://sh.rustup.rs | sh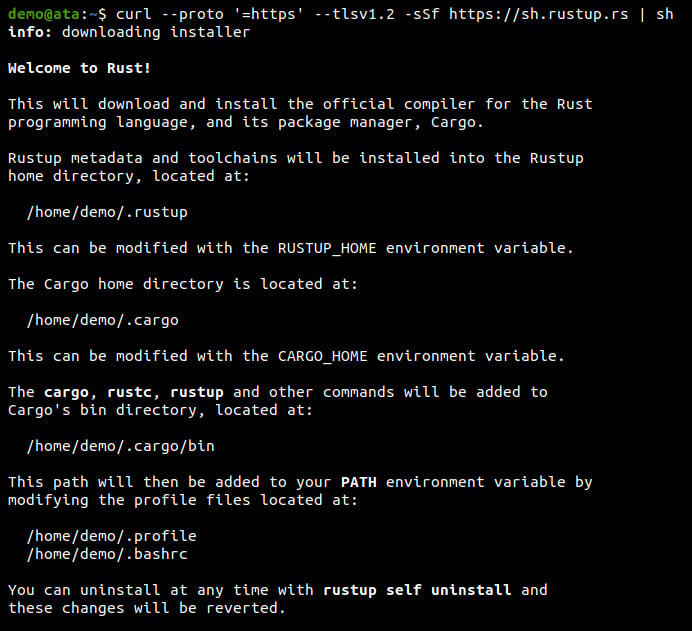
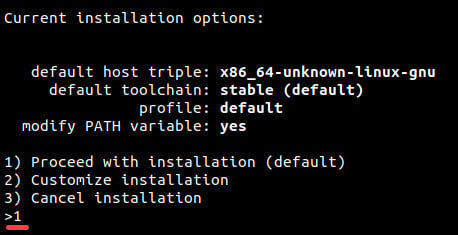
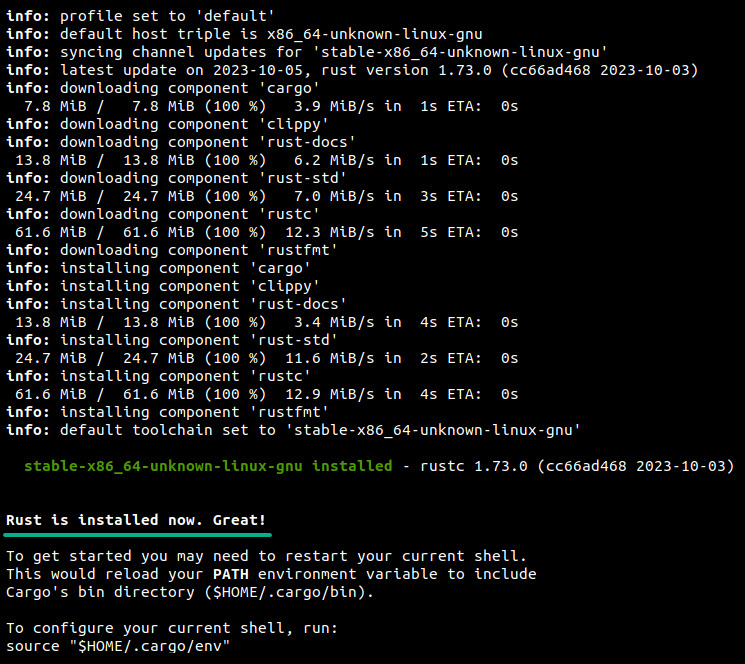
2. Next, scroll down to the bottom, input 1, and press Enter to continue the installation.
Once installed, you’ll see a confirmation message, as shown below.
3. Now, run the command below to check and print the --version of the Rust compiler (rustc). rustc --version

4. With the version confirmed, invoke the following command to source the environment configuration for Rust from the ~/.cargo/env file.
This file typically sets up environment variables related to the Rust toolchain. This command does not produce output but configures the current terminal session to recognize Cargo (Rust’s package manager) commands.
source $HOME/.cargo/envCreating a Rust Program
Since Rust has found its home in your Ubuntu environment, roll up your sleeves and get hands-on crafting your first lines of Rust code. You’ll create a Rust program that prints a message to the terminal.
To create a Rust program, complete the steps below:
1. Execute the following commands to create (mkdir) and navigate (cd) to a project directory (i.e., /first-rust)
These commands do not provide output, but the /first-rust directory is where you’ll store resources for your Rust program.
mkdir first-rust && cd first-rust2. Open your favorite text editor, like nano, vim, or gedit, but this tutorial’s choice is nano.
nano sample.rs3. Next, populate the following code to your sample.rs file, save the file, and close the editor.
This code is a Rust program that uses the println! Macro to print a message to the terminal.
// Defines the main function - The entry point of the Rust program
fn main() {
		// Prints a message to the terminal
    println!("Congratulations on running your first Rust program!");
}
4. Lastly, change your working directory to where you saved your sample.rs file (or specify the full path) and execute the below chmod command. This command produces no output when successful but adds execute permission to the file (sample.rs), enabling you to run the script later.
chmod +x sample.rsCompiling and Running the Rust Program
You’ve just elegantly crafted your first Rust program, a commendable achievement. But how can you be sure that your program functions as intended? Elevate your coding adventure, and start compiling and running your program.
To compile and run your Rust program, proceed with the following:
Run the following rustc command to compile your Rust program (sample.rs).
This command has no output but compiles your project to an executable file (sample) based on the name of your Rust resource file (sample.rs)
rustc sample.rsOnce compiled, execute the following command to run your compiled Rust program (sample) from your working directory (./)
Since you already compiled your program, you only need to specify the file name (sample) without the file format (.rs). Otherwise, the shell will try to interpret the Rust code as a script and return an error.
./sampleYou’ll see the message below on your terminal if all goes well.
Congratulations! You’ve just compiled and run your first Rust program on Ubuntu.

Integrating Rust with Development Tools (VSCode)
As your Rust program comes to life through compilation and execution, the journey doesn’t end there. Embrace efficiency, collaboration, and a more rewarding coding experience by integrating Rust with development tools like VSCode.
Think of this process as upgrading from a manual typewriter to a sleek computer, enhancing productivity.
To integrate Rust with VSCode, execute the following actions:
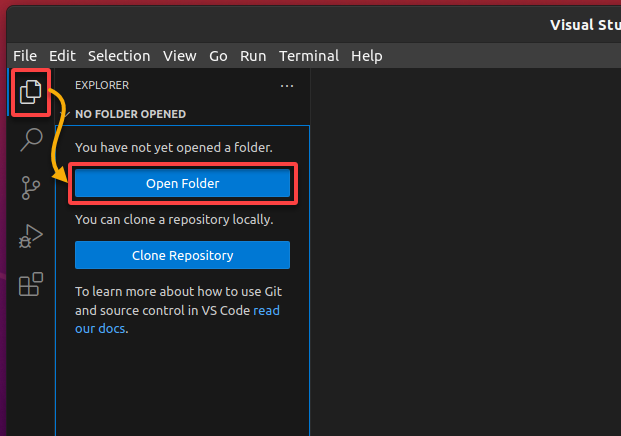
1. Launch VSCode and open your project directory, as shown below.
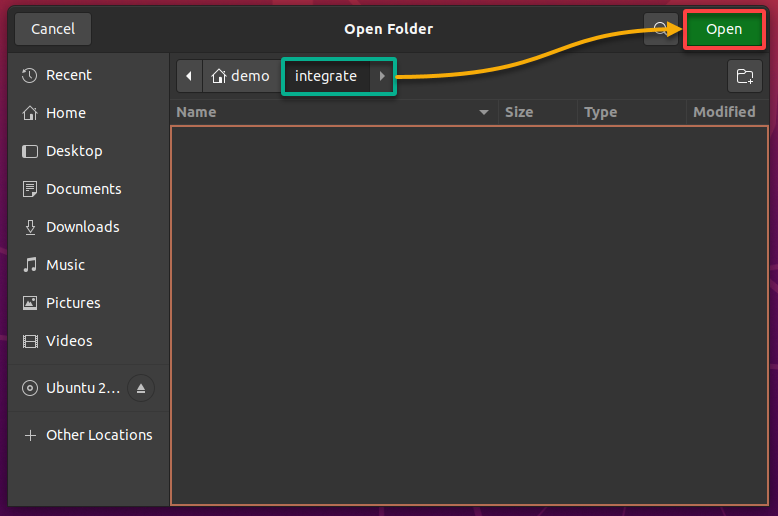
2. Next, create a new directory called ~/integrate and open it as your project directory.
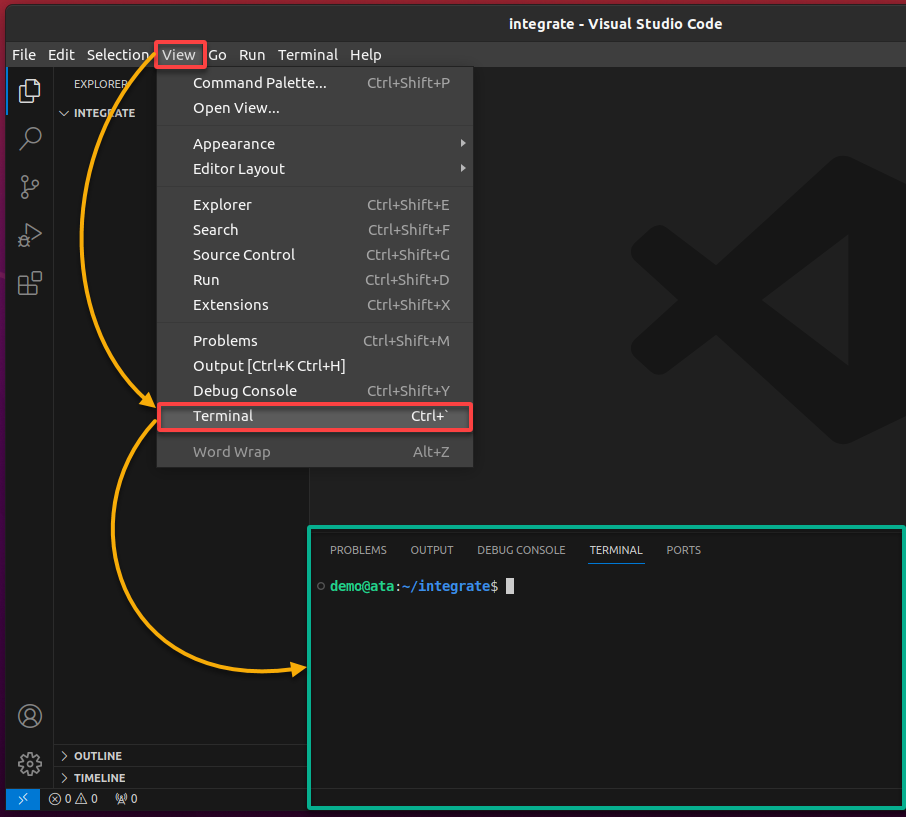
3. Click on the View menu, and choose Terminal (or press Ctrl+` ) to open the integrated terminal in VSCode.
Notice below that the working directory is automatically set to your newly-created project directory (~/integrate).
4. Now, run the following command in the terminal to initialize (init) your project directory.
cargo initThis command sets up the basic structure and configuration files for your new Rust project, as shown below.

5. Once initialized, create a new file called file.txt (arbitrary) inside the /src directory and add the following content. The /src directory stores all your resource files for your Rust program.
Congratulations! Integration is successful!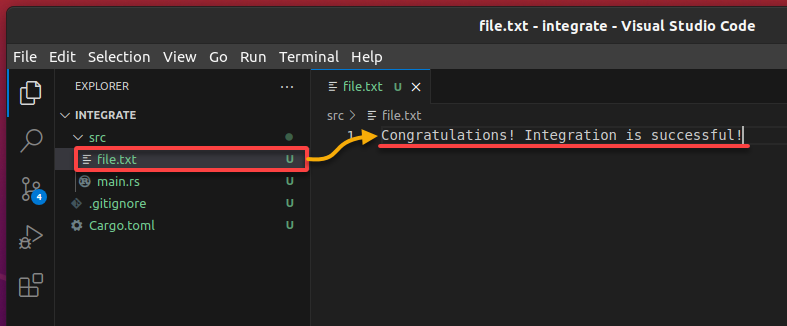
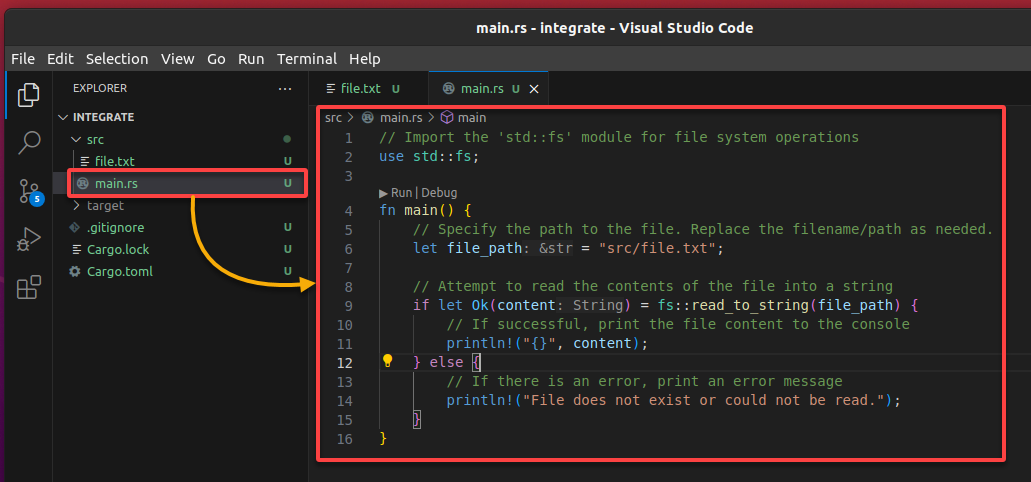
6. Select the main.rs file inside the /src directory and replace the content with the following code.
Note that you can always change the name of the main.rs file as you prefer.
// Import the 'std::fs' module for file system operations
use std::fs;

fn main() {
    // Specify the path to the file. Replace the filename/path as needed.
    let file_path = "src/file.txt";

    // Attempt to read the contents of the file into a string
    if let Ok(content) = fs::read_to_string(file_path) {
        // If successful, print the file content to the console
        println!("{}", content);
    } else {
        // If there is an error, print an error message
        println!("File does not exist or could not be read.");
    }
}
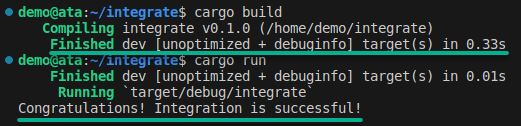
7. Finally, run the below cargo commands to build and run your new Rust project.
cargo build
cargo run
As shown below, the program found the file.txt file and printed its content to the terminal, which confirms the entire project is a success.
Conclusion
Throughout this tutorial, you’ve crafted a foundation for an exhilarating coding adventure from installing Rust on your Ubuntu machine. You’ve seen your code come to life through compilation and execution and streamlined your development process by integrating Rust with VSCode.
Now, as you reflect on your steps, why not delve into the compelling world of Concurrency and Parallelism in Rust? Understanding concurrency and parallelism opens new horizons for performance optimization in your Rust projects.
Explore and realize that Rust’s design choices make it not just a language for high-performance computing but also an excellent choice for handling complex, concurrent tasks!


