


Are you looking for a way to collaborate with your team more effectively? Visual Studio Code (VSCode) Live Share can help and is just around the corner! VSCode Live Share is a real-time collaboration tool that allows you to share your code and collaborate on coding projects.
In this tutorial, you’ll learn how to set up VSCode Live Share and how real-time team coding collaborations work.
Check out VSCode Live Share and see how productive your daily routine can get!
Prerequisites
This tutorial will be a hands-on demonstration. If you’d like to follow along, be sure you have the following.
- Two Windows 10 machines, either physical or virtual – This tutorial uses one VM (guest) and one physical machine (host) to test the live share feature.
- Visual Studio Code IDE installed on both host and guest machines.
- A project opened in Visual Studio Code that you’d like to collaborate on with your guest.
Downloading and Installing the VSCode Live Share Extension
The VSCode Live Share extension lets you and others edit the same file, debug the same app, and even run commands in the same console simultaneously. So whether you’re working on a small project or a large one, VSCode Live Share can make your life easier and get the job done faster.
You and your teammates will need to install the extension first to start collaborating. You’ll download the VSCode Live Share extension pack from the Visual Studio Marketplace.
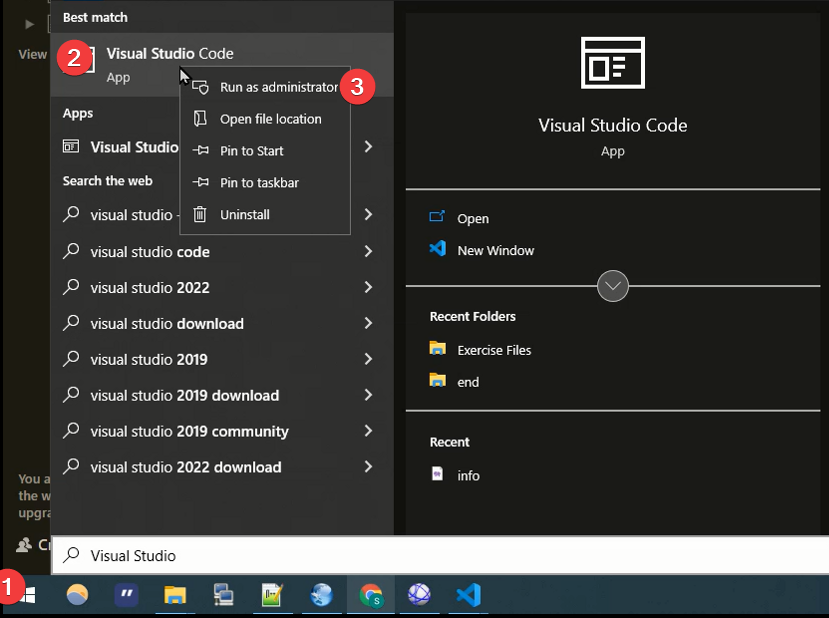
1. On your host machine, launch the Visual Studio Code in administrator mode. Some features, such as port forwarding, might require administrator privileges.
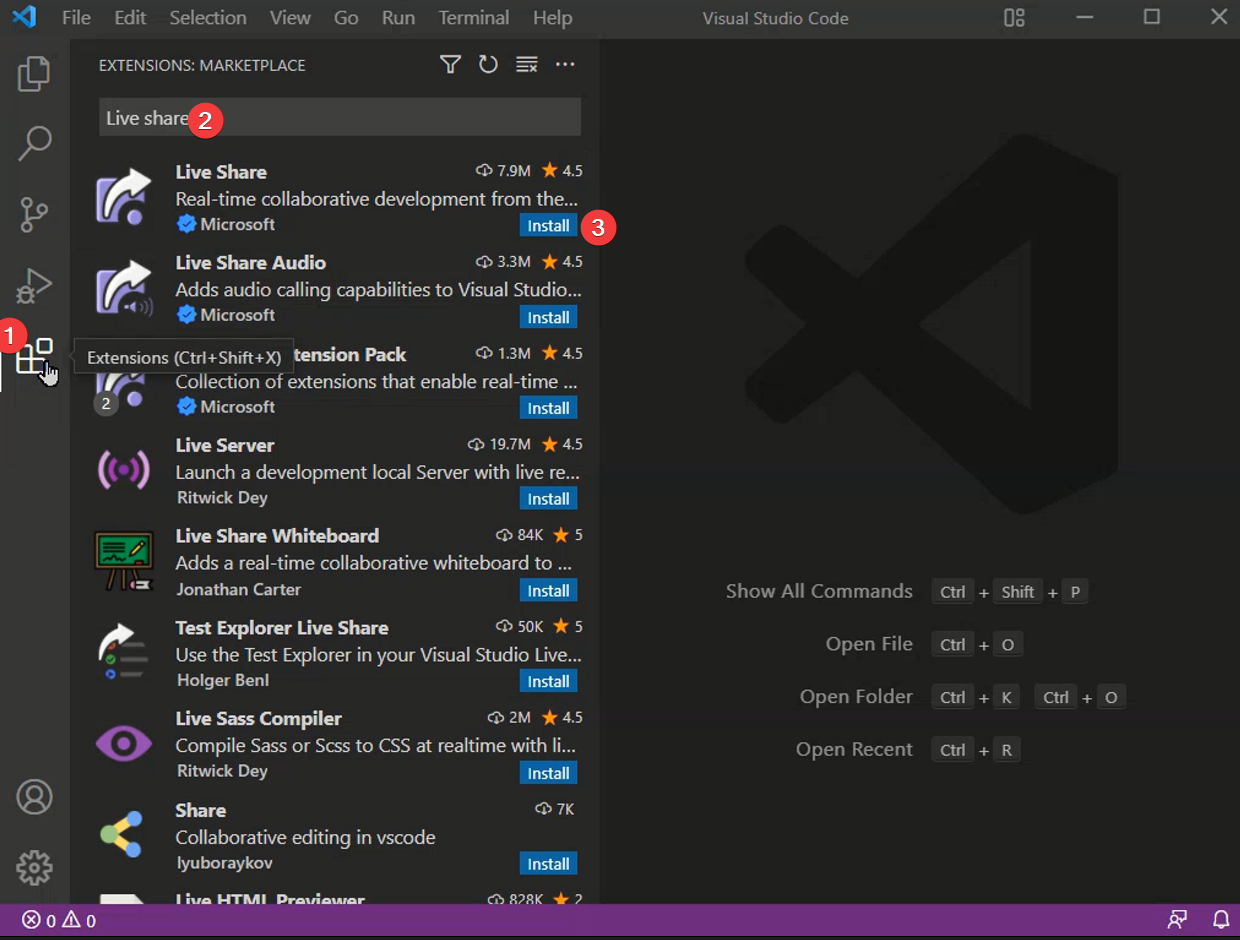
2. Next, on VSCode’s window, install the Live Share extension with the following:
- Click the Extensions icon from the left navigation panel, as shown below, to access the extensions marketplace.
- Type Live Share in the search bar and look for Live Share from Microsoft.
- Click Install at the bottom-right of the Live Share extension to install the extension.
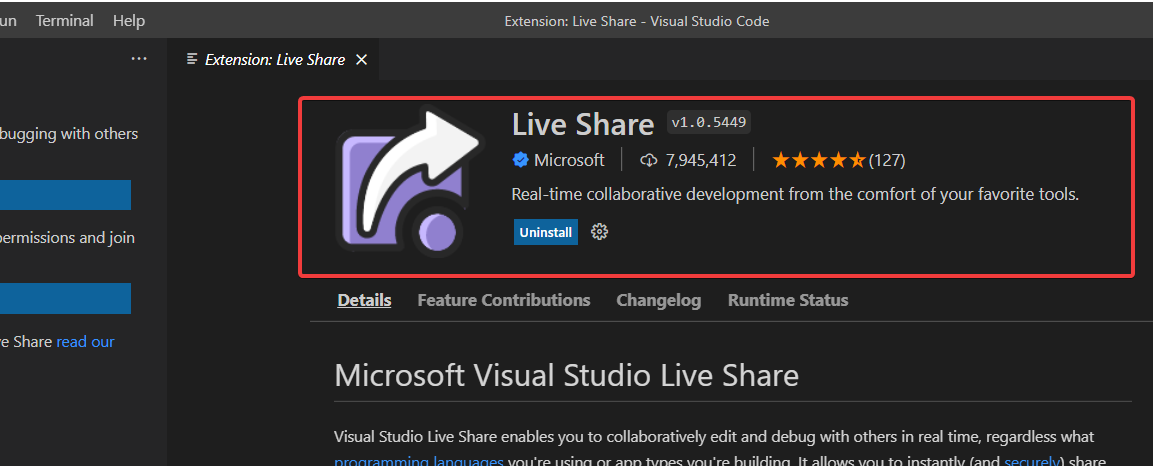
3. Close and restart VSCode after installing the extension.
When VSCode opens up again, you’ll get the Live Share extension tab below, which confirms the Live Share extension is now available in VSCode.
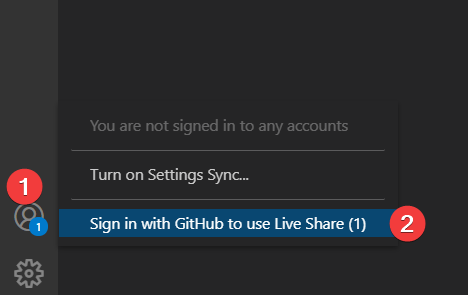
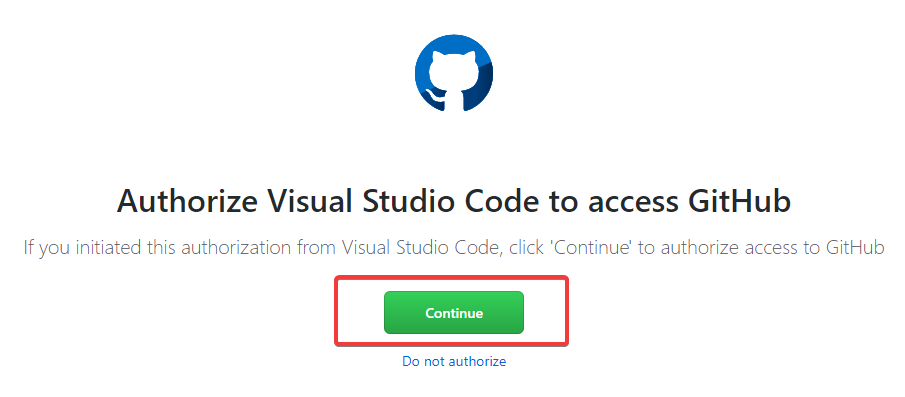
4. Now, click on the avatar icon at the bottom left and choose Sign in with GitHub. A browser tab will open and redirects to GitHub.com (step five), where you’ll sign in to your GitHub account.
You need to sign in to GitHub to use the Live Share extension. Live Share depends on the GitHub repository hosting service to provide user authentication and authorization.
For collaborators to share and join a session, you and your guest must be signed in to a valid GitHub account.
5. Click on Continue and follow the on-screen instructions to sign in to your GitHub account. After signing in, the browser window will close, and you’ll be redirected back to VSCode.
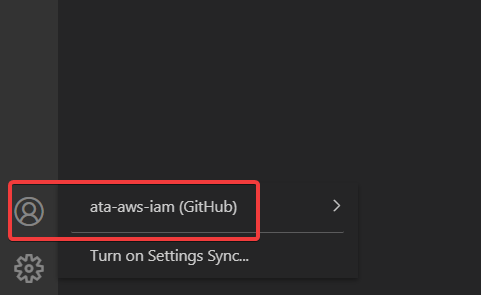
6. Next, click on the avatar icon again to verify that you are signed in, as shown below.
The panel will display your GitHub user name (ata-aws-iam). If not, re-sign in following the previous steps four to five.
7. Lastly, repeat steps one to six on your guest machine to install the Live Share extension and sign in to GitHub.
Sharing a Project and Joining a Collaboration Session
Now that you and your guest have the required tools installed, you’re ready to start a collaboration session by sharing a project.
1. On the host machine, start a collaboration session with the following:
- Press CTRL+SHIFT+P in VSCode to open the command palette, as shown below.
- Enter Start Collaboration Session and select liveshare.start from the list.
- Click OK when you get a pop-up message to accept unblocking ports on your firewall. Doing so enables VSCode to interact with your guest machine in real-time.
By default, both participants in the collaboration session will have editor rights and can make changes to the same file.
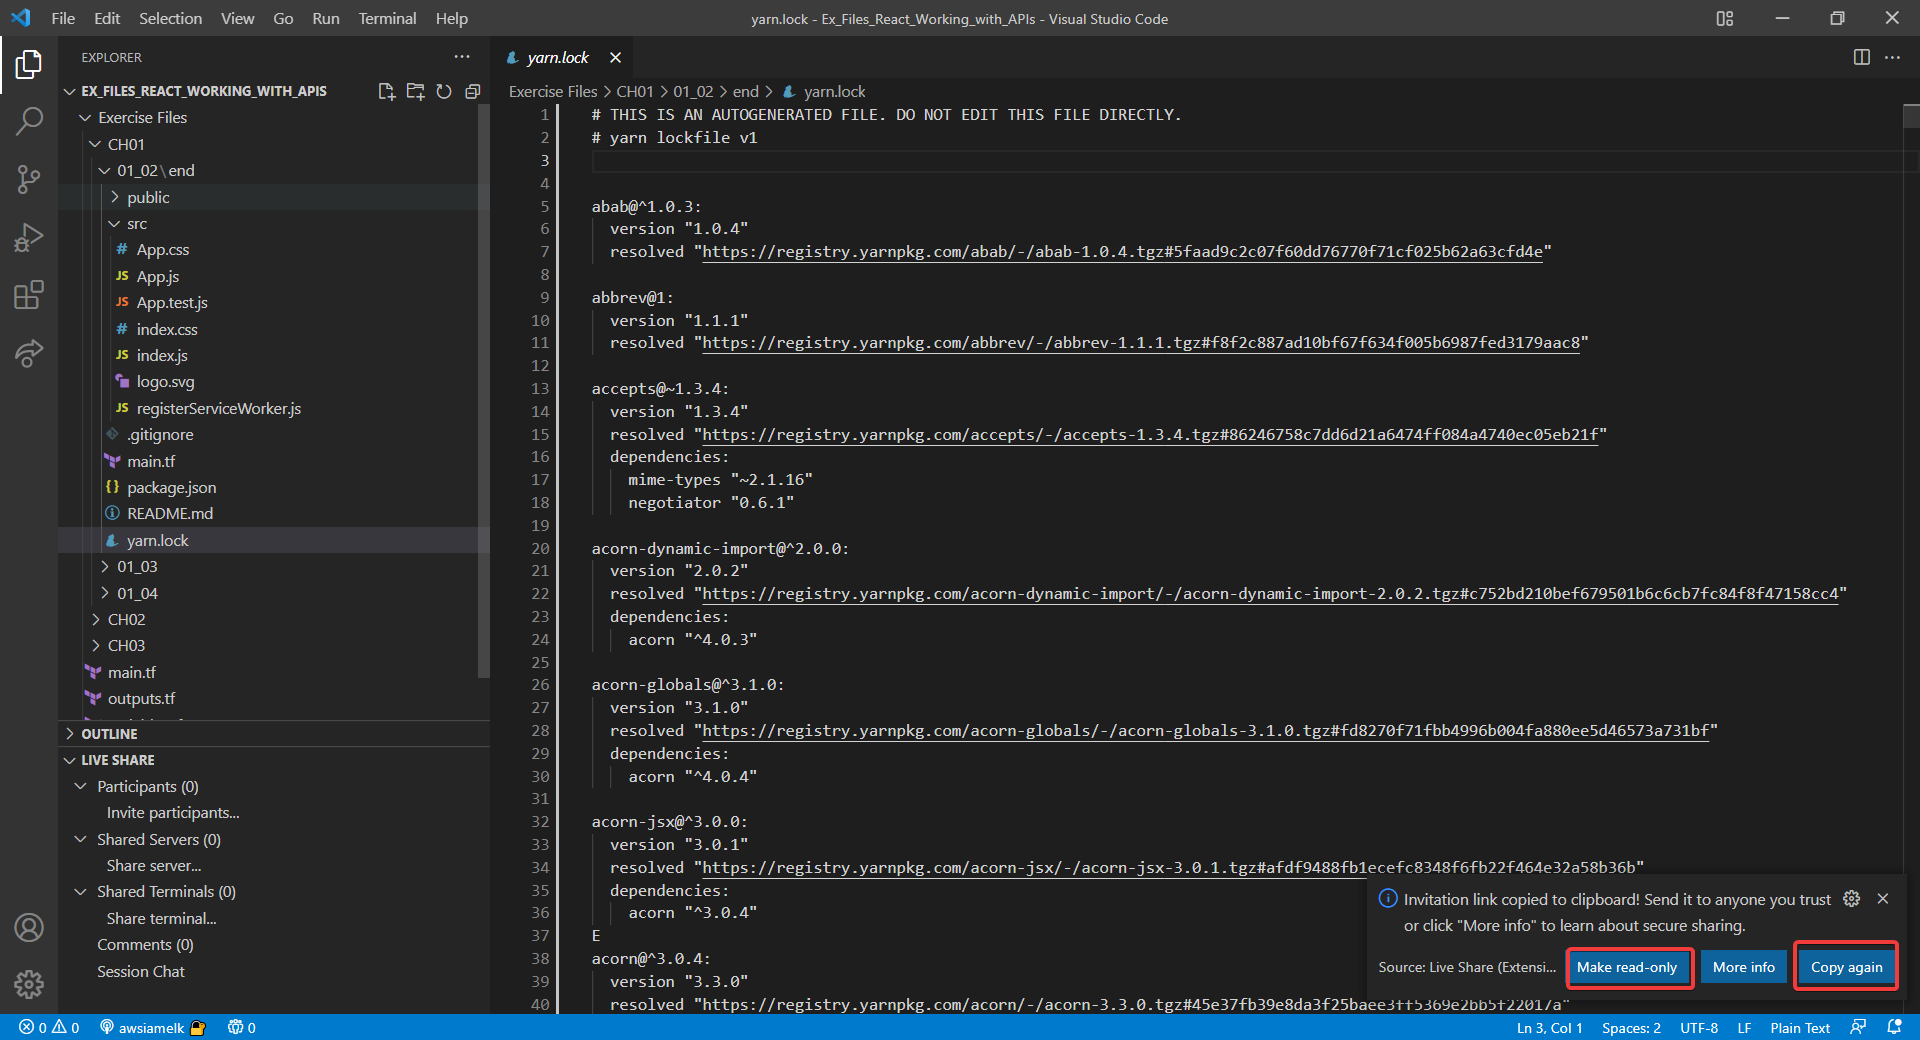
2. Next, set your collaborator’s access permission and generate an invitation link to the collaboration session:
- Click on Make read-only mode at the bottom right, as shown below, to restrict your collaborator with read-only access. Doing so enables the collaborator to only view the contents of the files and not make any changes.
- Click Copy again to copy the invitation link to your clipboard.
- Send the invitation link to your guest. You can use an email or a chat tool such as Slack or Discord.
Only share projects with people you trust, as they will have access to your code and can see or make changes to your code.
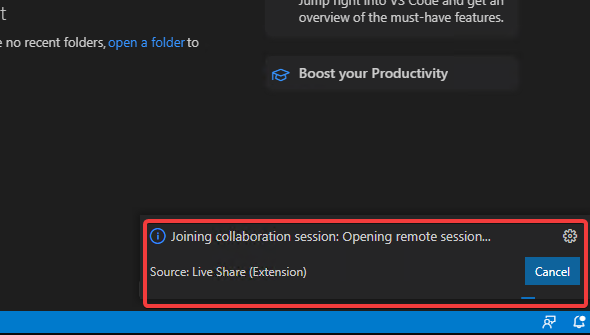
3. Switch to your guest machine, and click on the invitation link sent from the host machine.
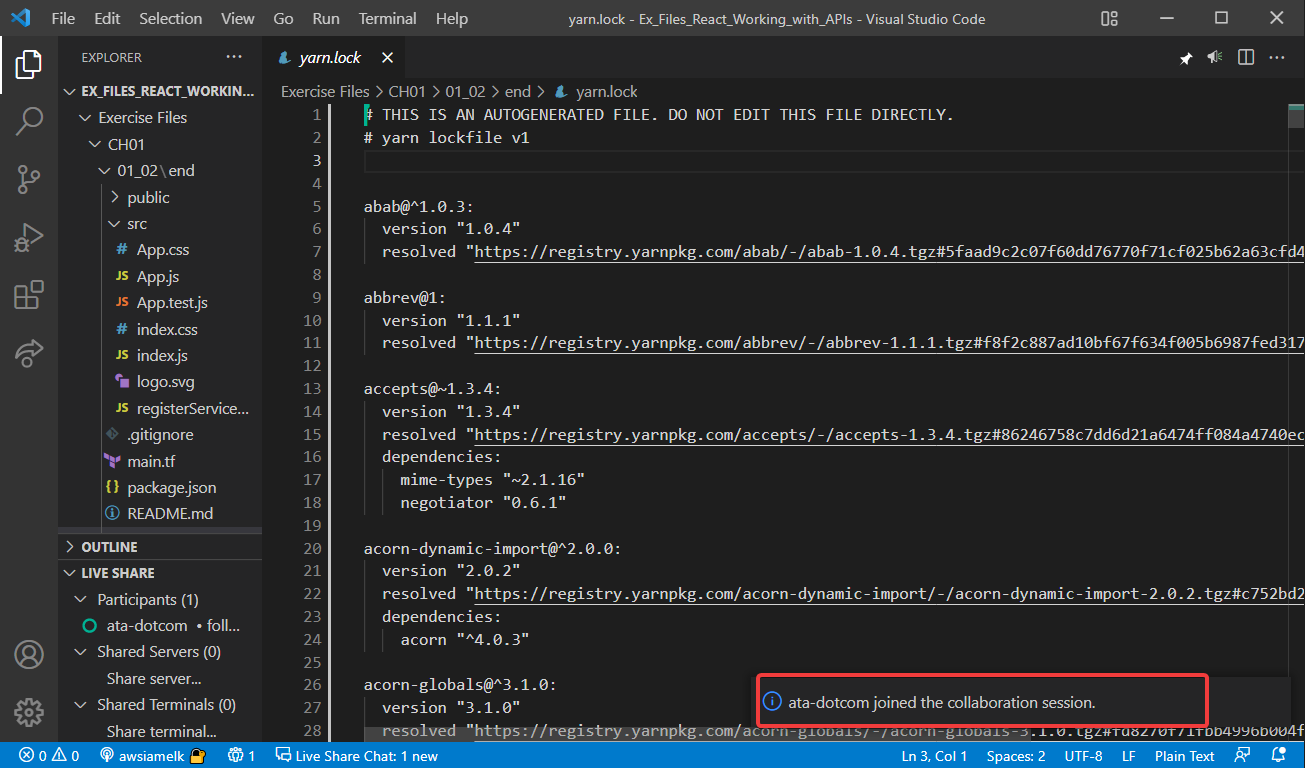
As your guest machine joins the collaboration session, you’ll see a notification (bottom-right), like the one below.
If joining the session was a success, you’ll see your guest machine’s name (ata-dotcom) on your host machine’s VSCode window (bottom-right), as shown below. At this point, you’re ready to start collaborating on code with your guest.
4. Lastly, make any changes to your project from the host machine. Doing so lets you see the changes reflect real-time on the guest machine, as shown below.
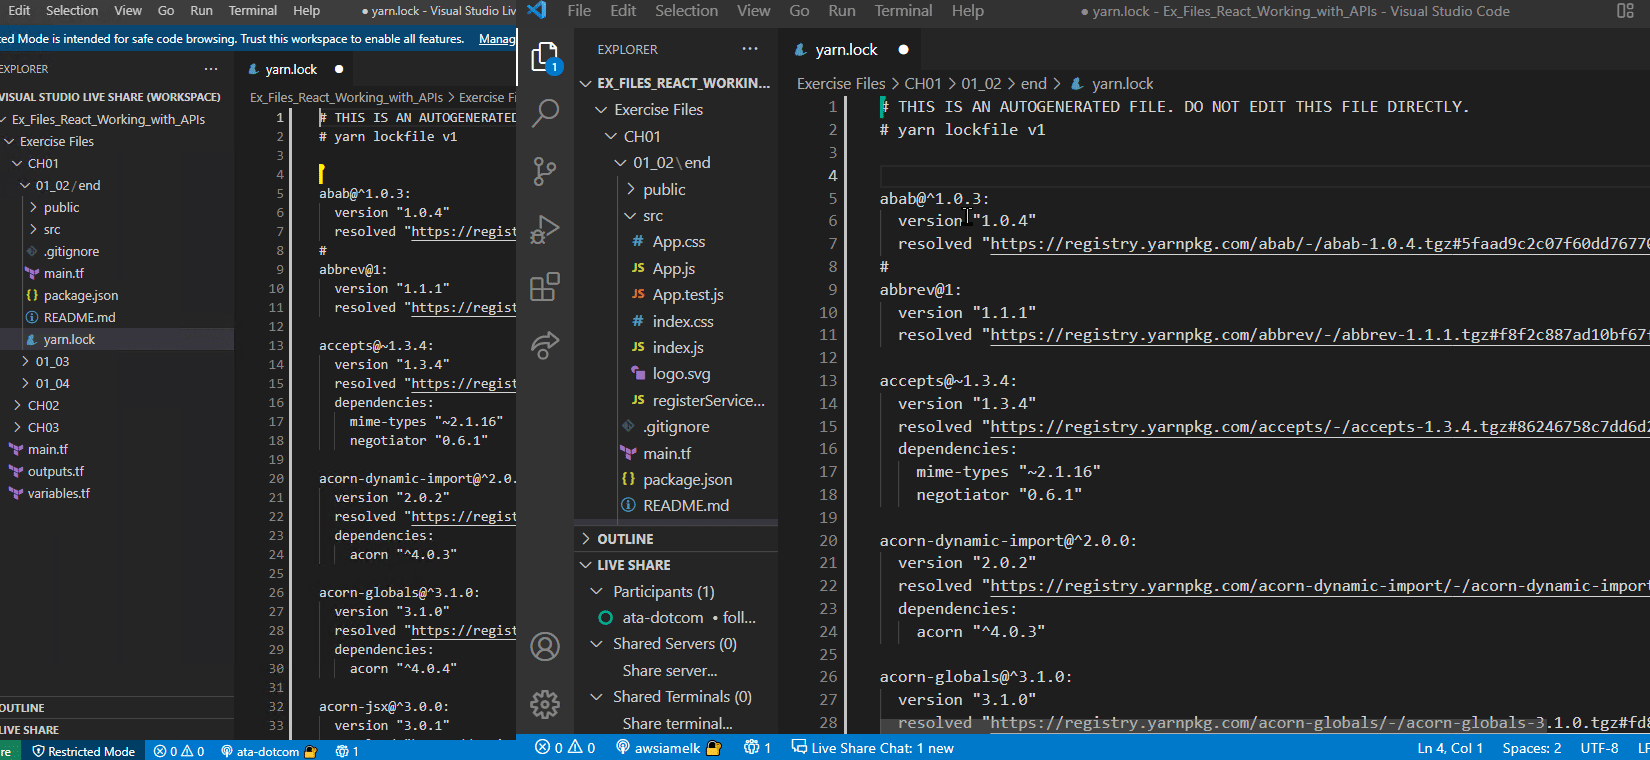
Below, you can see that even highlighting a code block reflects real-time. This behavior comes in handy when explaining a certain code block to your guest.

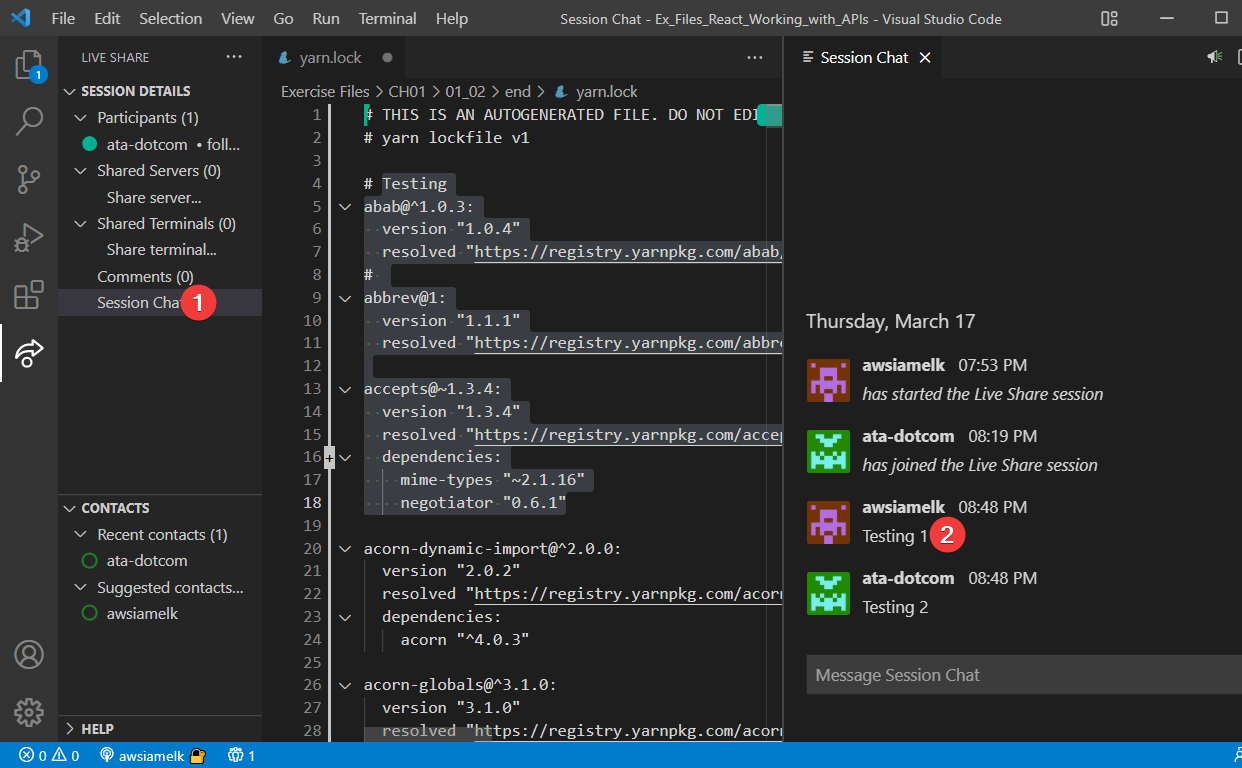
Collaborating in a Session Chat Room
Apart from seeing changes in real-time, VSCode Live Share also has a built-in chat feature that you can use to communicate with your guest. This feature is useful when asking your guests a question without interrupting their flow. Or when you’re discussing possible solutions to a problem.
Click on Session Chat at the bottom left corner of the Live Share panel to start chatting with your guest, as shown below. You’ll see a chat panel open on the right side of the VSCode window.
Now, type your message in the text box at the bottom, and hit enter. The message will be delivered to your guest in real-time.
Sharing a Terminal
The terminal is one of the most critical tools for system administrators and developers. But there are times when demonstrating what’s going on in the terminal gets challenging as you troubleshoot a problem. For example, your npm install is not working because you don’t have the correct permissions.
Luckily, VSCode has a built-in feature that allows you to share your terminal with your guest. With this feature, your guest gets to see what you’re doing and help you troubleshoot the problem in real-time
To share your Terminal with your guest:
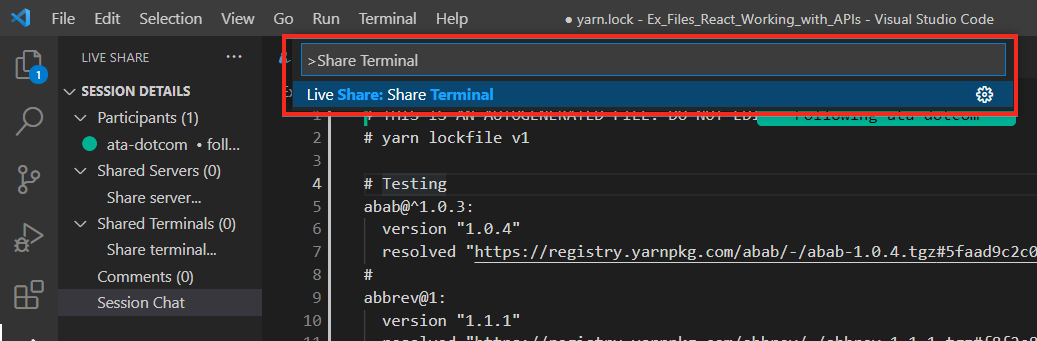
1. Open the command palette again, and type Share Terminal, as shown below.
Select Live Share: Share Terminal from the drop-down menu, and you’ll choose the permission to give your guest (step two).
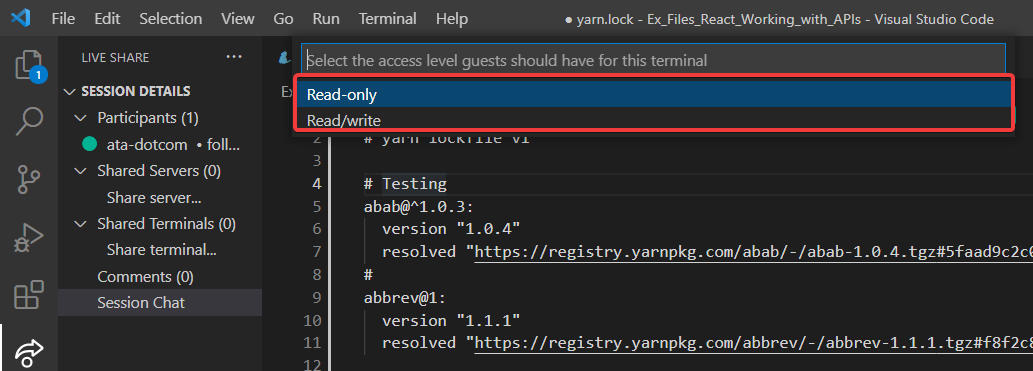
2. Choose Read-only or Read/write mode for your guest in the drop-down menu below, and a shared terminal opens up on the guest machine. The guest machine will be in the same directory as your host machine.
3. Finally, run the below ls command to list the contents of the working directory. This action lets you test if the guest’s terminal shows the same output as the host’s terminal.
You’ll see the same output on your guest machine’s terminal below. Since your terminal is shared with your guest, you can troubleshoot any problem that may occur in real-time.
ls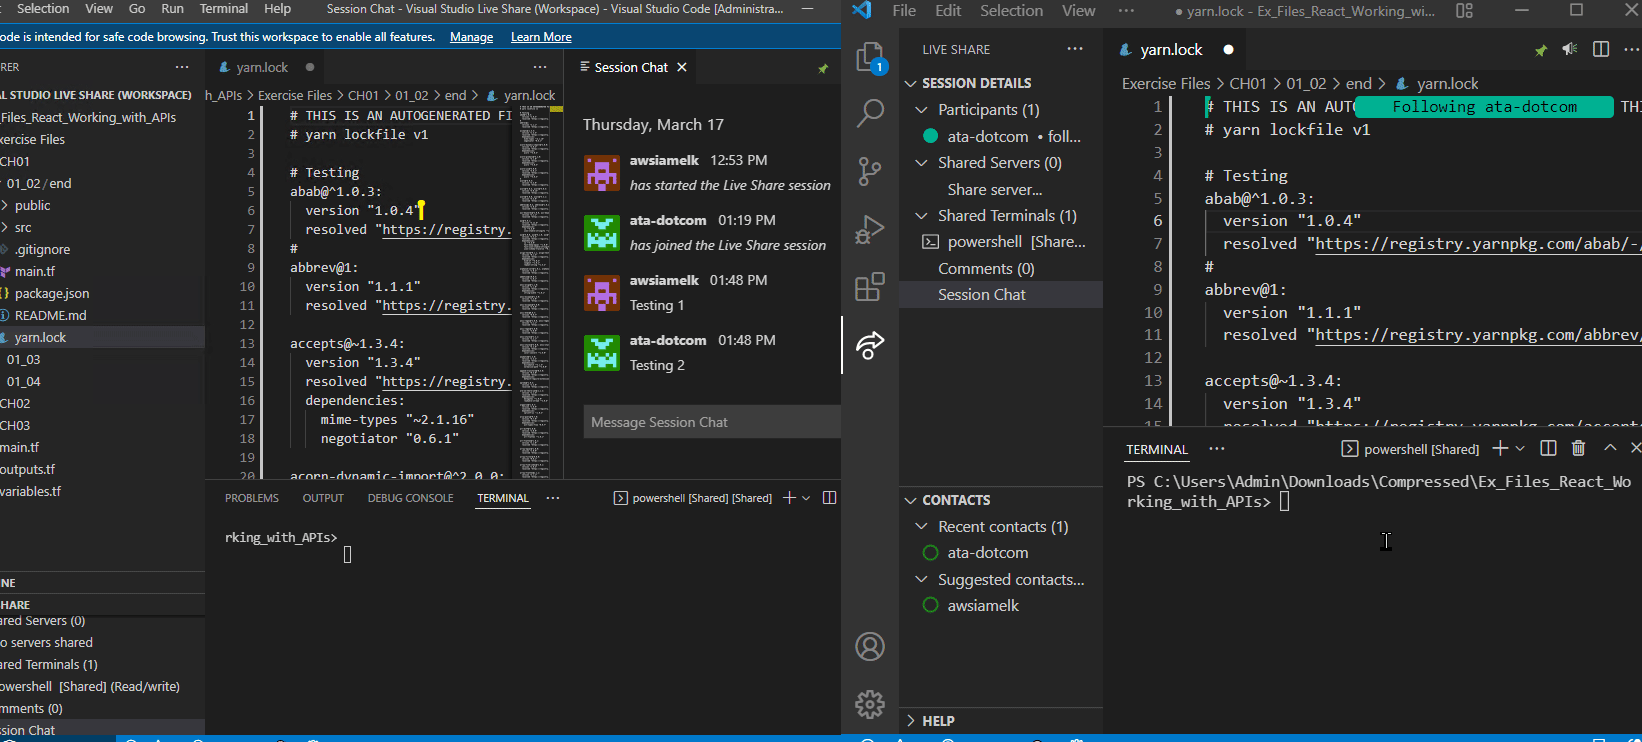
Sharing a Server
Sharing a server sounds impossible, right? But wait until you see how VSCode makes it possible to share a server.
For example, you’re working on a web app, and you want to let your guest see the changes you made in real-time. Without having to rebuild and redeploy the app every time you make a change, VSCode enables you to share your web server with your guest in real-time.
To share your server with your guest:
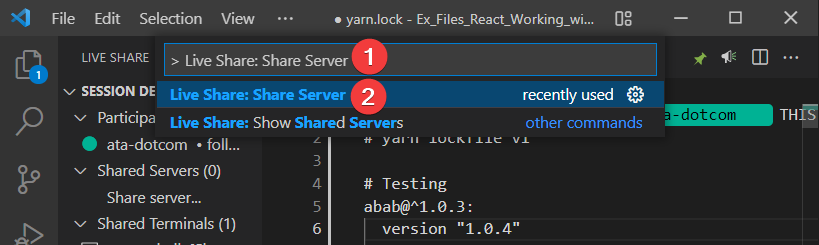
1. Open the command palette, and type Live Share: Share Server. Select Live Share: Share Server from the drop-down menu, as shown below, to share your server.
Sharing a server is useful when showing your guest a website or a web application you’re working on. The best part is that your guest doesn’t need to install anything other than a browser.
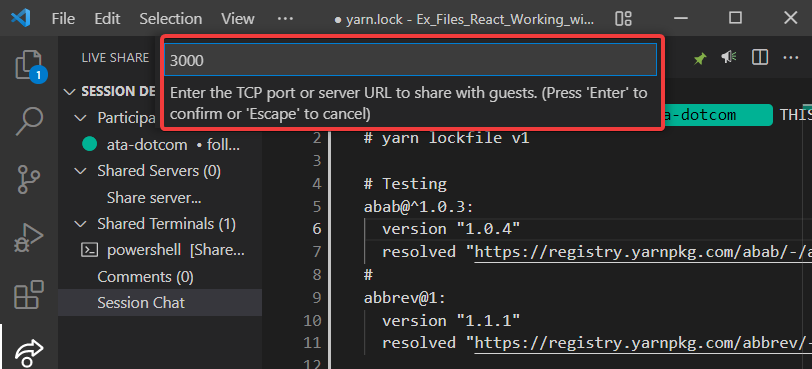
2. On the next screen, provide a port number for your guest to access the server, then press ENTER to start sharing the server.
The port number can be anything you want, but it’s ideal to choose any unused port number or above 3000. And don’t worry, the connection is secure as it’s established on an SSH or SSL tunnel basis by default.
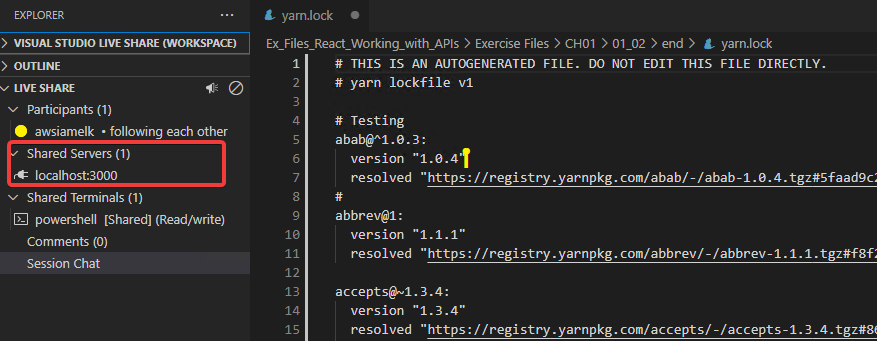
3. Switch back to your guest machine and see a server running at http://localhost:3000 shared by the host, as shown below.
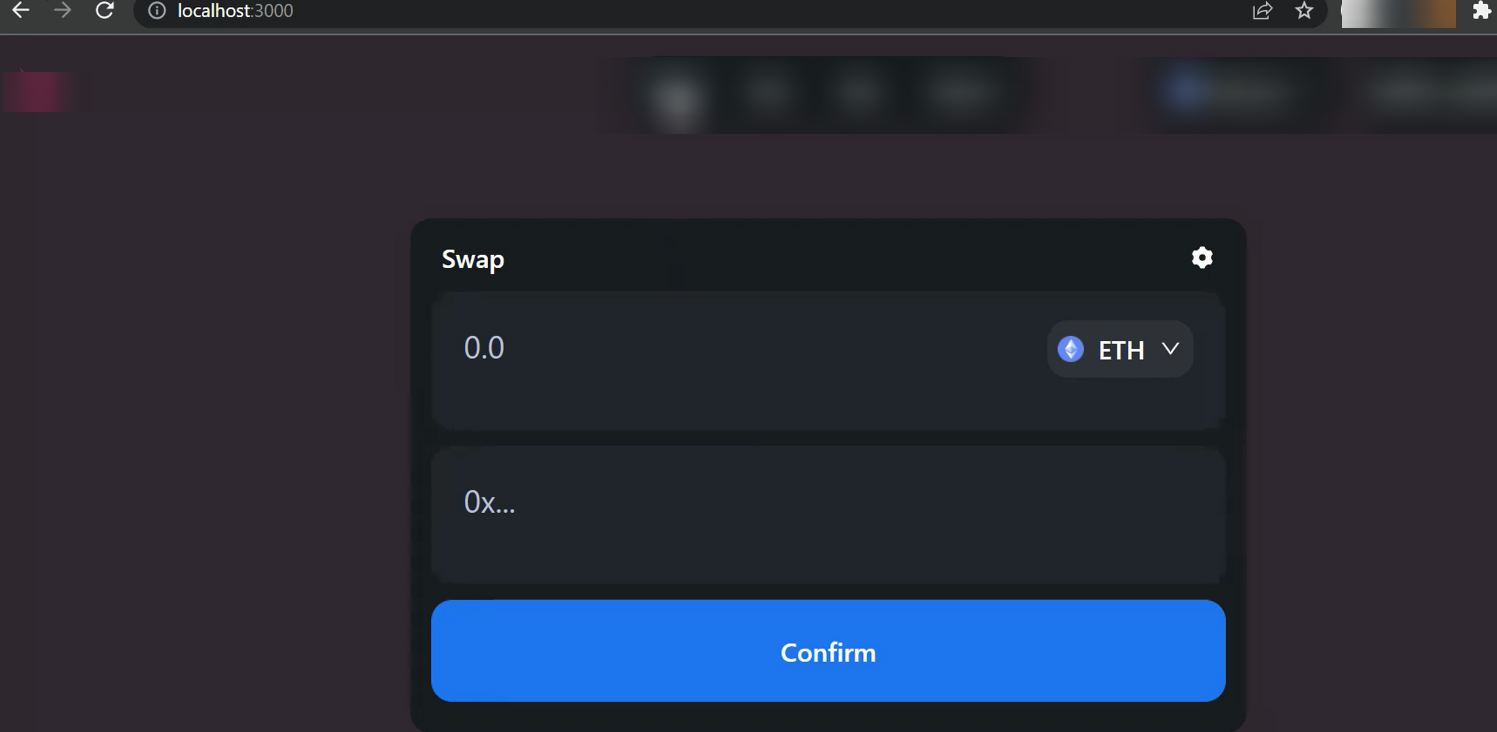
4. Finally, open your preferred web browser, and navigate to http://localhost:3000 to access the host server.
Like the one below, you’ll see the same website or web app that the host is working on in real-time. And since both the host and the guest share the same server, you can now troubleshoot problems while still working on the code.
Conclusion
In this tutorial, you’ve looked at the VSCode Live Share extension and how it can help share your terminal and server with a guest in real-time. Give it a try and be more productive when working on projects.
VSCode has many valuable features that can help be more productive when working on a project. Now, why not try remote coding on a GitHub project?


