


Are you tired of the hassle of managing SSH keys to connect to your EC2 instances? Look no further! The AWS EC2 Instance Connect is a game-changing tool that simplifies the process while maintaining top-notch security measures.
In this tutorial, you will discover everything you need to know about setting up and using EC2 Instance Connect.
Say goodbye to tedious key management and hello to hassle-free, secure access to your instances!
Prerequisites
This tutorial comprises hands-on demonstrations, from setting up the EC2 Instance Connect to connecting to your EC2 instance. To follow along, be sure you have the following:
- An AWS account with active billing enabled – A free tier account will be sufficient.
- An IAM user with administrator access to your AWS resources for the AWS EC2 Instance Connect CLI to establish a connection.
- A local system with AWS CLI installed. You need to configure the AWS CLI with your administrative IAM user credentials – This tutorial uses Ubuntu 20.04 as an example.
- An SSH client installed on your local system – This tutorial uses the Kitty SSH client.
Launching an EC2 Instance with Key Pair
Before taking advantage of the EC2 Instance Connect, you must launch an EC2 instance, an essential step to demonstrate the features and usage of EC2 Instance Connect.
In this tutorial, you will launch an EC2 instance with Key Pair as follows:
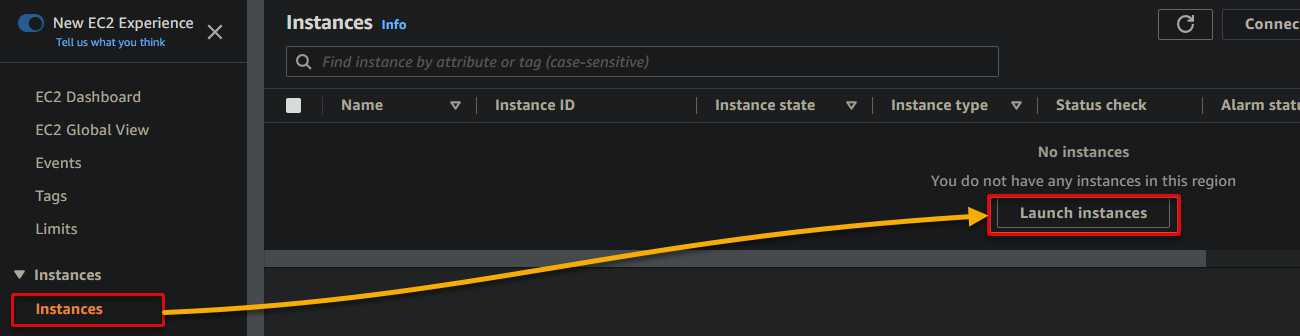
1. Open your favorite web browser, log in to your AWS Management Console, and access the EC2 console.
2. Next, navigate to Instances (left pane), and click Launch Instance to initiate launching an EC2 instance.
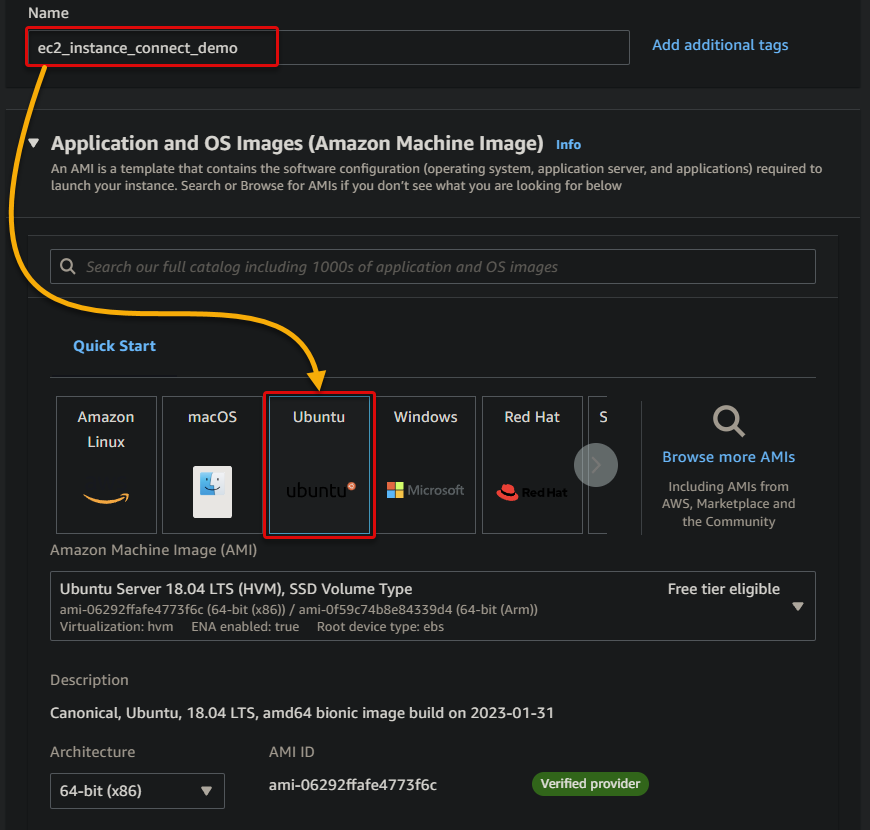
3. On the next page, configure the instance name and the OS image as follows:
4. Now, scroll down and configure the instance’s type and key pair:
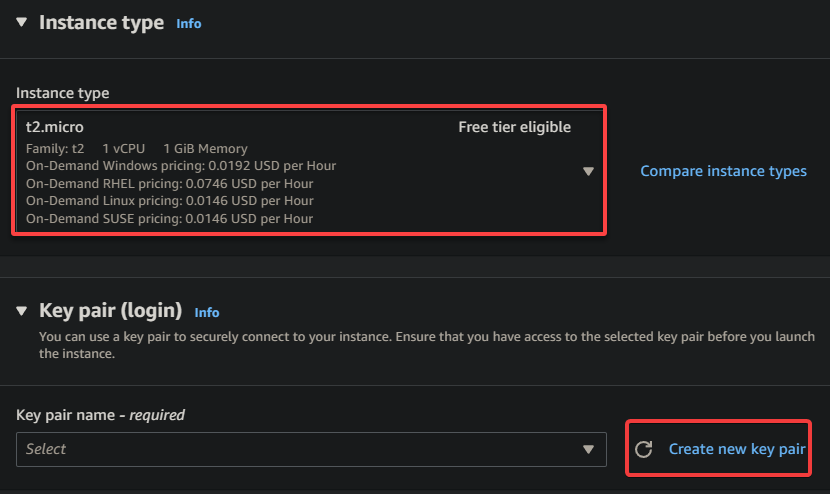
5. In the pop-up window, configure the new key pair with the following:

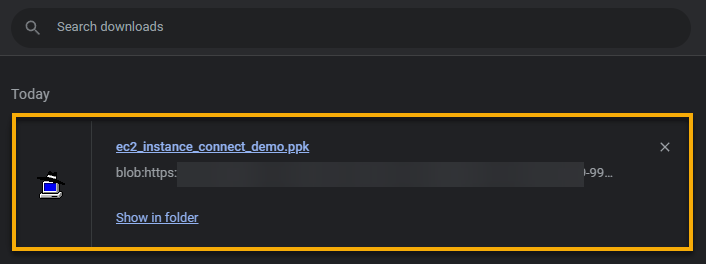
Once generated, the key pair is automatically downloaded to your local system, as shown below, which you will need to connect to your instance later.
Ensure that you securely store your private key.
6. Keep other settings as default, and click Launch instance (right pane) under the Summary section to launch your EC2 instance.
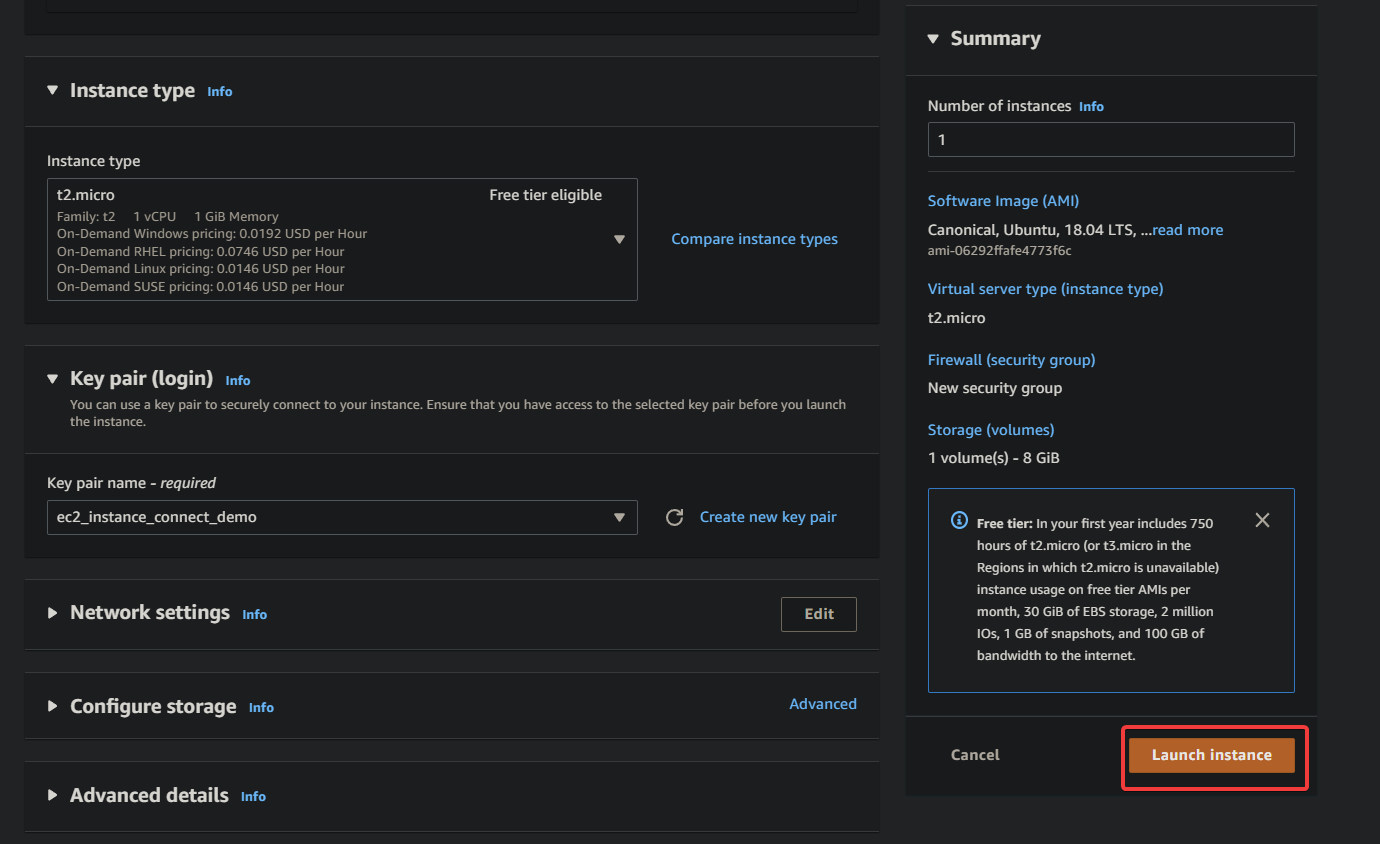
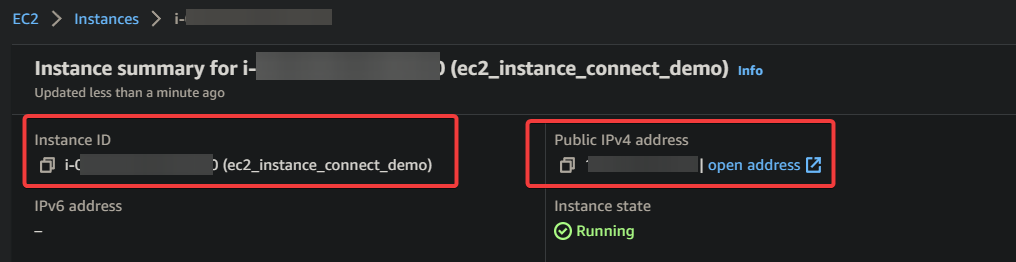
Launching your EC2 instance may take a few moments to become fully operational. Once the instance is running, note down the Instance ID, and Public IP address for later use.
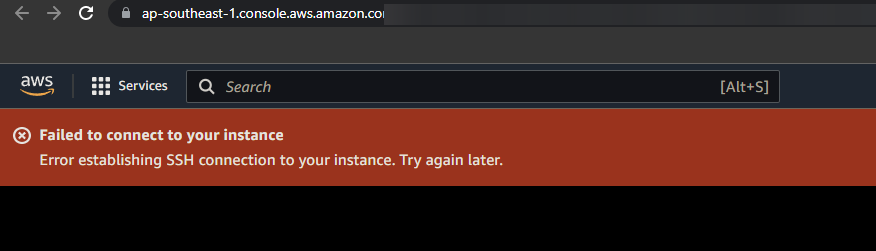
7. Lastly, click Connect to test EC2 Instance Connect.

Did you get the same error below? This error shows up, which is expected since you still need to set up and configure EC2 Instance Connect. No worries, though; you will learn how to fix this error in the following sections.
Setting Up the EC2 Instance Connect
After successfully configuring your first EC2 instance, how do you know it works? You will have to connect to your EC2 instance. But first, you must set up EC2 Instance Connect and configure the necessary settings for access.
To set up the EC2 Instance Connect, follow these steps:
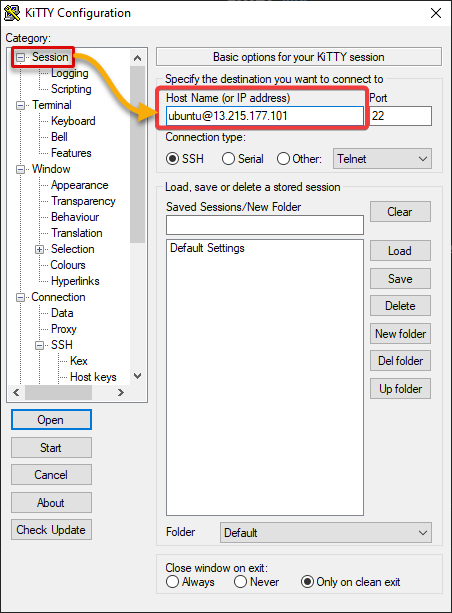
1. Bring up your SSH terminal window, in this case, KiTTY.
2. Under the Session category (left pane), enter the Public IP address of your EC2 instance that you noted in step six of the “Launching an EC2 Instance with Key Pair” section.
Ensure you prefix the IP address with ubuntu@ (e.g., [email protected]), as shown below.
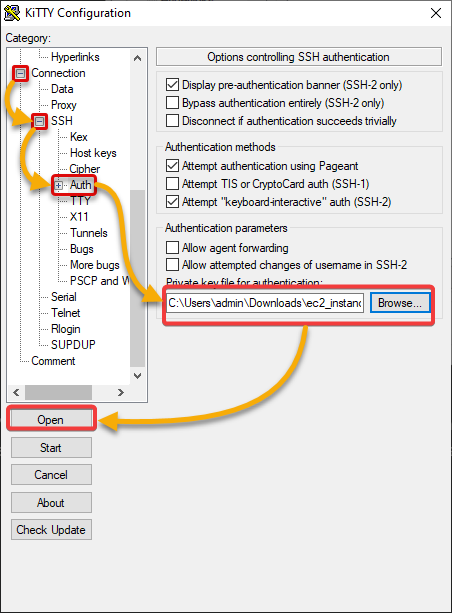
3. Now, configure the options for controlling SSH authentication as follows:
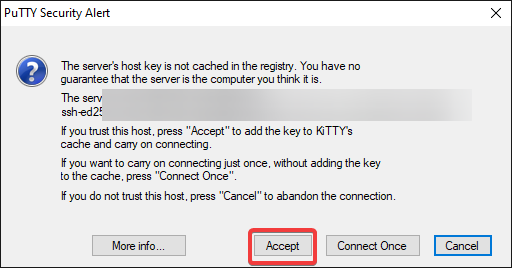
4. Click Accept when prompted for the server’s host key, as shown below. You will be logged in to your instance if everything is correctly configured.
Notice that using a key pair requires you to manually download, configure and store the key pair for each instance. This process can become cumbersome when dealing with multiple instances in the long run.
Instance Connect is a way of simplifying the process, allowing you to connect directly using SSH without configuring or storing key pairs. You will learn more about the EC2 Instance Connect later. But for now, you must install the EC2 Instance Connect on your instance first.
5. Run the following commands to update the apt package manager and install EC2 Instance Connect on your instance.
sudo apt update -y && sudo apt-get install ec2-instance-connect -y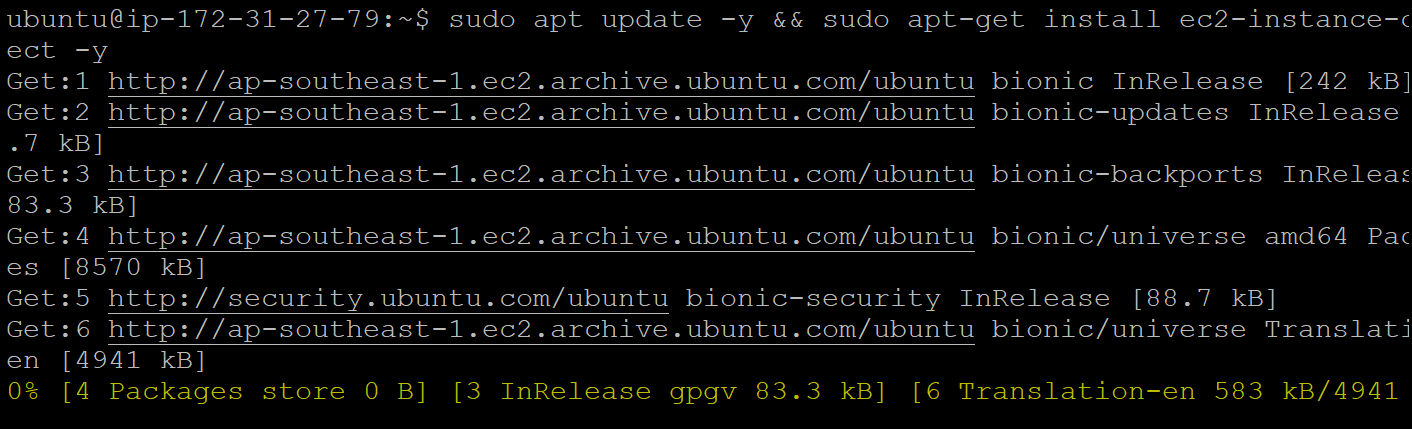
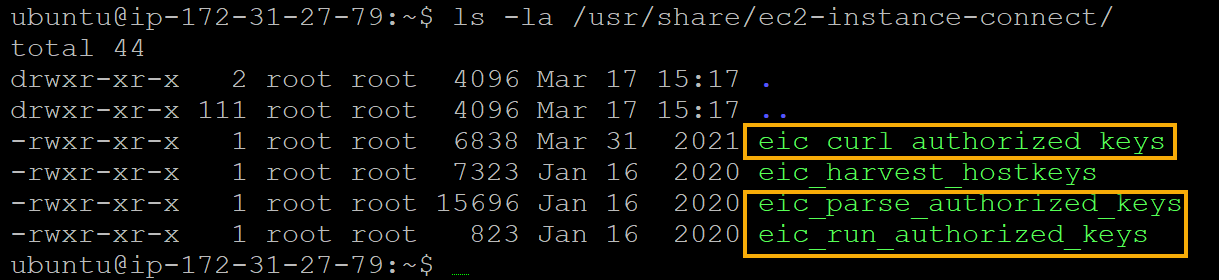
6. Once installed, run the below command to list (ls) all contents (-a) of the /usr/share/ec2-instance-connect/ directory in a long list format (-l).
ls -la /usr/share/ec2-instance-connect/You will see three new scripts, as shown below. These scripts are responsible for securely managing the authorized keys and allowing users to connect to the EC2 instance without the need to manage SSH keys manually.
| Script | Function |
|---|---|
| eic_curl_authorized_keys | Downloads the public key a user has authorized to connect to the instance. This script uses a signed URL provided by EC2 Instance Connect to download the authorized keys file. |
| eic_parse_authorized_keys | Parses the authorized keys file downloaded by eic_curl_authorized_keys. This script extracts the public key from the file and places it in the ~/.ssh/authorized_keys file of the user connecting to the instance. |
| eic_run_authorized_keys | Runs the SSH session with the authorized key that was parsed and placed in the authorized_keys file. This script provides the user with a shell prompt to the instance, allowing them to interact with the instance securely. |
Verifying the EC2 Instance Connect Installation
Like setting up an EC2 instance, your EC2 Instance Connect installation still needs verification. You can verify the installation by attempting to log in to your instance without manually configuring any key pairs.
Return to your instance in your EC2 console, and click Connect button to connect to your instance.

The connection will succeed without errors if all goes well, as shown below.
Congratulations! You have successfully set up EC2 Instance Connect and can now securely connect to your instances without the hassle of managing SSH keys.

Installing and Using the EC2 Instance Connect CLI
So far, you have seen how to connect to an EC2 instance using the console-based UI. But what if you prefer to manage your instances via a command-line environment?
The EC2 Instance Connect CLI is a convenient tool that simplifies connecting to EC2 instances with a single command (mssh). With this tool, all you need is the instance ID and the username of the user you want to connect with (no more tedious clicking).
1. Run the following aws s2apicommand to perform the following:
aws s3api get-object --bucket ec2-instance-connect --key cli/ec2instanceconnectcli-latest.tar.gz ec2instanceconnectcli-latest.tar.gz && sudo pip install ec2instanceconnectcli-latest.tar.gz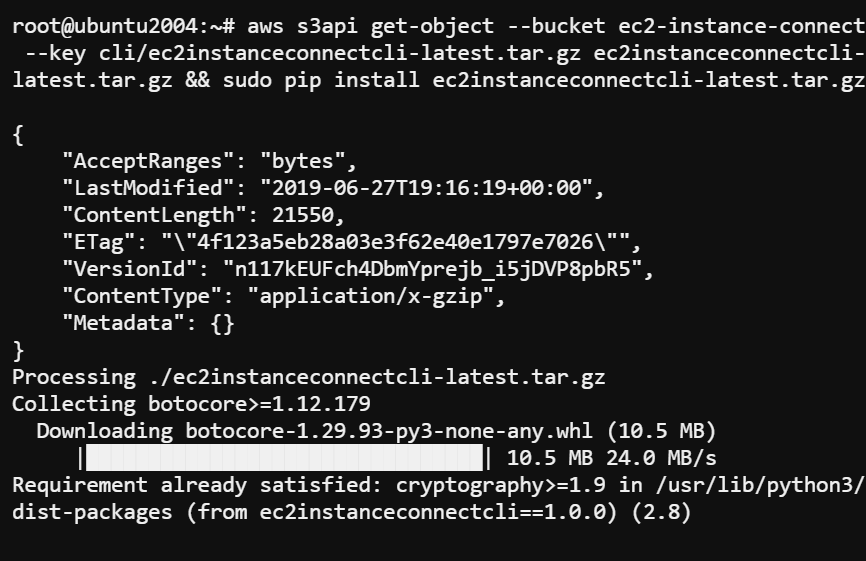
2. Once installed, run the below command to view all available options for the mssh command.
mssh -help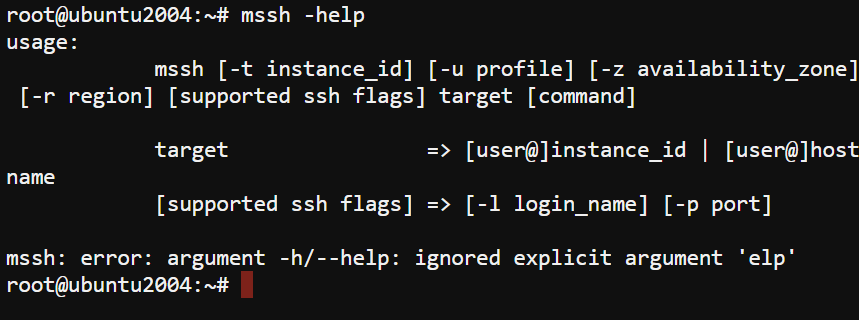
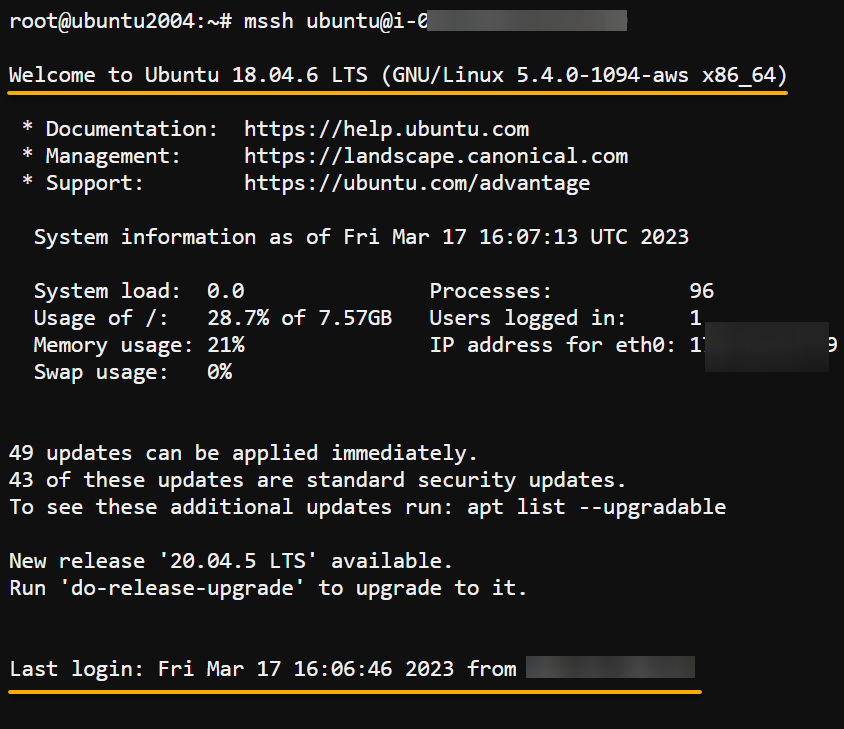
mssh command3. Finally, run the mssh command below to connect to your EC2 instance via the EC2 Instance Connect CLI.
Replace username with your preferred user to connect as and instance_id with instance ID you noted in step six of the “Launching an EC2 Instance with Key Pair” section.
mssh username@instance_id
If everything is configured correctly, you will be logged in to your instance via the EC2 Instance Connect CLI without any errors or configuration required, as shown below.
Conclusion
EC2 Instance Connect offers a modern way to access your EC2 instances by handling the complex tasks of configuring, distributing, and storing key pairs. And in this tutorial, you have learned how to set up EC2 Instance Connect and connect to your instance via the console-based UI and CLI-based mssh command.
Now, you can securely log in and manage your EC2 instances in just a few clicks or a single command. With this newfound knowledge, why not also learn how to connect from WSL 2?


