


Are you looking for a trouble-free way to manage your Docker containers? If so, you should check out Docker Portainer. Portainer is a lightweight all-in-one management UI that allows you to easily manage your different Docker environments (Docker hosts or Swarm clusters).
With Docker Portainer in your toolkit, managing your Docker containers and images has never been effortless. Give Docker Portainer a try today and see how it can help make your Docker experience more enjoyable!
Prerequisites
This tutorial will be a hands-on demonstration. If you’d like to follow along, be sure you have the following.
- A Linux server. This tutorial uses Ubuntu 20.04.
- A user account with root/sudo privileges.
- You have installed Docker and Docker Compose on the server. As of this writing, the latest Docker and Docker Compose versions are 20.10.14 and 2.2.3, respectively.
Setting Up Docker Portainer
Docker Portainer has two flavors; the Business Edition (paid) and Community Edition (CE). This tutorial will be using Portainer CE.
Portainer runs as a containerized app, which means that you must create the container, configure the volume for persistent data, and assign port number bindings. The whole process might sound daunting, but it is not. You’ll have a running Docker Portainer container in a few steps.
Follow the below instructions to set up the Docker Portainer application.
1. Open your SSH client and log in to your server.
2. Run the below command to create a volume named portainer_data. This new volume is where you’ll store the Docker Portainer data. Volumes help you store persistent data or data that needs to be shared between containers.
docker volume create portainer_data
3. Next, run the below command to create the Portainer container. Below is a breakdown of the flags/options and what they mean to better understand the command.
- The
-doption tells Docker to run the container in detached mode (run in the background). This behavior is helpful when you need to continue using your terminal for other tasks.
- The
--name portaineroption specifies the container a name. In this example, your container name isportainer.
- The
-p 8080:9000option means to expose the container’s port9000, which is the default Portainer port number to the host’s port8080. Specify a different port number if you prefer. For example,-p 8081:9000makes the Portainer accessible to the host’s port8081.
- The
--restart alwaysoption tells Docker to restart the container after the container exits for any reason.
- The
-v /var/run/docker.sock:/var/run/docker.sockoptions mounts the Docker socket into the container. Portainer can communicate with the Docker daemon and manage your containers by specifying this value.
- The
-v portainer_data:/dataoption mounts the volume calledportainer_datayou created into the container. This portion allows Portainer to store its data inside the volume.
- You will be using the
portainer/portainerimage to create the container. This image is available on Docker Hub.
docker container run -d --name portainer -p 8080:9000 \
--restart=always \
-v /var/run/docker.sock:/var/run/docker.sock \
-v portainer_data:/data portainer/portainer
4. Run the below command to start the Portainer container. This command will also start a Portainer container and bind it to port 9000 on your server.
sudo docker start portainer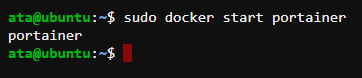
5. At this point, your Portainer server should be running. Run the below command to confirm the container’s status.
docker container lsAs you can see below, the portainer status is Up in n minutes, and port 9000 is bound to the host’s port 8080.

If you access Portainer externally, make sure that the port host’s port number is open on your firewall (if any).
Accessing Docker Portainer UI
Now that you have set up Portainer, you can start using it to manage your Docker containers. But first, you must access the Portainer web UI to initiate the Portainer configuration.
1. Open your web browser and navigate to http://server_ip:port/#/init/admin. Replace server_ip and port with your server IP address and the port you mapped to Portainer earlier.
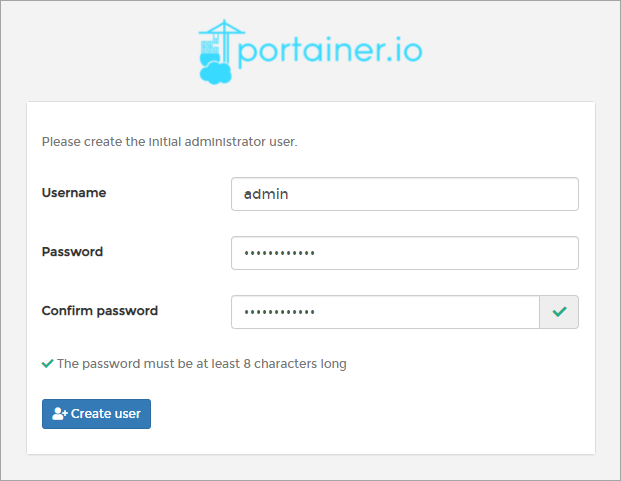
2. The first time you open the Portainer web UI, the page will prompt you to create a new administrator account. Type the username the password you want to create and click on the Create user button.
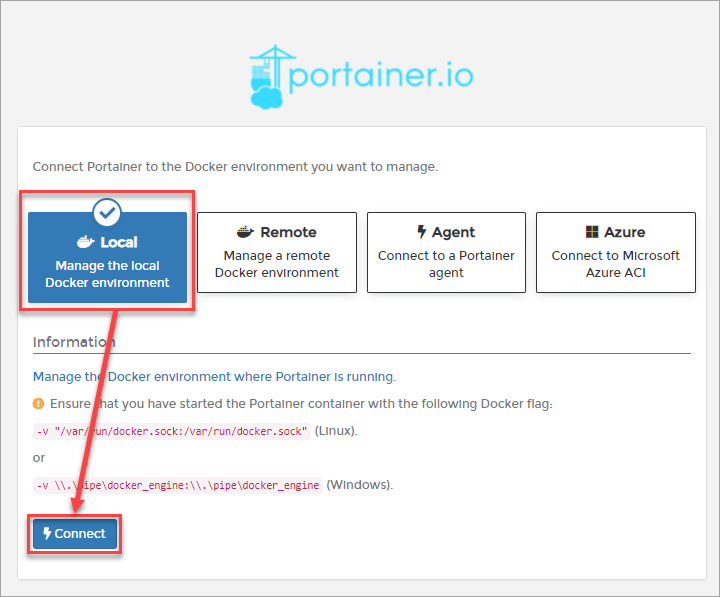
3. On the next page, choose the Docker environment you will manage. The options are:
- Local – Manage the local Docker environment.
- Remote – Manage a remote Docker environment. This option connects to the remote Docker server via SSH.
- Agent – Connect to a Portainer agent. This option connects to Portainer Agent deployed on other servers.
- Azure – Connects to your Microsoft Azure CLI account.
Select Local since you’ll be managing your local Docker environment in this example, and click Connect.
Managing Docker in Portainer
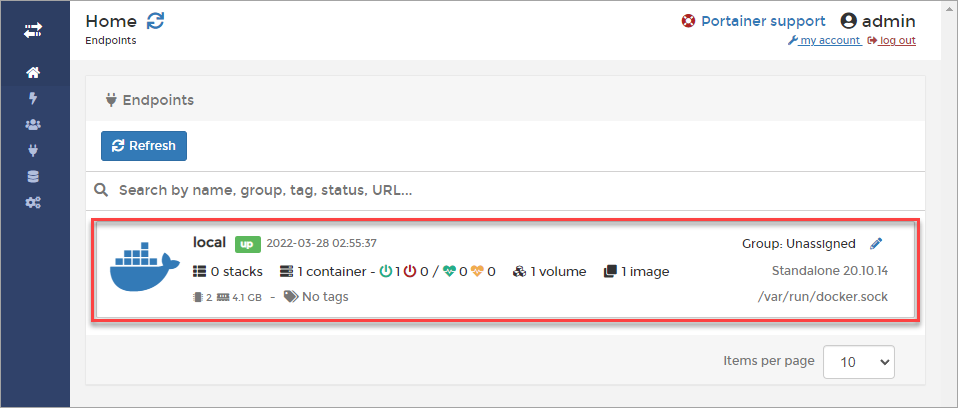
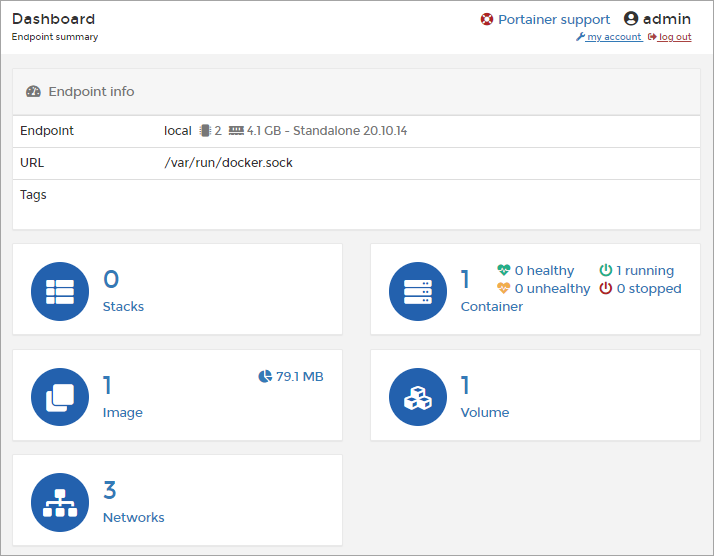
Once you’ve successfully connected Portainer to the local Docker environment, the next page shows you all endpoints on your server, as shown below. Here, you can start viewing all sorts of Docker information and manage your Docker environment. Forget about the command line!
1. First, click one local endpoint to view more details about that specific endpoint.
As you can see below, the Dashboard shows the running containers, available images, volumes, and networks.
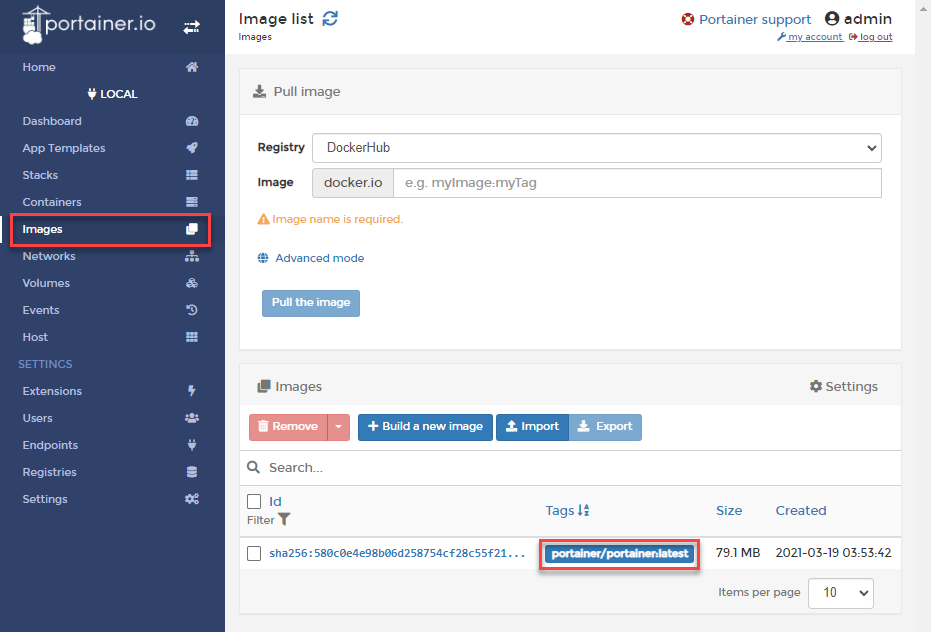
2. Next, click the Images link on the left-hand side to view or manage your Docker images.
You will see the list of all images below, including the portainer/portainer image you downloaded earlier. The list includes both official and private images. Use this page to search, download, or delete images.
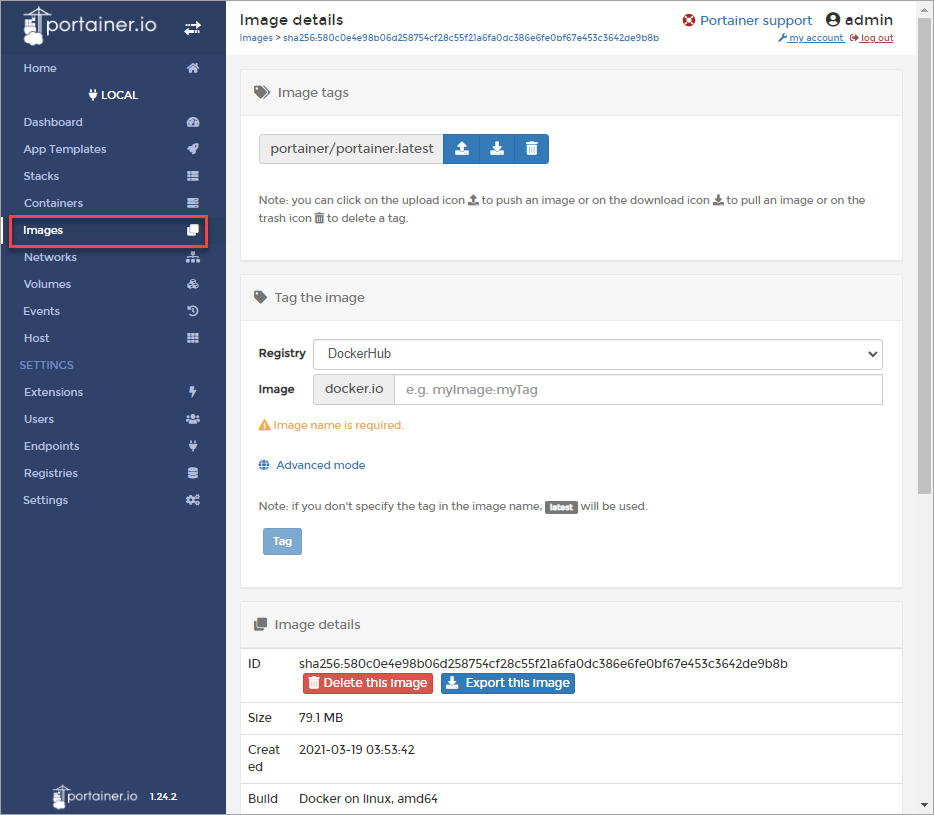
3. To view the details of an image, click on the image name. The Image details page includes information like the image size, tag, and repository.
This page will be your go-to when you need to pull or push images. What’s more, you can also use this page to edit the image tag before pushing it to a repository.
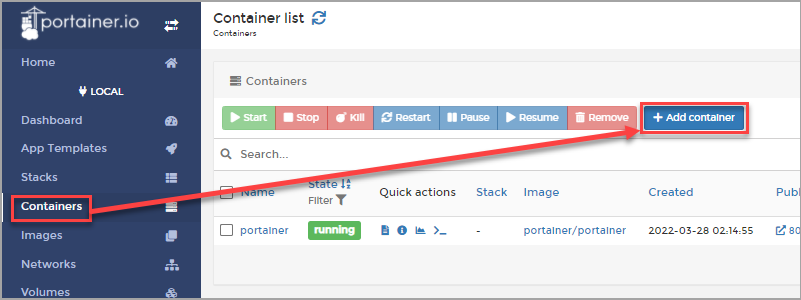
4. Now, click on the Container link to list all containers. Use this when you need to stop, start, restart, or delete a container. The screenshot below shows that there’s only one running container on this endpoint.
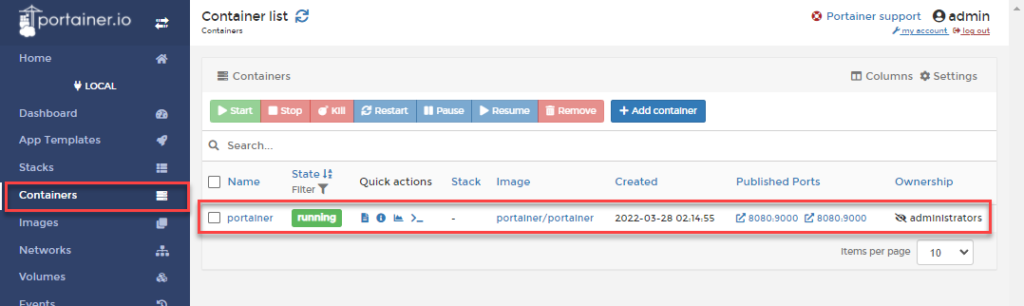
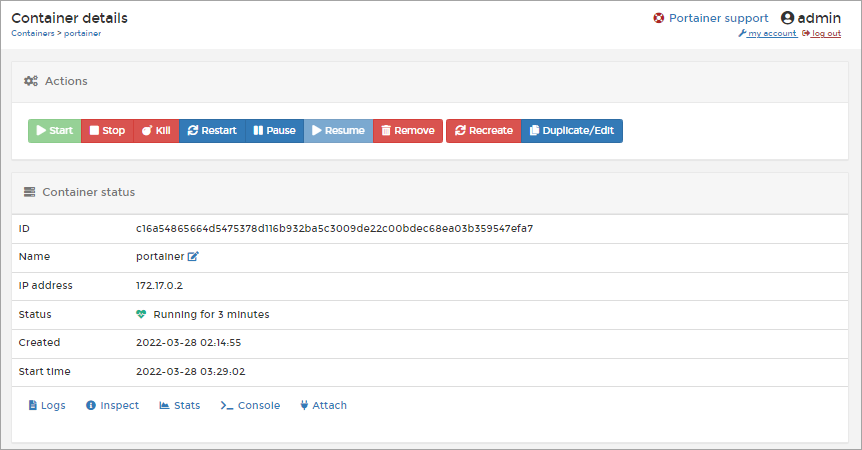
5. Click on the name of a container to view more details. The Container details page shows information like the IP address, state, and status.
Adding a New Container using Portainer for Testing
You’ve completed Portainer set up and now have a fully functional web GUI for managing your Docker environment. But your journey wouldn’t be complete if you didn’t test out your new shiny toy!
The quickest way to test your Docker Portainer is by adding a new container, running it, and checking that it is accessible. This example will be deploying an NGINX web server.
1. On the Portainer web UI, click the Containers menu link on the left-hand side.
2. Click the Add container button under the Containers section.
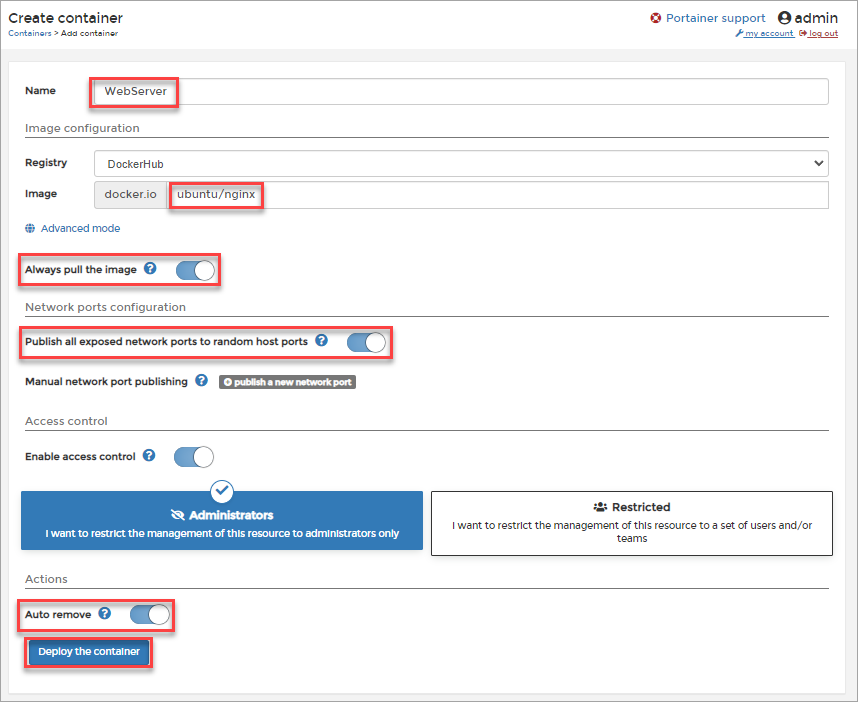
3. On the Create container page, complete the new container information as follows.
- Name: Provide a descriptive name for the container. In this example, the container name is
WebServer.
- Image: Provide the image name that will be the base of your container. In this example, the image name to use is
ubuntu/nginx.
- Always pull the image: Toggle on to let Portainer download the image when creating new container instances. This option ensures that you’ll always get the latest version of the image.
- Publish all exposed network ports to random host ports: Toggle on to let Portainer assign random host ports to the network port that the container exposes.
- Auto remove: Since you’re creating the container as a one-time test, toggle on this option so that Portainer can remove the container after it exits.
Leave everything else to their default values and click Deploy the container.
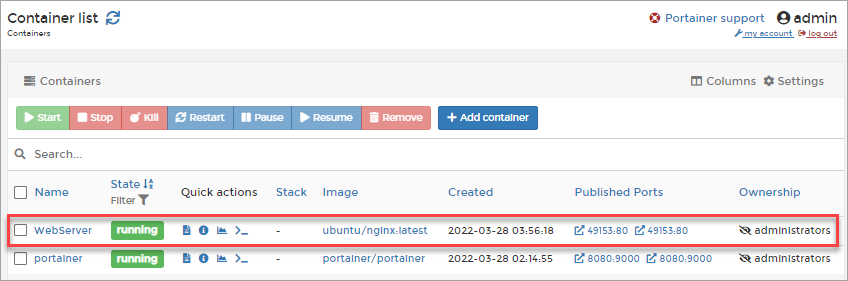
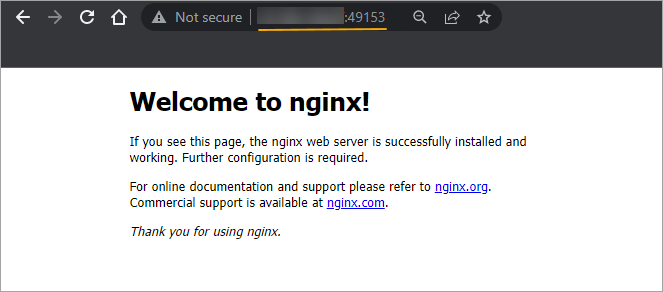
After Portainer creates the new container, you should see the new container on the Container list. As you can see from the below screenshot, the new container named WebServer is running, and the host port number is 49153.
4. Finally, open your web browser and navigate to http://server_ip:port. Replace server_ip with the IP address of your Docker server and port with the port number of the container you created.
If the container is working as expected, you should see the Welcome to nginx default home page
Conclusion
In this tutorial, you learned to install and configure Portainer as the web frontend management tool for Docker. You also learned to test your Docker Portainer setup by creating a new NGINX webserver container and accessing its home page from the web browser.
You’ve barely scratched the surface, and there are more Docker Portainer features to explore. Perhaps you could try building custom images, setting up Role-Based Access Control, and configuring snapshots. Good luck!


